manual transmission FORD TAURUS 2017 Owners Manual
[x] Cancel search | Manufacturer: FORD, Model Year: 2017, Model line: TAURUS, Model: FORD TAURUS 2017Pages: 504, PDF Size: 5.84 MB
Page 16 of 504
On Board Diagnostics Data LinkConnector
WARNING
Do not connect wireless plug-indevices to the data link connector.Unauthorized third parties could gainaccess to vehicle data and impair theperformance of safety related systems.Only allow repair facilities that follow ourservice and repair instructions to connecttheir equipment to the data link connector.
Your vehicle has an OBD Data LinkConnector (DLC) that is used inconjunction with a diagnostic scan tool forvehicle diagnostics, repairs andreprogramming services. Installing anaftermarket device that uses the DLCduring normal driving for purposes such asremote insurance company monitoring,transmission of vehicle data to otherdevices or entities, or altering theperformance of the vehicle, may causeinterference with or even damage tovehicle systems. We do not recommendor endorse the use of aftermarket plug-indevices unless approved by Ford. Thevehicle Warranty will not cover damagecaused by an aftermarket plug-in device.
MOBILE COMMUNICATIONS
EQUIPMENT
WARNING
Driving while distracted can result inloss of vehicle control, crash andinjury. We strongly recommend thatyou use extreme caution when using anydevice that may take your focus off theroad. Your primary responsibility is the safeoperation of your vehicle. We recommendagainst the use of any hand-held devicewhile driving and encourage the use ofvoice-operated systems when possible.Make sure you are aware of all applicablelocal laws that may affect the use ofelectronic devices while driving.
Using mobile communications equipmentis becoming increasingly important in theconduct of business and personal affairs.However, you must not compromise yourown or others’ safety when using suchequipment. Mobile communications canenhance personal safety and security whenappropriately used, particularly inemergency situations. Safety must beparamount when using mobilecommunications equipment to avoidnegating these benefits. Mobilecommunication equipment includes, butis not limited to, cellular phones, pagers,portable email devices, text messagingdevices and portable two-way radios.
EXPORT UNIQUE OPTIONS
For your particular global region, yourvehicle may be equipped with features andoptions that are different from the featuresand options that are described in thisOwner’s Manual. A market uniquesupplement may be supplied thatcomplements this book. By referring to themarket unique supplement, if provided,you can properly identify those features,
13
Taurus (CPH) Canada/United States of America, enUSA, First Printing
Introduction
Page 85 of 504
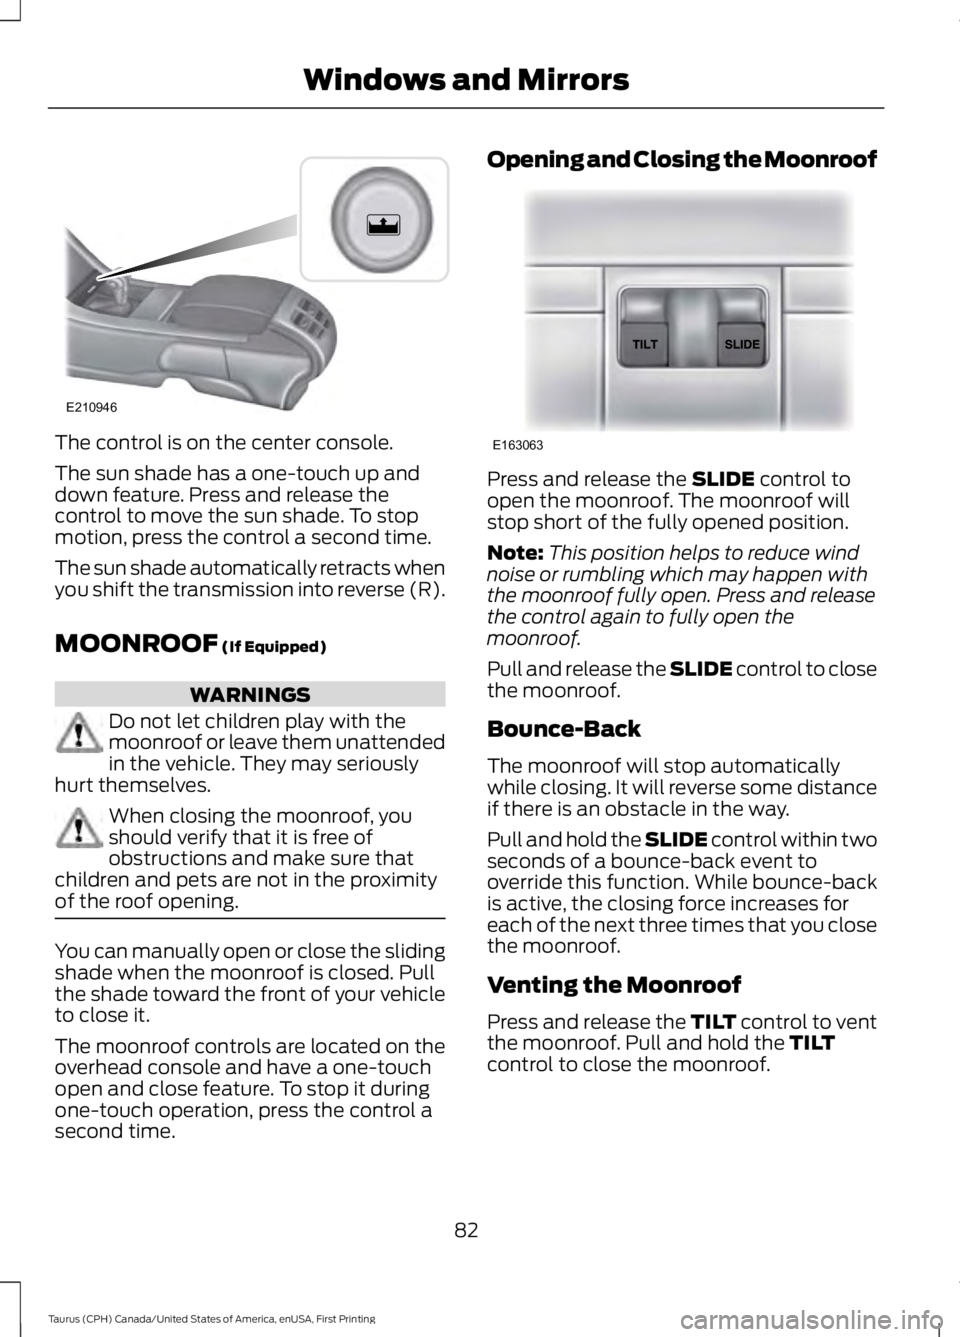
The control is on the center console.
The sun shade has a one-touch up anddown feature. Press and release thecontrol to move the sun shade. To stopmotion, press the control a second time.
The sun shade automatically retracts whenyou shift the transmission into reverse (R).
MOONROOF (If Equipped)
WARNINGS
Do not let children play with themoonroof or leave them unattendedin the vehicle. They may seriouslyhurt themselves.
When closing the moonroof, youshould verify that it is free ofobstructions and make sure thatchildren and pets are not in the proximityof the roof opening.
You can manually open or close the slidingshade when the moonroof is closed. Pullthe shade toward the front of your vehicleto close it.
The moonroof controls are located on theoverhead console and have a one-touchopen and close feature. To stop it duringone-touch operation, press the control asecond time.
Opening and Closing the Moonroof
Press and release the SLIDE control toopen the moonroof. The moonroof willstop short of the fully opened position.
Note:This position helps to reduce windnoise or rumbling which may happen withthe moonroof fully open. Press and releasethe control again to fully open themoonroof.
Pull and release the SLIDE control to closethe moonroof.
Bounce-Back
The moonroof will stop automaticallywhile closing. It will reverse some distanceif there is an obstacle in the way.
Pull and hold the SLIDE control within twoseconds of a bounce-back event tooverride this function. While bounce-backis active, the closing force increases foreach of the next three times that you closethe moonroof.
Venting the Moonroof
Press and release the TILT control to ventthe moonroof. Pull and hold the TILTcontrol to close the moonroof.
82
Taurus (CPH) Canada/United States of America, enUSA, First Printing
Windows and MirrorsE210946 E163063
Page 110 of 504
Traction Control
ActionMessage
Displays the status of the traction control system. See UsingTraction Control (page 166).Traction Control Off
Displays the status of the traction control system. See UsingTraction Control (page 166).Traction Control On
Transmission
ActionMessage
Contact an authorized dealer.Transmission Malfunc-tion Service Now
The transmission is overheating and needs to cool. Stop in asafe place as soon as possible.Transmission OverTemperature StopSafely
The transmission is overheating and needs to cool. Stop in asafe place as soon as possible.Transmission Over-heating Stop Safely
Contact an authorized dealer.Transmission ServiceRequired
The transmission is getting hot. Stop to let it cool.Transmission Too HotPress Brake
The transmission has overheated and has limited functionality.See Automatic Transmission (page 153).Transmission LimitedFunction See Manual
The transmission is too cold. Wait for it to warm up beforeyou drive.Transmission WarmingUp Please Wait
A reminder to shift into park.Transmission Not in Park
A request for you to apply the brake as needed by the trans-mission.Press Brake Pedal
The transmission has adjusted the shift strategy.Transmission Adjusted
107
Taurus (CPH) Canada/United States of America, enUSA, First Printing
Information Displays
Page 156 of 504
AUTOMATIC TRANSMISSION
WARNINGS
Always fully apply the parking brakeand make sure you shift into park (P).Switch the ignition off and removethe key whenever you leave your vehicle.
Do not apply the brake pedal andaccelerator pedal simultaneously.Applying both pedals simultaneouslyfor more than a few seconds will limitengine performance, which may result indifficulty maintaining speed in traffic andcould lead to serious injury.
Understanding the Positions ofYour Automatic Transmission
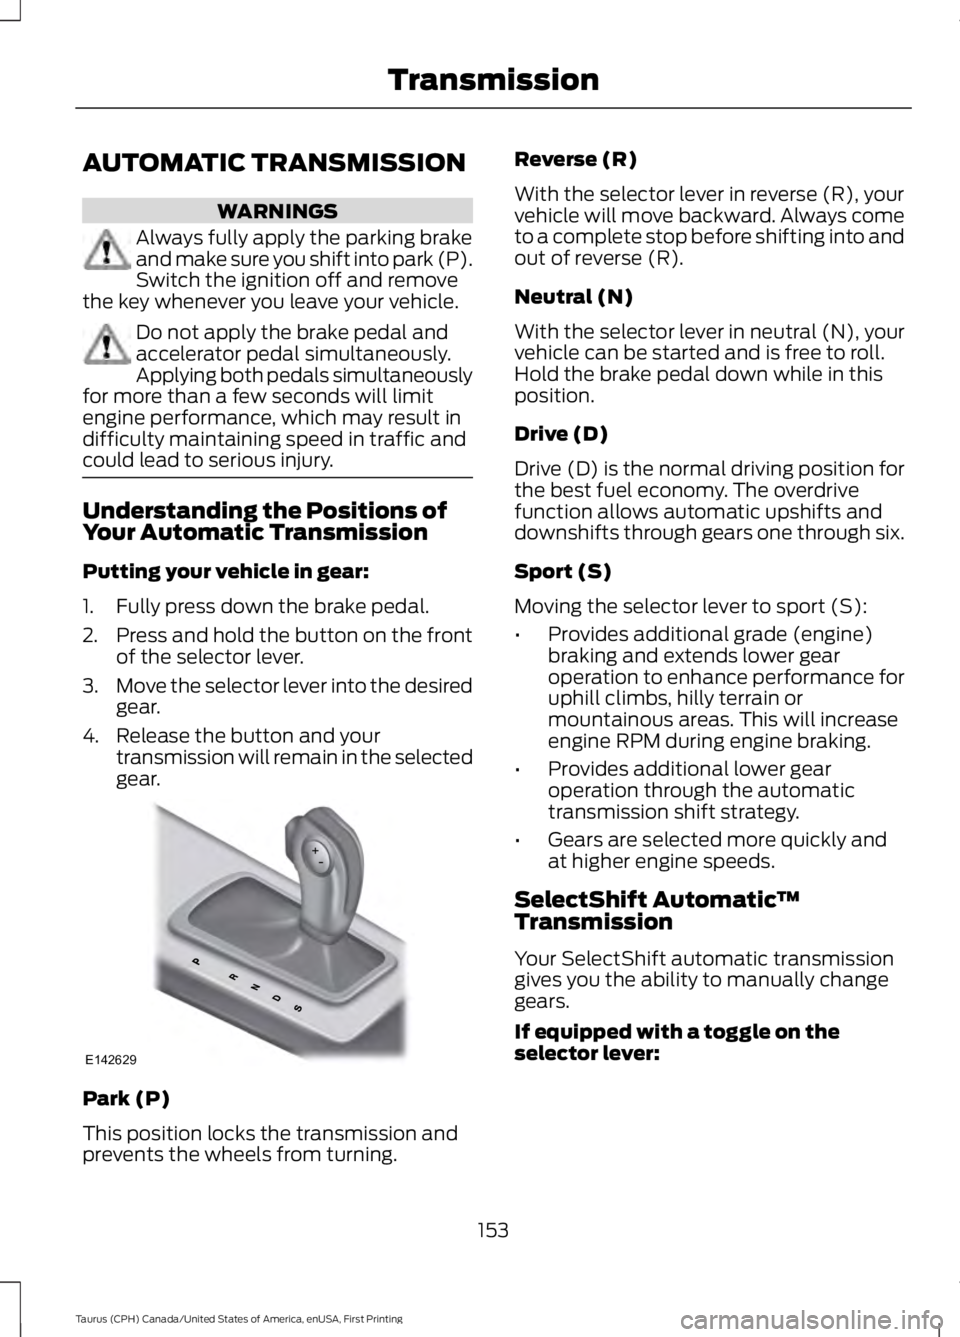
Putting your vehicle in gear:
1. Fully press down the brake pedal.
2.Press and hold the button on the frontof the selector lever.
3.Move the selector lever into the desiredgear.
4. Release the button and yourtransmission will remain in the selectedgear.
Park (P)
This position locks the transmission andprevents the wheels from turning.
Reverse (R)
With the selector lever in reverse (R), yourvehicle will move backward. Always cometo a complete stop before shifting into andout of reverse (R).
Neutral (N)
With the selector lever in neutral (N), yourvehicle can be started and is free to roll.Hold the brake pedal down while in thisposition.
Drive (D)
Drive (D) is the normal driving position forthe best fuel economy. The overdrivefunction allows automatic upshifts anddownshifts through gears one through six.
Sport (S)
Moving the selector lever to sport (S):
•Provides additional grade (engine)braking and extends lower gearoperation to enhance performance foruphill climbs, hilly terrain ormountainous areas. This will increaseengine RPM during engine braking.
•Provides additional lower gearoperation through the automatictransmission shift strategy.
•Gears are selected more quickly andat higher engine speeds.
SelectShift Automatic™Transmission
Your SelectShift automatic transmissiongives you the ability to manually changegears.
If equipped with a toggle on theselector lever:
153
Taurus (CPH) Canada/United States of America, enUSA, First Printing
TransmissionE142629
Page 157 of 504
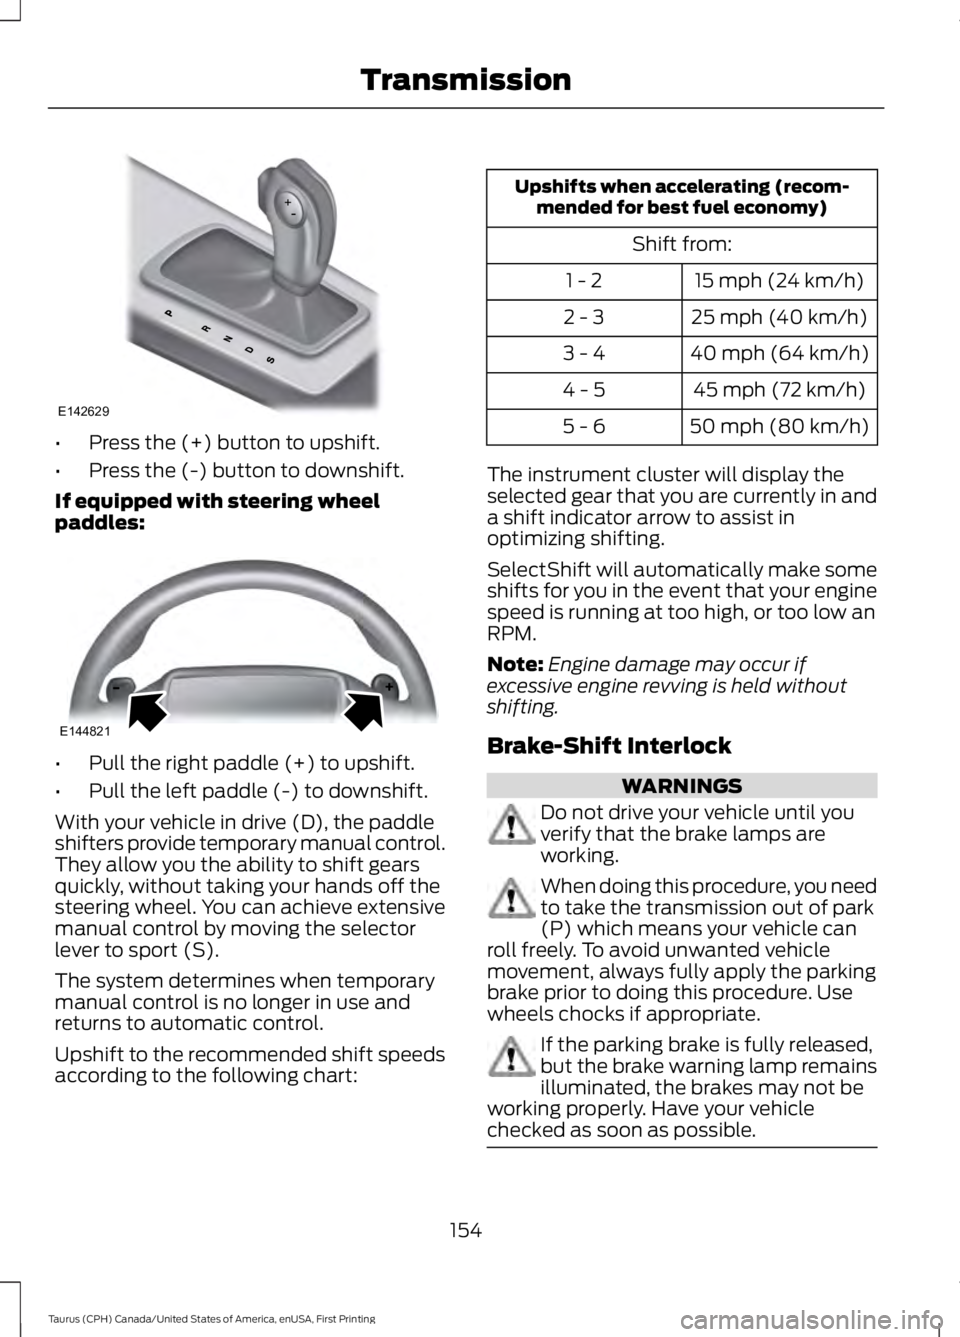
•Press the (+) button to upshift.
•Press the (-) button to downshift.
If equipped with steering wheelpaddles:
•Pull the right paddle (+) to upshift.
•Pull the left paddle (-) to downshift.
With your vehicle in drive (D), the paddleshifters provide temporary manual control.They allow you the ability to shift gearsquickly, without taking your hands off thesteering wheel. You can achieve extensivemanual control by moving the selectorlever to sport (S).
The system determines when temporarymanual control is no longer in use andreturns to automatic control.
Upshift to the recommended shift speedsaccording to the following chart:
Upshifts when accelerating (recom-mended for best fuel economy)
Shift from:
15 mph (24 km/h)1 - 2
25 mph (40 km/h)2 - 3
40 mph (64 km/h)3 - 4
45 mph (72 km/h)4 - 5
50 mph (80 km/h)5 - 6
The instrument cluster will display theselected gear that you are currently in anda shift indicator arrow to assist inoptimizing shifting.
SelectShift will automatically make someshifts for you in the event that your enginespeed is running at too high, or too low anRPM.
Note:Engine damage may occur ifexcessive engine revving is held withoutshifting.
Brake-Shift Interlock
WARNINGS
Do not drive your vehicle until youverify that the brake lamps areworking.
When doing this procedure, you needto take the transmission out of park(P) which means your vehicle canroll freely. To avoid unwanted vehiclemovement, always fully apply the parkingbrake prior to doing this procedure. Usewheels chocks if appropriate.
If the parking brake is fully released,but the brake warning lamp remainsilluminated, the brakes may not beworking properly. Have your vehiclechecked as soon as possible.
154
Taurus (CPH) Canada/United States of America, enUSA, First Printing
TransmissionE142629 E144821
Page 176 of 504
Note:Active park assist may not detectvehicles with overhanging loads (a bus or atruck), street furniture and other items. Youmust make sure the selected space issuitable for parking.
Note:You should drive your vehicle within5 ft (1.5 m) and as parallel to the othervehicles as possible while passing a parkingspace.
Note:The system always offers the lastdetected parking space (for example, if yourvehicle detects multiple spaces while youare driving, it offers the last one).
Note:If driven above approximately 22 mph(35 km/h), the display screen shows amessage to alert you to reduce your vehiclespeed.
Automatic Steering into ParkingSpace
Note:If vehicle speed exceeds 6 mph(10 km/h) or the maneuver is interrupted(driver input is detected), the systemswitches off and you need to take fullcontrol of your vehicle.
Note:If a maneuver is interrupted beforecompletion, the system switches off. Thesteering wheel position will not indicate theactualy position of the steering and you haveto take full control of your vehicle.
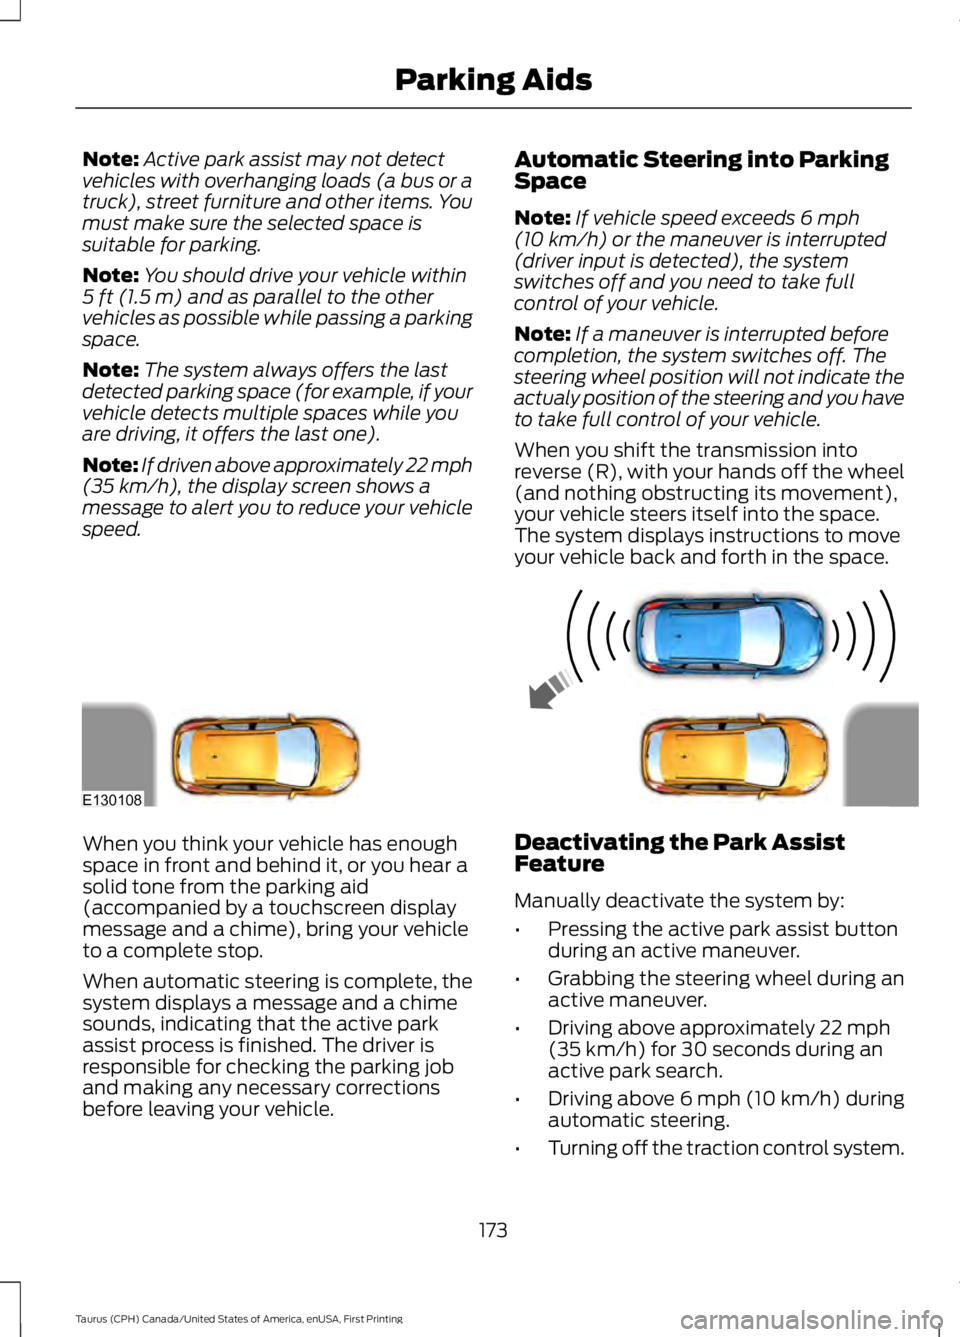
When you shift the transmission intoreverse (R), with your hands off the wheel(and nothing obstructing its movement),your vehicle steers itself into the space.The system displays instructions to moveyour vehicle back and forth in the space.
When you think your vehicle has enoughspace in front and behind it, or you hear asolid tone from the parking aid(accompanied by a touchscreen displaymessage and a chime), bring your vehicleto a complete stop.
When automatic steering is complete, thesystem displays a message and a chimesounds, indicating that the active parkassist process is finished. The driver isresponsible for checking the parking joband making any necessary correctionsbefore leaving your vehicle.
Deactivating the Park AssistFeature
Manually deactivate the system by:
•Pressing the active park assist buttonduring an active maneuver.
•Grabbing the steering wheel during anactive maneuver.
•Driving above approximately 22 mph(35 km/h) for 30 seconds during anactive park search.
•Driving above 6 mph (10 km/h) duringautomatic steering.
•Turning off the traction control system.
173
Taurus (CPH) Canada/United States of America, enUSA, First Printing
Parking AidsE130108
Page 180 of 504
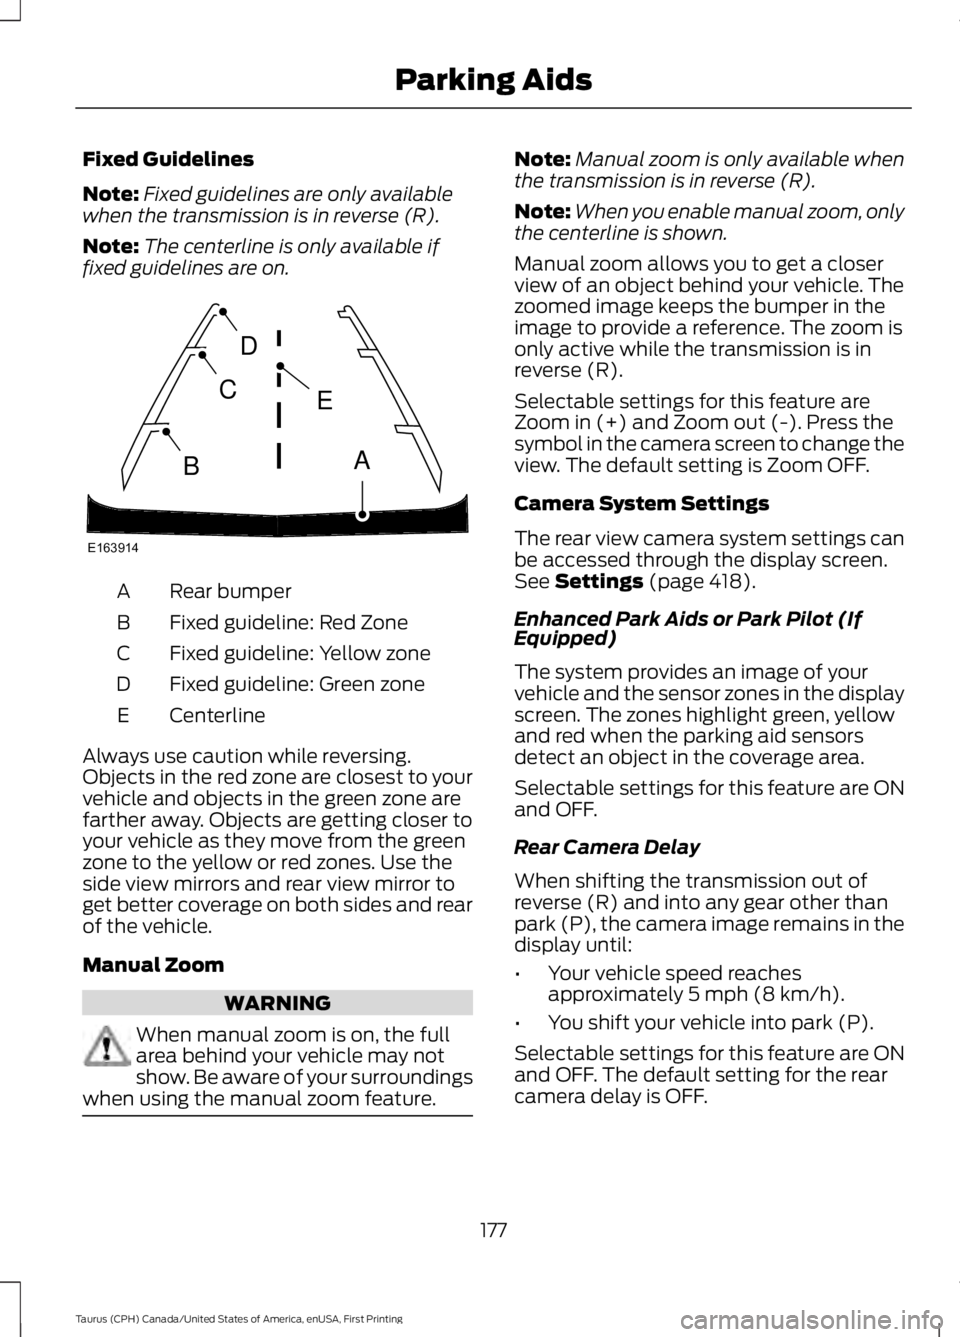
Fixed Guidelines
Note:Fixed guidelines are only availablewhen the transmission is in reverse (R).
Note:The centerline is only available iffixed guidelines are on.
Rear bumperA
Fixed guideline: Red ZoneB
Fixed guideline: Yellow zoneC
Fixed guideline: Green zoneD
CenterlineE
Always use caution while reversing.Objects in the red zone are closest to yourvehicle and objects in the green zone arefarther away. Objects are getting closer toyour vehicle as they move from the greenzone to the yellow or red zones. Use theside view mirrors and rear view mirror toget better coverage on both sides and rearof the vehicle.
Manual Zoom
WARNING
When manual zoom is on, the fullarea behind your vehicle may notshow. Be aware of your surroundingswhen using the manual zoom feature.
Note:Manual zoom is only available whenthe transmission is in reverse (R).
Note:When you enable manual zoom, onlythe centerline is shown.
Manual zoom allows you to get a closerview of an object behind your vehicle. Thezoomed image keeps the bumper in theimage to provide a reference. The zoom isonly active while the transmission is inreverse (R).
Selectable settings for this feature areZoom in (+) and Zoom out (-). Press thesymbol in the camera screen to change theview. The default setting is Zoom OFF.
Camera System Settings
The rear view camera system settings canbe accessed through the display screen.See Settings (page 418).
Enhanced Park Aids or Park Pilot (IfEquipped)
The system provides an image of yourvehicle and the sensor zones in the displayscreen. The zones highlight green, yellowand red when the parking aid sensorsdetect an object in the coverage area.
Selectable settings for this feature are ONand OFF.
Rear Camera Delay
When shifting the transmission out ofreverse (R) and into any gear other thanpark (P), the camera image remains in thedisplay until:
•Your vehicle speed reachesapproximately 5 mph (8 km/h).
•You shift your vehicle into park (P).
Selectable settings for this feature are ONand OFF. The default setting for the rearcamera delay is OFF.
177
Taurus (CPH) Canada/United States of America, enUSA, First Printing
Parking AidsE163914
A
E
D
C
B
Page 195 of 504
Note:The Blind Spot Information Systemdoes not prevent contact with other vehiclesor objects; nor detect parked vehicles,people, animals or infrastructure (fences,guardrails, trees). It’s only designed to alertyou to vehicles in the blind spot zones.
Note:When a vehicle passes quicklythrough the blind spot zone, typically fewerthan two seconds, the system does nottrigger.
Using the System
The Blind Spot Information System turnson when you start the engine and you driveyour vehicle forward above 3 mph(5 km/h).
For automatic transmissions, the BlindSpot Information System remains on whilethe transmission is in drive (D). If shiftedinto reverse (R) or park (P) the Blind SpotInformation System turns off. Once shiftedback into drive (D), the Blind SpotInformation System turns back on whenyou drive your vehicle above 3 mph(5 km/h).
For manual transmissions, the Blind SpotInformation System is on for all gearsexcept the reverse (R).
Note:The Blind Spot Information Systemdoes not function in reverse (R) or park (P).
System Lights and Messages
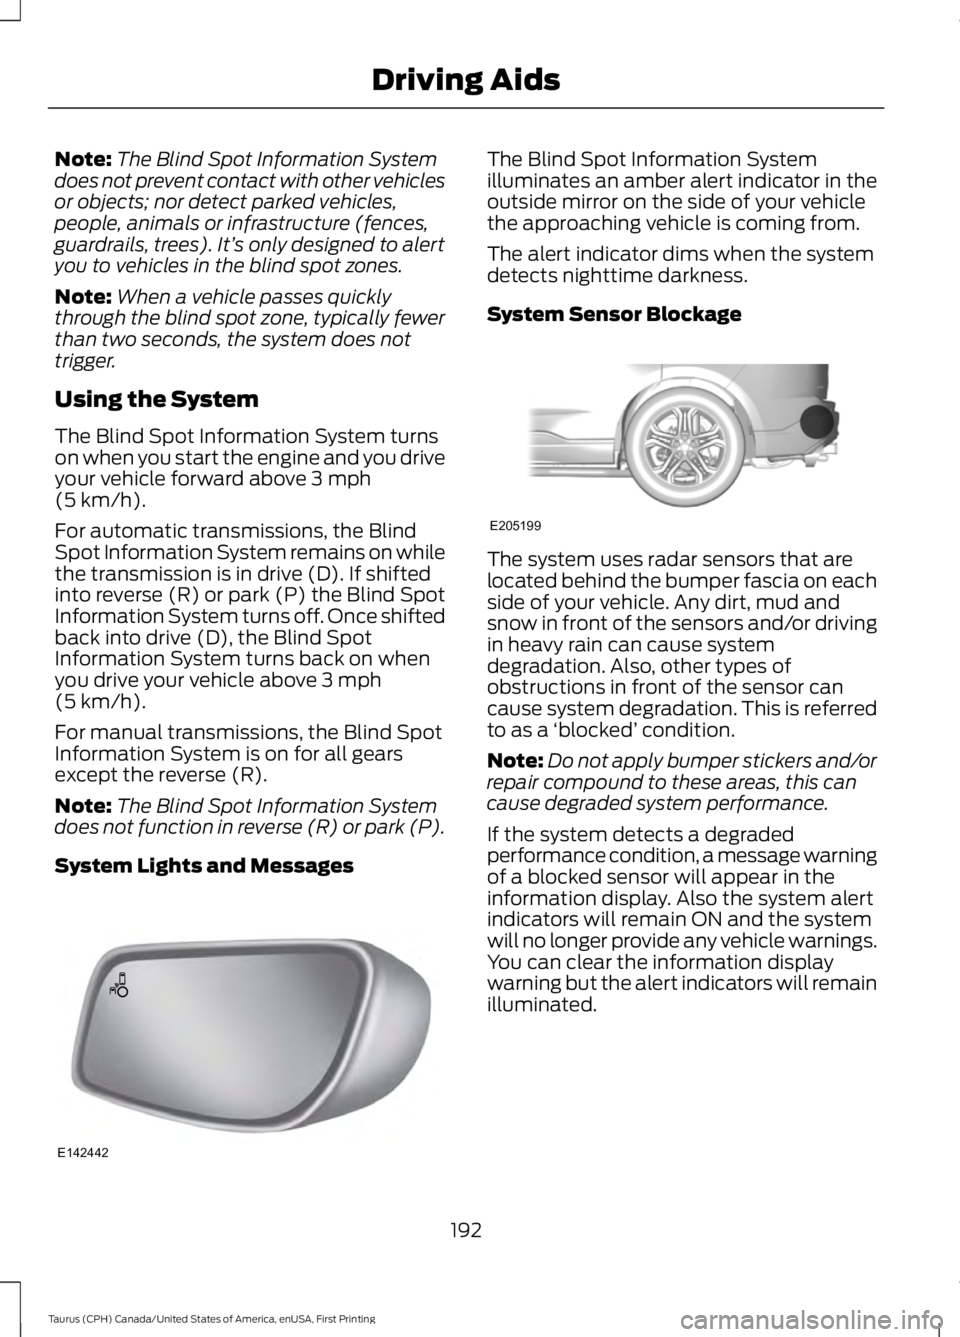
The Blind Spot Information Systemilluminates an amber alert indicator in theoutside mirror on the side of your vehiclethe approaching vehicle is coming from.
The alert indicator dims when the systemdetects nighttime darkness.
System Sensor Blockage
The system uses radar sensors that arelocated behind the bumper fascia on eachside of your vehicle. Any dirt, mud andsnow in front of the sensors and/or drivingin heavy rain can cause systemdegradation. Also, other types ofobstructions in front of the sensor cancause system degradation. This is referredto as a ‘blocked’ condition.
Note:Do not apply bumper stickers and/orrepair compound to these areas, this cancause degraded system performance.
If the system detects a degradedperformance condition, a message warningof a blocked sensor will appear in theinformation display. Also the system alertindicators will remain ON and the systemwill no longer provide any vehicle warnings.You can clear the information displaywarning but the alert indicators will remainilluminated.
192
Taurus (CPH) Canada/United States of America, enUSA, First Printing
Driving AidsE142442 E205199
Page 199 of 504
False Alerts
Note:When towing a trailer, the sensorsmay detect the trailer thus causing a falsealert. It may be desirable to turn the BlindSpot Information System off if the falsealerts become annoying.
There may be certain instances when thereis a false alert by the Cross Traffic Alertsystem that illuminates the alert indicatorwith no vehicle in the coverage zone. Someamount of false alerts are normal; they aretemporary and self-correct.
System Errors
If Cross Traffic Alert senses a problem withthe left or right sensor a message willappear in the information display. SeeInformation Messages (page 98).
Switching the System Off and On
You can temporarily switch Cross TrafficAlert off in the information display. SeeInformation Messages (page 98). Whenyou switch Cross Traffic Alert off, you willnot receive alerts and the informationdisplay will display a system off message.
Note:The Cross Traffic Alert switches onwhenever the ignition is switched on andready to provide appropriate alerts whenthe transmission is in reverse (R). CrossTraffic Alert will not remember the lastselected on or off setting.
You can also have Cross Traffic Alertswitched off permanently at an authorizeddealer. Once switched off permanently,the system can only be switched back onat an authorized dealer.
STEERING
Electric Power Steering
WARNINGS
The electric power steering systemhas diagnostic checks thatcontinuously monitor the system. Ifa fault is detected, a message displays inthe information display. Stop your vehicleas soon as it is safe to do so. Switch theignition off. After at least 10 seconds,switch the ignition on and watch theinformation display for a steering systemwarning message. If a steering systemwarning message returns, have the systemchecked by an authorized dealer.
If the system detects an error, youmay not feel a difference in thesteering, however a serious conditionmay exist. Obtain immediate service froman authorized dealer, failure to do so mayresult in loss of steering control.
Your vehicle has an electric power steeringsystem. There is no fluid reservoir. Nomaintenance is required.
If your vehicle loses electrical power whileyou are driving, electric power steeringassistance is lost. The steering system stilloperates and you can steer your vehiclemanually. Manually steering your vehiclerequires more effort.
Extreme continuous steering may increasethe effort required for you to steer yourvehicle. This increased effort preventsoverheating and permanent damage tothe steering system. You do not lose theability to steer your vehicle manually.Typical steering and driving maneuversallow the system to cool and return tonormal operation.
196
Taurus (CPH) Canada/United States of America, enUSA, First Printing
Driving Aids
Page 209 of 504
TOWING A TRAILER
WARNINGS
Towing trailers beyond themaximum recommendedgross trailer weight exceeds thelimit of your vehicle and couldresult in engine damage,transmission damage, structuraldamage, loss of vehicle control,vehicle rollover and personalinjury.
Do not exceed the GVWR orthe GAWR specified on thecertification label.
Note: See RecommendedTowing Weights (page 207).
Your vehicle may have electricalitems, such as fuses or relays,related to towing. See Fuses(page 226).
Your vehicle's load capacitydesignation is by weight, not byvolume, so you cannot necessarilyuse all available space whenloading a vehicle or trailer.
Towing a trailer places an extraload on your vehicle's engine,transmission, axle, brakes, tiresand suspension. Inspect thesecomponents periodically during,and after, any towing operation.
Load Placement
To help minimize how trailermovement affects your vehiclewhen driving:
•Load the heaviest items closestto the trailer floor.
•Load the heaviest itemscentered between the left andright side trailer tires.
•Load the heaviest items abovethe trailer axles or just slightlyforward toward the trailertongue. Do not allow the finaltrailer tongue weight to goabove or below 10-15% of theloaded trailer weight.
•Select a ball mount with thecorrect rise or drop and loadcapacity. When both theloaded vehicle and trailer areconnected, the trailer frameshould be level, or slightlyangled down toward yourvehicle, when viewed from theside.
When driving with a trailer orpayload, a slight takeoff vibrationor shudder may be present due tothe increased payload weight.Additional information regardingproper trailer loading and settingyour vehicle up for towing islocated in another chapter of thismanual. See Load Limit (page200).
You can also find information inthe RV & Trailer Towing Guideavailable at your authorizeddealer, or online.
206
Taurus (CPH) Canada/United States of America, enUSA, First Printing
Towing