wheel FORD THUNDERBIRD 2003 11.G User Guide
[x] Cancel search | Manufacturer: FORD, Model Year: 2003, Model line: THUNDERBIRD, Model: FORD THUNDERBIRD 2003 11.GPages: 200, PDF Size: 1.79 MB
Page 109 of 200
Always set the parking brake fully and make sure the gearshift is
latched in P (Park). Turn the ignition to the LOCK position and
remove the key whenever you leave your vehicle.
If the parking brake is fully released, but the brake warning lamp
remains illuminated, the brakes may not be working properly.
See your dealer or a qualified service technician.
Driving with a 5–speed automatic transmission
Your transmission is equipped with an adaptive learning strategy found in
the vehicle computer. This feature is designed to increase durability, and
provide consistent shift feel over the life of the vehicle. A new vehicle or
transmission may have firm and/or soft shifts. This operation is
considered normal and will not affect function or durability of the
transmission. Over time, the adaptive learning process will fully update
transmission operation. Additionally, whenever the battery is
disconnected or a new battery installed, the strategy must be relearned.
P (Park)
This position locks the transmission and prevents the rear wheels from
turning.
To put your vehicle in gear:
•Start the engine
•Depress the brake pedal
•Move the gearshift lever into the desired gear
To put your vehicle in P (Park):
•Come to a complete stop
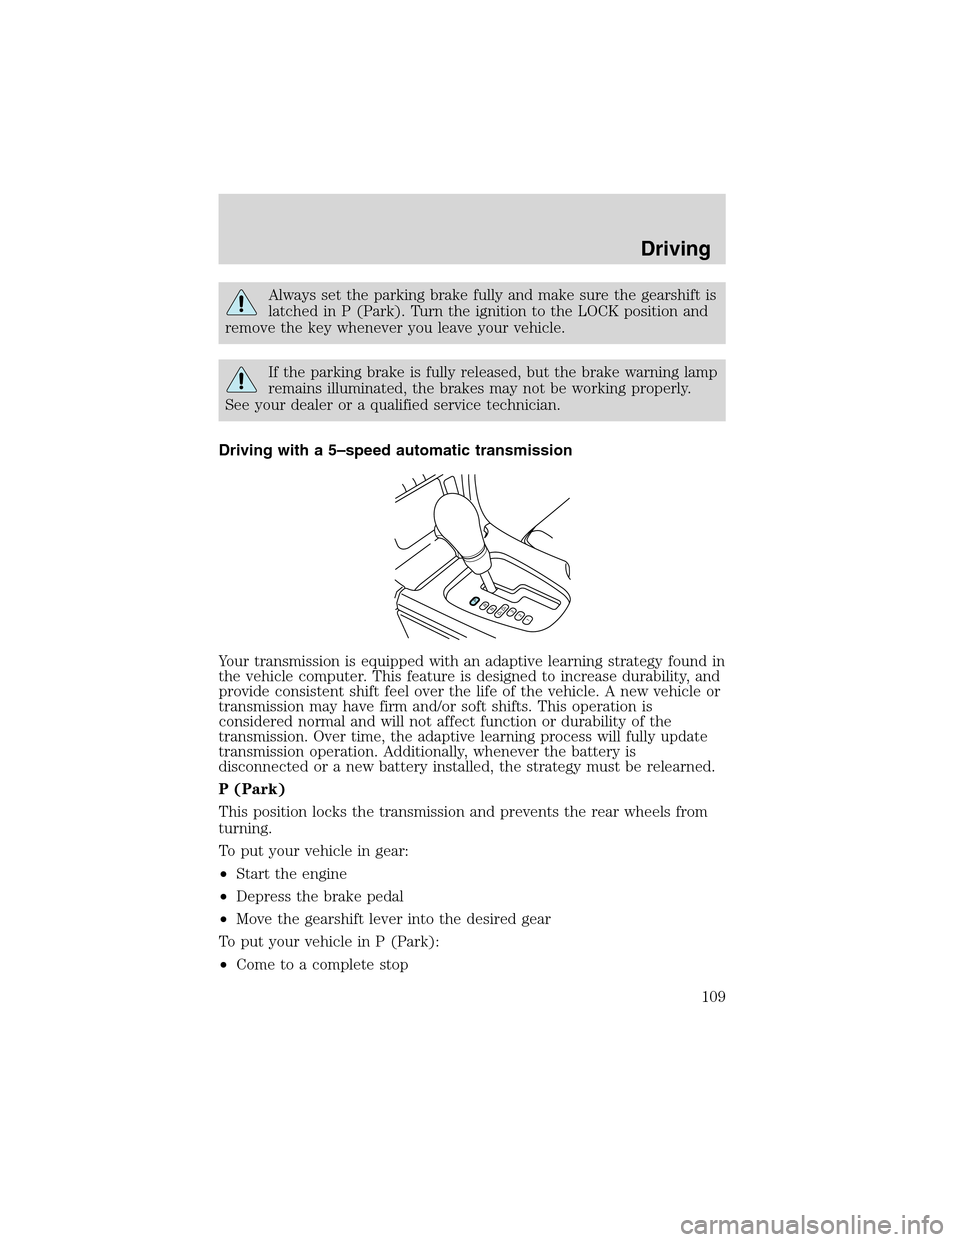
PRND5D4321
Driving
109
Page 113 of 200
•If shifter (-) is tapped more than once in rapid succession, the
transmission will downshift only into the next lower gear, then when
the vehicle reaches a speed below a calibrated entry speed, the
transmission will allow a downshift into the next lower gear if again
selected by the driver. This is to prevent engine and transmission
damage and to keep the engine and transmission within allowable
RPM ranges.
•An electronic indicator on the instrument cluster will display the
selected gear.
Recommended shift speeds
Upshift according to the following chart:
Recommended upshift schedule
Shift from:
1 - 2 24 km/h (15 mph)
2 - 3 40 km/h (25 mph)
3 - 4 64 km/h (40 mph)
4 - 5 72 km/h (45 mph)
If your vehicle gets stuck in mud or snow
If your vehicle gets stuck in mud or snow, it may be rocked out by
shifting from forward and reverse gears, stopping between shifts in a
steady pattern. Press lightly on the accelerator in each gear.
Do not rock the vehicle if the engine is not at normal operating
temperature or damage to the transmission may occur.
Do not rock the vehicle for more than a minute or damage to the
transmission and tires may occur, or the engine may overheat.
DRIVING THROUGH WATER
If driving through deep or standing water is unavoidable, proceed very
slowly especially if the depth is not known. Never drive through water
that is higher than the bottom of the hubs (for trucks) or the bottom of
the wheel rims (for cars). Traction or brake capability may be limited
and your vehicle may stall. Water may also enter your engine’s air intake
and severely damage your engine.
Once through the water, always dry the brakes by moving your vehicle
slowly while applying light pressure on the brake pedal. Wet brakes do
not stop the vehicle as quickly as dry brakes.Driving through deep
water where the transmission vent tube is submerged may allow
water into the transmission and cause internal transmission
damage.
Driving
113
Page 115 of 200
TRAILER TOWING
Your vehicle is not equipped to tow. No towing packages are available
through Ford or Lincoln/Mercury dealers.
RECREATIONAL TOWING (ALL WHEELS ON THE GROUND)
Follow these guidelines for your specific powertrain combination to tow
your vehicle with all four wheels on the ground (such as behind a
recreational vehicle).
These guidelines are designed to ensure that your transmission is not
damaged due to insufficient lubrication.
All Rear Wheel Drive (RWD) vehicles:
This applies to all cars and 4x2 trucks/sport utilities with rear wheel
drive capability.
•Place the transmission in N (Neutral)
•Maximum speed is 56 km/h (35 mph)
•Maximum distance is 80 km (50 miles)
If a distance of 80 km (50 miles) or a speed of 56 km/h (35 mph) must
be exceeded, you must disconnect the driveshaft.
Ford recommends the driveshaft be removed/installed only by a
qualified technician. Improper removal/installation of the
driveshaft may cause damage to the driveshaft and internal
transmission components.See your local dealer for driveshaft
removal/installation.
Driving
115
Page 117 of 200
U.S. Ford or Mercury vehicle customers who require roadside assistance,
call 1–800–241–3673; Lincoln vehicle customers call 1–800–521–4140.
Canadian customers who require roadside assistance, call
1–800–665–2006.
If you need to arrange roadside assistance for yourself, Ford Motor
Company will reimburse a reasonable amount. To obtain reimbursement
information, U.S. Ford or Mercury vehicles customers call
1-800-241-3673; Lincoln vehicle customers call 1–800–521–4140.
Canadian customers who need to obtain reimbursement information, call
1–800–665–2006.
Roadside coverage beyond basic warranty
In the United States, you may purchase additional roadside assistance
coverage beyond this period through the Ford Auto Club by contacting
your Ford or Lincoln Mercury dealer.
Similarly in Canada, for uninterrupted Roadside Assistance coverage, you
may purchase extended coverage prior to your Basic Warranty’s Roadside
Assistance expiring. For more information and enrollment, contact
1–877–294–2582 or visit our website at www.ford.ca.
HAZARD FLASHER
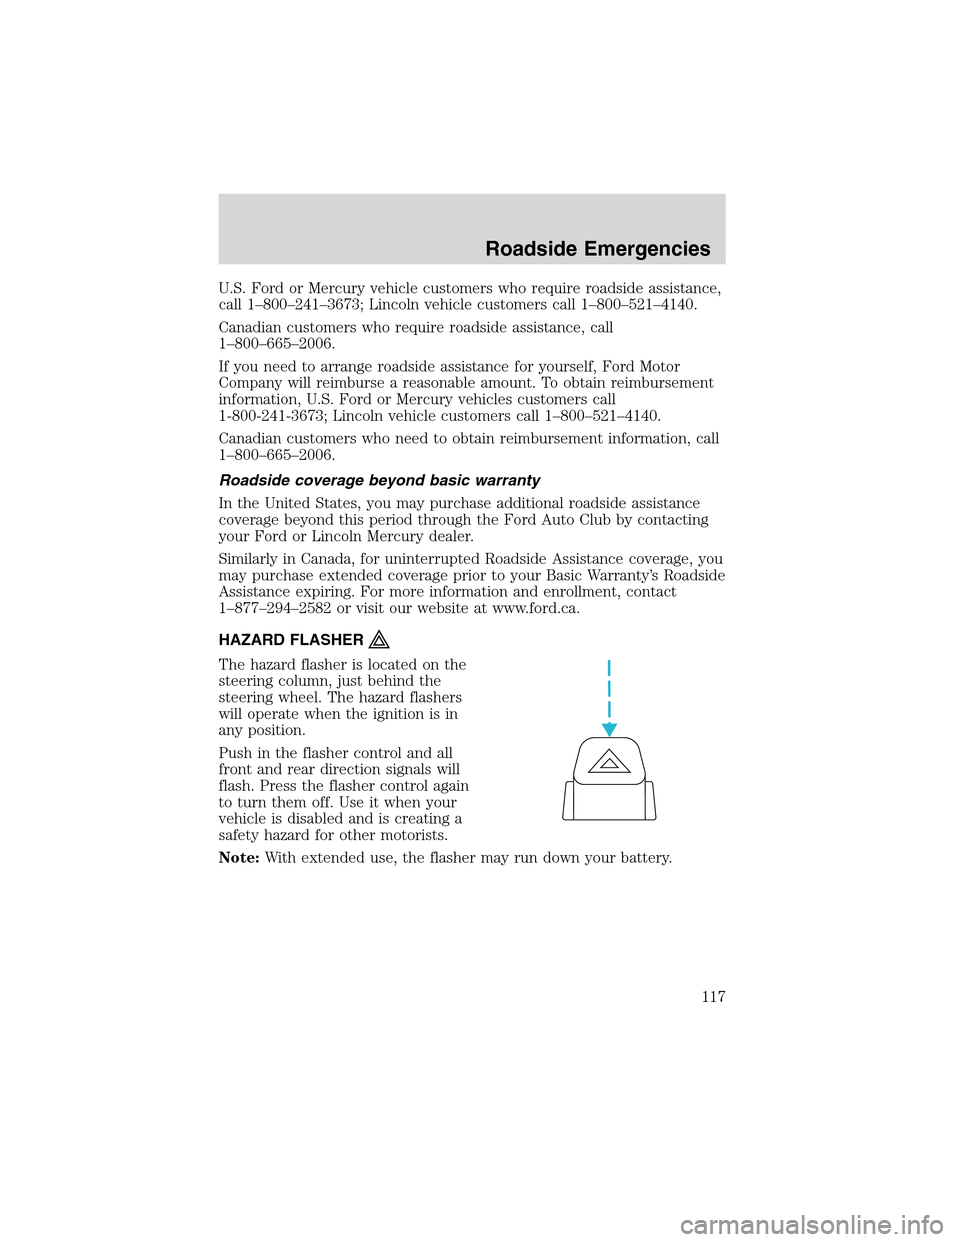
The hazard flasher is located on the
steering column, just behind the
steering wheel. The hazard flashers
will operate when the ignition is in
any position.
Push in the flasher control and all
front and rear direction signals will
flash. Press the flasher control again
to turn them off. Use it when your
vehicle is disabled and is creating a
safety hazard for other motorists.
Note:With extended use, the flasher may run down your battery.
Roadside Emergencies
117
Page 127 of 200
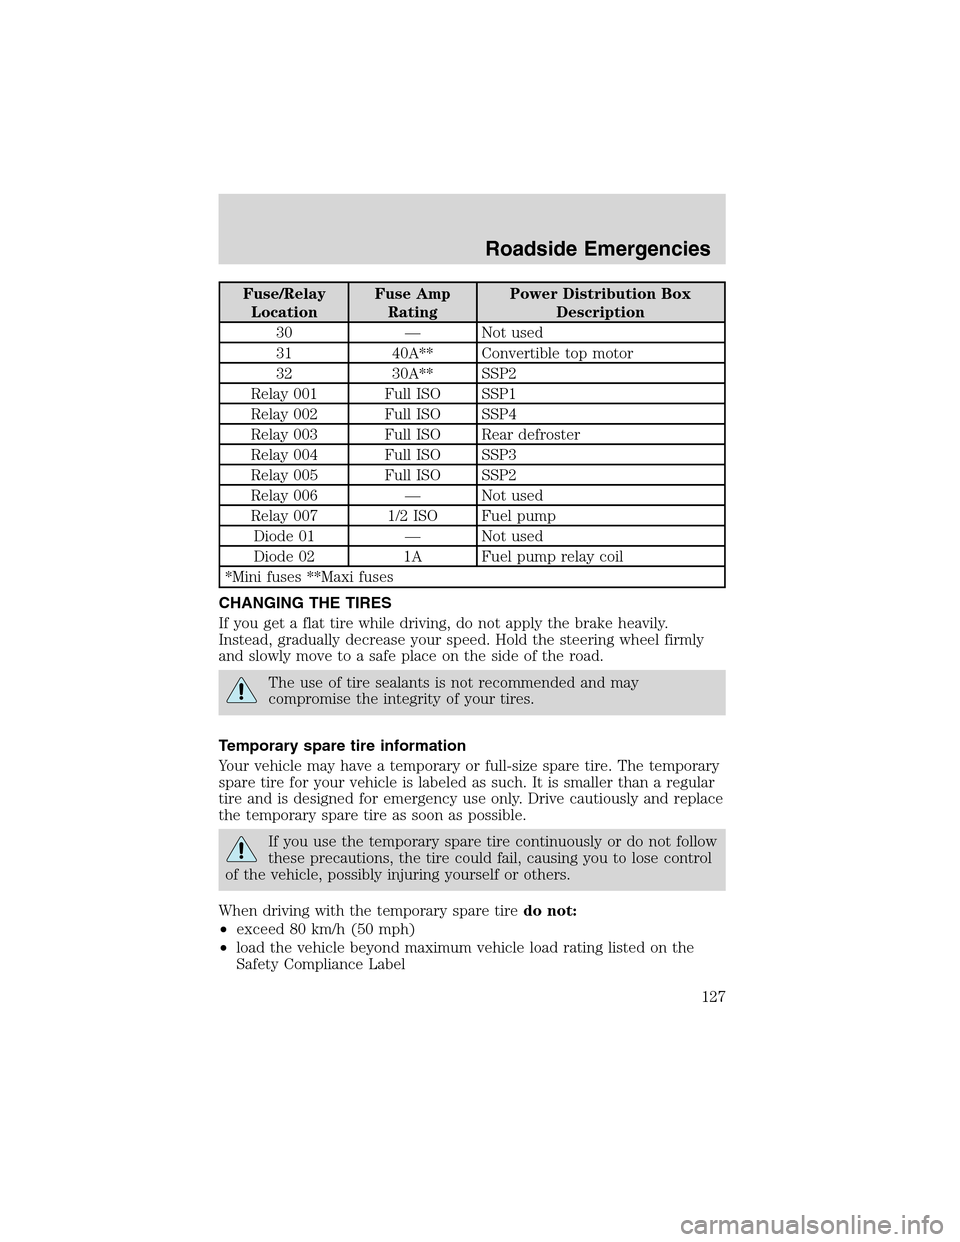
Fuse/Relay
LocationFuse Amp
RatingPower Distribution Box
Description
30—Not used
31 40A** Convertible top motor
32 30A** SSP2
Relay 001 Full ISO SSP1
Relay 002 Full ISO SSP4
Relay 003 Full ISO Rear defroster
Relay 004 Full ISO SSP3
Relay 005 Full ISO SSP2
Relay 006—Not used
Relay 007 1/2 ISO Fuel pump
Diode 01—Not used
Diode 02 1A Fuel pump relay coil
*Mini fuses **Maxi fuses
CHANGING THE TIRES
If you get a flat tire while driving, do not apply the brake heavily.
Instead, gradually decrease your speed. Hold the steering wheel firmly
and slowly move to a safe place on the side of the road.
The use of tire sealants is not recommended and may
compromise the integrity of your tires.
Temporary spare tire information
Your vehicle may have a temporary or full-size spare tire. The temporary
spare tire for your vehicle is labeled as such. It is smaller than a regular
tire and is designed for emergency use only. Drive cautiously and replace
the temporary spare tire as soon as possible.
If you use the temporary spare tire continuously or do not follow
these precautions, the tire could fail, causing you to lose control
of the vehicle, possibly injuring yourself or others.
When driving with the temporary spare tiredo not:
•exceed 80 km/h (50 mph)
•load the vehicle beyond maximum vehicle load rating listed on the
Safety Compliance Label
Roadside Emergencies
127
Page 128 of 200
•tow a trailer
•use tire chains
•drive through an automatic car wash, because of the vehicle’s reduced
ground clearance
•try to repair the temporary spare tire or remove it from its wheel
•drive for long distances when the temporary-use spare is on
•use the wheel for any other type of vehicle
•use more than one temporary spare tire at a time
Use of a temporary spare tire at any one wheel location can lead to
impairment of the following:
•Handling, stability and braking performance
•Comfort and noise
•Ground clearance and parking at curbs
•Winter driving capability
Tire change procedure
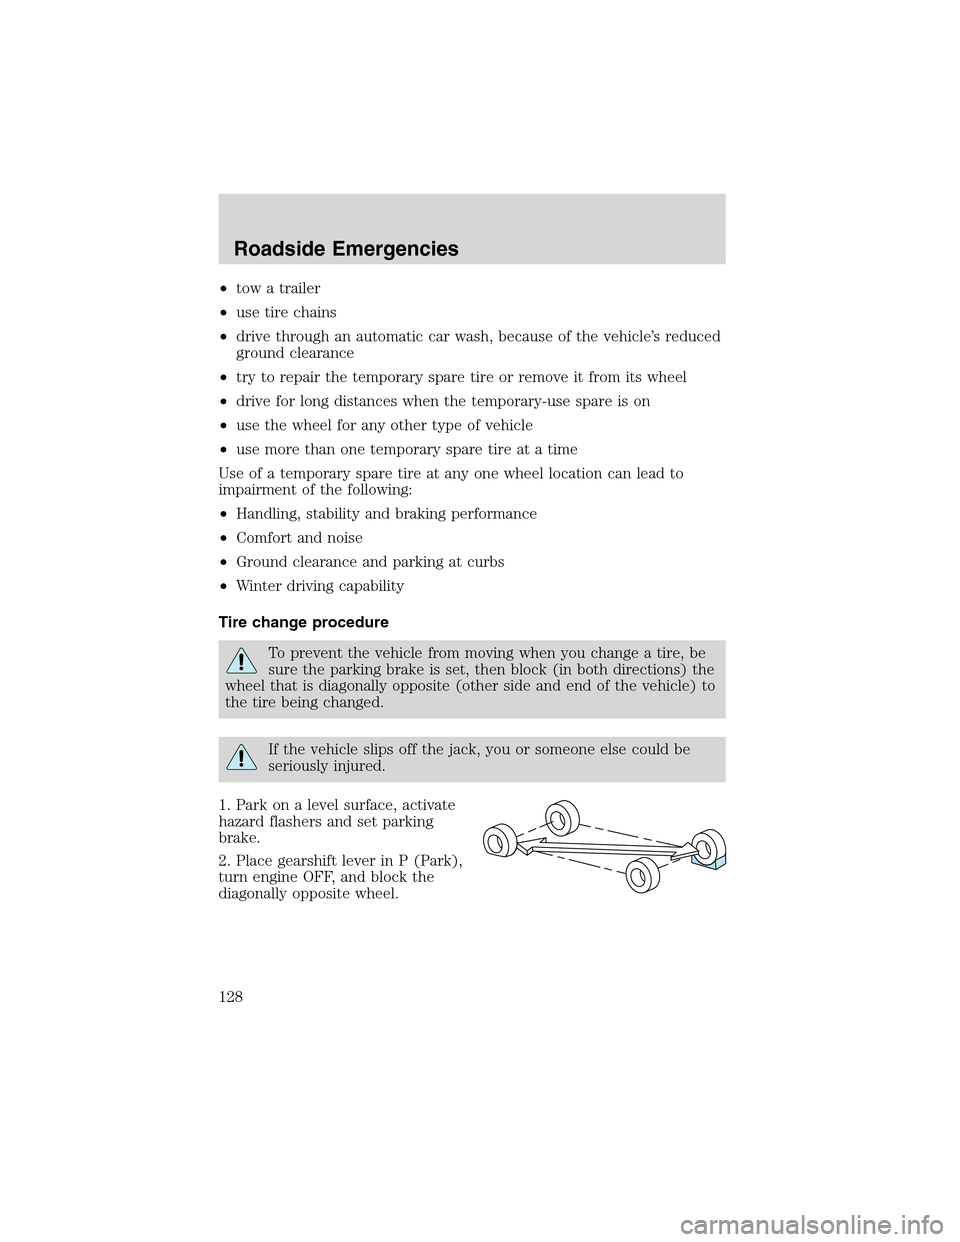
To prevent the vehicle from moving when you change a tire, be
sure the parking brake is set, then block (in both directions) the
wheel that is diagonally opposite (other side and end of the vehicle) to
the tire being changed.
If the vehicle slips off the jack, you or someone else could be
seriously injured.
1. Park on a level surface, activate
hazard flashers and set parking
brake.
2. Place gearshift lever in P (Park),
turn engine OFF, and block the
diagonally opposite wheel.
Roadside Emergencies
128
Page 129 of 200
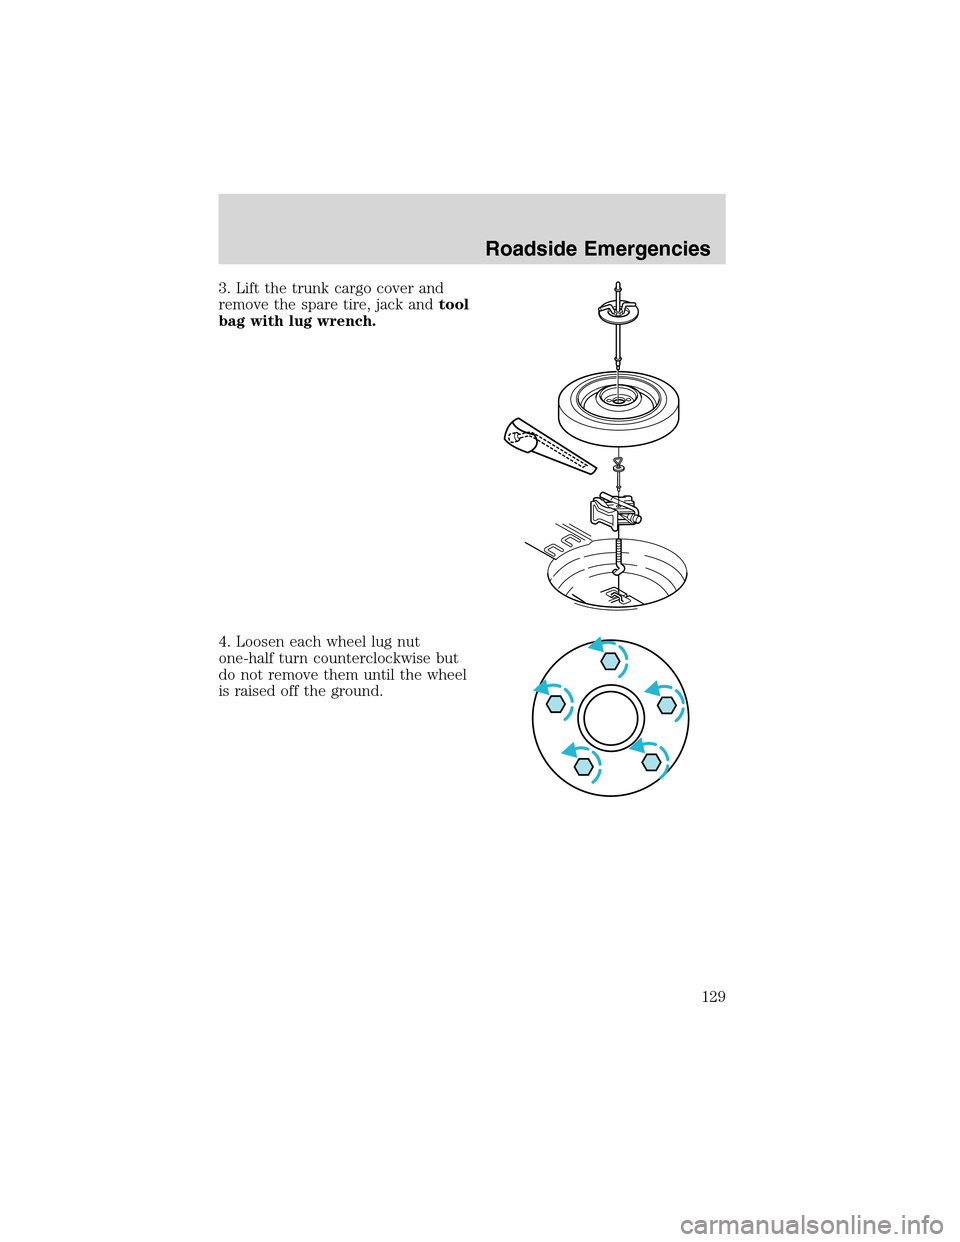
3.Liftthe trunk cargo cover and
remove the spare tire, jack andtool
bag with lug wrench.
4. Loosen each wheel lug nut
one-half turn counterclockwise but
do not remove them until the wheel
is raised off the ground.
Roadside Emergencies
129
Page 130 of 200
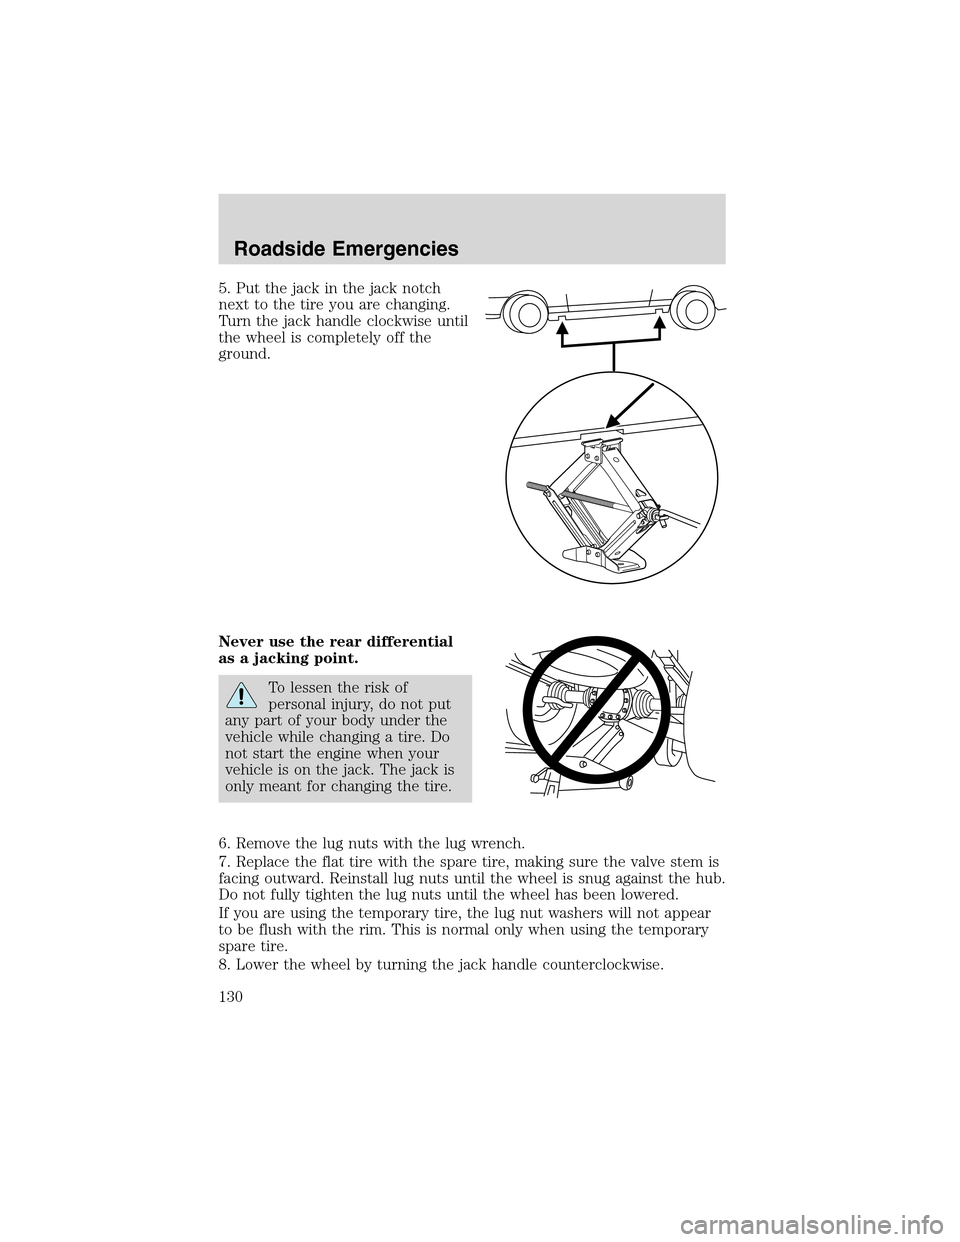
5. Put the jack in the jack notch
next to the tire you are changing.
Turn the jack handle clockwise until
the wheel is completely off the
ground.
Never use the rear differential
as a jacking point.
To lessen the risk of
personal injury, do not put
any part of your body under the
vehicle while changing a tire. Do
not start the engine when your
vehicle is on the jack. The jack is
only meant for changing the tire.
6. Remove the lug nuts with the lug wrench.
7. Replace the flat tire with the spare tire, making sure the valve stem is
facing outward. Reinstall lug nuts until the wheel is snug against the hub.
Do not fully tighten the lug nuts until the wheel has been lowered.
If you are using the temporary tire, the lug nut washers will not appear
to be flush with the rim. This is normal only when using the temporary
spare tire.
8. Lower the wheel by turning the jack handle counterclockwise.
Roadside Emergencies
130
Page 131 of 200
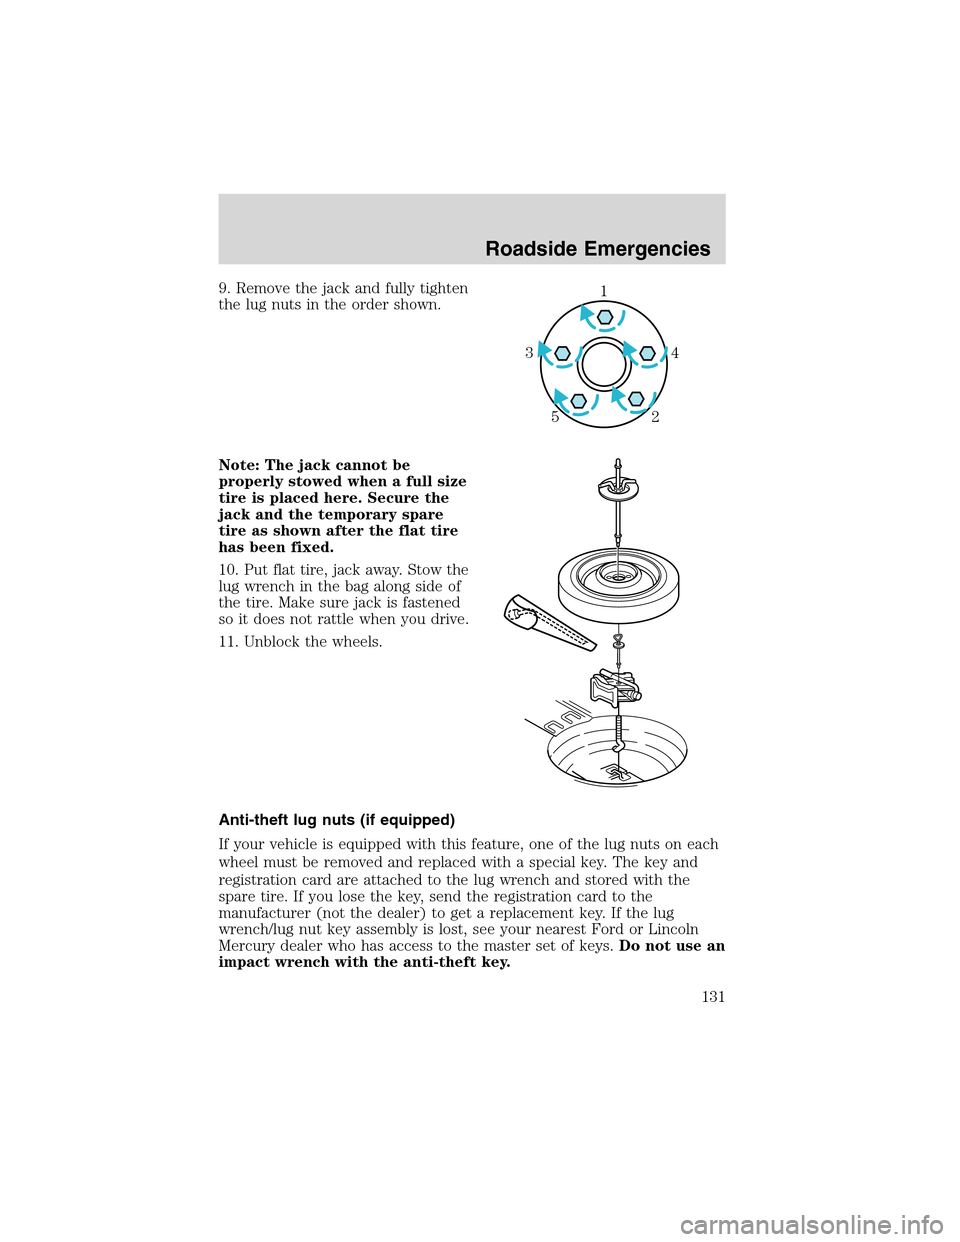
9. Remove the jack and fully tighten
the lug nuts in the order shown.
Note: The jack cannot be
properly stowed when a full size
tire is placed here. Secure the
jack and the temporary spare
tire as shown after the flat tire
has been fixed.
10. Put flat tire, jack away. Stow the
lug wrench in the bag along side of
the tire. Make sure jack is fastened
so it does not rattle when you drive.
11. Unblock the wheels.
Anti-theft lug nuts (if equipped)
If your vehicle is equipped with this feature, one of the lug nuts on each
wheel must be removed and replaced with a special key. The key and
registration card are attached to the lug wrench and stored with the
spare tire. If you lose the key, send the registration card to the
manufacturer (not the dealer) to get a replacement key. If the lug
wrench/lug nut key assembly is lost, see your nearest Ford or Lincoln
Mercury dealer who has access to the master set of keys.Do not use an
impact wrench with the anti-theft key.1
4 3
2 5
Roadside Emergencies
131
Page 138 of 200
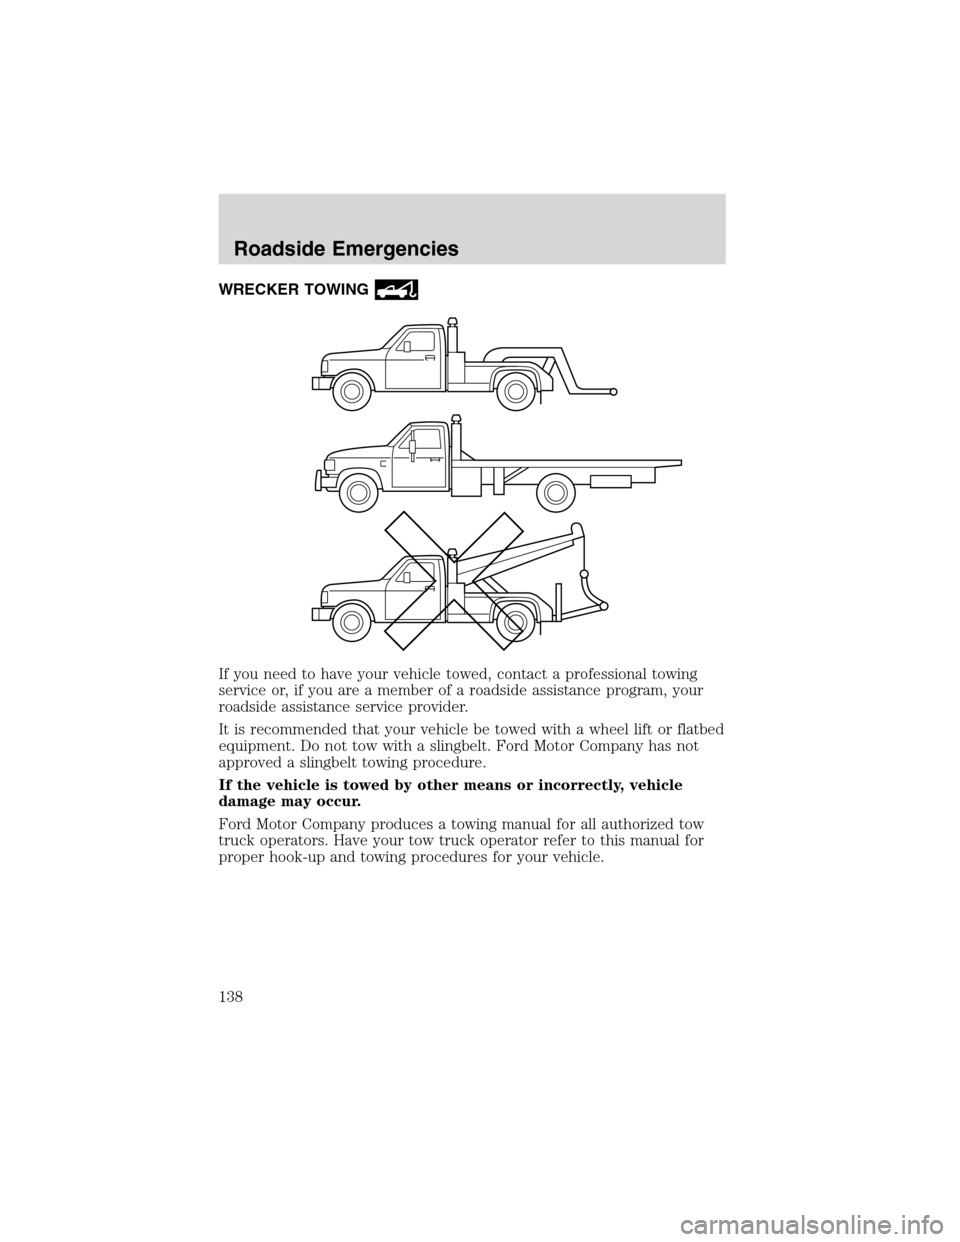
WRECKER TOWING
If you need to have your vehicle towed, contact a professional towing
service or, if you are a member of a roadside assistance program, your
roadside assistance service provider.
It is recommended that your vehicle be towed with a wheel lift or flatbed
equipment. Do not tow with a slingbelt. Ford Motor Company has not
approved a slingbelt towing procedure.
If the vehicle is towed by other means or incorrectly, vehicle
damage may occur.
Ford Motor Company produces a towing manual for all authorized tow
truck operators. Have your tow truck operator refer to this manual for
proper hook-up and towing procedures for your vehicle.
Roadside Emergencies
138