ECO mode FORD THUNDERBIRD 2003 11.G Owners Manual
[x] Cancel search | Manufacturer: FORD, Model Year: 2003, Model line: THUNDERBIRD, Model: FORD THUNDERBIRD 2003 11.GPages: 200, PDF Size: 1.79 MB
Page 8 of 200
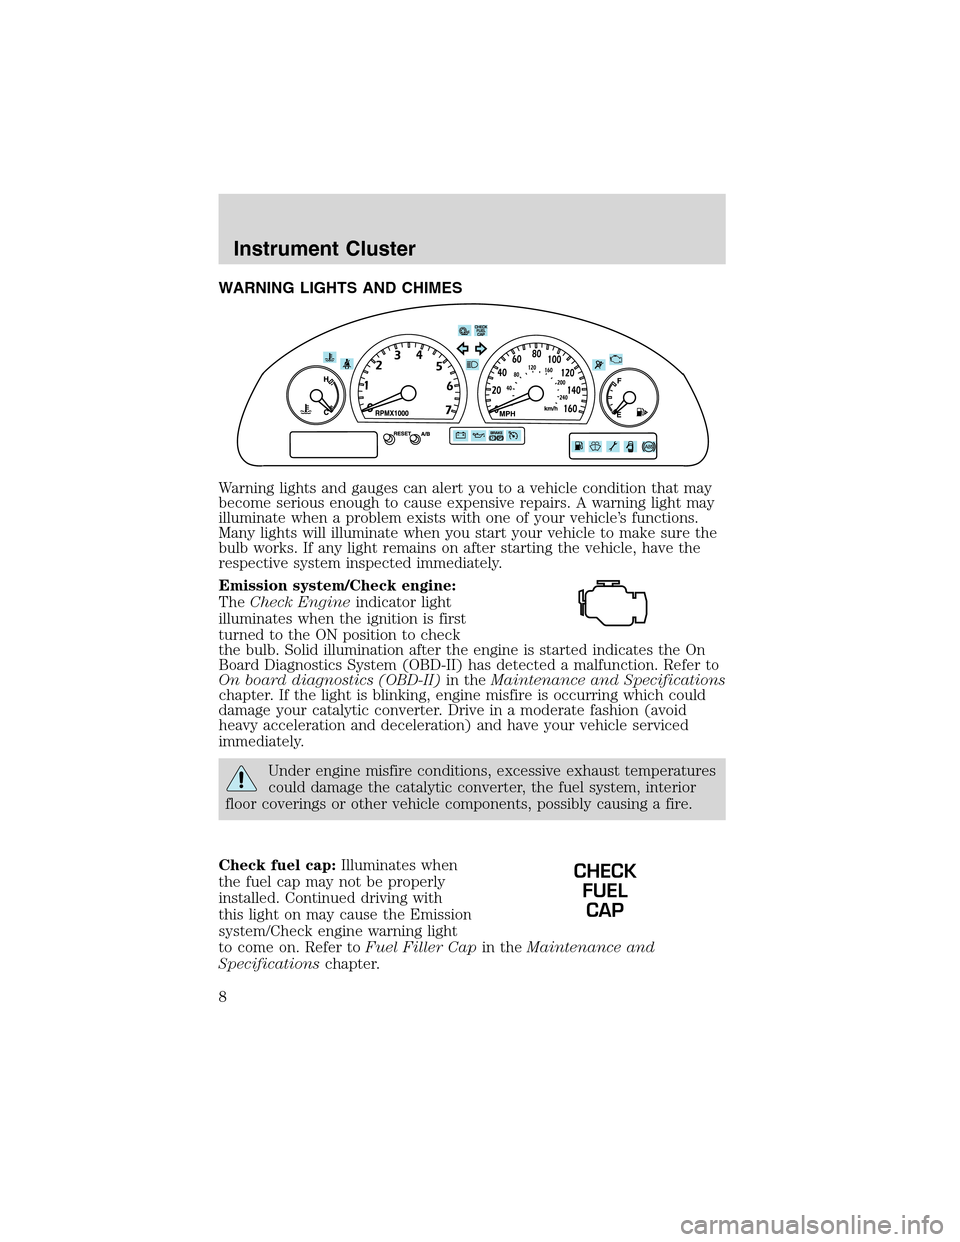
WARNING LIGHTS AND CHIMES
Warning lights and gauges can alert you to a vehicle condition that may
become serious enough to cause expensive repairs. A warning light may
illuminate when a problem exists with one of your vehicle’s functions.
Many lights will illuminate when you start your vehicle to make sure the
bulb works. If any light remains on after starting the vehicle, have the
respective system inspected immediately.
Emission system/Check engine:
TheCheck Engineindicator light
illuminates when the ignition is first
turned to the ON position to check
the bulb. Solid illumination after the engine is started indicates the On
Board Diagnostics System (OBD-II) has detected a malfunction. Refer to
On board diagnostics (OBD-II)in theMaintenance and Specifications
chapter. If the light is blinking, engine misfire is occurring which could
damage your catalytic converter. Drive in a moderate fashion (avoid
heavy acceleration and deceleration) and have your vehicle serviced
immediately.
Under engine misfire conditions, excessive exhaust temperatures
could damage the catalytic converter, the fuel system, interior
floor coverings or other vehicle components, possibly causing a fire.
Check fuel cap:Illuminates when
the fuel cap may not be properly
installed. Continued driving with
this light on may cause the Emission
system/Check engine warning light
to come on. Refer toFuel Filler Capin theMaintenance and
Specificationschapter.
CHECK
FUEL
CAP
Instrument Cluster
8
Page 15 of 200
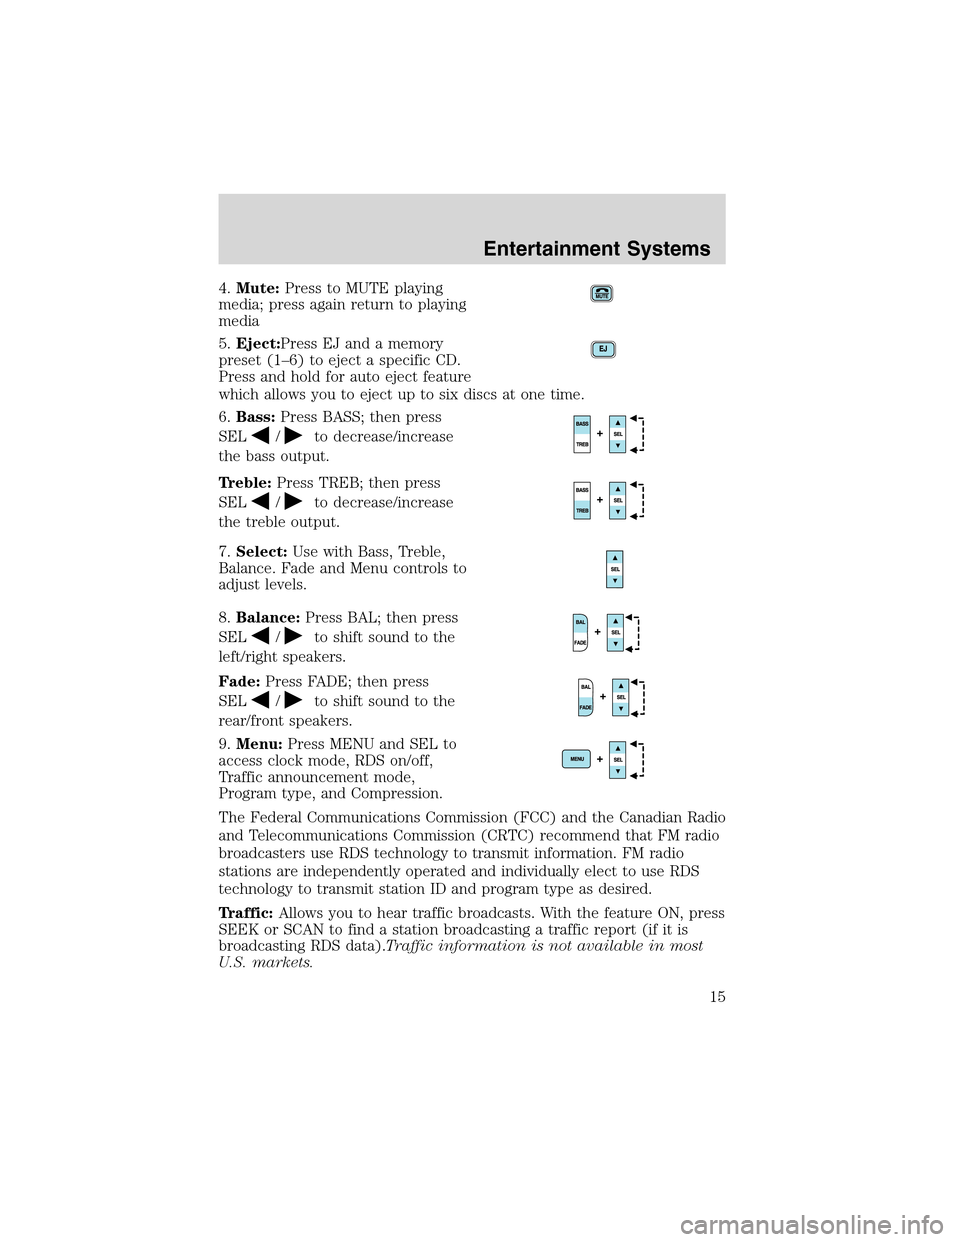
4.Mute:Press to MUTE playing
media; press again return to playing
media
5.Eject:Press EJ and a memory
preset (1–6) to eject a specific CD.
Press and hold for auto eject feature
which allows you to eject up to six discs at one time.
6.Bass:Press BASS; then press
SEL
/to decrease/increase
the bass output.
Treble:Press TREB; then press
SEL
/to decrease/increase
the treble output.
7.Select:Use with Bass, Treble,
Balance. Fade and Menu controls to
adjust levels.
8.Balance:Press BAL; then press
SEL
/to shift sound to the
left/right speakers.
Fade:Press FADE; then press
SEL
/to shift sound to the
rear/front speakers.
9.Menu:Press MENU and SEL to
access clock mode, RDS on/off,
Traffic announcement mode,
Program type, and Compression.
The Federal Communications Commission (FCC) and the Canadian Radio
and Telecommunications Commission (CRTC) recommend that FM radio
broadcasters use RDS technology to transmit information. FM radio
stations are independently operated and individually elect to use RDS
technology to transmit station ID and program type as desired.
Traffic:Allows you to hear traffic broadcasts. With the feature ON, press
SEEK or SCAN to find a station broadcasting a traffic report (if it is
broadcasting RDS data).Traffic information is not available in most
U.S. markets.
Entertainment Systems
15
Page 17 of 200
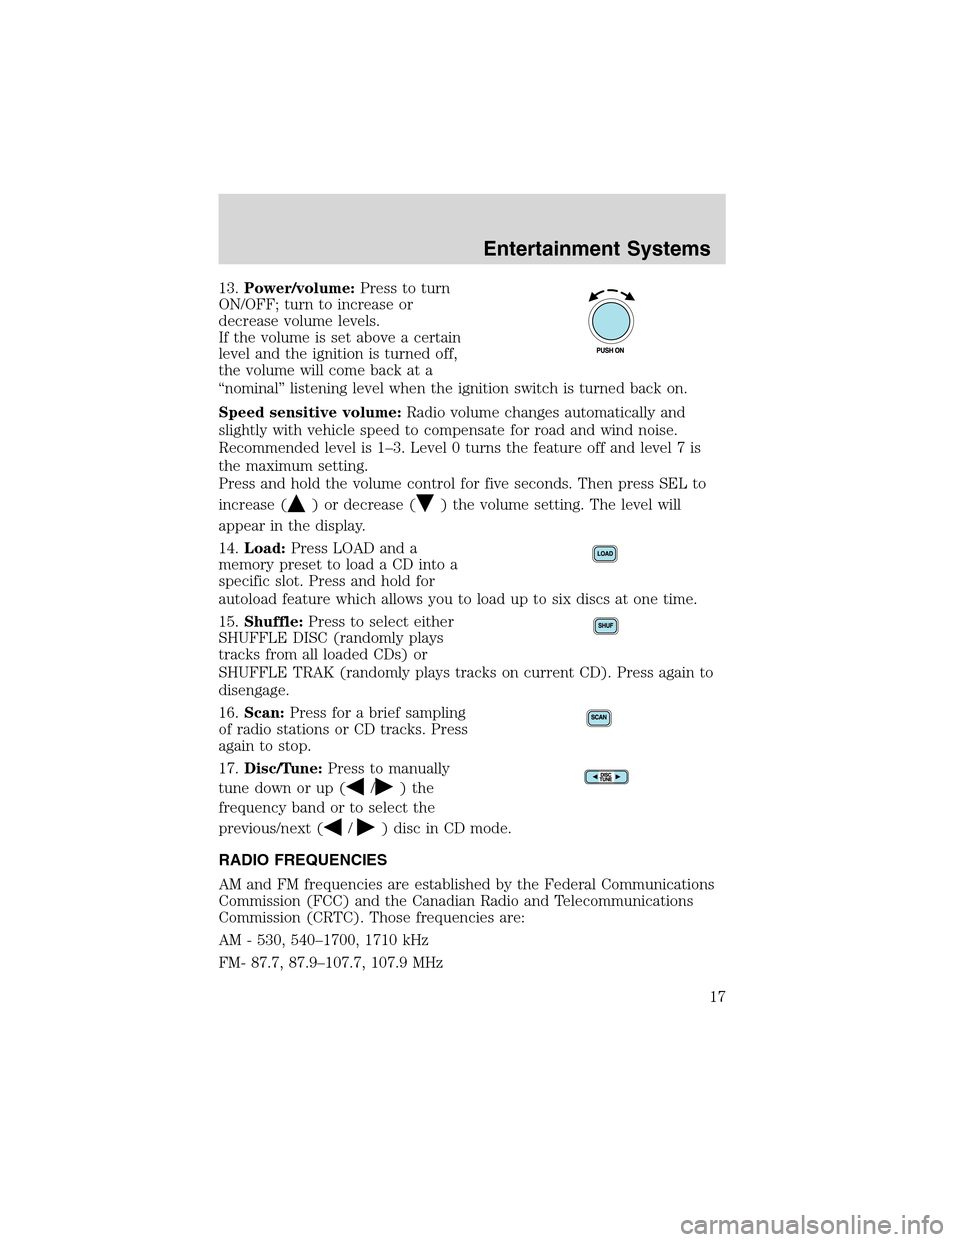
13.Power/volume:Press to turn
ON/OFF; turn to increase or
decrease volume levels.
If the volume is set above a certain
level and the ignition is turned off,
the volume will come back at a
“nominal”listening level when the ignition switch is turned back on.
Speed sensitive volume:Radio volume changes automatically and
slightly with vehicle speed to compensate for road and wind noise.
Recommended level is 1–3. Level 0 turns the feature off and level 7 is
the maximum setting.
Press and hold the volume control for five seconds. Then press SEL to
increase (
) or decrease () the volume setting. The level will
appear in the display.
14.Load:Press LOAD and a
memory preset to load a CD into a
specific slot. Press and hold for
autoload feature which allows you to load up to six discs at one time.
15.Shuffle:Press to select either
SHUFFLE DISC (randomly plays
tracks from all loaded CDs) or
SHUFFLE TRAK (randomly plays tracks on current CD). Press again to
disengage.
16.Scan:Press for a brief sampling
of radio stations or CD tracks. Press
again to stop.
17.Disc/Tune:Press to manually
tune down or up (
/)the
frequency band or to select the
previous/next (
/) disc in CD mode.
RADIO FREQUENCIES
AM and FM frequencies are established by the Federal Communications
Commission (FCC) and the Canadian Radio and Telecommunications
Commission (CRTC). Those frequencies are:
AM - 530, 540–1700, 1710 kHz
FM- 87.7, 87.9–107.7, 107.9 MHz
Entertainment Systems
17
Page 44 of 200
Ifyouraiseandlowertheconvertibletop several times in a row, the
motor will heat up, causing the thermal circuit breaker to open so that
the top will stop operating. The convertible top will operate again after
allowing the motor to cool several minutes.
To lower the convertible top:
1. Bring vehicle to a complete stop. Put the gearshift in the P (Park)
position.
The convertible top will operate with the key in the RUN position,
RUN/ACC position or in the accessory delay mode. It is recommended
that the vehicle’s engine is running when lowering the top to prevent
draining the battery.
2. Check the convertible top stowage compartment behind the seat to be
sure it is empty and ready to receive the top.
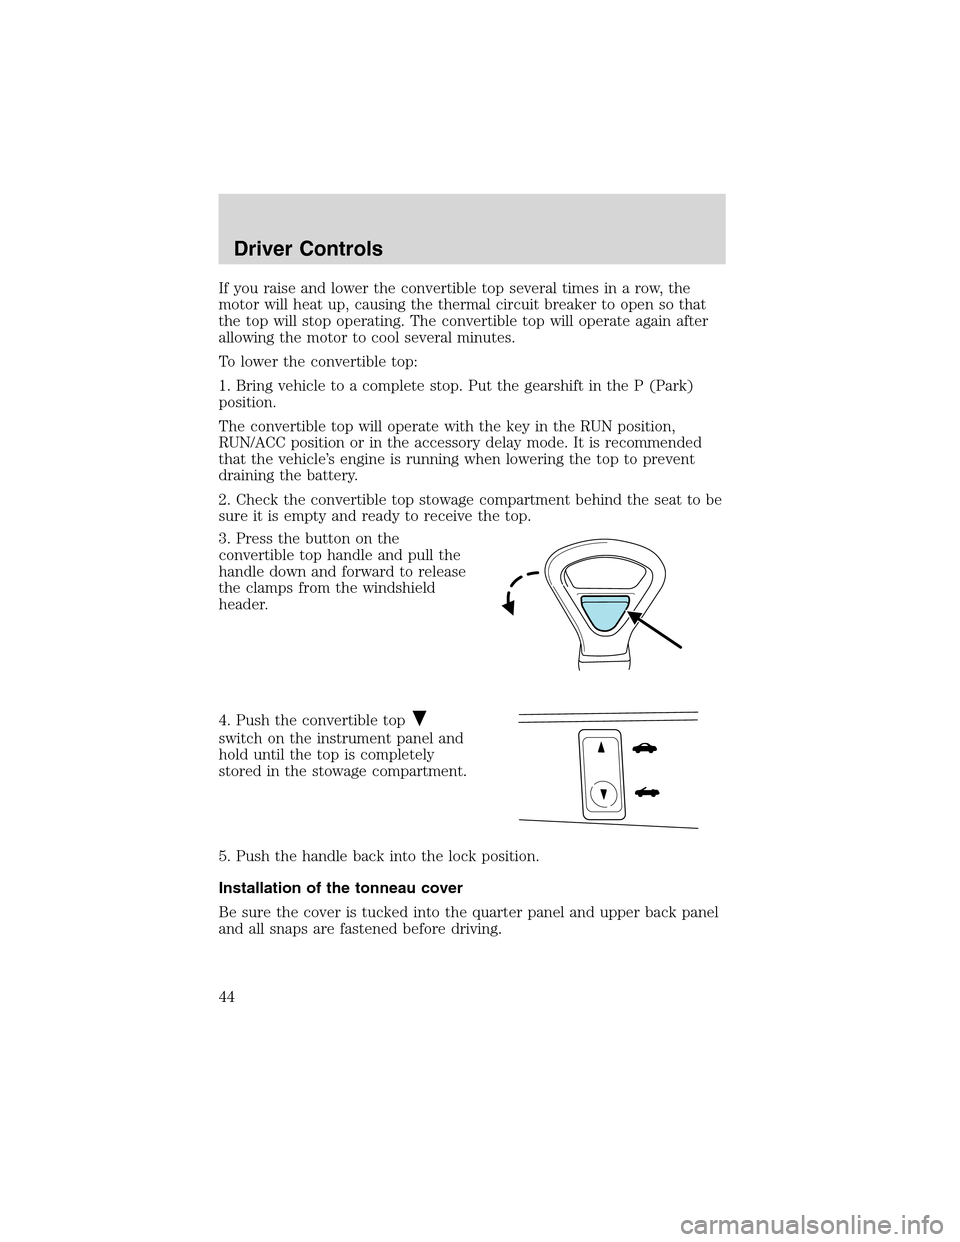
3. Press the button on the
convertible top handle and pull the
handle down and forward to release
the clamps from the windshield
header.
4. Push the convertible top
switch on the instrument panel and
hold until the top is completely
stored in the stowage compartment.
5. Push the handle back into the lock position.
Installation of the tonneau cover
Be sure the cover is tucked into the quarter panel and upper back panel
and all snaps are fastened before driving.
Driver Controls
44
Page 45 of 200
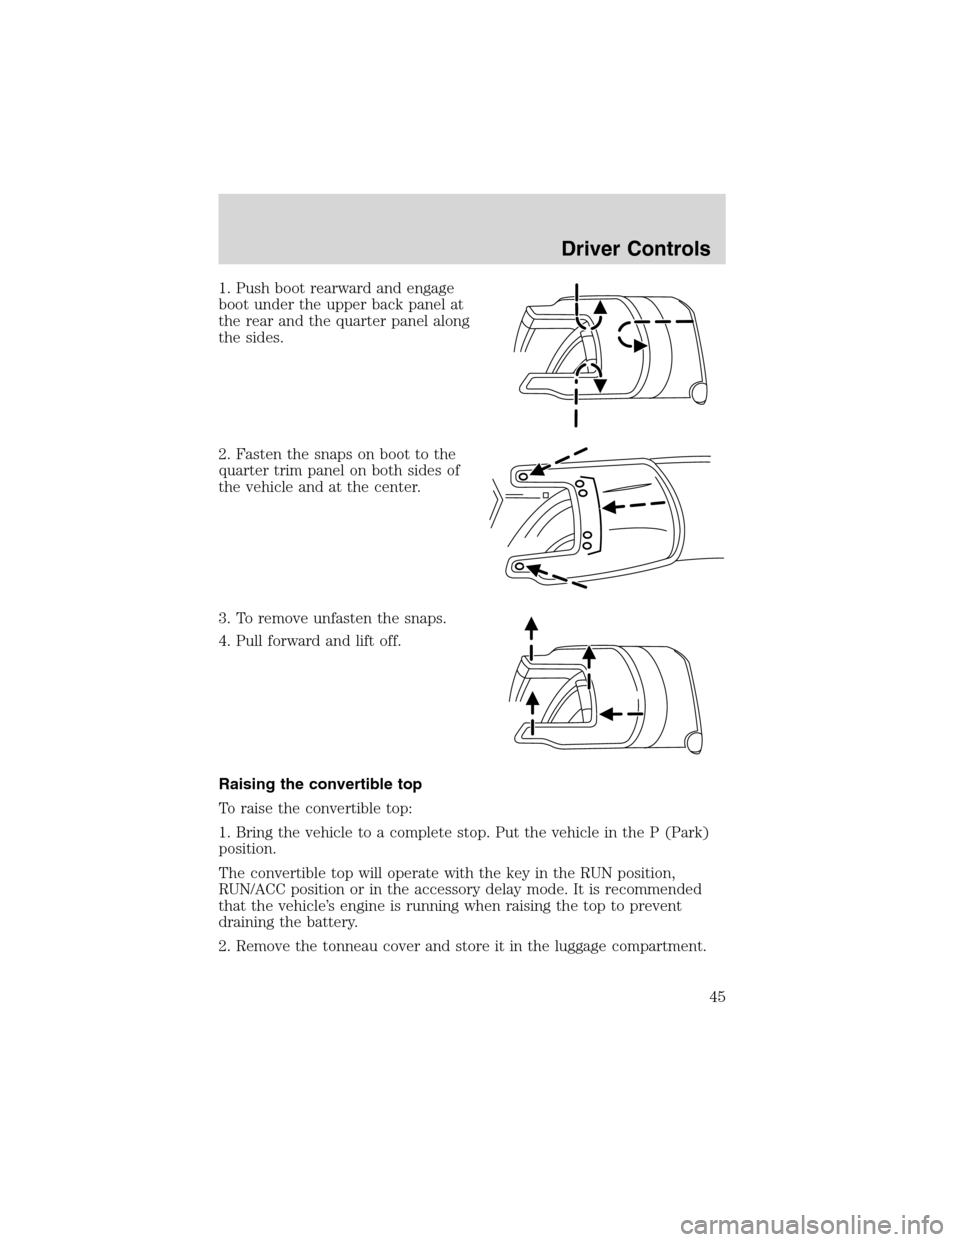
1. Push boot rearward and engage
boot under the upper back panel at
the rear and the quarter panel along
the sides.
2. Fasten the snaps on boot to the
quarter trim panel on both sides of
the vehicle and at the center.
3. To remove unfasten the snaps.
4. Pull forward and lift off.
Raising the convertible top
To raise the convertible top:
1. Bring the vehicle to a complete stop. Put the vehicle in the P (Park)
position.
The convertible top will operate with the key in the RUN position,
RUN/ACC position or in the accessory delay mode. It is recommended
that the vehicle’s engine is running when raising the top to prevent
draining the battery.
2. Remove the tonneau cover and store it in the luggage compartment.
Driver Controls
45
Page 60 of 200
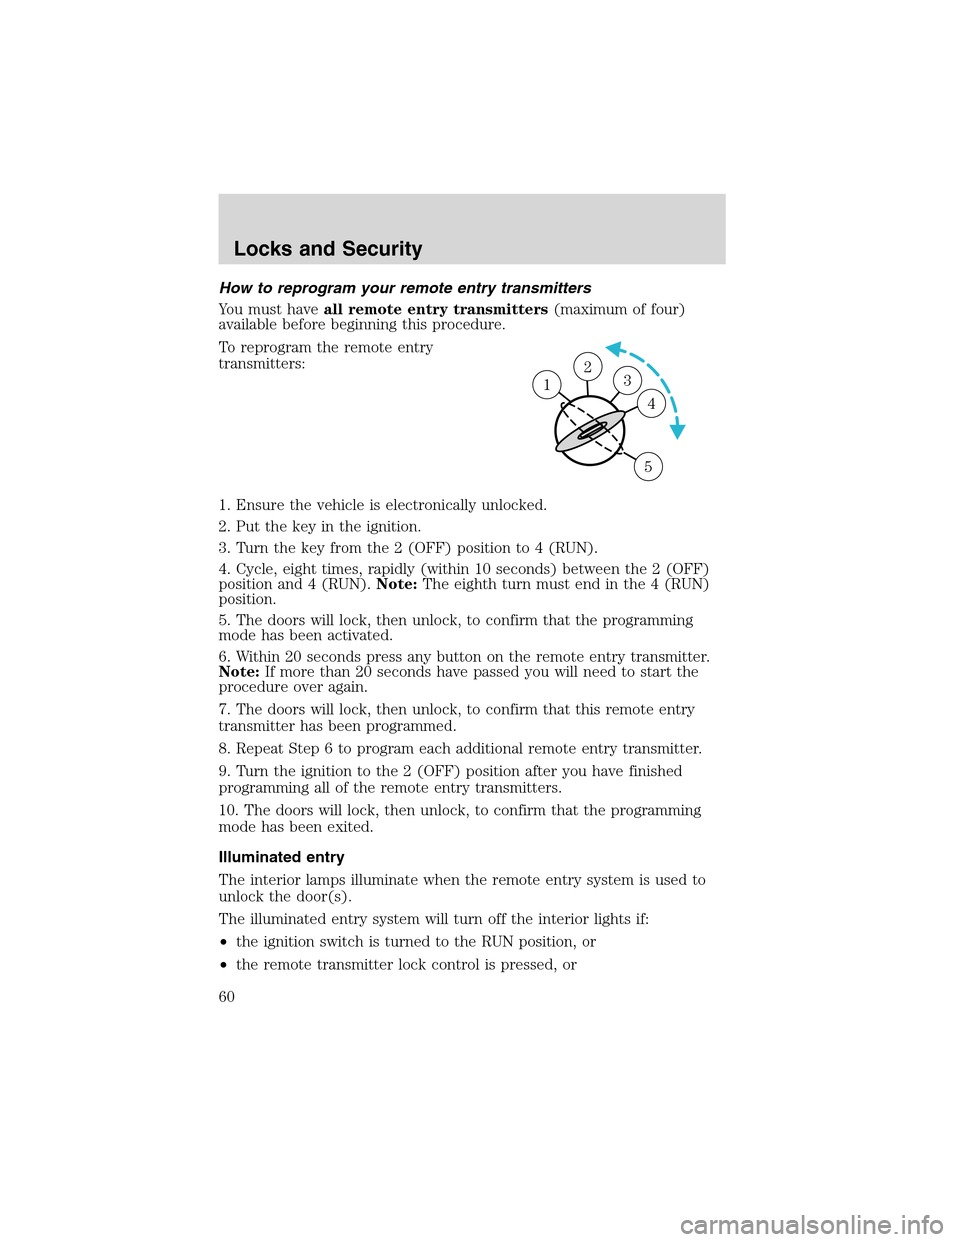
Howto reprogram your remote entry transmitters
You must haveall remote entry transmitters(maximum of four)
available before beginning this procedure.
To reprogram the remote entry
transmitters:
1. Ensure the vehicle is electronically unlocked.
2. Put the key in the ignition.
3. Turn the key from the 2 (OFF) position to 4 (RUN).
4. Cycle, eight times, rapidly (within 10 seconds) between the 2 (OFF)
position and 4 (RUN).Note:The eighth turn must end in the 4 (RUN)
position.
5. The doors will lock, then unlock, to confirm that the programming
mode has been activated.
6. Within 20 seconds press any button on the remote entry transmitter.
Note:If more than 20 seconds have passed you will need to start the
procedure over again.
7. The doors will lock, then unlock, to confirm that this remote entry
transmitter has been programmed.
8. Repeat Step 6 to program each additional remote entry transmitter.
9. Turn the ignition to the 2 (OFF) position after you have finished
programming all of the remote entry transmitters.
10. The doors will lock, then unlock, to confirm that the programming
mode has been exited.
Illuminated entry
The interior lamps illuminate when the remote entry system is used to
unlock the door(s).
The illuminated entry system will turn off the interior lights if:
•the ignition switch is turned to the RUN position, or
•the remote transmitter lock control is pressed, or
23 1
4
5
Locks and Security
60
Page 95 of 200
•Keep the buckle release button pointing up and away from the safety
seat, with the tongue between the child seat and the release button,
to prevent accidental unbuckling.
•Place seat back in upright position.
•Put the safety belt in the automatic locking mode. Refer toAutomatic
locking mode.
Ford recommends the use of a child safety seat having a top tether
strap. Install the child safety seat in a seating position which is capable
of providing a tether anchorage. For more information on top tether
straps, refer toAttaching safety seats with tether strapsin this chapter.
Carefully follow all of the manufacturer’s instructions included
with the safety seat you put in your vehicle. If you do not install
and use the safety seat properly, the child may be injured in a sudden
stop or collision.
Installing child safety seats with combination lap and shoulder
belts
Air bags can kill or injure a child in a child seat.NEVERplace a
rear-facing child seat in front of an active air bag. If you must
use a forward-facing child seat in the front seat, move the seat all the
way back and turn the passenger air bags OFF.
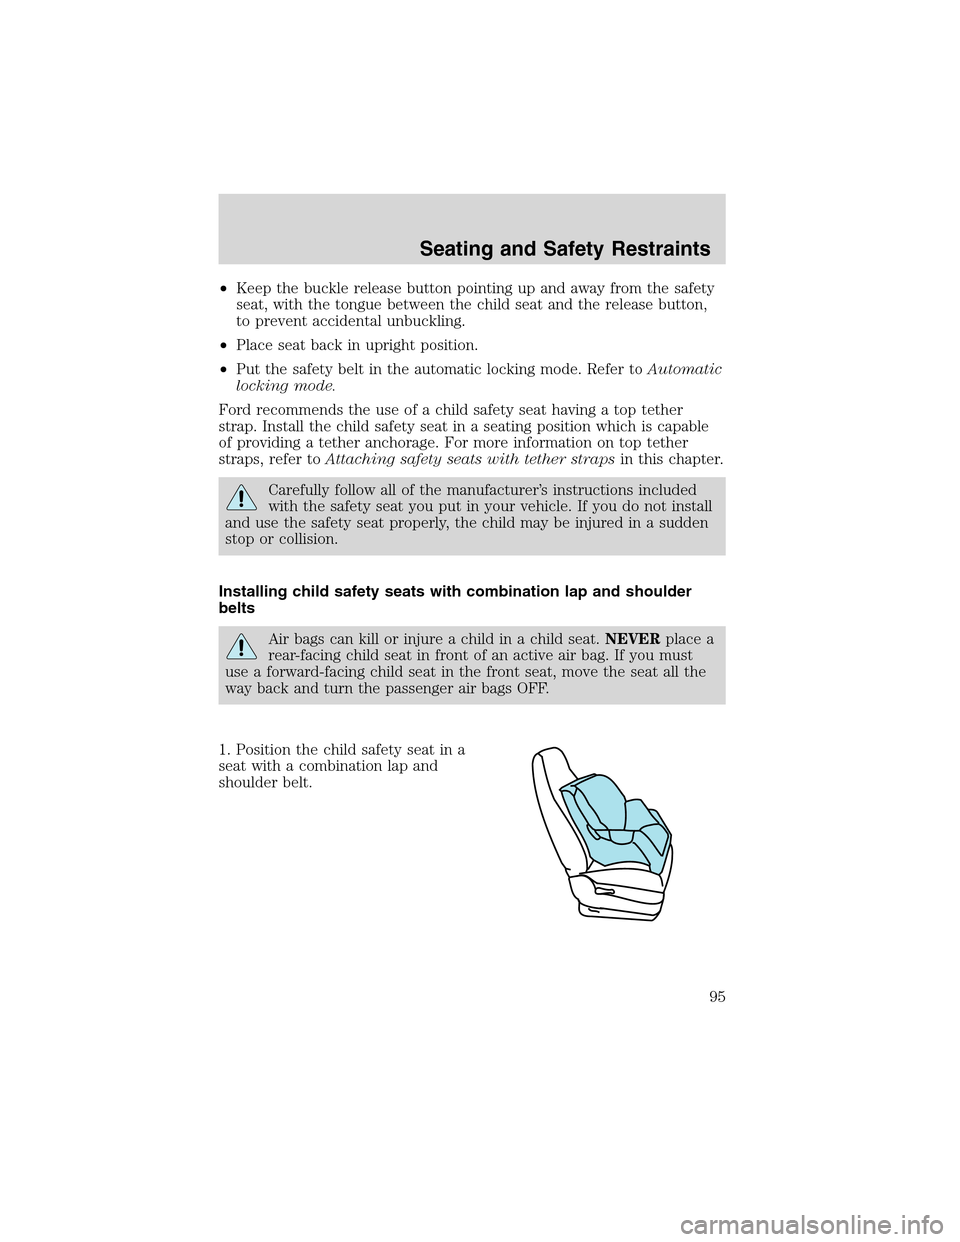
1. Position the child safety seat in a
seat with a combination lap and
shoulder belt.
Seating and Safety Restraints
95
Page 110 of 200
•Move the gearshift lever and securely latch it in P (Park)
Always set the parking brake fully and make sure the gearshift is
latched in P (Park). Turn the ignition to the LOCK position and
remove the key whenever you leave your vehicle.
R (Reverse)
With the gearshift lever in R (Reverse), the vehicle will move backward.
Always come to a complete stop before shifting into and out of R
(Reverse).
N (Neutral)
With the gearshift lever in N (Neutral), the vehicle can be started and is
free to roll. Hold the brake pedal down while in this position.
Drive 5 (Overdrive)
The normal driving position for the best fuel economy. Transmission
operates in gears one through five.
Drive 4 (Overdrive cancelled)
Activated when the transmission shift lever is moved to the D4 position.
•This position allows for all forward gears 1–4, except overdrive.
•Provides engine braking.
•Use when driving conditions cause excessive shifting from O/D to
other gears. Examples: city traffic, hilly terrain, heavy loads and when
engine braking is required.
•To return to D5 (overdrive mode), move the transmission shift lever
into the D5 position.
•Select D4 at higher speeds will cause the transmission to downshift
into fourth gear.
3 (Third)
This position allows for third gear only.
•Provides engine braking.
•To return to D5 or D4, move the transmission shift lever into the D5
or D4 position.
•Selecting 3 (Third) at higher speeds will cause the transmission to
downshift to third gear at the appropriate vehicle speed.
2 (Second)
This position allows for second gear only.
Driving
110
Page 111 of 200
•Providesenginebraking.
•Use to start-up on slippery roads.
•To return to D5 or D4, move the transmission shift lever into the D5,
D4 or 3 (Third) position.
•Selecting 2 (Second) at higher speeds will cause the transmission to
downshift to second gear at the appropriate vehicle speed.
1 (First)
•Provides maximum engine braking.
•Allows upshifts by moving shift lever.
•Will not downshift into first gear at high speeds; will cause the
transmission to downshift to a lower gear, then allows for first gear
when the vehicle reaches slower speeds.
Forced downshifts
•Allowed in Overdrive or Drive.
•Depress the accelerator to the floor.
•Allows transmission to select an appropriate gear.
Driving with a 5–speed automatic transmission with the Select
Shift Transmission (SST) shifter (if equipped)
Understanding gearshift positions
The Select Shift Transmission (SST) shifter allows the driver to select
between the transmission’s automatic shift mode or the manually
selected shift mode.
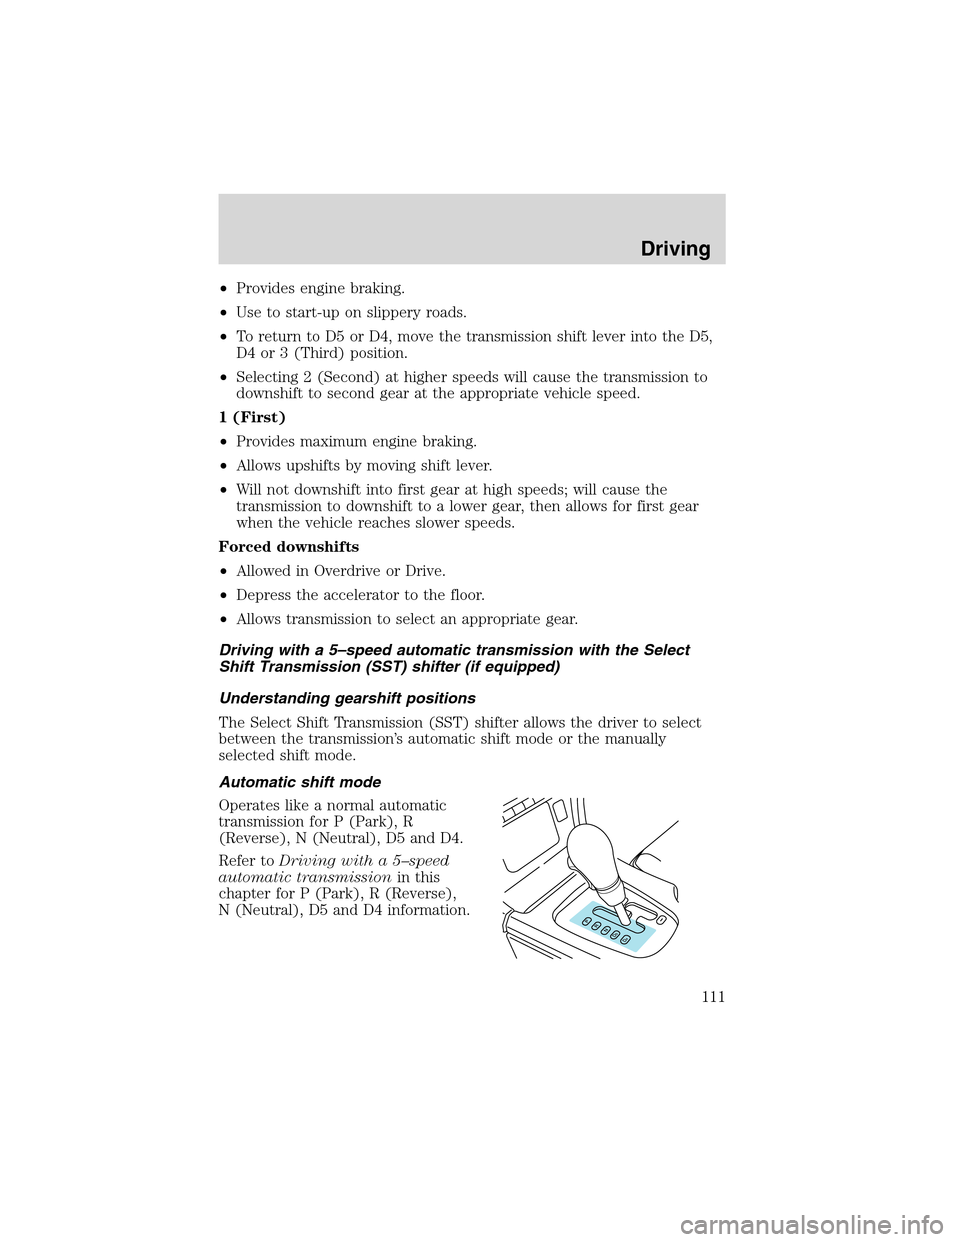
Automatic shift mode
Operates like a normal automatic
transmission for P (Park), R
(Reverse), N (Neutral), D5 and D4.
Refer toDriving with a 5–speed
automatic transmissionin this
chapter for P (Park), R (Reverse),
N (Neutral), D5 and D4 information.
Driving
111
Page 135 of 200
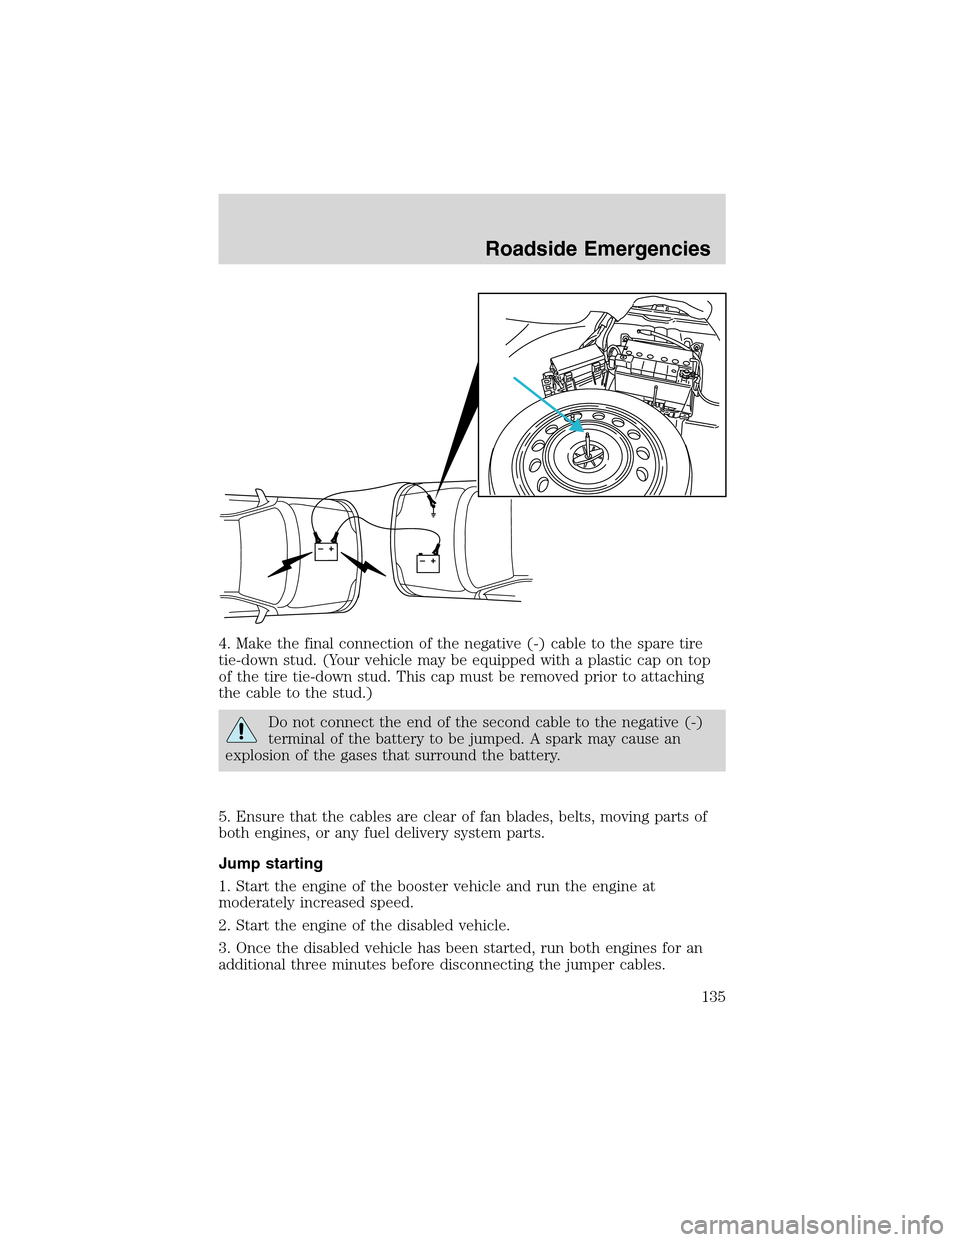
4. Make the final connection of the negative (-) cable to the spare tire
tie-down stud. (Your vehicle may be equipped with a plastic cap on top
of the tire tie-down stud. This cap must be removed prior to attaching
the cable to the stud.)
Do not connect the end of the second cable to the negative (-)
terminal of the battery to be jumped. A spark may cause an
explosion of the gases that surround the battery.
5. Ensure that the cables are clear of fan blades, belts, moving parts of
both engines, or any fuel delivery system parts.
Jump starting
1. Start the engine of the booster vehicle and run the engine at
moderately increased speed.
2. Start the engine of the disabled vehicle.
3. Once the disabled vehicle has been started, run both engines for an
additional three minutes before disconnecting the jumper cables.
+–+–
Roadside Emergencies
135