key battery FORD THUNDERBIRD 2003 11.G Owners Manual
[x] Cancel search | Manufacturer: FORD, Model Year: 2003, Model line: THUNDERBIRD, Model: FORD THUNDERBIRD 2003 11.GPages: 200, PDF Size: 1.79 MB
Page 39 of 200
LOCKABLE AND ELECTRONIC TRUNK REMOTE CONTROL
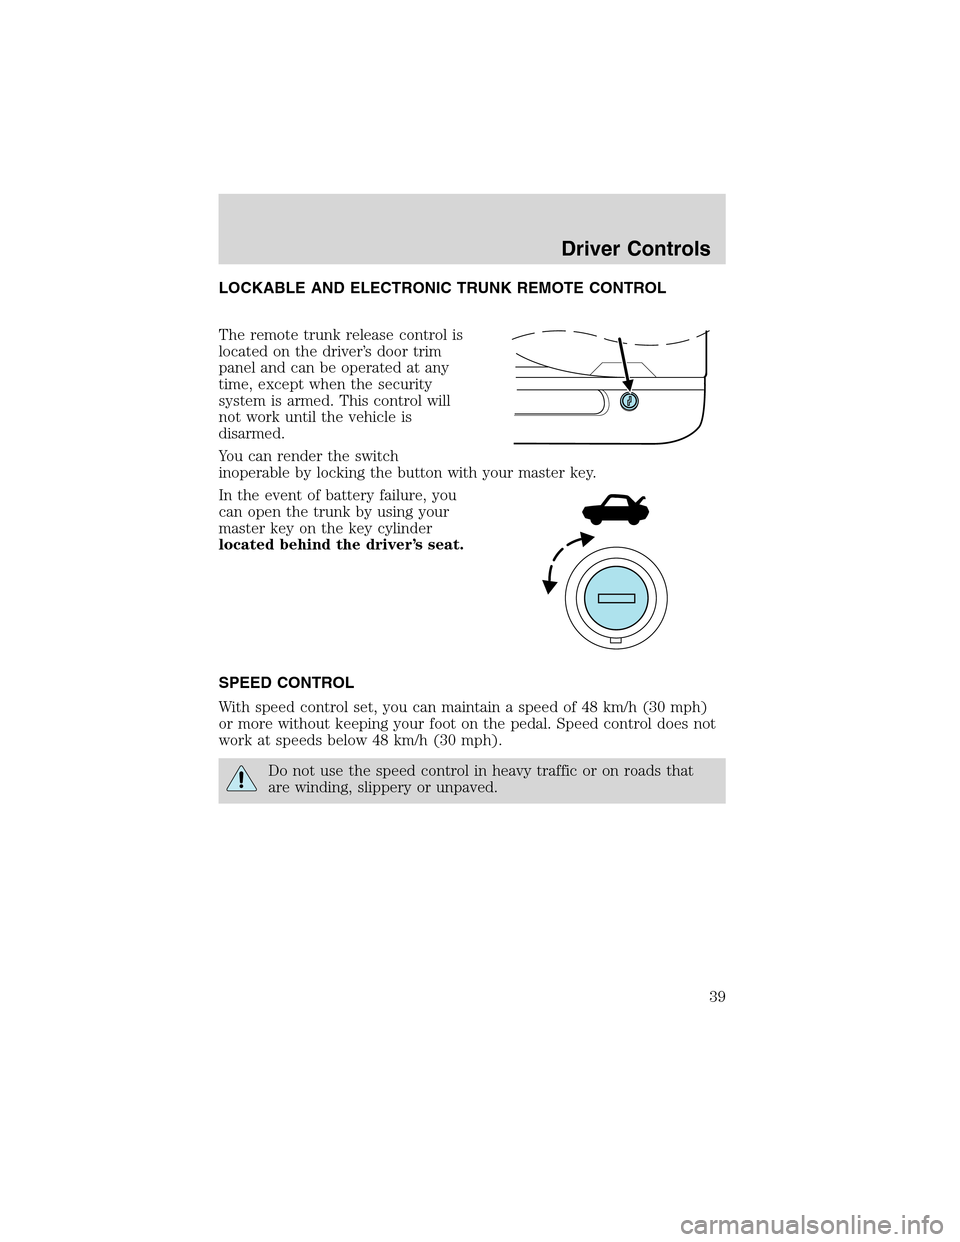
The remote trunk release control is
located on the driver’s door trim
panel and can be operated at any
time, except when the security
system is armed. This control will
not work until the vehicle is
disarmed.
You can render the switch
inoperable by locking the button with your master key.
In the event of battery failure, you
can open the trunk by using your
master key on the key cylinder
located behind the driver’s seat.
SPEED CONTROL
With speed control set, you can maintain a speed of 48 km/h (30 mph)
or more without keeping your foot on the pedal. Speed control does not
work at speeds below 48 km/h (30 mph).
Do not use the speed control in heavy traffic or on roads that
are winding, slippery or unpaved.
Driver Controls
39
Page 44 of 200
Ifyouraiseandlowertheconvertibletop several times in a row, the
motor will heat up, causing the thermal circuit breaker to open so that
the top will stop operating. The convertible top will operate again after
allowing the motor to cool several minutes.
To lower the convertible top:
1. Bring vehicle to a complete stop. Put the gearshift in the P (Park)
position.
The convertible top will operate with the key in the RUN position,
RUN/ACC position or in the accessory delay mode. It is recommended
that the vehicle’s engine is running when lowering the top to prevent
draining the battery.
2. Check the convertible top stowage compartment behind the seat to be
sure it is empty and ready to receive the top.
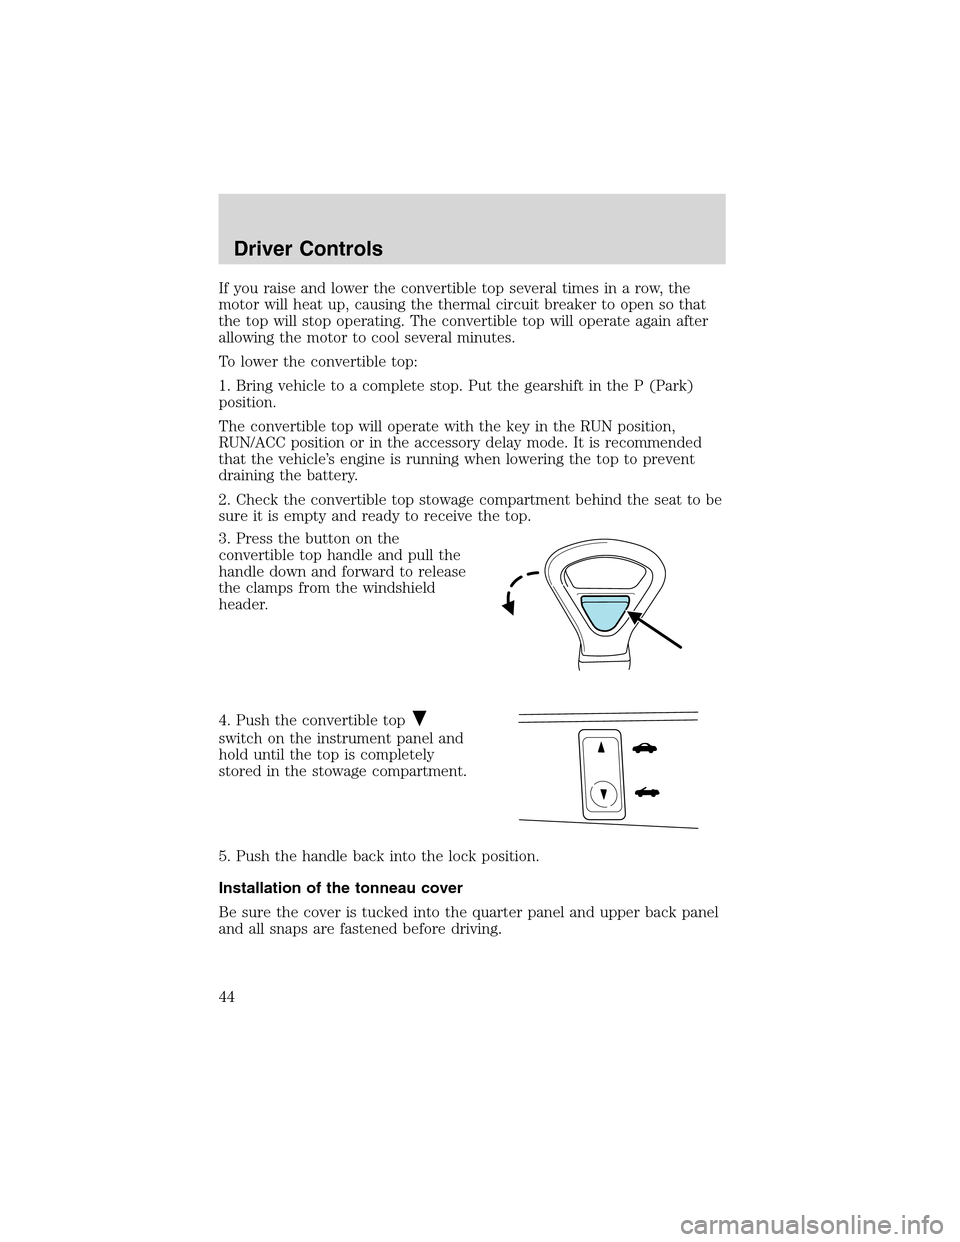
3. Press the button on the
convertible top handle and pull the
handle down and forward to release
the clamps from the windshield
header.
4. Push the convertible top
switch on the instrument panel and
hold until the top is completely
stored in the stowage compartment.
5. Push the handle back into the lock position.
Installation of the tonneau cover
Be sure the cover is tucked into the quarter panel and upper back panel
and all snaps are fastened before driving.
Driver Controls
44
Page 45 of 200
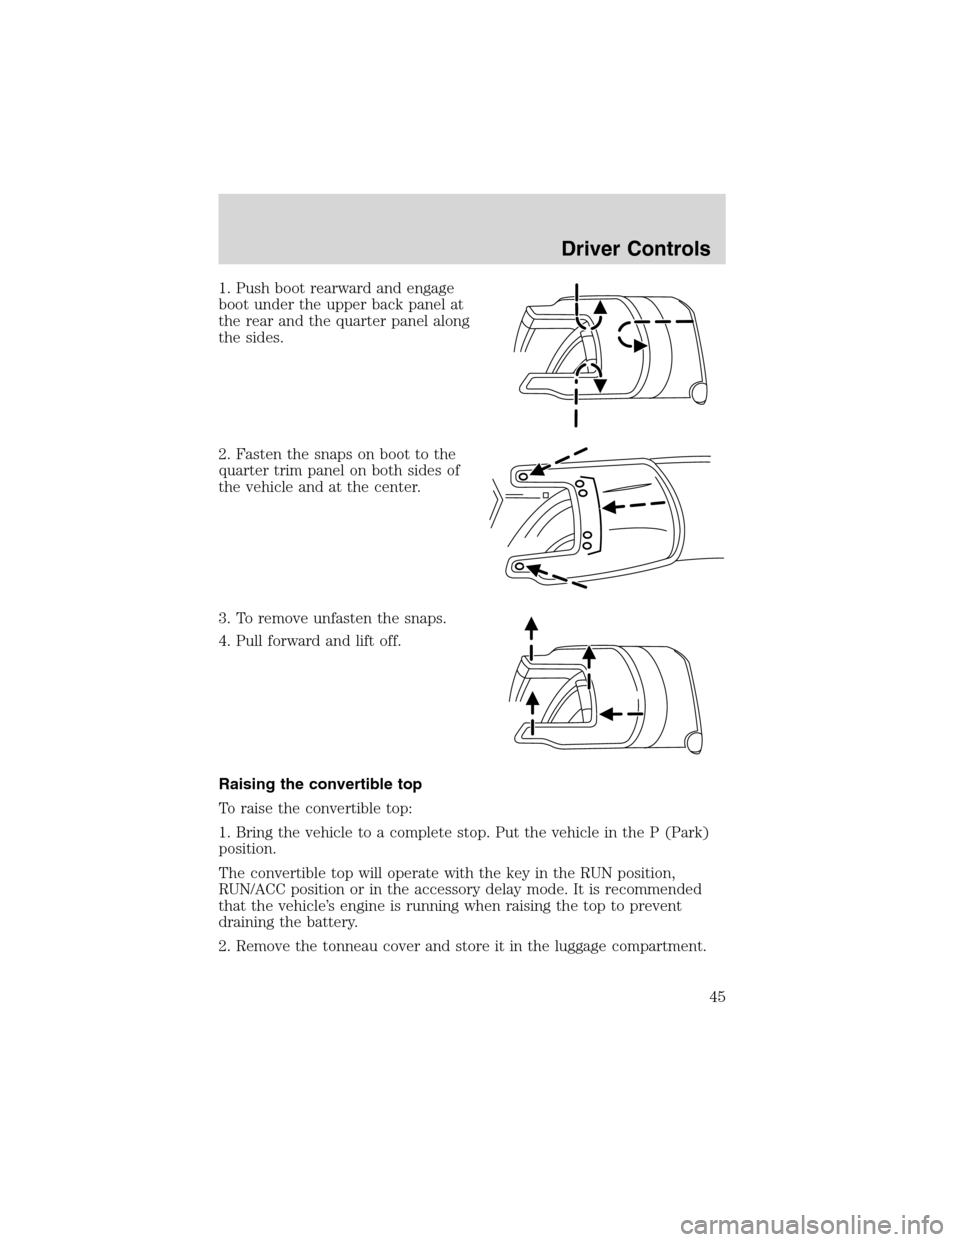
1. Push boot rearward and engage
boot under the upper back panel at
the rear and the quarter panel along
the sides.
2. Fasten the snaps on boot to the
quarter trim panel on both sides of
the vehicle and at the center.
3. To remove unfasten the snaps.
4. Pull forward and lift off.
Raising the convertible top
To raise the convertible top:
1. Bring the vehicle to a complete stop. Put the vehicle in the P (Park)
position.
The convertible top will operate with the key in the RUN position,
RUN/ACC position or in the accessory delay mode. It is recommended
that the vehicle’s engine is running when raising the top to prevent
draining the battery.
2. Remove the tonneau cover and store it in the luggage compartment.
Driver Controls
45
Page 56 of 200
Doorkeyunlocking/locking
Unlocking the doors
Turn the key in the door cylinder to unlock the driver’s door.
The illuminated entry feature will turn on all the interior lamps for 25
seconds or until the ignition is turned to the RUN position.
The inside lights will not turn off if:
•they have been turned on using the dimmer control or
•any door is open.
The battery saver feature will turn off the interior lamps 30 minutes after
the ignition is turned to the OFF position.
Locking the doors
Turn the key in the door cylinder to lock the driver’s door.Note:Locking
the driver’s door using a key does not arm the perimeter alarm.
INTERIOR LUGGAGE COMPARTMENT RELEASE
Your vehicle is equipped with a mechanical interior luggage compartment
release handle that provides a means of escape for children and adults in
the event they become locked inside the luggage compartment.
Adults are advised to familiarize themselves with the operation and
location of the release handle.
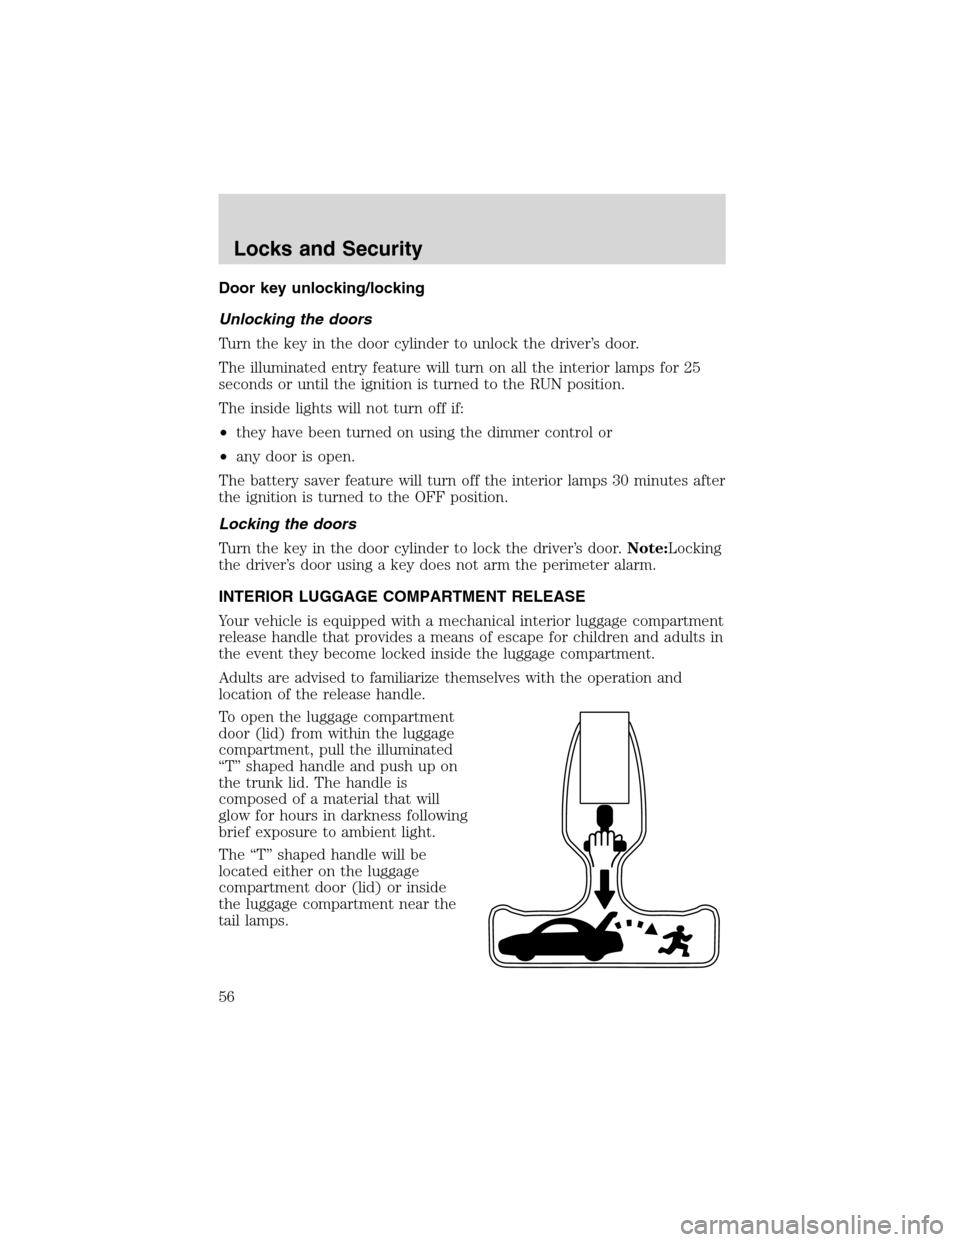
To open the luggage compartment
door (lid) from within the luggage
compartment, pull the illuminated
“T”shaped handle and push up on
the trunk lid. The handle is
composed of a material that will
glow for hours in darkness following
brief exposure to ambient light.
The“T”shaped handle will be
located either on the luggage
compartment door (lid) or inside
the luggage compartment near the
tail lamps.
Locks and Security
56
Page 58 of 200
If there is any potential remote keyless entry problem with your vehicle,
ensureALL remote entry transmittersare taken to your authorized
dealer to aid in troubleshooting.
Locking the doors
1. Pressand release to lock all the doors and activate the anti-theft
system.Note:the turn signal lamps will flash once to confirm the doors,
trunk and hood are closed.
2. Press
and release again within three seconds to confirm that all the
doors, trunk and hood are closed and locked.Note:the doors will lock
again, and the horn will chirp once.
If any of the doors , the trunk or the hood are not properly closed the
horn will make two quick chirps.
Unlocking the doors
1. Pressand release to unlock the driver’s door and deactivate the
perimeter alarm (if activated).Note:The interior lamps will illuminate.
2. Press
and release again within three seconds to unlock all the
doors.
The remote entry system comes with an illuminated entry feature. This
feature turns on the interior lamps for 25 seconds or until the ignition is
turned to the RUN position.
The inside lights will not turn off if:
•they have been turned on using the dimmer control or
•any door is open.
The battery saver feature will turn off the interior lamps 30 minutes after
the ignition is turned to the OFF position.
Opening the trunk
Pressonce to open the trunk.
•Ensure that the trunk is closed and latched before driving your
vehicle. Failure to properly latch the trunk may cause objects to fall
out or block the driver’s rear view.
Sounding a panic alarm
Press
to activate the alarm. The horn will sound for a maximum of
30 seconds and the turn signal lamps will flash for a maximum of 5
Locks and Security
58
Page 59 of 200
minutes. Pressoragain, or turn the ignition out of the OFF
position to deactivate the panic alarm, or wait for the alarm to timeout in
5 minutes.
Note:The panic alarm will only operate when the ignition is in the OFF
or ACC position.
Replacing the battery
The remote entry transmitter uses one coin type three-volt lithium
battery CR2032 or equivalent. The typical operating range for your
remote entry transmitter is approximately 10 meters (33 feet). A
decrease in the operating range could be caused by:
•weather conditions,
•nearby radio towers,
•structures around the vehicle and
•other vehicles parked next to the vehicle.
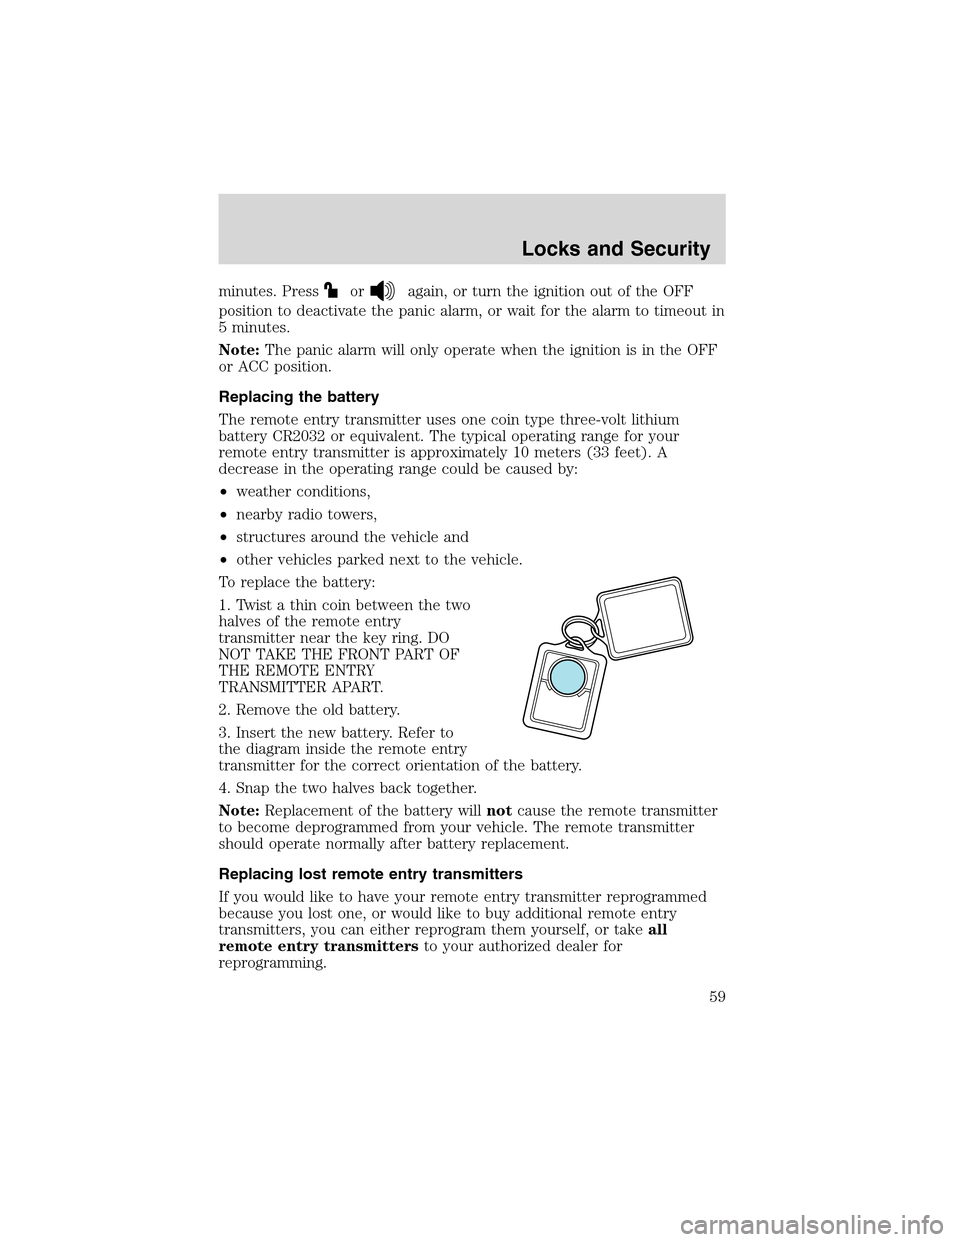
To replace the battery:
1. Twist a thin coin between the two
halves of the remote entry
transmitter near the key ring. DO
NOT TAKE THE FRONT PART OF
THE REMOTE ENTRY
TRANSMITTER APART.
2. Remove the old battery.
3. Insert the new battery. Refer to
the diagram inside the remote entry
transmitter for the correct orientation of the battery.
4. Snap the two halves back together.
Note:Replacement of the battery willnotcause the remote transmitter
to become deprogrammed from your vehicle. The remote transmitter
should operate normally after battery replacement.
Replacing lost remote entry transmitters
If you would like to have your remote entry transmitter reprogrammed
because you lost one, or would like to buy additional remote entry
transmitters, you can either reprogram them yourself, or takeall
remote entry transmittersto your authorized dealer for
reprogramming.
Locks and Security
59
Page 61 of 200
•after 25 seconds of illumination.
The inside lights will not turn off if:
•they have been turned on with the dimmer control, or
•any door is open.
The battery saver will shut off the interior lamps 30 minutes after the
ignition has been turned to the OFF position.
Autolock
The autolock feature will lock the vehicle’s doors when:
•all the doors are closed,
•the ignition is in the RUN position, and
•you shift into forward or reverse, putting the vehicle in motion.
Relock
The autolock feature repeats when:
•either door is opened then closed while the ignition is in the RUN
position,
•you shift into forward or reverse, and
•you put the vehicle in motion by releasing the brake pedal.
Deactivating/activating autolock
Your vehicle comes with the autolock feature activated. There are two
methods to enable/disable this feature: One is through your dealer, and
the second is using a power door unlock/lock sequence.
Before following the activation or deactivation procedures, make sure
that the anti-theft system is not activated, ignition is off, and the vehicle
doors are closed.
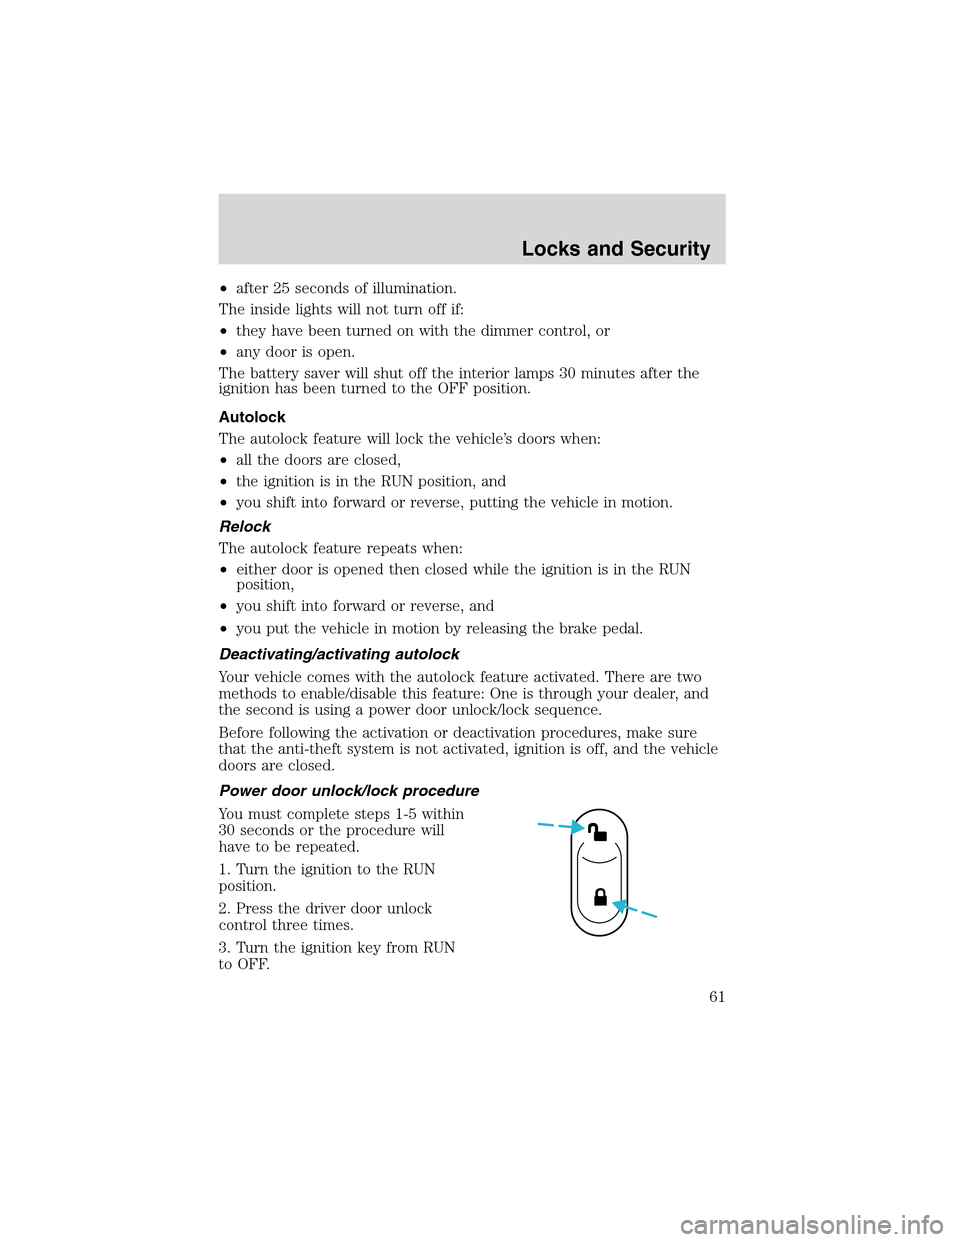
Power door unlock/lock procedure
You must complete steps 1-5 within
30 seconds or the procedure will
have to be repeated.
1. Turn the ignition to the RUN
position.
2. Press the driver door unlock
control three times.
3. Turn the ignition key from RUN
to OFF.
Locks and Security
61
Page 109 of 200
Always set the parking brake fully and make sure the gearshift is
latched in P (Park). Turn the ignition to the LOCK position and
remove the key whenever you leave your vehicle.
If the parking brake is fully released, but the brake warning lamp
remains illuminated, the brakes may not be working properly.
See your dealer or a qualified service technician.
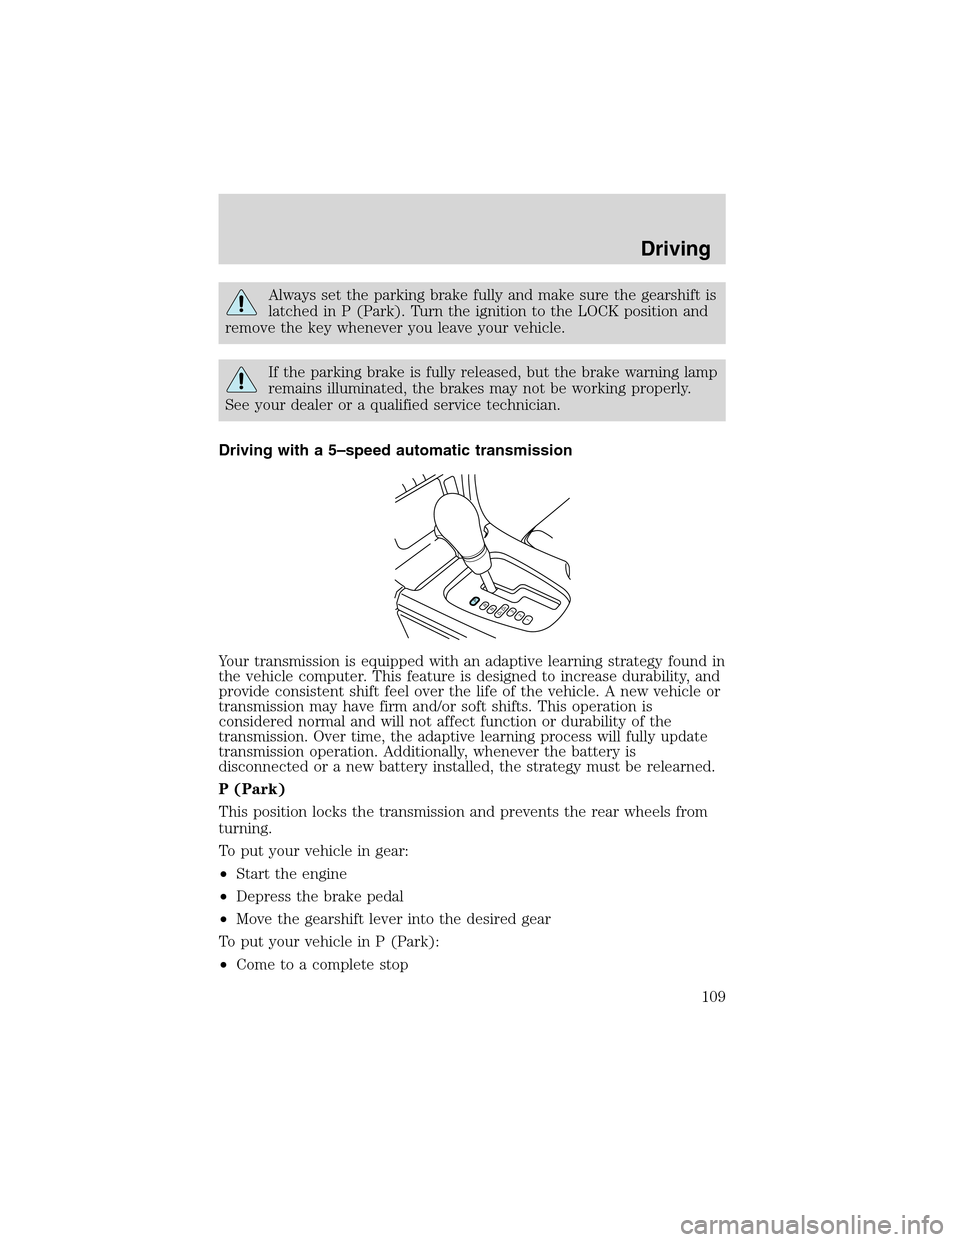
Driving with a 5–speed automatic transmission
Your transmission is equipped with an adaptive learning strategy found in
the vehicle computer. This feature is designed to increase durability, and
provide consistent shift feel over the life of the vehicle. A new vehicle or
transmission may have firm and/or soft shifts. This operation is
considered normal and will not affect function or durability of the
transmission. Over time, the adaptive learning process will fully update
transmission operation. Additionally, whenever the battery is
disconnected or a new battery installed, the strategy must be relearned.
P (Park)
This position locks the transmission and prevents the rear wheels from
turning.
To put your vehicle in gear:
•Start the engine
•Depress the brake pedal
•Move the gearshift lever into the desired gear
To put your vehicle in P (Park):
•Come to a complete stop
PRND5D4321
Driving
109
Page 132 of 200
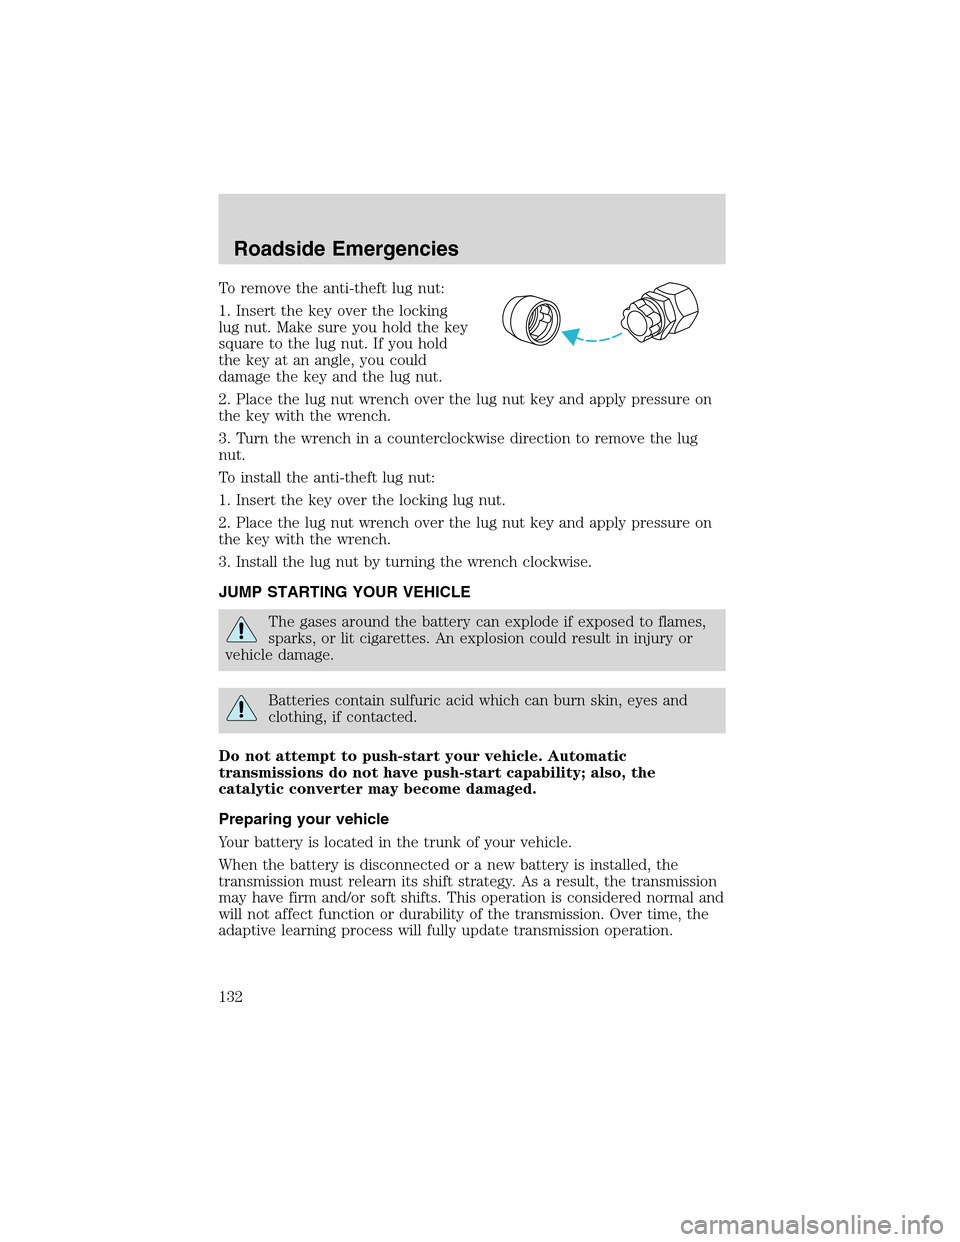
To remove the anti-theft lug nut:
1. Insert the key over the locking
lug nut. Make sure you hold the key
square to the lug nut. If you hold
the key at an angle, you could
damage the key and the lug nut.
2. Place the lug nut wrench over the lug nut key and apply pressure on
the key with the wrench.
3. Turn the wrench in a counterclockwise direction to remove the lug
nut.
To install the anti-theft lug nut:
1. Insert the key over the locking lug nut.
2. Place the lug nut wrench over the lug nut key and apply pressure on
the key with the wrench.
3. Install the lug nut by turning the wrench clockwise.
JUMP STARTING YOUR VEHICLE
The gases around the battery can explode if exposed to flames,
sparks, or lit cigarettes. An explosion could result in injury or
vehicle damage.
Batteries contain sulfuric acid which can burn skin, eyes and
clothing, if contacted.
Do not attempt to push-start your vehicle. Automatic
transmissions do not have push-start capability; also, the
catalytic converter may become damaged.
Preparing your vehicle
Your battery is located in the trunk of your vehicle.
When the battery is disconnected or a new battery is installed, the
transmission must relearn its shift strategy. As a result, the transmission
may have firm and/or soft shifts. This operation is considered normal and
will not affect function or durability of the transmission. Over time, the
adaptive learning process will fully update transmission operation.
Roadside Emergencies
132
Page 154 of 200
SERVICE RECOMMENDATIONS
To help you service your vehicle:
•We highlight do-it-yourself items in the engine compartment for easy
location.
•We provide a scheduled maintenance guide which makes tracking
routine service easy.
If your vehicle requires professional service, your dealership can provide
the necessary parts and service. Check yourWarranty Guide/Owner
Information Guideto find out which parts and services are covered.
Use only recommended fuels, lubricants, fluids and service parts
conforming to specifications. Motorcraft parts are designed and built to
provide the best performance in your vehicle.
PRECAUTIONS WHEN SERVICING YOUR VEHICLE
•Do not work on a hot engine.
•Make sure that nothing gets caught in moving parts.
•Do not work on a vehicle with the engine running in an enclosed
space, unless you are sure you have enough ventilation.
•Keep all open flames and other burning (cigarettes) material away
from the battery and all fuel related parts.
Working with the engine off
1. Set the parking brake and ensure the gearshift is securely latched in P
(Park).
2. Turn off the engine and remove the key.
3. Block the wheels to prevent the vehicle from moving unexpectedly.
Working with the engine on
1. Set the parking brake and shift to P (Park).
2. Block the wheels.
Note:Do not start your engine with the air cleaner removed and do not
remove it while the engine is running.
Maintenance and Specifications
154