clock FORD TRANSIT 2018 Owners Manual
[x] Cancel search | Manufacturer: FORD, Model Year: 2018, Model line: TRANSIT, Model: FORD TRANSIT 2018Pages: 521, PDF Size: 8.65 MB
Page 41 of 521
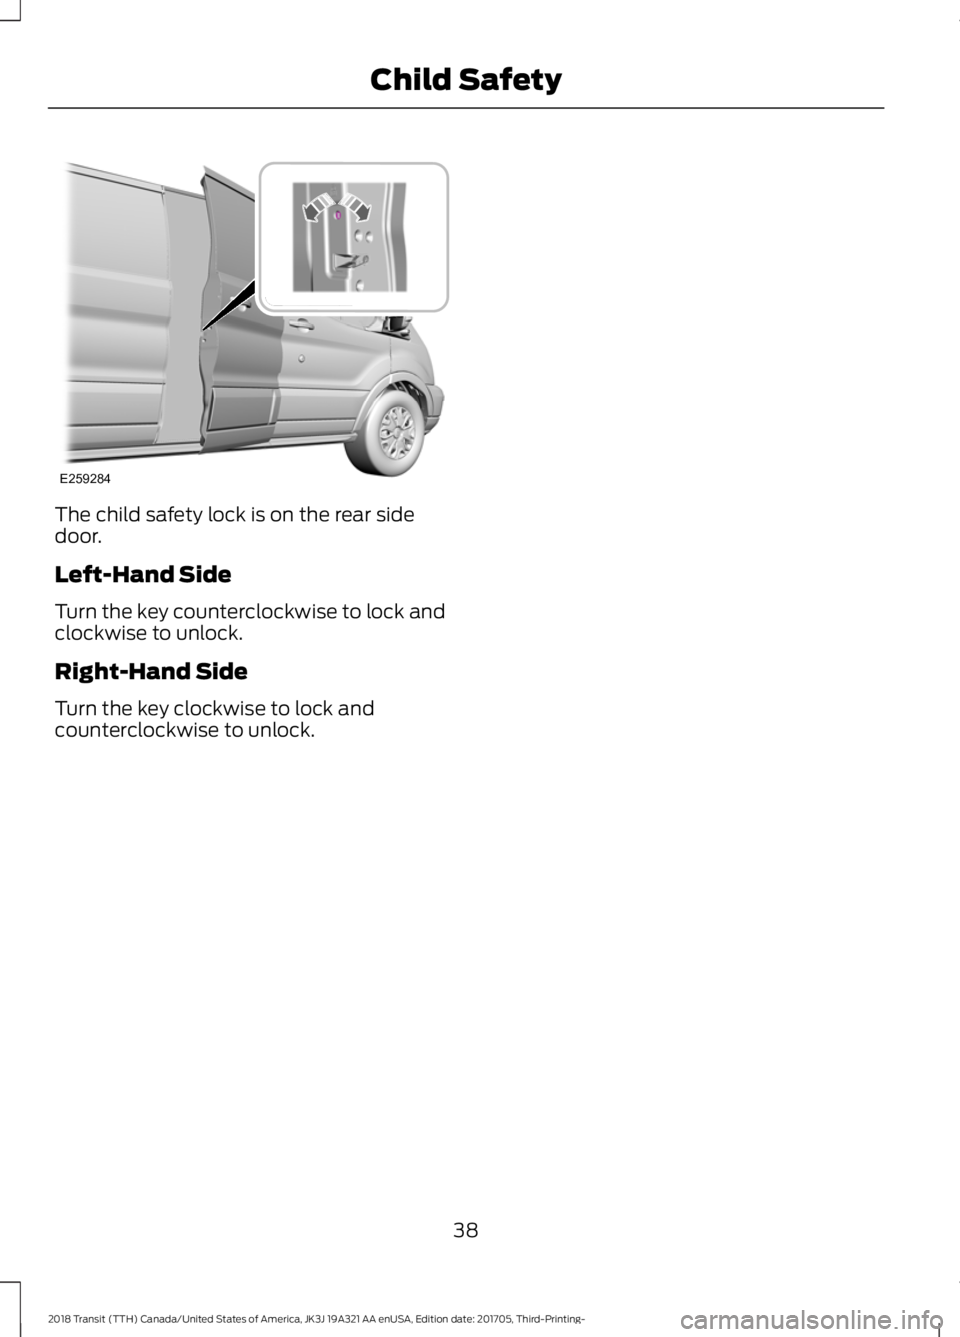
The child safety lock is on the rear side
door.
Left-Hand Side
Turn the key counterclockwise to lock and
clockwise to unlock.
Right-Hand Side
Turn the key clockwise to lock and
counterclockwise to unlock.
38
2018 Transit (TTH) Canada/United States of America, JK3J 19A321 AA enUSA, Edition date: 201705, Third-Printing- Child SafetyE259284
Page 82 of 521
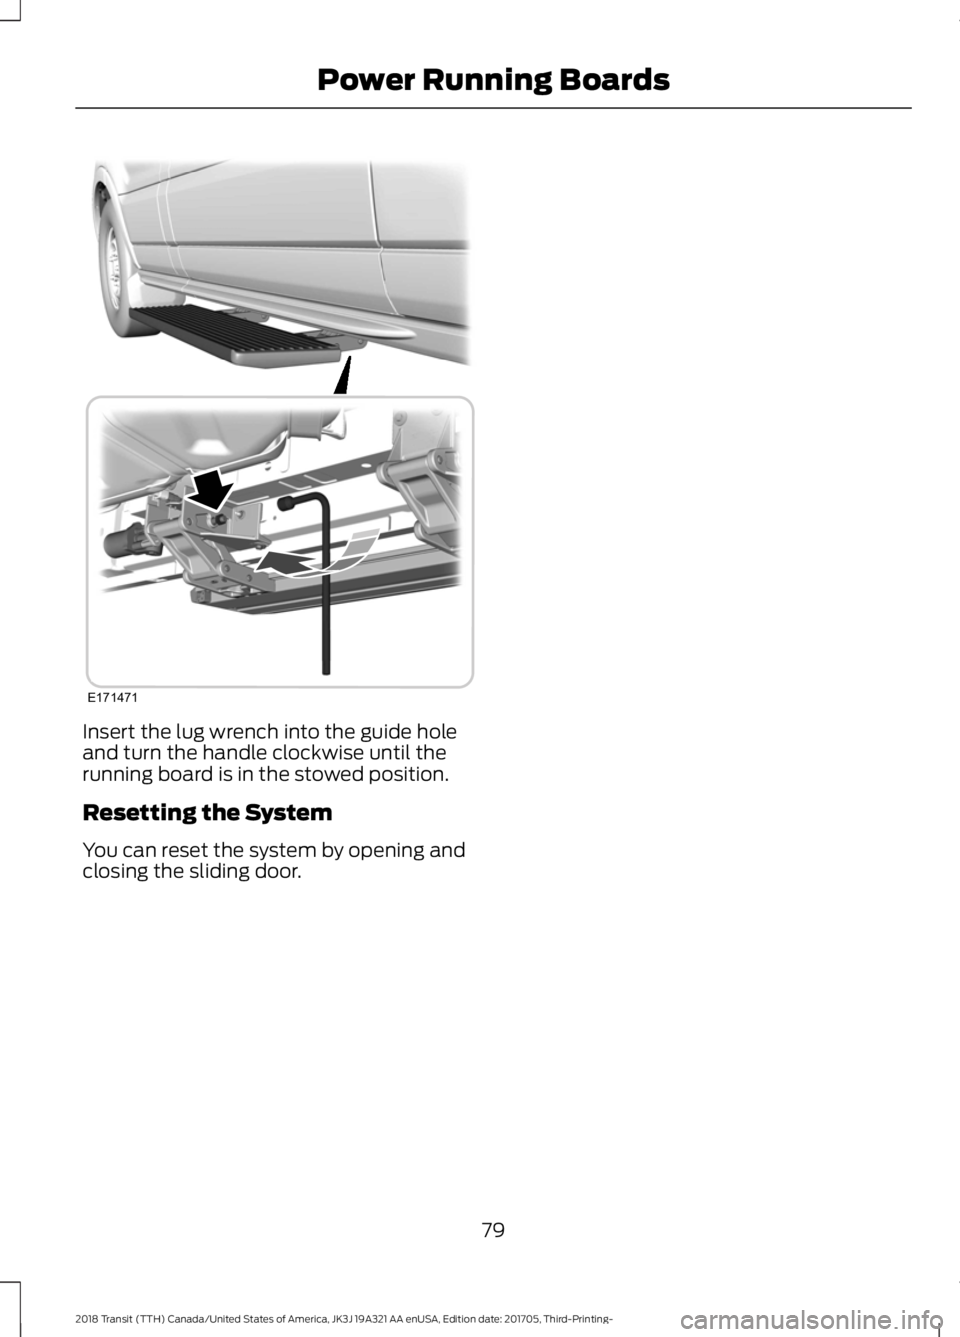
Insert the lug wrench into the guide hole
and turn the handle clockwise until the
running board is in the stowed position.
Resetting the System
You can reset the system by opening and
closing the sliding door.
79
2018 Transit (TTH) Canada/United States of America, JK3J 19A321 AA enUSA, Edition date: 201705, Third-Printing- Power Running BoardsE171471
Page 118 of 521
WARNING: Make sure the driver seat
fully locks into place by rocking it backward
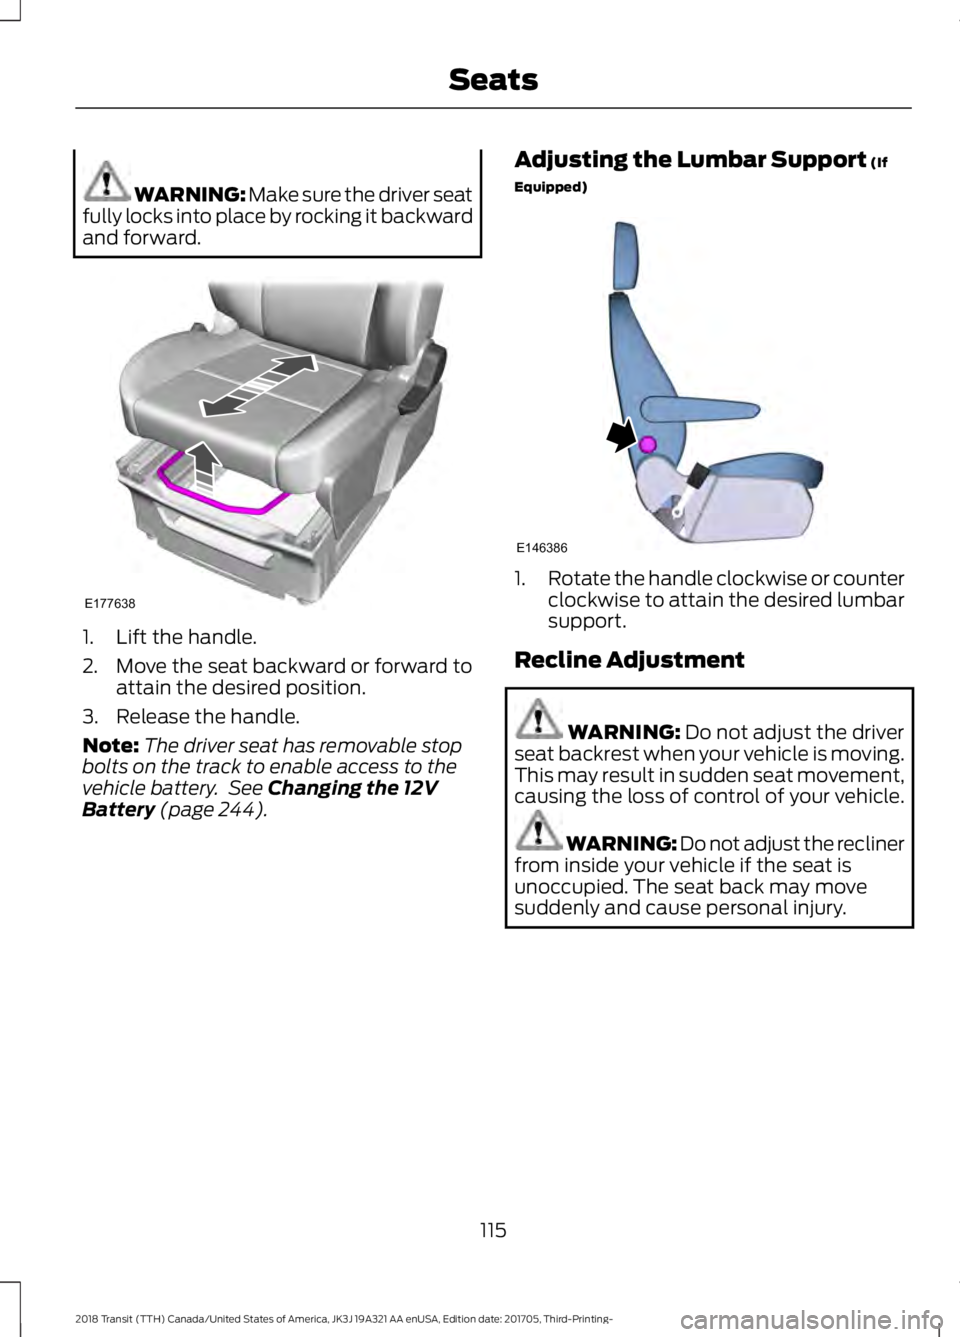
and forward. 1. Lift the handle.
2. Move the seat backward or forward to
attain the desired position.
3. Release the handle.
Note: The driver seat has removable stop
bolts on the track to enable access to the
vehicle battery. See Changing the 12V
Battery (page 244). Adjusting the Lumbar Support
(If
Equipped) 1.
Rotate the handle clockwise or counter
clockwise to attain the desired lumbar
support.
Recline Adjustment WARNING:
Do not adjust the driver
seat backrest when your vehicle is moving.
This may result in sudden seat movement,
causing the loss of control of your vehicle. WARNING: Do not adjust the recliner
from inside your vehicle if the seat is
unoccupied. The seat back may move
suddenly and cause personal injury.
115
2018 Transit (TTH) Canada/United States of America, JK3J 19A321 AA enUSA, Edition date: 201705, Third-Printing- SeatsE177638 E146386
Page 128 of 521
CUP HOLDERS
WARNING: Do not place hot drinks
in the cup holders when your vehicle is
moving. WARNING:
Make sure that cups
placed in the holders do not obstruct your
vision while driving.
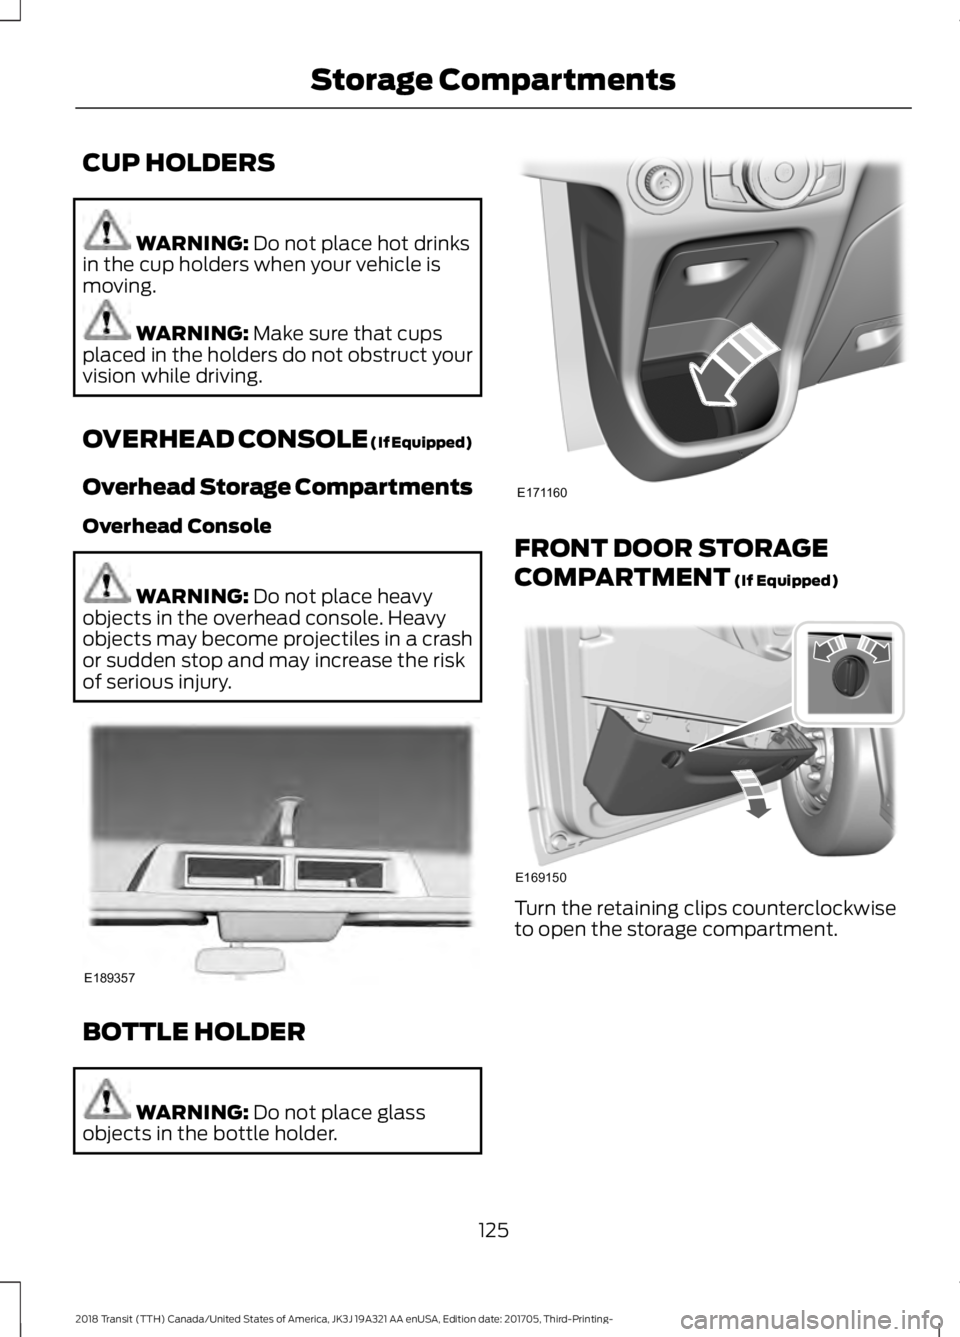
OVERHEAD CONSOLE (If Equipped)
Overhead Storage Compartments
Overhead Console WARNING:
Do not place heavy
objects in the overhead console. Heavy
objects may become projectiles in a crash
or sudden stop and may increase the risk
of serious injury. BOTTLE HOLDER
WARNING:
Do not place glass
objects in the bottle holder. FRONT DOOR STORAGE
COMPARTMENT
(If Equipped)
Turn the retaining clips counterclockwise
to open the storage compartment.
125
2018 Transit (TTH) Canada/United States of America, JK3J 19A321 AA enUSA, Edition date: 201705, Third-Printing- Storage CompartmentsE189357 E171160 E169150
Page 202 of 521
If you need to have your vehicle towed,
contact a professional towing service or,
if you are a member of a roadside
assistance program, your roadside
assistance service provider.
We recommend the use of a wheel lift and
dollies or flatbed equipment to tow your
vehicle. Do not tow with a slingbelt. Ford
Motor Company has not approved a
slingbelt towing procedure. Vehicle
damage may occur if towed incorrectly, or
by any other means.
Ford Motor Company produces a towing
manual for all authorized tow truck
operators. Have your tow truck operator
refer to this manual for proper hook-up
and towing procedures for your vehicle.
It is acceptable to have your front-wheel
drive vehicle towed from the front if using
proper wheel lift equipment to raise the
front wheels off the ground. When towing
in this manner, the rear wheels can remain
on the ground.
Front-wheel drive vehicles must have the
front wheels placed on a tow dolly when
towing your vehicle from the rear using
wheel lift equipment. This prevents
damage to the transmission.
Towing an all-wheel or four-wheel drive
vehicle requires that all wheels be off the
ground, such as using a wheel lift and
dollies or flatbed equipment. This prevents
damage to the transmission, all-wheel or
four-wheel drive system and vehicle.
TOWING POINTS
Front Towing Point
WARNING: Make sure that the
towing eye is fully tightened. Failure to
follow this instruction could result in
personal injury. WARNING:
You must switch the
ignition on when your vehicle is being
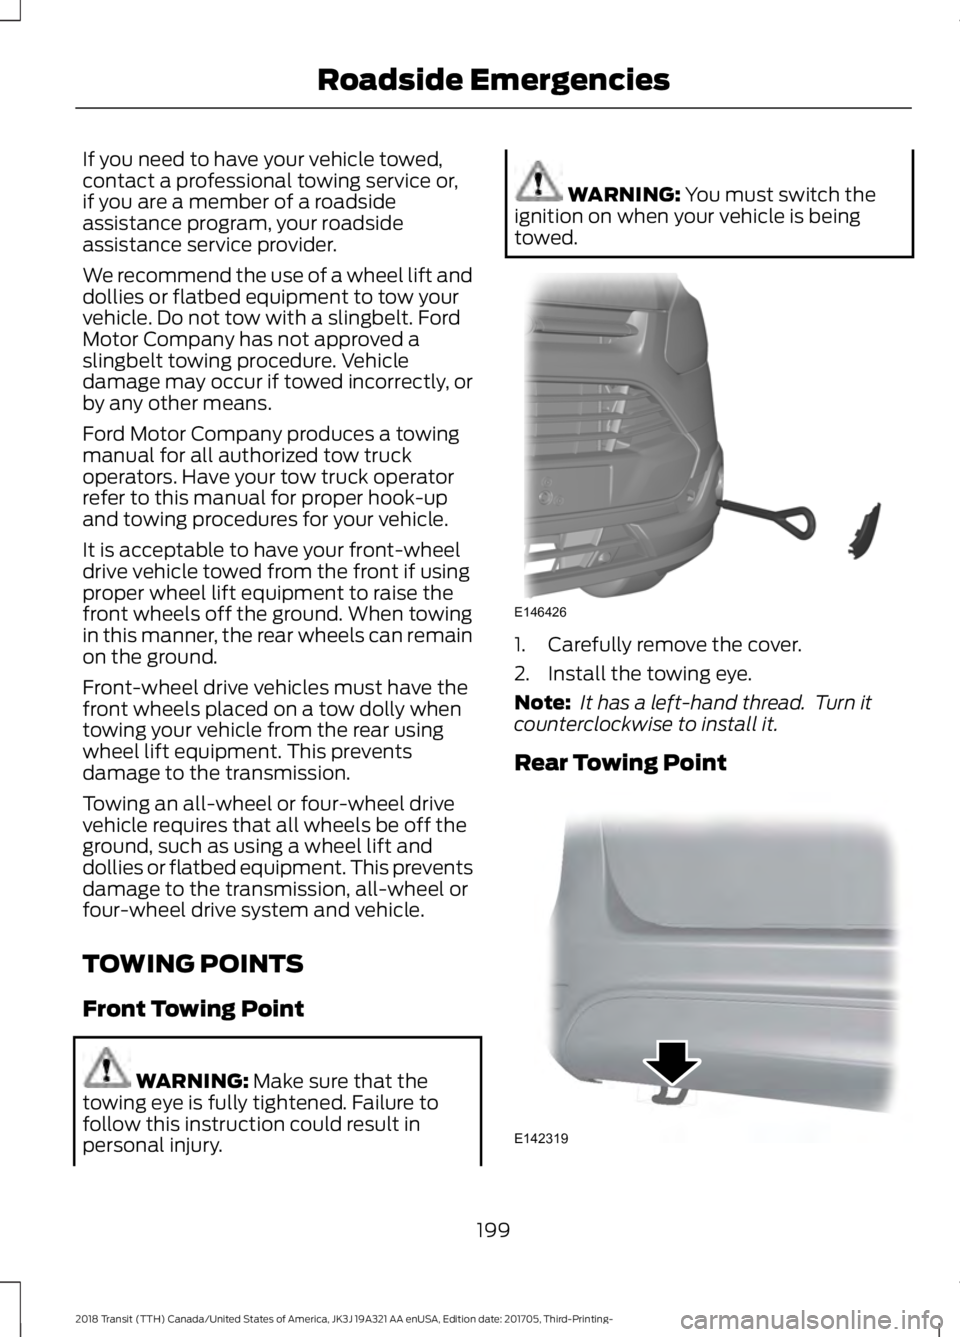
towed. 1. Carefully remove the cover.
2. Install the towing eye.
Note:
It has a left-hand thread. Turn it
counterclockwise to install it.
Rear Towing Point 199
2018 Transit (TTH) Canada/United States of America, JK3J 19A321 AA enUSA, Edition date: 201705, Third-Printing- Roadside EmergenciesE146426 E142319
Page 240 of 521
Maintain coolant concentration within
48% to 50%, which equates to a freeze
point between -29°F (-34°C) and -35°F
(-37°C). Coolant concentration should be
checked using a refractometer. We do not
recommend the use of hydrometers or
coolant test strips for measuring coolant
concentration.
Adding Coolant WARNING:
Do not add engine
coolant when the engine is hot. Failure to
follow this instruction could result in
personal injury. WARNING:
Do not remove the
coolant reservoir cap when the cooling
system is hot. Wait 10 minutes for the
cooling system to cool down. Cover the
coolant reservoir cap with a thick cloth to
prevent the possibility of scalding and
slowly remove the cap. Failure to follow
this instruction could result in personal
injury.
Note: Automotive fluids are not
interchangeable. Take care not to put
engine coolant in the windshield washer
fluid reservoir or windshield washer fluid in
the engine coolant reservoir.
Note: Do not use stop leak pellets, cooling
system sealants, or non-specified additives
as they can cause damage to the engine
cooling or heating systems. Resulting
component damage may not be covered by
the vehicle Warranty. It is very important to use prediluted
coolant approved to the correct
specification in order to avoid plugging the
small passageways in the engine cooling
system. See
Capacities and
Specifications (page 305). Do not mix
different colors or types of coolant in your
vehicle. Mixing of engine coolants or using
an incorrect coolant may harm the engine
or cooling system components and may
not be covered by the vehicle Warranty.
Note: If prediluted coolant is not available,
use the approved concentrated coolant
diluting it to 50/50 with distilled water. See
Capacities and Specifications (page
305).
Using water that has not been deionised
may contribute to deposit formation,
corrosion and plugging of the small cooling
system passageways.
Note: Coolants marketed for all makes and
models may not be approved to our
specifications and may cause damage to
the cooling system. Resulting component
damage may not be covered by the vehicle
Warranty.
If the coolant level is at or below the
minimum mark, add prediluted coolant
immediately.
To top up the coolant level do the
following:
1. Unscrew the cap slowly. Any pressure escapes as you unscrew the cap.
2. Add prediluted coolant approved to the correct specification. See
Capacities and Specifications (page
305
).
3. Add enough prediluted coolant to reach the correct level.
4. Replace the coolant reservoir cap, turn
it clockwise until you feel a strong
resistance.
237
2018 Transit (TTH) Canada/United States of America, JK3J 19A321 AA enUSA, Edition date: 201705, Third-Printing- Maintenance
Page 245 of 521
2. Add power steering fluid to the MAX
mark. Do not overfill.
3. Replace the filler cap. Turn it until you feel a strong resistance.
WASHER FLUID CHECK
When adding fluid, use a mixture of washer
fluid and water to help prevent freezing in
cold weather and improve the cleaning
capability. For information on fluid dilution,
refer to the product instructions. We
recommend that you only use high quality
washer fluid.
Note: The reservoir supplies the front and
rear washer systems.
DRAINING THE FUEL FILTER
WATER TRAP - 3.2L POWER
STROKE DIESEL WARNING:
Do not dispose of fuel
in the household refuse or the public
sewage system. Use an authorized waste
disposal facility.
Your vehicle is fitted with a diesel fuel
conditioner module located behind the fuel
tank. A warning lamp will illuminate
and a message will be displayed
when approximately
3.38 fl oz
(100 ml) of water accumulates in the
module. If you allow the water level to
exceed this level, the water may pass
through to the engine and may cause fuel
injection equipment damage.
Note: To drain the fuel filter water trap,
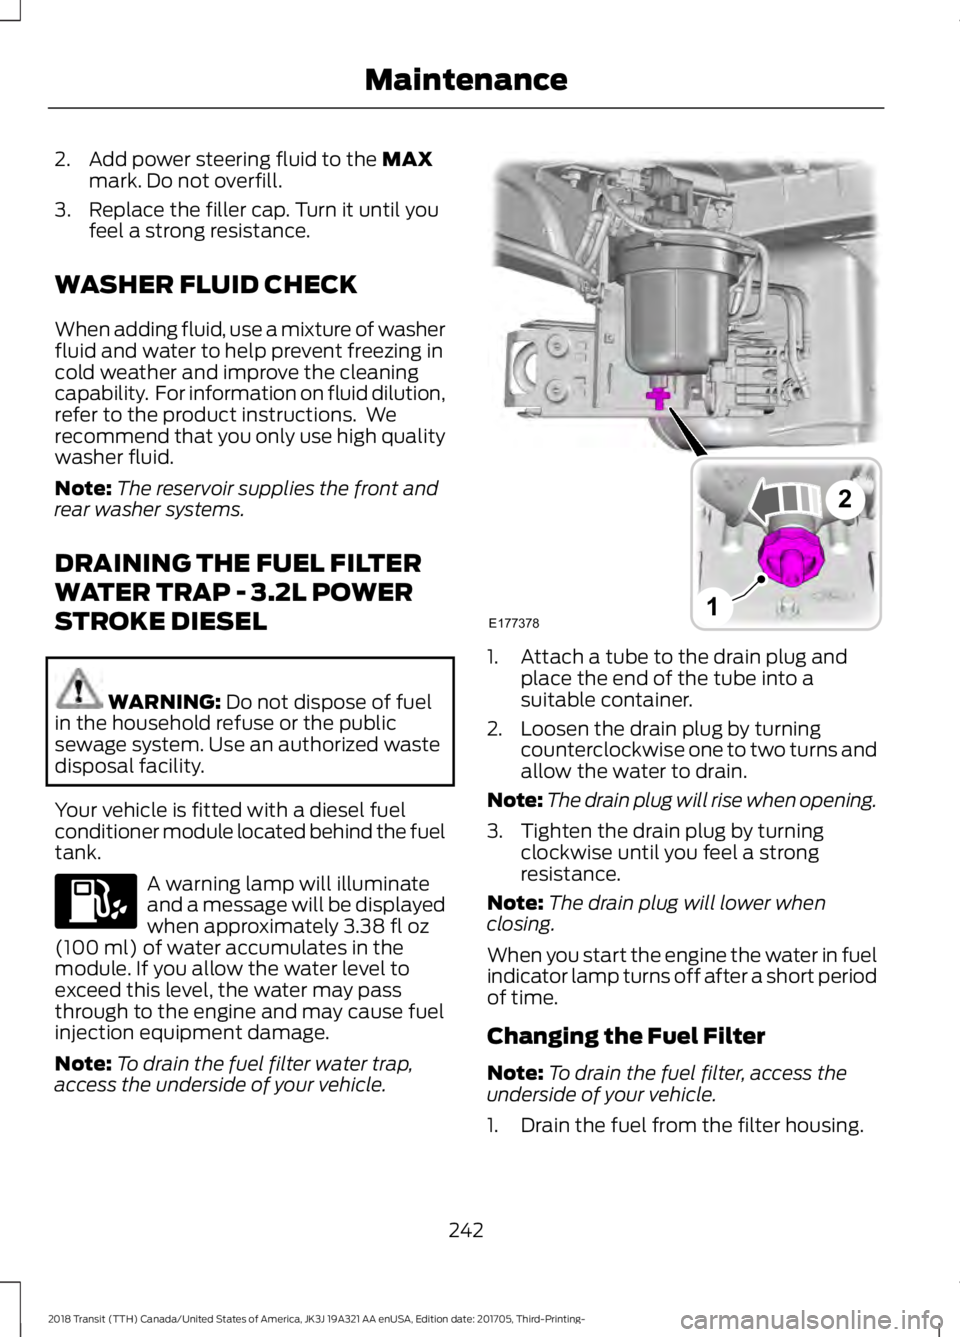
access the underside of your vehicle. 1. Attach a tube to the drain plug and
place the end of the tube into a
suitable container.
2. Loosen the drain plug by turning counterclockwise one to two turns and
allow the water to drain.
Note: The drain plug will rise when opening.
3. Tighten the drain plug by turning clockwise until you feel a strong
resistance.
Note: The drain plug will lower when
closing.
When you start the engine the water in fuel
indicator lamp turns off after a short period
of time.
Changing the Fuel Filter
Note: To drain the fuel filter, access the
underside of your vehicle.
1. Drain the fuel from the filter housing.
242
2018 Transit (TTH) Canada/United States of America, JK3J 19A321 AA enUSA, Edition date: 201705, Third-Printing- Maintenance E177378
2
1
Page 246 of 521
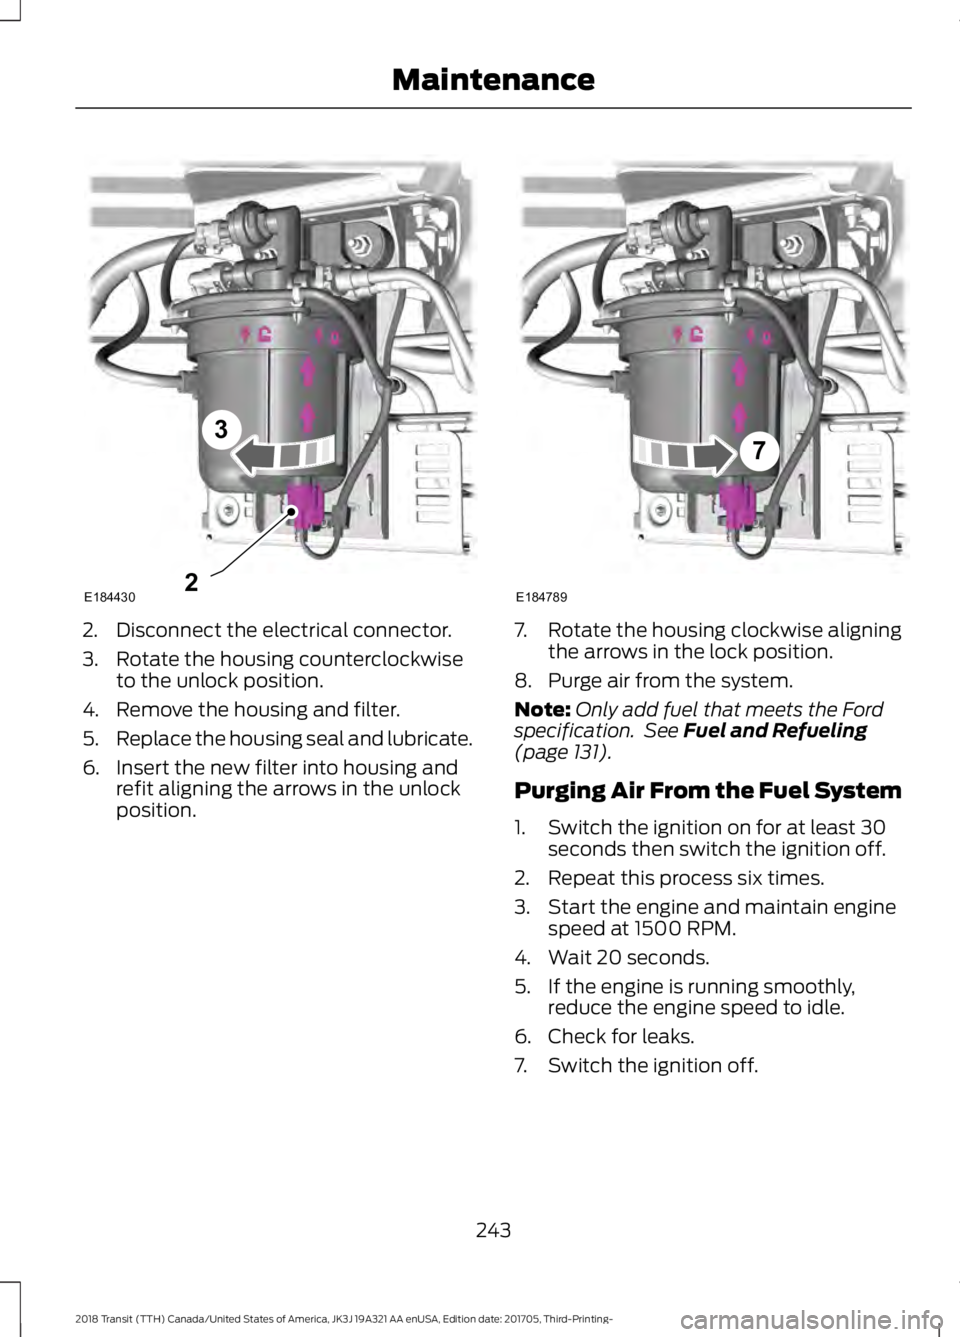
2. Disconnect the electrical connector.
3. Rotate the housing counterclockwise
to the unlock position.
4. Remove the housing and filter.
5. Replace the housing seal and lubricate.
6. Insert the new filter into housing and refit aligning the arrows in the unlock
position. 7. Rotate the housing clockwise aligning
the arrows in the lock position.
8. Purge air from the system.
Note: Only add fuel that meets the Ford
specification. See Fuel and Refueling
(page 131).
Purging Air From the Fuel System
1. Switch the ignition on for at least 30 seconds then switch the ignition off.
2. Repeat this process six times.
3. Start the engine and maintain engine speed at 1500 RPM.
4. Wait 20 seconds.
5. If the engine is running smoothly, reduce the engine speed to idle.
6. Check for leaks.
7. Switch the ignition off.
243
2018 Transit (TTH) Canada/United States of America, JK3J 19A321 AA enUSA, Edition date: 201705, Third-Printing- MaintenanceE1844302
3 E184789
7
Page 251 of 521
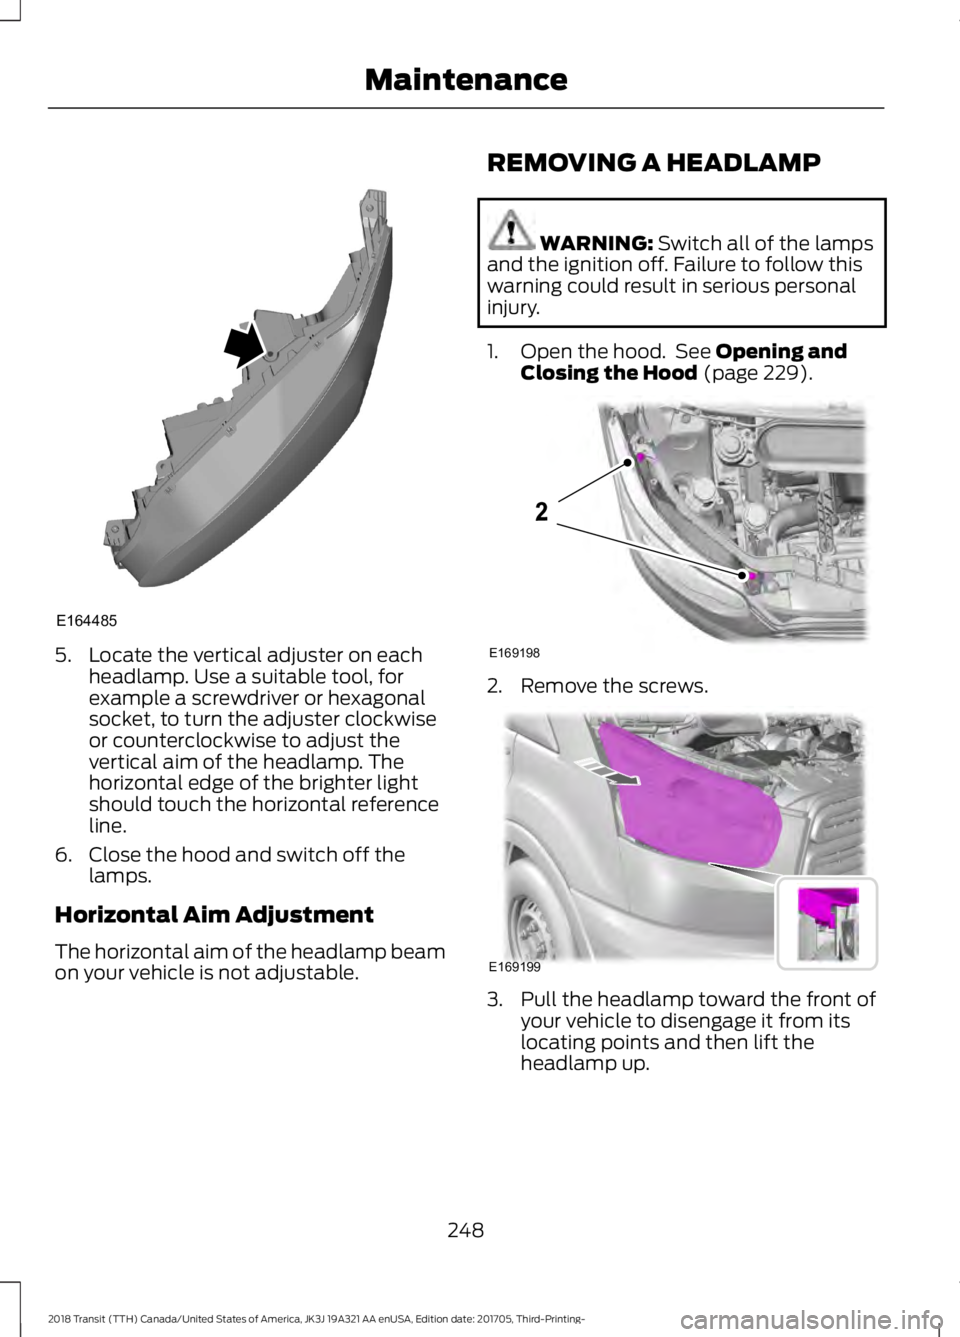
5. Locate the vertical adjuster on each
headlamp. Use a suitable tool, for
example a screwdriver or hexagonal
socket, to turn the adjuster clockwise
or counterclockwise to adjust the
vertical aim of the headlamp. The
horizontal edge of the brighter light
should touch the horizontal reference
line.
6. Close the hood and switch off the lamps.
Horizontal Aim Adjustment
The horizontal aim of the headlamp beam
on your vehicle is not adjustable. REMOVING A HEADLAMP WARNING: Switch all of the lamps
and the ignition off. Failure to follow this
warning could result in serious personal
injury.
1. Open the hood. See
Opening and
Closing the Hood (page 229). 2. Remove the screws.
3. Pull the headlamp toward the front of
your vehicle to disengage it from its
locating points and then lift the
headlamp up.
248
2018 Transit (TTH) Canada/United States of America, JK3J 19A321 AA enUSA, Edition date: 201705, Third-Printing- MaintenanceE164485 E169198
2 E169199
Page 252 of 521
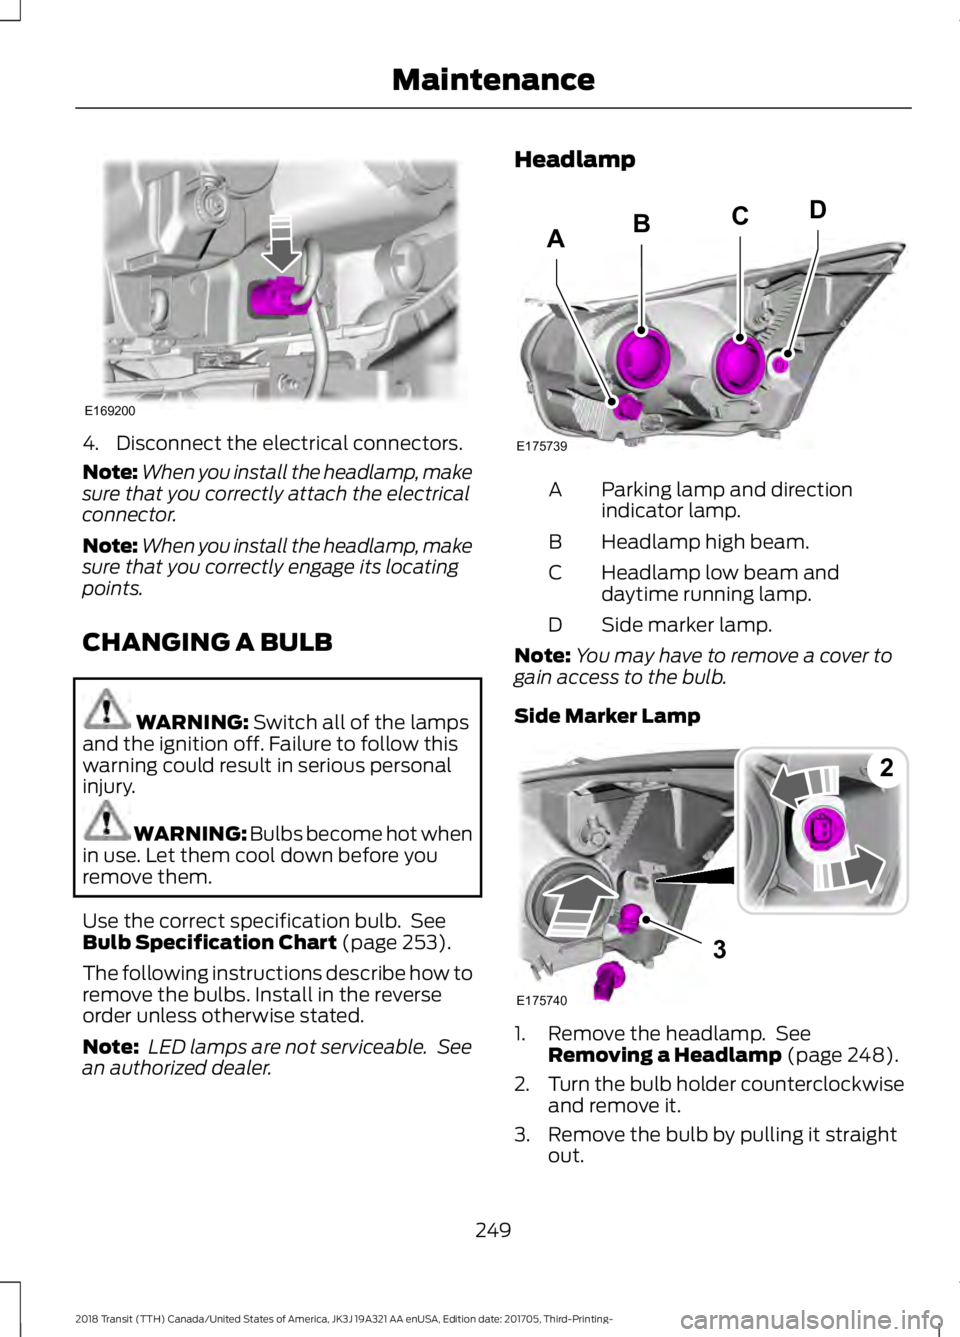
4. Disconnect the electrical connectors.
Note:
When you install the headlamp, make
sure that you correctly attach the electrical
connector.
Note: When you install the headlamp, make
sure that you correctly engage its locating
points.
CHANGING A BULB WARNING: Switch all of the lamps
and the ignition off. Failure to follow this
warning could result in serious personal
injury. WARNING: Bulbs become hot when
in use. Let them cool down before you
remove them.
Use the correct specification bulb. See
Bulb Specification Chart
(page 253).
The following instructions describe how to
remove the bulbs. Install in the reverse
order unless otherwise stated.
Note: LED lamps are not serviceable. See
an authorized dealer. Headlamp
Parking lamp and direction
indicator lamp.
A
Headlamp high beam.
B
Headlamp low beam and
daytime running lamp.
C
Side marker lamp.
D
Note: You may have to remove a cover to
gain access to the bulb.
Side Marker Lamp 1. Remove the headlamp. See
Removing a Headlamp
(page 248).
2. Turn the bulb holder counterclockwise
and remove it.
3. Remove the bulb by pulling it straight out.
249
2018 Transit (TTH) Canada/United States of America, JK3J 19A321 AA enUSA, Edition date: 201705, Third-Printing- MaintenanceE169200 E175739
BCD
A 3
E175740
2