key battery FORD TRANSIT 2018 Owners Manual
[x] Cancel search | Manufacturer: FORD, Model Year: 2018, Model line: TRANSIT, Model: FORD TRANSIT 2018Pages: 521, PDF Size: 8.65 MB
Page 63 of 521
REMOTE CONTROL - VEHICLES
WITHOUT: PASSIVE ANTI-
THEFT SYSTEM (PATS)
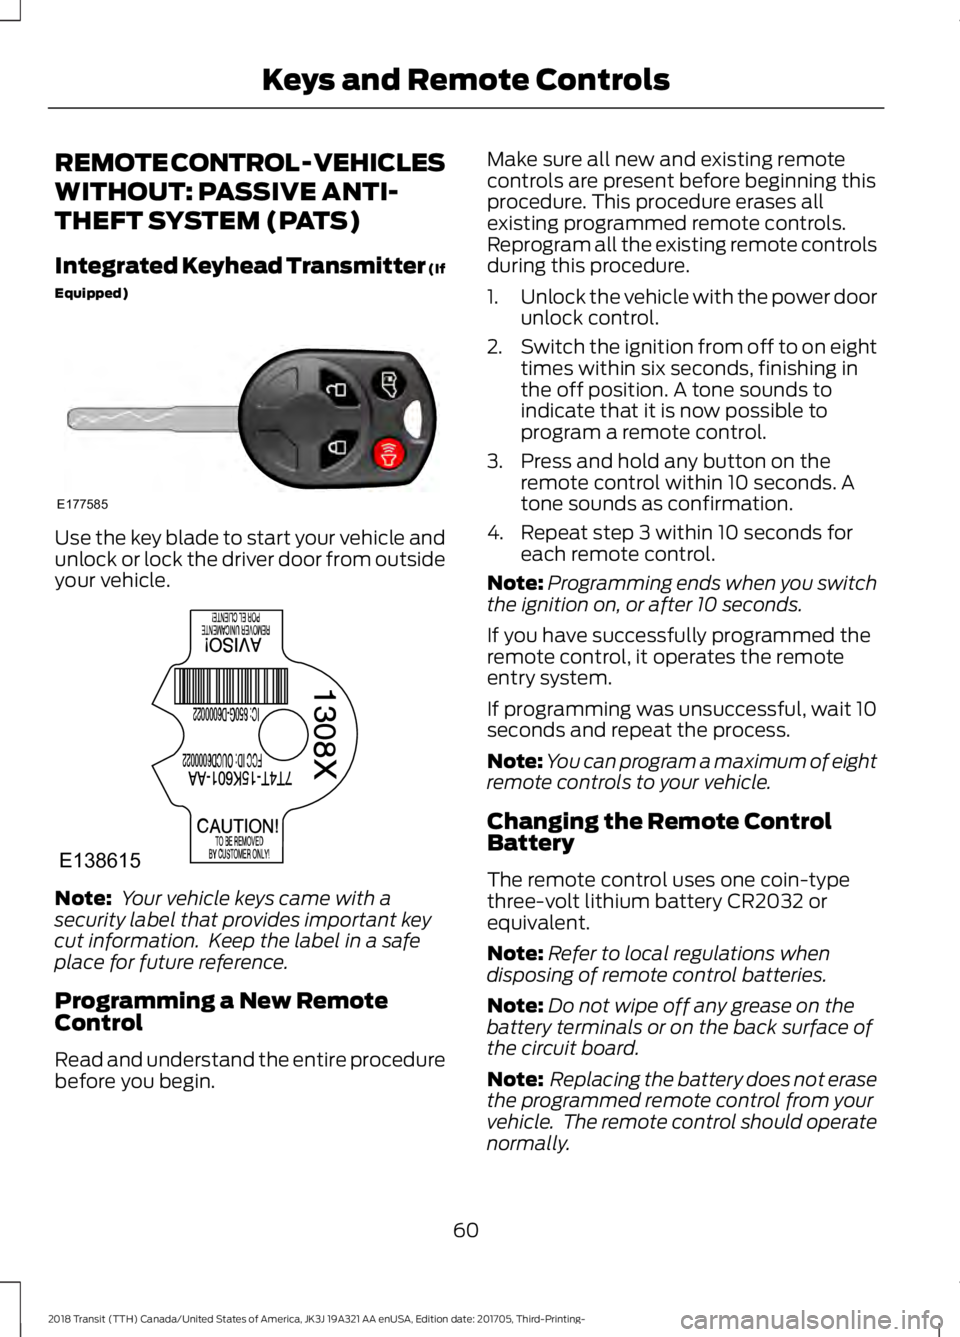
Integrated Keyhead Transmitter (If
Equipped)
Use the key blade to start your vehicle and
unlock or lock the driver door from outside
your vehicle.
Note:
Your vehicle keys came with a
security label that provides important key
cut information. Keep the label in a safe
place for future reference.
Programming a New Remote
Control
Read and understand the entire procedure
before you begin. Make sure all new and existing remote
controls are present before beginning this
procedure. This procedure erases all
existing programmed remote controls.
Reprogram all the existing remote controls
during this procedure.
1.
Unlock the vehicle with the power door
unlock control.
2. Switch the ignition from off to on eight
times within six seconds, finishing in
the off position. A tone sounds to
indicate that it is now possible to
program a remote control.
3. Press and hold any button on the remote control within 10 seconds. A
tone sounds as confirmation.
4. Repeat step 3 within 10 seconds for each remote control.
Note: Programming ends when you switch
the ignition on, or after 10 seconds.
If you have successfully programmed the
remote control, it operates the remote
entry system.
If programming was unsuccessful, wait 10
seconds and repeat the process.
Note: You can program a maximum of eight
remote controls to your vehicle.
Changing the Remote Control
Battery
The remote control uses one coin-type
three-volt lithium battery CR2032 or
equivalent.
Note: Refer to local regulations when
disposing of remote control batteries.
Note: Do not wipe off any grease on the
battery terminals or on the back surface of
the circuit board.
Note: Replacing the battery does not erase
the programmed remote control from your
vehicle. The remote control should operate
normally.
60
2018 Transit (TTH) Canada/United States of America, JK3J 19A321 AA enUSA, Edition date: 201705, Third-Printing- Keys and Remote ControlsE177585 E138615
Page 64 of 521
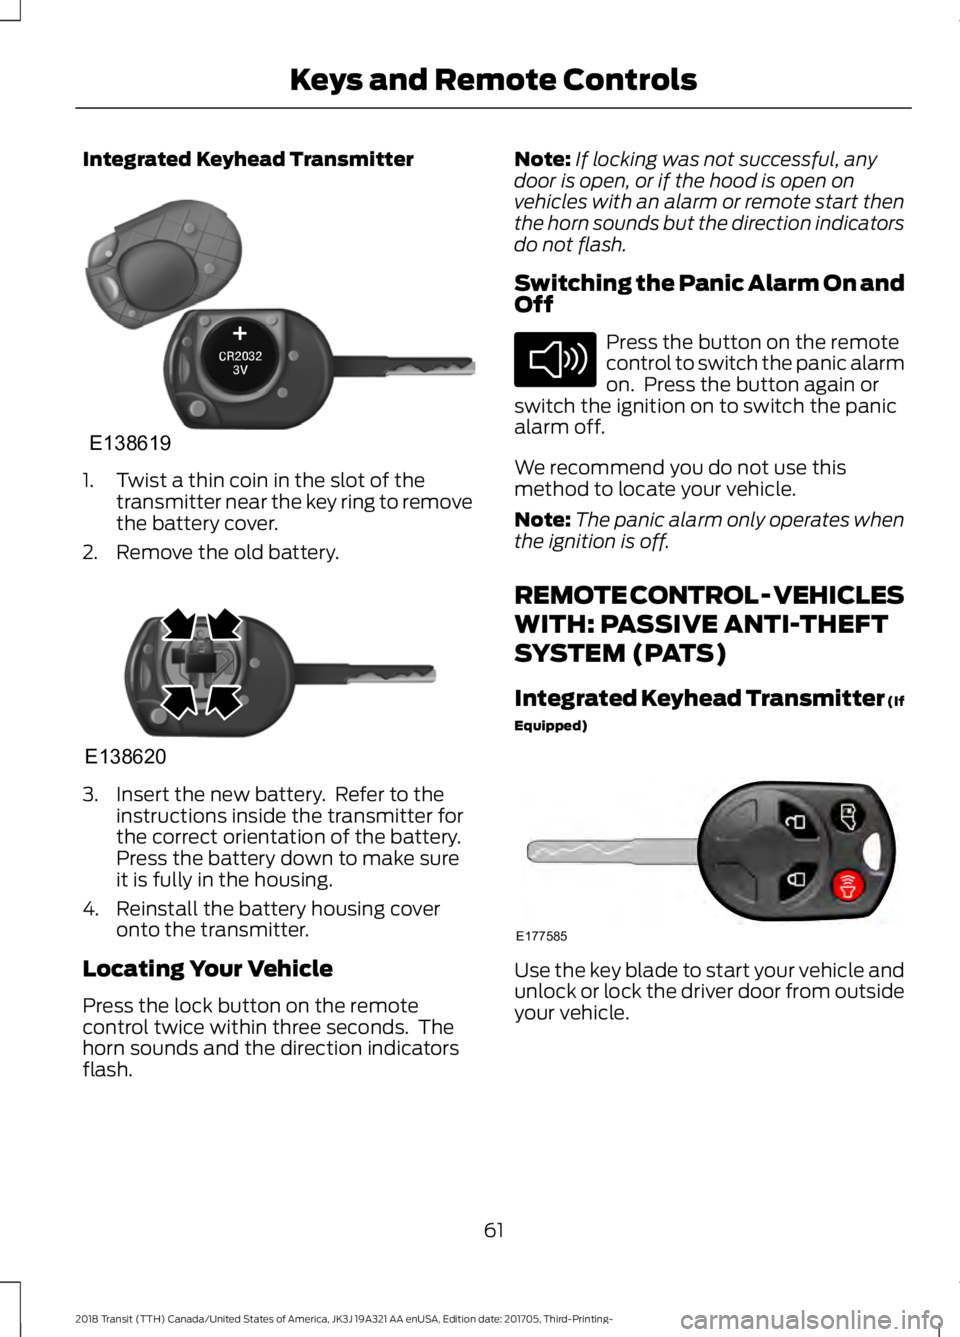
Integrated Keyhead Transmitter
1. Twist a thin coin in the slot of the
transmitter near the key ring to remove
the battery cover.
2. Remove the old battery. 3. Insert the new battery. Refer to the
instructions inside the transmitter for
the correct orientation of the battery.
Press the battery down to make sure
it is fully in the housing.
4. Reinstall the battery housing cover onto the transmitter.
Locating Your Vehicle
Press the lock button on the remote
control twice within three seconds. The
horn sounds and the direction indicators
flash. Note:
If locking was not successful, any
door is open, or if the hood is open on
vehicles with an alarm or remote start then
the horn sounds but the direction indicators
do not flash.
Switching the Panic Alarm On and
Off Press the button on the remote
control to switch the panic alarm
on. Press the button again or
switch the ignition on to switch the panic
alarm off.
We recommend you do not use this
method to locate your vehicle.
Note: The panic alarm only operates when
the ignition is off.
REMOTE CONTROL - VEHICLES
WITH: PASSIVE ANTI-THEFT
SYSTEM (PATS)
Integrated Keyhead Transmitter (If
Equipped) Use the key blade to start your vehicle and
unlock or lock the driver door from outside
your vehicle.
61
2018 Transit (TTH) Canada/United States of America, JK3J 19A321 AA enUSA, Edition date: 201705, Third-Printing- Keys and Remote ControlsE138619 E138620 E138624 E177585
Page 65 of 521
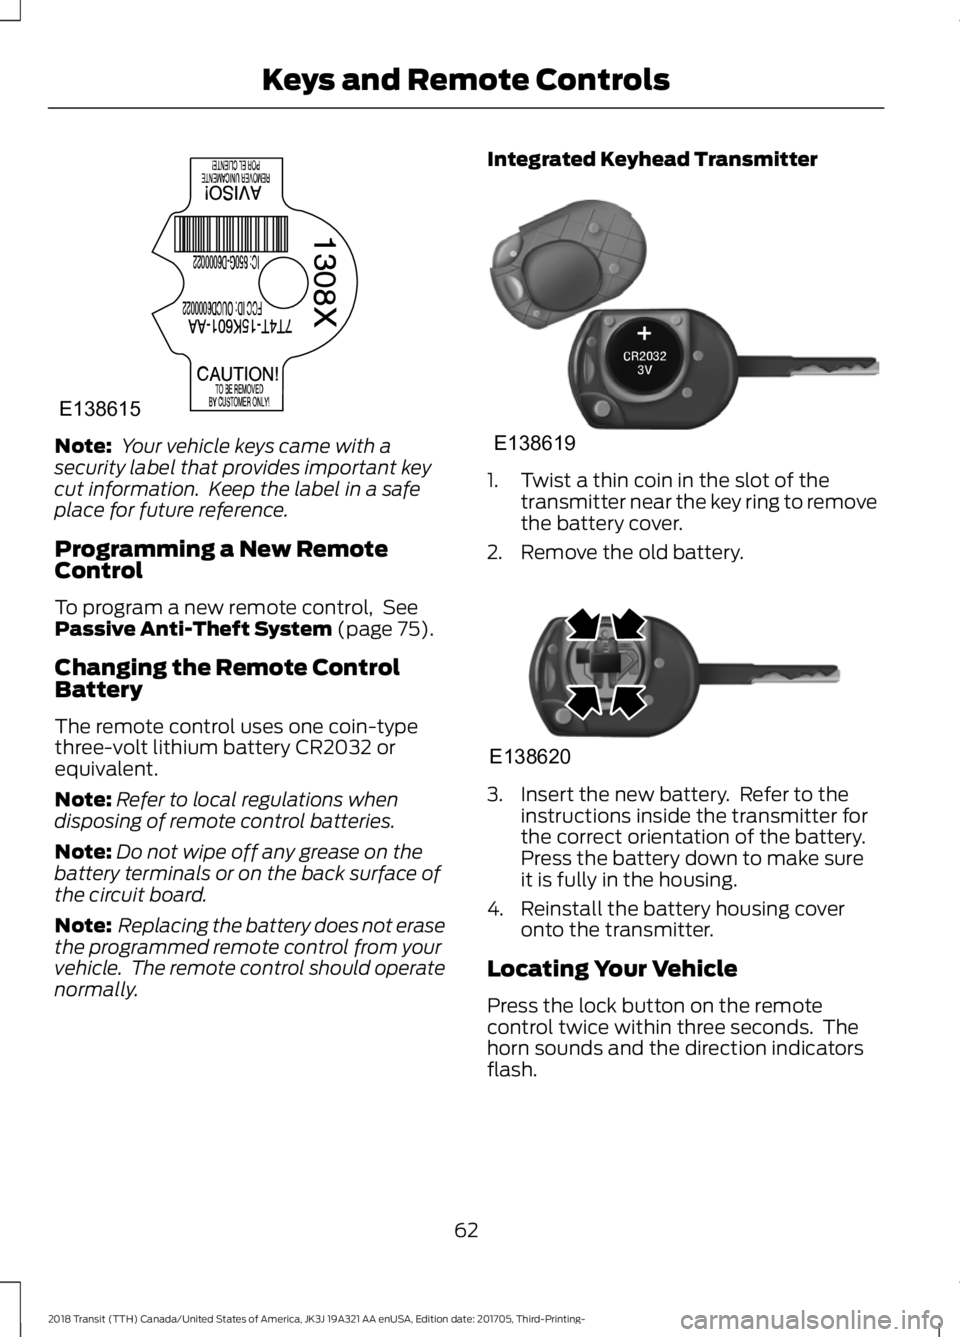
Note:
Your vehicle keys came with a
security label that provides important key
cut information. Keep the label in a safe
place for future reference.
Programming a New Remote
Control
To program a new remote control, See
Passive Anti-Theft System (page 75).
Changing the Remote Control
Battery
The remote control uses one coin-type
three-volt lithium battery CR2032 or
equivalent.
Note: Refer to local regulations when
disposing of remote control batteries.
Note: Do not wipe off any grease on the
battery terminals or on the back surface of
the circuit board.
Note: Replacing the battery does not erase
the programmed remote control from your
vehicle. The remote control should operate
normally. Integrated Keyhead Transmitter
1. Twist a thin coin in the slot of the
transmitter near the key ring to remove
the battery cover.
2. Remove the old battery. 3. Insert the new battery. Refer to the
instructions inside the transmitter for
the correct orientation of the battery.
Press the battery down to make sure
it is fully in the housing.
4. Reinstall the battery housing cover onto the transmitter.
Locating Your Vehicle
Press the lock button on the remote
control twice within three seconds. The
horn sounds and the direction indicators
flash.
62
2018 Transit (TTH) Canada/United States of America, JK3J 19A321 AA enUSA, Edition date: 201705, Third-Printing- Keys and Remote ControlsE138615 E138619 E138620
Page 129 of 521
GENERAL INFORMATION
WARNING: Extended idling at high
engine speeds can produce very high
temperatures in the engine and exhaust
system, creating the risk of fire or other
damage. WARNING: Do not park, idle or drive
your vehicle on dry grass or other dry
ground cover. The emission system heats
up the engine compartment and exhaust
system, creating the risk of fire. WARNING:
Do not start the engine
in a closed garage or in other enclosed
areas. Exhaust fumes can be toxic. Always
open the garage door before you start the
engine. WARNING: Exhaust leaks may result
in entry of harmful and potentially lethal
fumes into the passenger compartment.
If you smell exhaust fumes inside your
vehicle, have your vehicle inspected
immediately. Do not drive if you smell
exhaust fumes.
If you disconnect the battery, your vehicle
may exhibit some unusual driving
characteristics for approximately
5 mi
(8 km) after you reconnect it. This is
because the engine management system
must realign itself with the engine. You
can disregard any unusual driving
characteristics during this period.
The powertrain control system meets all
Canadian interference-causing equipment
standard requirements regulating the
impulse electrical field or radio noise. When you start the engine, avoid pressing
the accelerator pedal before and during
operation. Only use the accelerator pedal
when you have difficulty starting the
engine.
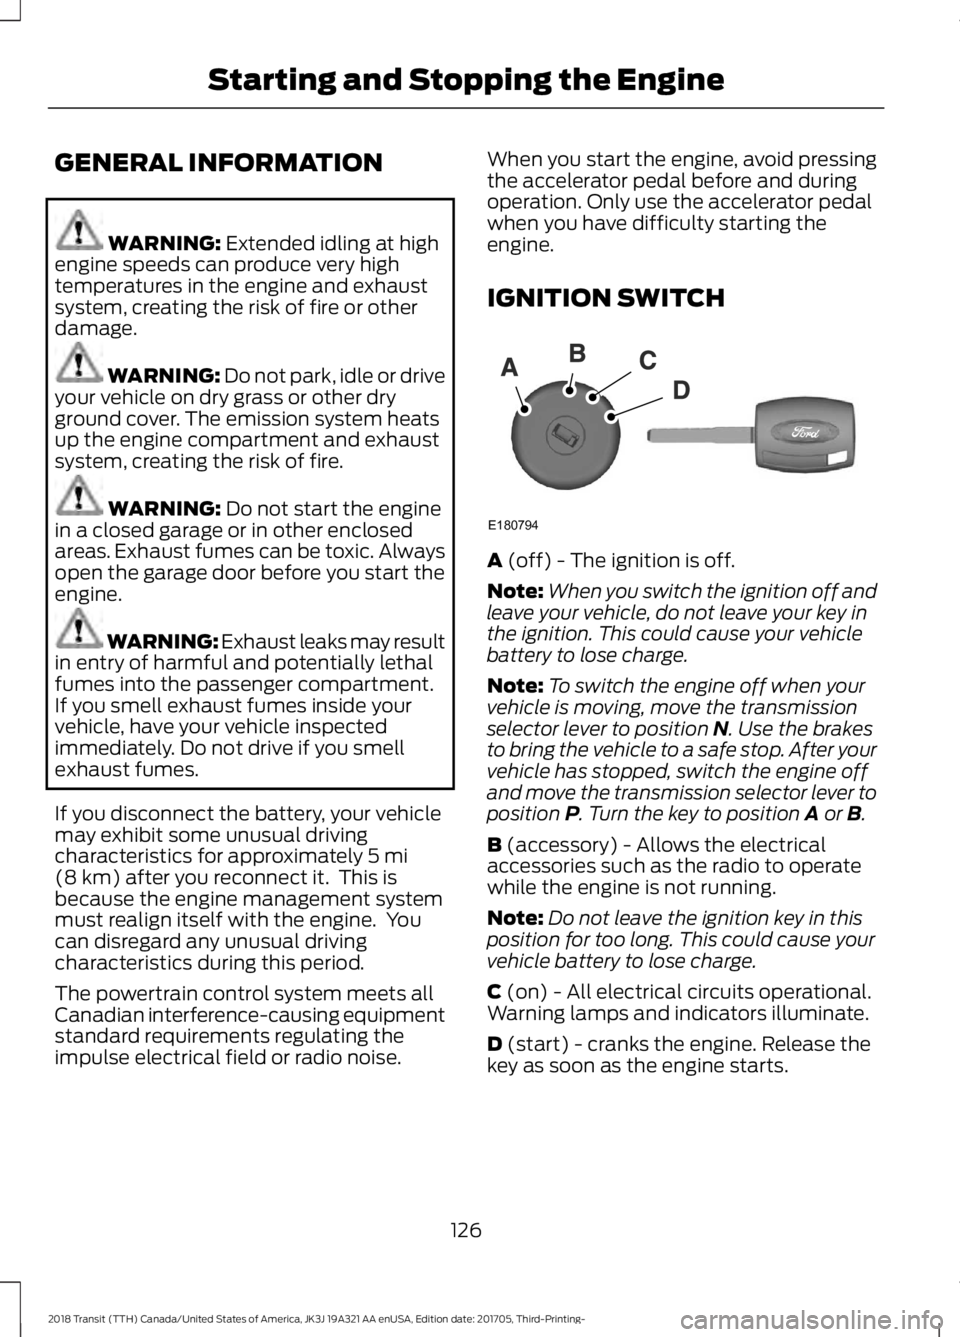
IGNITION SWITCH
A
(off) - The ignition is off.
Note: When you switch the ignition off and
leave your vehicle, do not leave your key in
the ignition. This could cause your vehicle
battery to lose charge.
Note: To switch the engine off when your
vehicle is moving, move the transmission
selector lever to position
N. Use the brakes
to bring the vehicle to a safe stop. After your
vehicle has stopped, switch the engine off
and move the transmission selector lever to
position
P. Turn the key to position A or B.
B
(accessory) - Allows the electrical
accessories such as the radio to operate
while the engine is not running.
Note: Do not leave the ignition key in this
position for too long. This could cause your
vehicle battery to lose charge.
C
(on) - All electrical circuits operational.
Warning lamps and indicators illuminate.
D
(start) - cranks the engine. Release the
key as soon as the engine starts.
126
2018 Transit (TTH) Canada/United States of America, JK3J 19A321 AA enUSA, Edition date: 201705, Third-Printing- Starting and Stopping the EngineE180794
Page 197 of 521
ROADSIDE ASSISTANCE
Vehicles Sold in the United States:
Getting Roadside Assistance
To fully assist you should you have a
vehicle concern, Ford Motor Company
offers a complimentary roadside
assistance program. This program is
separate from the New Vehicle Limited
Warranty.
The service is available:
•
24 hours a day, seven days a week.
• For the coverage period listed on the
Roadside Assistance Card included in
your Owner's Manual portfolio.
Roadside Assistance covers:
• A flat tire change with a good spare
(except vehicles supplied with a tire
inflation kit).
• Battery jump start.
• Lock-out assistance (key replacement
cost is the customer's responsibility).
• Fuel delivery — independent service
contractors, if not prohibited by state,
local or municipal law, shall deliver up
to 2 gal (8 L) of gasoline or 5 gal (20 L)
of diesel fuel to a disabled vehicle.
Roadside Assistance limits fuel delivery
service to two no-charge occurrences
within a 12-month period.
• Winch out — available within 100 ft
(30 m) of a paved or county
maintained road, no recoveries. •
Towing — independent service
contractors, if not prohibited by state,
local or municipal law, shall tow Ford
eligible vehicles to an authorized dealer
within
35 mi (56 km) of the
disablement location or to the nearest
authorized dealer. If a member
requests a tow to an authorized dealer
that is more than
35 mi (56 km) from
the disablement location, the member
shall be responsible for any mileage
costs in excess of
35 mi (56 km).
• Roadside Assistance includes up to
$200 for a towed trailer if the disabled
eligible vehicle requires service at the
nearest authorized dealer. If the towing
vehicle is operational but the trailer is
not, then the trailer does not qualify for
any roadside services.
Vehicles Sold in the United States:
Using Roadside Assistance
Complete the roadside assistance
identification card and place it in your
wallet for quick reference. This card is in
the owner's information portfolio in the
glove compartment.
United States vehicle customers who
require Roadside Assistance, call
1-800-241-3673.
If you need to arrange roadside assistance
for yourself, Ford Motor Company
reimburses a reasonable amount for
towing to the nearest dealership within
35 mi (56 km)
. To obtain reimbursement
information, United States vehicle
customers call 1-800-241-3673.
Customers need to submit their original
receipts.
194
2018 Transit (TTH) Canada/United States of America, JK3J 19A321 AA enUSA, Edition date: 201705, Third-Printing- Roadside Emergencies
Page 337 of 521
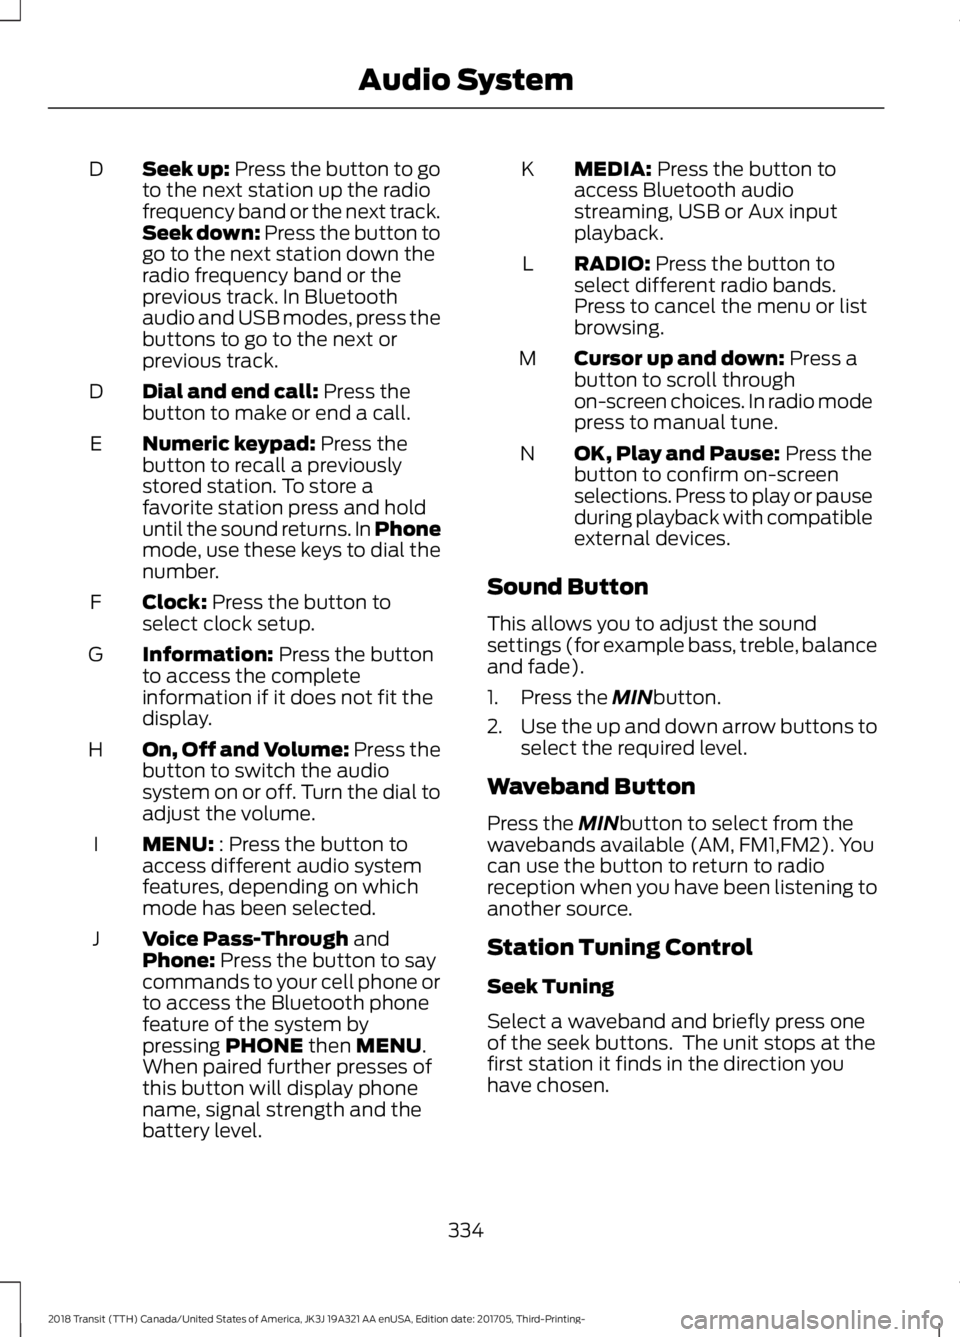
Seek up: Press the button to go
to the next station up the radio
frequency band or the next track.
Seek down: Press the button to
go to the next station down the
radio frequency band or the
previous track. In Bluetooth
audio and USB modes, press the
buttons to go to the next or
previous track.
D
Dial and end call:
Press the
button to make or end a call.
D
Numeric keypad:
Press the
button to recall a previously
stored station. To store a
favorite station press and hold
until the sound returns. In Phone
mode, use these keys to dial the
number.
E
Clock:
Press the button to
select clock setup.
F
Information:
Press the button
to access the complete
information if it does not fit the
display.
G
On, Off and Volume:
Press the
button to switch the audio
system on or off. Turn the dial to
adjust the volume.
H
MENU:
: Press the button to
access different audio system
features, depending on which
mode has been selected.
I
Voice Pass-Through
and
Phone: Press the button to say
commands to your cell phone or
to access the Bluetooth phone
feature of the system by
pressing
PHONE then MENU.
When paired further presses of
this button will display phone
name, signal strength and the
battery level.
J MEDIA:
Press the button to
access Bluetooth audio
streaming, USB or Aux input
playback.
K
RADIO:
Press the button to
select different radio bands.
Press to cancel the menu or list
browsing.
L
Cursor up and down:
Press a
button to scroll through
on-screen choices. In radio mode
press to manual tune.
M
OK, Play and Pause:
Press the
button to confirm on-screen
selections. Press to play or pause
during playback with compatible
external devices.
N
Sound Button
This allows you to adjust the sound
settings (for example bass, treble, balance
and fade).
1. Press the
MINbutton.
2. Use the up and down arrow buttons to
select the required level.
Waveband Button
Press the
MINbutton to select from the
wavebands available (AM, FM1,FM2). You
can use the button to return to radio
reception when you have been listening to
another source.
Station Tuning Control
Seek Tuning
Select a waveband and briefly press one
of the seek buttons. The unit stops at the
first station it finds in the direction you
have chosen.
334
2018 Transit (TTH) Canada/United States of America, JK3J 19A321 AA enUSA, Edition date: 201705, Third-Printing- Audio System
Page 340 of 521
Deleting a Paired Device or Phone
To remove a paired device follow this
process:
1. Press the PHONE button and then
keep pressing the MENU button to
scroll to the DEL DEVICE display.
2. Press the
OK button. The first paired
device name will be shown. Scroll to
the required device name using the up
and down arrow. Once choose the
device, press
OK, the message "DEL
DEVICE" will appear. Press OK, Scroll
to select
"YES" and press OK to
confirm. Select delete all to erase all
paired devices.
3. Press the
OK button multiple times to
unpair the device from the audio unit.
Privacy Mode
You can transfer a call from hands free to
private mode during an active call.
Press the
MENU button until PRIVACY
appears, then press the OK button to
transfer. To return to hands free mode,
press the dial button.
Phone Menu Options
Press the
PHONE button to select phone
mode. Press the PHONE button again to
display information such as phone name,
signal strength and battery level.
When in phone mode, press the
MENU
button to scroll through the various phone
options:
• Dial.
• Phonebook.
• Call History.
• Add Device.
• Select Device.
• Set Primary.
• Delete Device.
• Bluetooth on and off. •
Load Phonebook.
• Reject on or off.
Press the OK button to select the required
option, and use the up and down arrows
to change features.
Making and Receiving Calls
Outgoing calls can be made by:
• Entering a number using the keys on
the radio.
• Saying a command to call someone
after pressing the
Voice
Pass-Through button.
• Selecting a contact from the
downloaded phonebook.
• Selecting a number or contact from the
call history log.
• Using quick dial by pressing one of the
radio preset buttons.
• Using the redial function.
• Using the cell phone.
Incoming calls can be answered by:
• Pressing the call pickup button on the
audio unit.
• Using the cell phone.
Calls can be rejected using the end call
button on the audio unit or by using the cell
phone directly.
USB
Note: Only use USB Mass-Storage device
compliant devices.
Note: Always switch your audio unit to a
different source (for example the radio)
before unplugging the USB device.
Note: Do not install or connect USB hubs
or splitters.
337
2018 Transit (TTH) Canada/United States of America, JK3J 19A321 AA enUSA, Edition date: 201705, Third-Printing- Audio System
Page 418 of 521
To call a number in your contacts,
select:
Action and Description
Menu Item
You can then select the
name of the contact you
want to call. Any numbers
stored for that contact
display along with any
stored contact photos. You
can then select the
number that you want to
call. The system begins the
call.
Contacts
To call a number from your recent calls,
select: Action and Description
Menu Item
You can then select an
entry that you want to call.
The system begins the call.
Recent Call
List
To call a number that is not stored in
your phone, select: Action and Description
Menu Item
Select the digits of the
number you wish to call.
Phone
Keypad
The system begins the call.
Call
Pressing the backspace button deletes the
last digit you typed.
Receiving Calls
During an incoming call, an audible tone
sounds. Caller information appears in the
display if it is available. To accept the call, select: Menu Item
Accept
Note: You can also accept the call by
pressing the phone button on the steering
wheel.
To reject the call, select: Menu Item
Reject
Note: You can also reject the call by
pressing the phone button on the steering
wheel.
Ignore the call by doing nothing. SYNC 3
logs it as a missed call.
During a Phone Call
During a phone call, the contacts name
and number display on the screen along
with the call duration.
The phone status items are also visible:
• Signal Strength.
• Battery.
• 911 Assist (United States and Canada
only). See Settings (page 428).
You can select any of the following during
an active phone call:
415
2018 Transit (TTH) Canada/United States of America, JK3J 19A321 AA enUSA, Edition date: 201705, Third-Printing- SYNC™ 3
Page 515 of 521
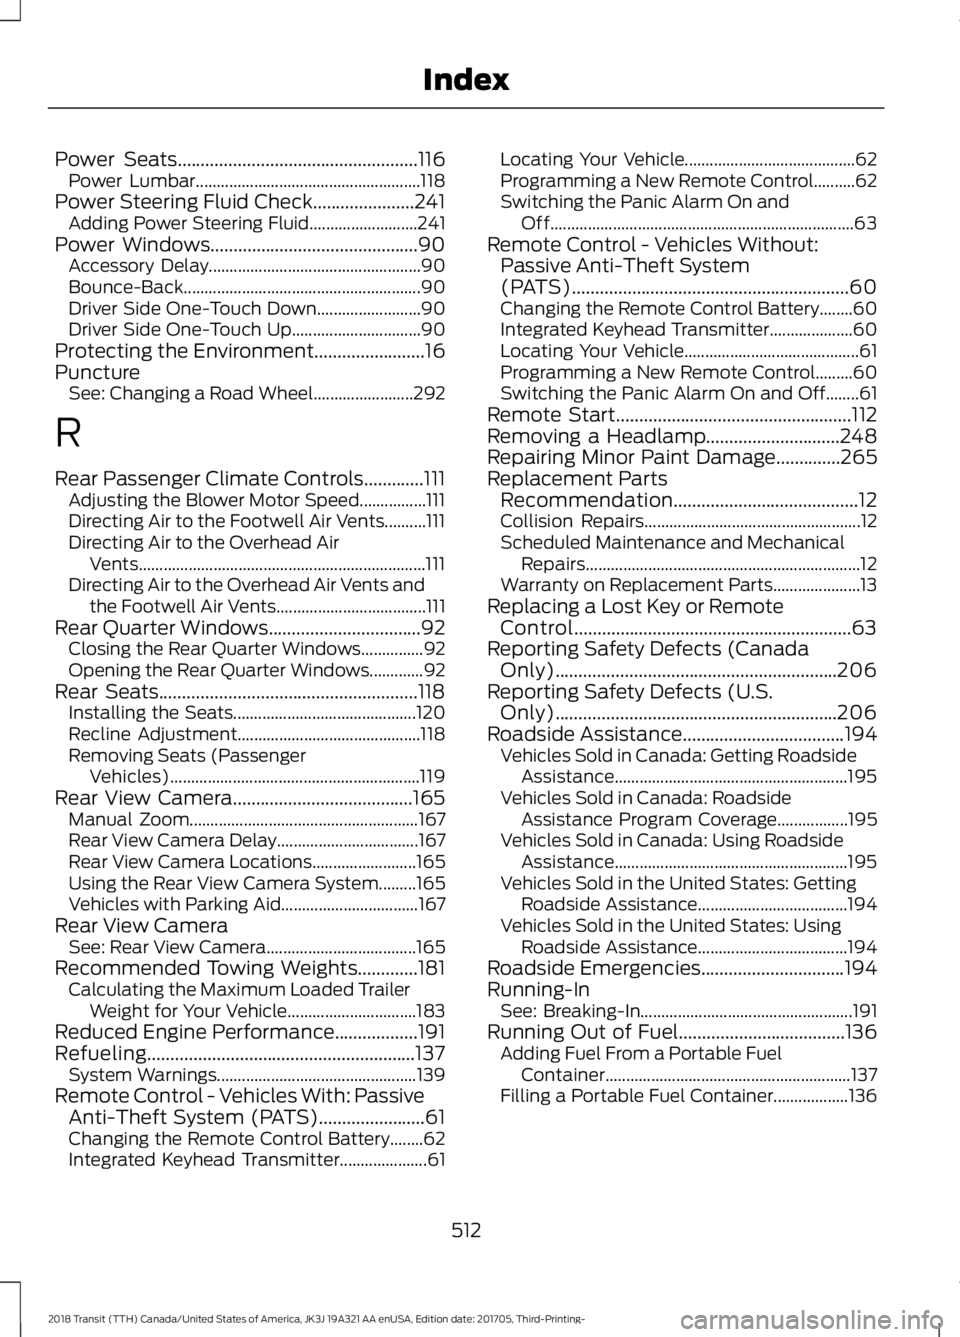
Power Seats....................................................116
Power Lumbar...................................................... 118
Power Steering Fluid Check......................241 Adding Power Steering Fluid.......................... 241
Power Windows.............................................90 Accessory Delay................................................... 90
Bounce-Back......................................................... 90
Driver Side One-Touch Down......................... 90
Driver Side One-Touch Up............................... 90
Protecting the Environment........................16
Puncture See: Changing a Road Wheel........................ 292
R
Rear Passenger Climate Controls.............111 Adjusting the Blower Motor Speed................111
Directing Air to the Footwell Air Vents..........111
Directing Air to the Overhead Air
Vents..................................................................... 111
Directing Air to the Overhead Air Vents and the Footwell Air Vents.................................... 111
Rear Quarter Windows
.................................92
Closing the Rear Quarter Windows...............92
Opening the Rear Quarter Windows.............92
Rear Seats........................................................118 Installing the Seats............................................ 120
Recline Adjustment............................................ 118
Removing Seats (Passenger Vehicles)............................................................ 119
Rear View Camera.......................................165 Manual Zoom....................................................... 167
Rear View Camera Delay.................................. 167
Rear View Camera Locations......................... 165
Using the Rear View Camera System.........165
Vehicles with Parking Aid................................. 167
Rear View Camera See: Rear View Camera.................................... 165
Recommended Towing Weights.............181 Calculating the Maximum Loaded Trailer
Weight for Your Vehicle............................... 183
Reduced Engine Performance..................191
Refueling..........................................................137 System Warnings................................................ 139
Remote Control - Vehicles With: Passive Anti-Theft System (PATS).......................61
Changing the Remote Control Battery........62
Integrated Keyhead Transmitter..................... 61Locating Your Vehicle.........................................
62
Programming a New Remote Control..........62
Switching the Panic Alarm On and Off........................................................................\
. 63
Remote Control - Vehicles Without: Passive Anti-Theft System
(PATS)............................................................60
Changing the Remote Control Battery........60
Integrated Keyhead Transmitter.................... 60
Locating Your Vehicle.......................................... 61
Programming a New Remote Control.........60
Switching the Panic Alarm On and Off........61
Remote Start
...................................................112
Removing a Headlamp.............................248
Repairing Minor Paint Damage..............265
Replacement Parts Recommendation........................................12
Collision Repairs.................................................... 12
Scheduled Maintenance and Mechanical Repairs.................................................................. 12
Warranty on Replacement Parts..................... 13
Replacing a Lost Key or Remote Control............................................................63
Reporting Safety Defects (Canada Only).............................................................206
Reporting Safety Defects (U.S. Only).............................................................206
Roadside Assistance
...................................194
Vehicles Sold in Canada: Getting Roadside
Assistance........................................................ 195
Vehicles Sold in Canada: Roadside Assistance Program Coverage.................195
Vehicles Sold in Canada: Using Roadside Assistance........................................................ 195
Vehicles Sold in the United States: Getting Roadside Assistance.................................... 194
Vehicles Sold in the United States: Using Roadside Assistance.................................... 194
Roadside Emergencies
...............................194
Running-In See: Breaking-In................................................... 191
Running Out of Fuel
....................................136
Adding Fuel From a Portable Fuel
Container........................................................... 137
Filling a Portable Fuel Container.................. 136
512
2018 Transit (TTH) Canada/United States of America, JK3J 19A321 AA enUSA, Edition date: 201705, Third-Printing- Index