Light control FORD TRANSIT CONNECT 2011 1.G User Guide
[x] Cancel search | Manufacturer: FORD, Model Year: 2011, Model line: TRANSIT CONNECT, Model: FORD TRANSIT CONNECT 2011 1.GPages: 295, PDF Size: 2.23 MB
Page 47 of 295
INTERIOR LAMPS
Dome lamp
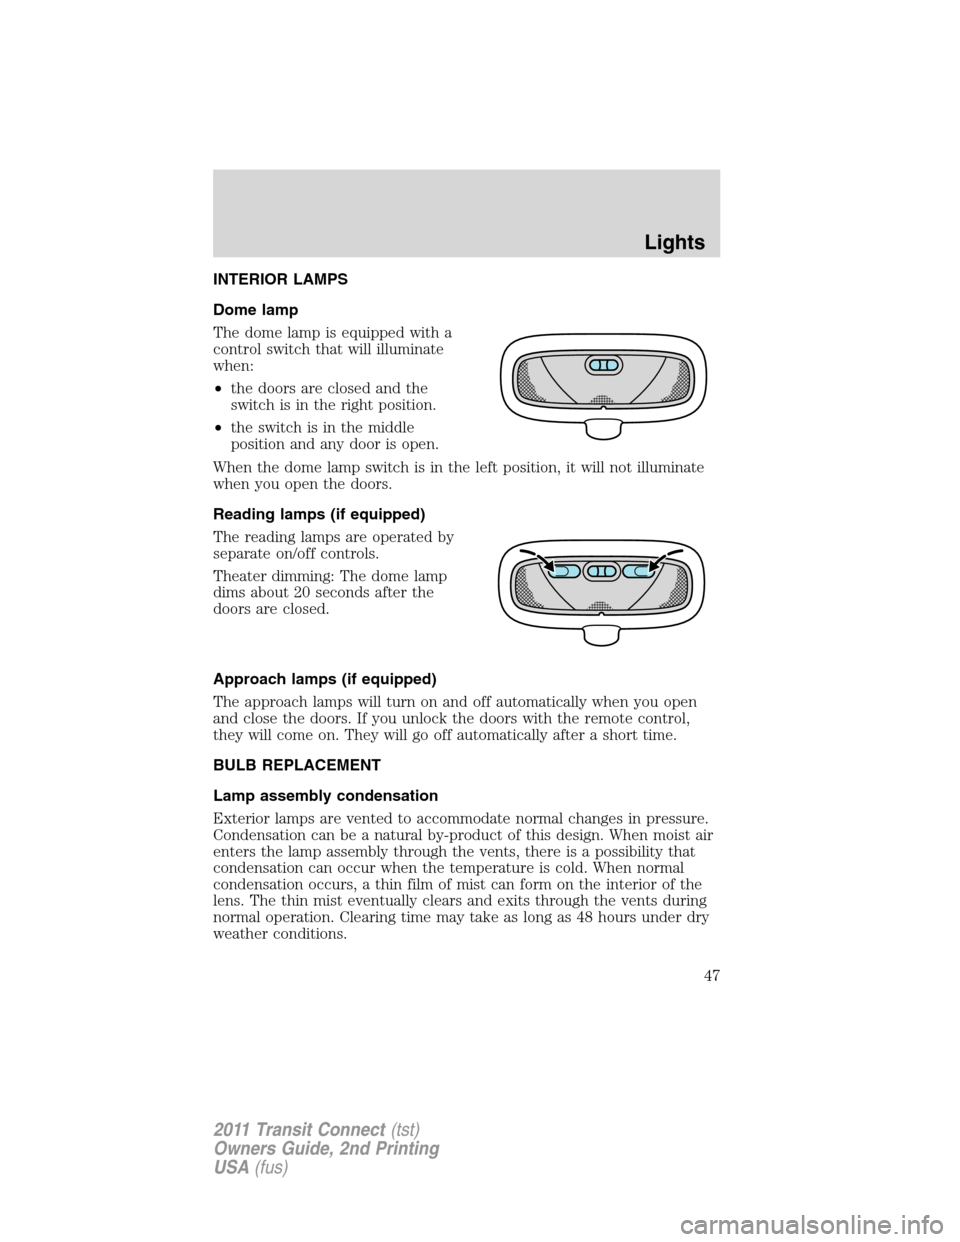
The dome lamp is equipped with a
control switch that will illuminate
when:
•the doors are closed and the
switch is in the right position.
•the switch is in the middle
position and any door is open.
When the dome lamp switch is in the left position, it will not illuminate
when you open the doors.
Reading lamps (if equipped)
The reading lamps are operated by
separate on/off controls.
Theater dimming: The dome lamp
dims about 20 seconds after the
doors are closed.
Approach lamps (if equipped)
The approach lamps will turn on and off automatically when you open
and close the doors. If you unlock the doors with the remote control,
they will come on. They will go off automatically after a short time.
BULB REPLACEMENT
Lamp assembly condensation
Exterior lamps are vented to accommodate normal changes in pressure.
Condensation can be a natural by-product of this design. When moist air
enters the lamp assembly through the vents, there is a possibility that
condensation can occur when the temperature is cold. When normal
condensation occurs, a thin film of mist can form on the interior of the
lens. The thin mist eventually clears and exits through the vents during
normal operation. Clearing time may take as long as 48 hours under dry
weather conditions.
Lights
47
2011 Transit Connect(tst)
Owners Guide, 2nd Printing
USA(fus)
Page 50 of 295
Replacing reading bulbs
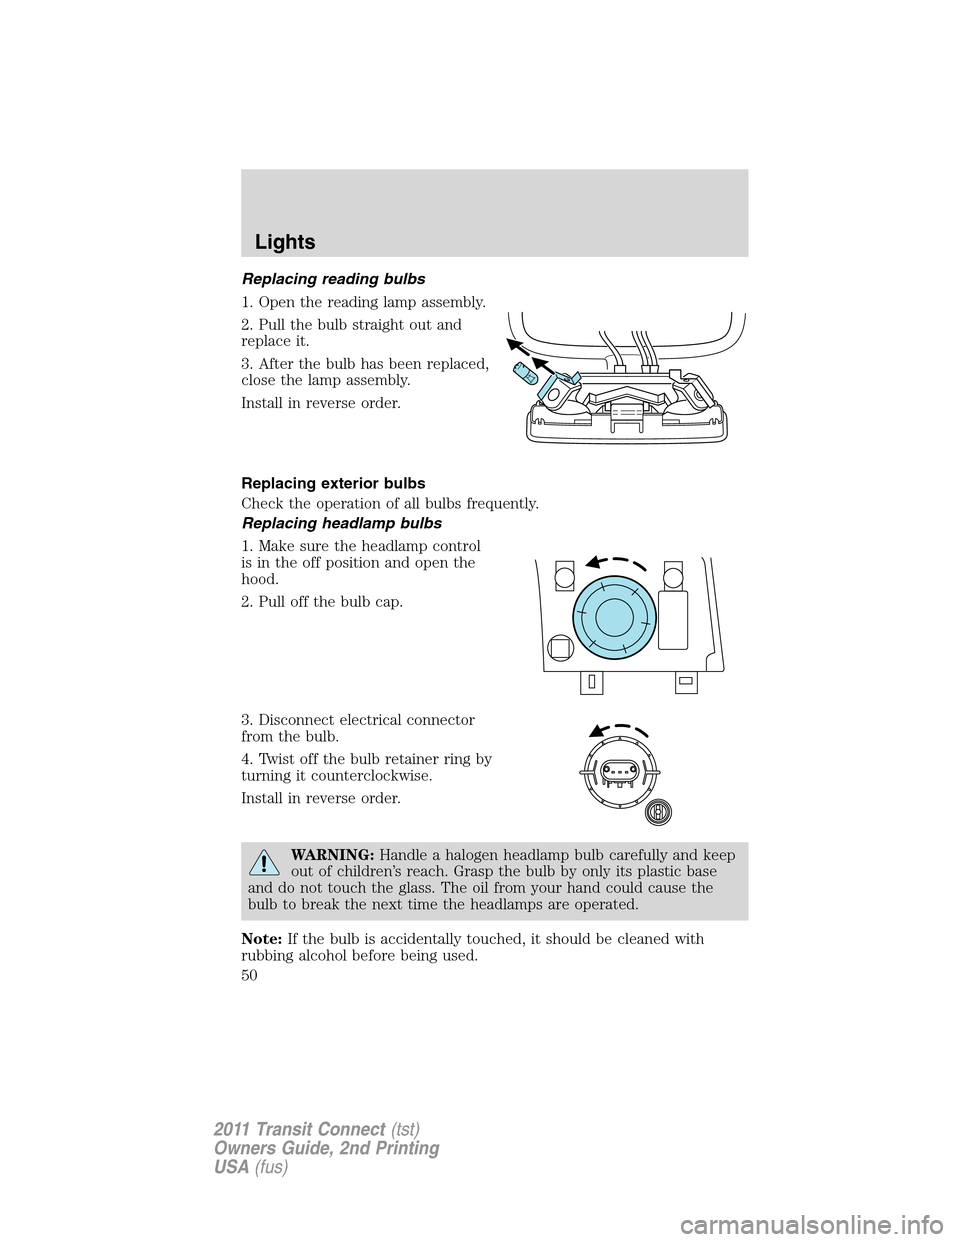
1. Open the reading lamp assembly.
2. Pull the bulb straight out and
replace it.
3. After the bulb has been replaced,
close the lamp assembly.
Install in reverse order.
Replacing exterior bulbs
Check the operation of all bulbs frequently.
Replacing headlamp bulbs
1. Make sure the headlamp control
is in the off position and open the
hood.
2. Pull off the bulb cap.
3. Disconnect electrical connector
from the bulb.
4. Twist off the bulb retainer ring by
turning it counterclockwise.
Install in reverse order.
WARNING:Handle a halogen headlamp bulb carefully and keep
out of children’s reach. Grasp the bulb by only its plastic base
and do not touch the glass. The oil from your hand could cause the
bulb to break the next time the headlamps are operated.
Note:If the bulb is accidentally touched, it should be cleaned with
rubbing alcohol before being used.
Lights
50
2011 Transit Connect(tst)
Owners Guide, 2nd Printing
USA(fus)
Page 51 of 295
Replacing front parking lamp bulbs
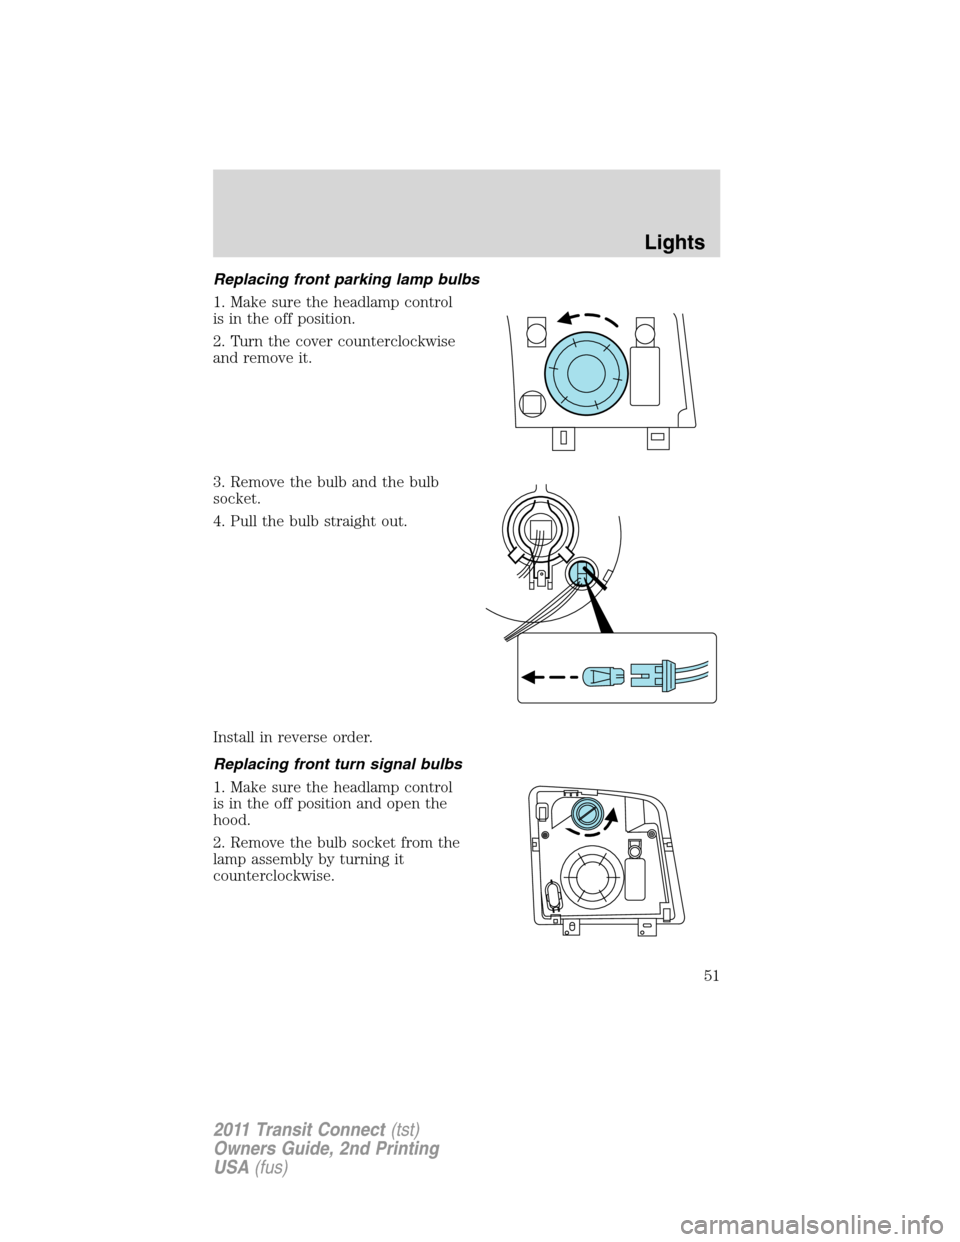
1. Make sure the headlamp control
is in the off position.
2. Turn the cover counterclockwise
and remove it.
3. Remove the bulb and the bulb
socket.
4. Pull the bulb straight out.
Install in reverse order.
Replacing front turn signal bulbs
1. Make sure the headlamp control
is in the off position and open the
hood.
2. Remove the bulb socket from the
lamp assembly by turning it
counterclockwise.
Lights
51
2011 Transit Connect(tst)
Owners Guide, 2nd Printing
USA(fus)
Page 52 of 295
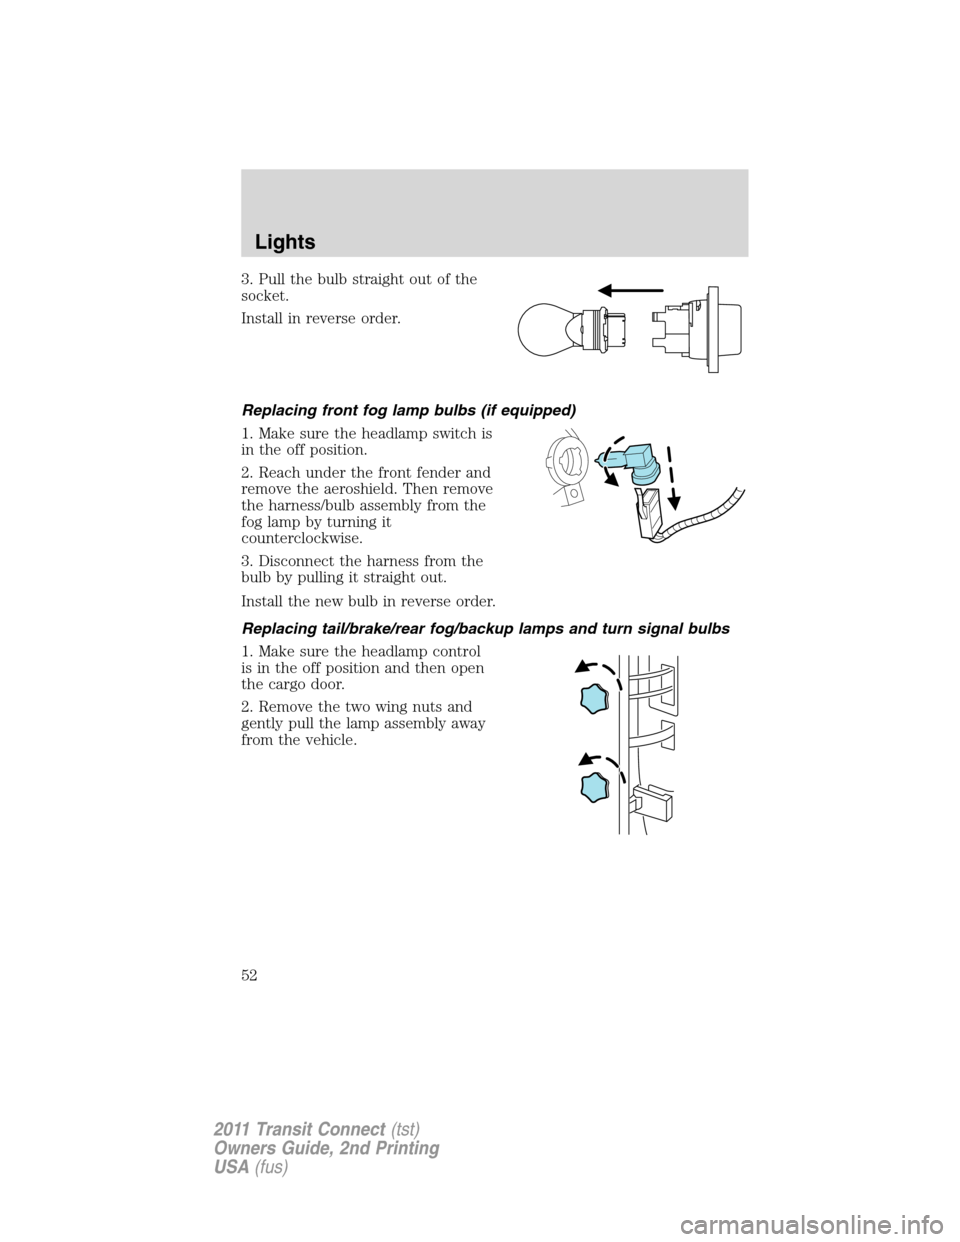
3. Pull the bulb straight out of the
socket.
Install in reverse order.
Replacing front fog lamp bulbs (if equipped)
1. Make sure the headlamp switch is
in the off position.
2. Reach under the front fender and
remove the aeroshield. Then remove
the harness/bulb assembly from the
fog lamp by turning it
counterclockwise.
3. Disconnect the harness from the
bulb by pulling it straight out.
Install the new bulb in reverse order.
Replacing tail/brake/rear fog/backup lamps and turn signal bulbs
1. Make sure the headlamp control
is in the off position and then open
the cargo door.
2. Remove the two wing nuts and
gently pull the lamp assembly away
from the vehicle.
Lights
52
2011 Transit Connect(tst)
Owners Guide, 2nd Printing
USA(fus)
Page 54 of 295
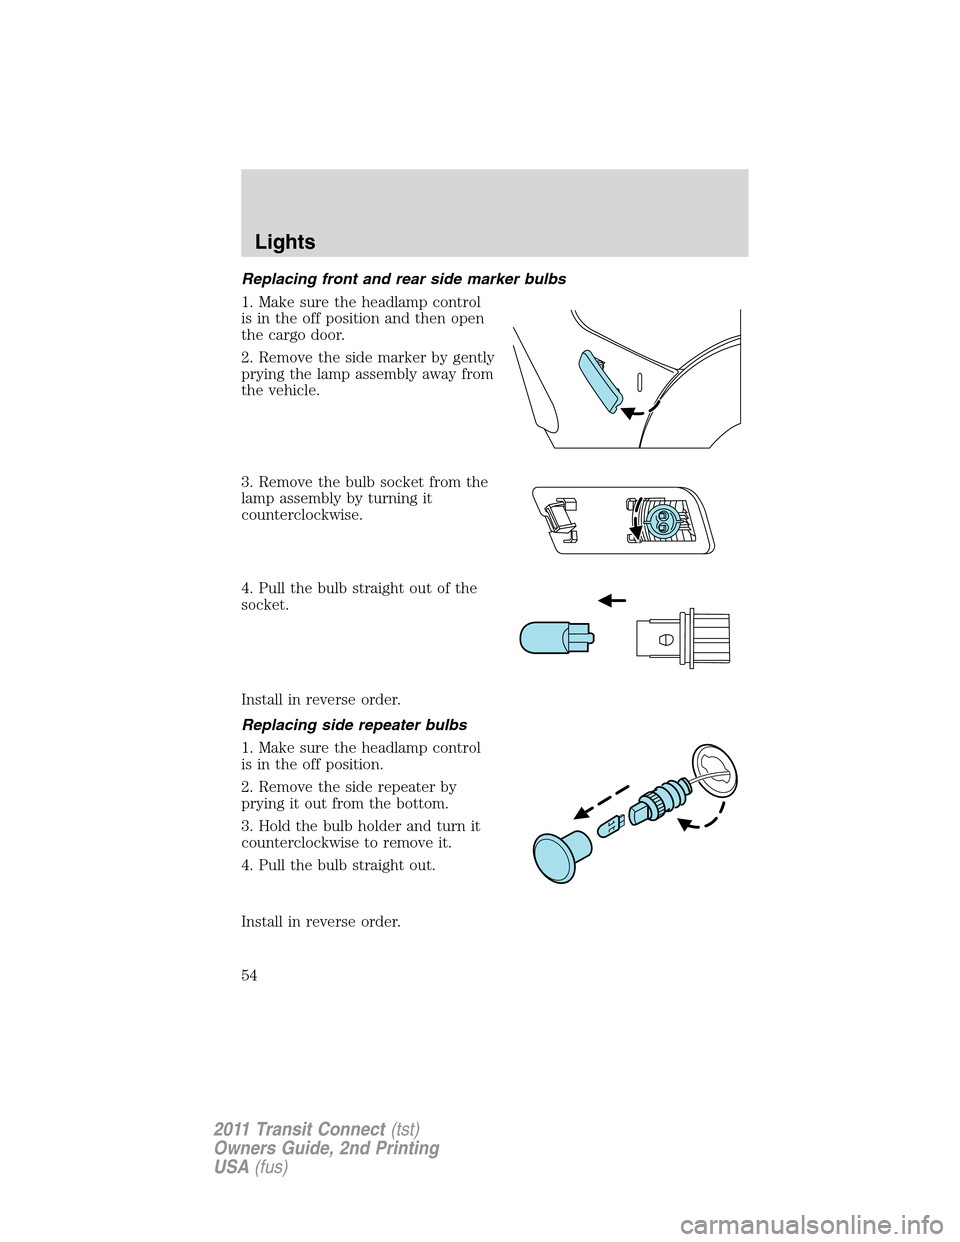
Replacing front and rear side marker bulbs
1. Make sure the headlamp control
is in the off position and then open
the cargo door.
2. Remove the side marker by gently
prying the lamp assembly away from
the vehicle.
3. Remove the bulb socket from the
lamp assembly by turning it
counterclockwise.
4. Pull the bulb straight out of the
socket.
Install in reverse order.
Replacing side repeater bulbs
1. Make sure the headlamp control
is in the off position.
2. Remove the side repeater by
prying it out from the bottom.
3. Hold the bulb holder and turn it
counterclockwise to remove it.
4. Pull the bulb straight out.
Install in reverse order.
Lights
54
2011 Transit Connect(tst)
Owners Guide, 2nd Printing
USA(fus)
Page 55 of 295
Replacing high-mount brake lamp bulbs
See your authorized dealer for replacement.
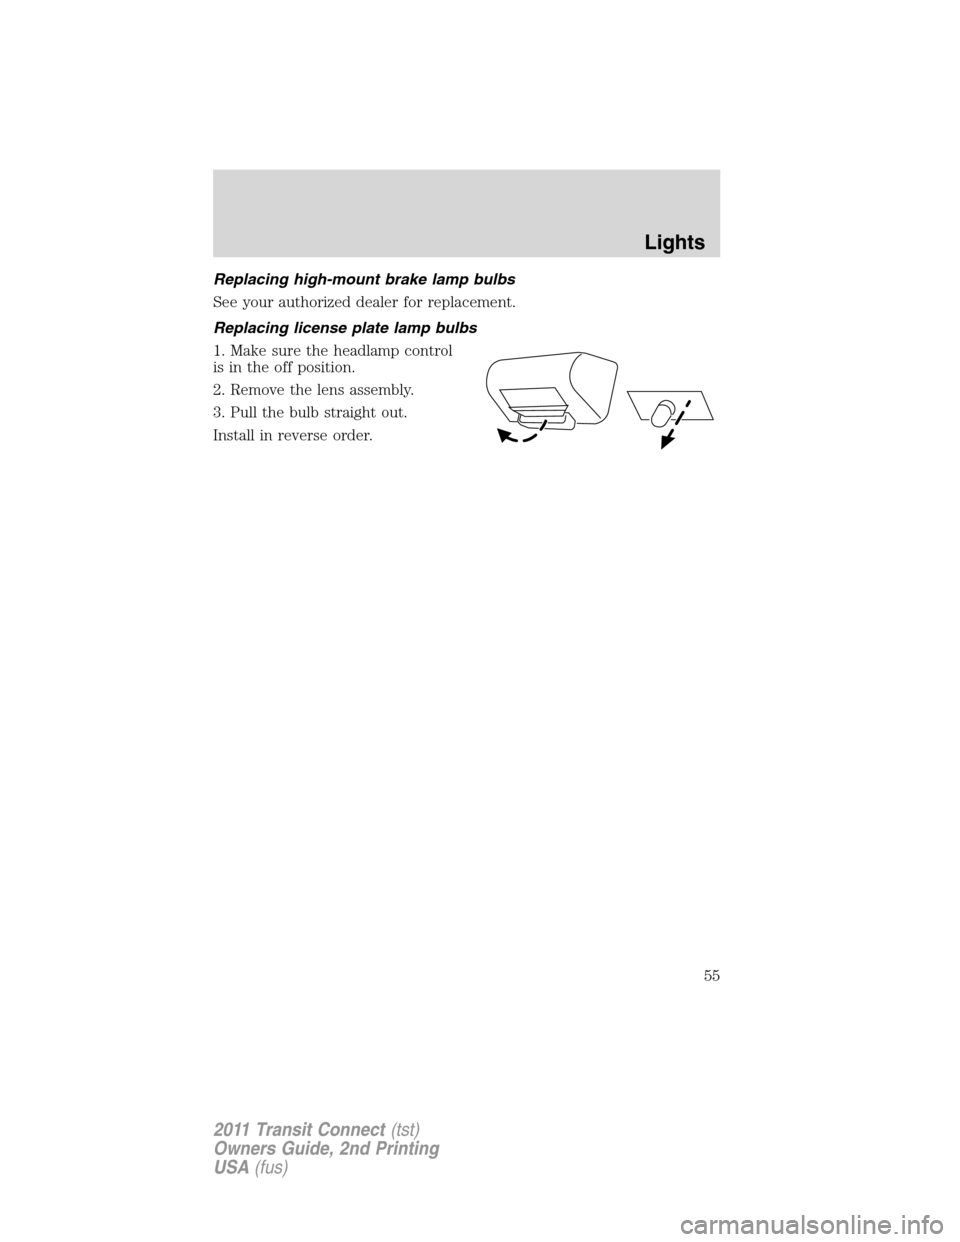
Replacing license plate lamp bulbs
1. Make sure the headlamp control
is in the off position.
2. Remove the lens assembly.
3. Pull the bulb straight out.
Install in reverse order.
Lights
55
2011 Transit Connect(tst)
Owners Guide, 2nd Printing
USA(fus)
Page 58 of 295
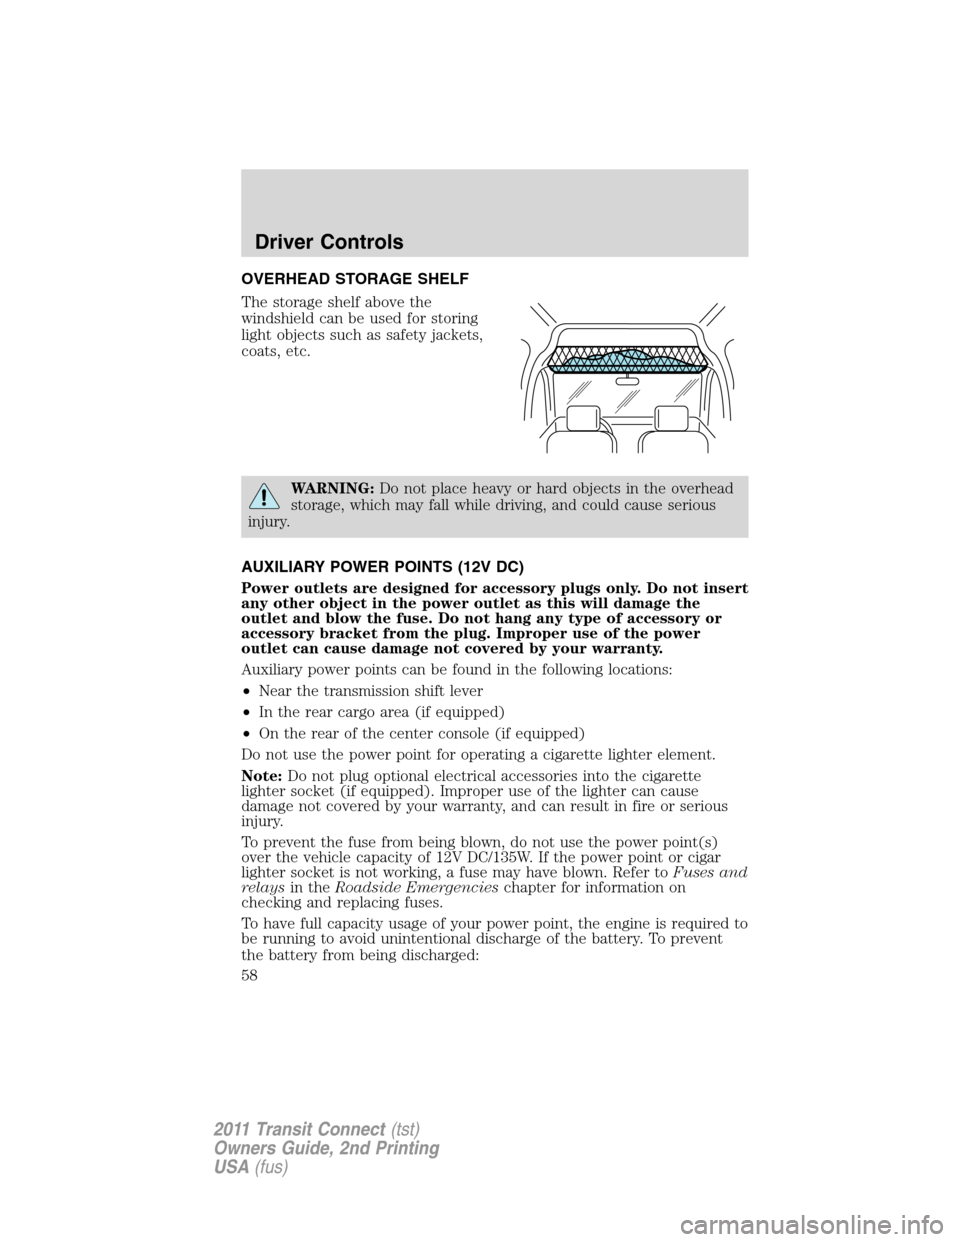
OVERHEAD STORAGE SHELF
The storage shelf above the
windshield can be used for storing
light objects such as safety jackets,
coats, etc.
WARNING:Do not place heavy or hard objects in the overhead
storage, which may fall while driving, and could cause serious
injury.
AUXILIARY POWER POINTS (12V DC)
Power outlets are designed for accessory plugs only. Do not insert
any other object in the power outlet as this will damage the
outlet and blow the fuse. Do not hang any type of accessory or
accessory bracket from the plug. Improper use of the power
outlet can cause damage not covered by your warranty.
Auxiliary power points can be found in the following locations:
•Near the transmission shift lever
•In the rear cargo area (if equipped)
•On the rear of the center console (if equipped)
Do not use the power point for operating a cigarette lighter element.
Note:Do not plug optional electrical accessories into the cigarette
lighter socket (if equipped). Improper use of the lighter can cause
damage not covered by your warranty, and can result in fire or serious
injury.
To prevent the fuse from being blown, do not use the power point(s)
over the vehicle capacity of 12V DC/135W. If the power point or cigar
lighter socket is not working, a fuse may have blown. Refer toFuses and
relaysin theRoadside Emergencieschapter for information on
checking and replacing fuses.
To have full capacity usage of your power point, the engine is required to
be running to avoid unintentional discharge of the battery. To prevent
the battery from being discharged:
Driver Controls
58
2011 Transit Connect(tst)
Owners Guide, 2nd Printing
USA(fus)
Page 60 of 295
Automatic dimming interior rear view mirror (if equipped)
The interior rear view mirror has an auto-dimming function. The
electronic day/night mirror will change from the normal (high reflective)
state to the non-glare (darkened) state when bright lights (glare) reach
the mirror. When the mirror detects bright light from behind the vehicle,
it will automatically adjust (darken) to minimize glare.
The mirror will automatically return to the normal state whenever the
vehicle is placed in R (Reverse) to ensure a bright clear view when
backing up.
Do not block the sensors on the front and back of the interior
rear view mirror since this may impair proper mirror
performance.
Note:A rear center passenger and/or raised rear center headrest (if
equipped) may also block the light from reaching the sensor.
Do not clean the housing or glass of any mirror with harsh
abrasives, fuel or other petroleum-based cleaning products.
Note:If equipped with a rearview camera system, a video image will
display in the mirror when the vehicle is put in R (Reverse). As you shift
into any other gear from R (Reverse), the image will remain for a few
seconds and then turn off. Refer toRearview camera systemin the
Drivingchapter.
EXTERIOR MIRRORS
Power side view mirrors (if equipped)
WARNING:Do not adjust the mirror while the vehicle is in
motion.
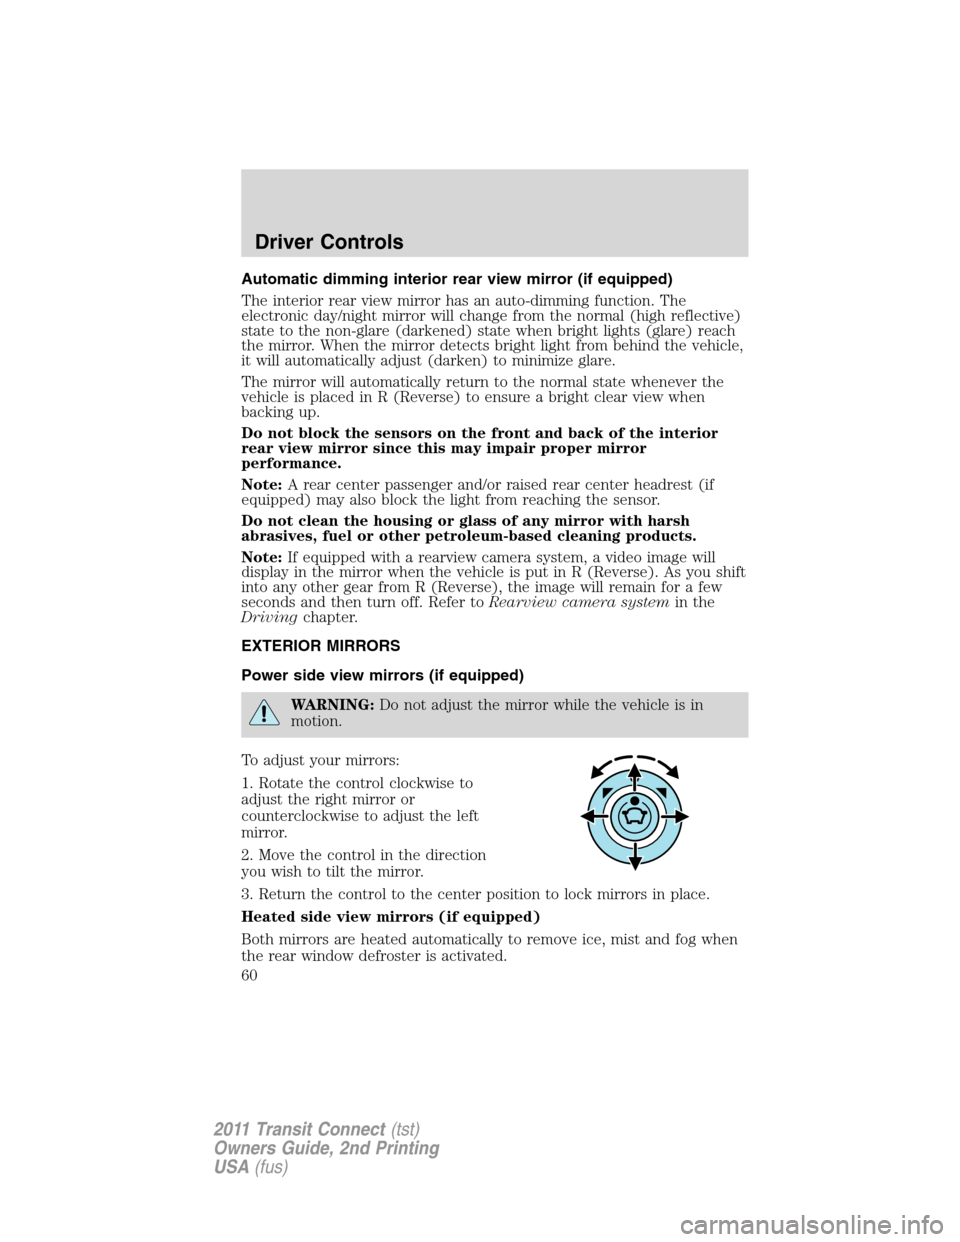
To adjust your mirrors:
1. Rotate the control clockwise to
adjust the right mirror or
counterclockwise to adjust the left
mirror.
2. Move the control in the direction
you wish to tilt the mirror.
3. Return the control to the center position to lock mirrors in place.
Heated side view mirrors (if equipped)
Both mirrors are heated automatically to remove ice, mist and fog when
the rear window defroster is activated.
Driver Controls
60
2011 Transit Connect(tst)
Owners Guide, 2nd Printing
USA(fus)
Page 61 of 295
Do not remove ice from the mirrors with a scraper or attempt to
readjust the mirror glass if it is frozen in place. These actions
could cause damage to the glass and mirrors.
Fold-away mirrors
Pull/push the mirrors in to fold/unfold them.
Blind spot mirrors
Your vehicle is equipped with blind spot mirrors. Refer toBlind spot
mirrorsin theDrivingchapter.
SPEED CONTROL (IF EQUIPPED)
With speed control set, you can maintain a set speed without keeping
your foot on the accelerator pedal.
WARNING:Do not use the speed control in heavy traffic or on
roads that are winding, slippery or unpaved.
Using speed control
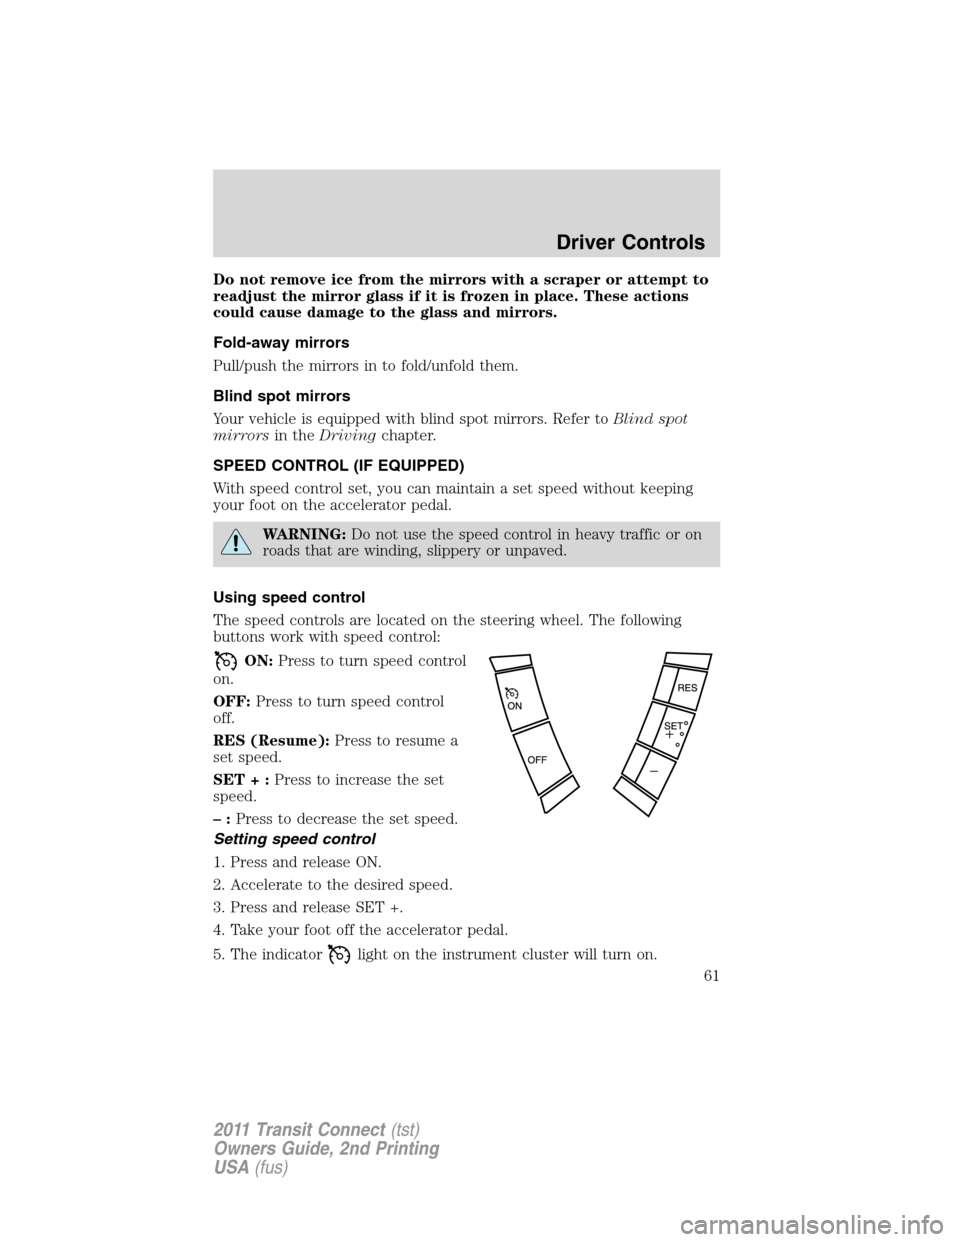
The speed controls are located on the steering wheel. The following
buttons work with speed control:
ON:Press to turn speed control
on.
OFF:Press to turn speed control
off.
RES (Resume):Press to resume a
set speed.
SET+:Press to increase the set
speed.
–:Press to decrease the set speed.
Setting speed control
1. Press and release ON.
2. Accelerate to the desired speed.
3. Press and release SET +.
4. Take your foot off the accelerator pedal.
5. The indicator
light on the instrument cluster will turn on.
Driver Controls
61
2011 Transit Connect(tst)
Owners Guide, 2nd Printing
USA(fus)
Page 73 of 295
are not present during the programming procedure, the transmitters that
are not present during programming will no longer operate the vehicle.
Note:Ensure the brake pedal is not depressed during this sequence.
To reprogram the remote entry transmitters:
1. Ensure the vehicle is unlocked.
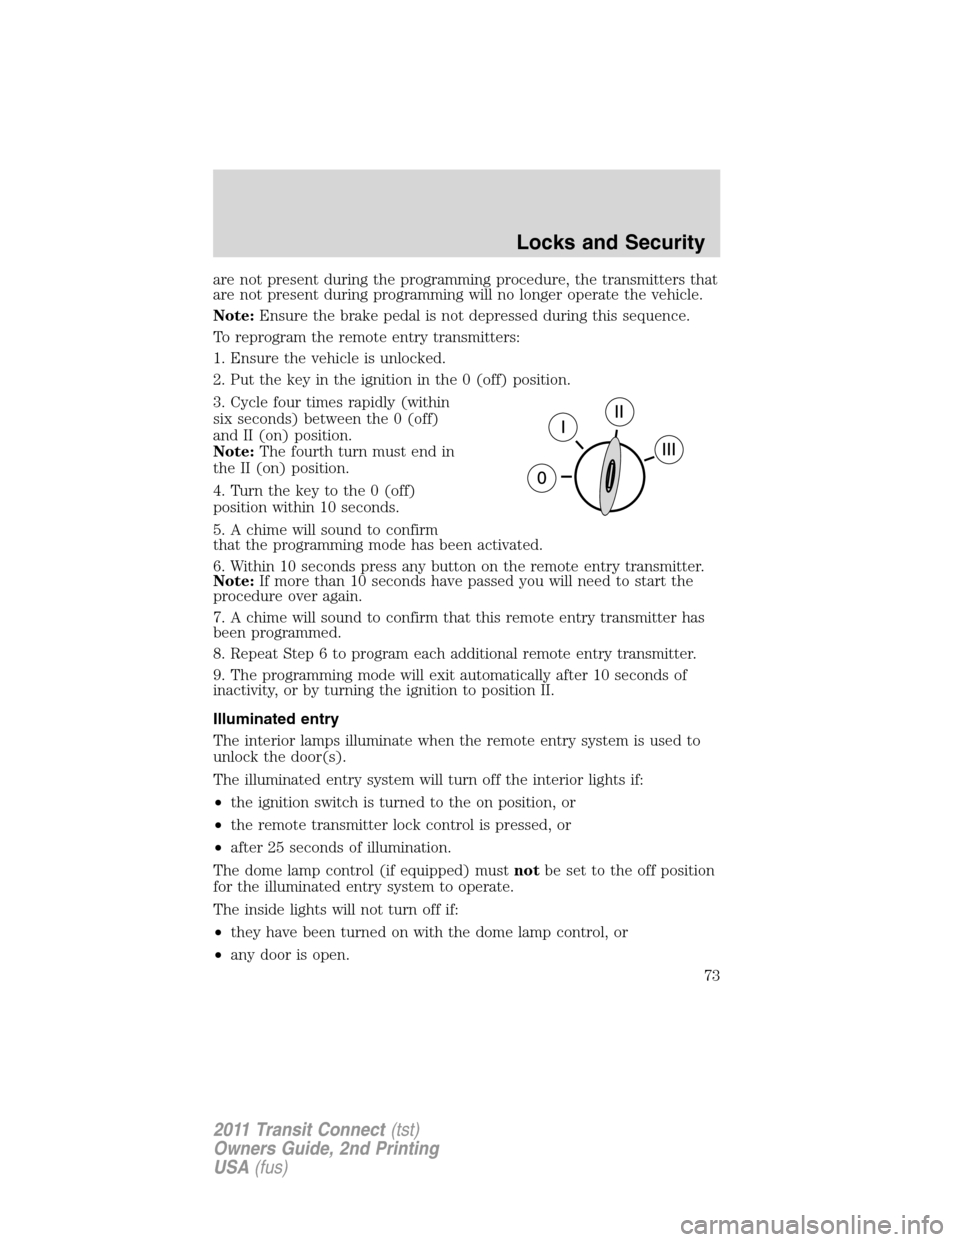
2. Put the key in the ignition in the 0 (off) position.
3. Cycle four times rapidly (within
six seconds) between the 0 (off)
and II (on) position.
Note:The fourth turn must end in
the II (on) position.
4. Turn the key to the 0 (off)
position within 10 seconds.
5. A chime will sound to confirm
that the programming mode has been activated.
6. Within 10 seconds press any button on the remote entry transmitter.
Note:If more than 10 seconds have passed you will need to start the
procedure over again.
7. A chime will sound to confirm that this remote entry transmitter has
been programmed.
8. Repeat Step 6 to program each additional remote entry transmitter.
9. The programming mode will exit automatically after 10 seconds of
inactivity, or by turning the ignition to position II.
Illuminated entry
The interior lamps illuminate when the remote entry system is used to
unlock the door(s).
The illuminated entry system will turn off the interior lights if:
•the ignition switch is turned to the on position, or
•the remote transmitter lock control is pressed, or
•after 25 seconds of illumination.
The dome lamp control (if equipped) mustnotbe set to the off position
for the illuminated entry system to operate.
The inside lights will not turn off if:
•they have been turned on with the dome lamp control, or
•any door is open.
Locks and Security
73
2011 Transit Connect(tst)
Owners Guide, 2nd Printing
USA(fus)