warning light FORD TRANSIT CONNECT 2014 2.G Owner's Guide
[x] Cancel search | Manufacturer: FORD, Model Year: 2014, Model line: TRANSIT CONNECT, Model: FORD TRANSIT CONNECT 2014 2.GPages: 411, PDF Size: 6.62 MB
Page 148 of 411
Trailer Lighting
The electrical system on your
vehicle is not suitable for towing
trailers with LED lamps.
TRAILER SWAY CONTROL
If the trailer begins to sway, the stability
control warning lamp flashes and a
message appears in the information
display. The system applies the brakes to
the individual wheels and reduces engine
torque to aid vehicle stability.
Stop your vehicle as soon as it is safe to
do so. Check the vertical weight on the tow
ball and trailer load distribution. See
Capacities and Specifications (page
237). See Load Carrying (page 134).
Note: This feature does not prevent trailer
sway, but reduces it once it begins.
Note: This feature cannot stop all trailers
from swaying.
Note: In some cases, if your vehicle speed
is too high, the system may turn on multiple
times, gradually reducing your vehicle speed.
RECOMMENDED TOWING
WEIGHTS
Your vehicle may tow a trailer. The
maximum loaded trailer weight
must be less than or equal to the
maximum loaded trailer weight
listed for your vehicle
configuration on the following
chart.
Note: Do not exceed the maximum
loaded trailer weight for your
vehicle configuration listed in the
chart below. Note:
Make sure you take the
trailer frontal area into
consideration, do not exceed 20
feet (1.86 meters). Towing a trailer
that exceeds this frontal area will
reduce the performance and fuel
economy of your vehicle when
towing. Select a trailer that has a
rounded front and an aerodynamic
design.
Note: For high altitude operation,
reduce the gross combined weight
by 2% per 1000 feet (300 meters)
starting at the 1000 foot (300
meter) elevation point.
Note: Certain states require
electric trailer brakes for trailers
over a specified weight. Be sure to
check state regulations for this
specified weight. The maximum
loaded trailer weights listed may
be limited to this specified weight,
as the vehicle ’s electrical system
may not include the wiring
connector needed to activate
electric trailer brakes.
145
Tourneo Connect/Transit Connect (CHC) Canada/United States of America, enUSA, Edition date: 07/2013 Towing
Page 150 of 411
ESSENTIAL TOWING CHECKS
Follow these guidelines for safe towing:
•
Do not tow a trailer until you drive your
vehicle at least 1000 miles (1600
kilometers).
• Consult your local motor vehicle laws
for towing a trailer.
• See the instructions included with
towing accessories for the correct
installation and adjustment
specifications.
• Service your vehicle more frequently if
you tow a trailer. See Scheduled
Maintenance (page 384).
• If you use a rental trailer, follow the
rental agency's instructions.
Another chapter of this manual contains
load specification terms found on the tire
label and Safety Compliance label and
instructions on calculating your vehicle's
load. See
Load Limit (page 136).
Remember to account for the trailer
tongue weight as part of your vehicle load
when calculating the total vehicle weight.
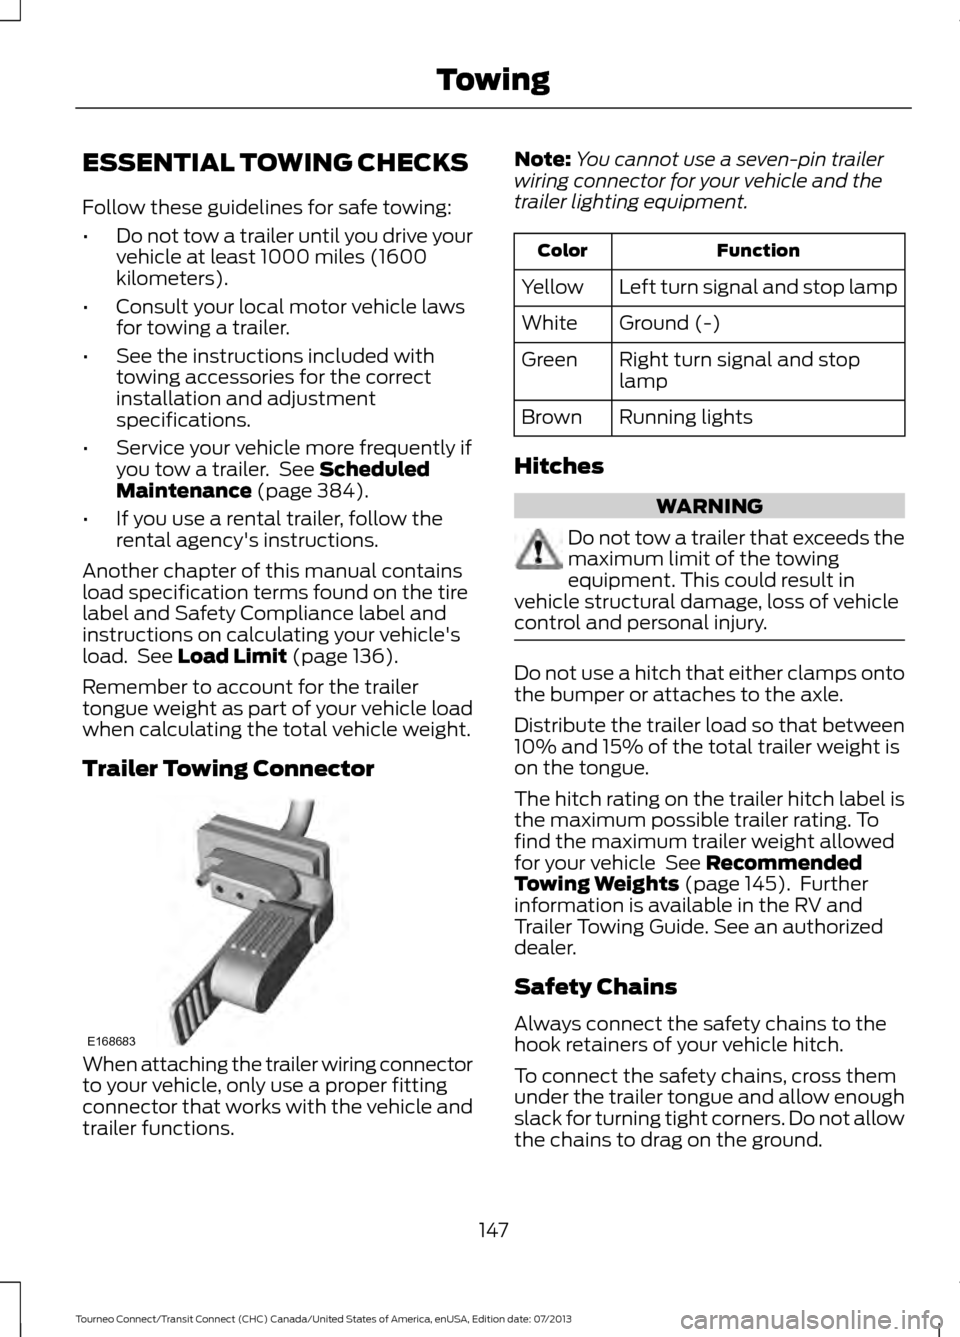
Trailer Towing Connector When attaching the trailer wiring connector
to your vehicle, only use a proper fitting
connector that works with the vehicle and
trailer functions. Note:
You cannot use a seven-pin trailer
wiring connector for your vehicle and the
trailer lighting equipment. Function
Color
Left turn signal and stop lamp
Yellow
Ground (-)
White
Right turn signal and stop
lamp
Green
Running lights
Brown
Hitches WARNING
Do not tow a trailer that exceeds the
maximum limit of the towing
equipment. This could result in
vehicle structural damage, loss of vehicle
control and personal injury. Do not use a hitch that either clamps onto
the bumper or attaches to the axle.
Distribute the trailer load so that between
10% and 15% of the total trailer weight is
on the tongue.
The hitch rating on the trailer hitch label is
the maximum possible trailer rating. To
find the maximum trailer weight allowed
for your vehicle
See Recommended
Towing Weights (page 145). Further
information is available in the RV and
Trailer Towing Guide. See an authorized
dealer.
Safety Chains
Always connect the safety chains to the
hook retainers of your vehicle hitch.
To connect the safety chains, cross them
under the trailer tongue and allow enough
slack for turning tight corners. Do not allow
the chains to drag on the ground.
147
Tourneo Connect/Transit Connect (CHC) Canada/United States of America, enUSA, Edition date: 07/2013 TowingE168683
Page 151 of 411
Note:
Never attach safety chains to the
bumper.
Trailer Brakes WARNING
Do not connect a trailer's hydraulic
brake system directly to your
vehicle's brake system. Your vehicle
may not have enough braking power and
your chances of having a crash greatly
increase. Electric brakes and manual, automatic or
surge-type trailer brakes are safe if you
install them correctly and adjust them to
the manufacturer's specifications. The
trailer brakes must meet local and federal
regulations.
The rating for the tow vehicle's braking
system operation is at the gross vehicle
weight rating, not the gross combined
weight rating.
Separate functioning brake systems are
required for safe control of towed vehicles
and trailers weighing more than 1500
pounds (680 kilograms) when loaded.
Trailer Lamps
WARNING
Never connect any trailer lamp wiring
to the vehicle's tail lamp wiring; this
may damage the electrical system
resulting in fire. Contact an authorized
dealer as soon as possible for assistance
in correct trailer tow wiring installation.
Additional electrical equipment may be
required. Trailer lamps are required on most towed
vehicles. Make sure all running lights, brake
lights, turn signals and hazard warning
flashers are working. Before Towing a Trailer
Practice turning, stopping and backing up
to get the feel of your vehicle-trailer
combination before starting on a trip.
When turning, make wider turns so the
trailer wheels clear curbs and other
obstacles.
When Towing a Trailer
•
Do not drive faster than 70 mph (113
km/h) during the first 500 miles (800
kilometers).
• Do not make full-throttle starts.
• Check the trailer hitch, electrical
connections and trailer wheel lug nuts
thoroughly after you have traveled 50
miles (80 kilometers).
• When stopped in congested or heavy
traffic during hot weather, place the
transmission selector lever in position
P to aid engine and transmission
cooling and to help A/C performance.
• Turn off the speed control with heavy
loads or in hilly terrain. The speed
control may turn off automatically
when you are towing on long, steep
grades.
• When driving down a long or steep hill,
if your vehicle is fitted with a
SelectShift Automatic® Transmission,
use a low gear, See
Automatic
Transmission (page 119). Do not
apply the brakes continuously, as they
may overheat and become less
effective.
• If the transmission is fitted with Grade
Assist or a Towing feature, use this
feature when towing. This provides
engine braking and helps eliminate
excessive transmission shifting for
optimum fuel economy and
transmission cooling.
148
Tourneo Connect/Transit Connect (CHC) Canada/United States of America, enUSA, Edition date: 07/2013 Towing
Page 156 of 411
•
Do not warm up your vehicle on cold
mornings.
• Reduce the use of air conditioning and
heat.
• Avoid using speed control in hilly
terrain.
• Do not rest your foot on the brake
pedal while driving.
• Avoid carrying unnecessary weight
(approximately 1 mpg [0.4
kilometers/liter] is lost for every 400
lbs [180 kilograms] of weight carried).
• Avoid adding particular accessories to
your vehicle (e.g. bug deflectors,
rollbars/light bars, running boards, ski
racks).
• Avoid driving with the wheels out of
alignment.
COLD WEATHER
PRECAUTIONS
The functional operation of some
components and systems can be affected
at temperatures below -13°F (-25°C).
DRIVING THROUGH WATER WARNINGS
Drive through water in an emergency
only and not as part of normal
driving.
Engine damage can occur if water
enters the air filter.
In an emergency, you can drive your vehicle
through water to a maximum depth of 8
inches (200 millimeters) and at a
maximum speed of 6 mph (10 km/h). You
must take extra care when driving through
flowing water. When driving in water, maintain a low
speed and do not stop your vehicle. After
driving through water and as soon as it is
safe to do so:
•
Depress the brake pedal lightly to
check that the brakes are functioning
correctly.
• Check that the horn works.
• Check that your vehicle's lamps are
fully operational.
• Check the power assistance
of the steering system.
FLOOR MATS
(If Equipped) WARNINGS
Always use floor mats that are
designed to fit the foot well of your
vehicle. Only use floor mats that
leave the pedal area unobstructed. Only
use floor mats that are firmly secured to
retention posts so that they cannot slip out
of position and interfere with the pedals
or impair safe operation of your vehicle in
other ways. Pedals that cannot move freely can
cause loss of vehicle control and
increase the risk of serious personal
injury. Always make sure that the floor
mats are properly attached to the
retention posts in the carpet that are
supplied with your vehicle. Floor mats must
be properly secured to both retention posts
to make sure mats do not shift out of
position. Never place floor mats or any other
covering in the vehicle foot well that
cannot be properly secured to
prevent them from moving and interfering
with the pedals or the ability to control the
vehicle.
153
Tourneo Connect/Transit Connect (CHC) Canada/United States of America, enUSA, Edition date: 07/2013 Driving Hints
Page 179 of 411
CHANGING A FUSE
Fuses
WARNING
Always replace a fuse with one that
has the specified amperage rating.
Using a fuse with a higher amperage
rating can cause severe wire damage and
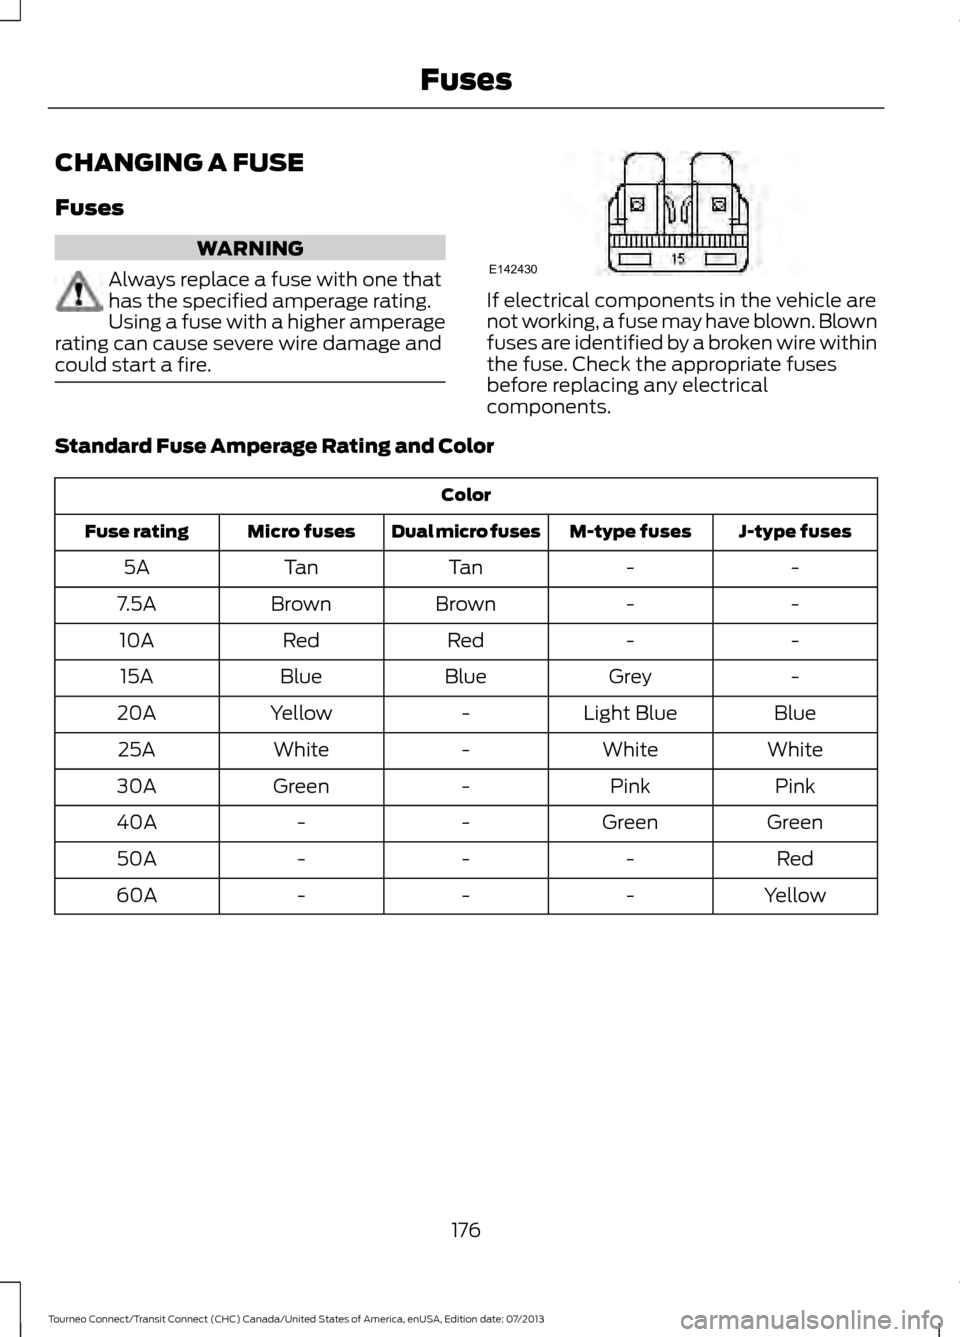
could start a fire. If electrical components in the vehicle are
not working, a fuse may have blown. Blown
fuses are identified by a broken wire within
the fuse. Check the appropriate fuses
before replacing any electrical
components.
Standard Fuse Amperage Rating and Color Color
J-type fuses
M-type fuses
Dual micro fuses
Micro fuses
Fuse rating
-
-
Tan
Tan
5A
-
-
Brown
Brown
7.5A
-
-
Red
Red
10A
-
Grey
Blue
Blue
15A
Blue
Light Blue
-
Yellow
20A
White
White
-
White
25A
Pink
Pink
-
Green
30A
Green
Green
-
-
40A
Red
-
-
-
50A
Yellow
-
-
-
60A
176
Tourneo Connect/Transit Connect (CHC) Canada/United States of America, enUSA, Edition date: 07/2013 FusesE142430
Page 186 of 411
Adding Engine Coolant
WARNINGS
Do not add engine coolant when the
engine is hot. Steam and scalding
liquids released from a hot cooling
system can burn you badly. Also, spilling
coolant on hot engine parts can burn you. Do not put engine coolant in the
windshield washer fluid reservoir. If
sprayed on the windshield, engine
coolant could make it difficult to see
through the windshield. Do not add coolant further than the
MAX mark.
To reduce the risk of personal injury,
make sure the engine is cool before
unscrewing the coolant pressure
relief cap. The cooling system is under
pressure; steam and hot liquid can come
out forcefully when the cap is loosened
slightly. Note:
Do not use stop leak pellets, cooling
system sealants or additives as they can
cause damage to the engine cooling or
heating systems. The vehicle warranty does
not cover this damage.
Note: During normal vehicle operation, the
engine coolant may change color from
orange to pink or light red. As long as the
engine coolant is clear and uncontaminated,
this color change does not indicate that the
engine coolant has degraded or that you
drain the engine coolant, flush the system
or replace the engine coolant. •
Do not mix different colors or types of
coolant in your vehicle. Make sure the
correct coolant is used. Mixing of
engine coolants may harm the engine ’s
cooling system. The use of incorrect
coolant may harm engine and cooling
system components and may void the
warranty. Use prediluted engine
coolant meeting the Ford specification.
See Capacities and Specifications
(page 237).
• In case of emergency, you can add a
large amount of water without engine
coolant in order to reach a vehicle
service location. In this instance, you
must have the cooling system drained,
chemically cleaned with Motorcraft
Premium Cooling System Flush, and
refilled with engine coolant as soon as
possible. Water alone (without engine
coolant) can cause engine damage, for
example corrosion, overheating or
freezing.
• Do not use alcohol, methanol, brine or
any engine coolants mixed with alcohol
or methanol antifreeze. Alcohol and
other liquids can cause engine damage,
for example overheating or freezing.
• Do not add extra inhibitors or additives
to the coolant. These can be harmful
and compromise the corrosion
protection of the engine coolant.
Unscrew the cap slowly. Any pressure will
escape as you unscrew the cap.
Whenever you add coolant, check the
coolant level in the coolant reservoir the
next few times you drive the vehicle. If
necessary, add enough prediluted engine
coolant to bring the coolant level to the
correct level.
Recycled Engine Coolant
We do not recommend the use of recycled
engine coolant since a Ford-approved
recycling process is not yet available.
183
Tourneo Connect/Transit Connect (CHC) Canada/United States of America, enUSA, Edition date: 07/2013 Maintenance
Page 188 of 411
CHANGING THE 12V BATTERY
WARNINGS
Batteries normally produce explosive
gases which can cause personal
injury. Therefore, do not allow
flames, sparks or lighted substances to
come near the battery. When working near
the battery, always shield your face and
protect your eyes. Always provide proper
ventilation. When lifting a plastic-cased battery,
excessive pressure on the end walls
could cause acid to flow through the
vent caps, resulting in personal injury and
damage to the vehicle or battery. Lift the
battery with a battery carrier or with your
hands on opposite corners. Keep batteries out of reach of
children. Batteries contain sulfuric
acid. Avoid contact with skin, eyes or
clothing. Shield your eyes when working
near the battery to protect against possible
splashing of acid solution. In case of acid
contact with skin or eyes, flush
immediately with water for a minimum of
15 minutes and get prompt medical
attention. If acid is swallowed, call a
physician immediately. Your vehicle is equipped with a
Motorcraft® maintenance-free battery
which normally does not require additional
water during its life of service.
Note:
If your battery has a cover/shield,
make sure it is reinstalled after the battery
has been cleaned or replaced.
Note: See an authorized dealer for low
voltage battery access, testing, or
replacement. When a low voltage battery replacement
is necessary, see an authorized dealer to
replace the low voltage battery with a Ford
recommended replacement low voltage
battery that matches the electrical
requirements of the vehicle
To ensure proper operation of the battery
management system (BMS), do not allow
a technician to connect any electrical
device ground connection directly to the
low voltage battery negative post. A
connection at the low voltage battery
negative post can cause inaccurate
measurements of the battery condition
and potential incorrect system operation.
Note:
If a person adds electrical or
electronic accessories or components to the
vehicle, the accessories or components may
adversely affect the low voltage battery
performance and durability and may also
affect the performance of other electrical
systems in the vehicle.
For longer, trouble-free operation, keep the
top of the battery clean and dry. Also,
make certain the battery cables are always
tightly fastened to the battery terminals.
If you see any corrosion on the battery or
terminals, remove the cables from the
terminals and clean with a wire brush. You
can neutralize the acid with a solution of
baking soda and water.
When a battery replacement is required,
the battery should only be replaced with
a Ford recommended replacement battery
that matches the electrical requirements
of the vehicle.
Because your vehicle ’s engine is
electronically-controlled by a computer,
some engine control settings are
maintained by power from the low voltage
battery. Some engine computer settings,
like the idle trim and fuel trim strategy,
optimize the driveability and performance
of the engine. Some other computer
settings, like the clock and radio station
185
Tourneo Connect/Transit Connect (CHC) Canada/United States of America, enUSA, Edition date: 07/2013 Maintenance
Page 192 of 411
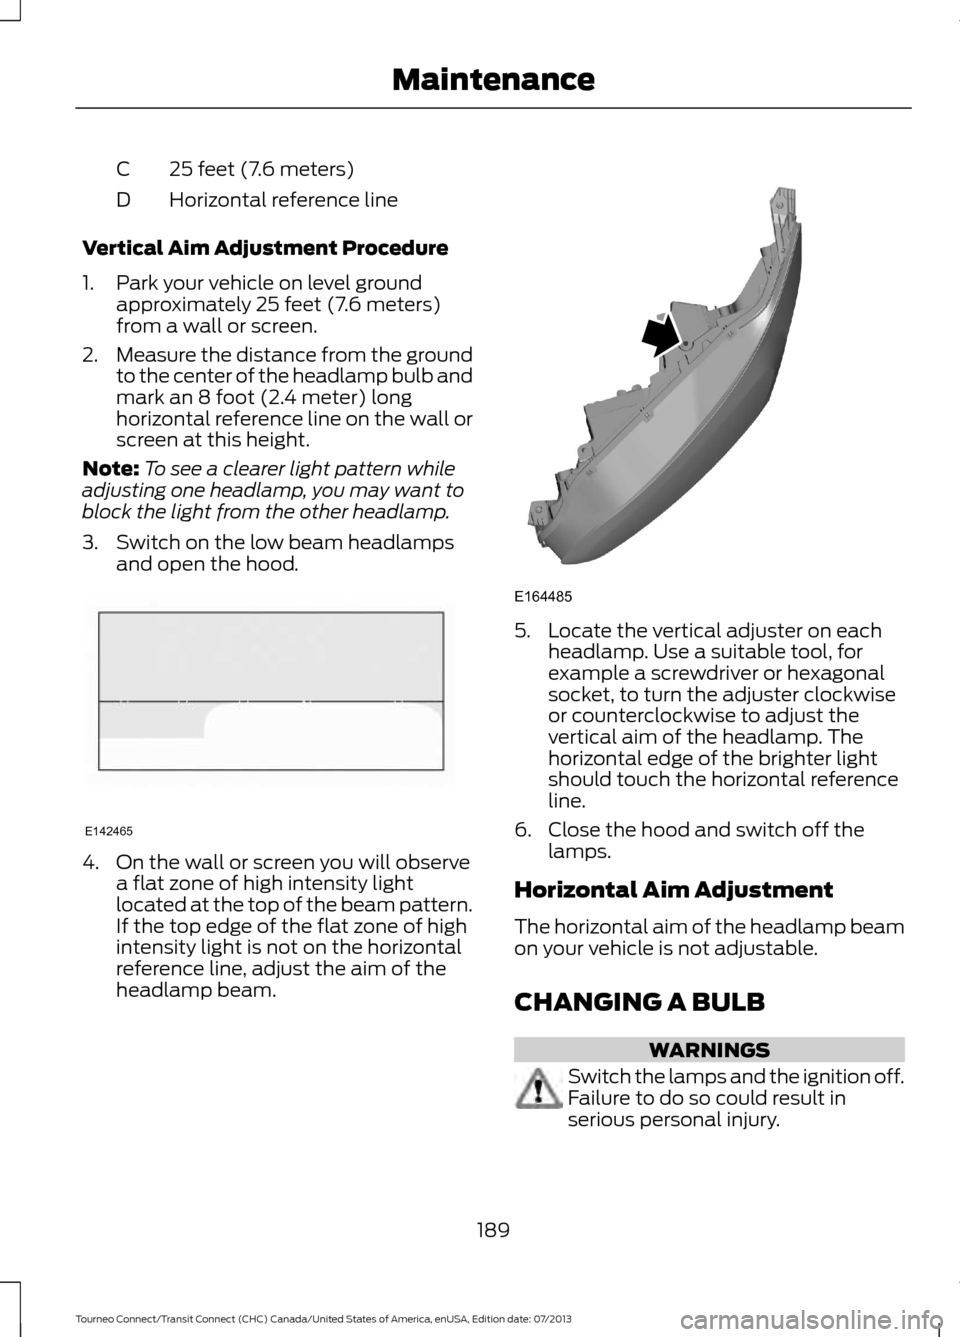
25 feet (7.6 meters)
C
Horizontal reference line
D
Vertical Aim Adjustment Procedure
1. Park your vehicle on level ground approximately 25 feet (7.6 meters)
from a wall or screen.
2. Measure the distance from the ground
to the center of the headlamp bulb and
mark an 8 foot (2.4 meter) long
horizontal reference line on the wall or
screen at this height.
Note: To see a clearer light pattern while
adjusting one headlamp, you may want to
block the light from the other headlamp.
3. Switch on the low beam headlamps and open the hood. 4. On the wall or screen you will observe
a flat zone of high intensity light
located at the top of the beam pattern.
If the top edge of the flat zone of high
intensity light is not on the horizontal
reference line, adjust the aim of the
headlamp beam. 5. Locate the vertical adjuster on each
headlamp. Use a suitable tool, for
example a screwdriver or hexagonal
socket, to turn the adjuster clockwise
or counterclockwise to adjust the
vertical aim of the headlamp. The
horizontal edge of the brighter light
should touch the horizontal reference
line.
6. Close the hood and switch off the lamps.
Horizontal Aim Adjustment
The horizontal aim of the headlamp beam
on your vehicle is not adjustable.
CHANGING A BULB WARNINGS
Switch the lamps and the ignition off.
Failure to do so could result in
serious personal injury.
189
Tourneo Connect/Transit Connect (CHC) Canada/United States of America, enUSA, Edition date: 07/2013 MaintenanceE142465 E164485
Page 207 of 411
•
Never wash or rinse any ignition coil,
spark plug wire or spark plug well, or
the area in and around these locations.
• Cover the battery, power distribution
box, and air filter assembly to prevent
water damage when cleaning the
engine.
CLEANING THE WINDOWS AND
WIPER BLADES
Car wash chemicals and environmental
fallout can result in windshield and wiper
blade contamination. Dirty windshield and
wipers will result in poor windshield wiper
operation. Keep the windshield and wiper
blades clean to maintain windshield wiper
performance.
To clean the windshield and wiper blades:
• Clean the windshield with a
non-abrasive glass cleaner.
• For windshields contaminated with
tree sap, chemicals, wax or bugs, clean
the entire windshield using steel wool
(no greater than 0000 grade) in a
circular motion and rinse with water.
• Clean the wiper blades with isopropyl
rubbing alcohol or windshield washer
concentrate.
Note: Do not use razor blades or other
sharp objects to clean or remove decals
from the inside of the heated rear window.
The vehicle warranty does not cover
damage caused to the heated rear window
grid lines.
CLEANING THE INTERIOR WARNINGS
Do not use cleaning solvents, bleach
or dye on the vehicle
’s safety belts,
as these actions may weaken the
belt webbing. WARNINGS
On vehicles equipped with
seat-mounted airbags, do not use
chemical solvents or strong
detergents. Such products could
contaminate the side airbag system and
affect performance of the side airbag in a
collision. For fabric, carpets, cloth seats, safety belts
and seats equipped with side airbags:
•
Remove dust and loose dirt with a
vacuum cleaner.
• Remove light stains and soil with
Motorcraft Professional Strength
Carpet & Upholstery Cleaner.
• If grease or tar is present on the
material, spot-clean the area first with
Motorcraft Spot and Stain Remover. In
Canada, use Motorcraft Multi-Purpose
Cleaner.
• If a ring forms on the fabric after spot
cleaning, clean the entire area
immediately (but do not oversaturate)
or the ring will set.
• Do not use household cleaning
products or glass cleaners, which can
stain and discolor the fabric and affect
the flame retardant abilities of the seat
materials.
CLEANING THE INSTRUMENT
PANEL AND INSTRUMENT
CLUSTER LENS WARNING
Do not use chemical solvents or
strong detergents when cleaning the
steering wheel or instrument panel
to avoid contamination of the airbag
system. 204
Tourneo Connect/Transit Connect (CHC) Canada/United States of America, enUSA, Edition date: 07/2013 Vehicle Care
Page 219 of 411
The tire suppliers may have
additional markings, notes or
warnings such as standard load,
radial tubeless, etc.
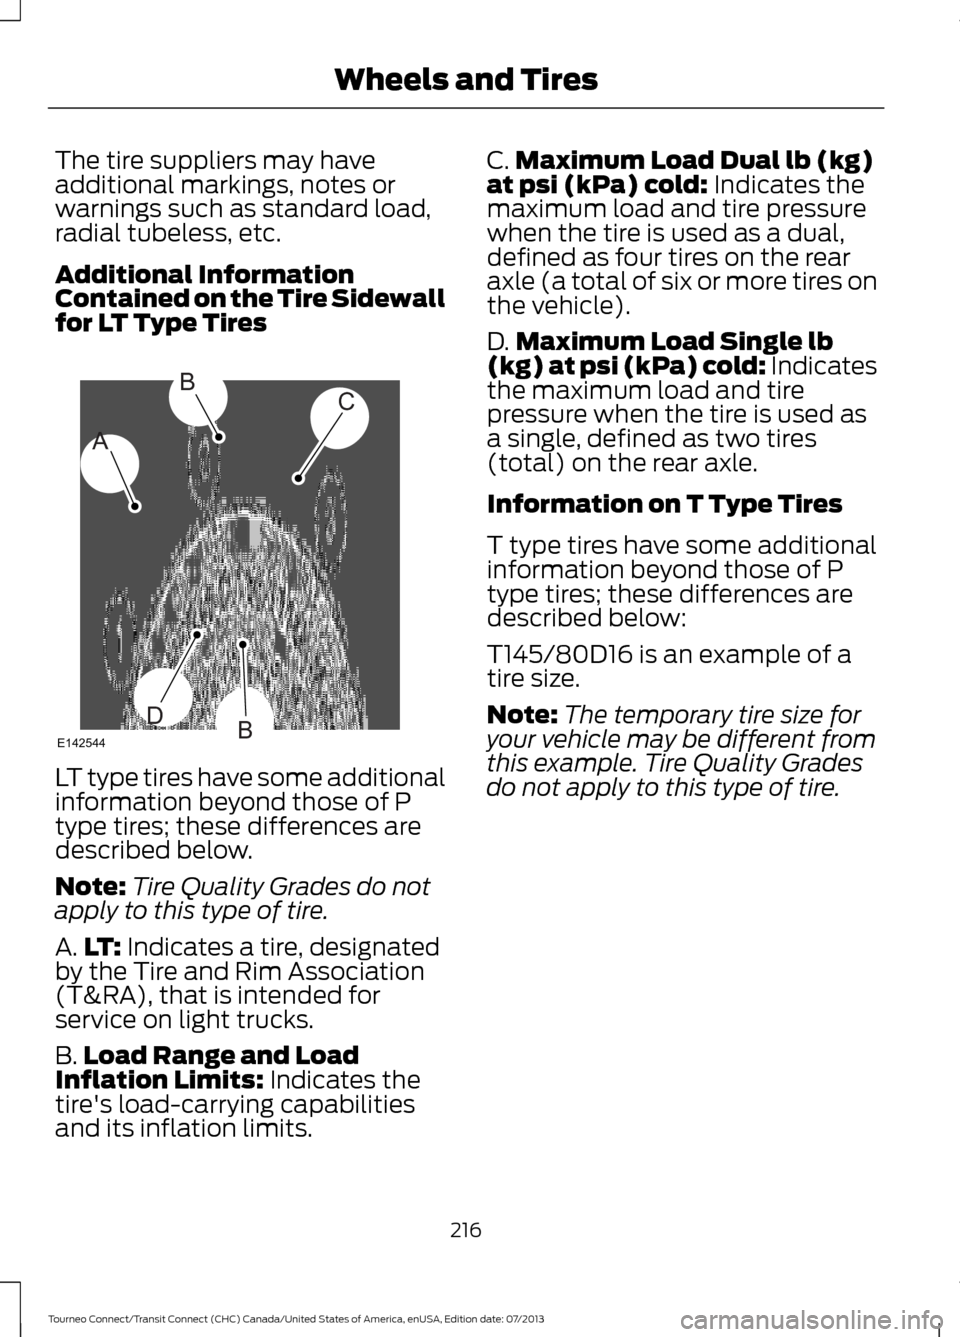
Additional Information
Contained on the Tire Sidewall
for LT Type Tires
LT type tires have some additional
information beyond those of P
type tires; these differences are
described below.
Note:
Tire Quality Grades do not
apply to this type of tire.
A. LT: Indicates a tire, designated
by the Tire and Rim Association
(T&RA), that is intended for
service on light trucks.
B. Load Range and Load
Inflation Limits:
Indicates the
tire's load-carrying capabilities
and its inflation limits. C.
Maximum Load Dual lb (kg)
at psi (kPa) cold:
Indicates the
maximum load and tire pressure
when the tire is used as a dual,
defined as four tires on the rear
axle (a total of six or more tires on
the vehicle).
D. Maximum Load Single lb
(kg) at psi (kPa) cold:
Indicates
the maximum load and tire
pressure when the tire is used as
a single, defined as two tires
(total) on the rear axle.
Information on T Type Tires
T type tires have some additional
information beyond those of P
type tires; these differences are
described below:
T145/80D16 is an example of a
tire size.
Note: The temporary tire size for
your vehicle may be different from
this example. Tire Quality Grades
do not apply to this type of tire.
216
Tourneo Connect/Transit Connect (CHC) Canada/United States of America, enUSA, Edition date: 07/2013 Wheels and TiresA
BC
BDE142544