check engine light FORD TRANSIT CONNECT 2016 2.G Owners Manual
[x] Cancel search | Manufacturer: FORD, Model Year: 2016, Model line: TRANSIT CONNECT, Model: FORD TRANSIT CONNECT 2016 2.GPages: 439, PDF Size: 6.96 MB
Page 11 of 439
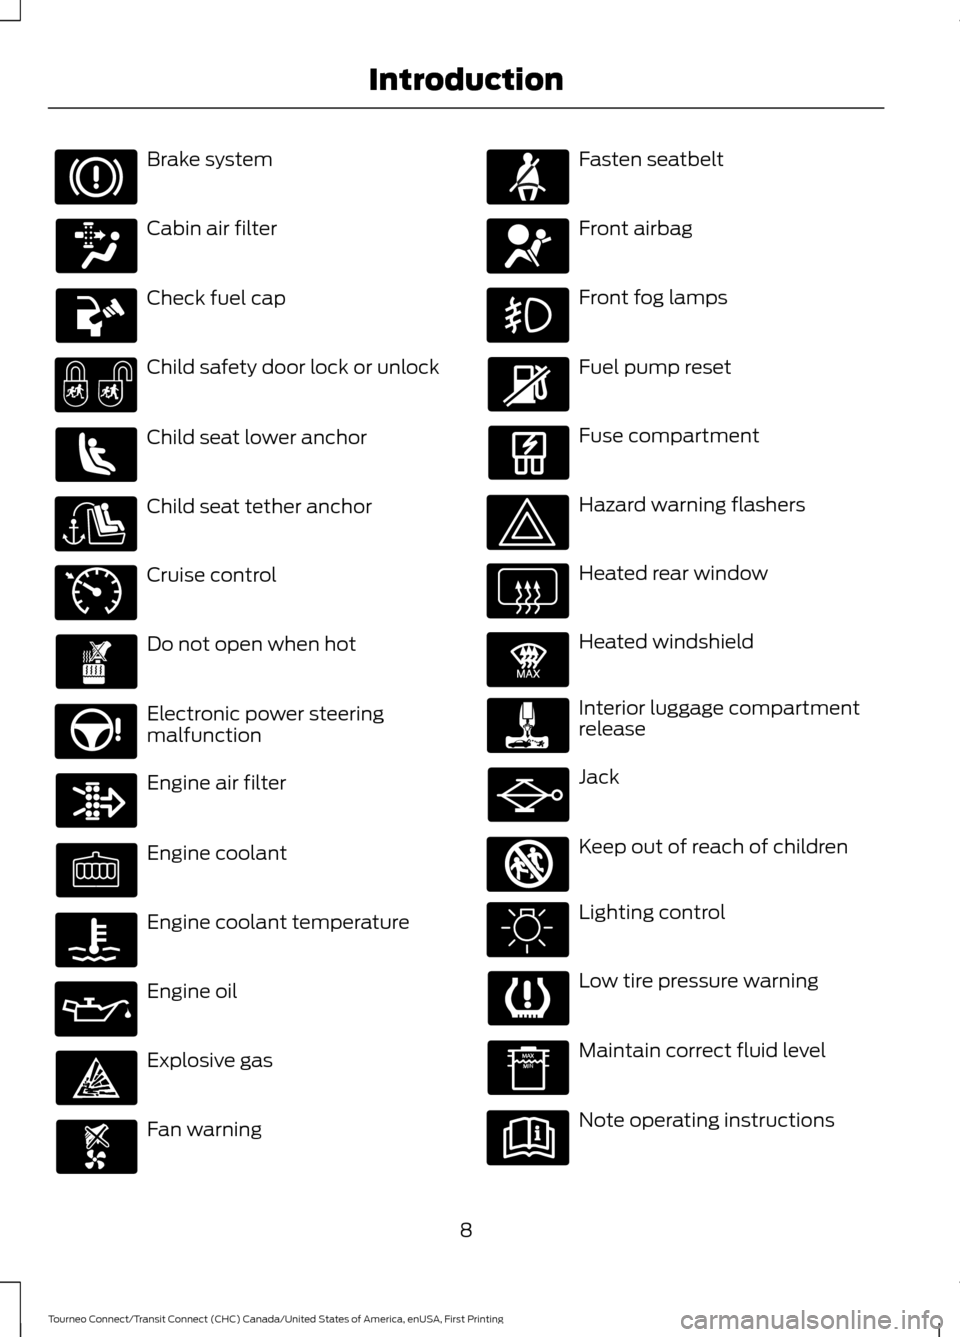
Brake system
Cabin air filter
Check fuel cap
Child safety door lock or unlock
Child seat lower anchor
Child seat tether anchor
Cruise control
Do not open when hot
Electronic power steering
malfunction
Engine air filter
Engine coolant
Engine coolant temperature
Engine oil
Explosive gas
Fan warning Fasten seatbelt
Front airbag
Front fog lamps
Fuel pump reset
Fuse compartment
Hazard warning flashers
Heated rear window
Heated windshield
Interior luggage compartment
release
Jack
Keep out of reach of children
Lighting control
Low tire pressure warning
Maintain correct fluid level
Note operating instructions
8
Tourneo Connect/Transit Connect (CHC) Canada/United States of America, enUSA, First Printing Introduction E71340 E91392 E161353
Page 84 of 439
If the needle enters the red section, the
engine is overheating. Stop the engine,
switch the ignition off and determine the
cause once the engine has cooled down.
See Engine Coolant Check (page 198).
Note: Do not restart the engine until the
cause of overheating has been resolved.
Fuel Gauge
Switch the ignition on. The fuel gauge will
indicate approximately how much remains
in the fuel tank. The fuel gauge may vary
slightly when your vehicle is moving or on
a gradient. The arrow adjacent to the fuel
pump symbol indicates on which side of
the vehicle the fuel filler door is located.
Low Fuel Level Reminder
Vehicles with Trip Computer
A low fuel level reminder displays and
sounds when the distance to empty
reaches
75 mi (120 km) to empty for
MyKey, and at 50 mi (80 km), 25 mi
(40 km), 10 mi (20 km) and 0 mi (0 km)
for all vehicle keys.
Vehicles without Trip Computer
A low fuel level reminder displays and
sounds when the fuel gauge needle is at
1/16th.
Note: The low fuel warning and
distance-to-empty warning can appear at
different fuel gauge positions depending on
fuel economy conditions. This variation is
normal. WARNING LAMPS AND
INDICATORS
The following warning lamps and
indicators will alert you to a vehicle
condition that may become serious. Some
lamps will illuminate when you start your
vehicle to make sure they work. If any
lamps remain on after starting your vehicle,
refer to the respective system warning
lamp for further information.
Note:
Some warning indicators appear in
the information display and function the
same as a warning lamp but do not display
when you start your vehicle.
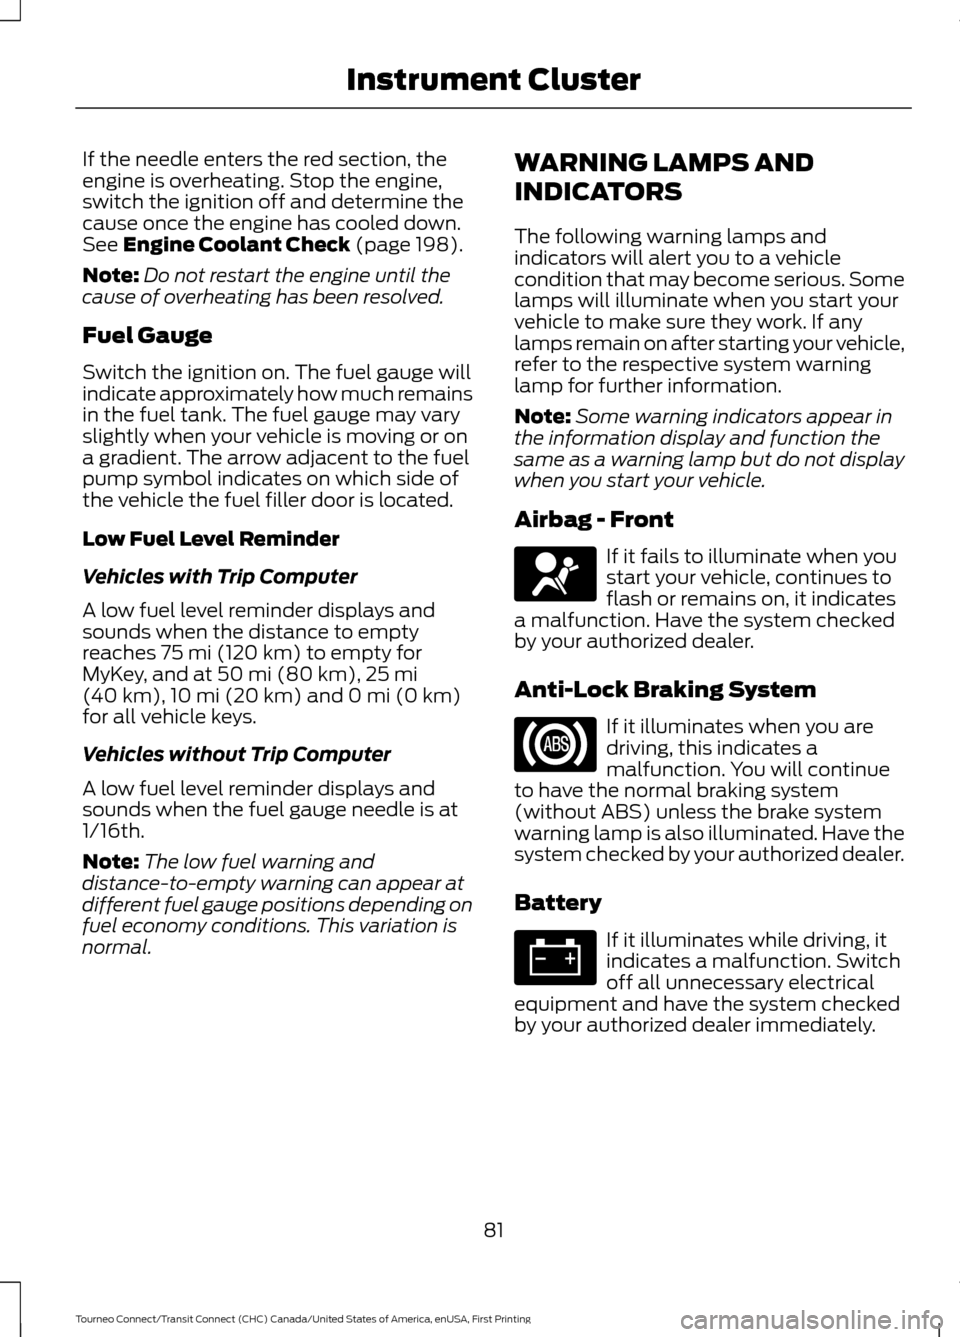
Airbag - Front If it fails to illuminate when you
start your vehicle, continues to
flash or remains on, it indicates
a malfunction. Have the system checked
by your authorized dealer.
Anti-Lock Braking System If it illuminates when you are
driving, this indicates a
malfunction. You will continue
to have the normal braking system
(without ABS) unless the brake system
warning lamp is also illuminated. Have the
system checked by your authorized dealer.
Battery If it illuminates while driving, it
indicates a malfunction. Switch
off all unnecessary electrical
equipment and have the system checked
by your authorized dealer immediately.
81
Tourneo Connect/Transit Connect (CHC) Canada/United States of America, enUSA, First Printing Instrument Cluster
Page 86 of 439
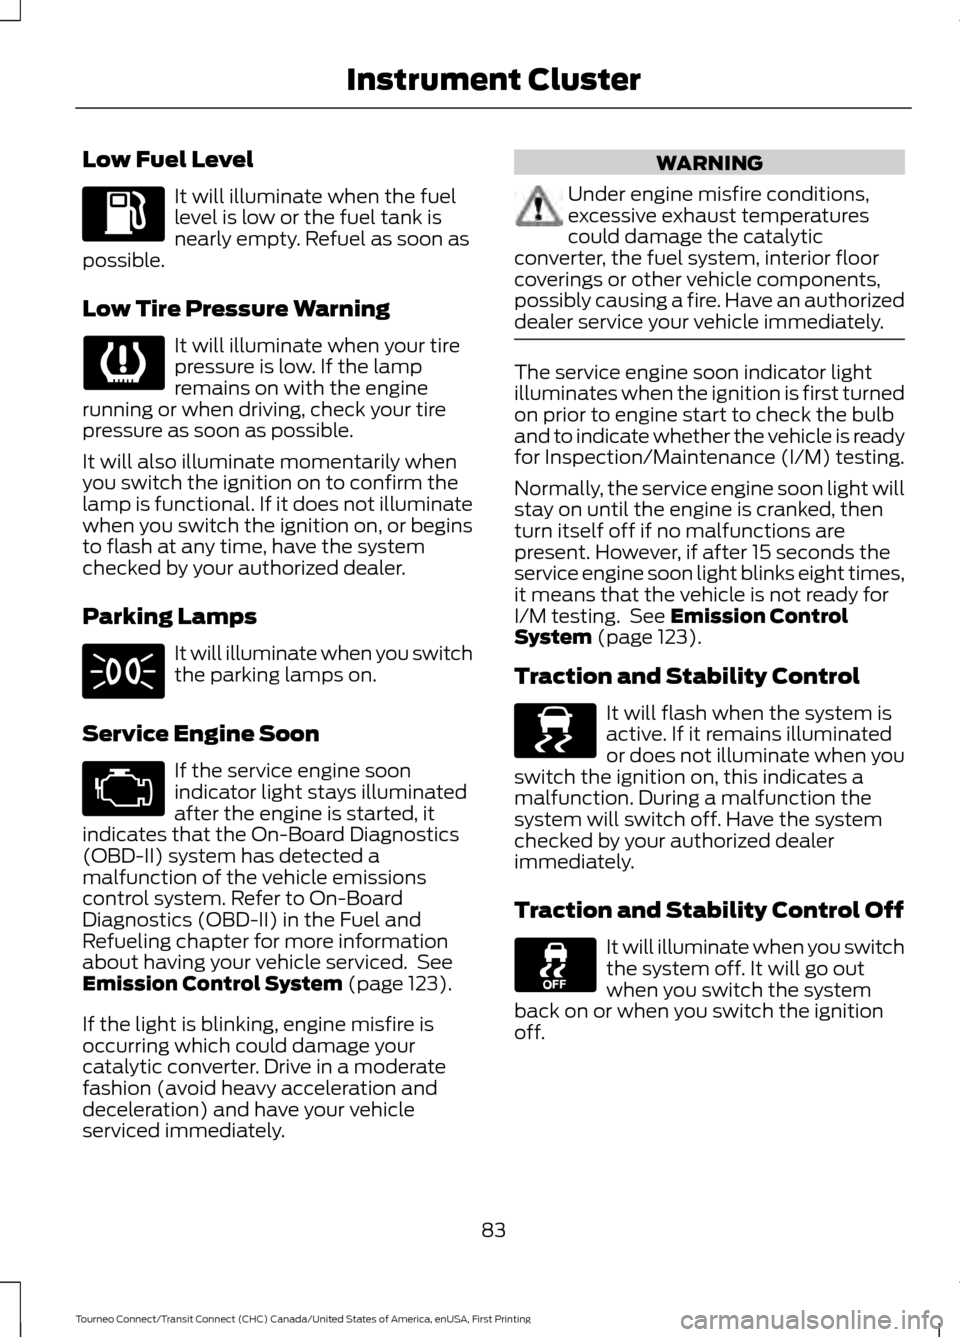
Low Fuel Level
It will illuminate when the fuel
level is low or the fuel tank is
nearly empty. Refuel as soon as
possible.
Low Tire Pressure Warning It will illuminate when your tire
pressure is low. If the lamp
remains on with the engine
running or when driving, check your tire
pressure as soon as possible.
It will also illuminate momentarily when
you switch the ignition on to confirm the
lamp is functional. If it does not illuminate
when you switch the ignition on, or begins
to flash at any time, have the system
checked by your authorized dealer.
Parking Lamps It will illuminate when you switch
the parking lamps on.
Service Engine Soon If the service engine soon
indicator light stays illuminated
after the engine is started, it
indicates that the On-Board Diagnostics
(OBD-II) system has detected a
malfunction of the vehicle emissions
control system. Refer to On-Board
Diagnostics (OBD-II) in the Fuel and
Refueling chapter for more information
about having your vehicle serviced. See
Emission Control System (page 123).
If the light is blinking, engine misfire is
occurring which could damage your
catalytic converter. Drive in a moderate
fashion (avoid heavy acceleration and
deceleration) and have your vehicle
serviced immediately. WARNING
Under engine misfire conditions,
excessive exhaust temperatures
could damage the catalytic
converter, the fuel system, interior floor
coverings or other vehicle components,
possibly causing a fire. Have an authorized
dealer service your vehicle immediately. The service engine soon indicator light
illuminates when the ignition is first turned
on prior to engine start to check the bulb
and to indicate whether the vehicle is ready
for Inspection/Maintenance (I/M) testing.
Normally, the service engine soon light will
stay on until the engine is cranked, then
turn itself off if no malfunctions are
present. However, if after 15 seconds the
service engine soon light blinks eight times,
it means that the vehicle is not ready for
I/M testing. See
Emission Control
System (page 123).
Traction and Stability Control It will flash when the system is
active. If it remains illuminated
or does not illuminate when you
switch the ignition on, this indicates a
malfunction. During a malfunction the
system will switch off. Have the system
checked by your authorized dealer
immediately.
Traction and Stability Control Off It will illuminate when you switch
the system off. It will go out
when you switch the system
back on or when you switch the ignition
off.
83
Tourneo Connect/Transit Connect (CHC) Canada/United States of America, enUSA, First Printing Instrument Cluster E138639
Page 95 of 439
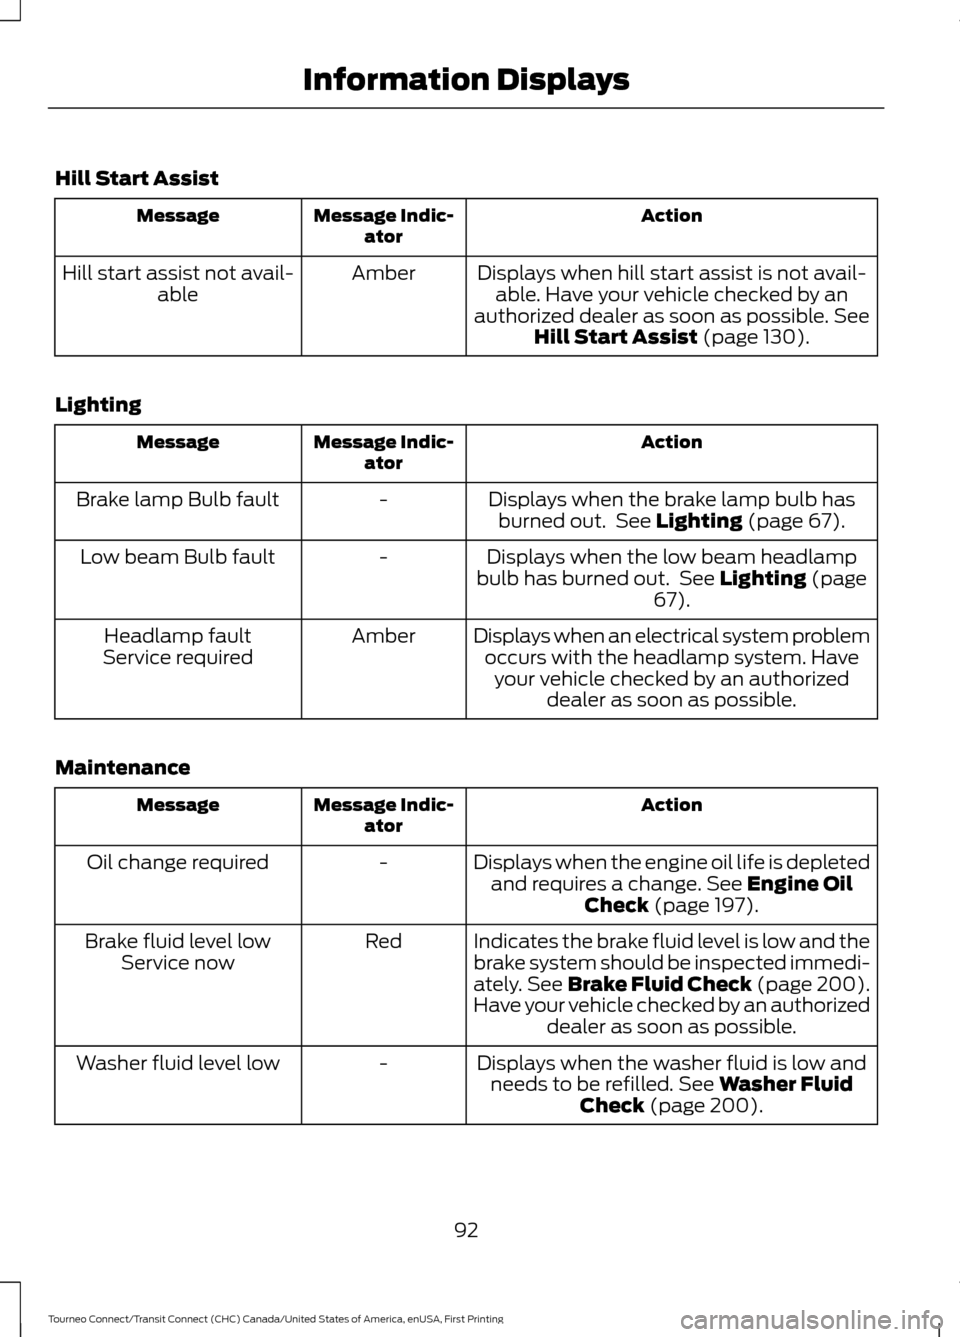
Hill Start Assist
Action
Message Indic-
ator
Message
Displays when hill start assist is not avail-able. Have your vehicle checked by an
authorized dealer as soon as possible. See
Hill Start Assist (page 130).
Amber
Hill start assist not avail-
able
Lighting Action
Message Indic-
ator
Message
Displays when the brake lamp bulb hasburned out. See
Lighting (page 67).
-
Brake lamp Bulb fault
Displays when the low beam headlamp
bulb has burned out. See
Lighting (page
67).
-
Low beam Bulb fault
Displays when an electrical system problemoccurs with the headlamp system. Haveyour vehicle checked by an authorized dealer as soon as possible.
Amber
Headlamp fault
Service required
Maintenance Action
Message Indic-
ator
Message
Displays when the engine oil life is depletedand requires a change.
See Engine Oil
Check (page 197).
-
Oil change required
Indicates the brake fluid level is low and the
brake system should be inspected immedi-
ately.
See Brake Fluid Check (page 200).
Have your vehicle checked by an authorized dealer as soon as possible.
Red
Brake fluid level low
Service now
Displays when the washer fluid is low andneeds to be refilled.
See Washer Fluid
Check (page 200).
-
Washer fluid level low
92
Tourneo Connect/Transit Connect (CHC) Canada/United States of America, enUSA, First Printing Information Displays
Page 132 of 439
GENERAL INFORMATION
Note:
Occasional brake noise is normal. If
a metal-to-metal, continuous grinding or
continuous squeal sound is present, the
brake linings may be worn-out. Have the
system checked by an authorized dealer. If
your vehicle has continuous vibration or
shudder in the steering wheel while braking,
have it checked by an authorized dealer.
Note: Brake dust may accumulate on the
wheels, even under normal driving
conditions. Some dust is inevitable as the
brakes wear and does not contribute to
brake noise. See Cleaning the Alloy
Wheels (page 218).
Note: Depending on applicable laws and
regulations in the country for which your
vehicle was originally built, your brake lamps
may flash during heavy braking. Following
this, your hazard lights may also flash when
your vehicle comes to a stop. See
Warning Lamps and
Indicators (page 81).
Wet brakes result in reduced braking
efficiency. Gently press the brake pedal a
few times when driving from a car wash or
standing water to dry the brakes.
Brake Over Accelerator
In the event the accelerator pedal
becomes stuck or entrapped, apply steady
and firm pressure to the brake pedal to
slow the vehicle and reduce engine power.
If you experience this condition, apply the
brakes and bring your vehicle to a safe
stop. Move the transmission to park (P),
switch the engine off and apply the parking
brake. Inspect the accelerator pedal for
any interference. If none are found and the
condition persists, have your vehicle towed
to the nearest authorized dealer. Brake Assist
Brake assist detects when you brake
rapidly by measuring the rate at which you
press the brake pedal. It provides
maximum braking efficiency as long as you
press the pedal, and can reduce stopping
distances in critical situations.
Anti-lock Brake System
This system helps you maintain steering
control during emergency stops by keeping
the brakes from locking.
This lamp momentarily
illuminates when you turn the
ignition on. If the light does not
illuminate during start up, remains on or
flashes, the system may be disabled. Have
the system checked by an authorized
dealer. If the anti-lock brake system is
disabled, normal braking is still effective. If the brake warning lamp
illuminates when you release the
parking brake, have the system
checked by an authorized dealer.
HINTS ON DRIVING WITH
ANTI-LOCK BRAKES
Note: When the system is operating, the
brake pedal will pulse and may travel
further. Maintain pressure on the brake
pedal. You may also hear a noise from the
system. This is normal.
The anti-lock braking system will not
eliminate the risks when:
• You drive too closely to the vehicle in
front of you.
• Your vehicle is hydroplaning.
• You take corners too fast.
• The road surface is poor.
129
Tourneo Connect/Transit Connect (CHC) Canada/United States of America, enUSA, First Printing BrakesE144522 E144522
Page 166 of 439
Note:
Never attach safety chains to the
bumper.
Trailer Brakes WARNING
Do not connect a trailer's hydraulic
brake system directly to your
vehicle's brake system. Your vehicle
may not have enough braking power and
your chances of having a crash greatly
increase. Electric brakes and manual, automatic or
surge-type trailer brakes are safe if you
install them correctly and adjust them to
the manufacturer's specifications. The
trailer brakes must meet local and federal
regulations.
The rating for the tow vehicle's braking
system operation is at the gross vehicle
weight rating, not the gross combined
weight rating.
Separate functioning brake systems are
required for safe control of towed vehicles
and trailers weighing more than 1500
pounds (680 kilograms) when loaded.
Trailer Lamps
WARNING
Never connect any trailer lamp wiring
to the vehicle's tail lamp wiring; this
may damage the electrical system
resulting in fire. Contact an authorized
dealer as soon as possible for assistance
in correct trailer tow wiring installation.
Additional electrical equipment may be
required. Trailer lamps are required on most towed
vehicles. Make sure all running lights, brake
lights, turn signals and hazard warning
flashers are working. Before Towing a Trailer
Practice turning, stopping and backing up
to get the feel of your vehicle-trailer
combination before starting on a trip.
When turning, make wider turns so the
trailer wheels clear curbs and other
obstacles.
When Towing a Trailer
•
Do not drive faster than 70 mph (113
km/h) during the first 500 miles (800
kilometers).
• Do not make full-throttle starts.
• Check the trailer hitch, electrical
connections and trailer wheel lug nuts
thoroughly after you have traveled 50
miles (80 kilometers).
• When stopped in congested or heavy
traffic during hot weather, place the
transmission selector lever in position
P to aid engine and transmission
cooling and to help A/C performance.
• Turn off the speed control with heavy
loads or in hilly terrain. The speed
control may turn off automatically
when you are towing on long, steep
grades.
• When driving down a long or steep hill,
if your vehicle is fitted with a
SelectShift Automatic® Transmission,
use a low gear, See
Automatic
Transmission (page 126). Do not
apply the brakes continuously, as they
may overheat and become less
effective.
• If the transmission is fitted with Grade
Assist or a Towing feature, use this
feature when towing. This provides
engine braking and helps eliminate
excessive transmission shifting for
optimum fuel economy and
transmission cooling.
163
Tourneo Connect/Transit Connect (CHC) Canada/United States of America, enUSA, First Printing Towing
Page 171 of 439
•
Avoid using speed control in hilly
terrain.
• Do not rest your foot on the brake
pedal while driving.
• Avoid carrying unnecessary weight.
• Avoid adding particular accessories to
your vehicle (e.g. bug deflectors,
rollbars/light bars, running boards, ski
racks).
• Avoid driving with the wheels out of
alignment.
COLD WEATHER
PRECAUTIONS
The functional operation of some
components and systems can be affected
at temperatures below -13°F (-25°C).
DRIVING THROUGH WATER WARNING
Do not drive through flowing or deep
water as you may lose control of your
vehicle.
Note:
Driving through standing water can
cause vehicle damage.
Note: Engine damage can occur if water
enters the air filter.
Before driving through standing water,
check the depth. Never drive through water
that is higher than the bottom of the front
rocker area of your vehicle. When driving through standing water, drive
very slowly and do not stop your vehicle.
Your brake performance and traction may
be limited. After driving through water and
as soon as it is safe to do so:
•
Lightly press the brake pedal to dry the
brakes and to check that they work.
• Check that the horn works.
• Check that the exterior lights work.
• Turn the steering wheel to check that
the steering power assist works.
FLOOR MATS WARNINGS
Always use floor mats that are
designed to fit the foot well of your
vehicle. Only use floor mats that
leave the pedal area unobstructed. Only
use floor mats that are firmly secured to
retention posts so that they cannot slip out
of position and interfere with the pedals
or impair safe operation of your vehicle in
other ways. Pedals that cannot move freely can
cause loss of vehicle control and
increase the risk of serious personal
injury.
168
Tourneo Connect/Transit Connect (CHC) Canada/United States of America, enUSA, First Printing Driving HintsE176360
Page 202 of 439
Adding Engine Coolant
WARNINGS
Do not add engine coolant when the
engine is hot. Steam and scalding
liquids released from a hot cooling
system can burn you badly. Also, spilling
coolant on hot engine parts can burn you. Do not put engine coolant in the
windshield washer fluid reservoir. If
sprayed on the windshield, engine
coolant could make it difficult to see
through the windshield. Do not add coolant further than the
MAX mark.
To reduce the risk of personal injury,
make sure the engine is cool before
unscrewing the coolant pressure
relief cap. The cooling system is under
pressure; steam and hot liquid can come
out forcefully when the cap is loosened
slightly. Note:
Do not use stop leak pellets, cooling
system sealants or additives as they can
cause damage to the engine cooling or
heating systems. The vehicle warranty does
not cover this damage.
Note: During normal vehicle operation, the
engine coolant may change color from
orange to pink or light red. As long as the
engine coolant is clear and uncontaminated,
this color change does not indicate that the
engine coolant has degraded, nor does it
require that qualified personnel drain the
engine coolant, flush the system or replace
the engine coolant. •
Do not mix different colors or types of
coolant in your vehicle. Make sure the
correct coolant is used. Mixing of
engine coolants may harm the engine ’s
cooling system. The use of incorrect
coolant may harm engine and cooling
system components and may void the
warranty. Use prediluted engine
coolant meeting the Ford specification.
• In case of emergency, you can add a
large amount of water without engine
coolant in order to reach a vehicle
service location. In this instance, you
must have the cooling system drained,
chemically cleaned with Motorcraft
Premium Cooling System Flush, and
refilled with engine coolant as soon as
possible. Water alone (without engine
coolant) can cause engine damage, for
example corrosion, overheating or
freezing.
• Do not use alcohol, methanol, brine or
any engine coolants mixed with alcohol
or methanol antifreeze. Alcohol and
other liquids can cause engine damage,
for example overheating or freezing.
• Do not add extra inhibitors or additives
to the coolant. These can be harmful
and compromise the corrosion
protection of the engine coolant.
Unscrew the cap slowly. Any pressure will
escape as you unscrew the cap.
Add prediluted engine coolant meeting the
Ford specification.
Whenever you add coolant, check the
coolant level in the coolant reservoir the
next few times you drive the vehicle. If
necessary, add enough prediluted engine
coolant to bring the coolant level to the
correct level.
Recycled Engine Coolant
We do not recommend the use of recycled
engine coolant since a Ford-approved
recycling process is not yet available.
199
Tourneo Connect/Transit Connect (CHC) Canada/United States of America, enUSA, First Printing Maintenance
Page 222 of 439
General
•
Store all vehicles in a dry, ventilated
place.
• Protect from sunlight, if possible.
• If vehicles are stored outside, they
require regular maintenance to protect
against rust and damage.
Body
• Wash your vehicle thoroughly to
remove dirt, grease, oil, tar or mud from
exterior surfaces, rear-wheel housing
and the underside of front fenders.
• Periodically wash your vehicle if it is
stored in exposed locations.
• Touch-up exposed or primed metal to
prevent rust.
• Cover chrome and stainless steel parts
with a thick coat of auto wax to prevent
discoloration. Re-wax as necessary
when you wash your vehicle.
• Lubricate all hood, door and luggage
compartment hinges and latches with
a light grade oil.
• Cover interior trim to prevent fading.
• Keep all rubber parts free from oil and
solvents.
Engine
• Change the engine oil and filter prior to
storage because used engine oil
contains contaminates which may
cause engine damage.
• Start the engine every 15 days for a
minimum of 15 minutes. Run at fast idle
with the climate controls set to defrost
until the engine reaches normal
operating temperature. •
With your foot on the brake, shift
through all the gears while the engine
is running.
• We recommend that you change the
engine oil before you use your vehicle
again.
Fuel system
• Fill the fuel tank with high-quality fuel
until the first automatic shutoff of the
fuel pump nozzle.
Cooling system
• Protect against freezing temperatures.
• When removing your vehicle from
storage, check coolant fluid level.
Confirm that there are no cooling
system leaks and that fluid is at the
recommended level.
Battery
• Check and recharge as necessary. Keep
connections clean.
• If storing your vehicle for more than 30
days without recharging the battery,
we recommend that you disconnect
the battery cables to maintain battery
charge for quick starting.
Note: It is necessary to reset memory
features if battery cables are disconnected.
Brakes
• Make sure the brakes and parking brake
release fully.
Tires
• Maintain recommended air pressure.
219
Tourneo Connect/Transit Connect (CHC) Canada/United States of America, enUSA, First Printing Vehicle Care
Page 245 of 439
Carrying Out the System Reset
Procedure
Read the entire procedure before carrying
out a system reset.
1. Drive your vehicle above 20 mph (32
km/h) for at least two minutes and
then park in a safe location where you
can easily get to all four tires and have
access to a tire inflation pump.
2. Switch the ignition off.
3. Switch the ignition on with the engine off.
4. Turn the hazard flashers on then off three times, this must be completed
within 10 seconds. If the reset mode
has been entered successfully, the horn
will chirp once and the system indicator
will flash. If this does not occur, repeat
the procedure from step 2. If after
repeated attempts to enter the reset
mode, the horn does not chirp and the
system indicator does not flash, have
your vehicle checked by an authorized
dealer as soon as possible.
5. Train the system sensors in the tires using the following reset sequence
starting with the left front tire and
following a clockwise order: Left front,
right front, right rear, left rear.
6. Remove the valve cap from the valve stem on the left front tire. Decrease the
air pressure until the horn chirps.
Note: The single horn chirp confirms that
the sensor identification code has been
learned by your vehicle for this position. If a
double horn chirp is heard, the reset
procedure was unsuccessful and must be
repeated.
7. Remove the valve cap from the valve stem on the right front tire. Decrease
the air pressure until the horn chirps.
8. Remove the valve cap from the valve stem on the right rear tire. Decrease the
air pressure until the horn chirps. 9. Remove the valve cap from the valve
stem on the left rear tire. Decrease the
air pressure until the horn chirps.
Training is complete when the horn
chirps after the last system sensor (left
rear) has been trained and the system
indicator stops flashing.
10. Switch the ignition off. If two short horn chirps are heard, the reset
procedure was unsuccessful and
must be repeated.
Note: If after repeating the procedure two
short horn chirps are heard again, have your
vehicle checked by an authorized dealer as
soon as possible.
11. Set all four tires to the correct pressure See Maintenance (page
193). or the tire inflation pressure label
(located on the edge of driver door or
the B-Pillar).
CHANGING A ROAD WHEEL WARNINGS
The use of tire sealants may damage
your tire pressure monitoring system
and should only be used in roadside
emergencies. If you must use a sealant, the
Ford Tire Mobility Kit sealant should be
used. The tire pressure monitoring system
sensor and valve stem on the wheel must
be replaced by an authorized dealer after
use of the sealant. If the tire pressure monitor sensor
becomes damaged, it will no longer
function.
See Tire Pressure
Monitoring System (page 238). Note:
The tire pressure monitoring system
indicator light will illuminate when the spare
tire is in use. To restore the full function of
the monitoring system, all road wheels
equipped with tire pressure monitoring
sensors must be mounted on the vehicle.
242
Tourneo Connect/Transit Connect (CHC) Canada/United States of America, enUSA, First Printing Wheels and Tires