change time FORD TRANSIT CONNECT 2019 Owners Manual
[x] Cancel search | Manufacturer: FORD, Model Year: 2019, Model line: TRANSIT CONNECT, Model: FORD TRANSIT CONNECT 2019Pages: 493, PDF Size: 7.43 MB
Page 3 of 493
The information contained in this publication was correct at the time of going to print. In the interest of
continuous development, we reserve the right to change specifications, design or equipment at any time
without notice or obligation. No part of this publication may be reproduced, transmitted, stored in a
retrieval system or translated into any language in any form by any means without our written permission.
Errors and omissions excepted.
© Ford Motor Company 2018
All rights reserved.
Part Number: CG3739en 201804 20180409084652
California Proposition 65
WARNING: Operating, servicing and
maintaining a passenger vehicle or off-highway
motor vehicle can expose you to chemicals
including engine exhaust, carbon monoxide,
phthalates, and lead, which are known to the State
of California to cause cancer and birth defects or
other reproductive harm. To minimize exposure,
avoid breathing exhaust, do not idle the engine
except as necessary, service your vehicle in a
well-ventilated area and wear gloves or wash your
hands frequently when servicing your vehicle. For
more information go to
www.P65Warnings.ca.gov/passenger-vehicle. WARNING:
Battery posts, terminals and
related accessories contain lead and lead
compounds, chemicals known to the State of
California to cause cancer and reproductive harm.
Wash your hands after handling
.
Page 13 of 493
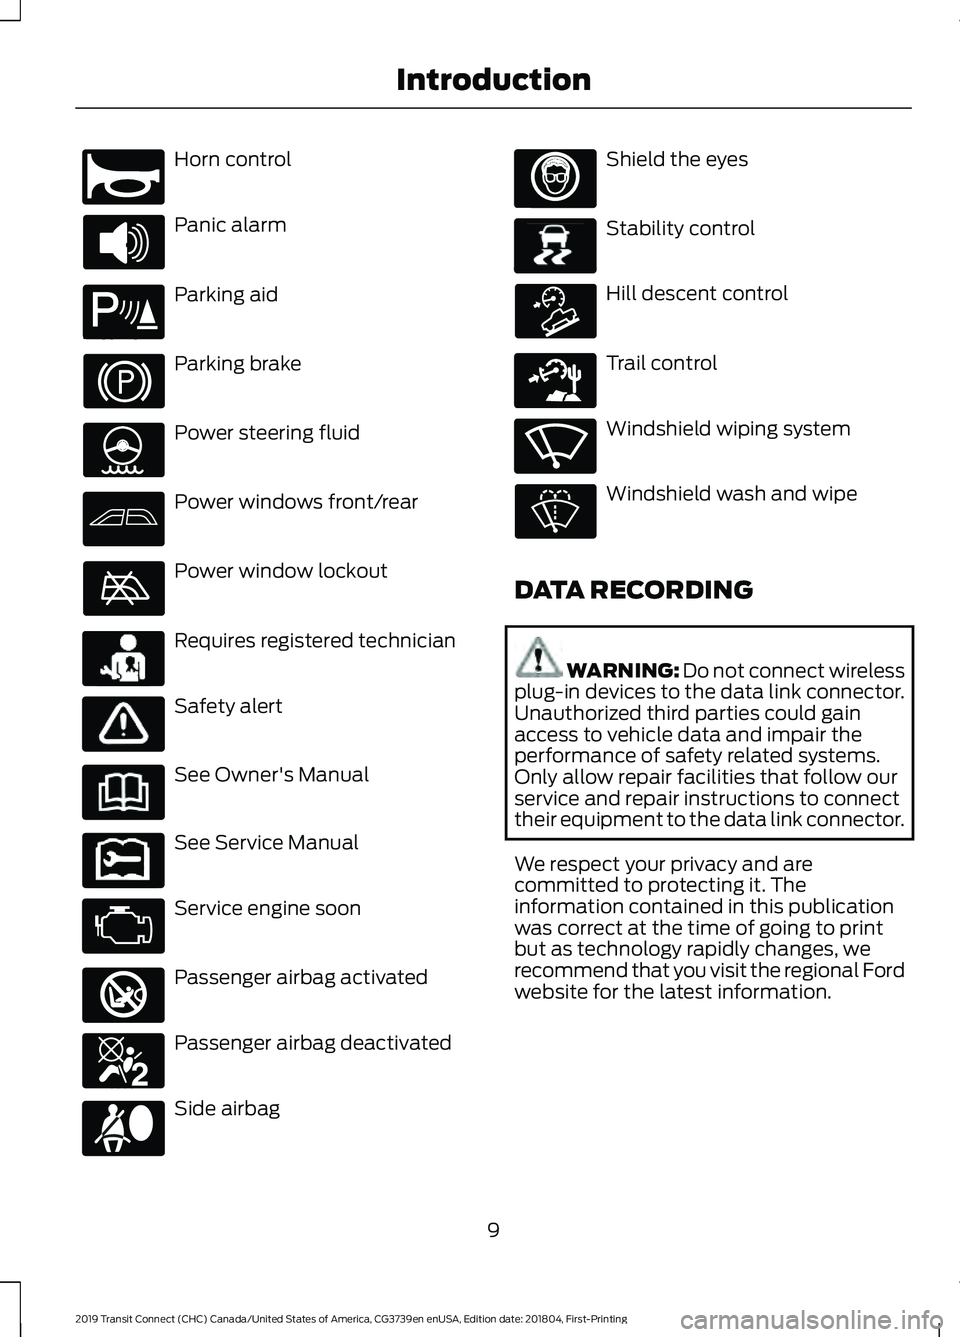
Horn control
Panic alarm
Parking aid
Parking brake
Power steering fluid
Power windows front/rear
Power window lockout
Requires registered technician
Safety alert
See Owner's Manual
See Service Manual
Service engine soon
Passenger airbag activated
Passenger airbag deactivated
Side airbag Shield the eyes
Stability control
Hill descent control
Trail control
Windshield wiping system
Windshield wash and wipe
DATA RECORDING WARNING: Do not connect wireless
plug-in devices to the data link connector.
Unauthorized third parties could gain
access to vehicle data and impair the
performance of safety related systems.
Only allow repair facilities that follow our
service and repair instructions to connect
their equipment to the data link connector.
We respect your privacy and are
committed to protecting it. The
information contained in this publication
was correct at the time of going to print
but as technology rapidly changes, we
recommend that you visit the regional Ford
website for the latest information.
9
2019 Transit Connect (CHC) Canada/United States of America, CG3739en enUSA, Edition date: 201804, First-Printing IntroductionE270945 E139213 E231159 E231158 E270849 E270850 E167012 E138639 E163957 E271982 E270969
Page 67 of 493
LOCKING AND UNLOCKING
Remote Control
You can use the remote control at any
time.
Unlocking the Doors
The position lamps illuminate when you
unlock the doors. When you switch the
ignition on, they automatically turn off.
Note:
You can unlock the driver door with
the key. Use the key when the remote
control is not functioning.
Note: When you leave your vehicle
unattended for several weeks, the remote
control turns off. Your vehicle must be
unlocked and the engine started using the
key. Unlocking and starting your vehicle
once enables the remote control.
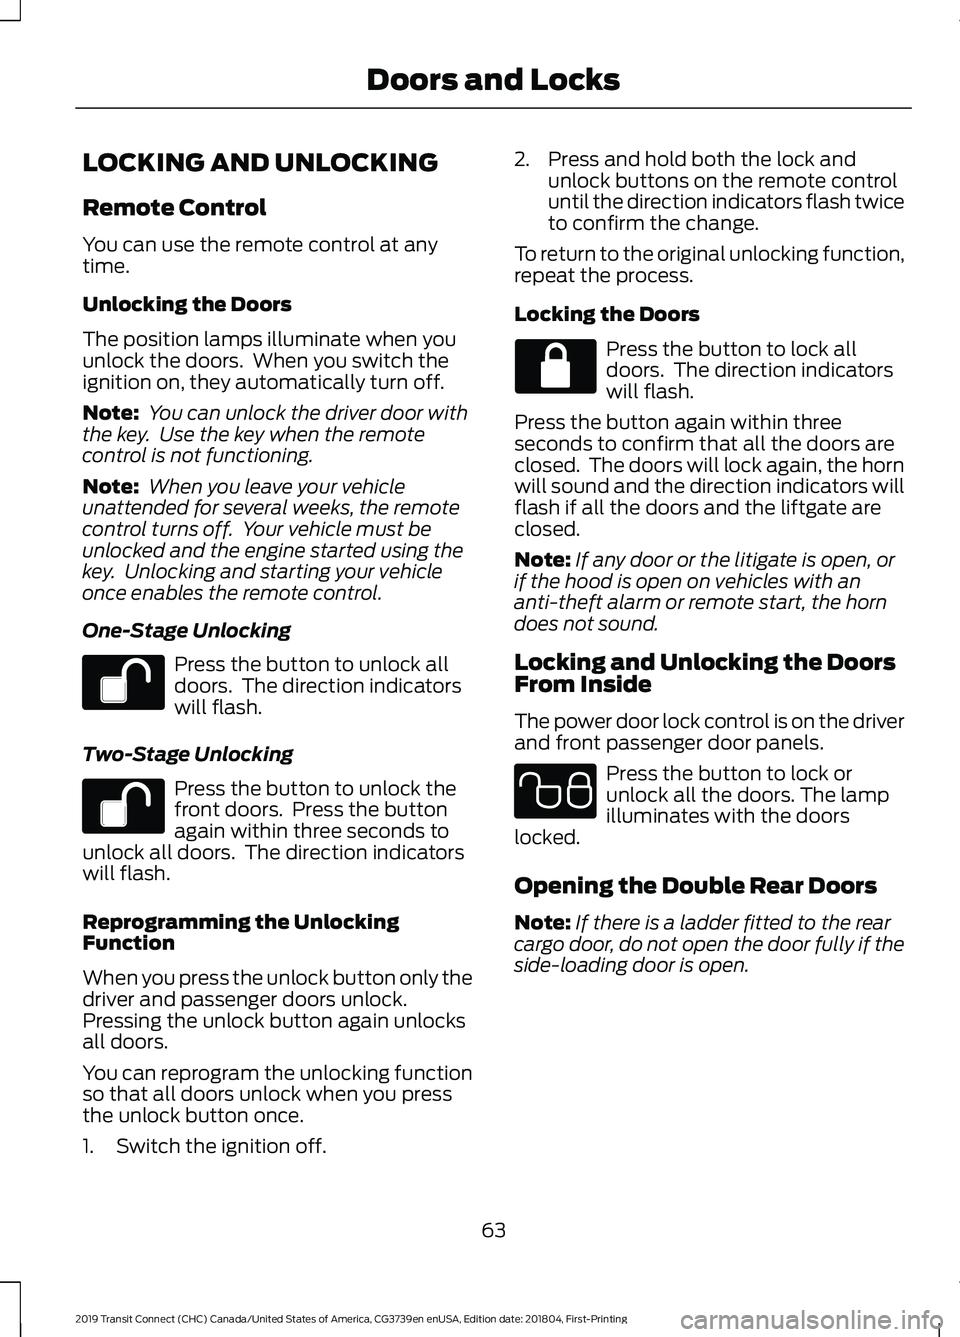
One-Stage Unlocking Press the button to unlock all
doors. The direction indicators
will flash.
Two-Stage Unlocking Press the button to unlock the
front doors. Press the button
again within three seconds to
unlock all doors. The direction indicators
will flash.
Reprogramming the Unlocking
Function
When you press the unlock button only the
driver and passenger doors unlock.
Pressing the unlock button again unlocks
all doors.
You can reprogram the unlocking function
so that all doors unlock when you press
the unlock button once.
1. Switch the ignition off. 2. Press and hold both the lock and
unlock buttons on the remote control
until the direction indicators flash twice
to confirm the change.
To return to the original unlocking function,
repeat the process.
Locking the Doors Press the button to lock all
doors. The direction indicators
will flash.
Press the button again within three
seconds to confirm that all the doors are
closed. The doors will lock again, the horn
will sound and the direction indicators will
flash if all the doors and the liftgate are
closed.
Note: If any door or the litigate is open, or
if the hood is open on vehicles with an
anti-theft alarm or remote start, the horn
does not sound.
Locking and Unlocking the Doors
From Inside
The power door lock control is on the driver
and front passenger door panels. Press the button to lock or
unlock all the doors. The lamp
illuminates with the doors
locked.
Opening the Double Rear Doors
Note: If there is a ladder fitted to the rear
cargo door, do not open the door fully if the
side-loading door is open.
63
2019 Transit Connect (CHC) Canada/United States of America, CG3739en enUSA, Edition date: 201804, First-Printing Doors and Locks E102566
Page 82 of 493
GENERAL INFORMATION
Condensation in the Exterior Front
Lamps and Rear Lamps
Exterior front lamps and rear lamps have
vents to accommodate normal changes
in air pressure.
Condensation can be a natural by-product
of this design. When moist air enters the
lamp assembly through the vents, there is
a possibility that condensation can occur
when the temperature is cold. When
normal condensation occurs, a fine mist
can form on the interior of the lens. The
fine mist eventually clears and exits
through the vents during normal operation.
Clearing time may take as long as 48 hours
under dry weather conditions.
Examples of acceptable condensation are:
•
The presence of a fine mist (no streaks,
drip marks or large droplets).
• A fine mist covers less than 50% of the
lens.
Examples of unacceptable condensation
are:
• A water puddle inside the lamp.
• Streaks, drip marks or large droplets
present on the interior of the lens.
If you see any unacceptable condensation,
have your vehicle checked by an authorized
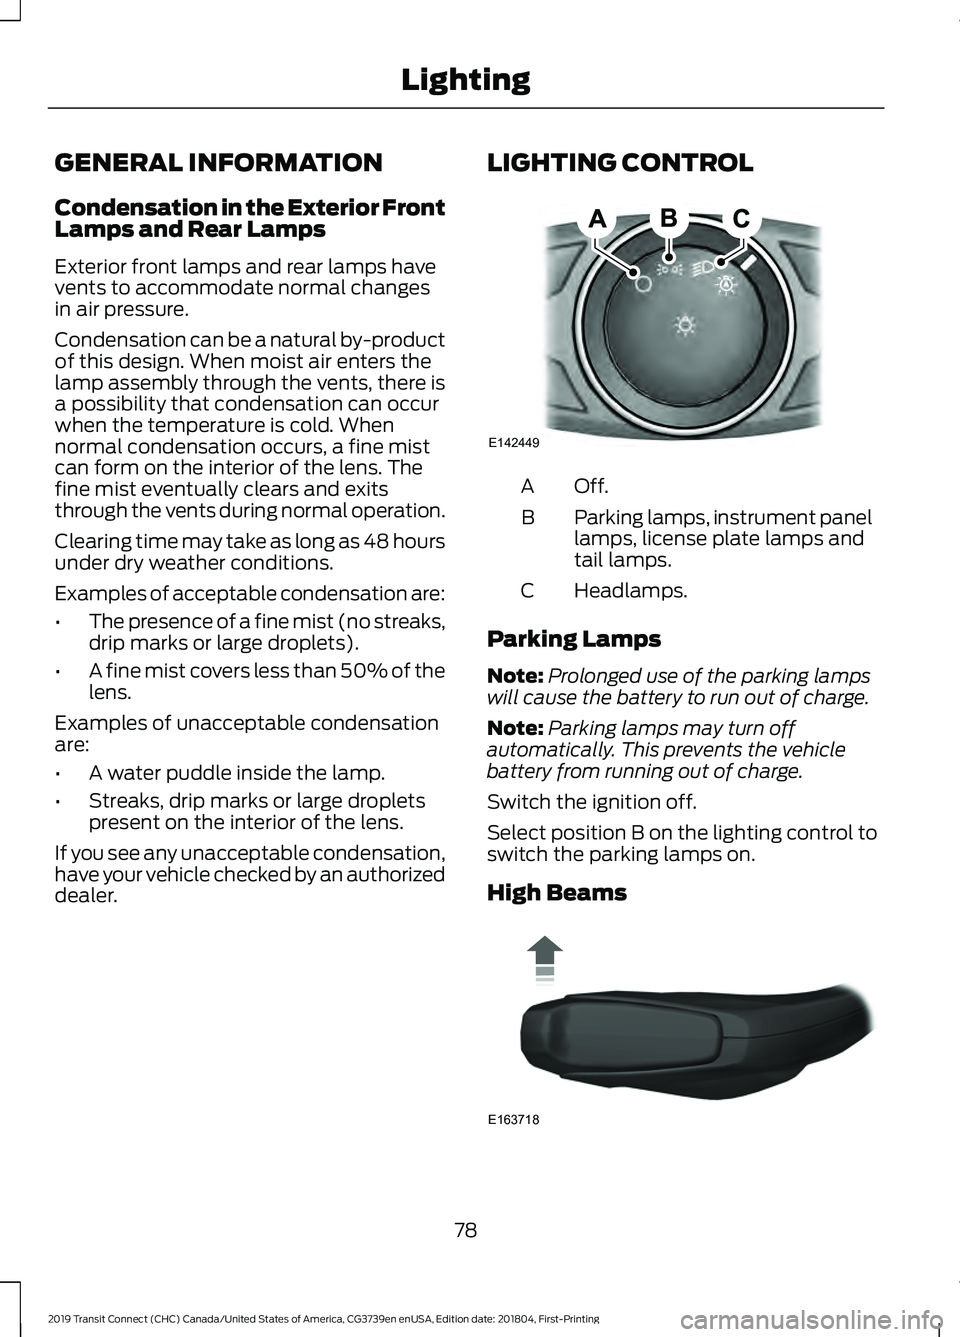
dealer. LIGHTING CONTROL Off.A
Parking lamps, instrument panel
lamps, license plate lamps and
tail lamps.
B
Headlamps.
C
Parking Lamps
Note: Prolonged use of the parking lamps
will cause the battery to run out of charge.
Note: Parking lamps may turn off
automatically. This prevents the vehicle
battery from running out of charge.
Switch the ignition off.
Select position B on the lighting control to
switch the parking lamps on.
High Beams 78
2019 Transit Connect (CHC) Canada/United States of America, CG3739en enUSA, Edition date: 201804, First-Printing LightingE142449 E163718
Page 86 of 493
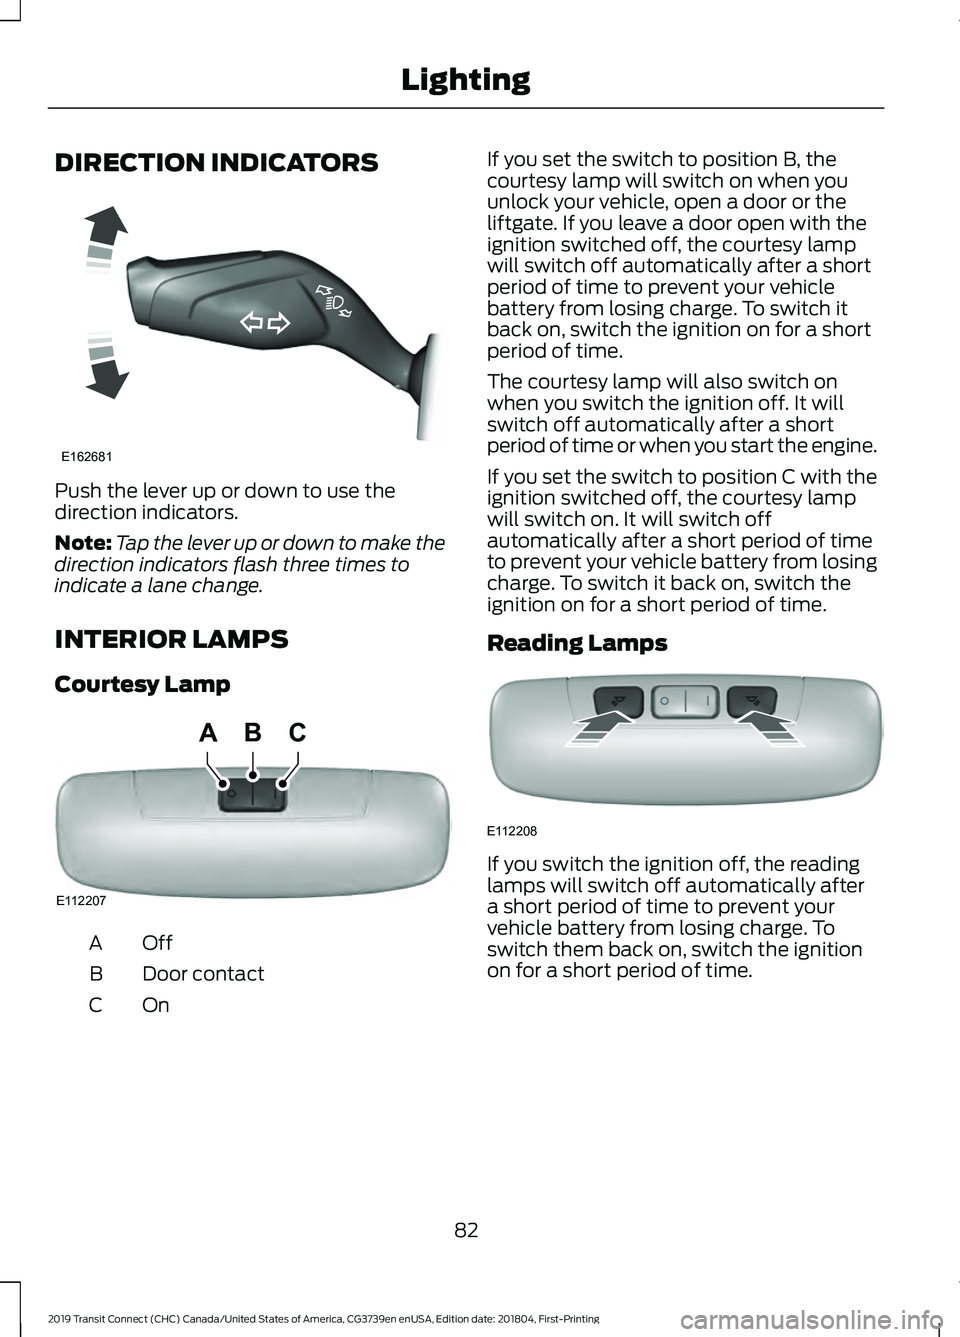
DIRECTION INDICATORS
Push the lever up or down to use the
direction indicators.
Note:
Tap the lever up or down to make the
direction indicators flash three times to
indicate a lane change.
INTERIOR LAMPS
Courtesy Lamp OffA
Door contact
B
OnC If you set the switch to position B, the
courtesy lamp will switch on when you
unlock your vehicle, open a door or the
liftgate. If you leave a door open with the
ignition switched off, the courtesy lamp
will switch off automatically after a short
period of time to prevent your vehicle
battery from losing charge. To switch it
back on, switch the ignition on for a short
period of time.
The courtesy lamp will also switch on
when you switch the ignition off. It will
switch off automatically after a short
period of time or when you start the engine.
If you set the switch to position C with the
ignition switched off, the courtesy lamp
will switch on. It will switch off
automatically after a short period of time
to prevent your vehicle battery from losing
charge. To switch it back on, switch the
ignition on for a short period of time.
Reading Lamps
If you switch the ignition off, the reading
lamps will switch off automatically after
a short period of time to prevent your
vehicle battery from losing charge. To
switch them back on, switch the ignition
on for a short period of time.
82
2019 Transit Connect (CHC) Canada/United States of America, CG3739en enUSA, Edition date: 201804, First-Printing LightingE162681 E112207
BCA E112208
Page 98 of 493
Settings
Menu Item
Information
Display
Driver Assistance
Vehicle Settings
Vehicle Maintenance
MyKey
CLOCK
Type 1
To adjust the clock, switch the ignition on
and press buttons H or M on the
information and entertainment display as
necessary.
Type 2
Note: Use the information display to adjust
the clock. See General Information (page
92).
TRIP COMPUTER
Resetting the Trip Computer
Press and hold
OK on the current screen
to reset the respective trip, distance, time
and average fuel information.
Trip Odometer
Registers the distance traveled of
individual journeys. Distance to Empty
Indicates the approximate distance your
vehicle will travel on the fuel remaining in
the tank. Changes in driving pattern may
cause the value to vary.
Average Fuel
Indicates the average fuel consumption
since the function was last reset.
Digital Speedometer
The speed your vehicle is traveling at will
display as a digital number.
PERSONALIZED SETTINGS
Measure Units
To swap between imperial and metric
units, scroll to this display and press the
OK
button.
Swapping between imperial and metric
units will affect the following displays:
• Distance to empty.
• Average fuel consumption.
• Instantaneous fuel consumption.
• Average speed.
Switching Chimes Off
The following chimes can be switched off:
• Warning messages.
• Information messages.
INFORMATION MESSAGES 94
2019 Transit Connect (CHC) Canada/United States of America, CG3739en enUSA, Edition date: 201804, First-Printing Information Displays
Page 157 of 493
Switching Between E85 and
Gasoline
We do not recommend repeatedly
alternating between E85 and gasoline. If
you switch from using E85 to gasoline, or
from gasoline to E85, add as much fuel as
possible, at least half a tank. Drive your
vehicle immediately for a minimum of 5 mi
(8 km) to allow it to adapt to the change
in ethanol concentration. If you use E85
exclusively, we recommend that you fill
the fuel tank with regular unleaded
gasoline at each scheduled oil change.
FUEL FILLER FUNNEL
LOCATION
The fuel filler funnel is in the glove
compartment.
RUNNING OUT OF FUEL
Running out of fuel can cause damage not
covered by the vehicle Warranty.
If your vehicle runs out of fuel:
• Add a minimum of
1.3 gal (5 L) of fuel
to restart the engine.
• You may need to switch the ignition
from off to on several times after
refueling to allow the fuel system to
pump the fuel from the tank to the
engine. When restarting, cranking time
takes a few seconds longer than
normal.
Note: If your vehicle is on a steep slope,
more fuel may be required. Filling a Portable Fuel Container WARNING:
Flow of fuel through a
fuel pump nozzle can produce static
electricity. This can cause a fire if you are
filling an ungrounded fuel container.
Use the following guidelines to avoid
electrostatic charge build-up, which can
produce a spark, when filling an
ungrounded fuel container:
• Only use an approved fuel container to
transfer fuel to your vehicle. Place the
container on the ground when filling it.
• Do not fill a fuel container when it is
inside your vehicle (including the cargo
area).
• Keep the fuel pump nozzle in contact
with the fuel container when filling it.
• Do not use a device that holds the fuel
pump nozzle lever in the fill position.
Adding Fuel From a Portable Fuel
Container WARNING:
Do not insert the nozzle
of a fuel container or an aftermarket funnel
into the fuel filler neck. This may damage
the fuel system filler neck or its seal and
cause fuel to run onto the ground. WARNING:
Do not try to pry open or
push open the capless fuel system with
foreign objects. This could damage the fuel
system and its seal and cause injury to you
or others. WARNING:
Do not dispose of fuel
in the household refuse or the public
sewage system. Use an authorized waste
disposal facility.
153
2019 Transit Connect (CHC) Canada/United States of America, CG3739en enUSA, Edition date: 201804, First-Printing Fuel and Refueling
Page 171 of 493
Action and Description
Message
Press the OK button or the right arrow button.
Exhaust Filter at Limit
Clean Now Follow the prompts regarding exhaust position as required
to start manual regeneration. Make sure you understand each
prompt. The information display confirms that regeneration
has started and when it is completed.
Press the
OK button or the right arrow button.
Exhaust Filter Over-
loaded Clean Now Follow the prompts regarding exhaust position as required
to start manual regeneration. Make sure you understand each
prompt. The information display confirms that regeneration
has started and when it is completed.
Note: You cannot use the manual regeneration until the diesel particulate filter load
percentage has reached 100 percent. The diesel particulate filter load percentage fluctuates
when driving due to automatic regeneration.
When you start manual regeneration the
engine speed rises to approximately
2000– 2500 rpm and the cooling fan
speed increases. A change in engine noise
due to the cooling fan and engine speed
increase may be heard during the
regeneration process.
Depending on the amount of soot
collected by the diesel particulate filter,
the regeneration process varies depending
on the outside air temperature and
altitude. Manual regeneration may last up
to 40 minutes.
When manual regeneration is complete
the cooling fan and engine speed return to
normal idling. The exhaust system remains
very hot for several minutes after
regeneration is complete. Do not reposition
the vehicle over dry leaves, dry grass or
other combustible materials until the
exhaust system has had sufficient time to
cool.
Interrupt or Cancel Manual Regeneration
You can interrupt or cancel manual
regeneration by switching the engine off.
It may be possible to interrupt or cancel
manual regeneration by pressing any
pedal. Note:
To protect the exhaust system you
may not be able to restart the engine for 10
minutes.
Depending on the amount of time allowed
for manual regeneration to operate, soot
may not have had sufficient time to be
eliminated. The exhaust system may still
be very hot for several minutes after
regeneration.
If you switch the engine off during manual
regeneration, turbo charger flutter occurs.
This is a consequence of switching a diesel
engine off during turbo charger boost
operation, which is normal.
Manual Regeneration with Automatic
Regeneration Control
Where vehicle use has significant engine
idle operation, frequent vehicle speed less
than
25 mph (40 km/h), or driving short
distances where the engine does not fully
warm up, automatic regeneration could
not sufficiently clean the diesel particulate
filter. You can switch automatic
regeneration off until you can drive your
167
2019 Transit Connect (CHC) Canada/United States of America, CG3739en enUSA, Edition date: 201804, First-Printing Engine Emission Control
Page 181 of 493
PRINCIPLE OF OPERATION
WARNING: Vehicle modifications
involving braking system, aftermarket roof
racks, suspension, steering system, tire
construction and wheel and tire size may
change the handling characteristics of your
vehicle and may adversely affect the
performance of the electronic stability
control system. In addition, installing any
stereo loudspeakers may interfere with
and adversely affect the electronic stability
control system. Install any aftermarket
stereo loudspeaker as far as possible from
the front center console, the tunnel, and
the front seats in order to minimize the risk
of interfering with the electronic stability
control sensors. Reducing the
effectiveness of the electronic stability
control system could lead to an increased
risk of loss of vehicle control, vehicle
rollover, personal injury and death. WARNING:
Remember that even
advanced technology cannot defy the laws
of physics. It’ s always possible to lose
control of a vehicle due to inappropriate
driver input for the conditions. Aggressive
driving on any road condition can cause
you to lose control of your vehicle
increasing the risk of personal injury or
property damage. Activation of the
electronic stability control system is an
indication that at least some of the tires
have exceeded their ability to grip the road;
this could reduce the operator ’s ability to
control the vehicle potentially resulting in
a loss of vehicle control, vehicle rollover,
personal injury and death. If your electronic
stability control system activates, SLOW
DOWN.
The system automatically turns on each
time you switch the ignition on. If a fault occurs in either the stability
control or the traction control system, you
may experience the following conditions:
•
The stability and traction control light
illuminates steadily.
• The stability control and traction
control systems do not enhance your
vehicle's ability to maintain traction of
the wheels.
If a driving condition activates either the
stability control or the traction control
system you may experience the following
conditions:
• The stability and traction control light
flashes.
• Your vehicle slows down.
• Reduced engine power.
• A vibration in the brake pedal.
• The brake pedal is stiffer than usual.
• If the driving condition is severe and
your foot is not on the brake, the brake
pedal may move as the system applies
higher brake force.
The stability control system has several
features built into it to help you maintain
control of your vehicle:
Electronic Stability Control
The system enhances your vehicle ’s ability
to prevent skids or lateral slides by
applying brakes to one or more of the
wheels individually and, if necessary,
reducing engine power.
Roll Stability Control
The system enhances your vehicle ’s ability
to prevent rollovers by detecting your
vehicle ’s roll motion and the rate at which
it changes by applying the brakes to one
or more wheels individually.
177
2019 Transit Connect (CHC) Canada/United States of America, CG3739en enUSA, Edition date: 201804, First-Printing Stability Control
Page 189 of 493
WARNING: The sensors may not
detect objects in heavy rain or other
conditions that cause interference. WARNING:
You are responsible for
controlling your vehicle at all times. The
system is designed to be an aid and does
not relieve you of your responsibility to
drive with due care and attention. Failure
to follow this instruction could result in the
loss of control of your vehicle, personal
injury or death.
Active park assist is a multi-step process
and may require you to shift the
transmission multiple times. Follow the
onscreen instructions until the parking
maneuver is complete.
If you are uncomfortable with the proximity
to any vehicle or object, you may choose
to override the system by grabbing the
steering wheel, or by taking full control of
your vehicle after pressing the active park
assist button.
Keep your hands, hair, clothing and any
loose items clear of the steering wheel
when using active park assist.
The sensors are on the front and rear
bumpers.
Note: Keep the sensors free from snow, ice
and large accumulations of dirt.
Note: Do not cover up the sensors.
Note: Do not clean the sensors with sharp
objects.
Note: The sensors may not detect objects
with surfaces that absorb ultrasonic waves.
The sensors may falsely detect objects due
to ultrasonic interference caused by, for
example motorcycle exhausts, truck air
brakes or horns. Note:
If you change any tires, the system
must recalibrate and may not correctly
operate for a short time.
The system may not correctly operate in
any of the following conditions:
• You use a spare tire or a tire that is
significantly worn more than the other
tires.
• One or more tires are incorrectly
inflated.
• You try to park on a tight curve.
• Something passes between the front
bumper and the parking space. For
example, a pedestrian or cyclist.
• The edge of the neighboring parked
vehicle is high off the ground. For
example, a bus, tow truck or flatbed
truck.
• The weather conditions are poor. For
example, during heavy rain, snow, fog,
high humidity and high temperatures.
Do not use the system if:
• You have attached an add-on
accessory close to the sensors on the
front or rear of your vehicle. For
example, a bike rack or trailer.
• You have attached an overhanging
object to the roof. For example, a
surfboard.
• The front bumper, rear bumper or the
side sensors are damaged.
• The correct tire size is not in use on your
vehicle. For example, a mini-spare tire.
Using Active Park Assist
Selecting an Active Park Assist Mode Press the button once to
activate parallel parking. Press
the button a second time to
activate perpendicular parking. If you press
the button again the system switches off.
185
2019 Transit Connect (CHC) Canada/United States of America, CG3739en enUSA, Edition date: 201804, First-Printing Parking Aids
(If Equipped)E146186