clock FORD TRANSIT CONNECT 2020 Owners Manual
[x] Cancel search | Manufacturer: FORD, Model Year: 2020, Model line: TRANSIT CONNECT, Model: FORD TRANSIT CONNECT 2020Pages: 509, PDF Size: 7.73 MB
Page 10 of 509
Wi-Fi Hotspot
Creating a Wi-Fi Hotspot - Vehicles
Without: SYNC 3 .....................................365
Creating a Wi-Fi Hotspot - Vehicles With: SYNC 3 .......................................................
365
Changing the Wi-Fi Hotspot Name or Password - Vehicles Without: SYNC 3
.......................................................................
366
Changing the Wi-Fi Hotspot Name or Password - Vehicles With: SYNC 3
.......................................................................
366
Audio System
General Information ..................................
367
Audio Unit - Vehicles Without: SYNC 3 .......................................................................
368
Audio Unit - Vehicles With: SYNC 3 ......
371
AM/FM Radio - Vehicles Without: SYNC 3.....................................................................
372
Audio Unit Clock and Date Displays - Vehicles Without: SYNC 3 ...................
373
Connecting a Bluetooth Device - Vehicles Without: SYNC 3 ...................
373
Satellite Radio ..............................................
373
Streaming Bluetooth Audio - Vehicles Without: SYNC 3 .....................................
375
Playing Media From a USB Device - Vehicles Without: SYNC 3 ...................
375
USB Port .........................................................
376
Using Voice Recognition ..........................
376
SYNC™ 3
General Information ...................................
377
Home Screen ...............................................
384
Using Voice Recognition ..........................
384
Entertainment .............................................
390
Phone ..............................................................
392
Navigation .....................................................
393
Apps .................................................................
397
Settings ..........................................................
398
SYNC™ 3 Troubleshooting ......................
412Accessories
Accessories
...................................................
425
Ford Protect
Ford Protect ..................................................
426
Scheduled Maintenance
General Maintenance Information ......
428
Normal Scheduled Maintenance ..........
431
Special Operating Conditions Scheduled Maintenance ............................................
434
Scheduled Maintenance Record ..........
436
Appendices
Electromagnetic Compatibility .............
446
End User License Agreement ................
448
Declaration of Conformity - Vehicles Without: SYNC 3 .....................................
473
Declaration of Conformity - Vehicles With: SYNC 3 ............................................
474
Declaration of Conformity - Vehicles With: Wireless Accessory Charging
........................................................................\
474
Type Approvals ............................................
476
6
2020 Transit Connect (CHC) Canada/United States of America, CG3739en enUSA, Edition date: 201903, First-Printing Table of Contents
Page 38 of 509
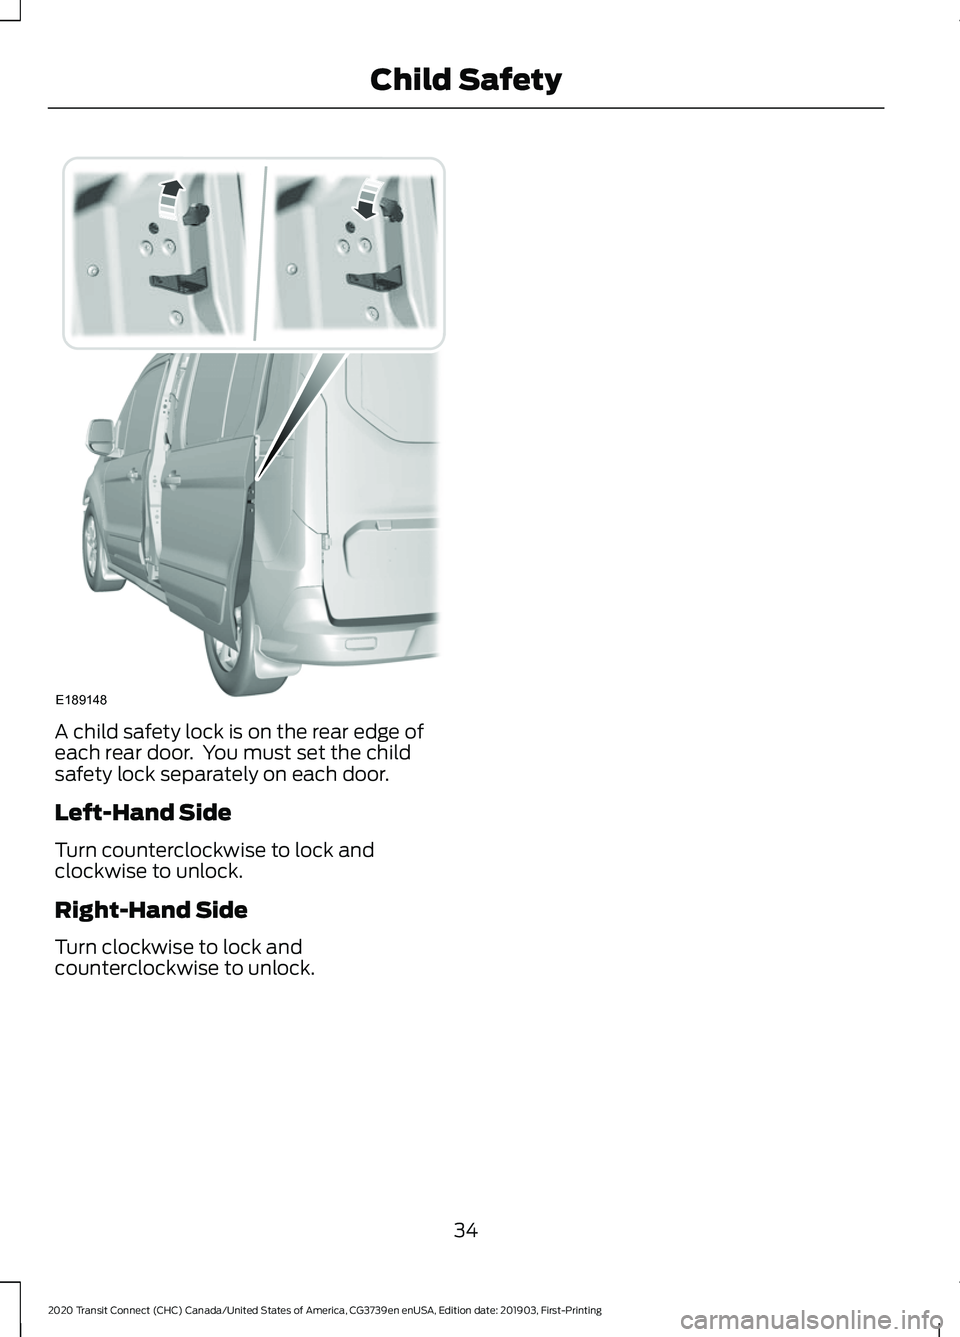
A child safety lock is on the rear edge of
each rear door. You must set the child
safety lock separately on each door.
Left-Hand Side
Turn counterclockwise to lock and
clockwise to unlock.
Right-Hand Side
Turn clockwise to lock and
counterclockwise to unlock.
34
2020 Transit Connect (CHC) Canada/United States of America, CG3739en enUSA, Edition date: 201903, First-Printing Child SafetyE189148
Page 73 of 509
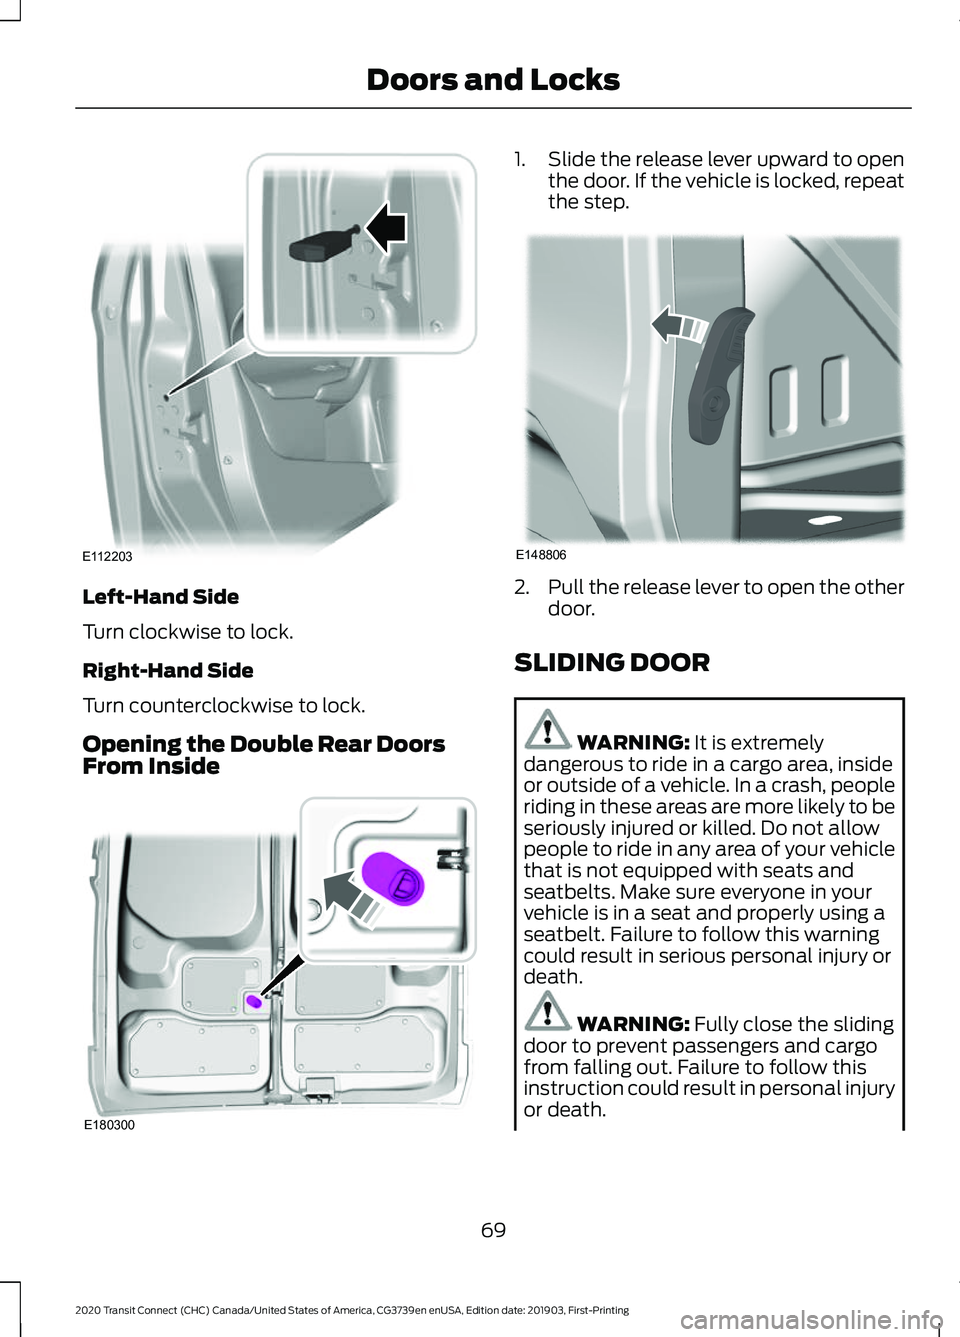
Left-Hand Side
Turn clockwise to lock.
Right-Hand Side
Turn counterclockwise to lock.
Opening the Double Rear Doors
From Inside 1.
Slide the release lever upward to open
the door. If the vehicle is locked, repeat
the step. 2.
Pull the release lever to open the other
door.
SLIDING DOOR WARNING: It is extremely
dangerous to ride in a cargo area, inside
or outside of a vehicle. In a crash, people
riding in these areas are more likely to be
seriously injured or killed. Do not allow
people to ride in any area of your vehicle
that is not equipped with seats and
seatbelts. Make sure everyone in your
vehicle is in a seat and properly using a
seatbelt. Failure to follow this warning
could result in serious personal injury or
death. WARNING:
Fully close the sliding
door to prevent passengers and cargo
from falling out. Failure to follow this
instruction could result in personal injury
or death.
69
2020 Transit Connect (CHC) Canada/United States of America, CG3739en enUSA, Edition date: 201903, First-Printing Doors and LocksE112203 E180300 E148806
Page 118 of 509
MANUAL CLIMATE CONTROL
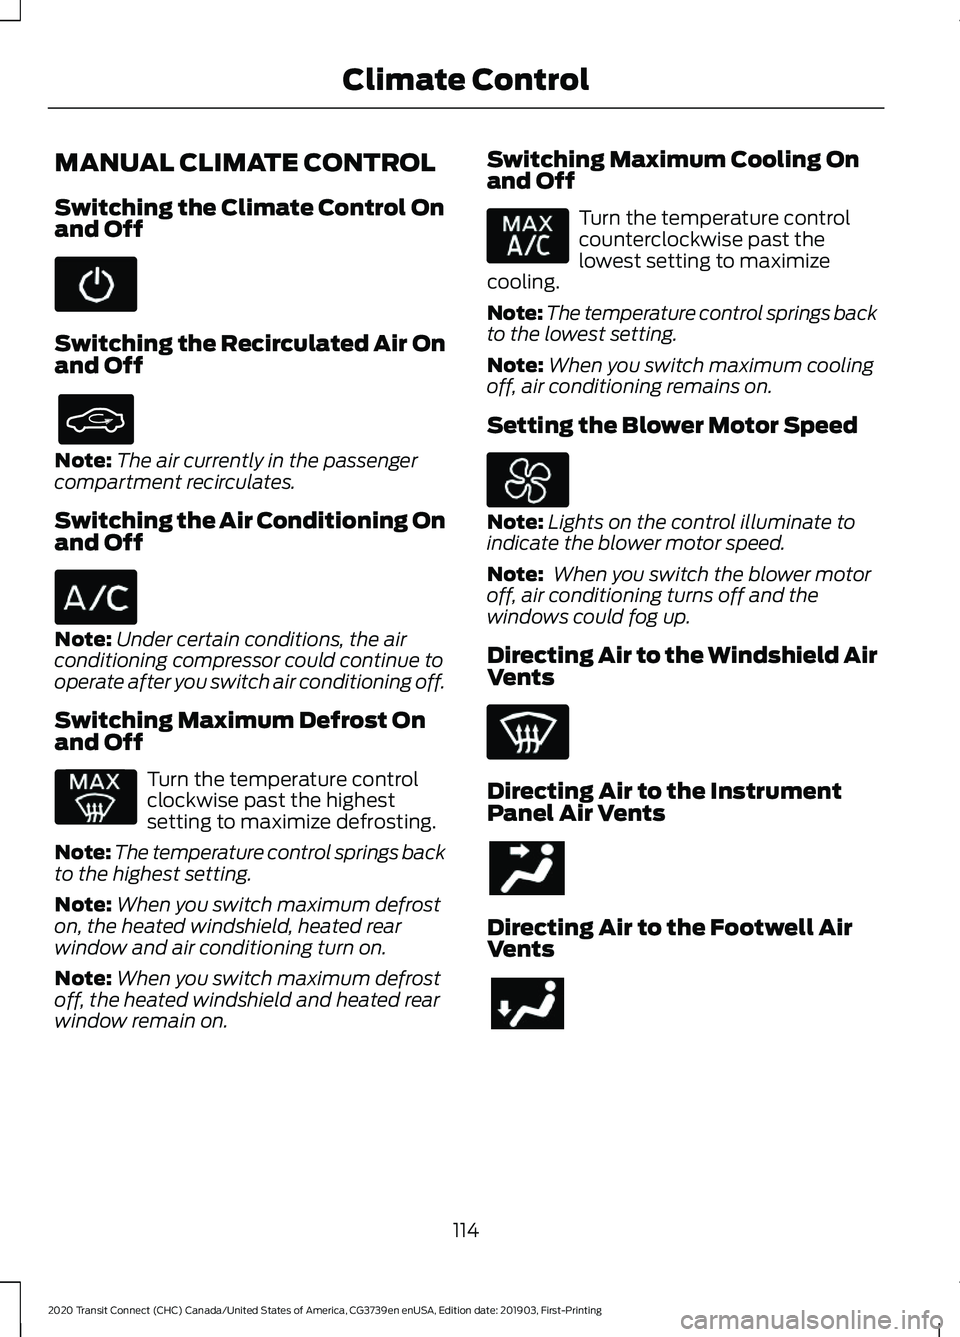
Switching the Climate Control On
and Off
Switching the Recirculated Air On
and Off
Note:
The air currently in the passenger
compartment recirculates.
Switching the Air Conditioning On
and Off Note:
Under certain conditions, the air
conditioning compressor could continue to
operate after you switch air conditioning off.
Switching Maximum Defrost On
and Off Turn the temperature control
clockwise past the highest
setting to maximize defrosting.
Note: The temperature control springs back
to the highest setting.
Note: When you switch maximum defrost
on, the heated windshield, heated rear
window and air conditioning turn on.
Note: When you switch maximum defrost
off, the heated windshield and heated rear
window remain on. Switching Maximum Cooling On
and Off Turn the temperature control
counterclockwise past the
lowest setting to maximize
cooling.
Note: The temperature control springs back
to the lowest setting.
Note: When you switch maximum cooling
off, air conditioning remains on.
Setting the Blower Motor Speed Note:
Lights on the control illuminate to
indicate the blower motor speed.
Note: When you switch the blower motor
off, air conditioning turns off and the
windows could fog up.
Directing Air to the Windshield Air
Vents Directing Air to the Instrument
Panel Air Vents
Directing Air to the Footwell Air
Vents
114
2020 Transit Connect (CHC) Canada/United States of America, CG3739en enUSA, Edition date: 201903, First-Printing Climate Control
Page 119 of 509
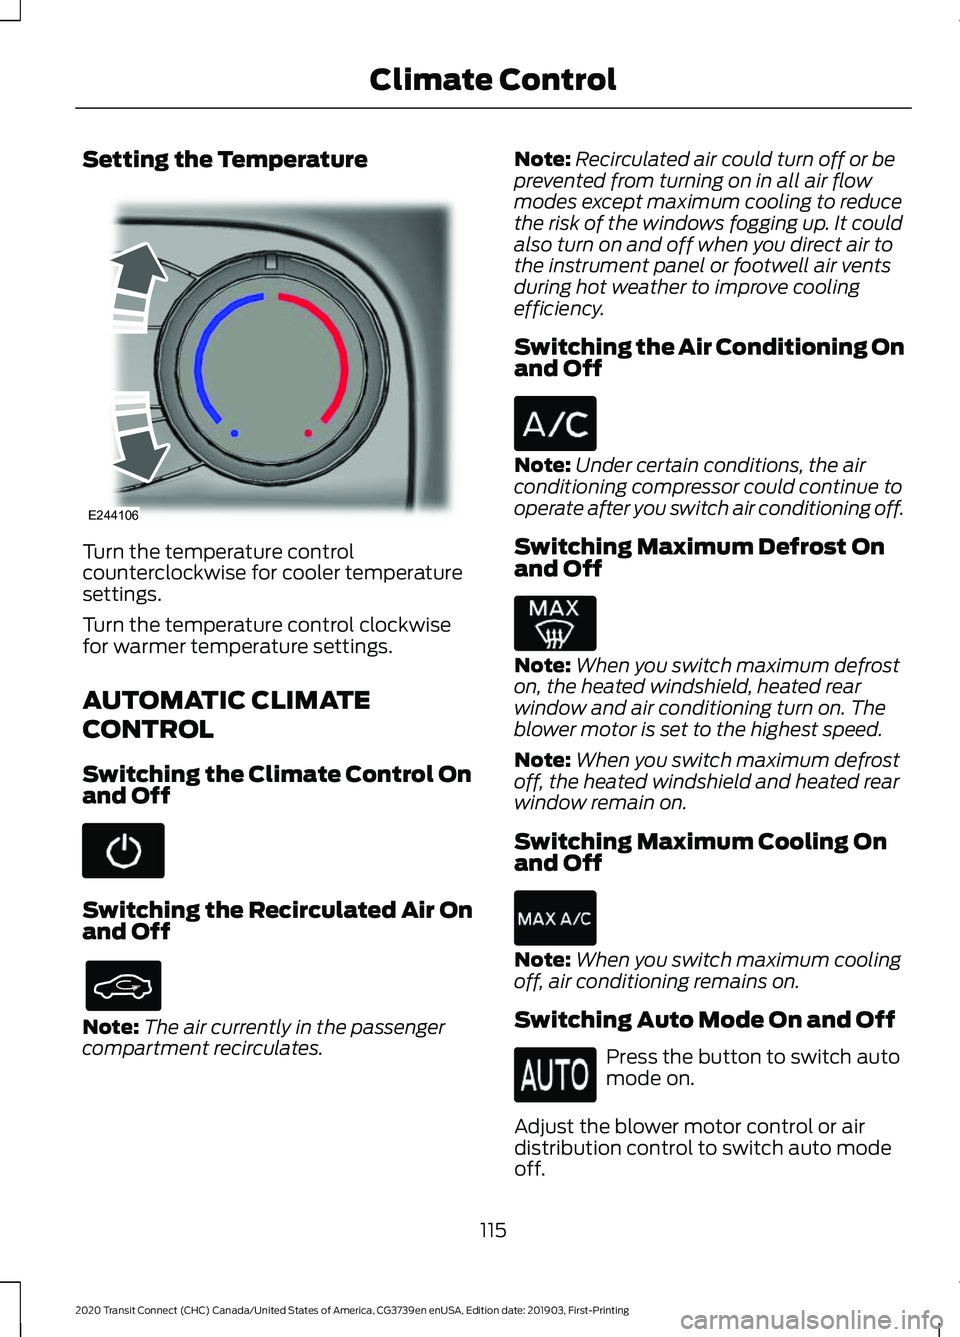
Setting the Temperature
Turn the temperature control
counterclockwise for cooler temperature
settings.
Turn the temperature control clockwise
for warmer temperature settings.
AUTOMATIC CLIMATE
CONTROL
Switching the Climate Control On
and Off
Switching the Recirculated Air On
and Off
Note:
The air currently in the passenger
compartment recirculates. Note:
Recirculated air could turn off or be
prevented from turning on in all air flow
modes except maximum cooling to reduce
the risk of the windows fogging up. It could
also turn on and off when you direct air to
the instrument panel or footwell air vents
during hot weather to improve cooling
efficiency.
Switching the Air Conditioning On
and Off Note:
Under certain conditions, the air
conditioning compressor could continue to
operate after you switch air conditioning off.
Switching Maximum Defrost On
and Off Note:
When you switch maximum defrost
on, the heated windshield, heated rear
window and air conditioning turn on. The
blower motor is set to the highest speed.
Note: When you switch maximum defrost
off, the heated windshield and heated rear
window remain on.
Switching Maximum Cooling On
and Off Note:
When you switch maximum cooling
off, air conditioning remains on.
Switching Auto Mode On and Off Press the button to switch auto
mode on.
Adjust the blower motor control or air
distribution control to switch auto mode
off.
115
2020 Transit Connect (CHC) Canada/United States of America, CG3739en enUSA, Edition date: 201903, First-Printing Climate ControlE244106
Page 120 of 509
Setting the Blower Motor Speed
Press and release + or - to set
the volume of air circulated in
the passenger compartment.
Note: Lights on the control illuminate to
indicate the blower motor speed.
Directing Air to the Windshield Air
Vents Directing Air to the Instrument
Panel Air Vents
Directing Air to the Footwell Air
Vents
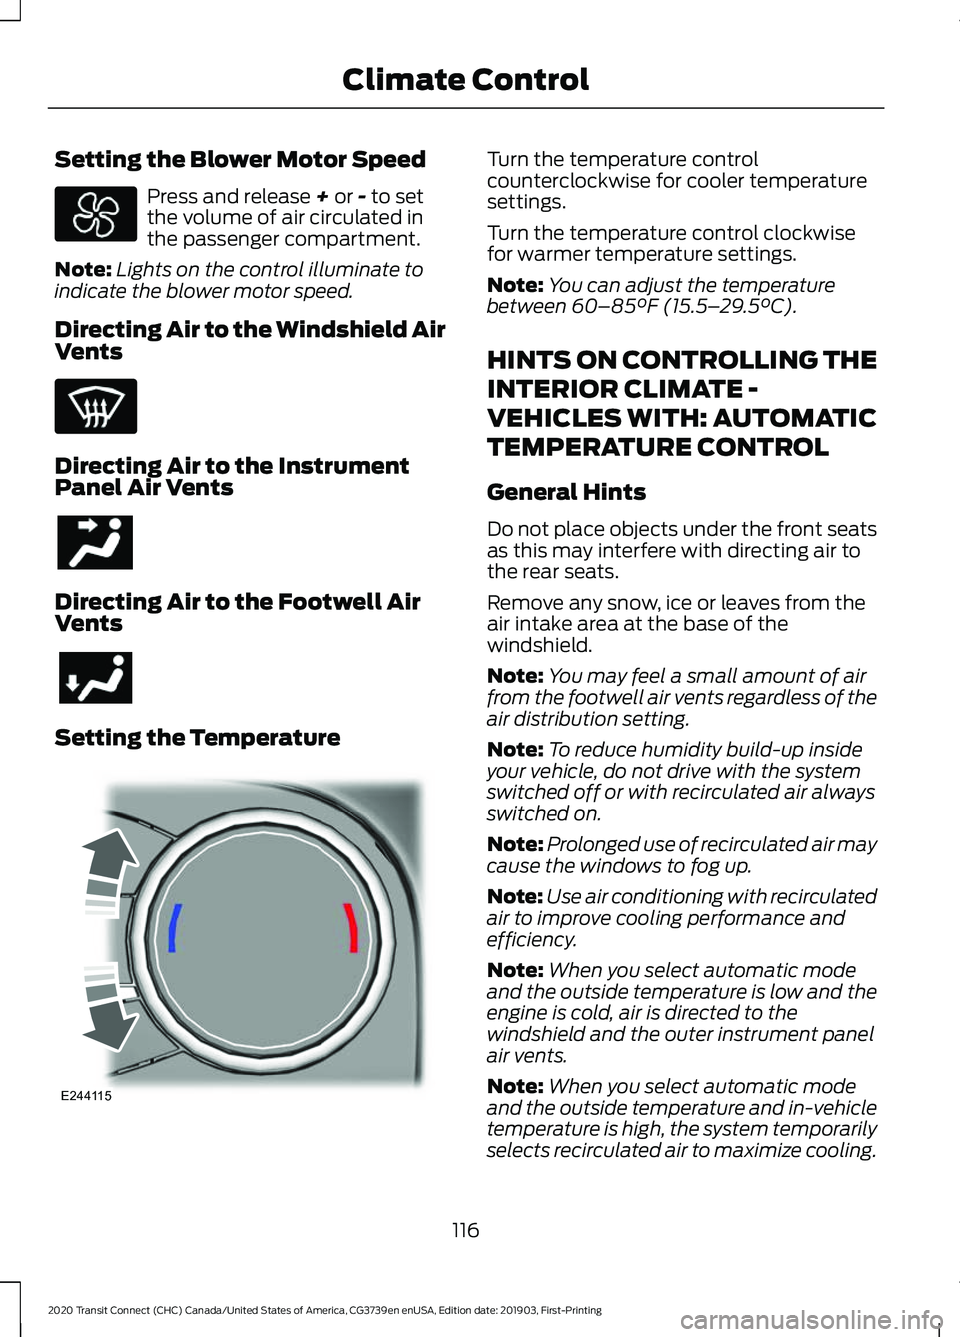
Setting the Temperature Turn the temperature control
counterclockwise for cooler temperature
settings.
Turn the temperature control clockwise
for warmer temperature settings.
Note:
You can adjust the temperature
between
60–85°F (15.5– 29.5°C).
HINTS ON CONTROLLING THE
INTERIOR CLIMATE -
VEHICLES WITH: AUTOMATIC
TEMPERATURE CONTROL
General Hints
Do not place objects under the front seats
as this may interfere with directing air to
the rear seats.
Remove any snow, ice or leaves from the
air intake area at the base of the
windshield.
Note: You may feel a small amount of air
from the footwell air vents regardless of the
air distribution setting.
Note: To reduce humidity build-up inside
your vehicle, do not drive with the system
switched off or with recirculated air always
switched on.
Note: Prolonged use of recirculated air may
cause the windows to fog up.
Note: Use air conditioning with recirculated
air to improve cooling performance and
efficiency.
Note: When you select automatic mode
and the outside temperature is low and the
engine is cold, air is directed to the
windshield and the outer instrument panel
air vents.
Note: When you select automatic mode
and the outside temperature and in-vehicle
temperature is high, the system temporarily
selects recirculated air to maximize cooling.
116
2020 Transit Connect (CHC) Canada/United States of America, CG3739en enUSA, Edition date: 201903, First-Printing Climate Control E244115
Page 173 of 509
6. Replace the diesel exhaust fluid tank
filler cap. Turn it clockwise until you
feel a strong resistance.
Do not attempt to start the engine if you
have filled the diesel exhaust fluid tank
with incorrect fluid. Incorrect diesel
exhaust fluid use could cause damage not
covered by the vehicle Warranty. Have your
vehicle immediately checked.
Filling the Diesel Exhaust Fluid
Tank Using a Container WARNING: Keep diesel exhaust
fluid out of reach of children. Avoid
contact with skin, eyes or clothing. In
case of contact with your eyes, flush
immediately with water and get prompt
medical attention. In case of contact
with your skin, clean immediately with
soap and water. If you swallow any
diesel exhaust fluid, drink plenty of
water, call a physician immediately. WARNING:
Only refill the diesel
exhaust fluid tank in a well ventilated
area. When you remove the diesel
exhaust fluid tank filler cap or a diesel
exhaust fluid container cap, ammonia
vapors may escape. Ammonia vapors
can be irritating to skin, eyes and mucous
membranes. Inhaling ammonia vapors
can cause burning to the eyes, throat and
nose and cause coughing and watery
eyes.
Always follow the manufacturer's
instructions.
1. Remove the fluid container cap.
2. Place the spout on to the container and
tighten it until you feel a strong
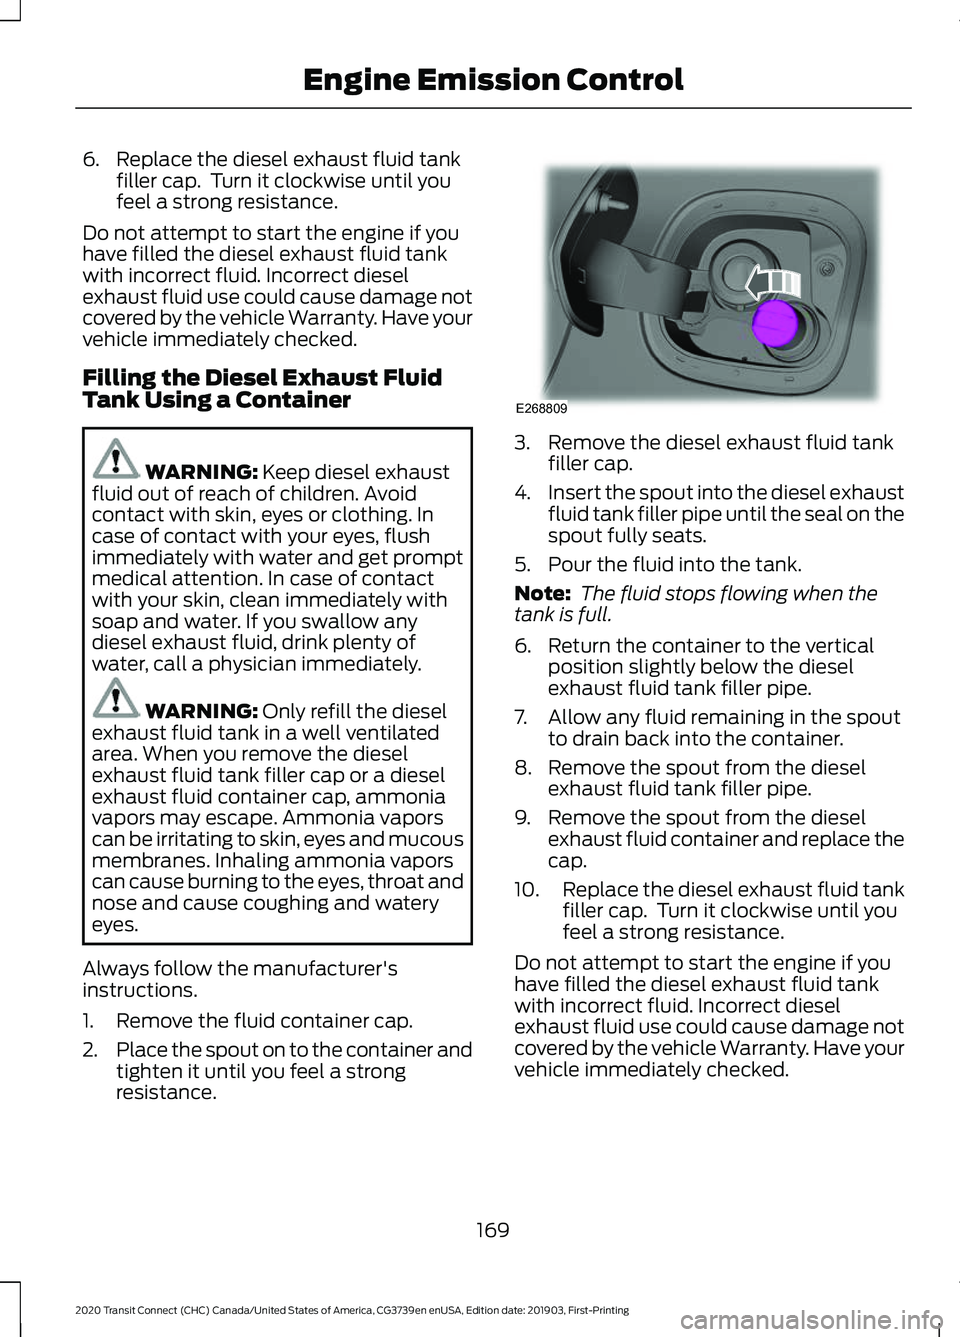
resistance. 3. Remove the diesel exhaust fluid tank
filler cap.
4. Insert the spout into the diesel exhaust
fluid tank filler pipe until the seal on the
spout fully seats.
5. Pour the fluid into the tank.
Note: The fluid stops flowing when the
tank is full.
6. Return the container to the vertical position slightly below the diesel
exhaust fluid tank filler pipe.
7. Allow any fluid remaining in the spout to drain back into the container.
8. Remove the spout from the diesel exhaust fluid tank filler pipe.
9. Remove the spout from the diesel exhaust fluid container and replace the
cap.
10. Replace the diesel exhaust fluid tank
filler cap. Turn it clockwise until you
feel a strong resistance.
Do not attempt to start the engine if you
have filled the diesel exhaust fluid tank
with incorrect fluid. Incorrect diesel
exhaust fluid use could cause damage not
covered by the vehicle Warranty. Have your
vehicle immediately checked.
169
2020 Transit Connect (CHC) Canada/United States of America, CG3739en enUSA, Edition date: 201903, First-Printing Engine Emission ControlE268809
Page 258 of 509
1. Remove the jumper cable from the
ground metal surface or connecting
point, if available.
2. Remove the jumper cable on the negative (-) terminal of the booster
vehicle's battery.
3. Remove the jumper cable from the positive (+) terminal of the booster
vehicle's battery.
4. Remove the jumper cable from the positive (+) terminal of the disabled
vehicle's battery.
After starting your vehicle and removing
the jumper cables, allow it to idle for
several minutes so the battery can
recharge.
POST-CRASH ALERT SYSTEM
The system flashes the turn signal lamps
and sounds the horn (intermittently) in the
event of a serious impact that deploys an
airbag (front, side, side curtain or Safety
Canopy) or the seatbelt pretensioners.
The horn and lamps will turn off when:
• The hazard control button is pressed
• The panic button (if equipped) is
pressed on the remote entry
transmitter
• Your vehicle runs out of power
TOWING POINTS
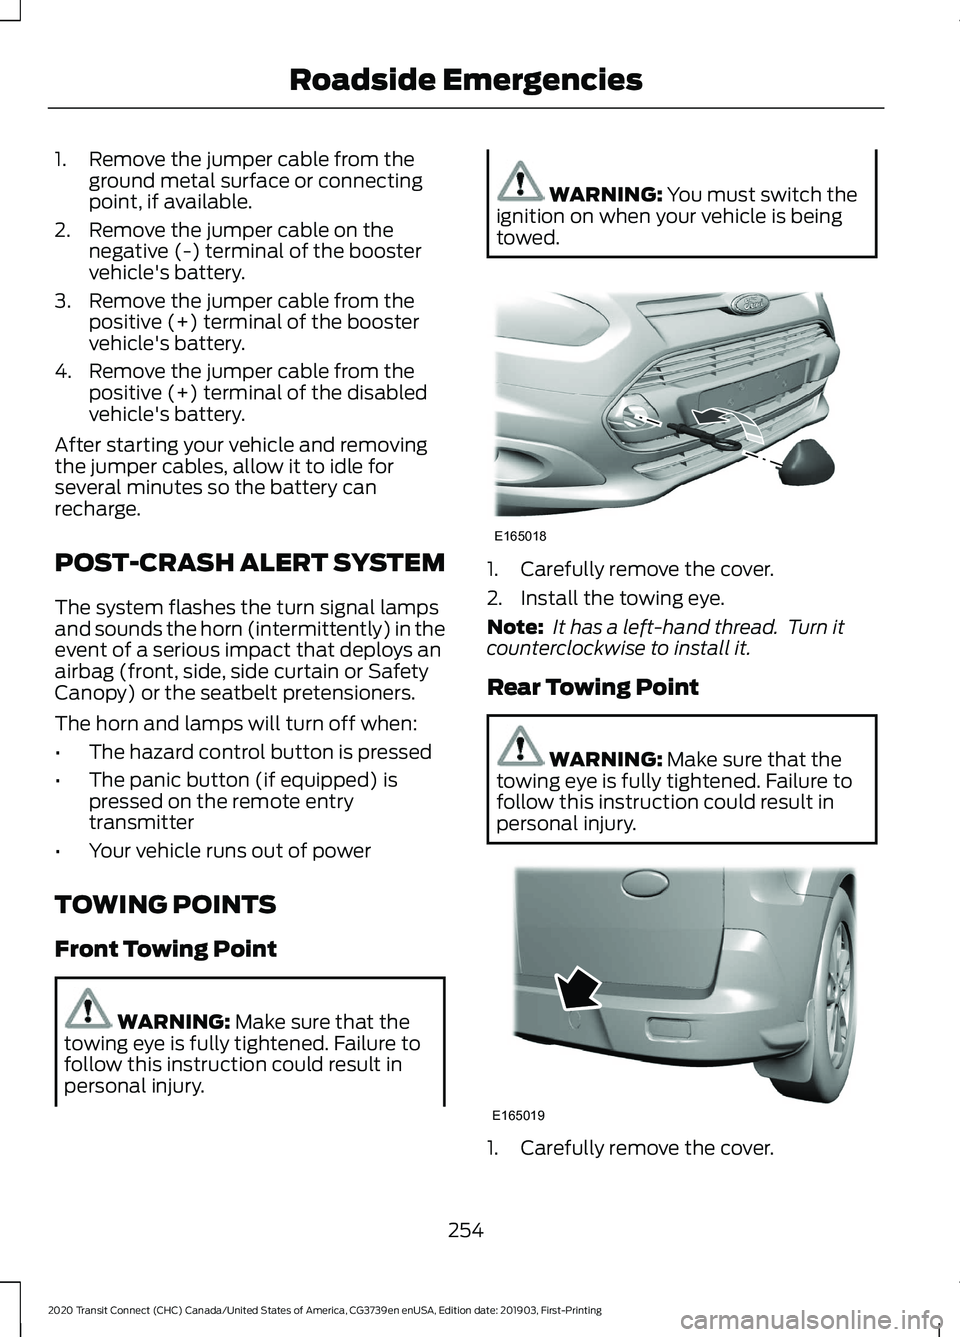
Front Towing Point WARNING: Make sure that the
towing eye is fully tightened. Failure to
follow this instruction could result in
personal injury. WARNING:
You must switch the
ignition on when your vehicle is being
towed. 1. Carefully remove the cover.
2. Install the towing eye.
Note:
It has a left-hand thread. Turn it
counterclockwise to install it.
Rear Towing Point WARNING:
Make sure that the
towing eye is fully tightened. Failure to
follow this instruction could result in
personal injury. 1. Carefully remove the cover.
254
2020 Transit Connect (CHC) Canada/United States of America, CG3739en enUSA, Edition date: 201903, First-Printing Roadside EmergenciesE165018 E165019
Page 259 of 509
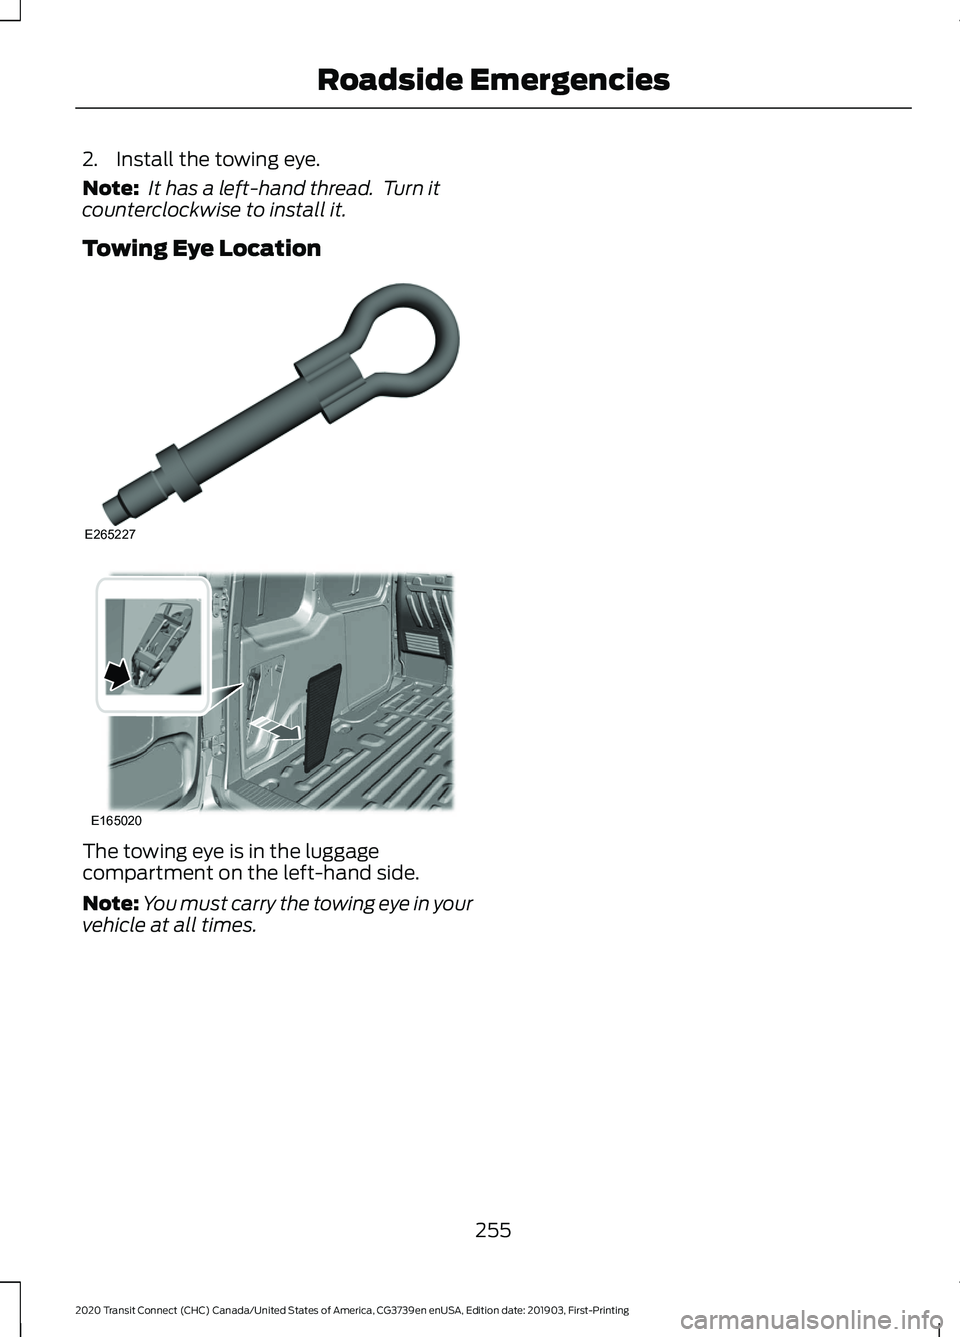
2. Install the towing eye.
Note:
It has a left-hand thread. Turn it
counterclockwise to install it.
Towing Eye Location The towing eye is in the luggage
compartment on the left-hand side.
Note:
You must carry the towing eye in your
vehicle at all times.
255
2020 Transit Connect (CHC) Canada/United States of America, CG3739en enUSA, Edition date: 201903, First-Printing Roadside EmergenciesE265227 E165020
Page 281 of 509
Note:
The oil consumption of new engines
reaches its normal level after approximately
3,000 mi (5,000 km).
Adding Engine Oil WARNING:
Do not add engine oil
when the engine is hot. Failure to follow
this instruction could result in personal
injury. WARNING:
Do not remove the
filler cap when the engine is running.
Do not use supplemental engine oil
additives because they are unnecessary
and could lead to engine damage that may
not be covered by the vehicle Warranty. Only use oils certified for gasoline engines
by the American Petroleum Institute (API).
An oil with this trademark symbol
conforms to the current engine and
emission system protection standards and
fuel economy requirements of the
International Lubricants Specification
Advisory Committee (ILSAC).
To top up the engine oil level do the
following:
1. Clean the area surrounding the engine
oil filler cap before you remove it. 2. Remove the engine oil filler cap. See
Under Hood Overview
(page 272).
Turn it counterclockwise and remove
it.
3. Add engine oil that meets our specifications.
See Capacities and
Specifications (page 345). You may
have to use a funnel to pour the engine
oil into the opening.
4. Recheck the oil level.
5. If the oil level is correct, replace the dipstick and make sure it is fully seated.
6. Replace the engine oil filler cap. Turn it clockwise until you feel a strong
resistance.
Note: Do not add oil further than the
maximum mark. Oil levels above the
maximum mark may cause engine damage.
Note: Make sure you install the oil filler cap
correctly.
Note: Soak up any spillage with an
absorbent cloth immediately.
OIL CHANGE INDICATOR
RESET
Only reset the system after changing the
engine oil and oil filter.
Resetting the Oil Life Monitoring
System
1. Switch the ignition on. Do not start the
engine.
2. Fully press the accelerator and brake pedals at the same time.
3. Keep the accelerator and brake pedals
fully pressed.
4. After three seconds, a message appears confirming that the reset is in
progress.
5. After 25 seconds, a message appears confirming that the reset is complete.
277
2020 Transit Connect (CHC) Canada/United States of America, CG3739en enUSA, Edition date: 201903, First-Printing MaintenanceE142732