FORD WINDSTAR 2003 2.G Owners Manual
Manufacturer: FORD, Model Year: 2003, Model line: WINDSTAR, Model: FORD WINDSTAR 2003 2.GPages: 240, PDF Size: 3.09 MB
Page 91 of 240
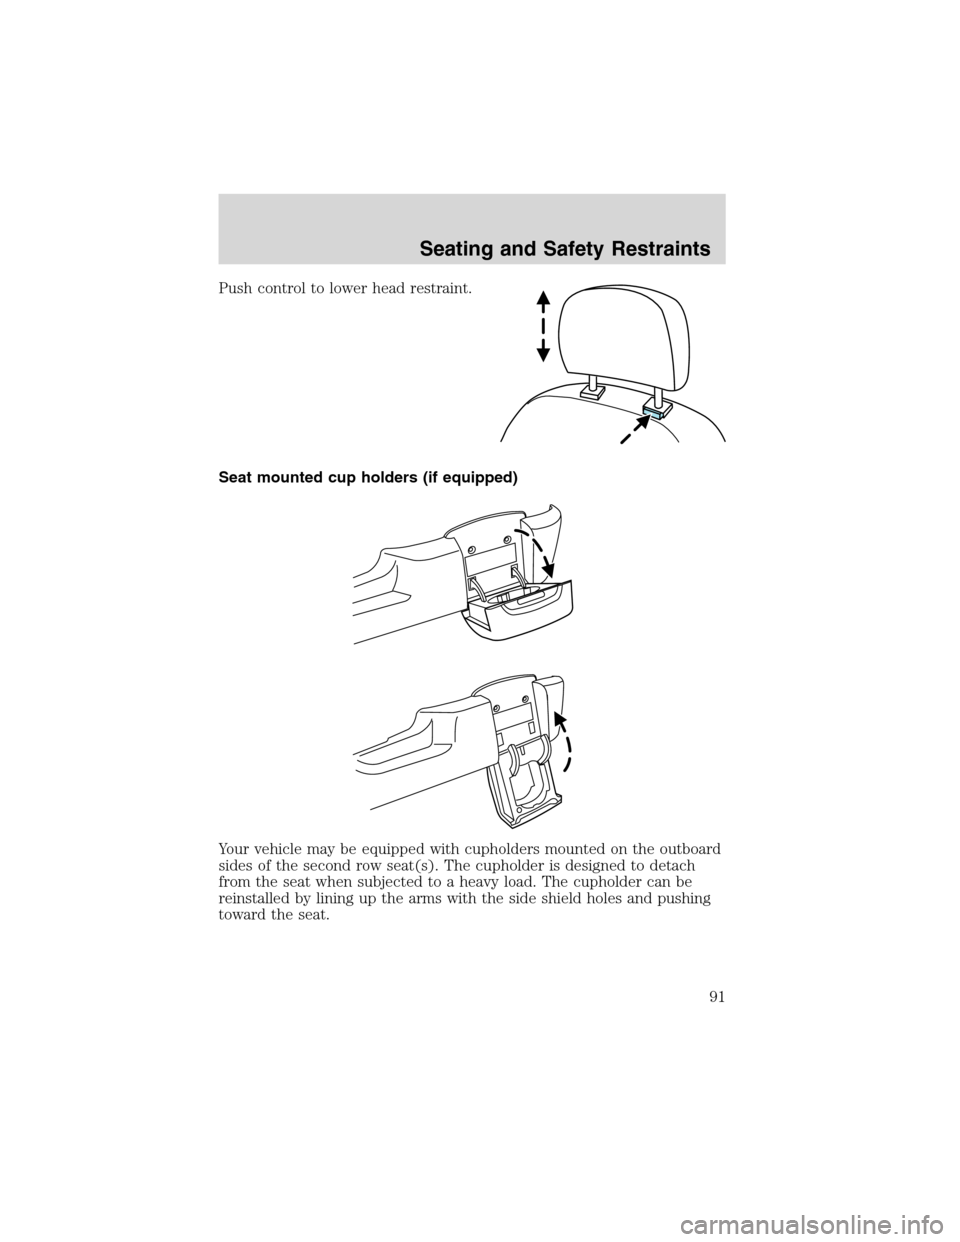
Push control to lower head restraint.
Seat mounted cup holders (if equipped)
Your vehicle may be equipped with cupholders mounted on the outboard
sides of the second row seat(s). The cupholder is designed to detach
from the seat when subjected to a heavy load. The cupholder can be
reinstalled by lining up the arms with the side shield holes and pushing
toward the seat.
Seating and Safety Restraints
91
Page 92 of 240
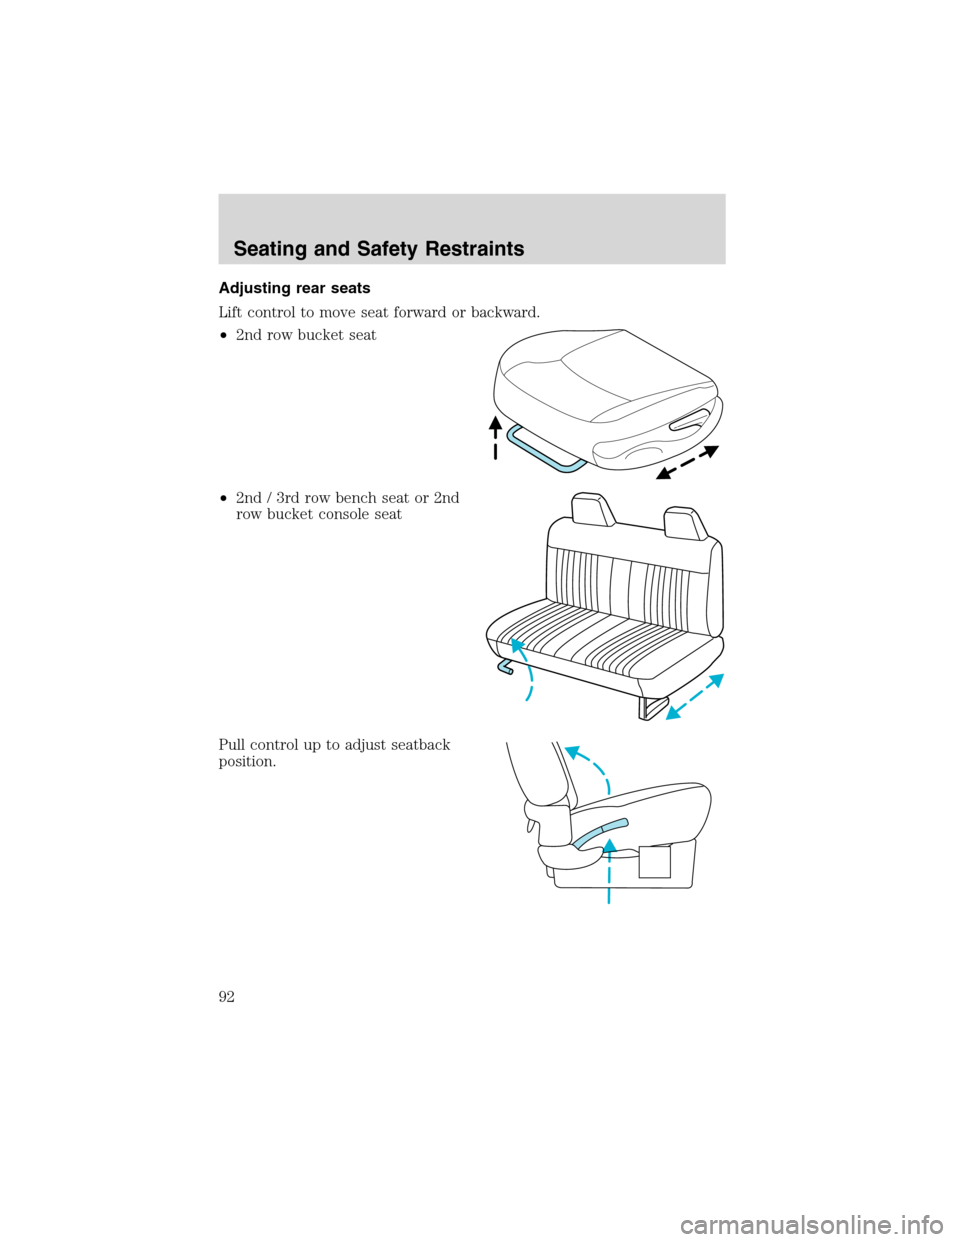
Adjusting rear seats
Lift control to move seat forward or backward.
•2nd row bucket seat
•2nd / 3rd row bench seat or 2nd
row bucket console seat
Pull control up to adjust seatback
position.
Seating and Safety Restraints
92
Page 93 of 240
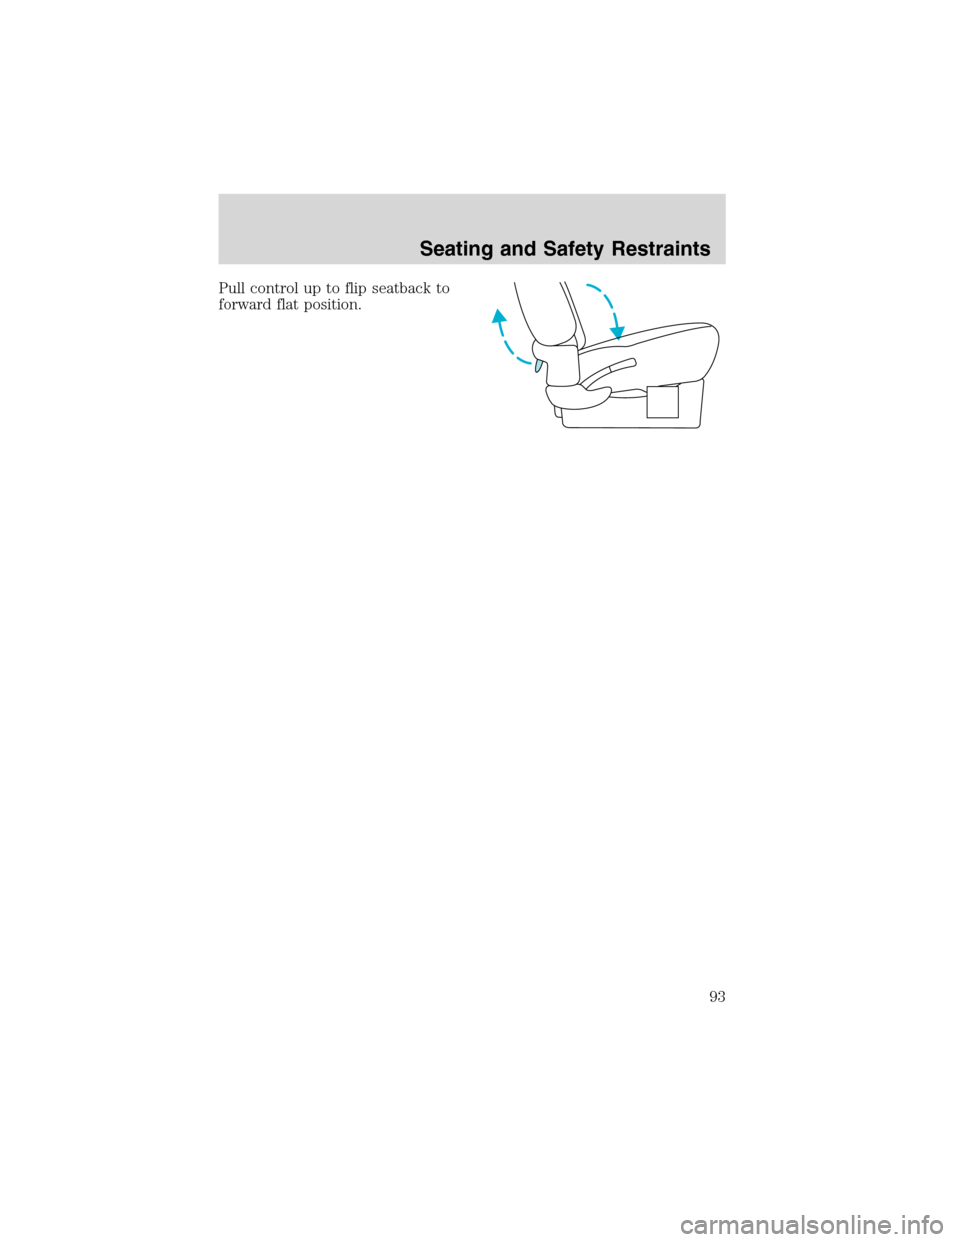
Pull control up to flip seatback to
forward flat position.
Seating and Safety Restraints
93
Page 94 of 240
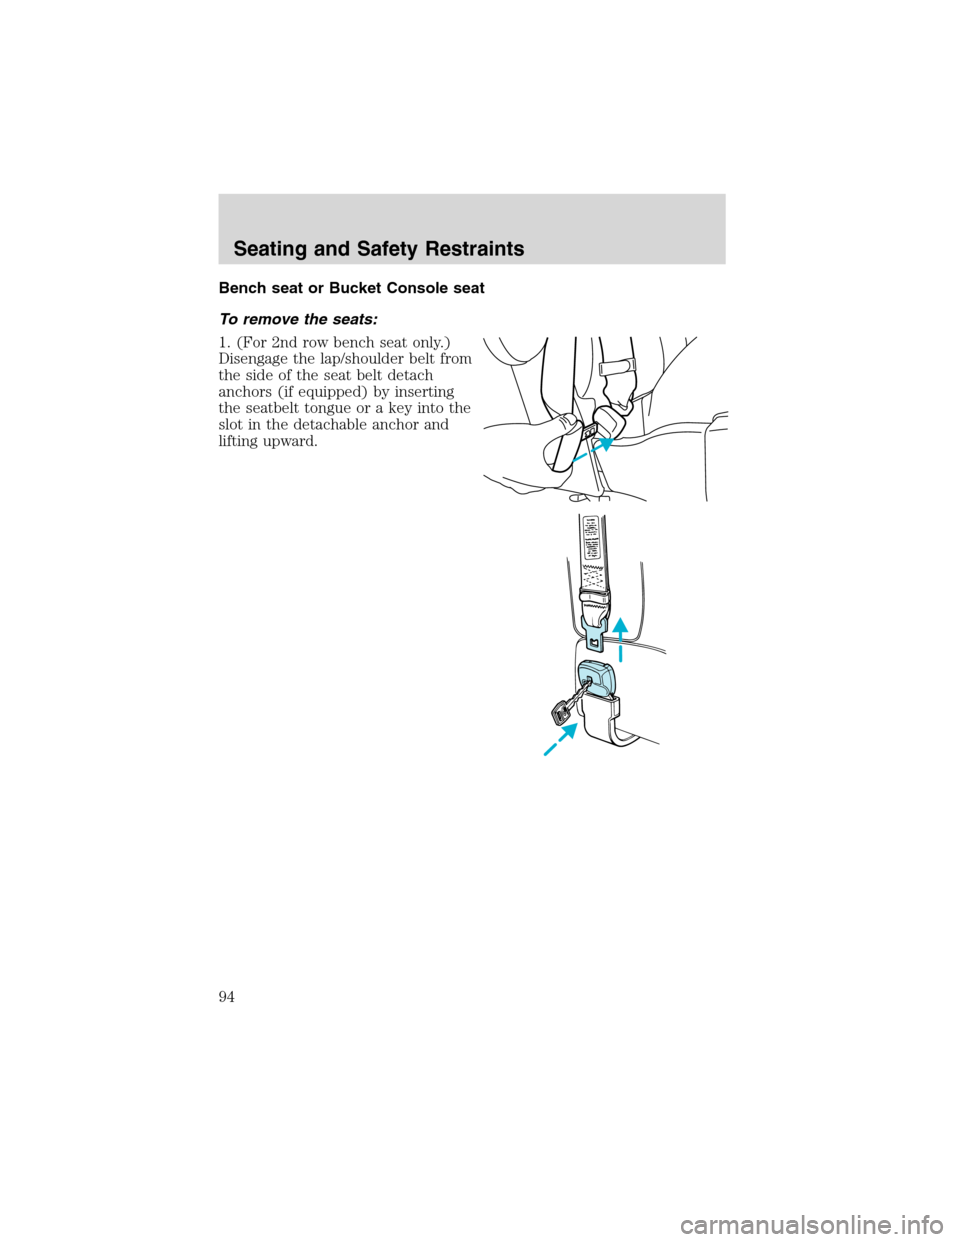
Bench seat or Bucket Console seat
To remove the seats:
1. (For 2nd row bench seat only.)
Disengage the lap/shoulder belt from
the side of the seat belt detach
anchors (if equipped) by inserting
the seatbelt tongue or a key into the
slot in the detachable anchor and
lifting upward.
Seating and Safety Restraints
94
Page 95 of 240
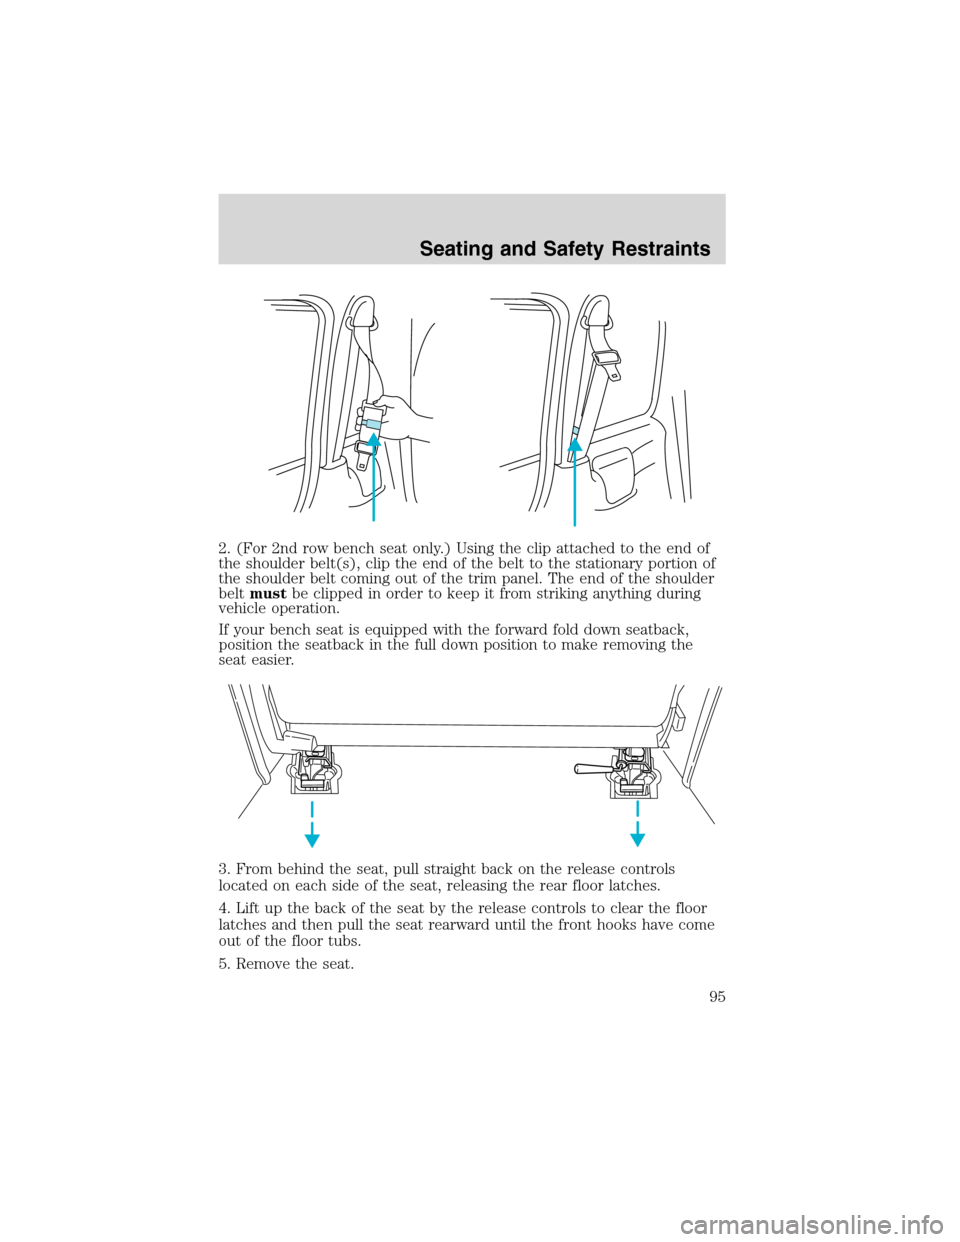
2. (For 2nd row bench seat only.) Using the clip attached to the end of
the shoulder belt(s), clip the end of the belt to the stationary portion of
the shoulder belt coming out of the trim panel. The end of the shoulder
beltmustbe clipped in order to keep it from striking anything during
vehicle operation.
If your bench seat is equipped with the forward fold down seatback,
position the seatback in the full down position to make removing the
seat easier.
3. From behind the seat, pull straight back on the release controls
located on each side of the seat, releasing the rear floor latches.
4. Lift up the back of the seat by the release controls to clear the floor
latches and then pull the seat rearward until the front hooks have come
out of the floor tubs.
5. Remove the seat.
Seating and Safety Restraints
95
Page 96 of 240
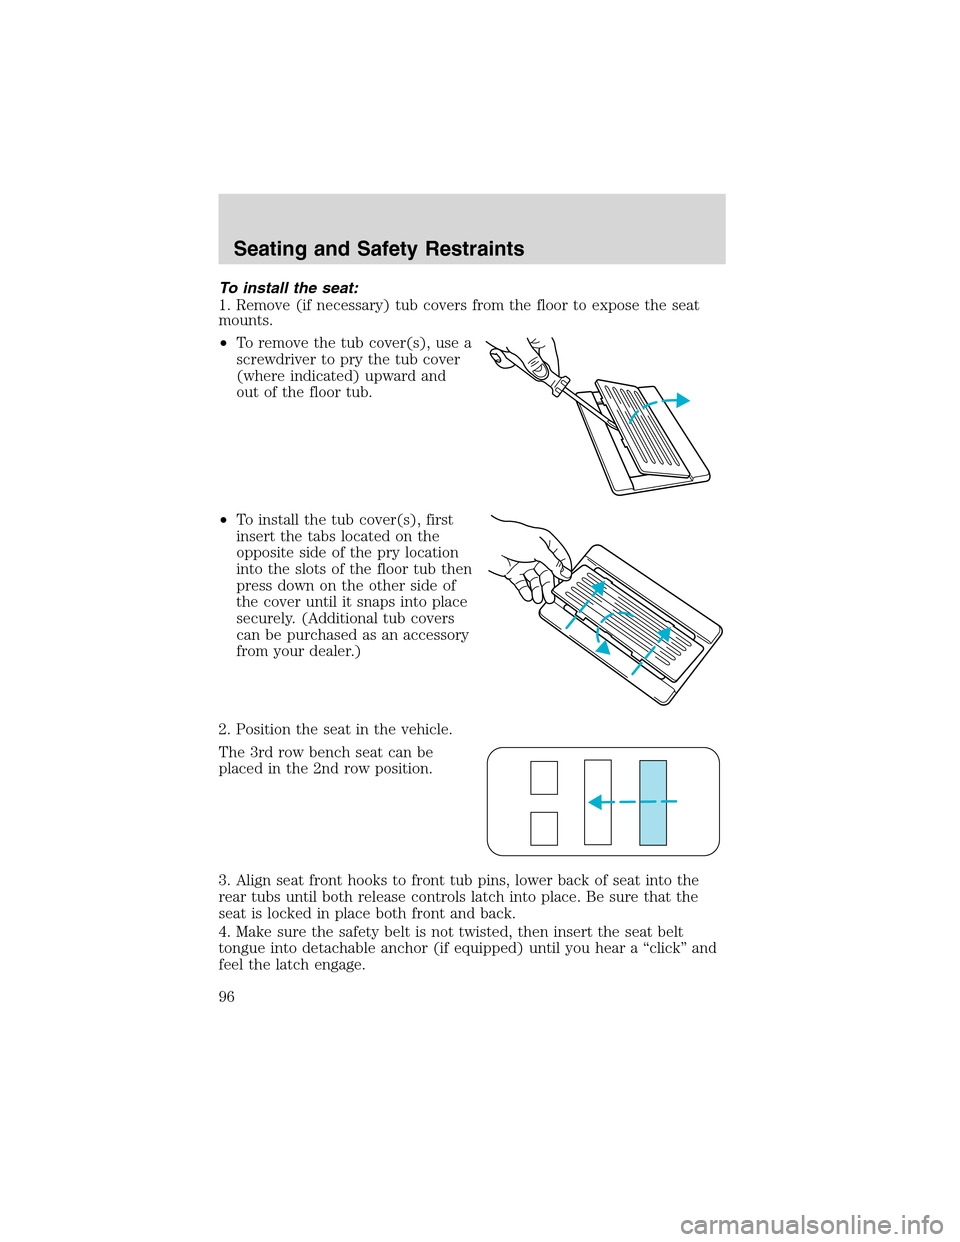
To install the seat:
1. Remove (if necessary) tub covers from the floor to expose the seat
mounts.
•To remove the tub cover(s), use a
screwdriver to pry the tub cover
(where indicated) upward and
out of the floor tub.
•To install the tub cover(s), first
insert the tabs located on the
opposite side of the pry location
into the slots of the floor tub then
press down on the other side of
the cover until it snaps into place
securely. (Additional tub covers
can be purchased as an accessory
from your dealer.)
2. Position the seat in the vehicle.
The 3rd row bench seat can be
placed in the 2nd row position.
3. Align seat front hooks to front tub pins, lower back of seat into the
rear tubs until both release controls latch into place. Be sure that the
seat is locked in place both front and back.
4. Make sure the safety belt is not twisted, then insert the seat belt
tongue into detachable anchor (if equipped) until you hear a“click”and
feel the latch engage.
Seating and Safety Restraints
96
Page 97 of 240
Always latch the vehicle seat to the floor, whether the seat is
occupied or empty. If not latched, the seat may cause injury
during a sudden stop.
Bucket seats
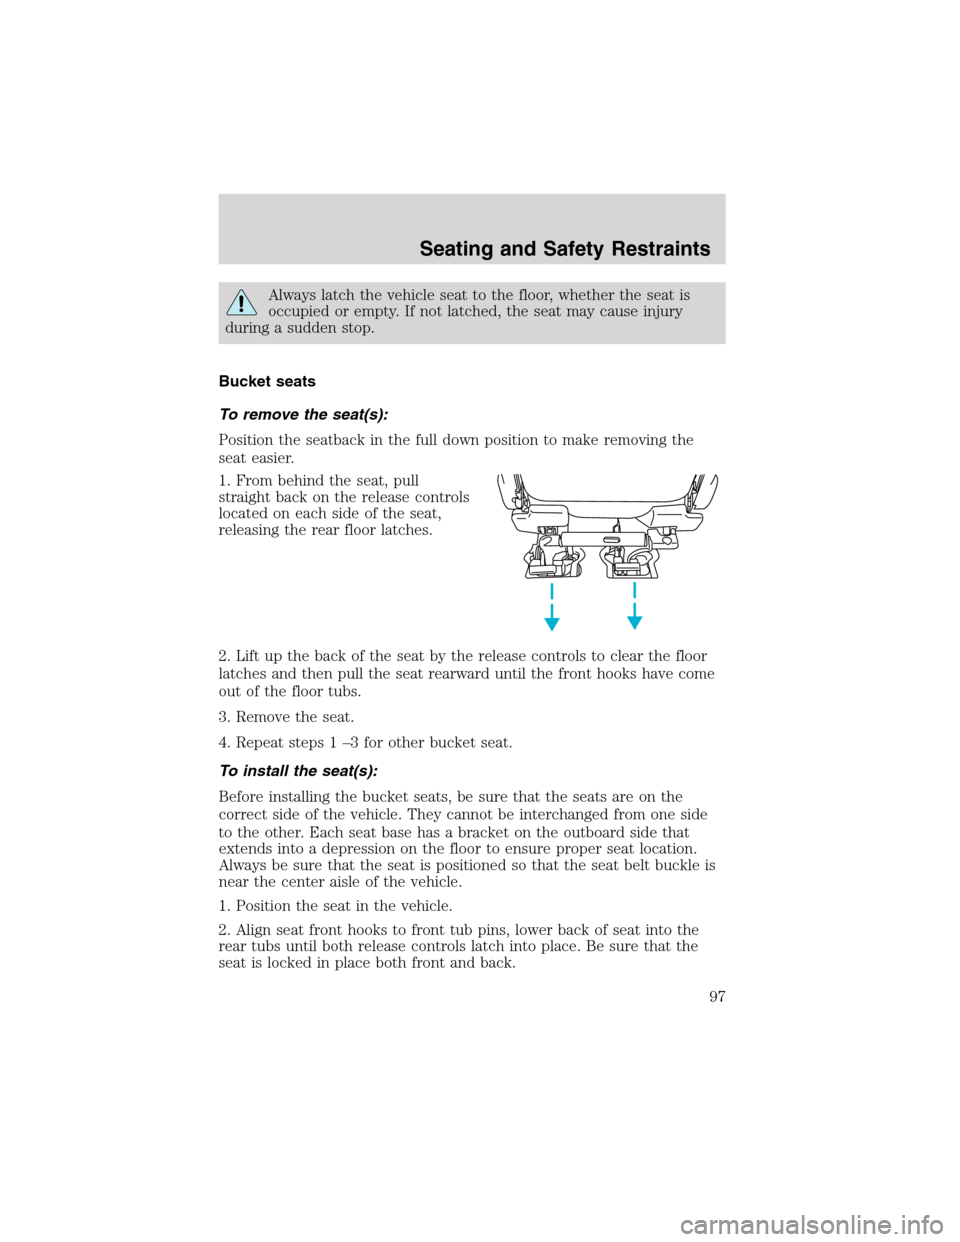
To remove the seat(s):
Position the seatback in the full down position to make removing the
seat easier.
1. From behind the seat, pull
straight back on the release controls
located on each side of the seat,
releasing the rear floor latches.
2. Lift up the back of the seat by the release controls to clear the floor
latches and then pull the seat rearward until the front hooks have come
out of the floor tubs.
3. Remove the seat.
4. Repeat steps 1–3 for other bucket seat.
To install the seat(s):
Before installing the bucket seats, be sure that the seats are on the
correct side of the vehicle. They cannot be interchanged from one side
to the other. Each seat base has a bracket on the outboard side that
extends into a depression on the floor to ensure proper seat location.
Always be sure that the seat is positioned so that the seat belt buckle is
near the center aisle of the vehicle.
1. Position the seat in the vehicle.
2. Align seat front hooks to front tub pins, lower back of seat into the
rear tubs until both release controls latch into place. Be sure that the
seat is locked in place both front and back.
Seating and Safety Restraints
97
Page 98 of 240
Always latch the vehicle seat to the floor, whether the seat is
occupied or empty. If not latched, the seat may cause injury
during a sudden stop.
SAFETY RESTRAINTS
Personal Safety System
The Personal Safety System provides an improved overall level of frontal
crash protection to front seat occupants and is designed to help further
reduce the risk of air bag-related injuries. The system is able to analyze
different occupant conditions and crash severity before activating the
appropriate safety devices to help better protect a range of occupants in
a variety of frontal crash situations.
Your vehicle’s Personal Safety System consists of:
•Driver and passenger dual-stage air bag supplemental restraints.
•Front safety belts with pretensioners, energy management retractors,
and safety belt usage sensors.
•Driver’s seat position sensor.
•Passenger occupant classification sensor
•Front crash severity sensor.
•Restraints Control Module (RCM) with impact and safing sensors.
•Restraint system warning light and back-up tone.
•The electrical wiring for the air bags, crash sensor(s), safety belt
pretensioners, front safety belt usage sensors, driver seat position
sensor, passenger occupant classification sensor, and indicator lights.
How does the personal safety system work?
The Personal safety system can adapt the deployment strategy of your
vehicle’s safety devices according to crash severity and occupant
conditions. A collection of crash and occupant sensors provides
information to the Restraints control module (RCM). During a crash, the
RCM activates the safety belt pretensioners and/or either one or both
stages of the dual-stage air bag supplemental restraints based on crash
severity and occupant conditions.
The fact that the pretensioners or air bags did not activate for both front
seat occupants in a collision does not mean that something is wrong with
the system. Rather, it means the Personal safety system determined the
Seating and Safety Restraints
98
Page 99 of 240
accident conditions (crash severity, belt usage, etc.) were not
appropriate to activate these safety devices. Front air bags and
pretensioners are designed to activate only in frontal and near-frontal
collisions, not rollovers, side-impacts, or rear-impacts unless the collision
causes sufficient longitudinal deceleration.
Driver and passenger dual-stage air bag supplemental restraints
The dual-stage air bags offer the capability to tailor the level of air bag
inflation energy. A lower, less forceful energy level is provided for more
common, moderate-severity impacts. A higher energy level is used for
the most severe impacts. Refer toAir bag supplemental restraints
section in this chapter.
Front crash severity sensor
The front crash severity sensor enhances the ability to detect the
severity of an impact. Positioned up front, it provides valuable
information early in the crash event on the severity of the impact. This
allows your Personal safety system to distinguish between different levels
of crash severity and modify the deployment strategy of the dual-stage
air bags and safety belt pretensioners.
Driver’s seat position sensor
The driver’s seat position sensor allows your Personal safety system to
tailor the deployment level of the driver dual-stage air bag based on seat
position. The system is designed to help protect smaller drivers sitting
close to the driver air bag by providing a lower air bag output level.
Passenger occupant classification sensor (OCS)
For air bags to do their job they must inflate with great force, and this
force can pose a potentially deadly risk to occupants that are very close
to the air bag when it begins to inflate. For some occupants, this occurs
because they are initially sitting very close to the air bag. For other
occupants, this occurs when the occupant is not properly restrained by
seat belts or child safety seats and they move forward during pre-crash
braking. The most effective way to reduce the risk of unnecessary
injuries is to make sure all occupants are properly restrained. Accident
statistics suggest that children are much safer when properly restrained
in the rear seating positions than in the front.
Air bags can kill or injure a child in a child seat.NEVERplace a
rear-facing child seat in front of an active air bag. If you must
use a forward-facing child seat in the front seat, move the seat all the
way back.
Seating and Safety Restraints
99
Page 100 of 240
Always transport children 12 years old and under in the back
seat and always properly use appropriate child restraints.
The passenger occupant classification sensor can automatically turn off
the passenger front air bag and side air bag (if equipped). The system is
designed to help protect small (child size) occupants from air bag
deployments when they are improperly seated or restrained in the front
passenger seat contrary to proper child-seating or restraint usage
recommendations. Even with this technology, parents areSTRONGLY
encouraged to always properly restrain children in the rear seat. The
sensor also turns off the air bag(s) when the passenger seat is empty to
prevent unnecessary replacement of the air bag(s) after a collision.
Front safety belt usage sensors
The front safety belt usage sensors detect whether or not the driver and
front outboard passenger safety belts are fastened. This information
allows your Personal safety system to tailor the air bag deployment and
safety belt pretensioner activation depending upon safety belt usage.
Refer toSafety beltsection in this chapter.
Front safety belt pretensioners
The safety belt pretensioners at the front outboard safety positions are
designed to tighten the safety belts firmly against the occupant’s body
during a frontal or near-frontal collision. This maximizes the effectiveness
of the safety belts and helps properly position the occupant relative to
the air bag to improve protection. The safety belt pretensioners can be
either activated alone or, if the collision is of sufficient severity, together
with the air bags.
Front safety belt energy management retractors
The front safety belt energy management retractors allow webbing to be
pulled out of the retractor in a gradual and controlled manner in
response to the occupant’s forward momentum. This helps reduce the
risk of force-related injuries to the occupant’s chest by limiting the load
on the occupant. Refer toEnergy management featuresection in this
chapter.
Determining if the Personal safety system is operational
The Personal safety system uses a warning light in the instrument cluster
or a back-up tone to indicate the condition of the system. Refer to the
Warning lightsection in theInstrument clusterchapter. Routine
maintenance of the Personal safety system is not required.
Seating and Safety Restraints
100