cooling GENESIS G70 2021 Owner's Manual
[x] Cancel search | Manufacturer: GENESIS, Model Year: 2021, Model line: G70, Model: GENESIS G70 2021Pages: 516, PDF Size: 12.84 MB
Page 219 of 516

3-134
Convenient features of your vehicle
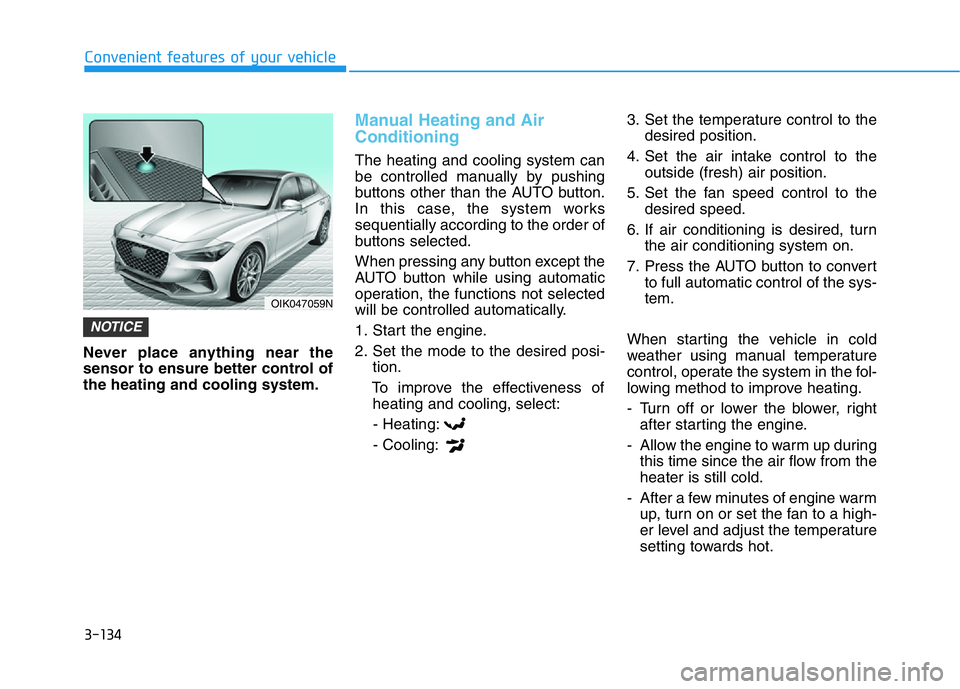
Never place anything near the
sensor to ensure better control of
the heating and cooling system.
Manual Heating and Air
Conditioning
The heating and cooling system can
be controlled manually by pushing
buttons other than the AUTO button.
In this case, the system works
sequentially according to the order of
buttons selected.
When pressing any button except the
AUTO button while using automatic
operation, the functions not selected
will be controlled automatically.
1. Start the engine.
2. Set the mode to the desired posi-
tion.
To improve the effectiveness of
heating and cooling, select:
- Heating:
- Cooling:3. Set the temperature control to the
desired position.
4. Set the air intake control to the
outside (fresh) air position.
5. Set the fan speed control to the
desired speed.
6. If air conditioning is desired, turn
the air conditioning system on.
7. Press the AUTO button to convert
to full automatic control of the sys-
tem.
When starting the vehicle in cold
weather using manual temperature
control, operate the system in the fol-
lowing method to improve heating.
- Turn off or lower the blower, right
after starting the engine.
- Allow the engine to warm up during
this time since the air flow from the
heater is still cold.
- After a few minutes of engine warm
up, turn on or set the fan to a high-
er level and adjust the temperature
setting towards hot.
NOTICE
OIK047059N
Page 226 of 516

3-141
Convenient features of your vehicle
3
Operation Tips
• To help keep dust or unpleasant
fumes from entering the car
through the ventilation system,
temporarily set the air intake con-
trol briefly to the recirculated air
position. Return the control to the
fresh air position when the irritation
has passed. This will help keep the
driver alert and comfortable.
• To help prevent the inside of the
windshield from fogging, set the air
intake control to the fresh air posi-
tion and fan speed to the desired
position, turn on the air conditioning
system, and adjust the temperature
control to the desired temperature.
Air conditioning
All Genesis Branded Vehicle Air
Conditioning Systems are filled with
environmentally friendly R-1234yf
refrigerant.
1. Start the engine.
2. Push the air conditioning button.
3. Set the mode to the Face Level
mode.
4. Set the air intake control to the
recirculated air position. However,
prolonged operation of the recircu-
lated air position will excessively
dry the air. In this case, change the
air position.
5. Adjust the fan speed control and
temperature control to maintain
maximum comfort.
When maximum cooling is desired,
set the temperature control to the
extreme left position then set the fan
speed control to the highest speed.When using the air conditioning
system, monitor the engine tem-
perature gauge closely while driv-
ing up hills or in heavy traffic
when outside temperatures are
high. Air conditioning system
operation can cause engine over-
heating. Continue to use the fan,
but turn the air conditioning sys-
tem off if the engine temperature
gauge indicates engine overheat-
ing.
Air conditioning system operation
tips
• If the vehicle has been parked in
direct sunlight during hot weather,
open the windows for a short time
to let the hot air inside the vehicle
escape.
• After sufficient cooling has been
achieved, switch back from the
recirculated air to the fresh outside
air position.
NOTICE
Page 229 of 516

3-144
Convenient features of your vehicle
• For maximum defrosting, set the
temperature control to the extreme
right/hot position and the fan speed
control to the highest speed.
• If warm air to the floor is desired
while defrosting or defogging, set the
mode to the floor-defrost position.
• Before driving, clear all snow and
ice from the windshield, rear win-
dow, side view mirrors, and all side
windows.
• Clear all snow and ice from the
hood and air inlet in the cowl grill to
improve heater and defroster effi-
ciency and to reduce the probability
of fogging up the inside of the wind-
shield.
If the engine temperature is still
cold after starting, then a brief
engine warm up period may be
required for the vented air flow to
become warm or hot.
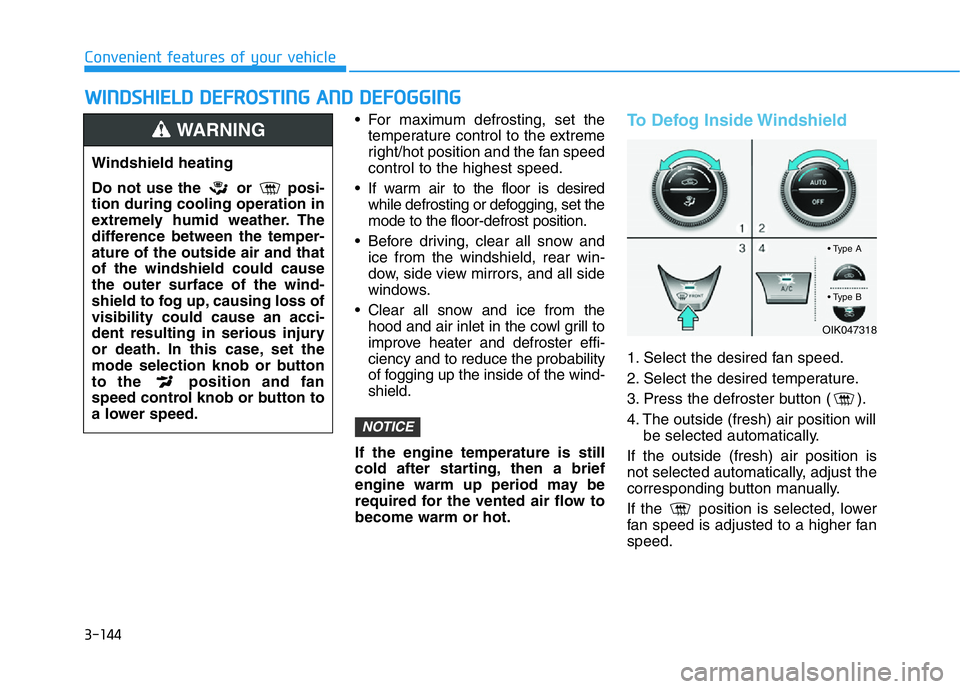
To Defog Inside Windshield
1. Select the desired fan speed.
2. Select the desired temperature.
3. Press the defroster button ( ).
4. The outside (fresh) air position will
be selected automatically.
If the outside (fresh) air position is
not selected automatically, adjust the
corresponding button manually.
If the position is selected, lower
fan speed is adjusted to a higher fan
speed.
NOTICE
WWINDSHIELD DEFROSTING AND DEFOGGING
Windshield heating
Do not use the or posi-
tion during cooling operation in
extremely humid weather. The
difference between the temper-
ature of the outside air and that
of the windshield could cause
the outer surface of the wind-
shield to fog up, causing loss of
visibility could cause an acci-
dent resulting in serious injury
or death. In this case, set the
mode selection knob or button
to the position and fan
speed control knob or button to
a lower speed.
WARNING
OIK047318
• Type A
• Type B
Page 311 of 516

5-62
Driving your vehicle
Auto start
To restart the engine in the auto
stop mode
• Release the brake pedal.
- When Auto Hold (if equipped with
EPB (Electronic Parking Brake))
is activated, if you release the
brake pedal, the engine will be in
the auto stop state. However, if
you depress the accelerator
pedal, the engine will start again.
The auto stop indicator ( ) goes
OFF on the instrument cluster, when
the engine is restarted.
The engine is automatically restart-
ed in the following situations.
• The brake vacuum pressure is low
• The engine has stopped for about
5 minutes
• The air conditioning is ON with the
fan speed set to the highest posi-
tion
• The front defroster is ON
• The battery is weak
• The cooling and heating perform-
ance of the climate control system
is unsatisfactory
• The vehicle is shifted to P (Park)
when Auto Hold is activated
• The door is opened or the seatbelt
is unfastened when Auto Hold is
activated
• The EPB switch is pressed when
Auto Hold is activated
The auto stop indicator ( ) blinks
in green for 5 seconds on the instru-
ment cluster.
The auto start is temporarily deac-
tivated in the following situations.
• When the shift lever is shifted from
N (Neutral) to R (Reverse), D
(Drive) or Manual shift mode with-
out the brake pedal depressed. A
message "Press brake pedal for
Auto Start" will appear on the LCD
display. To activate auto start,
depress the brake pedal.
OIK057086N
Page 385 of 516

5-136
Driving your vehicle
Winter Precautions
Use high quality ethylene glycol
coolant
Your vehicle is delivered with high
quality ethylene glycol coolant in the
cooling system. It is the only type of
coolant that should be used because
it helps prevent corrosion in the cool-
ing system, lubricates the water
pump and prevents freezing. Be sure
to replace or replenish your coolant
in accordance with the maintenance
schedule in chapter 7. Before winter,
have your coolant tested to assure
that its freezing point is sufficient for
the temperatures anticipated during
the winter.
Change to "winter weight" oil if
necessary
In some climates it is recommended
that a lower viscosity "winter weight"
oil be used during cold weather. See
chapter 8 for recommendations. If
you aren't sure what weight oil you
should use, consult an authorized
retailer of Genesis Branded prod-
ucts.
Check battery and cables
Winter puts additional burdens on
the battery system. Visually inspect
the battery and cables as described
in chapter 7. The level of charge in
your battery can be checked by an
authorized retailer of Genesis
Branded products or a service sta-
tion.
Check spark plugs and ignition
system
Inspect your spark plugs as
described in chapter 7 and replace
them if necessary. Also check all
ignition wiring and components to be
sure they are not cracked, worn or
damaged in any way.
Use approved window washer
anti-freeze in system
To keep the water in the window
washer system from freezing, add an
approved window washer anti-freeze
solution in accordance with instruc-
tions on the container. Window wash-
er anti-freeze is available from an
authorized retailer of Genesis
Branded products and most auto
parts outlets. Do not use engine
coolant or other types of anti-freeze
as these may damage the paint fin-
ish.
Page 386 of 516

5-137
Driving your vehicle
5
Do not let your parking brake
freeze
Under some conditions your parking
brake can freeze in the engaged
position. This is most likely to happen
when there is an accumulation of
snow or ice around or near the rear
brakes or if the brakes are wet. If
there is a risk the parking brake may
freeze, apply it only temporarily while
you put the gear selector lever in P
and block the rear wheels so the car
cannot roll. Then release the parking
brake.
Do not let ice and snow accu-
mulate underneath
Under some conditions, snow and
ice can build up under the fenders
and interfere with the steering. When
driving in severe winter conditions
where this may happen, you should
periodically check underneath the
car to be sure the movement of the
front wheels and the steering com-
ponents is not obstructed.
Don't place foreign objects or
materials in the engine com-
partment
Placement of foreign object or mate-
rials which prevent cooling of the
engine, in the engine compartment,
may cause a failure or combustion.
The manufacturer is not responsible
for the damage caused by such
placement.
To keep locks from freezing
To keep the locks from freezing,
squirt an approved de-icer fluid or
glycerine into the key opening. If a
lock is covered with ice, squirt it with
an approved de-icing fluid to remove
the ice. If the lock is frozen internally,
you may be able to thaw it out by
using a heated key. Handle the heat-
ed key with care to avoid injury.
Page 399 of 516

6-6
What to do in an emergency
9. Connect the other end of the sec-
ond jumper cable to the black,
negative (-) chassis ground of
your vehicle (4).
Do not allow the jumper cables to
contact anything except the cor-
rect battery or jumper terminals or
the correct ground. Do not lean
over the battery when making
connections.
10. Start the engine of the assisting
vehicle and let it run at approxi-
mately 2,000 rpm for a few min-
utes. Then start your vehicle.
11. Operate your vehicle for at least
30 minutes of driving or at least 60
minutes of engine running at idle
before shutting off the engine.
Without sufficient time to charge
the battery the vehicle will reoccur
another no start. You can also visit
your nearest Dealer to request the
battery be charged and tested.
If your vehicle will not start after a
few attempts, it probably requires
servicing. In this event please seek
qualified assistance. If the cause of
your battery discharging is not
apparent, have your vehicle checked
by an authorized retailer of Genesis
Branded products.Disconnect the jumper cables in the
exact reverse order you connected
them:
1. Disconnect the jumper cable from
the black, negative (-) chassis
ground of your vehicle (4).
2. Disconnect the other end of the
jumper cable from the black, neg-
ative (-) battery/chassis ground of
the assisting vehicle (3).
3. Disconnect the second jumper
cable from the red, positive (+)
battery/jumper terminal of the
assisting vehicle (2).
4. Disconnect the other end of the
jumper cable from the red, positive
(+) jumper terminal of your vehicle
(1).
Push-starting
Vehicles equipped with automatic
transmission cannot be push-start-
ed.
Follow the directions in this chapter
for jump-starting.If your temperature gage indicates
overheating, you experience a loss
of power, or hear loud pinging or
knocking, the engine may be over-
heating. If this happens, you should:
1. Pull off the road and stop as soon
as it is safe to do so.
2. Shift the vehicle to P (Park, for
automatic transmission vehicle) or
neutral (for manual transmission
vehicle), and apply the parking
brake. If the air conditioning is ON,
turn it OFF.
3. If engine coolant is running out
under the vehicle or steam is com-
ing out from the hood, stop the
engine. Do not open the hood until
the coolant has stopped running
or the steaming has stopped. If
there is no visible loss of engine
coolant and no steam, leave the
engine running and check to be
sure the engine cooling fan is
operating. If the fan is not running,
turn the engine off.
IF THE ENGINE OVERHEATS
Page 400 of 516

6-7
What to do in an emergency
6
4. Check for coolant leaking from the
radiator, hoses or under the vehi-
cle. (If the air conditioning had
been in use, it is normal for cold
water to be draining from it when
you stop.)
5. If engine coolant is leaking out,
stop the engine immediately and
call the nearest authorized retailer
of Genesis Branded products for
assistance.6. If you cannot find the cause of the
overheating, wait until the engine
temperature has returned to nor-
mal. Then, if coolant has been
lost, carefully add coolant to the
reservoir to bring the fluid level in
the reservoir up to the halfway
mark.
7. Proceed with caution, keeping
alert for further signs of overheat-
ing. If overheating happens again,
call an authorized retailer of
Genesis Branded products for
assistance. While the engine is
running, keep hands,
clothing and tools
away from the mov-
ing parts such as the
cooling fan and drive
belt to prevent seri-
ous injury.
WARNING
Serious loss of coolant indi-
cates a leak in the cooling sys-
tem and should be checked as
soon as possible by an author-
ized retailer of Genesis Branded
products.
CAUTION
Your vehicle is
equipped with a pres-
surized coolant
reserve tank. NEVER
remove the engine
coolant reservoir tank/radiator
cap or the drain plug while the
engine and radiator are HOT.
Hot coolant and steam may
blow out under pressure, caus-
ing serious injury.
Turn the engine off and wait
until the engine cools down.
Use extreme care when remov-
ing the engine coolant reservoir
tank/radiator cap. Wrap a towel
or thick rag around it, and turn it
counterclockwise slowly to
release some of the pressure
from the system. Step back
while the pressure is released.
When you are sure all the pres-
sure has been released, contin-
ue turning the cap counter-
clockwise to remove it.
WARNING
Page 439 of 516

7-15
7
Maintenance
Air Cleaner Filter
A Genesis air cleaner filter is recom-
mended when the filter is replaced.
Spark Plugs
Make sure to install new spark plugs
of the correct heat range.
Valve clearance
Inspect for excessive valve noise
and/or engine vibration and adjust if
necessary. Have an authorized retail-
er of Genesis Branded products per-
form the operation.
Cooling System
Check cooling system components,
such as radiator, coolant reservoir,
hoses and connections for leakage
and damage. Replace any damaged
parts.
Engine Coolant
The coolant should be changed at
the intervals specified in the mainte-
nance schedule.
Manual Transmission Fluid
(if equipped)
Inspect the manual transmission
fluid according to the maintenance
schedule.
Automatic Transmission Fluid
(if equipped)
Automatic transmission fluid should
not be checked under normal usage
conditions. But in severe conditions,
the fluid should be changed at an
authorized retailer of Genesis
Branded products in accordance to
the scheduled maintenance at the
beginning of this chapter.Automatic transmission fluid
color is red when new.
As the vehicle is driven, the auto-
matic transmission fluid will begin
to look darker. This is a normal
condition and you should not
judge the need to replace the fluid
based upon the changed color.
The use of a non-specified fluid
could result in transmission mal-
function and failure. Use only the
specified automatic transmission
fluid (refer to "Recommended
Lubricants and Capacities" in
chapter 8).
NOTICE
NOTICE
Page 443 of 516

7-19
7
Maintenance
ENGINE COOLANT
The high-pressure cooling system
has a reservoir filled with year-round
antifreeze coolant. The reservoir is
filled at the factory.
Check the antifreeze protection and
coolant level at least once a year, at
the beginning of the winter season
and before traveling to a colder cli-
mate.Checking the Engine Coolant
Level
Check the condition and connections
of all cooling system hoses and
heater hoses. Replace any swollen
or deteriorated hoses.
The coolant level should be filled
between the F and the L marks on
the side of the coolant reservoir
when the engine is cool.
If the coolant level is low, add enough
distilled (deionized) water to bring the
level to the F mark, but do not overfill.
If frequent additions are required, see
an authorized retailer of Genesis
Branded products for a cooling sys-
tem inspection.
Recommended engine coolant
• When adding coolant, use only dis-
tilled (deionized) water for your
vehicle and never mix hard water in
the coolant filled at the factory.
• An improper coolant mixture can
result in severe malfunction or
engine damage.
• The engine in your vehicle has alu-
minum engine parts and must be
protected by an ethylene-glycol
with phosphate based coolant to
prevent corrosion and freezing.
• Do not use alcohol or methanol
coolant or mix them with the spec-
ified coolant.
OIK077006