ignition GENESIS G70 2021 Owner's Manual
[x] Cancel search | Manufacturer: GENESIS, Model Year: 2021, Model line: G70, Model: GENESIS G70 2021Pages: 516, PDF Size: 12.84 MB
Page 73 of 516

2-55
Safety system of your vehicle
2
What to Expect After an Air
Bag Inflates
After a frontal or side air bag inflates,
it will deflate very quickly. Air bag
inflation will not prevent the driver
from seeing out of the windshield or
being able to steer. Curtain air bags
may remain partially inflated for
some time after they deploy.
Noise and smoke from inflating
air bag
When the air bags inflate, they make
a loud noise and may produce
smoke and powder in the air inside of
the vehicle. This is normal and is a
result of the ignition of the air bag
inflator. After the air bag inflates, you
may feel substantial discomfort in
breathing because of the contact of
your chest with both the seat belt and
the air bag, as well as from breathing
the smoke and powder. The powder
may aggravate asthma for some
people. If you experience breathing
problems after an air bag deploy-
ment, seek medical attention imme-
diately.
Though the smoke and powder are
nontoxic, they may cause irritation to
the skin, eyes, nose, throat, etc. If
this is the case, wash and rinse with
cold water immediately and seek
medical attention if the symptoms
persist.
•Always wash exposed skin
areas thoroughly with cold
and mild soap.
•Always have an authorized
retailer of Genesis Branded
products replace the air bag
immediately after deployment.
Air bags are designed to be
used only once.
After an air bag inflates, take
the following precautions:
•Open your windows and doors
as soon as possible after
impact to reduce prolonged
exposure to the smoke and
powder released by the inflat-
ing air bag.
•Do not touch the air bag stor-
age area's internal compo-
nents immediately after an air
bag has inflated. The parts
that come into contact with an
inflating air bag may be very
hot.
WARNING
Page 181 of 516

3-96
Convenient features of your vehicle
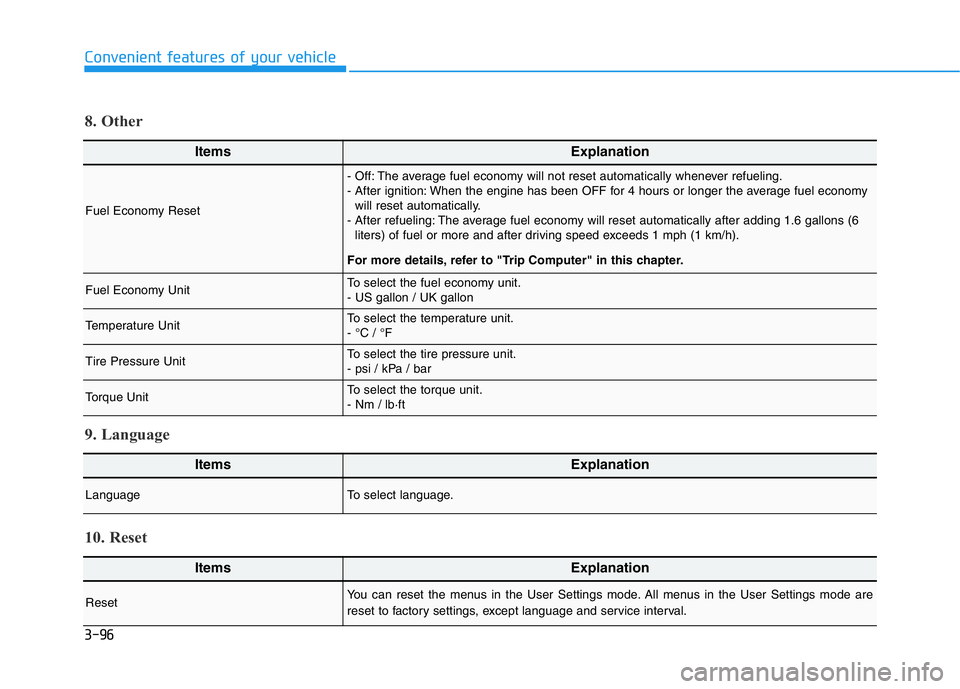
ItemsExplanation
Fuel Economy Reset
- Off: The average fuel economy will not reset automatically whenever refueling.
- After ignition: When the engine has been OFF for 4 hours or longer the average fuel economy
will reset automatically.
- After refueling: The average fuel economy will reset automatically after adding 1.6 gallons (6
liters) of fuel or more and after driving speed exceeds 1 mph (1 km/h).
For more details, refer to "Trip Computer" in this chapter.
Fuel Economy UnitTo select the fuel economy unit.
- US gallon / UK gallon
Temperature UnitTo select the temperature unit.
- °C / °F
Tire Pressure UnitTo select the tire pressure unit.
- psi / kPa / bar
Torque UnitTo select the torque unit.
- Nm / lb·ft
8. Other
ItemsExplanation
LanguageTo select language.
9. Language
ItemsExplanation
ResetYou can reset the menus in the User Settings mode. All menus in the User Settings mode are
reset to factory settings, except language and service interval.
10. Reset
Page 183 of 516

3-98
Convenient features of your vehicle
Average fuel economy/
Instant fuel economy
Average Fuel Economy (1)
• The average fuel economy is calcu-
lated by the total driving distance
and fuel consumption since the last
average fuel economy reset.
• The average fuel economy can be
reset both manually and automati-
cally.
Manual reset
To clear the average fuel economy
manually, press the OK button on the
steering wheel for more than 1 sec-
ond when the average fuel economy
is displayed.
Automatic reset
To automatically reset the average
fuel economy, select between "After
Ignition" or "After Refueling" in the
User Settings mode in the cluster
LCD display.
- After ignition: When the engine has
been OFF for 4 hours or longer the
average fuel economy will reset
automatically.
- After refueling: The average fuel
economy will reset automatically
after adding 1.6 gallons (6 liters) of
fuel or more and after driving speed
exceeds 1 mph (1 km/h).
Information
The vehicle must be driven for a min-
imum of 0.19 miles (300 meters) since
the last ignition key cycle before the
average fuel economy will be recalcu-
lated.
Instant Fuel Economy (2)
• The instantaneous fuel economy is
displayed according to the bar
graph in the LCD display while
driving.
i
OIK047124N
Page 184 of 516

3-99
Convenient features of your vehicle
3
Accumulated Info display
This display shows the accumulated
trip distance (1), the average fuel
economy (2), and the total driving
time (3).
The information is accumulated start-
ing from the last reset.
To reset the details, press and hold
the OK button when viewing the
Accumulated driving info. The trip
distance, the average fuel economy,
and total driving time will reset simul-
taneously.The accumulated driving information
will continue to be counted while the
engine is still running (for example,
when the vehicle is in traffic or
stopped at a stop light).
Information
The vehicle must be driven for a min-
imum of 0.19 miles (300 meters) since
the last ignition key cycle before the
average fuel economy will be recalcu-
lated.
Drive Info display
This display shows the trip distance
(1), the average fuel economy (2),
and the total driving time (3).
The information is combined for each
ignition cycle. However, when the
engine has been OFF for 4 hours or
longer the Drive Info screen will reset.
To reset the details, press and hold
the OK button when viewing the Drive
Info. The trip distance, the average
fuel economy, and total driving time
will reset simultaneously.
i
OIK047174NOIK047176N
Page 185 of 516

3-100
Convenient features of your vehicle
The driving information will continue to
be counted while the engine is still run-
ning (for example, when the vehicle is
in traffic or stopped at a stop light).
Information
The vehicle must be driven for a mini-
mum of 0.19 miles (300 meters) since the
last ignition key cycle before the average
fuel economy will be recalculated.
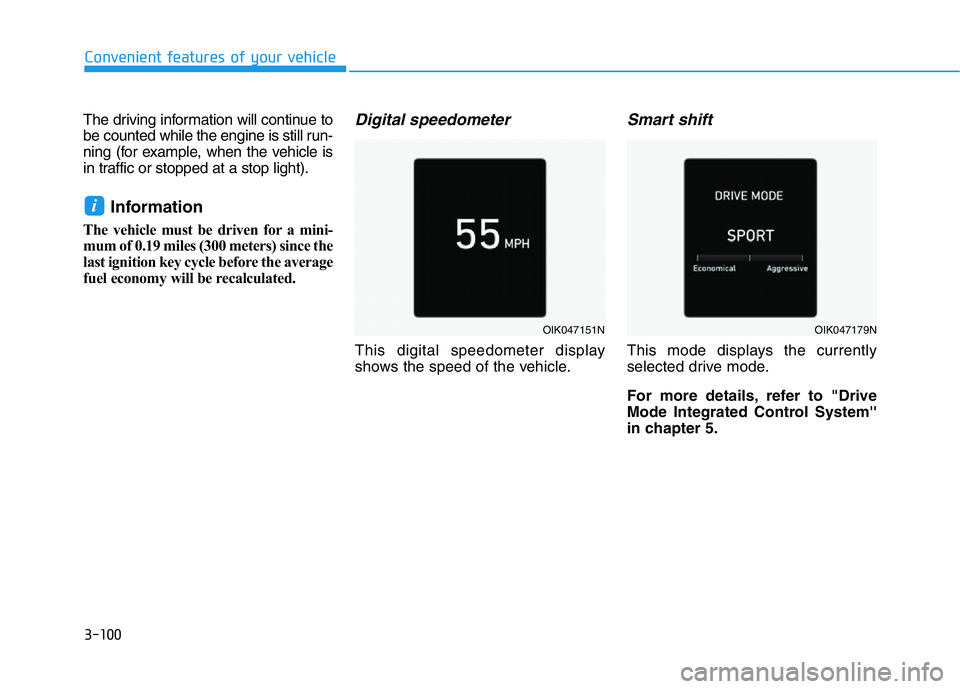
Digital speedometer
This digital speedometer display
shows the speed of the vehicle.
Smart shift
This mode displays the currently
selected drive mode.
For more details, refer to "Drive
Mode Integrated Control System''
in chapter 5.
i
OIK047151NOIK047179N
Page 346 of 516

5-97
Driving your vehicle
5
The color of indicator will
change depending on the
condition of LKA system.
- White :Sensor does not detect
lane lines or vehicle speed
is under 40mph (64 km/h).
- Green : Sensor detects lane lines
and the system is able to
control vehicle steering.
Information
If the indicator (white) is activated
from the previous ignition cycle, the
system will turn ON without any addi-
tional control. If you press the LKA
switch again, the indicator on the clus-
ter goes off.
LKA system activation
• To see the LKA system screen on
the LCD display in the cluster,
select Assist mode ( ).For more
details, refer to "LCD Display
Modes" in chapter 3.
• When both lane lines are detected
and all the conditions to activate
the LKA system are satisfied, a
green steering wheel indicator will
illuminate and the LKA system
indicator light will change from
white to green. This indicates that
the LKA system is in the
ENABLED state and the steering
wheel will be able to be controlled.
i
The Lane Keeping Assist (LKA)
system is a system to help pre-
vent the driver from leaving the
lane. However, the driver should
not solely rely on the system
but always check the road con-
ditions when driving.
WARNING
OIK057114L
Page 358 of 516

5-109
Driving your vehicle
5
Information
• During normal cruise control opera-
tion, when the SET switch is activat-
ed or reactivated after applying the
brakes, the cruise control will ener-
gize after approximately 3 seconds.
This delay is normal.
• Before activating the cruise control
function, the system will check to
verify that the brake switch is oper-
ating normally. Depress the brake
pedal at least once after turning ON
the ignition or starting the engine.
To set Cruise Control speed
1. Press the CRUISE button on the
steering wheel to turn the system
on. The cruise indicator will illumi-
nate.
2. Accelerate to the desired speed,
which must be more than 20 mph
(30 km/h).
Information - Manual
transmission
For manual transmission vehicles, you
should depress the brake pedal at
least once to set the cruise control
after starting the engine.3. Push the toggle switch down
(SET-), and release it. The set
speed on the LCD display will illu-
minate.
4. Release the accelerator pedal.
Information
On a steep slope, the vehicle may
slightly slow down or speed up, while
driving uphill or downhill.
i
i
i
OIK057023
OIK057022L
Page 385 of 516

5-136
Driving your vehicle
Winter Precautions
Use high quality ethylene glycol
coolant
Your vehicle is delivered with high
quality ethylene glycol coolant in the
cooling system. It is the only type of
coolant that should be used because
it helps prevent corrosion in the cool-
ing system, lubricates the water
pump and prevents freezing. Be sure
to replace or replenish your coolant
in accordance with the maintenance
schedule in chapter 7. Before winter,
have your coolant tested to assure
that its freezing point is sufficient for
the temperatures anticipated during
the winter.
Change to "winter weight" oil if
necessary
In some climates it is recommended
that a lower viscosity "winter weight"
oil be used during cold weather. See
chapter 8 for recommendations. If
you aren't sure what weight oil you
should use, consult an authorized
retailer of Genesis Branded prod-
ucts.
Check battery and cables
Winter puts additional burdens on
the battery system. Visually inspect
the battery and cables as described
in chapter 7. The level of charge in
your battery can be checked by an
authorized retailer of Genesis
Branded products or a service sta-
tion.
Check spark plugs and ignition
system
Inspect your spark plugs as
described in chapter 7 and replace
them if necessary. Also check all
ignition wiring and components to be
sure they are not cracked, worn or
damaged in any way.
Use approved window washer
anti-freeze in system
To keep the water in the window
washer system from freezing, add an
approved window washer anti-freeze
solution in accordance with instruc-
tions on the container. Window wash-
er anti-freeze is available from an
authorized retailer of Genesis
Branded products and most auto
parts outlets. Do not use engine
coolant or other types of anti-freeze
as these may damage the paint fin-
ish.
Page 397 of 516

6-4
What to do in an emergency
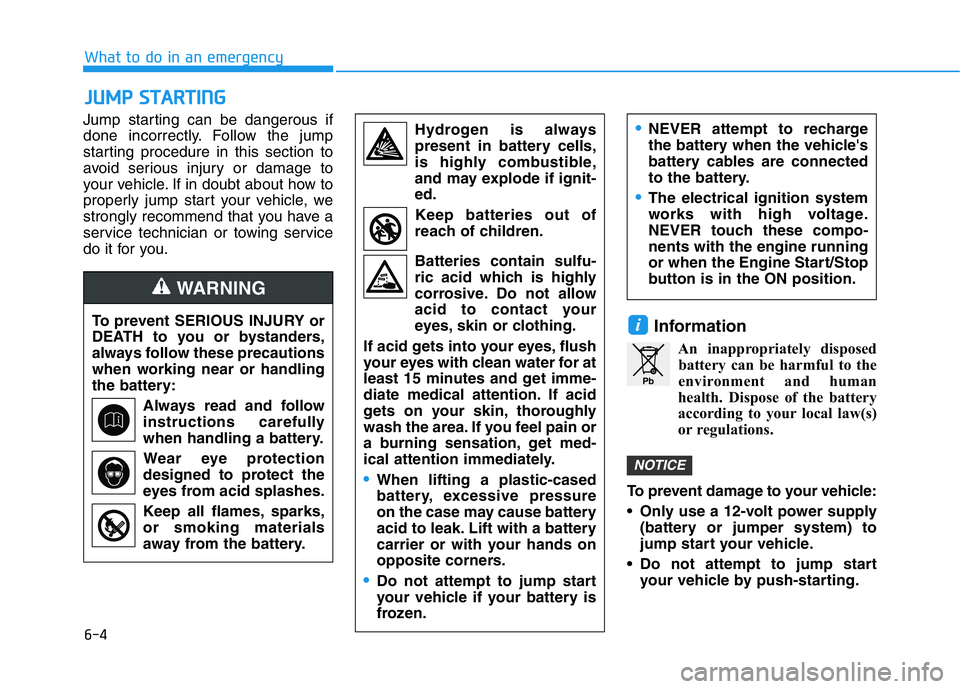
Jump starting can be dangerous if
done incorrectly. Follow the jump
starting procedure in this section to
avoid serious injury or damage to
your vehicle. If in doubt about how to
properly jump start your vehicle, we
strongly recommend that you have a
service technician or towing service
do it for you.
Information
An inappropriately disposed
battery can be harmful to the
environment and human
health. Dispose of the battery
according to your local law(s)
or regulations.
To prevent damage to your vehicle:
• Only use a 12-volt power supply
(battery or jumper system) to
jump start your vehicle.
• Do not attempt to jump start
your vehicle by push-starting.
NOTICE
i
JUMP STARTING
To prevent SERIOUS INJURY or
DEATH to you or bystanders,
always follow these precautions
when working near or handling
the battery:
Always read and follow
instructions carefully
when handling a battery.
Wear eye protection
designed to protect the
eyes from acid splashes.
Keep all flames, sparks,
or smoking materials
away from the battery.
WARNING
Hydrogen is always
present in battery cells,
is highly combustible,
and may explode if ignit-
ed.
Keep batteries out of
reach of children.
Batteries contain sulfu-
ric acid which is highly
corrosive. Do not allow
acid to contact your
eyes, skin or clothing.
If acid gets into your eyes, flush
your eyes with clean water for at
least 15 minutes and get imme-
diate medical attention. If acid
gets on your skin, thoroughly
wash the area. If you feel pain or
a burning sensation, get med-
ical attention immediately.
•When lifting a plastic-cased
battery, excessive pressure
on the case may cause battery
acid to leak. Lift with a battery
carrier or with your hands on
opposite corners.
•Do not attempt to jump start
your vehicle if your battery is
frozen.
•NEVER attempt to recharge
the battery when the vehicle's
battery cables are connected
to the battery.
•The electrical ignition system
works with high voltage.
NEVER touch these compo-
nents with the engine running
or when the Engine Start/Stop
button is in the ON position.
Pb
Page 419 of 516

6-26
Checking the tire inflation pres-
sure
1. After driving approximately 4~6
miles (7~10 km or about
10 minutes), stop at a safe loca-
tion.
2. Connect the filling hose (3) direct-
ly into the compressor.3. Connect the other end of the filling
hose (3) directly into the tire valve.
4. Plug the compressor power cord
(4) into the vehicle power outlet.5. Adjust the tire inflation pressure to
the recommended tire inflation.
With the ignition switched on, pro-
ceed as follows.
- To increase the inflation pres-
sure:
Switch on the compressor. To
check the current inflation pres-
sure setting, briefly switch off the
compressor.
- To reduce the inflation pres-
sure:
Press the button (9) on the com-
pressor.
Information
The pressure gage may show higher
than actual reading when the com-
pressor is running. To get an accurate
tire pressure, the compressor needs to
be turned off.
i
What to do in an emergency
OAEPH067042
OIK069039