maintenance schedule GENESIS G80 2021 User Guide
[x] Cancel search | Manufacturer: GENESIS, Model Year: 2021, Model line: G80, Model: GENESIS G80 2021Pages: 604, PDF Size: 11.47 MB
Page 526 of 604

09
9-11
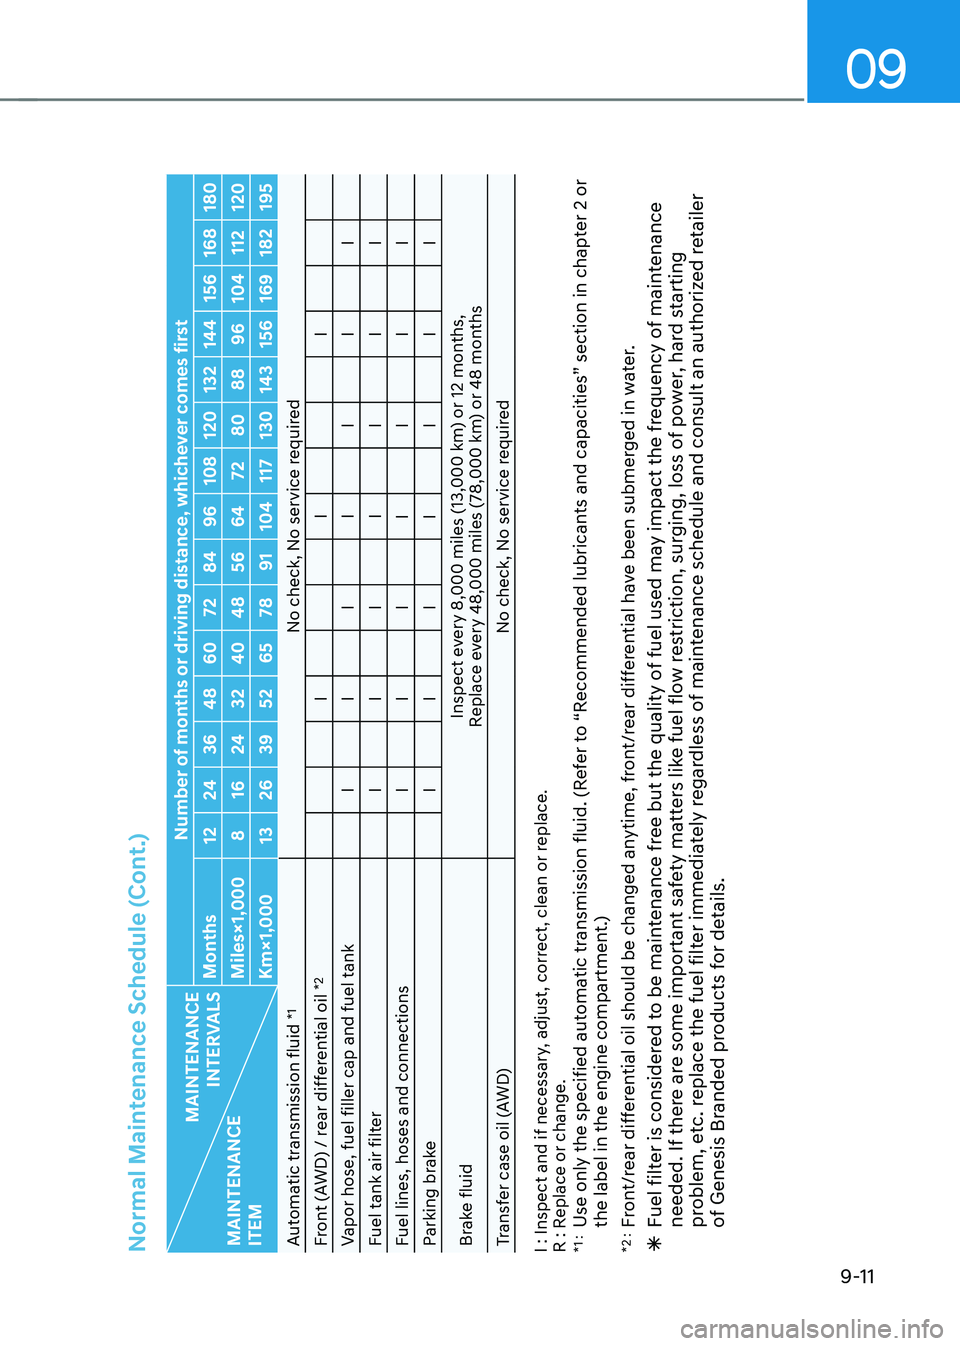
Normal Maintenance Schedule (Cont.)
MAINTENANCE
INTERVALS
MAINTENANCE
ITEM Number of months or driving distance, whichever comes first
Months 1224 3648 60 7284 96108 120 132144 156168 180
Miles×1,000 816 24 3240 48 5664 7280 8896104 112120
Km×1,000 1326 39 5265 78 91104 117130 143156169 182195
Automatic transmission fluid
*1
No check, No service required
Front (AWD) / rear differential oil
*2
I II
Vapor hose, fuel filler cap and fuel tank IIIIIII
Fuel tank air filter IIIIIII
Fuel lines, hoses and connections IIIIIII
Parking brake IIIIIII
Brake fluid Inspect every 8,000 miles (13,000 km) or 12 months,
Replace every 48,000 miles (78,000 km) or 48 months
Transfer case oil (AWD) No check, No service required
I : Inspect and if necessary, adjust, correct, clean or replace.
R : Replace or change.
*1 : Use only the specified automatic transmission fluid. (Refer to “Recommended lubricants and capacities” section in chapter 2 or
the label in the engine compartment.)
*2 : Front/rear differential oil should be changed anytime, front/rear differential have been submerged in water. Ã Fuel filter is considered to be maintenance free but the quality of fuel used may impact the frequency of maintenance
needed. If there are some important safety matters like fuel flow restriction, surging, loss of power, hard starting
problem, etc. replace the fuel filter immediately regardless of maintenance schedule and consult an authorized retailer
of Genesis Branded products for details.
Page 529 of 604

Maintenance
9-14
Engine Oil and Filter
The engine oil and filter should be
changed at the intervals specified in the
maintenance schedule. If the vehicle
is being driven in severe conditions,
more frequent oil and filter changes are
required.
Drive Belts
Inspect all drive belts for evidence
of cuts, cracks, excessive wear or oil
saturation and replace if necessary.
Drive belts should be checked
periodically for proper tension and
adjusted as necessary.
Information
When you are inspecting the belt, turn the
engine off.
Fuel Lines, Fuel Hoses and
Connections
Check the fuel lines, fuel hoses and
connections for leakage and damage.
Have an authorized retailer of Genesis
Branded products replace any damaged
or leaking parts immediately.
Fuel Filter
The fuel filter is considered to be
maintenance free but periodic inspection
is recommended for this maintenance
depends on fuel quality. If there are
some important matters like fuel flow
restriction, surging, loss of power, hard
starting problem etc., replace the fuel
filter immediately. We recommend that
you consult an authorized retailer of
Genesis Branded products for details.
Vapor Hose and Fuel Filler Cap
The vapor hose and fuel filler cap should
be inspected at those intervals specified
in the maintenance schedule. Make sure
a new vapor hose or fuel filler cap is
correctly replaced.
Air Cleaner Filter
We recommend that the air cleaner filter
be replaced by an authorized retailer of
Genesis Branded products.
Spark Plugs
Make sure to install new spark plugs of
the correct heat range.
Cooling System
Check cooling system components, such
as radiator, coolant reservoir, hoses and
connections for leakage and damage.
Replace any damaged parts.
EXPLANATION OF SCHEDULED MAINTENANCE ITEMS
Page 530 of 604

09
9-15
Engine Coolant/Liquid-Cooled
Intercooler Coolant
The coolant should be changed at the
intervals specified in the maintenance
schedule.
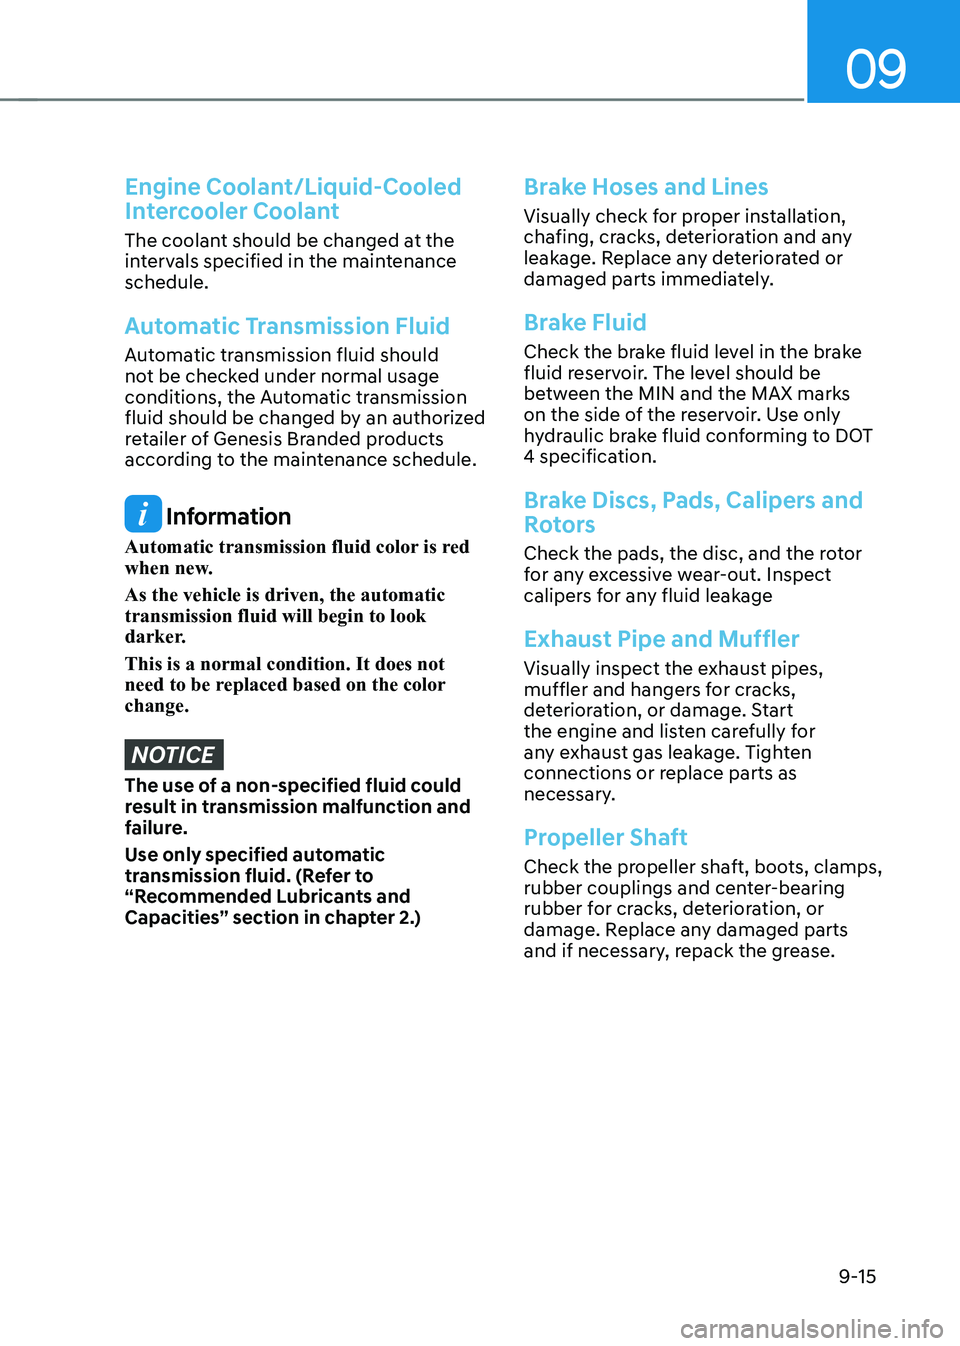
Automatic Transmission Fluid
Automatic transmission fluid should
not be checked under normal usage
conditions, the Automatic transmission
fluid should be changed by an authorized
retailer of Genesis Branded products
according to the maintenance schedule.
Information
Automatic transmission fluid color is red
when new.
As the vehicle is driven, the automatic
transmission fluid will begin to look
darker.
This is a normal condition. It does not
need to be replaced based on the color
change.
NOTICE
The use of a non-specified fluid could
result in transmission malfunction and
failure.
Use only specified automatic
transmission fluid. (Refer to
“Recommended Lubricants and
Capacities” section in chapter 2.)
Brake Hoses and Lines
Visually check for proper installation,
chafing, cracks, deterioration and any
leakage. Replace any deteriorated or
damaged parts immediately.
Brake Fluid
Check the brake fluid level in the brake
fluid reservoir. The level should be
between the MIN and the MAX marks
on the side of the reservoir. Use only
hydraulic brake fluid conforming to DOT
4 specification.
Brake Discs, Pads, Calipers and
Rotors
Check the pads, the disc, and the rotor
for any excessive wear-out. Inspect
calipers for any fluid leakage
Exhaust Pipe and Muffler
Visually inspect the exhaust pipes,
muffler and hangers for cracks,
deterioration, or damage. Start
the engine and listen carefully for
any exhaust gas leakage. Tighten
connections or replace parts as
necessary.
Propeller Shaft
Check the propeller shaft, boots, clamps,
rubber couplings and center-bearing
rubber for cracks, deterioration, or
damage. Replace any damaged parts
and if necessary, repack the grease.
Page 532 of 604

09
9-17
„„2.5L T-GDI
ORG3090005
„„3.5L T-GDI
ORG3090007
7. If it is near or at L, add enough oil to
bring the level to F.
Use only the specified engine oil (Refer
to “Recommended Lubricants and
Capacities” section in chapter 2).
NOTICE
To prevent damage to your engine:
• Do not overfill with engine oil. Add oil
in small quantities and recheck level
to ensure engine is not overfilled.
• Do not spill engine oil when adding
or changing engine oil. Use a funnel
to help prevent oil from being spilled
on engine components. Wipe off
spilled oil immediately.
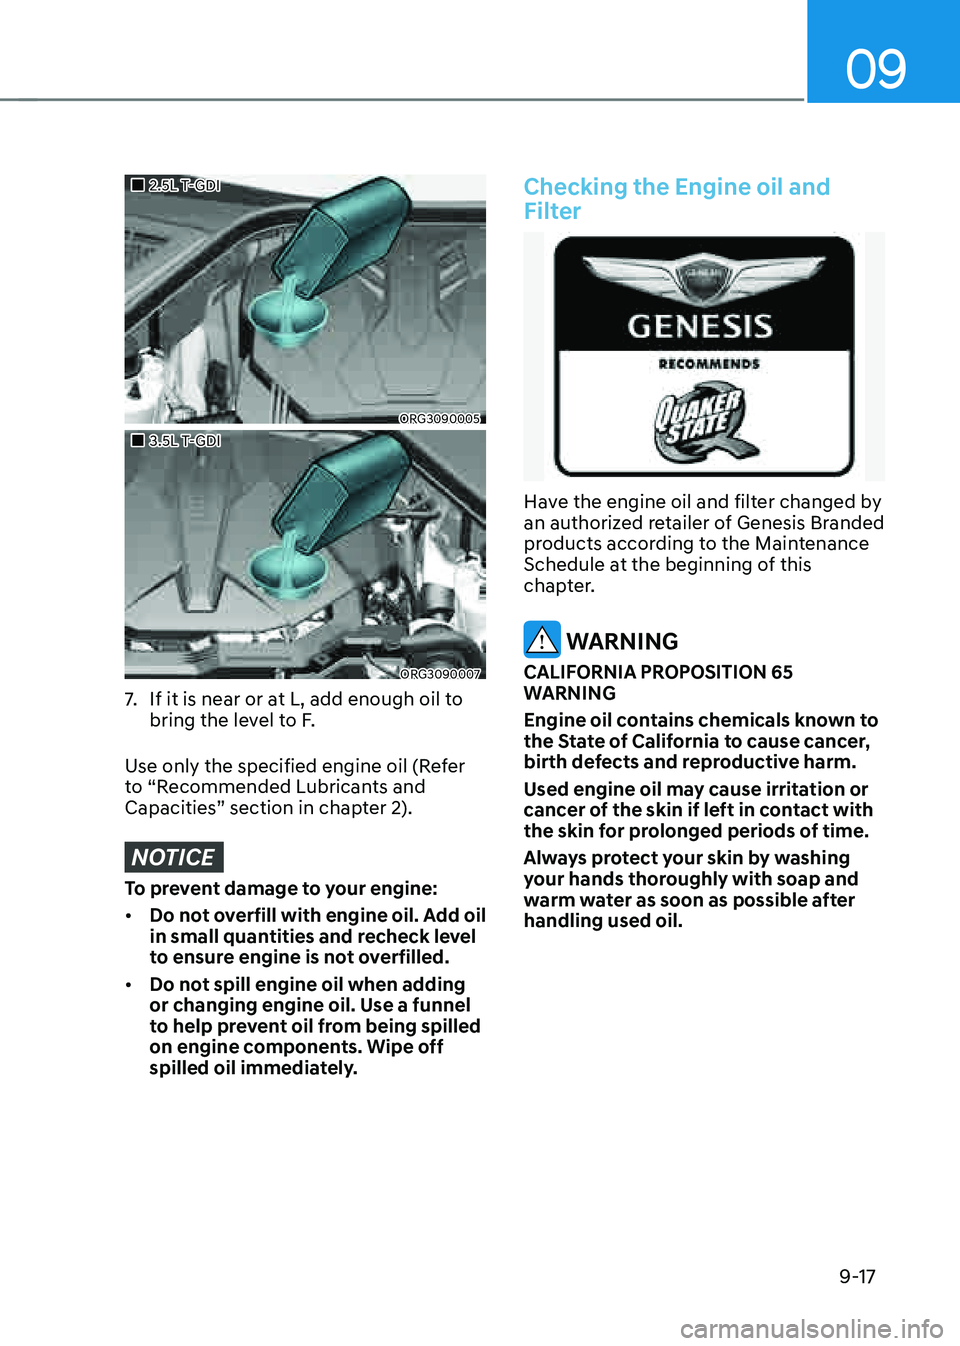
Checking the Engine oil and
Filter
Have the engine oil and filter changed by an authorized retailer of Genesis Branded
products according to the Maintenance
Schedule at the beginning of this
chapter.
WARNING
CALIFORNIA PROPOSITION 65
WARNING
Engine oil contains chemicals known to
the State of California to cause cancer,
birth defects and reproductive harm.
Used engine oil may cause irritation or
cancer of the skin if left in contact with
the skin for prolonged periods of time.
Always protect your skin by washing
your hands thoroughly with soap and
warm water as soon as possible after
handling used oil.
Page 535 of 604

Maintenance
9-20
Recommended coolant
• When adding coolant, use only
deionized water, distilled water or soft
water for your vehicle and never mix
hard water in the coolant filled at the
factory.
• An incorrect coolant mixture can
result in severe malfunction or engine
damage.
• The engine in your vehicle has
aluminum engine parts and must be
protected by an phosphate-based
ethylene glycol coolant to prevent
corrosion and freezing.
• Do not use alcohol or methanol
coolant or mix them with the specified
coolant.
• Do not use a solution that contains
more than 60% antifreeze or less than
35% antifreeze, which would reduce
the effectiveness of the solution.
For mixing percentage, refer to the
following table:
Ambient
Temperature Mixture Percentage
(volume)
Antifreeze Water
5°F (-15°C) 3565
-13°F (-25°C) 4060
-31°F (-35°C) 5050
-49°F (-45°C) 6040
Information
If in doubt about the mix ratio, a 50%
water and 50% antifreeze mix is the
easiest to mix together as it will be the
same quantity of each. It is suitable to
use for most temperature ranges of -31°F
(-35°C) and higher.
Changing Coolant
Have coolant be changed by an
authorized retailer of Genesis Branded
products according to the Maintenance
Schedule at the beginning of this
chapter.
WARNING
Do not use engine coolant or antifreeze
in the washer fluid reservoir.
Engine coolant can severely obscure
visibility when sprayed on the
windshield and may cause loss of
vehicle control resulting in an accident.
Engine coolant may also cause damage
to paint and body trim.
NOTICE
To prevent damage to engine parts, put
a thick towel around the engine coolant
cap and/or inverter coolant cap before
refilling the coolant to prevent the
coolant from overflowing into engine
parts, such as the alternator.
Page 538 of 604

09
9-23
Filter Replacement
„„2.5L T-GDI
ORG3090014
„„3.5L T-GDIt
ORG3090015
Do not attempt to wash or to rinse it, as
water will damage the filter.
If soiled, the air cleaner filter must be
replaced.
Visit an authorized retailer of Genesis
Branded products to replace air cleaner
filter.
Replace the filter according to the
Maintenance Schedule.
Information
If the vehicle is operated in extremely
dusty or sandy areas, replace the air
cleaner filter more often than the
usual recommended intervals (Refer
to “Maintenance Under Severe Usage
Conditions” section in this chapter).
NOTICE
• Do not drive with the air cleaner filter
removed. This will result in excessive
engine wear.
• When removing the air cleaner filter,
be careful that dust or dirt does not
enter the air intake, or damage may
result.
• We recommend that you use parts
for replacement from an authorized
retailer of Genesis Branded products.
AIR CLEANER
Page 539 of 604

Maintenance
9-24
Filter Inspection
The cabin air filter should be replaced
according to the Maintenance Schedule.
If the vehicle is operated in severely air-
polluted cities or on dusty rough roads
for a long period, it should be inspected
more frequently and replaced sooner.
Replace the cabin air filter by following
the procedure below and be careful to
avoid damaging other components.
Filter Replacement
ORG3090017
1. Open the glove box and remove the
support rod (1).
ORG3090018
2. Remove the stoppers on both sides to
allow the glove box to hang freely on
the hinges.
ORG3090019
3. Press and hold the lock (1) on the left
side of the cover.
4. Pull out (2) the cover
5. Replace the cabin air filter.
6. Reassemble in the reverse order of
disassembly.
NOTICE
OHI078055
Install a new cabin air filter in the
correct direction with the arrow symbol
(↓) facing downwards, to prevent noise
and reduce effectiveness.
CABIN AIR FILTER
Page 547 of 604

Maintenance
9-32
Tire Rotation
To equalize tread wear, Genesis
Branded Vehicle recommends that
the tires be rotated according to the
maintenance schedule or sooner if
irregular wear develops.
During rotation, check the tires for
correct balance.
When rotating tires, check for uneven
wear and damage. Abnormal wear
is usually caused by incorrect tire
pressure, improper wheel alignment,
out-of-balance wheels, severe braking
or severe cornering. Look for bumps or
bulges in the tread or side of the tire.
Replace the tire if you find any of these
conditions. Replace the tire if fabric or
cord is visible. After rotation, be sure to
bring the front and rear tire pressures
to specification and check wheel bolt
tightness (proper torque is 79~94 lbf·ft
[11~13 kgf·m].
„„18 inch tire
OHI078078
„„19, 20 inch tire
OHI078079
Disc brake pads should be inspected
for wear whenever tires are rotated.
Information
The outside and inside of the
unsymmetrical tire is distinguishable.
When installing an unsymmetrical
tire, be sure to install the side marked
“outside” face the outside. If the side
marked “inside” is installed on the
outside, it will have a negative effect
on vehicle performance.
WARNING
• Do not use the compact spare
tire for tire rotation.
• Do not mix bias ply and radial ply
tires under any circumstances.
This may cause unusual handling
characteristics that may cause
loss of vehicle control resulting in
an accident.
Page 587 of 604

Maintenance
9-72
The emission control system of your
vehicle is covered by a written limited
warranty. Please see the warranty
information contained in the Owner’s
Handbook & Warranty Information
booklet in your vehicle.
Your vehicle is equipped with an
emission control system to meet all
applicable emission regulations. There
are three emission control systems, as
follows.
(1) Crankcase emission control system
(2) Evaporative emission control system
(3) Exhaust emission control system
In order to ensure the proper function
of the emission control systems, it
is recommended that you have your
vehicle inspected and maintained by an
authorized retailer of Genesis Branded
products in accordance with the
maintenance schedule in this manual.
NOTICE
For the Inspection and Maintenance
Test (with Electronic Stability Control
(ESC) system)
• To prevent the vehicle from misfiring
during dynamometer testing, turn
the Electronic Stability Control
(ESC) system off by pressing the ESC
switch (ESC OFF light illuminated).
• After dynamometer testing is
completed, turn the ESC system back
on by pressing the ESC switch again.
1. Crankcase Emission Control
System
The positive crankcase ventilation system
is employed to prevent air pollution
caused by blow-by gases being emitted
from the crankcase. This system supplies
fresh filtered air to the crankcase through
the air intake hose. Inside the crankcase,
the fresh air mixes with blow-by gases,
which then pass through the PCV valve
into the induction system.
2. Evaporative Emission Control
System Including Onboard
Refueling Vapor Recovery
(ORVR)
The Evaporative Emission Control System
is designed to prevent fuel vapors from
escaping into the atmosphere. The
ORVR system is designed to allow the
vapors from the fuel tank to be loaded
into a canister while refueling at the gas
station, preventing the escape of fuel
vapors into the atmosphere.
Canister
Fuel vapors generated inside the fuel
tank are absorbed and stored in the
onboard canister. When the engine is
running, the fuel vapors absorbed in the
canister are drawn into the surge tank
through the purge control solenoid valve.
Purge Control Solenoid Valve (PCSV)
The purge control solenoid valve
is controlled by the Engine Control
Module (ECM); when the engine coolant
temperature is low during idling, the
PCSV closes so that evaporated fuel
is not taken into the engine. After the
engine warms-up during ordinary
driving, the PCSV opens to introduce
evaporated fuel to the engine.
EMISSION CONTROL SYSTEM
Page 594 of 604

I
I-5
E
Electronic Control Suspension
........................................................................\
...6-41
Electronically Controlled Suspension with Road Preview
............................6-41
Limitations of the System
........................................................................\
.......6-42
System Malfunction
........................................................................\
................6-41
System Malfunction
........................................................................\
................6-42
Emission Control System
........................................................................\
............9-72
Crankcase Emission Control System
..............................................................9-72
Evaporative Emission Control System Including Onboard Refueling Vapor
Recovery (ORVR)
........................................................................\
...................9-72
Exhaust Emission Control System
..................................................................9-73
Engine
........................................................................\
............................................2-8
Engine Compartment
........................................................................\
.....................9-3
Engine Compartment
........................................................................\
.....................2-7
Engine Number
........................................................................\
............................2-15
Engine Oil
........................................................................\
....................................9-16
Changing Coolant ........................................................................\
.................... 9-20
Checking the Coolant Level
........................................................................\
....9-18
Checking the Engine Oil and Filter
.................................................................9-17
Checking the Engine Oil Level
.......................................................................9-16
Engine Coolant/Liquid-Cooled Intercooler Coolant
.......................................9-18
Engine Start/Stop Button
........................................................................\
...............6-5
Engine Stop/Start Button Positions
...................................................................6-6
Remote Start
........................................................................\
..............................6-9
Smart Key Slot - Emergency Starting
...............................................................6-8
Starting the Engine
........................................................................\
....................6-7
Turning Off the Engine
........................................................................\
.............6-8
Explanation of Scheduled Maintenance Items
....................................................9-14
Exterior Features
........................................................................\
..........................5-62
Fuel Filler Door
........................................................................\
.......................5-73
Hood
........................................................................\
........................................5-62
Non-Powered Trunk
........................................................................\
...............5-63
Power Trunk
........................................................................\
...........................5-65
Smart Trunk
........................................................................\
............................5-70
Exterior Overview (I)
........................................................................\
....................2-2
Exterior Overview (II)
........................................................................\
...................2-3