instrument cluster GENESIS G80 2021 Owner's Guide
[x] Cancel search | Manufacturer: GENESIS, Model Year: 2021, Model line: G80, Model: GENESIS G80 2021Pages: 604, PDF Size: 11.47 MB
Page 162 of 604
Convenient Features
5-24
Used Vehicle/Digital Key
Maintenance
Purchasing used vehicle
If any of the digital key devices (smart
phone key, card key) are registered in
the vehicle, the message ‘Digital key(s)
active’ will appear on the instrument
cluster once when the vehicle is turned
on after unlocking the vehicle door.
When purchasing a used car, be sure to
check the message and delete the smart
phone key and card key registered by
the previous user. Please let us know
the purchase of a used vehicle through
Genesis Customer Care. Check whether
the card key that came with the used
vehicle operates properly. If the card key
does not work properly, delete the card
key and register the smart phone key,
and then re-register the card key.
Digital Key Maintenance
If you need to have your Digital Key
System repaired or replaced, the
registered smart key/card key can be
deleted. In this case, you should delete
the digital key on the smart phone and
re-register the key.
Limitations of the System
• Genesis Digital Key App on the smart
phone and card key may not work if
any of the following occurs:
-The Digital Key App in the smart
phone is deleted (reinstall the app)
-Account log information of Genesis
Digital Key App is expired (required
to re-log in)
-When you try to log in from
another smart phone instead of the
registered smart phone with same
user account - Smart phone rooting
or app hacking is detected
-Smart phone battery or the vehicle
battery is discharged
-Smart phone’s screen is off or
locked
-NFC or Bluetooth is turned off in the
smart phone settings
-Smart phone’s mobile network
setting is off or airplane mode is
activated
-A credit card is overlapped in the
back of your smart phone, or metal
or thick smart phone case is used
-Using the card key with other cards,
or using it in a wallet or card holder
-There is electronic interference by
other vehicles, objects, etc.
• The vehicle may not be controlled
by the smart phone if any of the
following occurs:
-Basic and necessary functions of
the smart phone are operating
(general call, urgent call, audio or
NFC payment)
-Using wireless earphone
Page 172 of 604
Convenient Features
5-34
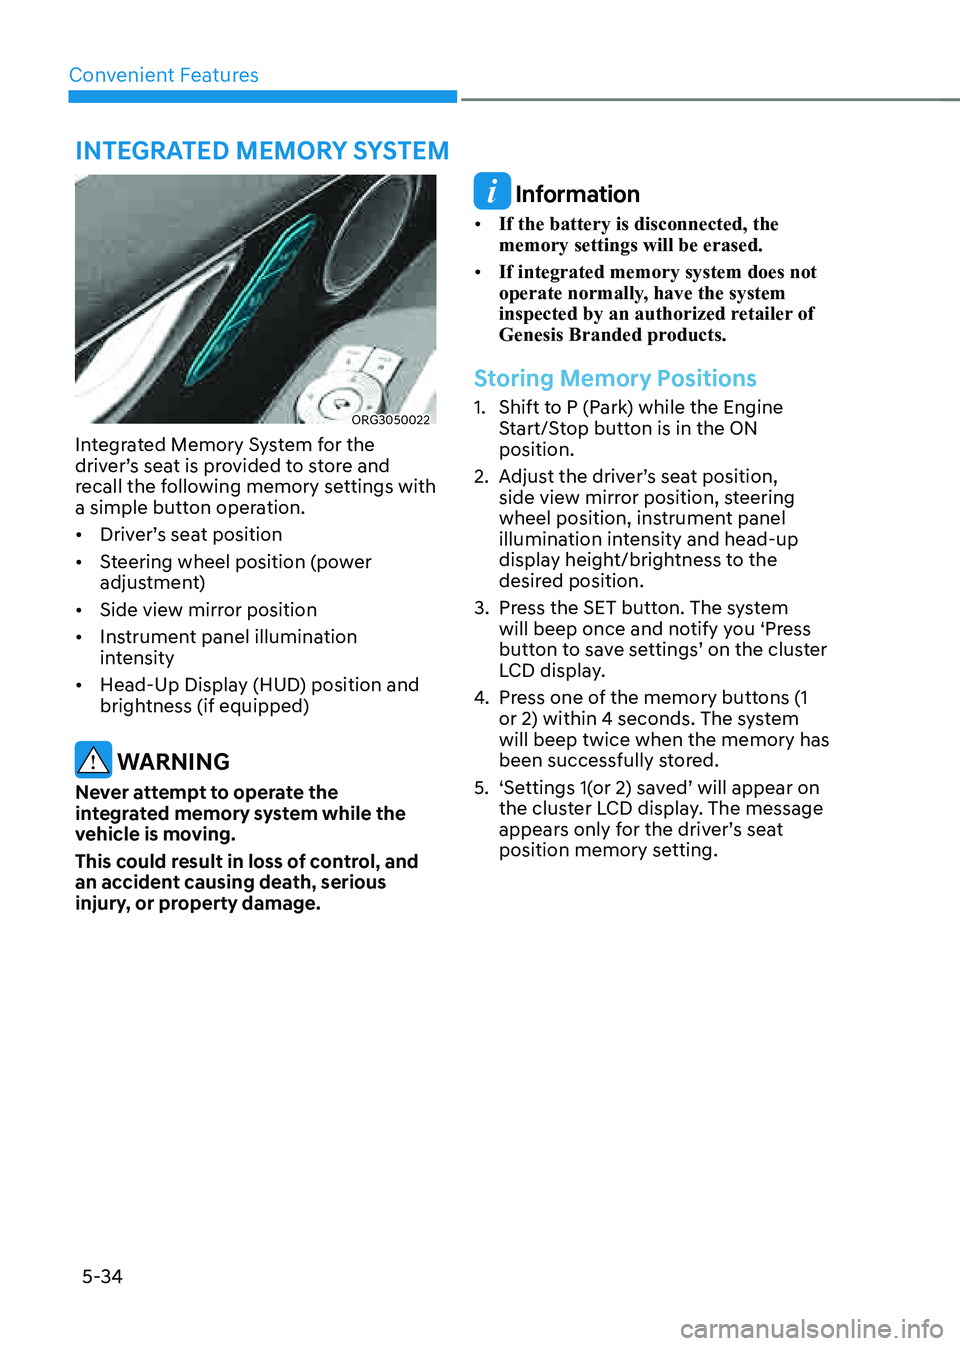
ORG3050022
Integrated Memory System for the
driver’s seat is provided to store and
recall the following memory settings with
a simple button operation.
• Driver’s seat position
• Steering wheel position (power
adjustment)
• Side view mirror position
• Instrument panel illumination
intensity
• Head-Up Display (HUD) position and
brightness (if equipped)
WARNING
Never attempt to operate the
integrated memory system while the
vehicle is moving.
This could result in loss of control, and
an accident causing death, serious
injury, or property damage.
Information
• If the battery is disconnected, the
memory settings will be erased.
• If integrated memory system does not
operate normally, have the system
inspected by an authorized retailer of
Genesis Branded products.
Storing Memory Positions
1. Shift to P (Park) while the Engine
Start/Stop button is in the ON
position.
2. Adjust the driver’s seat position,
side view mirror position, steering
wheel position, instrument panel
illumination intensity and head-up
display height/brightness to the
desired position.
3. Press the SET button. The system
will beep once and notify you ‘Press
button to save settings’ on the cluster
LCD display.
4. Press one of the memory buttons (1
or 2) within 4 seconds. The system
will beep twice when the memory has
been successfully stored.
5. ‘Settings 1(or 2) saved’ will appear on
the cluster LCD display. The message
appears only for the driver’s seat
position memory setting.
INTEGRATED MEMORY SYSTEM
Page 173 of 604
05
5-35
Recalling Memory Positions
1. Shift to P (Park) while the Engine
Start/Stop button is in the ON
position.
2. Press the desired memory button (1
or 2). The system will beep once, and
then the driver’s seat position, side
view mirror position, steering wheel
position, instrument panel illumination
intensity and head-up display height/
brightness will automatically adjust to
the stored positions.
3. ‘Settings 1(or 2) applied’ will appear on
the cluster LCD display.
Information
• If you press the SET button or the
corresponding button which the
setting is being recalled, the setting will
temporarily deactivate. If you press the
other buttons, the setting of the pressed
button will activate.
For example, if you press the SET
button or number 1 button with the
number 1 setting in operation, the
setting will temporarily deactivate. If
you press the number 2 button, the
number 2 setting will activate.
• If you adjust the seat, side view mirror,
steering wheel, instrument panel
illumination or head-up display while
recalling the stored positions, the pre-
set settings will become ineffective.
Resetting the System
Take the following procedures to reset
integrated memory system, when it does
not operate properly.
Resetting integrated memory
system
1. Stop the vehicle and open the driver’s
door with the vehicle shifted to P
(Park).
2. Adjust the driver’s seat and seatback
to the foremost position.
3. Press the SET button and push
forward the driver’s seat movement
switch over 2 seconds simultaneously.
While resetting integrated memory
system
1. Resetting starts with a notification
sound.
2. The driver’s seat and seatback is
adjusted to the rearward position with
the notification sound.
3. The driver’s seat and seatback is
re-adjusted to the default position
(central position) with the notification
sound.
However, in the following cases, the
resetting procedure and the notification
sound may stop.
• The memory button is pressed.
• The seat control switch is operated.
• The driving speed exceeds
2 mph (3 km/h).
• The driver’s door is closed.
Page 176 of 604

Convenient Features
5-38
Electric Power Steering (EPS)
The system assists you with steering the
vehicle. If the vehicle is turned off or
if the power steering system becomes
inoperative, you may still steer the
vehicle, but it will require increased
steering effort.
Should you notice any change in the
effort required to steer during normal
vehicle operation, we recommend that
you have the system checked by an
authorized retailer of Genesis Branded
products.
CAUTION
If Electric Power Steering does not
operate normally, the warning light and the message ‘Check motor driven
power steering’ will illuminate on the
instrument cluster. You may steer the
vehicle, but it will require increased
steering efforts. We recommend that
you take the vehicle to an authorized
retailer of Genesis Branded products
and have the system checked as soon as
possible.
Information
The following symptoms may occur during
normal vehicle operation:
• The steering effort may be high
immediately after pressing the Engine
Start/Stop button to the ON position.
This happens as the system performs
the EPS system diagnostics. When the
diagnostics are completed, the steering
wheel effort will return to its normal
condition.
• When the battery voltage is low, you
may have to put more steering effort.
However, it is a temporary condition so
that it will return to normal condition
after charging the battery.
• A click noise may be heard from the
EPS relay after the Engine Start/Stop
button is in the ON or OFF position.
• Motor noise may be heard when the
vehicle is at a stop or at a low driving
speed.
• When you operate the steering wheel
in low temperatures, abnormal noise
may occur. If the temperature rises, the
noise will disappear.
This is a normal condition.
• When an error is detected from EPS,
the steering effort assist function will
not be activated in order to prevent
accidents. Instrument cluster warning
lights may be on or the steering effort
may be high. If these symptoms occur,
drive the vehicle to a safe area as soon
as it is safe to do so. Have the system
checked by an authorized retailer of
Genesis Branded products as soon as
possible.
STEERING WHEEL
Page 177 of 604

05
5-39
Tilt/Telescopic Steering
When adjusting the steering wheel to a
comfortable position, adjust the steering
wheel so that it points toward your chest,
not toward your face. Make sure you can
see the instrument cluster warning lights
and gauges. After adjusting, push the
steering wheel both up and down to be
certain it is locked in position.
Always adjust the position of the steering
wheel before driving.
WARNING
NEVER adjust the steering wheel while
driving. This may cause loss of vehicle
control resulting in an accident.
Manual adjustment
ORG3050096L
To adjust the steering wheel angle and
height:
1. Pull down the lock-release lever (1).
2. Adjust the steering wheel to the
desired angle (2) and distance
forward/back (3).
3. Pull up the lock-release lever to lock
the steering wheel in place.
Information
Sometimes the lock release lever may not
engage completely. This may occur when
the gears of the locking mechanism do not
completely mesh. If this occurs, pull down
on the lock-release lever, readjust the
steering wheel again, and then pull back
up on the release lever to lock the steering
wheel in place.
Power adjustment
ORG3050023
To change the steering wheel angle and
height:
• Push the switch (1) up and down to
adjust the angle (2).
• Push the switch forward or rearward
to adjust the height (3).
NOTICE
Do not adjust the steering wheel
longer than necessary when the
engine is turned off. This may result in
unnecessary battery drain.
Page 200 of 604
Convenient Features
5-62
Hood
Opening the hood
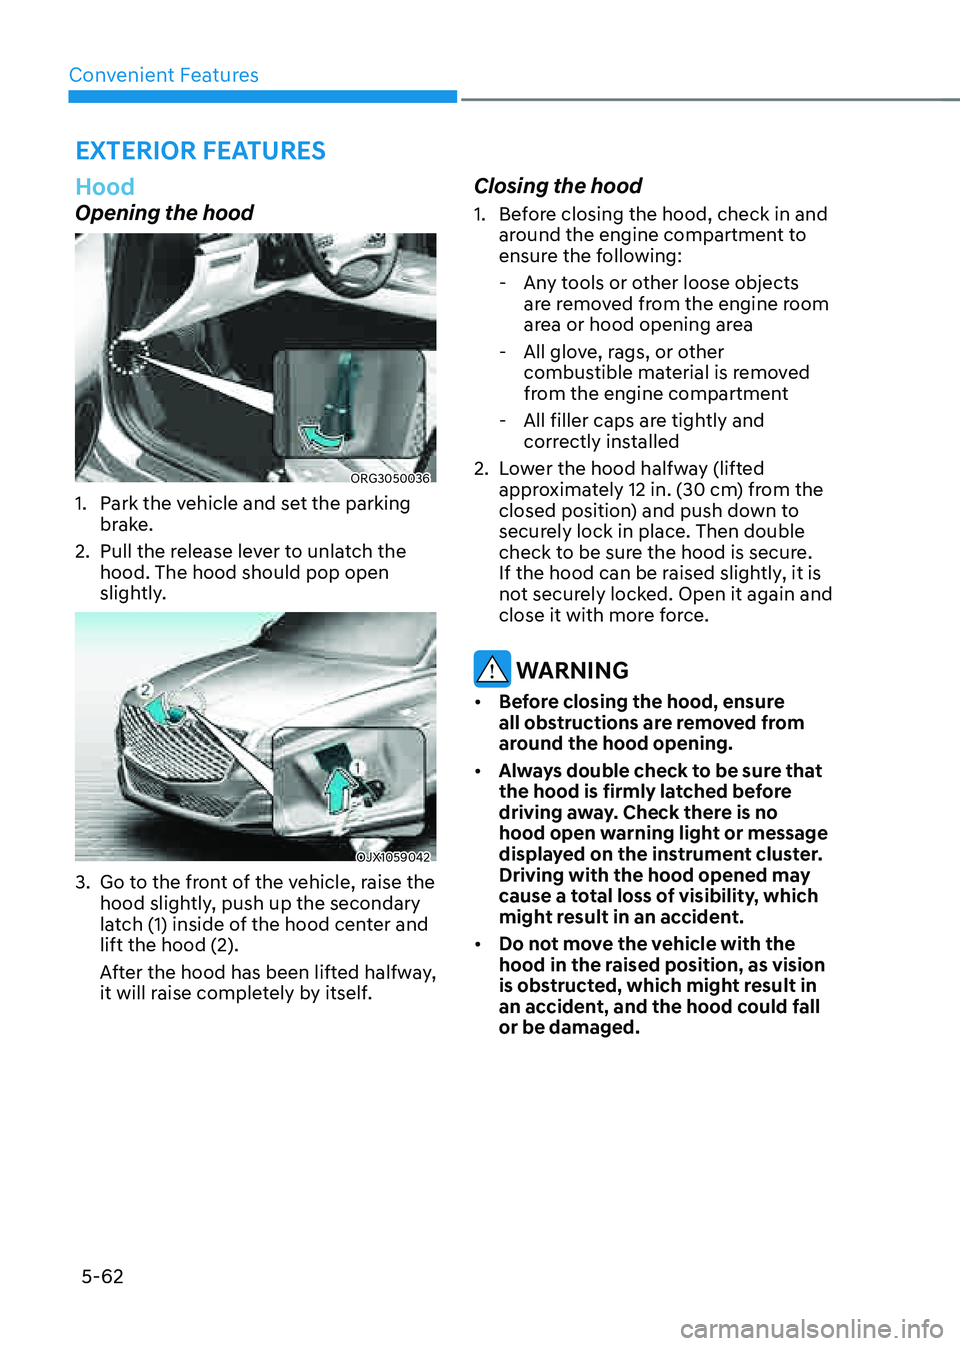
ORG3050036
1. Park the vehicle and set the parking
brake.
2. Pull the release lever to unlatch the
hood. The hood should pop open
slightly.
OJX1059042
3. Go to the front of the vehicle, raise the
hood slightly, push up the secondary
latch (1) inside of the hood center and
lift the hood (2).
After the hood has been lifted halfway,
it will raise completely by itself.
Closing the hood
1. Before closing the hood, check in and
around the engine compartment to
ensure the following:
-Any tools or other loose objects
are removed from the engine room
area or hood opening area
-All glove, rags, or other
combustible material is removed
from the engine compartment
-All filler caps are tightly and
correctly installed
2. Lower the hood halfway (lifted
approximately 12 in. (30 cm) from the
closed position) and push down to
securely lock in place. Then double
check to be sure the hood is secure.
If the hood can be raised slightly, it is
not securely locked. Open it again and
close it with more force.
WARNING
• Before closing the hood, ensure
all obstructions are removed from
around the hood opening.
• Always double check to be sure that
the hood is firmly latched before
driving away. Check there is no
hood open warning light or message
displayed on the instrument cluster.
Driving with the hood opened may
cause a total loss of visibility, which
might result in an accident.
• Do not move the vehicle with the
hood in the raised position, as vision
is obstructed, which might result in
an accident, and the hood could fall
or be damaged.
EXTERIOR FEATURES
Page 214 of 604
Convenient Features
5 -76
ORG3050056N
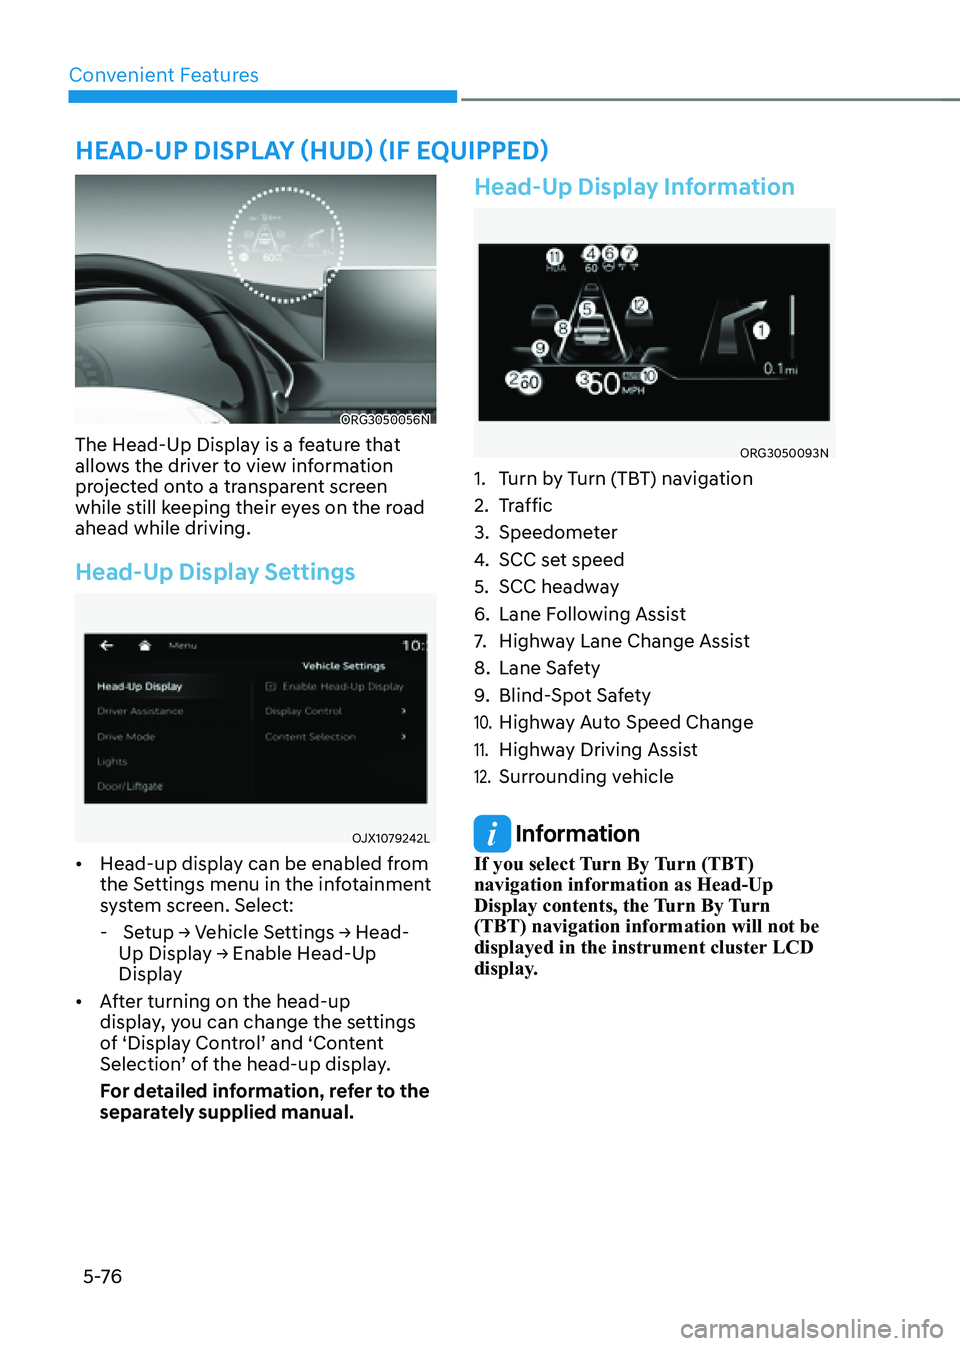
The Head-Up Display is a feature that
allows the driver to view information
projected onto a transparent screen
while still keeping their eyes on the road
ahead while driving.
Head-Up Display Settings
OJX1079242L
• Head-up display can be enabled from
the Settings menu in the infotainment
system screen. Select:
- Setup → Vehicle Settings → Head-
Up Display → Enable Head-Up
Display
• After turning on the head-up
display, you can change the settings
of ‘Display Control’ and ‘Content
Selection’ of the head-up display.
For detailed information, refer to the
separately supplied manual.
Head-Up Display Information
ORG3050093N
1. Turn by Turn (TBT) navigation
2. Traffic
3. Speedometer
4. SCC set speed
5. SCC headway
6. Lane Following Assist
7. Highway Lane Change Assist
8. Lane Safety
9. Blind-Spot Safety
10. Highway Auto Speed Change
11. Highway Driving Assist
12. Surrounding vehicle
Information
If you select Turn By Turn (TBT)
navigation information as Head-Up
Display contents, the Turn By Turn
(TBT) navigation information will not be
displayed in the instrument cluster LCD
display.
HEAD-UP DISPLAY (HUD) (IF EQUIPPED)
Page 226 of 604
Convenient Features
5-88
System Operation
Display and control
• After selecting ‘High Beam Assist’
in the Settings menu, High Beam
Assist will operate by following the
procedure below.
-Place the headlamp switch in
the AUTO position and push
the headlamp lever towards the
instrument cluster. The High Beam
Assist (
) indicator light will
illuminate on the cluster and the
system will be enabled.
- When the system is enabled, high
beam will turn on when vehicle
speed is above 25 mph (40 km/h).
When vehicle speed is below 15
mph (25 km/h), high beam will not
turn on.
-The High Beam () indicator light
will illuminate on the cluster when
high beam is on.
• When High Beam Assist is operating, if
the headlamp lever or switch is used,
the system operates as follow:
- If the headlamp lever is pulled
towards you when the high beam
is off, the high beam will turn on
without High Beam Assist canceled.
When you let go of the headlamp
lever, the lever will move to the
middle and the high beam will turn
off.
-If the headlamp lever is pulled
towards you when the high beam is
on by High Beam Assist, low beam
will be on and the system will turn
off.
-If the headlamp switch is placed
from AUTO to another position
(headlamp/position/off), High
Beam Assist will turn off and the
corresponding lamp will turn on.
• When High Beam Assist is operating,
high beam switches to low beam if
any of the following conditions occur:
-When the headlamp of an
oncoming vehicle is detected.
-When the tail lamp of a vehicle in
front is detected.
-When the headlamp or tail lamp of a
motorcycle or a bicycle is detected.
-When the surrounding ambient light
is bright enough that high beams
are not required.
-When streetlights or other lights are
detected.
System Malfunction and
Limitations
System malfunction
OJX1059235L
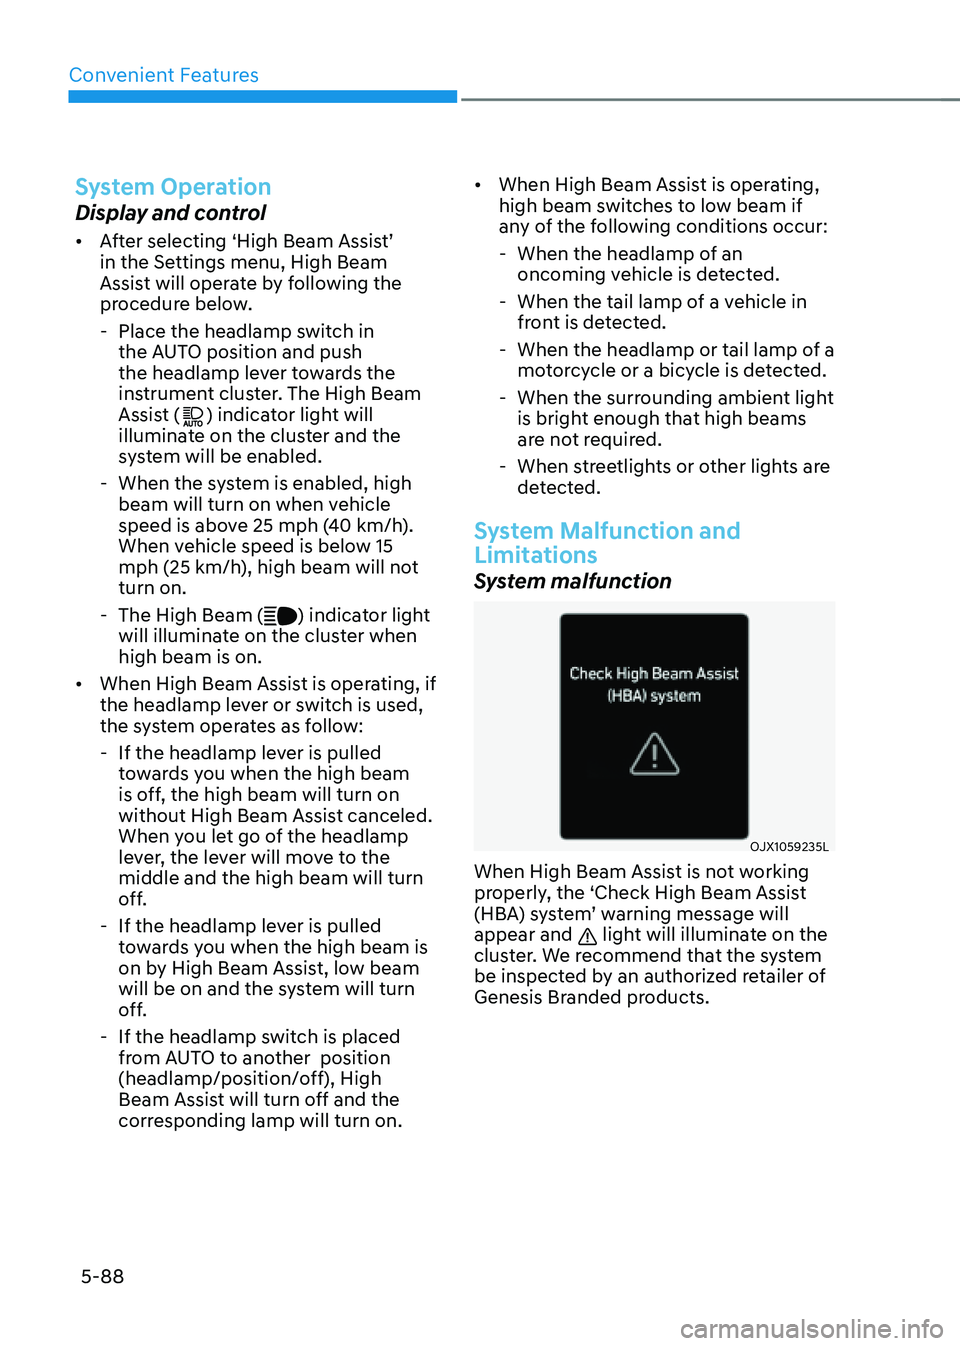
When High Beam Assist is not working
properly, the ‘Check High Beam Assist
(HBA) system’ warning message will
appear and
light will illuminate on the
cluster. We recommend that the system
be inspected by an authorized retailer of
Genesis Branded products.
Page 302 of 604
06
6-37
All Wheel Drive (AWD) delivers engine
power to front and rear wheels for
maximum traction. AWD is useful when
extra traction is required, such as when
driving on, muddy, wet, or snow-covered
roads.
WARNING
To reduce the risk of SERIOUS INJURY
or DEATH:
• Do not drive in conditions that
exceed the vehicles intended
design such as challenging off-road
conditions.
• Avoid high speeds when cornering or
turning.
• Do not make quick steering wheel
movements, such as sharp lane
changes or fast, sharp turns.
• The risk of a rollover is greatly
increased if you lose control of your
vehicle at highway speeds.
• Loss of control often occurs if two or
more wheels drop off the roadway
and the driver over steers to reenter
the roadway.
• In the event your vehicle leaves
the roadway, do not steer sharply.
Instead, slow down before pulling
back into the travel lanes.
WARNING
If the AWD () warning light stays on
the instrument cluster, your vehicle
may have a malfunction with the
AWD system. Whenever the AWD
(
) warning light illuminates, have
the vehicle inspected by an authorized
retailer of Genesis Branded products as
soon as possible.
NOTICE
• Do not drive in water if the level
is higher than the bottom of the
vehicle.
• Check your brake condition once
you are out of mud or water. Depress
the brake pedal several times as you
move slowly until you feel normal
braking return.
• Shorten your scheduled
maintenance interval if you drive in
off-road conditions such as sand,
mud or water (see "Maintenance
Under Severe Usage Conditions"
section in chapter 9).
• Always wash your vehicle thoroughly
after off road use, especially the
bottom of the vehicle.
• Be sure to equip the vehicle with four
tires of the same size and type.
• Make sure that a full time AWD
vehicle is towed by a flat bed tow
truck.
All Wheel Drive (AWD) Operation
If the AWD system determines there is a
need for four wheel drive, the engine's
driving power is distributed to all four
wheels automatically.
ALL WHEEL DRIVE (AWD) (IF EQUIPPED)
Page 308 of 604

06
6-43
Idle Stop and Go helps reduce fuel
consumption by automatically shutting
down the engine, when the vehicle is
at a standstill (i.e. red stop light, stop
sign, and traffic jam) subject to certain
prerequisite conditions being satisfied as
listed below.
The engine is automatically started upon
satisfying the starting conditions.
ISG system is always active, when the
engine is running.
Information
When the engine is automatically started
by ISG system, warning lights (i.e. ABS,
ESC, ESC OFF, EPS, and parking brake
warning light) may illuminate for a few
seconds due to low battery voltage.
However, it does not indicate a
malfunction with ISG system.
ISG System Operation
Prerequisite for activation
ISG system operates in the following
situations.
• The driver's seatbelt is fastened
• The driver's door and hood are closed
• The battery sensor is activated and
the battery is sufficiently charged
• Outside temperature is not too low or
too high
• The vehicle is driven over a constant
speed and stops
• The climate control system satisfies
the conditions
• The vehicle is sufficiently warmed up
• ISG related parts are working properly
• The incline is gradual
• The steering wheel is turned less than
180 degrees and then the vehicle
stops
Information
ISG system is not activated, when the
prerequisites to activate the ISG system
are unsatisfied. If this occurs, the ISG
OFF button indicator illuminates, and the
Auto Stop (
) indicator illuminates in
yellow on the instrument cluster.
When the Auto Stop (
) indicator stays
on the instrument cluster, have the system
inspected by an authorized retailer of
Genesis Branded products.
Auto stop
When ISG is on the engine will be
stopped automatically when both of the
following occurs:
1. Vehicle speed decreases to 0mph (0
km/h) full stop condition.
2. Brake pedal is depressed and gear is
in D (Drive) or N (Neutral).
The Auto Stop (
) indicator illuminates
in green on the instrument cluster, when
the engine stops.
Information
Idle stop cannot reoccur again until the
vehicle speed goes above 3 mph (5 km/h)
and then returns again to the automatic
stop conditions as previously mentioned.
IDLE STOP AND GO (ISG)