engine overheat GENESIS G80 2021 Owner's Manual
[x] Cancel search | Manufacturer: GENESIS, Model Year: 2021, Model line: G80, Model: GENESIS G80 2021Pages: 604, PDF Size: 11.47 MB
Page 50 of 604

Safety System
3-20
WARNING
NEVER place anything on the seat
that insulates against heat when the
seat warmer is in operation, such as a
blanket or seat cushion. This may cause
the seat warmer to overheat, causing a
burn or damage to the seat.
NOTICE
To prevent damage to the seat warmers
and seats:
• Never use a solvent such as paint
thinner, benzene, alcohol or gasoline
to clean the seats.
• Do not place heavy or sharp objects
on seats equipped with seat
warmers.
• Do not change the seat cover. It may
damage the seat warmer.
Front seat warmers
OJX1039053L
• While the engine is running, touch
either of the seat warmer icons
to warm the driver’s seat or front
passenger’s seat.
• Manual temperature control
Each time you touch the icon, the
temperature setting of the seat is
changed as follows :
OFF → HIGH ( ) → MIDDLE ( ) → LOW ( )
• Automatic temperature control
The seat warmer starts to
automatically control the seat
temperature in order to prevent
low temperature burns after being
manually turned ON.
OFF → HIGH ( ) → MIDDLE ( ) → LOW ( )
30 min 60 min
You may manually touch the icon to
increase seat temperature. However,
the seat temperature is automatically
adjusted again.
Page 103 of 604

Immobilizer indicator light ........................................................................\
..............4-19
AUTO STOP indicator light ........................................................................\
..............4-20
Turn signal indicator light ........................................................................\
................4-20
High beam indicator light ........................................................................\
...............4-20
Low beam indicator light ........................................................................\
.................4-21
Light ON indicator light ........................................................................\
....................4-21
High Beam Assist indicator light ........................................................................\
......4-21
AUTO HOLD indicator light ........................................................................\
..............4-21
LCD Display Messages ........................................................................\
.......................4-22
Vehicle is on ........................................................................\
.....................................4-22
Shift to P ........................................................................\
...........................................4-22
Vehicle is in N. Press START button and shift to P .................................................4-22
Low key battery ........................................................................\
...............................4-22
Press brake pedal to start engine ........................................................................\
..4-22
Key not in vehicle ........................................................................\
............................4-22
Key not detected ........................................................................\
..............................4-22
Press START button again ........................................................................\
..............4-22
Place the smart key in the emergency start slot and press the start button .......4-23
Check BRAKE SWITCH fuse ........................................................................\
...........4-23
Shift to P or N to start engine ........................................................................\
..........4-23
Battery discharging due to external electrical devices .........................................4-23
Door, Hood, trunk open indicator
........................................................................\
...4-23
Sunroof open indicator ........................................................................\
...................4-24
Low tire pressure ........................................................................\
.............................4-24
Lights ........................................................................\
................................................4-24
Wiper ........................................................................\
................................................4-25
Low washer fluid ........................................................................\
..............................4-25
Low fuel ........................................................................\
............................................4-25
Low engine oil ........................................................................\
.................................4-25
Engine overheated ........................................................................\
...........................4-26
Check haptic steering wheel system ......................................................................4-26
Check headlight ........................................................................\
..............................4-26
Check turn signal ........................................................................\
............................4-26
Check headlamp LED ........................................................................\
.....................4-26
4
Page 107 of 604

Instrument Cluster
4-6
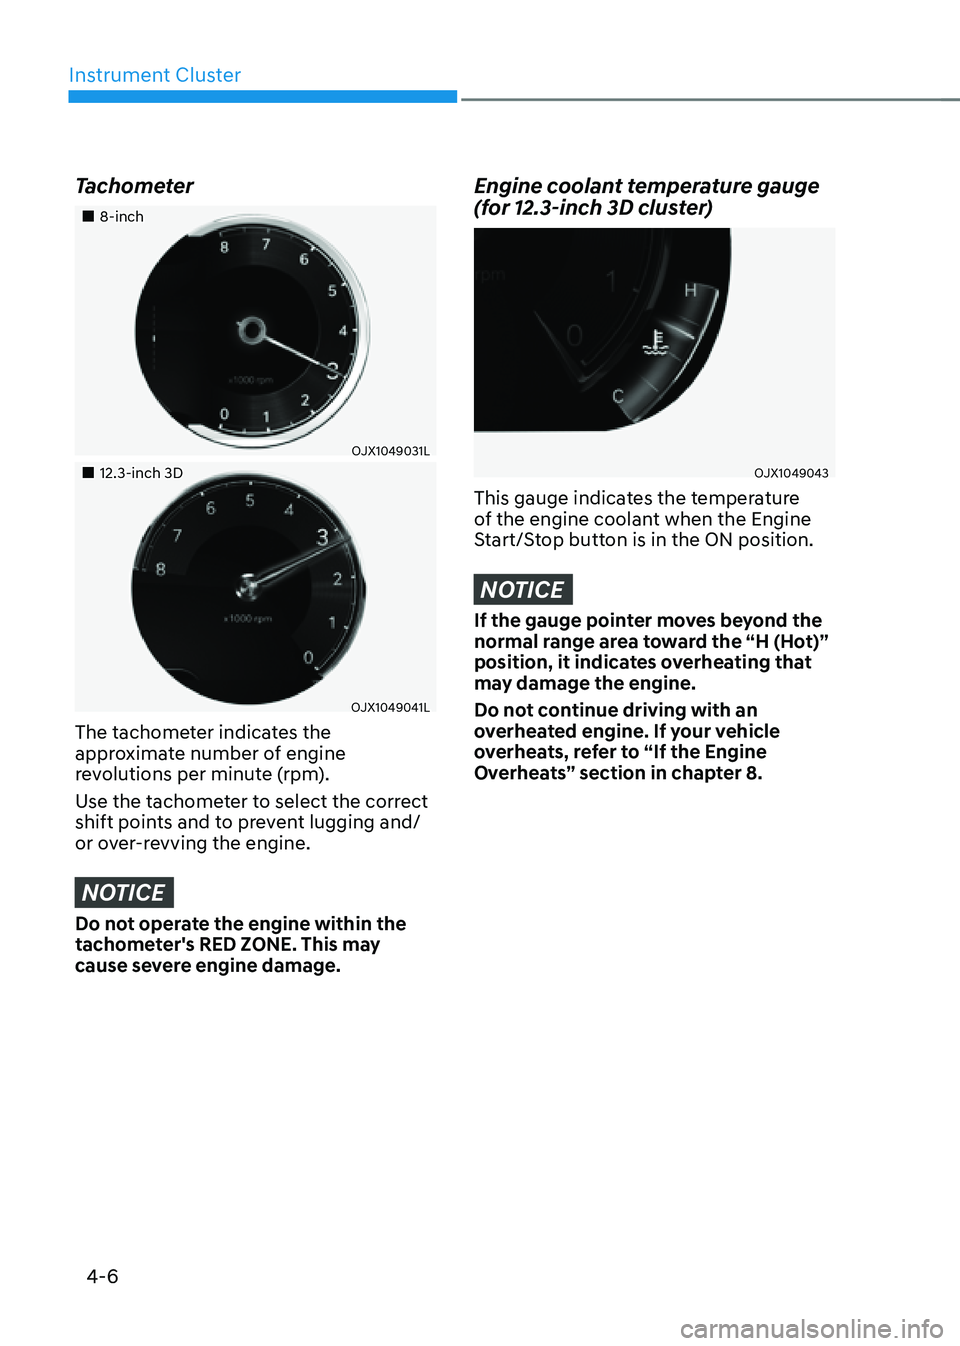
Tachometer
„„8-inch
OJX1049031L
„„12.3-inch 3D
OJX1049041L
The tachometer indicates the
approximate number of engine
revolutions per minute (rpm).
Use the tachometer to select the correct
shift points and to prevent lugging and/
or over-revving the engine.
NOTICE
Do not operate the engine within the
tachometer's RED ZONE. This may
cause severe engine damage.
Engine coolant temperature gauge
(for 12.3-inch 3D cluster)
OJX1049043
This gauge indicates the temperature
of the engine coolant when the Engine
Start/Stop button is in the ON position.
NOTICE
If the gauge pointer moves beyond the
normal range area toward the “H (Hot)”
position, it indicates overheating that
may damage the engine.
Do not continue driving with an
overheated engine. If your vehicle
overheats, refer to “If the Engine
Overheats” section in chapter 8.
Page 115 of 604

Instrument Cluster
4-14
Engine oil pressure warning
light
This warning light illuminates:
When the engine oil pressure is low.
If the engine oil pressure is low:
1. Drive carefully to the nearest safe
location and stop your vehicle.
2. Turn the engine off and check the
engine oil level (For more details,
refer to “Engine Oil” section in
chapter 2). If the level is low, add oil
as required.
If the warning light remains on after
adding oil or if oil is not available, have
the vehicle inspected by an authorized
retailer of Genesis Branded products
as soon as possible.
NOTICE
• If the engine is not stopped
immediately after the Engine Oil
Pressure warning light is illuminated
while the engine is running, severe
damage could result.
• If the warning light stays on while the
engine is running, it indicates that
there may be serious engine damage
or malfunction. In this case:
1. Stop the vehicle as soon as it is
safe to do so.
2. Turn off the engine and check the
oil level. If the oil level is low, fill
the engine oil to the proper level.
3. Start the engine again. If the
warning light stays on after the
engine is started, turn the engine
off immediately. If this occurs,
have the vehicle inspected by
an authorized retailer of Genesis
Branded products.
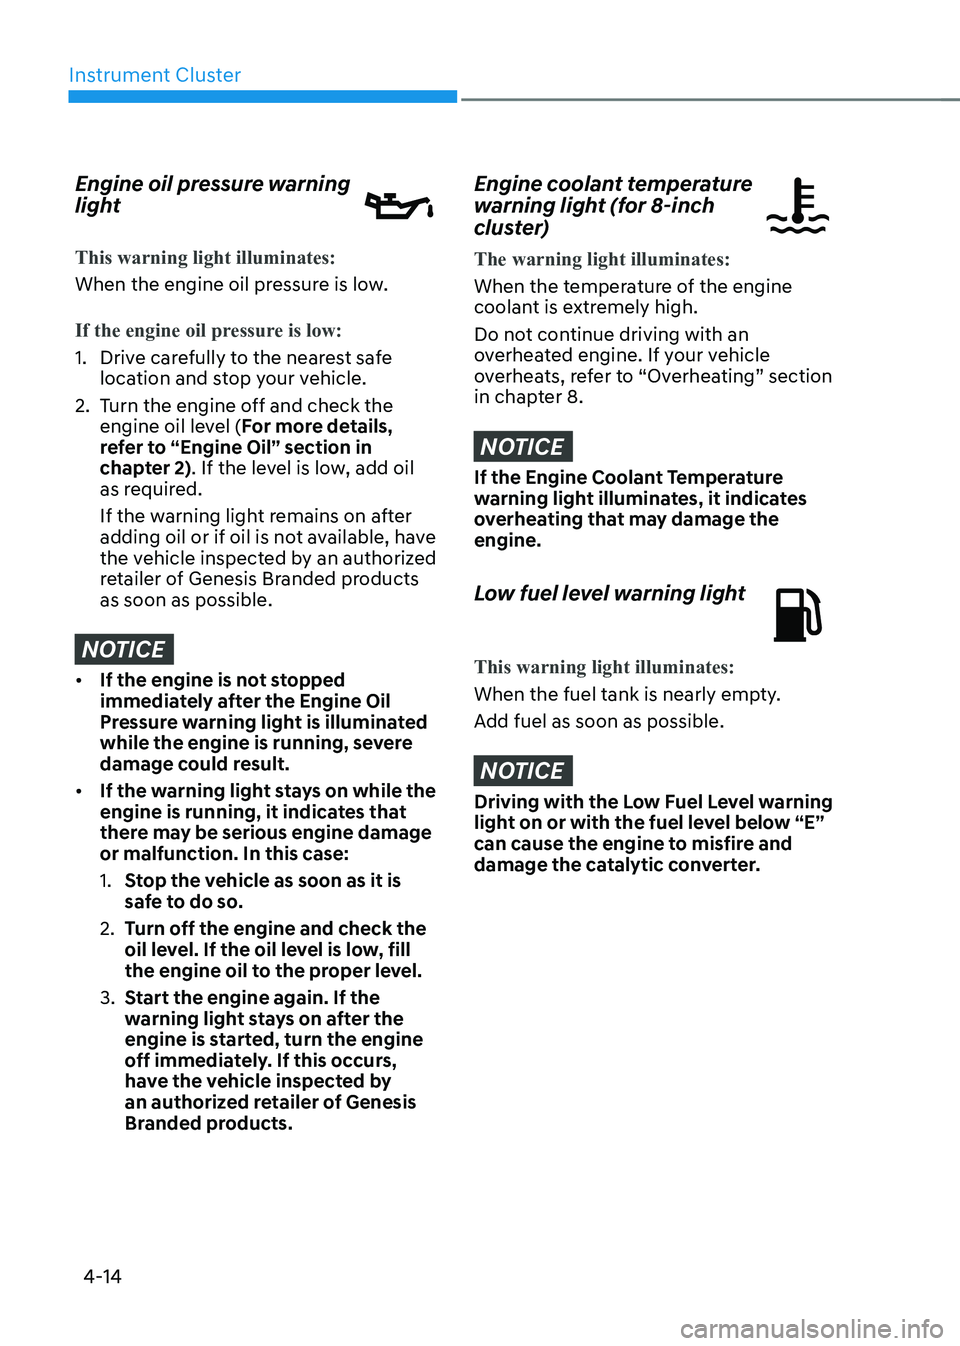
Engine coolant temperature
warning light (for 8-inch
cluster)
The warning light illuminates:
When the temperature of the engine
coolant is extremely high.
Do not continue driving with an
overheated engine. If your vehicle
overheats, refer to “Overheating” section
in chapter 8.
NOTICE
If the Engine Coolant Temperature
warning light illuminates, it indicates
overheating that may damage the
engine.
Low fuel level warning light
This warning light illuminates:
When the fuel tank is nearly empty.
Add fuel as soon as possible.
NOTICE
Driving with the Low Fuel Level warning
light on or with the fuel level below “E”
can cause the engine to misfire and
damage the catalytic converter.
Page 127 of 604

Instrument Cluster
4-26
Engine overheated
This message is displayed when the
engine coolant temperature is above
248°F (120°C). This means that the
engine is overheated and may be
damaged.
If your vehicle is overheated, refer to
“Overheating” section in chapter 8.
Check haptic steering wheel system
This message is displayed if there is a
problem with the haptic steering wheel
system. Have the vehicle inspected by an
authorized retailer of Genesis Branded
products.
Check headlight (if equipped)
This message is displayed if the
headlights are not operating properly. A
lamp may need to be replaced.
Make sure to replace the burned out
bulb with a new one of the same wattage
rating.
Check turn signal (if equipped)
This message is displayed if the turn
signal lamps are not operating properly.
A lamp may need to be replaced.
Make sure to replace the burned out
bulb with a new one of the same wattage
rating.
Check headlamp LED (if equipped)
This message is displayed if there is a
problem with the LED headlamp. Have
the vehicle inspected by an authorized
retailer of Genesis Branded products.
Page 243 of 604

05
5-105
System Operation
Cooling / Ventilation
1. Select the Face Level mode.
2. Set the air intake control to fresh or
recirculation mode.
3. Set the temperature control to the
desired position.
4. Set the fan speed control to the
desired speed.
Heating
1. Select the Floor Level mode.
2. Set the air intake control to fresh or
recirculation mode.
3. Set the temperature control to the
desired position.
4. Set the fan speed control to the
desired speed.
5. If desired, turn the air conditioning ON
with the temperature control knob set
to heat in order to dehumidify the air
before it enters into the cabin.
If the windshield fogs up, select the Front
Defrost
mode.
Operation Tips
• To keep dust or unpleasant fumes
from entering the vehicle through the
ventilation system, temporarily set the
air intake control to the recirculation
mode. Return the control to the to
Fresh mode when the unpleasant air
outside has diminished. This will help
keep the driver alert and comfortable.
• To help prevent the inside of the
windshield from fogging, set the air
intake control to fresh mode and the
fan speed to the desired position, turn
on the air conditioning system, and
adjust the temperature control to the
desired temperature.
Air conditioning
Your Genesis Branded Vehicle vehicle
air conditioning system is filled with
R-1234yf refrigerant.
1. Start the vehicle.
2. Press the air conditioning button.
3. Set the mode to the Face Level mode.
4. Set the air intake control to
Recirculation mode temporarily to
allow the cabin to cool quickly. When
the desired temperature in the cabin
is reached, change the air intake
control back to Fresh mode.
5. Adjust the fan speed control and
temperature control to maintain
maximum comfort.
When maximum cooling is desired, set
the temperature control to the lowest
position, then set the fan speed control
to the highest setting.
NOTICE
When using the air conditioning system,
monitor the engine temperature gauge
closely while driving up hills or in heavy
traffic when outside temperatures are
high. Air conditioning system operation
when climbing a steep grade or in
high outside ambient temperatures
can cause engine overheating.
Continue to use the fan, but turn the air
conditioning system off if the engine
temperature gauge indicates engine
overheating.
Page 256 of 604

Convenient Features
5-118
Power Outlet
ORG3050074
The power outlet is designed to provide
power for mobile telephones or other
devices designed to operate with vehicle
electrical systems. The devices should
draw less than 180 watts with the engine
running.
WARNING
Avoid electrical shocks. Do not place
your fingers or foreign objects (pin, etc.)
into a power outlet or touch the power
outlet with a wet hand.
NOTICE
To prevent damage to the Power
Outlets:
• Use the power outlet only when the
engine is running and remove the
accessory plug after use. Using the
accessory plug for prolonged periods
of time with the engine off could
cause the battery to discharge.
• Only use 12 volts electric accessories
which are less than 180 watts in
electric capacity.
• Adjust the air-conditioner or heater
to the lowest operating level when
using the power outlet.
• Close the cover when not in use.
• Some electronic devices can
cause electronic interference
when plugged into a vehicle’s
power outlet. These devices may
cause excessive audio static and
malfunctions in other electronic
systems or devices used in your
vehicle.
• Push the plug in as far as it will go. If
good contact is not made, the plug
may overheat and the fuse may open.
• Plug in battery equipped electrical/
electronic devices with reverse
current protection. The current
from the battery may flow into the
vehicle’s electrical/electronic system
and cause system malfunction.
Page 280 of 604

06
6-15
ORG3060028L
4. Remove the cap-cover (1) and press
the button (2) while depressing the
brake pedal.
Then, the gear will change to the
N (Neutral) position. The button
(2) operates only for 20 seconds to
change the gear between P (Park) and
N (Neutral) from the time when the
button (2) is first pressed. However,
the button must be pressed within 3
minutes after the engine is turned off.
Information
In situations when the gear needs to be
shifted from P (Park) to N (Neutral) when
the Engine Start/Stop button is in the OFF
position, refer to step 4.
Shift-lock system
For your safety, the automatic
transmission has a shift-lock system
which prevents shifting the transmission
from P (Park) into R (Reverse) or D (Drive)
unless the brake pedal is depressed.
To shift from P (Park) or N (Neutral) into R
(Reverse) or D (Drive):
1. Depress and hold the brake pedal.
2. Start the engine.
3. Shift gear while depressing the brake
pedal.
Parking
Always come to a complete stop and
continue to depress the brake pedal.
Shift the gear to P (Park), apply the
parking brake, and press the Engine
Start/Stop button to the OFF position.
Take the Key with you when leaving the
vehicle.
WARNING
• When you stay in the vehicle with
the engine running, be careful not
to depress the accelerator pedal for
a long period of time. The engine or
exhaust system may overheat and
start a fire.
• The exhaust gas and the exhaust
system are very hot. Keep away from
the exhaust system components.
• Do not stop or park over flammable
materials, such as dry grass, paper
or leaves. They may ignite and cause
a fire.
Page 284 of 604

06
6-19
Paddle Shifter (Manual Shift
Mode)
ORG3060011
The paddle shifter allows the driver to
shift gear without taking one’s hands off
the steering wheel.
The paddle shifter operates as follow.
• Pull the [+] or [-] paddle shifter once
to shift up or down one gear and the
system changes from automatic shift
mode to manual shift mode.
• To change back to automatic shift
mode from manual shift mode, do one
of the following:
-Pull the [+] paddle shifter for more
than one second.
-Drive the vehicle under 4 mph (7
km/h)
-Gently depress the accelerator
pedal for more than 6 seconds.
-Rotate the shift dial to the D (Drive)
position.
Information
If the [+] and [-] paddle shifters are pulled
at the same time, gear shift may not occur.
Good Driving Practices
• Never shift the gear from P (Park) or
N (Neutral) to any other position with
the accelerator pedal depressed.
• Never shift the gear into P (Park) when
the vehicle is in motion.
Be sure the vehicle is completely
stopped before you attempt to shift
into R (Reverse) or D (Drive).
• Do not shift the gear to N (Neutral)
when driving. If the gear is shifted to
N (Neutral) while driving, the vehicle
loses the ability to provide engine
braking. Doing so may increase the
risk of an accident.
Also, shift the gear back to D (Drive)
while the vehicle is moving may
severely damage the transmission.
• Driving uphill or downhill, always shift
to D (Drive) when driving forward or to
R (Reverse) when driving backwards,
and check the gear position indicated
on the cluster before driving. If you
drive in the opposite direction of the
selected gear, the engine will turn
off and a serious accident might be
occurred due to the degraded brake
performance.
• Do not drive with your foot resting
on the brake pedal. Even light, but
consistent pedal pressure can result
in the brakes overheating, brake wear
and possibly even brake failure.
Page 286 of 604

06
6-21
Power-Assist brakes
Your vehicle has power-assisted brakes
that adjust automatically through normal
usage.
If the engine is not running or is turned
off while driving, the power assist for
the brakes will not work. You can still
stop your vehicle by applying greater
force to the brake pedal than typical.
The stopping distance, however, will be
longer than with power brakes.
When the engine is not running, the
reserve brake power is partially depleted
each time the brake pedal is applied.
Do not pump the brake pedal when the
power assist has been interrupted.
WARNING
Take the following precautions:
• Do not drive with your foot resting
on the brake pedal. This will create
abnormal high brake temperatures,
excessive brake lining and pad wear,
and increased stopping distances.
• When descending down a long or
steep hill, use the paddle shifter
and manually downshift to a
lower gear in order to control your
speed without using the brake
pedal excessively. Applying the
brakes continuously will cause
the brakes to overheat and could
result in a temporary loss of braking
performance.
• Wet brakes may impair the vehicle's
ability to safely slow down; the
vehicle may also pull to one side
when the brakes are applied.
Applying the brakes lightly will
indicate whether they have been
affected in this way. Always test your
brakes in this fashion after driving
through deep water. To dry the
brakes, lightly tap the brake pedal to
heat up the brakes while maintaining
a safe forward speed until brake
performance returns to normal.
Avoid driving at high speeds until the
brakes function correctly.
Disc Brakes Wear Indicator
When your brake pads are worn and new
pads are required, you will hear a high
pitched warning sound from your front
or rear brakes. You may hear this sound
come and go or it may occur whenever
you depress the brake pedal.
Note that some driving conditions or
climates may cause a brake squeal
when you first apply (or lightly apply)
the brakes. This is normal and does not
indicate a problem with your brakes.
NOTICE
To avoid costly brake repairs, do not
continue to drive with worn brake pads.
Information
Always replace brake pads as complete
front or rear axle sets.
BRAKING SYSTEM