reset button GENESIS G80 2021 Owner's Manual
[x] Cancel search | Manufacturer: GENESIS, Model Year: 2021, Model line: G80, Model: GENESIS G80 2021Pages: 604, PDF Size: 11.47 MB
Page 128 of 604

04
4-27
LCD Display Control
ORG3040010
The LCD display modes can be changed by using the control switches.
SwitchOperation Function
PressMODE button for changing View modes
, Scroll UP, DOWN switch for changing items in Utility view and
Option menu
OK Press
SELECT/RESET switch for entering Option menu
Press and hold SELECT/RESET switch for retrieving assist information or
resetting the selected item
View modes
View modes
Explanation
Driving Assist Driving Assist view displays the status of the vehicle’s Driving Assist
systems.
Turn by Turn Turn By Turn view displays the state of the navigation.
Utility Utility view displays driving information such as the trip distance,
fuel economy and etc.
The information provided may differ depending on which functions are applicable
to your vehicle.
LCD DISPLAY
Page 138 of 604
04
4-37
VEHICLE SETTINGS (INFOTAINMENT SYSTEM)
ORG3040026N
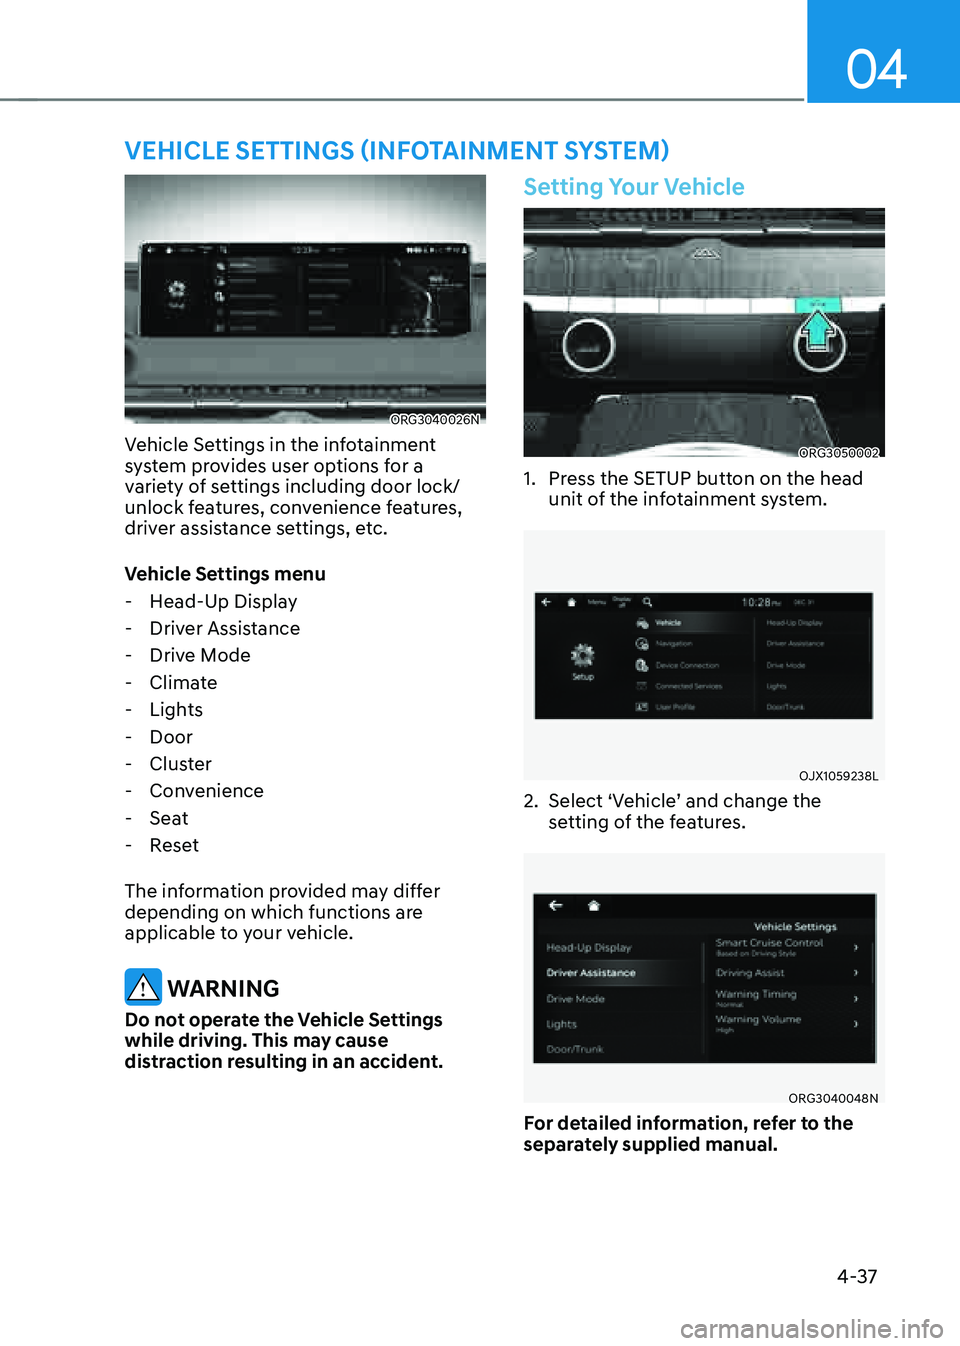
Vehicle Settings in the infotainment
system provides user options for a
variety of settings including door lock/
unlock features, convenience features,
driver assistance settings, etc.
Vehicle Settings menu
-Head-Up Display
-Driver Assistance
-Drive Mode
-Climate
-Lights
-Door
-Cluster
-Convenience
-Seat
-Reset
The information provided may differ
depending on which functions are
applicable to your vehicle.
WARNING
Do not operate the Vehicle Settings
while driving. This may cause
distraction resulting in an accident.
Setting Your Vehicle
ORG3050002
1. Press the SETUP button on the head
unit of the infotainment system.
OJX1059238L
2. Select ‘Vehicle’ and change the
setting of the features.
ORG3040048N
For detailed information, refer to the
separately supplied manual.
Page 170 of 604
Convenient Features
5-32
NOTICE
Child safety lock failure
OJX1059018L
When electronic child safety lock does
not work even though the button is
pressed, the message will be displayed
and an alarm will sound. If this occurs,
have the vehicle be inspected by an
authorized retailer Genesis Branded
products.
Safe Exit Assist (if equipped with
electronic child safety lock)
Safe Exit Assist helps prevent the rear
occupant from opening the rear door.
When an approaching vehicle from the
rear area is detected after the vehicle
stops, the rear doors will not unlock even
when the driver tries to unlock the rear
doors using the electronic child safety
lock button.
For more details, refer to “Safe Exit
Assist (SEA)” section in chapter 7.
Vehicle Auto-Shut Off Function
If your parked vehicle in a garage and
engine is left on for a period of time, the
engine will turn off automatically to help
prevent carbon monoxide poisoning.
System setting
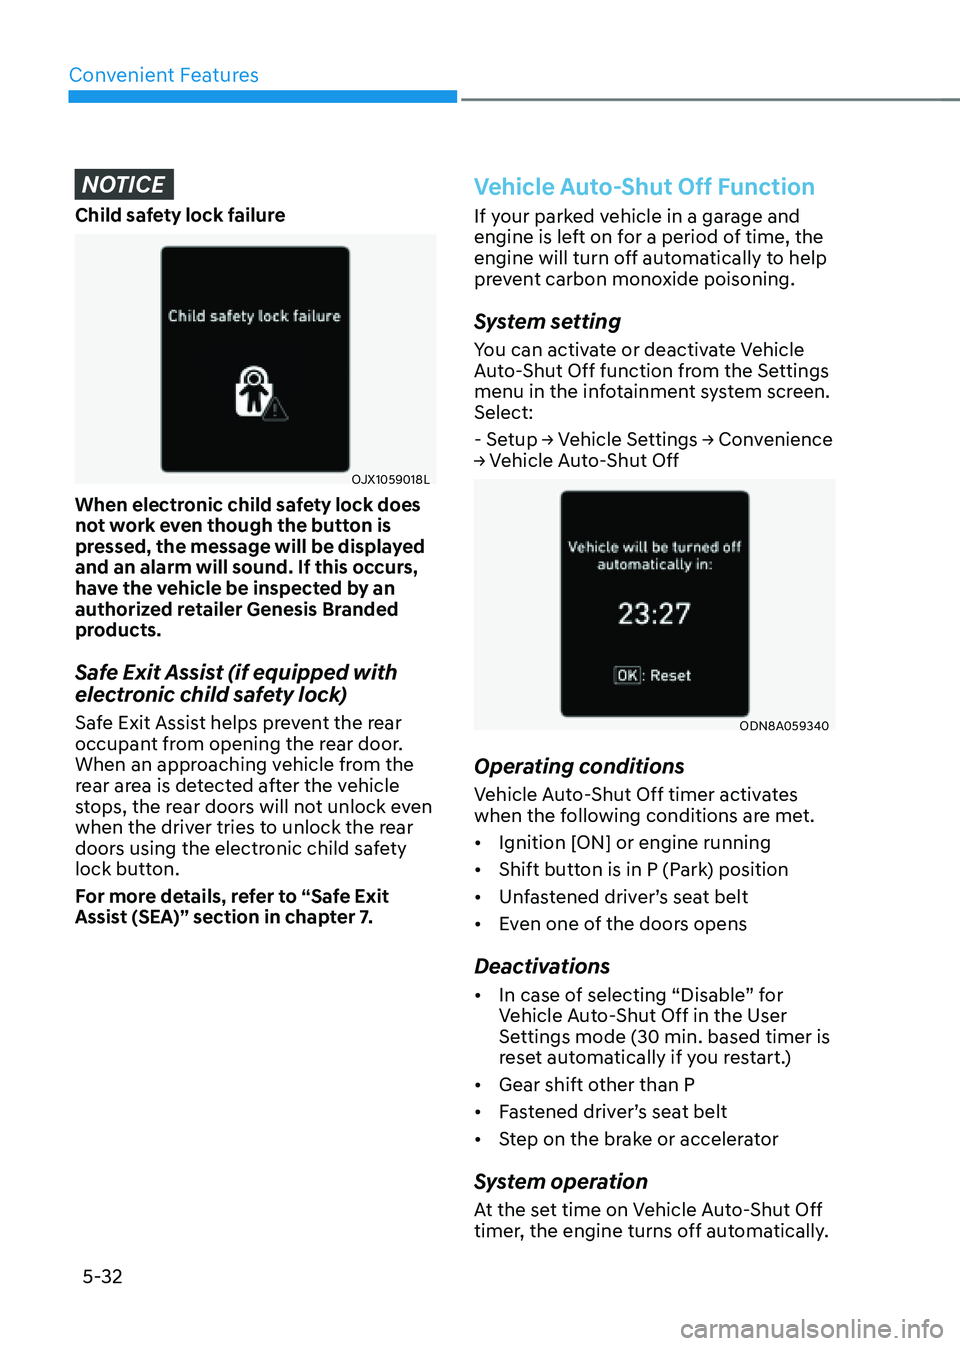
You can activate or deactivate Vehicle
Auto-Shut Off function from the Settings
menu in the infotainment system screen.
Select:
- Setup → Vehicle Settings → Convenience
→ Vehicle Auto-Shut Off
ODN8A059340
Operating conditions
Vehicle Auto-Shut Off timer activates
when the following conditions are met.
• Ignition [ON] or engine running
• Shift button is in P (Park) position
• Unfastened driver’s seat belt
• Even one of the doors opens
Deactivations
• In case of selecting “Disable” for
Vehicle Auto-Shut Off in the User
Settings mode (30 min. based timer is
reset automatically if you restart.)
• Gear shift other than P
• Fastened driver’s seat belt
• Step on the brake or accelerator
System operation
At the set time on Vehicle Auto-Shut Off
timer, the engine turns off automatically.
Page 171 of 604
05
5-33
This system helps to protect your vehicle
and valuables. The horn will sound and
the hazard warning lights will blink
continuously if any of the following
occur:
-A door is opened without using the
smart key.
-The trunk is opened without using the
smart key.
-The engine hood is opened.
The alarm continues for 30 seconds, then
the system resets. To turn off the alarm,
unlock the doors with the smart key.
The Theft Alarm System automatically
sets 30 seconds after you lock the doors
and the trunk. For the system to activate,
you must lock the doors and the trunk
from outside the vehicle with the smart
key or by touching the touch sensor on
the outside of the door handle with the
smart key in your possession.
The hazard warning lights will blink and
the chime will sound once to indicate the
system is armed.
Once the security system is set, opening
any door, the trunk, or the hood without
using the smart key will cause the alarm
to activate.
The Theft Alarm System will not set if the
hood, the trunk, or any door is not fully
closed. If the system will not set, check
the hood, the trunk, or the doors are fully
closed.
Do not attempt to alter this system or
add other devices to it.
Information
• Do not lock the doors until all
passengers have left the vehicle. If the
remaining passenger leaves the vehicle
when the system is armed, the alarm
will be activated.
• If the vehicle is not disarmed with the
smart key, open the doors by using the
mechanical key and start the engine by
directly pressing the Engine Start/Stop
button with the smart key.
• If the system is disarmed by unlocking
the vehicle, but neither a door or the
trunk is opened within 30 seconds, the
doors will relock and the system will
rearm automatically.
THEFT-ALARM SYSTEM
Page 173 of 604
05
5-35
Recalling Memory Positions
1. Shift to P (Park) while the Engine
Start/Stop button is in the ON
position.
2. Press the desired memory button (1
or 2). The system will beep once, and
then the driver’s seat position, side
view mirror position, steering wheel
position, instrument panel illumination
intensity and head-up display height/
brightness will automatically adjust to
the stored positions.
3. ‘Settings 1(or 2) applied’ will appear on
the cluster LCD display.
Information
• If you press the SET button or the
corresponding button which the
setting is being recalled, the setting will
temporarily deactivate. If you press the
other buttons, the setting of the pressed
button will activate.
For example, if you press the SET
button or number 1 button with the
number 1 setting in operation, the
setting will temporarily deactivate. If
you press the number 2 button, the
number 2 setting will activate.
• If you adjust the seat, side view mirror,
steering wheel, instrument panel
illumination or head-up display while
recalling the stored positions, the pre-
set settings will become ineffective.
Resetting the System
Take the following procedures to reset
integrated memory system, when it does
not operate properly.
Resetting integrated memory
system
1. Stop the vehicle and open the driver’s
door with the vehicle shifted to P
(Park).
2. Adjust the driver’s seat and seatback
to the foremost position.
3. Press the SET button and push
forward the driver’s seat movement
switch over 2 seconds simultaneously.
While resetting integrated memory
system
1. Resetting starts with a notification
sound.
2. The driver’s seat and seatback is
adjusted to the rearward position with
the notification sound.
3. The driver’s seat and seatback is
re-adjusted to the default position
(central position) with the notification
sound.
However, in the following cases, the
resetting procedure and the notification
sound may stop.
• The memory button is pressed.
• The seat control switch is operated.
• The driving speed exceeds
2 mph (3 km/h).
• The driver’s door is closed.
Page 174 of 604
Convenient Features
5-36
NOTICE
• While integrated memory system
is being reset, if the resetting
and notification sound stops
incompletely, restart the resetting
procedure again.
• Make sure that there is no objects
around the driver’s seat in advance
of resetting the integrated memory
system.
Seat Easy Access
Seat easy access will move the driver’s
seat and steering wheel automatically as
follows:
• Exiting the vehicle:
The driver’s seat, steering wheel and
seat bolster will move as follows when
the Engine Start/Stop button is in the
OFF position with the gear in P (Park)
and the driver’s door open.
-Driver seat: Moves rearward
depending on the distance selected
from the Settings menu in the
infotainment system.
-Steering wheel: Moves upward
-Seat bolster (if equipped): Adjusted
to the default position.
However, the driver’s seat may not
move rearward if there is not enough
space between the driver’s seat and
the rear seats.
Also, on a regular basis, the steering
wheel will also move forward to adjust
its location by itself.
• Entering the vehicle:
The driver’s seat, steering wheel and
seat bolster will move as follows
when the Engine Start/Stop button
is pressed to the ACC, ON or START
position or while carrying the smart
key, the driver’s door is closed with
the Engine Start/Stop button in the
OFF position.
- Driver seat: Moves back to its
original position.
-Steering wheel: Moves back to its
original position.
-Seat bolster (if equipped): Adjusted
to the default position.
• You can set the Seat Easy Access
function from the Settings menu
in the infotainment system screen.
Select:
-Driver seat
Setup → Vehicle Settings → Seat →
Seating Easy Access → Driver Seat
Easy Access → Normal/Extended/Off
-Steering wheel
Setup → Vehicle Settings → Seat
→ Seating Easy Access → Steering
wheel easy access
For detailed information, refer to the
separately supplied manual.
Page 191 of 604

05
5-53
Power Windows
The Engine Start/Stop button must be
in the ON position to be able to raise
or lower the windows. Each door has a
Power Window switch to control that
door’s window. The driver has a Power
Window Lock button which can block
the operation of passenger windows.
The power windows will operate for
approximately 3 minutes after the Engine
Start/Stop button is in the ACC or OFF
position. However, if the front doors are
opened, the Power Windows will not
operate even within the 3 minute period.
Window opening and closing
OJX1059031
To open:
Press the window switch down to the
first detent position (5). Release the
switch when you want the window to
stop.
To close:
Pull the window switch up to the first
detent position (5). Release the window
switch when you want the window to
stop.
Auto up/down window
Pressing or pulling up the power window
switch momentarily to the second
detent position (6) completely lowers or
lifts the window even when the switch
is released. To stop the window at the
desired position while the window is in
operation, pull up or press down and
release the switch.
Resetting the power windows
If the power windows do not operate
normally, the automatic power window
system must be reset as follows:
1. Press the Engine Start/Stop button to
the ON position.
2. Close the window and continue
pulling up on the power window
switch for at least one second.
If the power windows do not operate
properly after resetting, have the system
be inspected by an authorized retailer of
Genesis Branded products.
Page 206 of 604

Convenient Features
5-68
WARNING
To prevent serious injury and damage
take the following precautions when
operating the power trunk:
• Keep all faces, hands, arms, body
parts and other objects away from
the path of the power trunk.
• Do not intentionally place any
body parts or objects in the path
of the power trunk to make sure
the automatic stop and reversal
operates.
• Do not allow children to play with the
power trunk.
How to reset the power trunk
If the battery has been discharged or
disconnected, or if the power trunk fuse
has been replaced or removed, reset the
power trunk by performing the following
procedure:
1. Shift the vehicle to P (Park).
2. While Pressing the power trunk close
button, press the power trunk open
switch for more than 3 seconds. A
chime will sound.
3. Close the trunk manually.
If the Power Trunk doesn’t work properly
after performing the above procedure,
we recommend that you have the system
checked by an authorized retailer of
Genesis Branded products.
Trunk lid control button
OHI048009
When the trunk lid control button is
in the UNLOCK (button not pressed)
position, the power trunk can be
controlled with the power trunk main
control button, power trunk open switch,
power trunk close button, and the smart
key.
When this trunk lid control button is in
the LOCK (button pressed) position, the
power trunk can be opened using the
trunk release lever.
The smart trunk does not operate, when
the trunk lid control button is pressed to
the LOCK position.
Even though the trunk lid control button
is in the LOCK (button pressed) position,
the trunk will still be propelled upward by
mechanical force if the trunk is manually
opened more than 10 degrees beyond
the fully closed position. In addition,
if the trunk is manually closed to the
secondary latch position, the trunk will
be electrically moved to the fully latched
position.
Page 247 of 604

05
5-109
To Defrost Inside Windshield
ORG3050118
1. Set the fan speed to the highest
(extreme right) position.
2. Set the temperature to the extreme
hot (HI) position.
3. Press the defroster button ().
4. Fresh mode will be selected
automatically.
Check to make sure the air intake control
is in Fresh mode. If the air intake control
indicator light is illuminated, press the
button once to enable Fresh mode
(indicator light OFF).
If the
position is selected, lower fan speed is adjusted to a higher fan speed.
Defogging Logic
To reduce the probability of fogging
up the inside of the windshield, the air
intake or air conditioning are controlled
automatically according to certain
conditions such as
positions. To cancel or reset the defogging logic, do
the following.
1. Press the Engine Start/Stop button to
the ON position.
2. Press the defroster button () or
().
3. While pressing the air conditioning
button (A/C), press the air intake
control button at least 5 times within
3 seconds.
The air intake control button indicator
will blink 3 times to indicate that the
defogging logic has been disabled.
Repeat the steps again to re-enable the
defogging logic.
If the battery has been discharged or
disconnected, it resets to the defog logic
status.
Page 264 of 604
Convenient Features
5-126
VOLUME (VOL + / VOL -) (1)
• Rotate the VOLUME scroll up to
increase volume.
• Rotate the VOLUME scroll down to
decrease volume.
SEEK/PRESET ( / ) (2)
If the SEEK/PRESET switch is pressed up
or down and held for 0.8 second or more,
it will function in the following modes:
• RADIO mode
It will function as the AUTO SEEK
select button. It will SEEK until you
release the button.
• MEDIA mode
It will function as the FF/RW button.
If the SEEK/PRESET switch is pressed up
or down, it will function in the following
modes:
• RADIO mode
It will function as the PRESET STATION
UP/DOWN button.
• MEDIA mode
It will function as the TRACK UP/
DOWN button.
MODE (3)
Press the MODE button to toggle
through Radio or AUX modes.
MUTE () (4)
• Press the MUTE button to mute the
sound.
• Press the MUTE button again to
activate the sound.
For detailed information, refer to the
separately supplied manual.
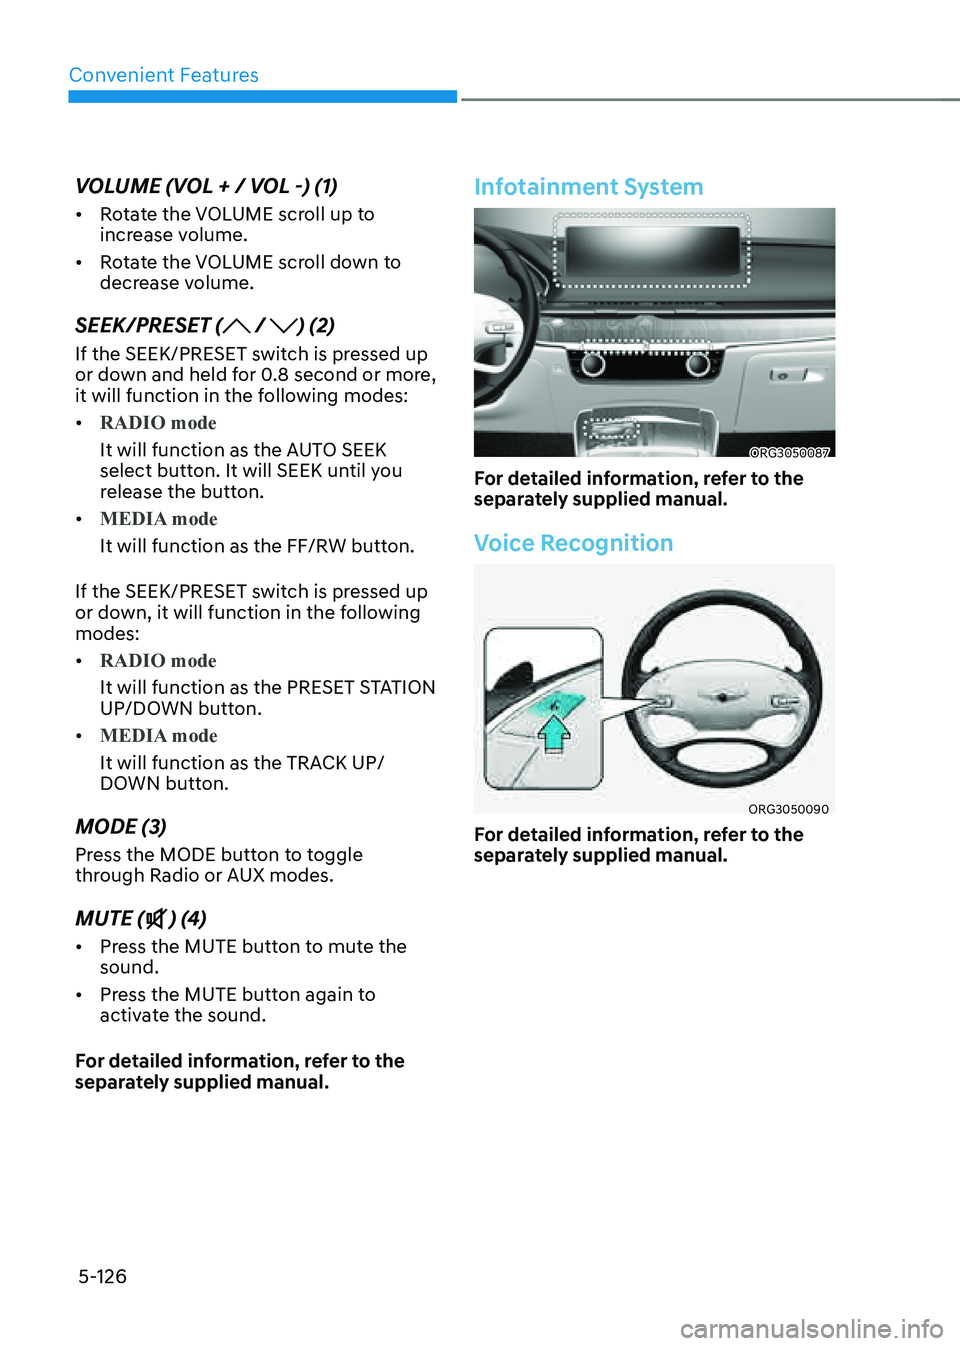
Infotainment System
ORG3050087
For detailed information, refer to the
separately supplied manual.
Voice Recognition
ORG3050090
For detailed information, refer to the
separately supplied manual.