run flat GENESIS G90 2017 Owner's Manual
[x] Cancel search | Manufacturer: GENESIS, Model Year: 2017, Model line: G90, Model: GENESIS G90 2017Pages: 524, PDF Size: 19.3 MB
Page 84 of 524
2-64
Safety system of your vehicle
The SRSCM (Supplemental Restraint
System Control Module) continually
monitors all SRS components while
the Engine Start/Stop button is in the
ON position to determine if a crash
impact is severe enough to require air
bag deployment or pre-tensioner seat
belt deployment.
SRS warning light
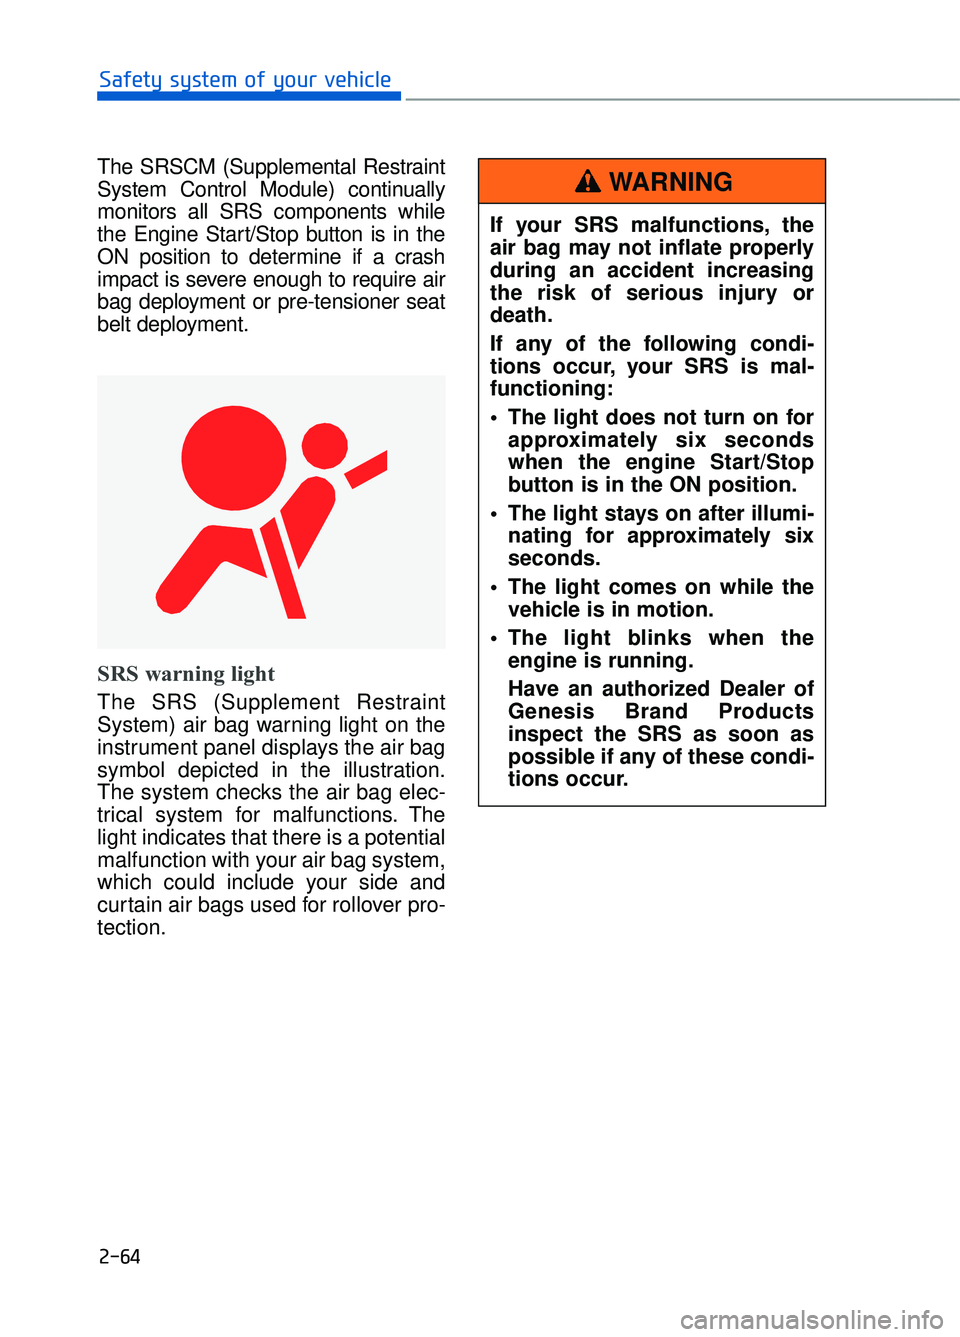
The SRS (Supplement Restraint
System) air bag warning light on the
instrument panel displays the air bag
symbol depicted in the illustration.
The system checks the air bag elec-
trical system for malfunctions. The
light indicates that there is a potential
malfunction with your air bag system,
which could include your side and
curtain air bags used for rollover pro-
tection.
If your SRS malfunctions, the
air bag may not inflate properly
during an accident increasing
the risk of serious injury or
death.
If any of the following condi-
tions occur, your SRS is mal-
functioning:
The light does not turn on for approximately six seconds
when the engine Start/Stop
button is in the ON position.
The light stays on after illumi- nating for approximately six
seconds.
The light comes on while the vehicle is in motion.
The light blinks when the engine is running.
Have an authorized Dealer of
Genesis Brand Products
inspect the SRS as soon as
possible if any of these condi-
tions occur.
WARNING
Page 110 of 524
Restrictions in handling keys
When leaving keys with parking lot and
valet attendants, the following proce-
dures will ensure your vehicle's trunk
and glove box compartment can only
be opened with the mechanical key.
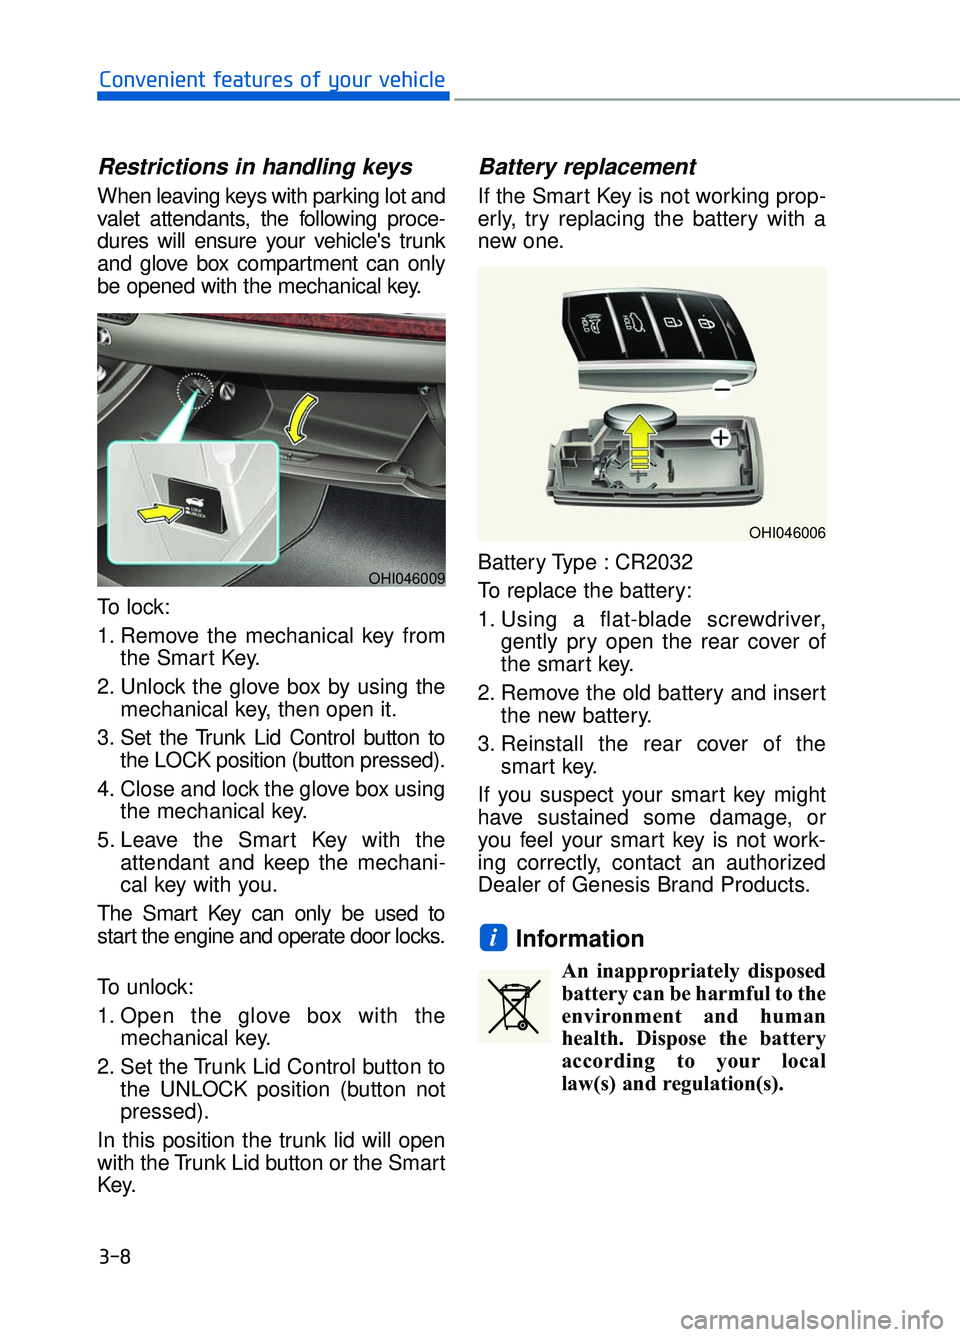
To lock:
1. Remove the mechanical key fromthe Smart Key.
2. Unlock the glove box by using the mechanical key, then open it.
3. Set the Trunk Lid Control button to the LOCK position (button pressed).
4. Close and lock the glove box using the mechanical key.
5. Leave the Smart Key with the attendant and keep the mechani-
cal key with you.
The Smart Key can only be used to
start the engine and operate door locks.
To unlock:
1. Open the glove box with the mechanical key.
2. Set the Trunk Lid Control button to the UNLOCK position (button not
pressed).
In this position the trunk lid will open
with the Trunk Lid button or the Smart
Key.
Battery replacement
If the Smart Key is not working prop-
erly, try replacing the battery with a
new one.
Battery Type : CR2032
To replace the battery:
1. Using a flat-blade screwdriver, gently pry open the rear cover of
the smart key.
2. Remove the old battery and insert the new battery.
3. Reinstall the rear cover of the smart key.
If you suspect your smart key might
have sustained some damage, or
you feel your smart key is not work-
ing correctly, contact an authorized
Dealer of Genesis Brand Products.
Information
An inappropriately disposed battery can be harmful to the
environment and human
health. Dispose the battery
according to your local
law(s) and regulation(s).
i
3-8
Convenient features of your vehicle
OHI046006
OHI046009
Page 285 of 524
5-24
Driving your vehicle
Towing
AWD vehicle must be towed with all
four wheels off the ground, using a
flatbed tow truck or wheel dollies.
The AWD system could be damaged
if improperly towed.
For more information, refer to
"Towing" in chapter 6.
Vehicle inspection
When the vehicle is on a car lift, donot operate the front and rear
wheels separately. All four wheels
should be operated.
Never engage the parking brake while running the engine on a car
lift. This may damage the AWD
system.
Dynamometer testing
An AWD vehicle must be tested on a
special four wheel chassis dynamome-
ter.
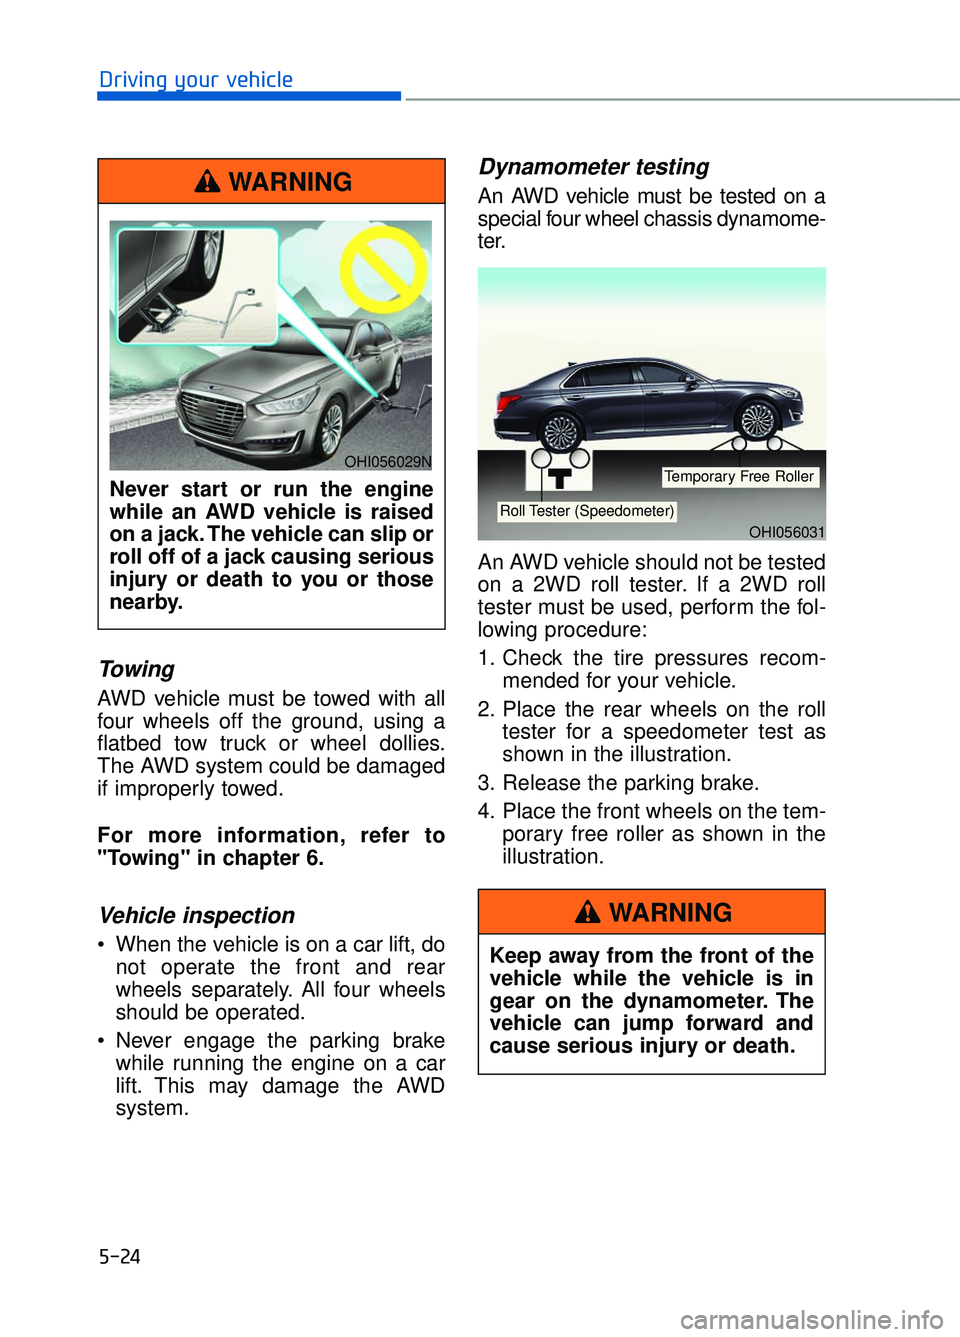
An AWD vehicle should not be tested
on a 2WD roll tester. If a 2WD roll
tester must be used, perform the fol-
lowing procedure:
1. Check the tire pressures recom- mended for your vehicle.
2. Place the rear wheels on the roll tester for a speedometer test as
shown in the illustration.
3. Release the parking brake.
4. Place the front wheels on the tem- porary free roller as shown in the
illustration.
OHI056031
Keep away from the front of the
vehicle while the vehicle is in
gear on the dynamometer. The
vehicle can jump forward and
cause serious injury or death.
WARNING
Never start or run the engine
while an AWD vehicle is raised
on a jack. The vehicle can slip or
roll off of a jack causing serious
injury or death to you or those
nearby.
WARNING
OHI056029NTemporary Free Roller
Roll Tester (Speedometer)
Page 288 of 524
5-27
05
Releasing the parking brake
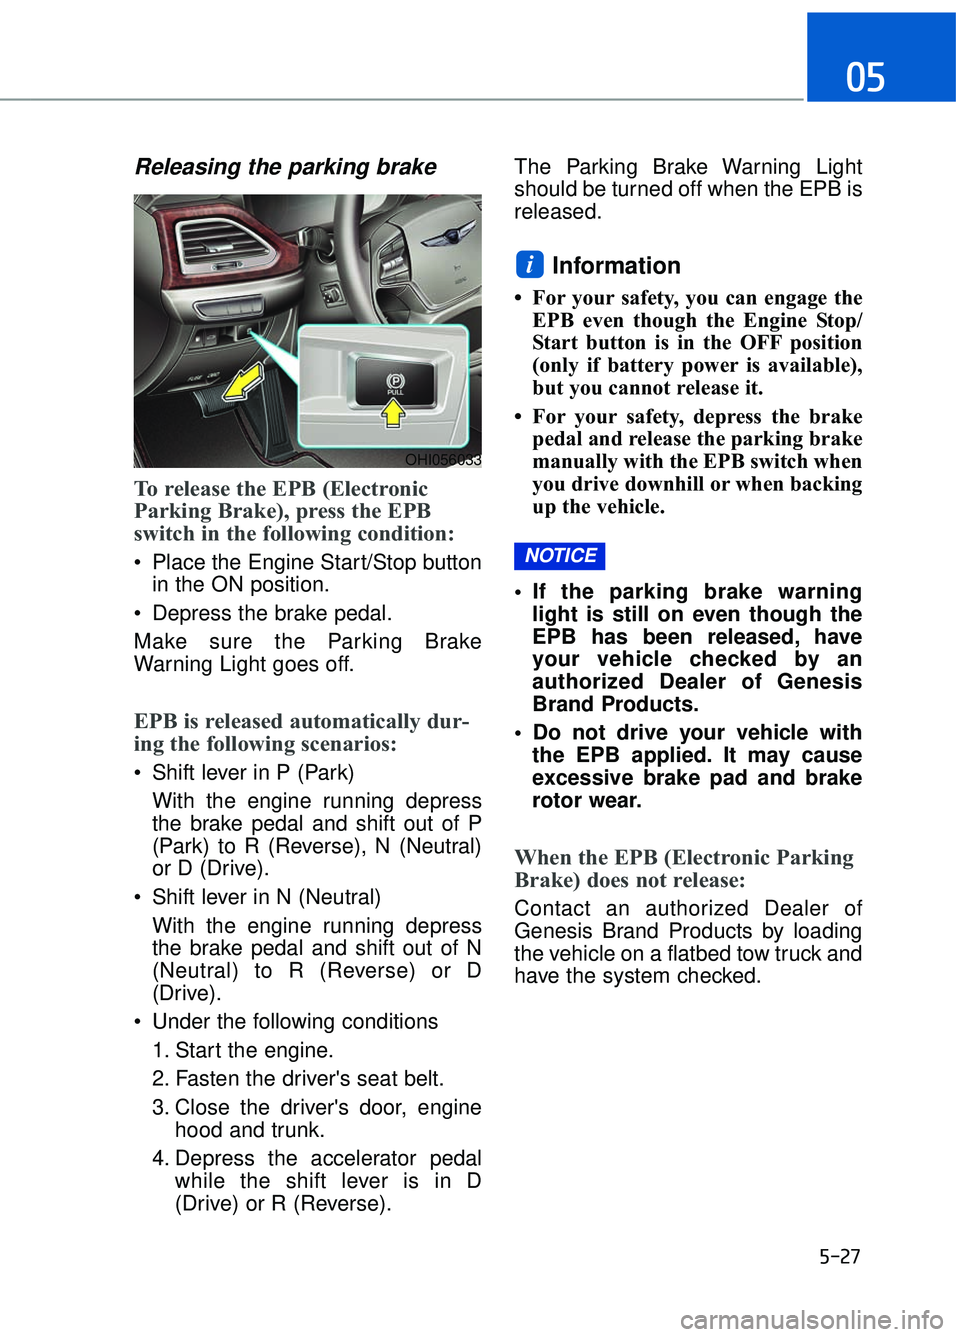
To release the EPB (Electronic
Parking Brake), press the EPB
switch in the following condition:
Place the Engine Start/Stop buttonin the ON position.
Depress the brake pedal.
Make sure the Parking Brake
Warning Light goes off.
EPB is released automatically dur-
ing the following scenarios:
Shift lever in P (Park) With the engine running depress
the brake pedal and shift out of P
(Park) to R (Reverse), N (Neutral)
or D (Drive).
Shift lever in N (Neutral) With the engine running depress
the brake pedal and shift out of N
(Neutral) to R (Reverse) or D
(Drive).
Under the following conditions 1. Start the engine.
2. Fasten the driver's seat belt.
3. Close the driver's door, engine hood and trunk.
4. Depress the accelerator pedal while the shift lever is in D
(Drive) or R (Reverse). The Parking Brake Warning Light
should be turned off when the EPB is
released.
Information
• For your safety, you can engage the
EPB even though the Engine Stop/
Start button is in the OFF position
(only if battery power is available),
but you cannot release it.
• For your safety, depress the brake pedal and release the parking brake
manually with the EPB switch when
you drive downhill or when backing
up the vehicle.
If the parking brake warning light is still on even though the
EPB has been released, have
your vehicle checked by an
authorized Dealer of Genesis
Brand Products.
Do not drive your vehicle with the EPB applied. It may cause
excessive brake pad and brake
rotor wear.
When the EPB (Electronic Parking
Brake) does not release:
Contact an authorized Dealer of
Genesis Brand Products by loading
the vehicle on a flatbed tow truck and
have the system checked.
NOTICE
i
OHI056033
Page 317 of 524

5-56
Driving your vehicle
Limitations of the System
The driver must be cautious in the
below situations, because the sys-
tem may not detect other vehicles or
objects in certain circumstances.
The vehicle drives on a curvedroad or through a tollgate.
The sensor is polluted with rain, snow, mud, etc.
The rear bumper where the sensor is located is covered with a foreign
object such as a bumper sticker, a
bumper guard, a bike rack, etc.
The rear bumper is damaged, or the sensor is out of the original
default position.
The vehicle height gets lower or higher due to heavy loading in a
trunk, abnormal tire pressure, etc.
The vehicle drives in inclement weather such as heavy rain or
snow.
There is a fixed object near the vehicle, such as a guardrail.
A big vehicle is near such as a bus or truck.
A motorcycle or bicycle is near.
A flat trailer is near.
If the vehicle has started at the same time as the vehicle next to
you and has accelerated.
When the other vehicle passes at a very fast speed.
While changing lanes.
While going down or up a steep road where the height of the lane is
different.
When the other vehicle approach- es very close. When a trailer or carrier is
installed.
When the temperature of the rear bumper is high.
When the sensors are blocked by the other vehicles, walls or park-
ing-lot pillars.
When the detected vehicle also moves back, as your vehicle drives
back.
If there are small objects in the detecting area such as a shopping
cart or a baby stroller.
If there is a low height vehicle such as a sports car.
When other vehicles are close to your vehicle.
When the vehicle in the next lane moves two lanes away from you
OR when the vehicle two lanes
away moves to the next lane from
you.
When driving through a narrow road with many trees or bushes.
Information
This device complies with Part 15 of
the FCC rules.
Operation is subject to the following
two conditions:
1. This device may not cause harmful interference, and
2. This device must accept any inter- ference received, including interfer-
ence that may cause undesired
operation.
i
Page 319 of 524

5-58
Driving your vehicle
When the turn signals operate, the
Smart Blind Spot Detection System
operates only once. However, when
the turn signals are turned OFF, the
system re-enters the activation con-
ditions.
The driver should drive the vehicle in
the middle of the vehicle lanes to
keep the system in the ready status.
When the vehicle drives too close to
one side of the vehicle lanes, the
system may not properly operate.
In addition, the system may not prop-
erly control your vehicle in accor-
dance with driving situations. Thus,
always pay close attention to road
situations.
Warning message
Smart BSD braking system mal-
function
When there is a malfunction with the
Smart Blind Spot Detection System,
warning message appears on the
LCD display and deactivates the
Smart Blind Spot Detection System.
In this case, have your vehicle
inspected by an authorized Dealer of
Genesis Brand Products.
Limitations of the System
The driver must be cautious in the
below situations, because the sys-
tem may not detect other vehicles or
objects in certain circumstances.
The vehicle drives on a curved road or through a tollgate.
The sensor is polluted with rain, snow, mud, etc.
The rear bumper where the sensor is located is covered with a foreign
object such as a bumper sticker, a
bumper guard, a bike rack, etc.
The rear bumper is damaged, or the sensor is out of the original
default position.
The vehicle height gets lower or higher due to heavy loading in a
trunk, abnormal tire pressure, etc.
The vehicle drives in inclement weather such as heavy rain or
snow.
There is a fixed object near the vehicle, such as a guardrail.
A big vehicle is near such as a bus or truck.
A motorcycle or bicycle is near.
A flat trailer is near.
If the vehicle has started at the same time as the vehicle next to
you and has accelerated.
When the other vehicle passes at a very fast speed.
While changing lanes.
While going down or up a steep road where the height of the lane is
different.
When the other vehicle approach- es very close.
When a trailer or carrier is installed.
OHI056116L
Page 387 of 524
6-12
What to do in an emergency
Information
If any of the below happens, have the
system checked by an authorized
Dealer of Genesis Brand Products.
1. The Low Tire Pressure Telltale/TPMS Malfunction Indicator does
not illuminate for 3 seconds when
the Engine Start/Stop button is
turned to the ON position or engine
is running.
2. The TPMS Malfunction Indicator remains illuminated after blinking
for approximately 1 minute.
3. The Low Tire Pressure Position Telltale remains illuminated.
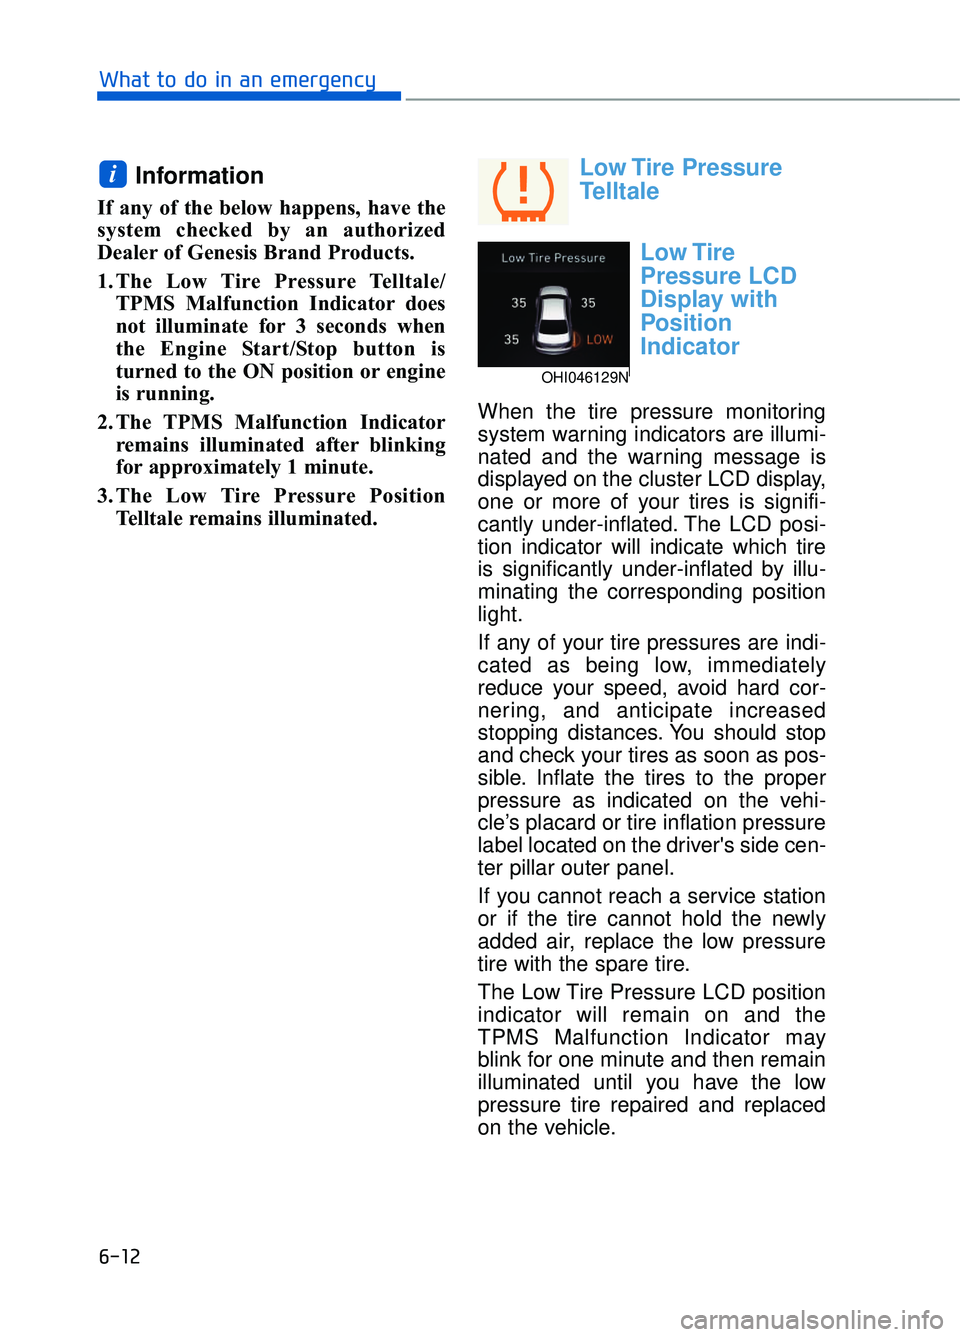
Low Tire Pressure
Telltale
Low Tire
Pressure LCD
Display with
Position
Indicator
When the tire pressure monitoring
system warning indicators are illumi-
nated and the warning message is
displayed on the cluster LCD display,
one or more of your tires is signifi-
cantly under-inflated. The LCD posi-
tion indicator will indicate which tire
is significantly under-inflated by illu-
minating the corresponding position
light.
If any of your tire pressures are indi-
cated as being low, immediately
reduce your speed, avoid hard cor-
nering, and anticipate increased
stopping distances. You should stop
and check your tires as soon as pos-
sible. Inflate the tires to the proper
pressure as indicated on the vehi-
cle’s placard or tire inflation pressure
label located on the driver's side cen-
ter pillar outer panel.
If you cannot reach a service station
or if the tire cannot hold the newly
added air, replace the low pressure
tire with the spare tire.
The Low Tire Pressure LCD position
indicator will remain on and the
TPMS Malfunction Indicator may
blink for one minute and then remain
illuminated until you have the low
pressure tire repaired and replaced
on the vehicle.
i
OHI046129N
Page 404 of 524
M
Ma
ai
in
n t
te
e n
n a
an
n c
ce
e
Check Tire Inflation Pressure .................................................................7-45
Tire Rotation ........................................................................\
.......................7-45
Wheel Alignment and Tire Balance .......................................................7-46
Tire Replacement ........................................................................\
...............7-47
Wheel Replacement........................................................................\
...........7-48
Tire Traction........................................................................\
........................7-49
Tire Maintenance........................................................................\
...............7-49
Tire Sidewall Labeling ........................................................................\
.......7-49
Tire Terminology and Definitions ..........................................................7-53
All Season Tires ........................................................................\
.................7-56
Summer Tires ........................................................................\
......................7-56
Snow Tires ........................................................................\
...........................7-56
Radial-Ply Tires........................................................................\
..................7-57
Low Aspect Ratio Tires ........................................................................\
....7-57
Fuses ........................................................................\
....................7-59
Instrument Panel Fuse Replacement ....................................................7-60
Engine Compartment Panel Fuse Replacement .................................7-61
Fuse/Relay Panel Description ................................................................7-64
Light bulbs........................................................................\
...........7-77
Headlamp, Parking Lamp, Turn Signal Lamp,
Daytime Running Light and Side Marker ...........................................7-77
Side Repeater Lamp Replacement.........................................................7-79
Rear Combination Light Bulb Replacement.........................................7-79
High Mounted Stop Light Replacement ...............................................7-79
License Plate Light Replacement replacement ..................................7-79
Interior Light Bulb Replacement ............................................................7-80
Appearance care ........................................................................\
7-81
Exterior Care........................................................................\
.......................7-81
Interior Care ........................................................................\
........................7-86
Emission Control System...........................................................7-88
Crankcase Emission Control System .....................................................7-88
Evaporative Emission Control System Including Onboard Refueling Vapor Recovery (ORVR) ......................................................7-88
Exhaust Emission Control System .........................................................7-89
California Perchlorate Notice ...................................................7-91
7
Page 509 of 524

Changing a Tire with TPMS ........................................................................\
........6-14
Checking tire inflation pressure ........................................................................\
...7-45
Child restraint system (CRS) ........................................................................\
.......2-45Booster seats........................................................................\
........................2-48
Children always in the rear ........................................................................\
.2-45
Forward-facing child restraint system ........................................................2-48
Installing a child restraint system (CRS) ....................................................2-48
Lower Anchors and tether for children .......................................................2-49
Rearward-facing child restraint system..................................\
.....................2-47
Securing a child restraint system seat with "Tether Anchor" system .........3-52
Securing a child restraint system with a lap/shoulder belt .........................3-53
Securing a child restraint with the the LATCH anchors system.................2-51
Selecting a child restraint system (CRS) ....................................................2-46
Child-protector rear door lock........................................................................\
......3-13
Clean air ........................................................................\
.....................................3-141
Climate control air filter........................................................................\
...............7-36
Clock ........................................................................\
..........................................3-151
Clothes hanger ........................................................................\
............................3-151
Combined instrument, see instrument cluster ......................................................3-60
Compact spare tire replacement ........................................................................\
...7-48
Consumer information........................................................................\
..................8-10
Coolant ........................................................................\
.........................................7-30
Cooling fluid, see engine coolant........................................................................\
.7-30
Crankcase emission control system .....................................................................7-8\
8
Cruise control system ........................................................................\
...................5-80
Cup holder ........................................................................\
..................................3-147
Curtain air bags ........................................................................\
............................2-62
Dashboard illumination, see instrument panel illumination ................................3-61
Dashboard, see instrument cluster .......................................................................3\
-60
Daytime running light (DRL) ........................................................................\
....3-107
Defogging (Windshield) ........................................................................\
.............3-138
Defroster ........................................................................\
.....................................3-121 Rear window defroster ........................................................................\
......3-121
Side view mirror defroster ........................................................................\
3-121
Defrosting (Windshield) ........................................................................\
.............3-138
Dimensions ........................................................................\
.....................................8-2
DIS navigation system ........................................................................\
...................4-4
Display illumination, see instrument panel illumination .....................................3-61
I-5
I
D