instrument cluster GENESIS G90 2021 User Guide
[x] Cancel search | Manufacturer: GENESIS, Model Year: 2021, Model line: G90, Model: GENESIS G90 2021Pages: 538, PDF Size: 13.02 MB
Page 209 of 538

3-108
Convenient features of your vehicle
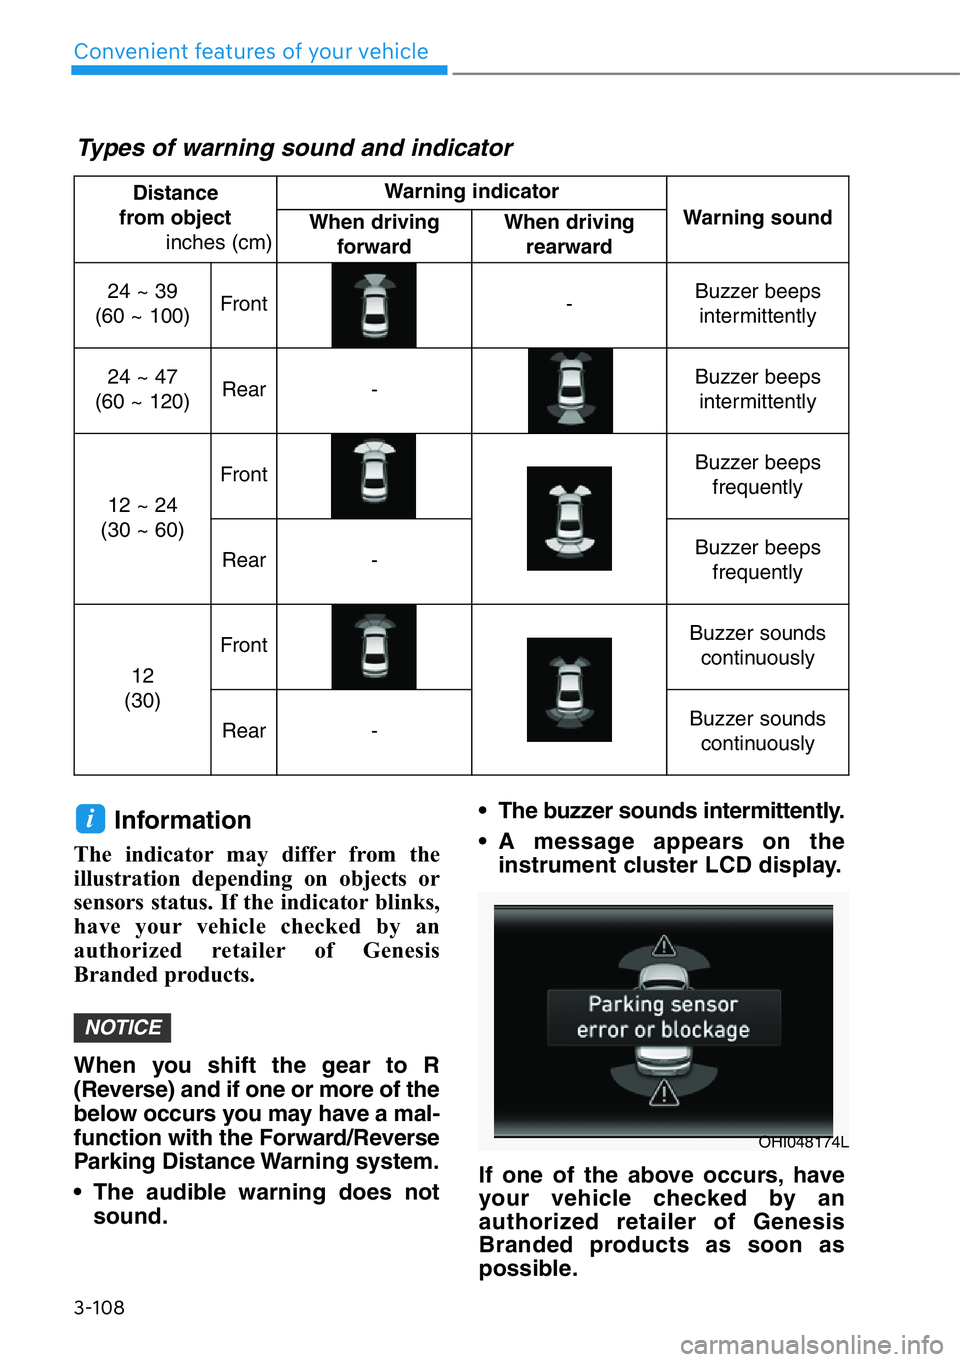
Distance
from object
inches (cm) Warning indicator
Warning soundWhen driving
forwardWhen driving
rearward
24 ~ 39
(60 ~ 100)Front-Buzzer beeps
intermittently
24 ~ 47
(60 ~ 120)Rear-Buzzer beeps
intermittently
12 ~ 24
(30 ~ 60)
FrontBuzzer beeps
frequently
Rear-Buzzer beeps
frequently
12
(30)
FrontBuzzer sounds
continuously
Rear-Buzzer sounds
continuously
Types of warning sound and indicator
Information
The indicator may differ from the
illustration depending on objects or
sensors status. If the indicator blinks,
have your vehicle checked by an
authorized retailer of Genesis
Branded products.
When you shift the gear to R
(Reverse) and if one or more of the
below occurs you may have a mal-
function with the Forward/Reverse
Parking Distance Warning system.
• The audible warning does not
sound.• The buzzer sounds intermittently.
• A message appears on the
instrument cluster LCD display.
If one of the above occurs, have
your vehicle checked by an
authorized retailer of Genesis
Branded products as soon as
possible.
NOTICE
i
OHI048174L
Page 291 of 538

Using All Wheel Drive (AWD)
The All Wheel Drive system delivers
engine power to front and rear
wheels for maximum traction. AWD is
useful when extra traction is
required, such as when driving on,
muddy, wet, or snow-covered roads.
If the system determines there is a
need for four wheel drive, the
engine's driving power is distributed
to all four wheels automatically.
ALL WHEEL DRIVE (AWD) (IF EQUIPPED)
5-39
05
If the AWD warning light ( )
stays on the instrument cluster,
your vehicle may have a mal-
function with the AWD system.
When the AWD warning light
( ) illuminates have your
vehicle checked by an author-
ized retailer of Genesis Branded
products as soon as possible.
WARNING
To reduce the risk of SERIOUS
INJURY or DEATH:
• Do not drive in conditions that
exceed the vehicles intended
design such as challenging
off-road conditions.
• Avoid high speeds when cor-
nering or turning.
• Do not make quick steering
wheel movements, such as
sharp lane changes or fast,
sharp turns.
• The risk of a rollover is great-
ly increased if you lose con-
trol of your vehicle at highway
speeds.
• Loss of control often occurs if
two or more wheels drop off
the roadway and the driver
over steers to reenter the
roadway.
• In the event your vehicle
leaves the roadway, do not
steer sharply. Instead, slow
down before pulling back into
the travel lanes.
• Always drive safely and use
caution when driving an AWD
vehicle.
WARNING
Page 297 of 538

5-45
05
DRIVE MODE INTEGRATED CONTROL SYSTEM
Drive Mode
The drive mode may be selected
according to the driver's preference
or road condition.
The mode changes whenever the
DRIVE MODE button is pressed.
• COMFORT mode :
COMFORT mode provides smooth
driving and comfortable riding.
• SPORT mode :
SPORT mode provides sporty but
firm riding.
• ECO mode :
ECO mode helps improve fuel effi-
ciency for eco-friendly driving.
• CUSTOM mode :
The driver can separately adjust
modes of each driving system.
COMFORT mode
When COMFORT mode
is selected by pressing
the DRIVE MODE button,
the COMFORT indicator
will illuminate on the
instrument cluster.
SPORT
When SPORT mode is
selected by pressing the
DRIVE MODE button, the
SPORT indicator will illu-
minate on the instrument
cluster.
• Whenever the engine is restarted,
the drive mode will revert back to
COMFORT mode. If SPORT mode
is desired, re-select SPORT mode.
• When SPORT mode is activated:
- The engine rpm will tend to
remain raised over a certain
length of time even after releas-
ing the accelerator
- Upshifts are delayed when accel-
erating
- Seat bolsters are active (if
equipped)
Information
In SPORT mode, the fuel efficiency
may decrease.
i
OHI058060L
OHI059236N
Page 298 of 538

5-46
Driving your vehicle
ECO mode
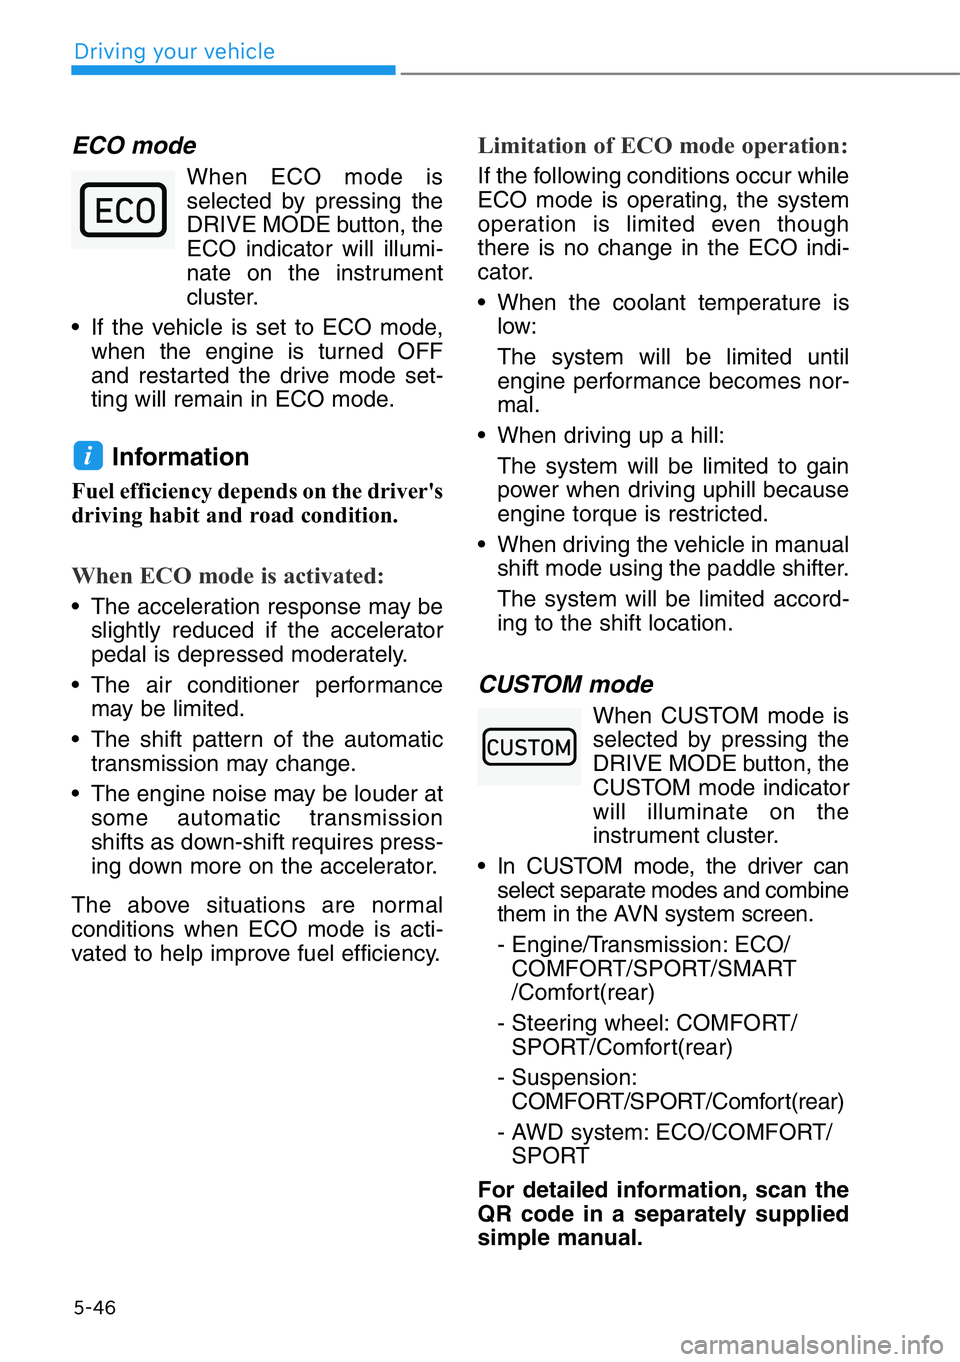
When ECO mode is
selected by pressing the
DRIVE MODE button, the
ECO indicator will illumi-
nate on the instrument
cluster.
• If the vehicle is set to ECO mode,
when the engine is turned OFF
and restarted the drive mode set-
ting will remain in ECO mode.
Information
Fuel efficiency depends on the driver's
driving habit and road condition.
When ECO mode is activated:
• The acceleration response may be
slightly reduced if the accelerator
pedal is depressed moderately.
• The air conditioner performance
may be limited.
• The shift pattern of the automatic
transmission may change.
• The engine noise may be louder at
some automatic transmission
shifts as down-shift requires press-
ing down more on the accelerator.
The above situations are normal
conditions when ECO mode is acti-
vated to help improve fuel efficiency.
Limitation of ECO mode operation:
If the following conditions occur while
ECO mode is operating, the system
operation is limited even though
there is no change in the ECO indi-
cator.
• When the coolant temperature is
low:
The system will be limited until
engine performance becomes nor-
mal.
• When driving up a hill:
The system will be limited to gain
power when driving uphill because
engine torque is restricted.
• When driving the vehicle in manual
shift mode using the paddle shifter.
The system will be limited accord-
ing to the shift location.
CUSTOM mode
When CUSTOM mode is
selected by pressing the
DRIVE MODE button, the
CUSTOM mode indicator
will illuminate on the
instrument cluster.
• In CUSTOM mode, the driver can
select separate modes and combine
them in the AVN system screen.
- Engine/Transmission: ECO/
COMFORT/SPORT/SMART
/Comfort(rear)
- Steering wheel: COMFORT/
SPORT/Comfort(rear)
- Suspension:
COMFORT/SPORT/Comfort(rear)
- AWD system: ECO/COMFORT/
SPORT
For detailed information, scan the
QR code in a separately supplied
simple manual.
i
Page 301 of 538

When certain conditions are met, the
engine is automatically decoupled
from the transmission while the shift
lever is remained in D (Drive). In this
Coasting mode, the engine stays at
idling speed to reduce fuel consump-
tion and increase coasting distance.
Coasting Setting
The Coasting function must be
turned ON from the Settings menu in
the AVN system screen. Select:
- Setup →Vehicle Settings →Drive
Mode →Coasting
For detailed information, scan the
QR code in a separately supplied
simple manual.
When Coasting is turned ON and the
conditions are met, the function
operates with a "Coasting" message
illuminated at the top center of the
instrument cluster.
• If the accelerator pedal is
pressed quickly for accelerating
with the Coasting function in
operation, acceleration may
occur after the engagement of
the clutch inside the transmis-
sion. In turn, the driver may con-
tinue to feel acceleration even
after the system is turned off.
• Driving with the Coasting func-
tion off may be required in some
cases since the engine brake is
not applied while the Coasting
function is in operation.
• Operating the AVN system
screen to activate or deactivate
the Coasting function while driv-
ing may be dangerous as the dri-
ver's attention is dispersed.
Coasting Operating
Conditions
The Coasting function will operate
when the accelerator pedal is
depressed and released under the
following conditions.
• The driving mode is ECO mode.
• SMART is selected for Engine/
Transmission in CUSTOM mode
from the AVN system screen and
driver acceleration is SMART ECO
• ECO is selected for Engine/
Transmission in CUSTOM mode
from the AVN system screen
• The shift lever is in D (Drive)
• The Smart Cruise Control button is
OFF
• The accelerator or brake pedal is
not depressed
• The vehicle's speed is within
35–100 mph (55–160 km/h) range
• The road gradient is within -5~+5%
range
• In SMART mode, if the distance
between the vehicle ahead and the
relative speed is within a certain
range
Information
• If the front radar for smart cruise
control system cannot operate nor-
mally, the inter-vehicle distance and
relative speed condition are auto-
matically ignored.
• The Coasting function works after
the engine is turned on, the trans-
mission is warmed up, and the
engine sensor self-diagnosis is com-
pleted after starting.
• Depending on the driving situation,
Coasting operation may be tem-
porarily delayed even if the above
conditions are met.
i
NOTICE
COASTING (IF EQUIPPED)
5-49
05
Page 304 of 538

• The warning light illu-
minates on the instru-
ment cluster, when you
cancel the FCA system.
The driver can monitor the FCA
ON/OFF status in the instrument
cluster. Also, the warning light illu-
minates when the ESC (Electronic
Stability Control) is turned off. If the
warning light remains ON when the
FCA is activated, have the system
checked by an authorized retailer
of Genesis Branded products.
• Selecting Warning Timing
The diver can select the initial
warning activation time from the
Settings menu in the AVN system
screen. Select:
- Setup →Vehicle Settings →
Driver Assistance →Warning
Timing →Normal / Late
For detailed information, scan
the QR code in a separately sup-
plied simple manual.The options for the initial Forward
Collision Warning includes the fol-
lowing:
- Normal:
When this option is selected, the
initial Forward Collision Warning is
activated sensitively. If you feel the
warning activates too early, set the
Forward Collision Warning to
'Late'.
Even though, 'Normal' is selected if
the front vehicle suddenly stops
the initial warning activation time
may not seem fast.
- Late:
When this option is selected, the
initial Forward Collision Warning is
activated later than normal. This
setting reduces the amount of dis-
tance between the vehicle, pedes-
trian or cyclist (if equipped) ahead
before the initial warning occurs.
Select 'Late' when traffic is light
and when driving speed is slow.
When you accelerate suddenly to
the vehicle ahead, the warning
may seem to activate earlier even if
'Late' is selected.
Information
If you change the warning timing, the
warning time of other systems may
change.
i
5-52
Driving your vehicle
Page 326 of 538

5-74
Driving your vehicle
Blind-Spot Collision-Avoidance
Assist (BCA) system
The Blind-Spot Collision-Avoidance
Assist system may apply braking
power, when an approaching vehicle
is detected within a certain distance
next to or behind your vehicle.
In this situation, the system gently
apply braking power on the tire,
which is located in the opposite side
of the possible-colliding point. The
instrument cluster will inform the
driver of the system activation.
Blind-Spot Collision-Avoidance Assist
system is automatically deactivated
when:
- The vehicle drives a certain dis-
tance away
- The vehicle direction is changed
against the possible-colliding point
- The steering wheel is abruptly
moved- The brake pedal is depressed
- After a certain period of time
The driver should drive the vehicle in
the middle of the vehicle lanes to
keep the system in the ready status.
When the vehicle drives too close to
one side of the vehicle lanes, the
system may not properly operate.
In addition, the system may not prop-
erly control your vehicle in accor-
dance with driving situations. Thus,
always pay close attention to road
conditions.
OHI058245L
OHI058246L
• The driver is responsible for
accurate steering.
• Do not unnecessarily operate
the steering wheel, when the
Blind-Spot Collision-Avoidance
Assist System is in operation.
• Always pay attention to road
and traffic conditions while
driving. The Blind-Spot
Collision-Avoidance Assist
system may not operate or
unnecessarily operate depend-
ing on certain situations.
• The Blind-Spot Collision-
Avoidance Assist system is not
a substitute for safe driving
practices, but is a supplemen-
tal system only. It is the respon-
sibility of the driver to always
drive cautiously to prevent
unexpected and sudden situa-
tions from occurring. Pay
attention to road conditions at
all times.
WARNING
Page 338 of 538

5-86
Driving your vehicle
Rear Cross-Traffic Collision-Avoidance Assist (RCCA) system
If the risk of collision is detected while the RCCW is generated, brake control
may be activated. The instrument cluster will inform the driver of the brake
control. If the rear view monitor system is operating, a warning will also
appear on the AVN system screen.
After the brake control is activated, the driver must immediately depress the
brake pedal and check the surroundings.
- The brake activation by the system lasts for about 2 seconds.
The driver must pay attention as the brake is disengaged after 2 seconds.
- The brake control by the system is canceled if the driver depresses the
brake pedal with sufficient power.
- Brake control is activated once for each right/left approach after shifting the
shift lever to R (Reverse).
The brake control may not operate properly according to the status of the
ESC (Electronic Stability Control). The same warning message is displayed
on the instrument cluster when:
- The ESC (Electronic Stability Control) warning light is on.
- The ESC (Electronic Stability Control) is engaged in a different function.
OHI058256L ■Left
■Left
OHI058254
OHI058257L ■Right
■Right
OHI058255
Page 354 of 538

5-102
Driving your vehicle
(1) Cruise indicator
(2) Set speed
(3) Vehicle-to-vehicle distance
To see the SCC screen on the LCD
display on the cluster, select Assist
mode ( ). For more details, refer to
"LCD Display Modes" in chapter 3.
The Smart Cruise Control system
allows you to program the vehicle to
help maintain the desired speed and
minimum distance between the vehi-
cle ahead.
The Smart Cruise Control system
will automatically adjust your vehicle
speed to maintain your programmed
speed and following distance without
requiring you to depress the acceler-
ator or brake pedals.
SMART CRUISE CONTROL WITH STOP & GO SYSTEM
OHI059259N
For your safety, please read the
owner's manual before using the
Smart Cruise Control system.
WARNING
The Smart Cruise Control sys-
tem is not a substitute for safe
driving practices, but a conven-
ience function only. It is the
responsibility of the driver to
always check the speed and
distance to the vehicle ahead.
WARNING
Take the following precautions :
•Always set the vehicle speed
under the speed limit.
•If the Smart Cruise Control is
left on, ( indicator
light in the instrument cluster
is illuminated) the Smart
Cruise Control can be activat-
ed unintentionally. Keep the
Smart Cruise Control system
off ( indicator light
OFF) when the Smart Cruise
Control is not in use, to avoid
inadvertently setting a speed.
•Use the Smart Cruise Control
system only when traveling
on open highways in good
weather.
WARNING
Smart Cruise Control is not a
collision avoidance or warning
device.
Smart Cruise Control is
designed to only detect vehi-
cles as it cannot detect motor-
cycles, bicycles, or pedestrians.
WARNING
Page 384 of 538

5-132
LKA operation
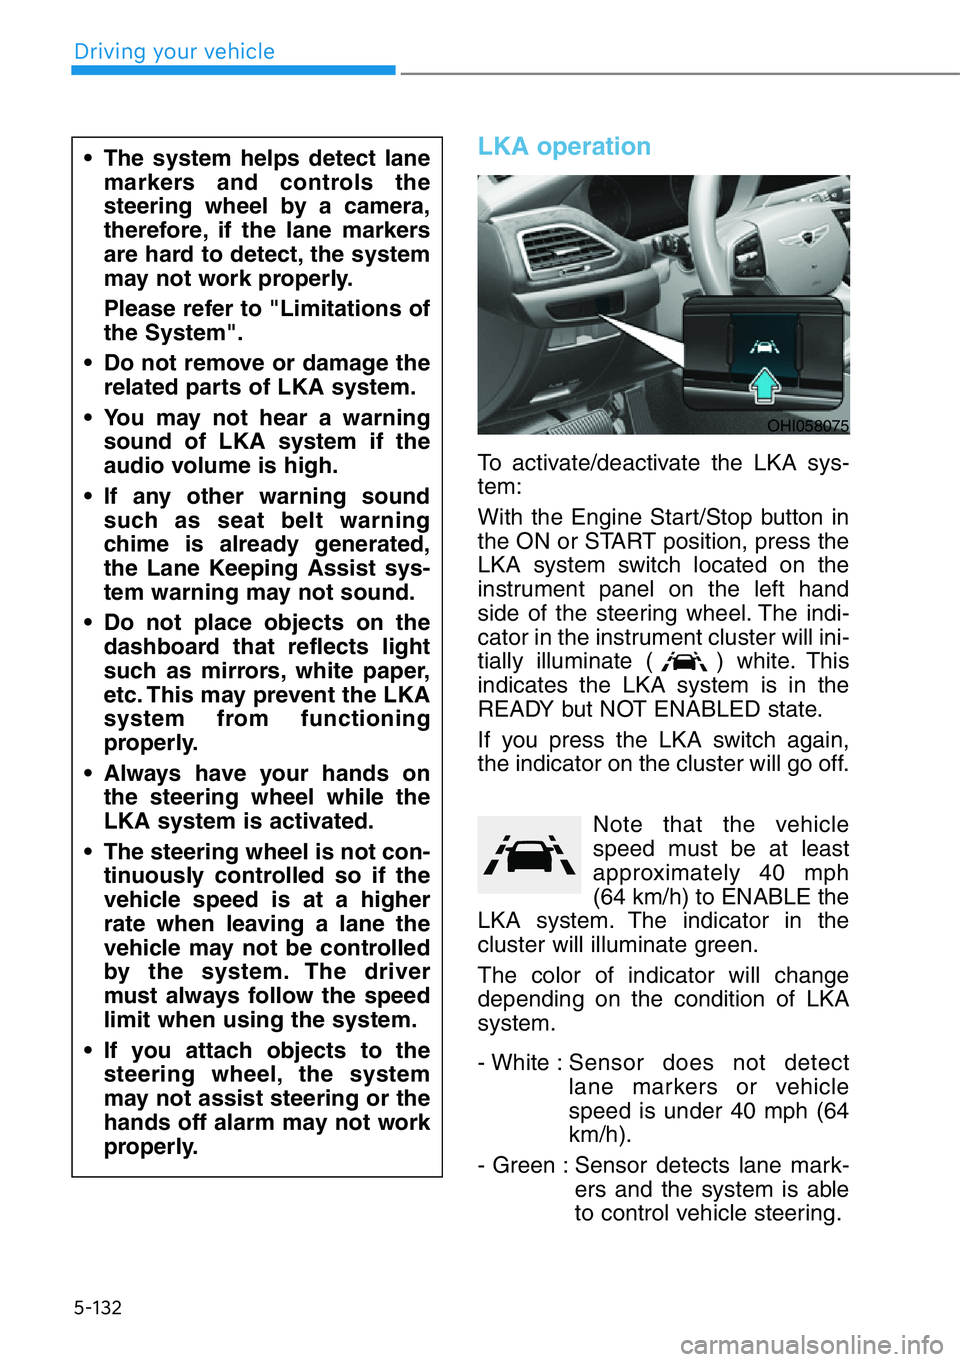
To activate/deactivate the LKA sys-
tem:
With the Engine Start/Stop button in
the ON or START position, press the
LKA system switch located on the
instrument panel on the left hand
side of the steering wheel. The indi-
cator in the instrument cluster will ini-
tially illuminate ( ) white. This
indicates the LKA system is in the
READY but NOT ENABLED state.
If you press the LKA switch again,
the indicator on the cluster will go off.
Note that the vehicle
speed must be at least
approximately 40 mph
(64 km/h) to ENABLE the
LKA system. The indicator in the
cluster will illuminate green.
The color of indicator will change
depending on the condition of LKA
system.
- White :Sensor does not detect
lane markers or vehicle
speed is under 40 mph (64
km/h).
- Green : Sensor detects lane mark-
ers and the system is able
to control vehicle steering.
• The system helps detect lane
markers and controls the
steering wheel by a camera,
therefore, if the lane markers
are hard to detect, the system
may not work properly.
Please refer to "Limitations of
the System".
• Do not remove or damage the
related parts of LKA system.
• You may not hear a warning
sound of LKA system if the
audio volume is high.
• If any other warning sound
such as seat belt warning
chime is already generated,
the Lane Keeping Assist sys-
tem warning may not sound.
• Do not place objects on the
dashboard that reflects light
such as mirrors, white paper,
etc. This may prevent the LKA
system from functioning
properly.
• Always have your hands on
the steering wheel while the
LKA system is activated.
• The steering wheel is not con-
tinuously controlled so if the
vehicle speed is at a higher
rate when leaving a lane the
vehicle may not be controlled
by the system. The driver
must always follow the speed
limit when using the system.
• If you attach objects to the
steering wheel, the system
may not assist steering or the
hands off alarm may not work
properly.
OHI058075
Driving your vehicle