height GENESIS GV80 2021 User Guide
[x] Cancel search | Manufacturer: GENESIS, Model Year: 2021, Model line: GV80, Model: GENESIS GV80 2021Pages: 632, PDF Size: 9.37 MB
Page 71 of 632
Safety System
3-42
Additional Seat Belt Safety
Precautions
Seat belt use during pregnancy
The seat belt should always be used
during pregnancy. The best way to
protect your unborn child is to protect
yourself by always wearing the seat belt.
Pregnant women should always wear
a lap-shoulder seat belt. Place the
shoulder belt across your chest, routed
between your breasts and away from
your neck. Place the lap belt below your
belly so that it fits SNUGLY across your
hips and pelvic bone, under the rounded
part of the belly.
WARNING
• A pregnant woman or a patient is
more vulnerable to any imapacts on
the abdomen during an abrupt stop
or accident. If you are in an accident
while pregnant, we recommend you
consult your doctor.
• To reduce the risk of serious injury or
death to an unborn child during an
accident, pregnant women should
NEVER place the lap portion of the
seat belt above or over the area of
the abdomen where the unborn child
is located.
Seat belt use and children
Infant and small children
All 50 states have Child Restraint System
laws which require children to travel
in approved Child Restraint System
devices, including booster seats. The
age at which seat belts can be used
instead of Child Restraint System differs
among states, so you should be aware of
the specific requirements in your state,
and where you are travelling. Infant and
Child Restraint System must be properly
placed and installed in a rear seat.
For more information refer to the “Child
Restraint Systems” section in this
chapter.
WARNING
ALWAYS properly restrain infants and
small children in a Child Restraint
System appropriate for the child’s
height and weight.
To reduce the risk of serious injury or
death to a child and other passengers,
NEVER hold a child in your lap or arms
when the vehicle is moving. The violent
forces created during an accident will
tear the child from your arms and throw
the child against the interior of the
vehicle.
Page 72 of 632
03
3-43
Small children are best protected from
injury in an accident when properly
restrained in the rear seat by a Child
Restraint System that meets the
requirements of the Federal Motor
Vehicle Safety Standards. Before buying
any Child Restraint System, make sure
that it has a label certifying that it meets
Federal Motor Vehicle Safety Standard
FMVSS 213.
The Child Restraint System must be
appropriate for your child’s height and
weight. Check the label on the Child
Restraint System for this information.
Refer to “Child Restraint Systems”
section in this chapter.
Larger children
Children under age 13 and who are
too large for a booster seat should
always occupy the rear seat and use the
available lap/shoulder belts. A seat belt
should lie across the upper thighs and
be snug across the shoulder and chest
to restrain the child safely. Check belt fit
periodically. A child’s squirming could
put the belt out of position. In the event
of an accident, children are afforded
the best safety restrained by a proper
Child Restraint System in the rear seats.
Always have the LATCH system inspected
by your authorized retailer of Genesis
Branded products after an accident. An
accident can damage the LATCH system
and may not properly secure the child
restraint.If a larger child over age 13 must be
seated in the front seat, the child must
be securely restrained by the available
lap/shoulder belt and the seat should be
placed in the rearmost position.
If the shoulder belt portion slightly
touches the child’s neck or face, try
placing the child closer to the center
of the vehicle. If the shoulder belt still
touches their face or neck, they need to
be returned to an appropriate booster
seat in the rear seat.
WARNING
• Always make sure larger children’s
seat belts are worn and properly
adjusted.
• NEVER allow the shoulder belt to
contact the child’s neck or face.
• Do not allow more than one child to
use a single seat belt.
Transporting an injured person
A seat belt should be used when an
injured person is being transported.
Consult a physician for specific
recommendations.
One person per belt
Two people (including children) should
never attempt to use a single seat belt.
This could increase the severity of
injuries in case of an accident.
Page 74 of 632

03
3-45
Children Always in the Rear
WARNING
Always properly restrain children in the
vehicle. Children of all ages are safer
when restrained in the rear seat. A child
riding in the front passenger seat can
be forcefully struck by an inflating air
bag resulting in SERIOUS INJURY or
DEATH.
Children under age 13 should always
ride in the rear seats and must always be
properly restrained to minimize the risk
of injury in an accident, sudden stop or
sudden maneuver.
According to accident statistics, children
are safer when properly restrained in the
rear seats than in the front seat. Even
with air bags, children can be seriously
injured or killed. Children too large for a
Child Restraint System must use the seat
belts provided.
All 50 states have child restraint laws
which require children to travel in
approved Child Restraint Systems.
The laws governing the age or height/
weight restrictions at which seat belts
can be used instead of Child Restraint
System differs among states, so
you should be aware of the specific
requirements in your state, and where
you are travelling.
Child Restraint Systems must be properly
placed and installed in the rear seat.
You must use a commercially available
Child Restraint System that meets the
requirements of the Federal Motor
Vehicle Safety Standards (FMVSS 213).
Child Restraint Systems are generally
designed to be secured in a vehicle seat
by lap belt portion of a lap/shoulder belt,
or by a LATCH system in the rear seats of
the vehicle.
Child Restraint System (CRS)
Infants and younger children must be
restrained in an appropriate rearward-
facing or forward-facing CRS that has
first been properly secured to the seat
of the vehicle. Read and comply with
the instructions for installation and use
provided by the manufacturer of the
Child Restraint System.
WARNING
An improperly secured child restraint
can increase the risk of SERIOUS
INJURY or DEATH in an accident. Always
take the following precautions when
using a Child Restraint System:
• NEVER install a child or infant
restraint in the front passenger's
seat.
• Always properly secure the child
restraint to a rear seat of the vehicle.
• Always follow the child restraint
system manufacturer's instructions
for installation and use.
• Always properly restrain your child in
the child restraint.
• If the vehicle head restraint prevents
proper installation of a child seat
(as described in the child restraint
system manual), the head restraint of
the respective seating position shall
be readjusted or entirely removed.
• Do not use an infant carrier or a
child safety seat that "hooks" over
a seatback, it may not provide
adequate protection in an accident.
• After an accident, have an authorized
retailer of Genesis Branded products
check the child restraint system,
seat belts, tether anchors and lower
anchors.
CHILD RESTRAINT SYSTEM (CRS)
Page 75 of 632

Safety System
3-46
Selecting a Child Restraint
System (CRS)
When selecting a Child Restraint System
for your child, always:
• Make sure the Child Restraint System
has a label certifying that it meets
applicable Federal Motor Vehicle
Safety Standards (FMVSS 213).
• Select a Child Restraint System based
on your child’s height and weight. The
required label or the instructions for
use typically provide this information.
• Select a Child Restraint System that
fits the vehicle seating position where
it will be used.
• Read and comply with the warnings
and instructions for installation and
use provided with the Child Restraint
System.
Child Restraint System types
There are three main types of Child
Restraint Systems: rearward-facing,
forward-facing and booster Child
Restraint Systems.
They are classified according to the
child’s age, height and weight.
OJX1039016OJX1039016
Rearward-facing Child Restraint System
A rearward-facing Child Restraint System
provides restraint with the seating
surface against the back of the child. The harness system holds the child in
place, and in an accident, acts to keep
the child positioned in the Child Restraint
Systems and reduce the stress to the
fragile neck and spinal cord.
All children under the age of one year
must always ride in a rearward-facing
Child Restraint System. Convertible and
3-in-1 Child Restraint Systems typically
have higher height and weight limits for
the rearward-facing position, allowing
you to keep your child rearward-facing
for a longer period of time.
Continue using Child Restraint Systems
in the rearward-facing position as long as
children fit within the height and weight
limits allowed by the Child Restraint
System’s manufacturer. It's the best way
to keep them safe. Once your child has
outgrown the rearward-facing Child
Restraint System, your child is ready for
a forward-facing Child Restraint System
with a harness.
WARNING
NEVER install a child or infant restraint
in the front passenger's seat.
Placing a rearward-facing child restraint
in the front seat can result in SERIOUS
INJURY or DEATH if the child restraint is
struck by an inflating air bag.
Page 76 of 632

03
3-47
OJX1039119OJX1039119
Forward-facing Child Restraint System
A forward-facing Child Restraint System
provides restraint for the child’s body
with a harness. Keep children in a
forward-facing Child Restraint System
with a harness until they reach the top
height or weight limit allowed by your
Child Restraint System’s manufacturer.
Once your child outgrows the forward-
facing Child Restraint System, your child
is ready for a booster seat.
Booster seats
A booster seat is a Child Restraint
System designed to improve the fit of
the vehicle’s seat belt system. A booster
seat positions the seat belt so that it
fits properly over the lap of your child.
Keep your children in booster seats until
they are big enough to fit in a seat belt
properly.
For a seat belt to fit properly, the lap belt
must lie comfortable across the upper
thighs, not the stomach. The shoulder
belt should lie comfortable across the
shoulder and chest and not across the
neck or face. Children under age 13
must always be properly restrained to
minimize the risk of injury in an accident,
sudden stop or sudden maneuver.
Installing a Child Restraint
System (CRS)
WARNING
Before installing your Child Restraint
System always:
• Read and follow the instructions
provided by the manufacturer of the
Child Restraint System.
• Read and follow the instructions
regarding child restraint systems in
this manual.
Failure to follow all warnings and
instructions could increase the risk of
the SERIOUS INJURY or DEATH if an
accident occurs.
WARNING
If the vehicle head restraint prevents
proper installation of a Child Restraint
System, the head restraint of the
respective seating position shall be
readjusted or entirely removed.
After selecting a proper Child Restraint
System for your child and checking that
the Child Restraint System fits properly
on the seating position, there are three
general steps for a proper installation:
• Properly secure the Child Restraint
System to the vehicle. All Child
Restraint Systems must be secured
to the vehicle with the lap part of a
lap/shoulder belt or with the LATCH
system.
Page 105 of 632
Safety System
3 -76
Additional Safety Precautions
Passengers should not move out of
or change seats while the vehicle is
moving. A passenger who is not wearing
a seat belt during a crash or emergency
stop can be thrown against the inside of
the vehicle, against other occupants, or
be ejected from the vehicle.
Do not use any accessories on seat
belts. Devices claiming to improve
occupant comfort or reposition the seat
belt can reduce the protection provided
by the seat belt and increase the chance
of serious injury in a crash.
Do not modify the front seats.
Modification of the front seats could
interfere with the operation of the
supplemental restraint system sensing
components or side air bags.
Do not place items under the front
seats. Placing items under the front seats
could interfere with the operation of the
supplemental restraint system sensing
components and wiring harnesses.
Do not cause impact to the doors.
Impact to the doors when the Engine
Start/Stop button is in the ON or START
position may cause the air bags to
inflate.
Modifications to accommodate
disabilities. If you require modification
to your vehicle to accommodate a
disability, contact Genesis Customer
Care at 844 340-9741.
Adding equipment to or modifying
your air bag equipped vehicle
If you modify your vehicle by changing
your vehicle’s frame, bumper system,
front end or side sheet metal or ride
height, this may affect the operation of
your vehicle’s air bag system.
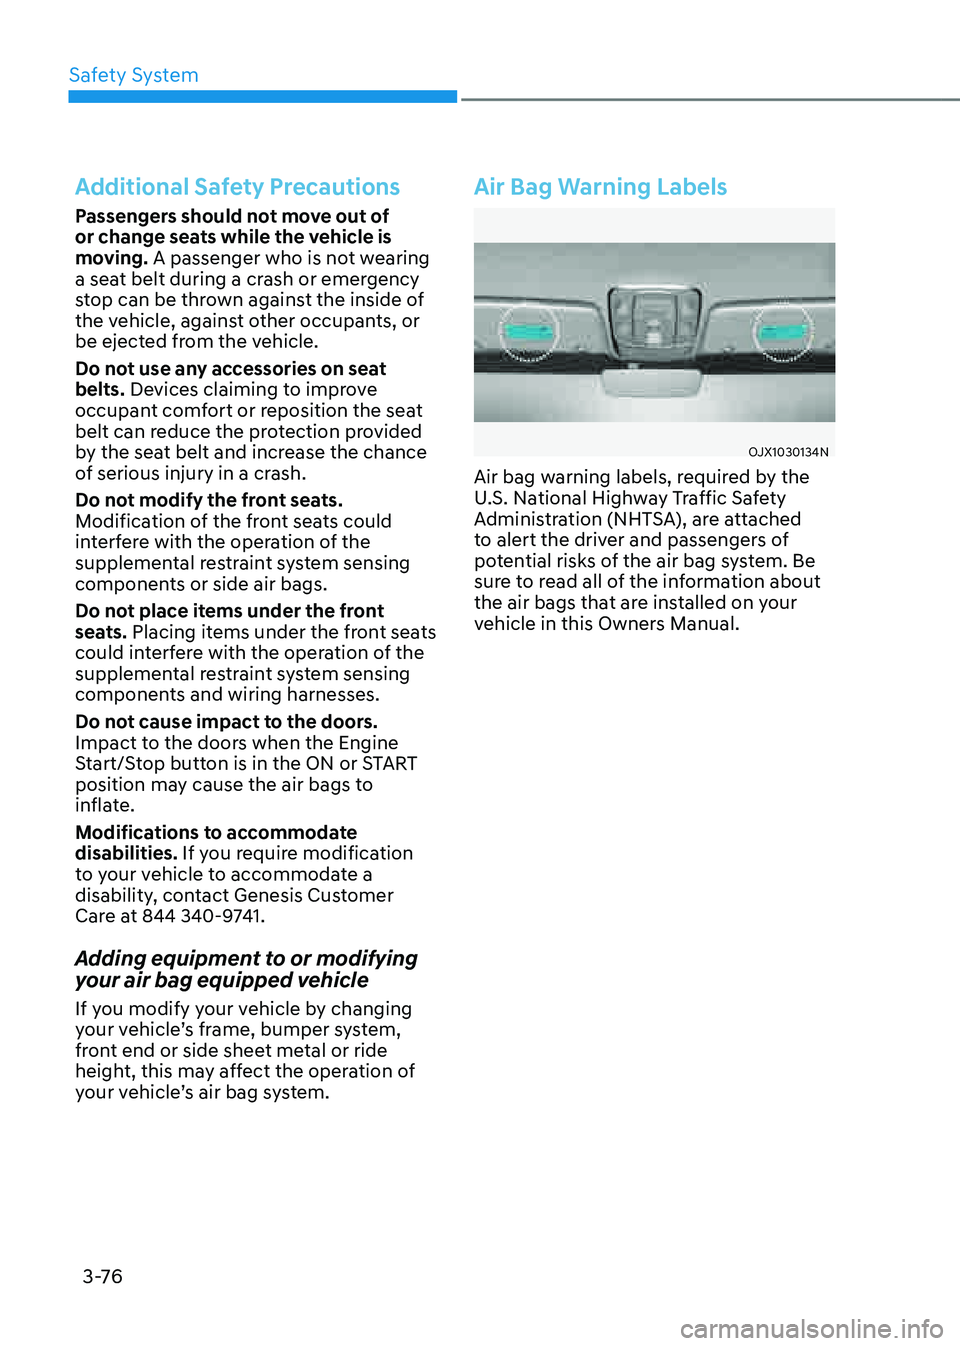
Air Bag Warning Labels
OJX1030134NOJX1030134N
Air bag warning labels, required by the
U.S. National Highway Traffic Safety
Administration (NHTSA), are attached
to alert the driver and passengers of
potential risks of the air bag system. Be
sure to read all of the information about
the air bags that are installed on your
vehicle in this Owners Manual.
Page 139 of 632
Instrument Cluster
4-34
Speed unit (if equipped)
OJX1049024LOJX1049024L
When the Speed Unit menu is selected,
press the OK switch on the steering
wheel. You can change the speed unit
setting between MPH and km/h for the
cluster.
3D Instrument Cluster (for 12.3-
Inch 3D Cluster)
3D cluster setting
To use the 3D cluster, press the Engine
Start/Stop button to the ON position,
and then select 'Setup → Vehicle Settings
→ 3D Cluster Depth → Medium/Light' in
infotainment system screen.
To use the cluster 2D, select 'Off'.
See additional information in supplied
Infotainment Manual.
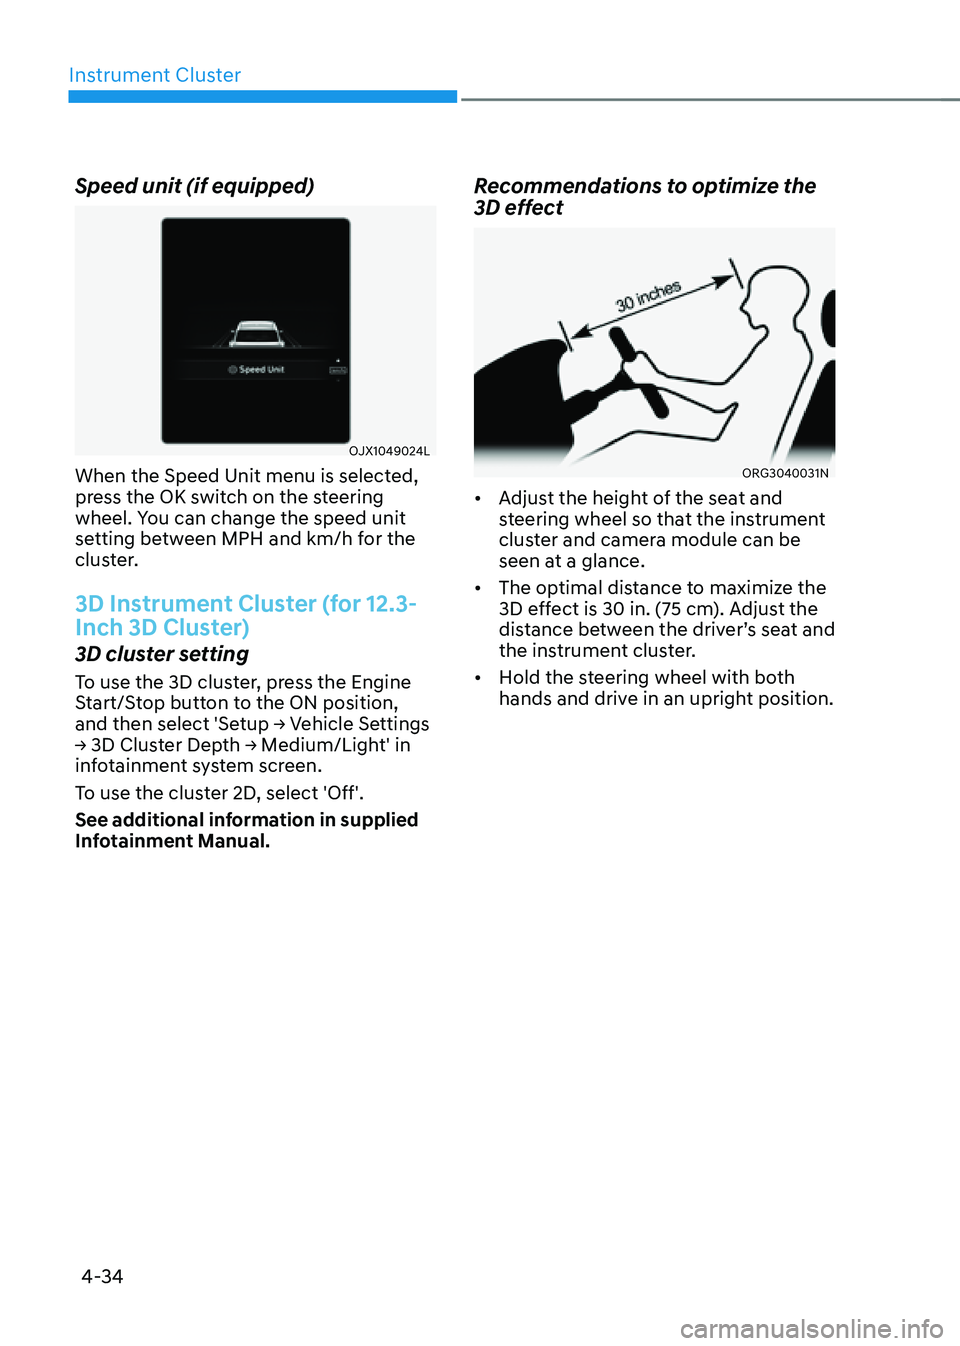
Recommendations to optimize the
3D effect
ORG3040031NORG3040031N
• Adjust the height of the seat and
steering wheel so that the instrument
cluster and camera module can be
seen at a glance.
• The optimal distance to maximize the
3D effect is 30 in. (75 cm). Adjust the
distance between the driver’s seat and
the instrument cluster.
• Hold the steering wheel with both
hands and drive in an upright position.
Page 177 of 632
05
5-35
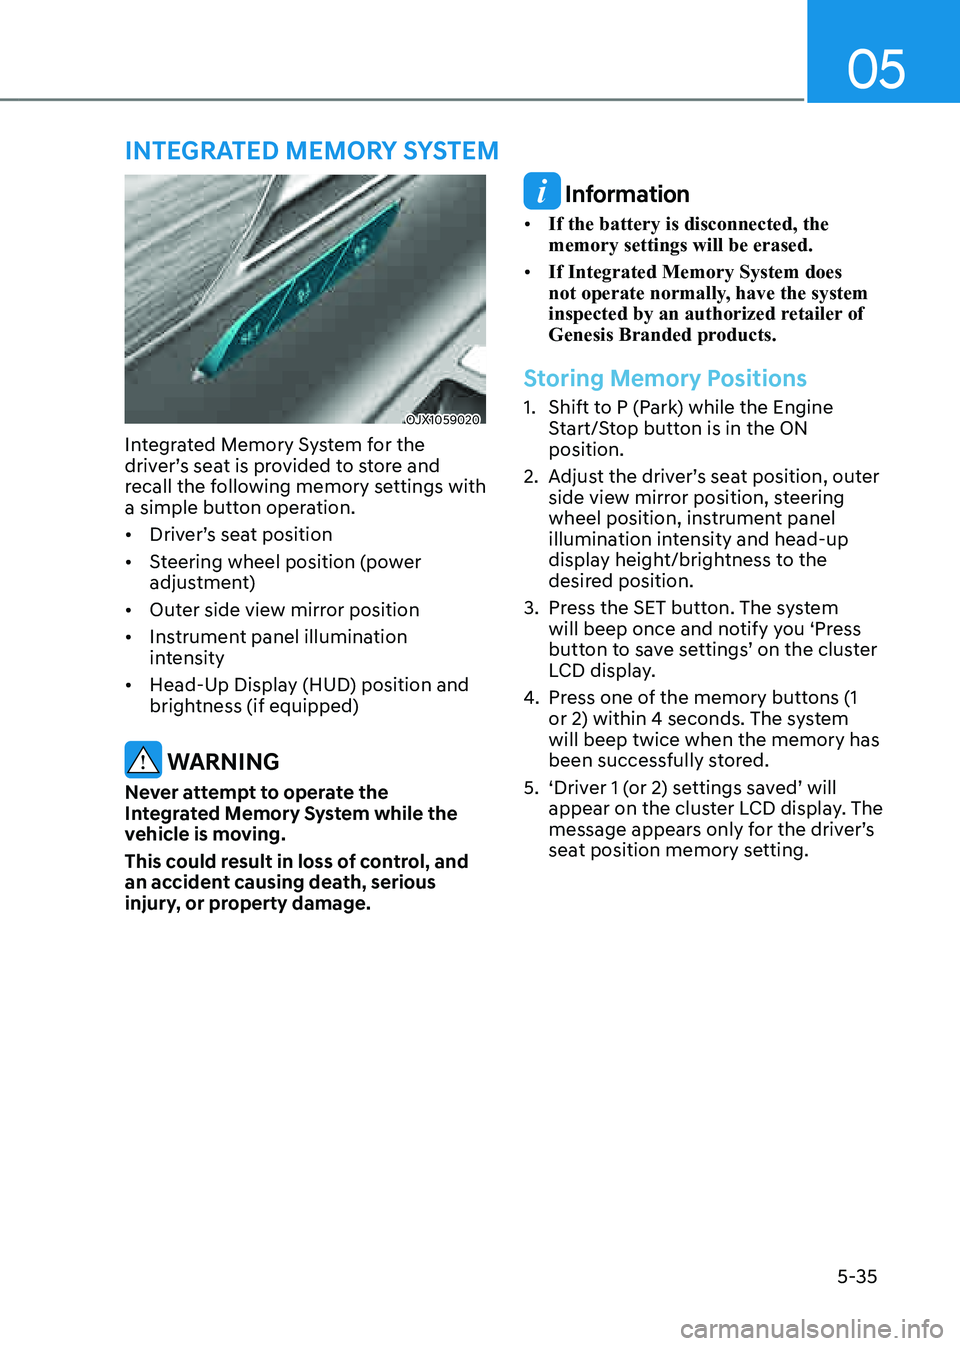
OJX1059020OJX1059020
Integrated Memory System for the
driver’s seat is provided to store and
recall the following memory settings with
a simple button operation.
• Driver’s seat position
• Steering wheel position (power
adjustment)
• Outer side view mirror position
• Instrument panel illumination
intensity
• Head-Up Display (HUD) position and
brightness (if equipped)
WARNING
Never attempt to operate the
Integrated Memory System while the
vehicle is moving.
This could result in loss of control, and
an accident causing death, serious
injury, or property damage.
Information
• If the battery is disconnected, the
memory settings will be erased.
• If Integrated Memory System does
not operate normally, have the system
inspected by an authorized retailer of
Genesis Branded products.
Storing Memory Positions
1. Shift to P (Park) while the Engine
Start/Stop button is in the ON
position.
2. Adjust the driver’s seat position, outer
side view mirror position, steering
wheel position, instrument panel
illumination intensity and head-up
display height/brightness to the
desired position.
3. Press the SET button. The system
will beep once and notify you ‘Press
button to save settings’ on the cluster
LCD display.
4. Press one of the memory buttons (1
or 2) within 4 seconds. The system
will beep twice when the memory has
been successfully stored.
5. ‘Driver 1 (or 2) settings saved’ will
appear on the cluster LCD display. The
message appears only for the driver’s
seat position memory setting.
INTEGRATED MEMORY SYSTEM
Page 178 of 632
Convenient Features
5-36
Recalling Memory Positions
1. Shift to P (Park) while the Engine
Start/Stop button is in the ON
position.
2. Press the desired memory button (1
or 2). The system will beep once, and
then the driver’s seat position, outer
side view mirror position, steering
wheel position, instrument panel
illumination intensity and head-
up display height/brightness will
automatically adjust to the stored
positions.
3. ‘Driver 1 (or 2) settings applied’ will
appear on the cluster LCD display.
Information
• If you press the SET button or the
corresponding button which the
setting is being recalled, the setting will
temporarily deactivate. If you press the
other buttons, the setting of the pressed
button will activate.
For example, if you press the SET
button or number 1 button with the
number 1 setting in operation, the
setting will temporarily deactivate. If
you press the number 2 button, the
number 2 setting will activate.
• If you adjust the seat, side view mirror,
steering wheel, instrument panel
illumination or head-up display while
recalling the stored positions, the pre-
set settings will become ineffective.
Resetting the System
Take the following procedures to reset
Integrated Memory System, when it does
not operate properly.
Resetting Integrated Memory
System
1. Stop the vehicle and open the driver’s
door with the vehicle shifted to P
(Park).
2. Adjust the driver’s seat and seatback
to the foremost position.
3. Press the SET button and push
forward the driver’s seat movement
switch over 2 seconds simultaneously.
While resetting Integrated Memory
System
1. Resetting starts with a notification
sound.
2. The driver’s seat and seatback is
adjusted to the rearward position with
the notification sound.
3. The driver’s seat and seatback is
re-adjusted to the default position
(central position) with the notification
sound.
However, in the following cases, the
resetting procedure and the notification
sound may stop.
• The memory button is pressed.
• The seat control switch is operated.
• The driving speed exceeds
2 mph (3 km/h).
• The driver’s door is closed.
Page 180 of 632

Convenient Features
5-38
The Smart Posture Care system
automatically provides a healthy posture
(position) for the driver’s back, and sets
the steering wheel, side view mirrors,
head-up display positions according to
the driver’s body measurements.
Information
If the Seat Posture Care system does
not operate normally, have the system
checked by an authorized retailer of
Genesis Branded products.
OJX1079170LOJX1079170L
1. Check that the gear is in P (Park) while
the Engine Start/Stop button is in the
ON position.
2. Select ‘Setup → Vehicle Settings → Seat
→ Smart Posture Care → Enter Driver’s
Information’ from the Settings menu
in the infotainment system screen.
3. Enter information (Height, Sitting
height, Weight) in the infotainment
system screen.
4. After entering the driver’s information,
press ‘Posture Analysis → Adjust
Posture → Save Current Posture’. The
driver’s seat, steering wheel, side view
mirror and head-up display will be
adjusted.
5. Save the adjusted seat position in
‘Settings 1’ or ‘Settings 2’.
See additional information in
supplied Infotainment Manual.
SMART POSTURE CARE SYSTEM (IF EQUIPPED)