door GENESIS GV80 2021 Repair Manual
[x] Cancel search | Manufacturer: GENESIS, Model Year: 2021, Model line: GV80, Model: GENESIS GV80 2021Pages: 632, PDF Size: 9.37 MB
Page 198 of 632
Convenient Features
5-56
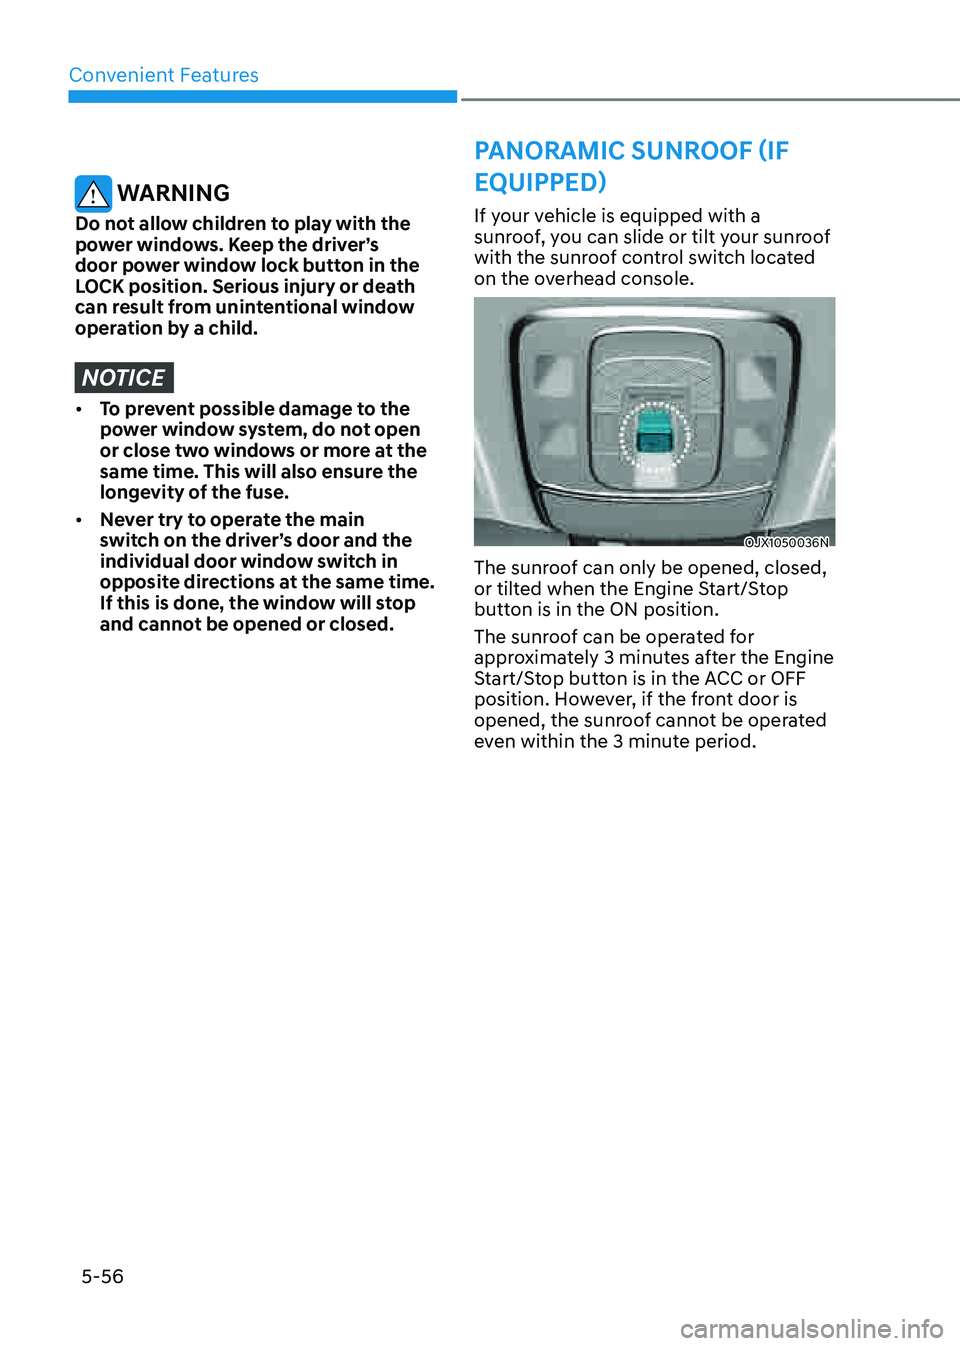
If your vehicle is equipped with a
sunroof, you can slide or tilt your sunroof
with the sunroof control switch located
on the overhead console.
OJX1050036NOJX1050036N
The sunroof can only be opened, closed,
or tilted when the Engine Start/Stop
button is in the ON position.
The sunroof can be operated for
approximately 3 minutes after the Engine
Start/Stop button is in the ACC or OFF
position. However, if the front door is
opened, the sunroof cannot be operated
even within the 3 minute period.
WARNING
Do not allow children to play with the
power windows. Keep the driver’s
door power window lock button in the
LOCK position. Serious injury or death
can result from unintentional window
operation by a child.
NOTICE
• To prevent possible damage to the
power window system, do not open
or close two windows or more at the
same time. This will also ensure the
longevity of the fuse.
• Never try to operate the main
switch on the driver’s door and the
individual door window switch in
opposite directions at the same time.
If this is done, the window will stop
and cannot be opened or closed.
PANORAMIC SUNROOF (IF
EQUIPPED)
Page 203 of 632
05
5-61
6. Within 3 seconds, push and hold
the control lever forward until the
sunshade and sunroof operates as
follows:
Sunshade Open → Glass Tilt Open →
Glass Slide Open → Glass Slide Close →
Sunshade Close
Do not release the lever until the
operation is completed.
If you release the control lever during
operation, start the procedure again from
step 2.
7. Release the sunroof control lever after
all steps have completed. The sunroof
system has been reset.
Information
If the sunroof is not reset when the vehicle
battery is disconnected or discharged, or
the sunroof fuse is blown, the sunroof may
not operate normally.
For more detailed information, contact
an authorized retailer of Genesis Branded
products.
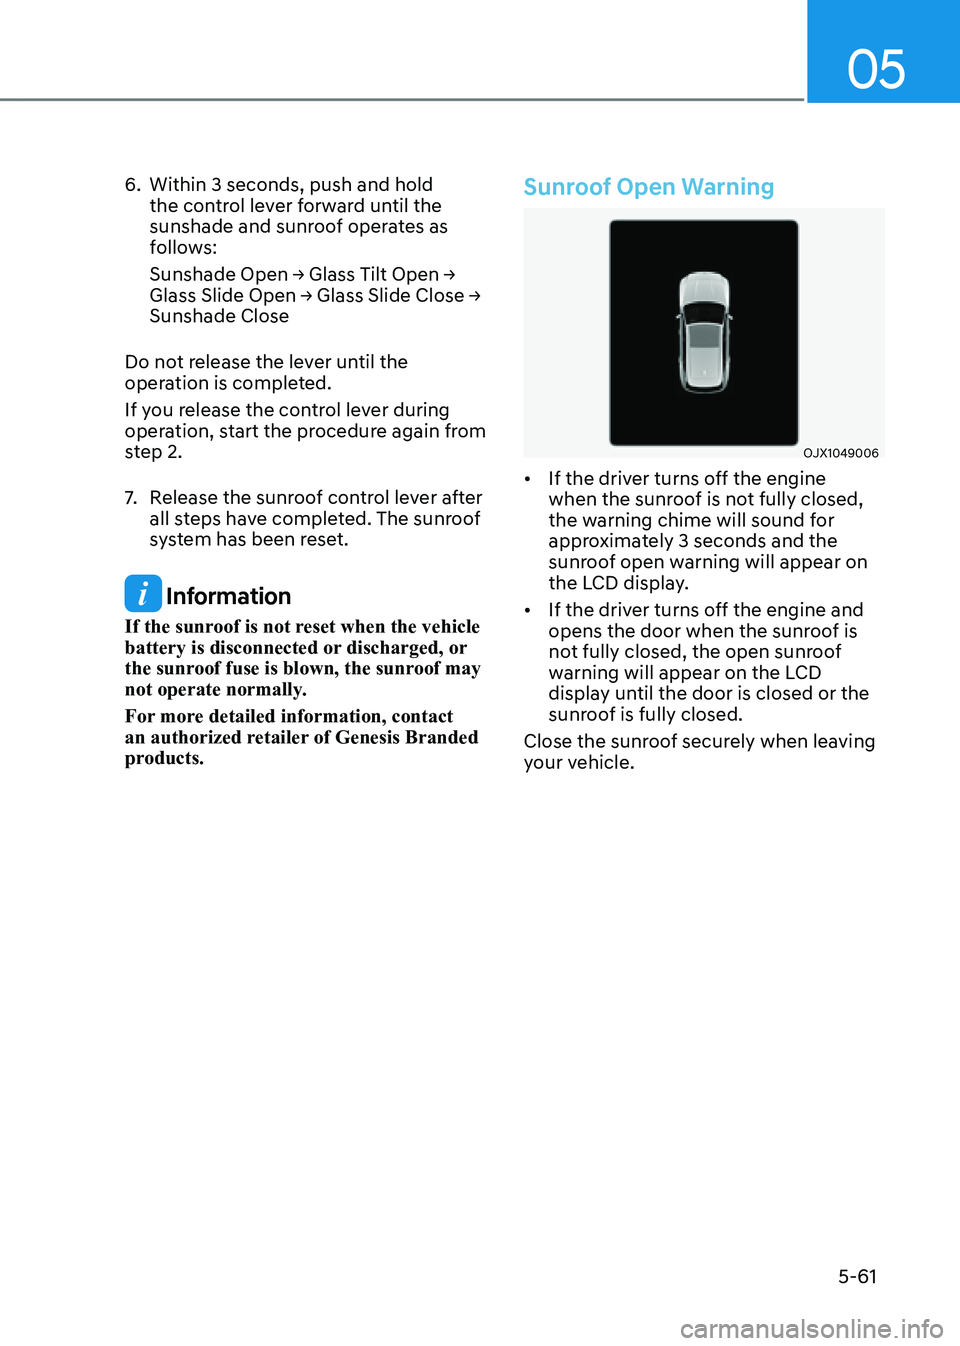
Sunroof Open Warning
OJX1049006 OJX1049006
• If the driver turns off the engine
when the sunroof is not fully closed,
the warning chime will sound for
approximately 3 seconds and the
sunroof open warning will appear on
the LCD display.
• If the driver turns off the engine and
opens the door when the sunroof is
not fully closed, the open sunroof
warning will appear on the LCD
display until the door is closed or the
sunroof is fully closed.
Close the sunroof securely when leaving
your vehicle.
Page 205 of 632
05
5-63
Power Liftgate
The power liftgate open/close button
automatically opens and closes the
liftgate.
Before using the power liftgate
The power liftgate operates when the
gear is in P (Park) with the Engine Start/
Stop button in the ON position. However,
the liftgate will operate regardless of the
gear position when the engine is off.
For safety, before attempting to open or
close the liftgate, make sure the vehicle
is in P (Park).
WARNING
• Never leave children unattended
in your vehicle. Children might
operate the power liftgate. Doing so
could result in injury to themselves
or others, and could damage the
vehicle.
• Make sure there are no people or
objects around the liftgate before
operating the power liftgate. Wait
until the liftgate is opened fully and
stopped before loading or unloading
cargo or passengers from the
vehicle.
NOTICE
Do not close or open the power
liftgate manually. This may cause
damage to the power liftgate. If it is
necessary to close or open the power
liftgate manually when the battery is
discharged or disconnected, do not
apply excessive force.
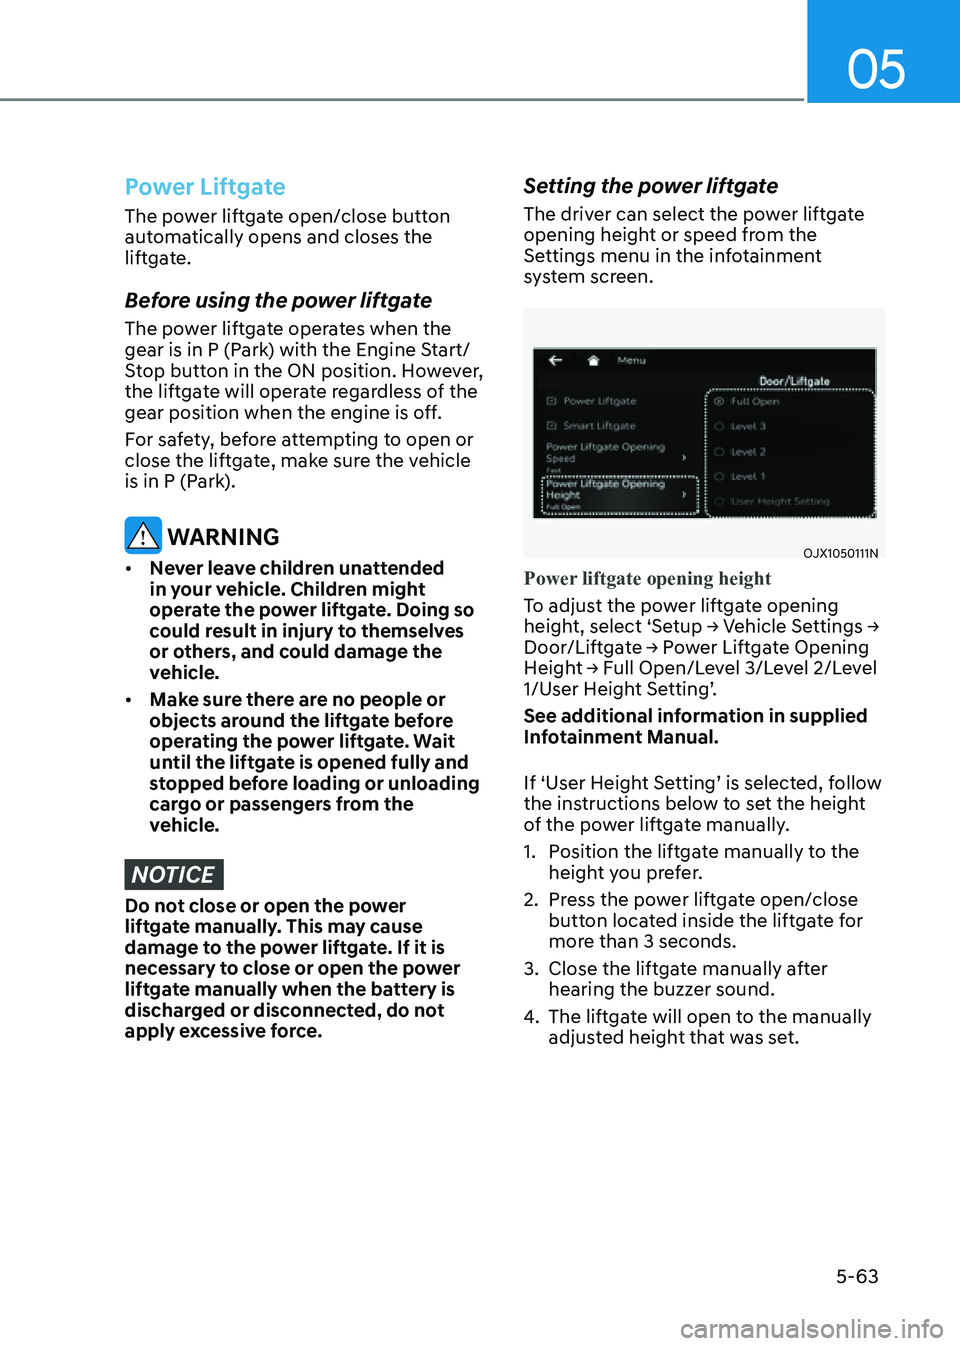
Setting the power liftgate
The driver can select the power liftgate
opening height or speed from the
Settings menu in the infotainment
system screen.
OJX1050111NOJX1050111N
Power liftgate opening height
To adjust the power liftgate opening
height, select ‘Setup → Vehicle Settings →
Door/Liftgate → Power Liftgate Opening
Height → Full Open/Level 3/Level 2/Level
1/User Height Setting’.
See additional information in supplied
Infotainment Manual.
If ‘User Height Setting’ is selected, follow
the instructions below to set the height
of the power liftgate manually.
1. Position the liftgate manually to the
height you prefer.
2. Press the power liftgate open/close
button located inside the liftgate for
more than 3 seconds.
3. Close the liftgate manually after
hearing the buzzer sound.
4. The liftgate will open to the manually
adjusted height that was set.
Page 206 of 632

Convenient Features
5-64
OJX1050233NOJX1050233N
Power liftgate opening speed
To adjust the power liftgate opening
speed, select ‘Setup → Vehicle Settings →
Door/Liftgate → Power Liftgate Opening
Speed → Fast/Slow’.
See additional information in supplied
Infotainment Manual.
Opening and closing the power
liftgate
�
Page 211 of 632

05
5-69
Smart Liftgate
OJX1059050LOJX1059050L
On a vehicle equipped with a smart key,
the liftgate can be opened with hands-
free activation using the smart liftgate
system.
Using smart liftgate
The hands-free smart liftgate system
can be opened automatically when the
following conditions are met:
• The smart liftgate option is enabled in
the Settings menu in the infotainment
system screen.
• The smart liftgate is activated and
ready 15 seconds after all the doors
are closed and locked.
• The smart liftgate will open when
the smart key is detected in the area
behind the vehicle for 3 seconds.
Information
The smart liftgate will NOT operate when:
• A door is not locked or closed.
• The smart key is detected within 15 seconds from when the doors were closed and locked.
• The smart key is detected within 15 seconds after the doors are closed and locked, and within 60 in. (1.5 m) from the front door handles (for
vehicles equipped with Welcome Light).
• The smart key is in the vehicle.
1. Settings
To use smart liftgate, it must be
enabled from the Settings menu in the
infotainment system screen. Select:
-Setup → Vehicle Settings → Door/
Liftgate → Smart Liftgate
See additional information in
supplied Infotainment Manual.
2. Detect and Alert
The smart liftgate detecting area
extends approximately 20-40 in. (50-100 cm) behind the vehicle. If you are positioned in the detecting area and
are carrying the smart key, the hazard
warning lights will blink and the chime
will sound to alert you that the smart
liftgate will open.
Page 213 of 632
05
5-71
• The alert stops once the smart key is
moved outside of the detecting area
within the 3 second period.
Information
• Smart liftgate may not operate
properly if any of the following occur:
-The smart key is close to a radio
transmitter such as a radio station or
an airport which can interfere with
normal operation of the transmitter.
-The smart key is near a mobile two
way radio system or a mobile phone.
-Another vehicle’s smart key is being
operated close to your vehicle.
• Smart liftgate detecting area may
change when:
-The vehicle is parked on an incline
or slope.
-One side of the vehicle is raised or
lowered relative to the opposite side.
Fuel Filler Door
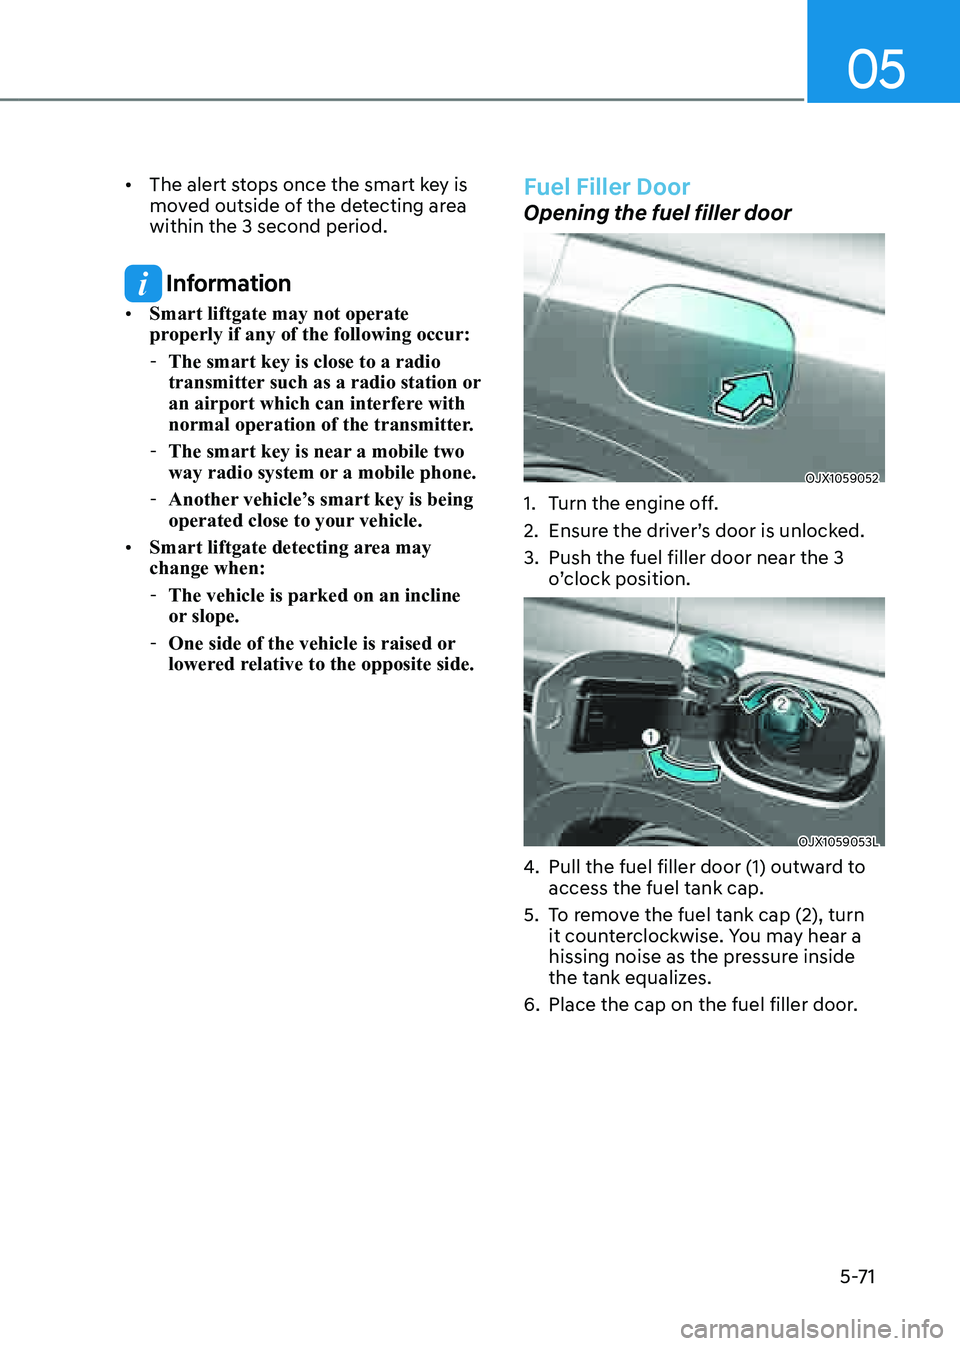
Opening the fuel filler door
OJX1059052OJX1059052
1. Turn the engine off.
2. Ensure the driver’s door is unlocked.
3. Push the fuel filler door near the 3
o’clock position.
OJX1059053LOJX1059053L
4. Pull the fuel filler door (1) outward to
access the fuel tank cap.
5. To remove the fuel tank cap (2), turn
it counterclockwise. You may hear a
hissing noise as the pressure inside
the tank equalizes.
6. Place the cap on the fuel filler door.
Page 214 of 632
Convenient Features
5-72
Information
If the fuel filler door does not open
because ice has formed around it, tap
lightly or push on the door to break the
ice and release the door. Do not pry on the
door. If necessary, spray around the door
with an approved deicer fluid (do not use
radiator antifreeze) or move the vehicle to
a warm place and allow the ice to melt.
Closing the fuel filler door
1. To install the fuel tank cap, turn it
clockwise until it “clicks” one time.
2. Close the fuel filler door until it is
latched securely.
Information
The fuel filler door will not close if the
driver’s door is locked. If you lock the
driver’s door while fueling, unlock it
before closing the fuel filler door.
WARNING
Gasoline is highly flammable and
explosive. Failure to follow these
guidelines may result in SERIOUS
INJURY or DEATH:
• Read and follow all warnings posted
at the gas station.
• Before refueling, note the location of
the Emergency Gasoline Shut-Off, if
available, at the gas station.
• Before touching the fuel nozzle, you
should eliminate the potential build-
up of static electricity by touching
a metal part of the vehicle, a safe
distance away from the fuel filler
neck, nozzle, or other gas source,
with your bare hand.
• Do not use mobile phones while
refueling. Electric current and/or
electronic interference from cellular
phones can potentially ignite fuel
vapors and cause a fire.
• Do not go back into the vehicle
once you have begun refueling.
You can generate a buildup of
static electricity by touching,
rubbing or sliding against any item
or fabric capable of producing
static electricity. Static electricity
discharge can ignite fuel vapors
causing a fire. If you must re-enter
the vehicle, you should once again
eliminate potentially dangerous
static electricity discharge by
touching a metal part of the vehicle,
away from the fuel filler neck, nozzle
or other gasoline source, with your
bare hand.
Page 220 of 632
Convenient Features
5-78
Turn signals and lane change signals
OJX1059065OJX1059065
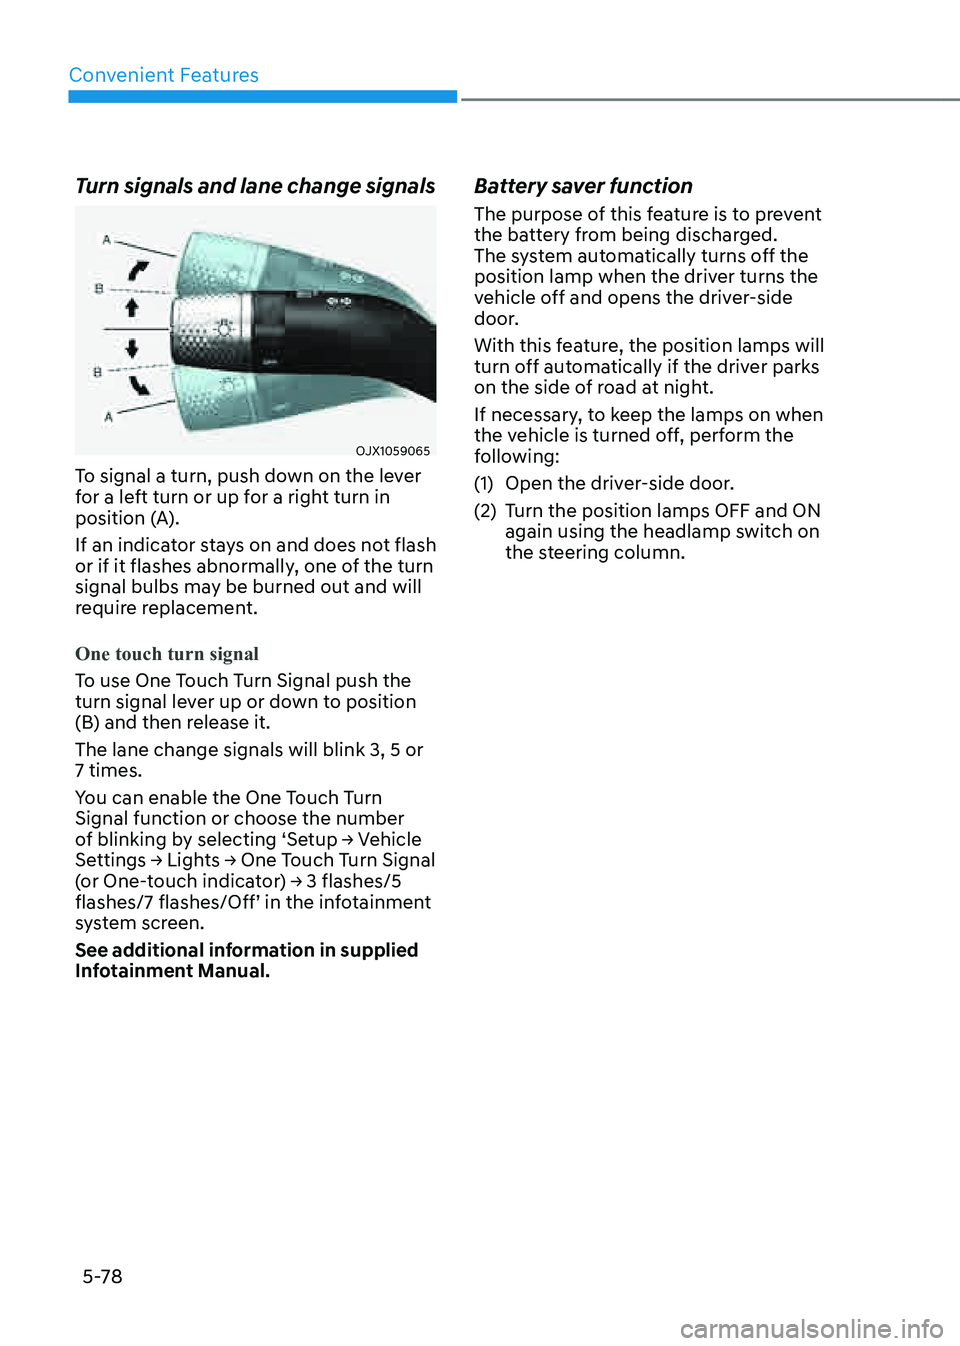
To signal a turn, push down on the lever
for a left turn or up for a right turn in
position (A).
If an indicator stays on and does not flash
or if it flashes abnormally, one of the turn
signal bulbs may be burned out and will
require replacement.
One touch turn signal
To use One Touch Turn Signal push the
turn signal lever up or down to position
(B) and then release it.
The lane change signals will blink 3, 5 or
7 times.
You can enable the One Touch Turn
Signal function or choose the number
of blinking by selecting ‘Setup → Vehicle
Settings → Lights → One Touch Turn Signal
(or One-touch indicator) → 3 flashes/5
flashes/7 flashes/Off’ in the infotainment
system screen.
See additional information in supplied
Infotainment Manual.
Battery saver function
The purpose of this feature is to prevent
the battery from being discharged.
The system automatically turns off the
position lamp when the driver turns the
vehicle off and opens the driver-side
door.
With this feature, the position lamps will
turn off automatically if the driver parks
on the side of road at night.
If necessary, to keep the lamps on when
the vehicle is turned off, perform the
following:
(1) Open the driver-side door.
(2) Turn the position lamps OFF and ON
again using the headlamp switch on
the steering column.
Page 221 of 632
05
5-79
Headlamp delay function
If the Engine Start/Stop button is in the
ACC position or the OFF position with
the headlamps ON, the headlamps (and/
or position lamps) remain on for about
5 minutes. However, if the driver’s door
is opened and closed, the headlamps
are turned off after 15 seconds. Also,
with the vehicle off if the driver’s door is
opened and closed, the headlamps (and/
or position lamps) are turned off after 15
seconds.
The headlamps (and/or position lamps)
can be turned off by pressing the lock
button on the smart key twice or turning
the headlamp switch to the OFF or AUTO
position.
You can enable the headlamp delay
function by selecting ‘Setup → Vehicle
Settings → Lights → Headlight Delay (or
Headlight time-out)’ in the infotainment
system screen.
See additional information in supplied
Infotainment Manual.
NOTICE
If the driver exits the vehicle through
another door besides the driver
door, the battery saver function
does not operate and the headlamp
delay function does not turn OFF
automatically.
This may cause the battery to
discharge. To avoid battery discharge,
turn OFF the headlamps manually from
the headlamp switch before exiting the
vehicle.
Headlamp moisture removal
function
Moisture may temporarily build up inside
of the headlamp when the headlamps
are on; the fan inside the headlamp will
begin to circulate air inside to remove
the moisture. If moisture is not removed,
have the vehicle inspected by an
authorized retailer of Genesis Branded
products.
Interior Lights
WARNING
Do not use the interior lights when
driving in the dark. The interior lights
may obscure your view and cause an
accident.
NOTICE
Do not use the interior lights for
extended periods when the vehicle is
turned off or the battery will discharge.
Interior lamp AUTO cut
The interior lamps will automatically go
off approximately 20 minutes after the
vehicle is turned off and the doors are
closed. If a door is opened, the lamp
will go off 25 minutes after the vehicle
is turned off. If the doors are locked by
the smart key and the vehicle enters the
armed stage of the theft alarm system,
the lamps will go off five seconds later.
Page 222 of 632

Convenient Features
5-80
Front lamps
OJX1050201NOJX1050201N
Front map lamp ():
Touch either icons to turn the map lamp
on or off. This light produces a spot
beam for convenient use as a map lamp
at night or as a personal lamp for the
driver and the front passenger.
Door lamp (
):
The front or rear room lamps come on
when the front or rear doors are opened.
When doors are unlocked by the smart
key, the front and rear lamps come on
for approximately 30 seconds as long as
any door is not opened. The front and
rear room lamps go out gradually after
approximately 30 seconds when the
door is closed. However, if the Engine
Start/Stop button is in the ON position
or all doors are locked, the front and rear
lamps will turn off. If a door is opened
with the Engine Start/Stop button in
the ACC position or the OFF position,
the front and rear lamps will stay on for
about 5 minutes.
Room lamp (
)
Press the button to turn ON the room
lamp for the front/rear seats.
Rear lamps
�