Automatic turn signal GENESIS GV80 2021 Owner's Manual
[x] Cancel search | Manufacturer: GENESIS, Model Year: 2021, Model line: GV80, Model: GENESIS GV80 2021Pages: 632, PDF Size: 9.37 MB
Page 126 of 632
04
4-21
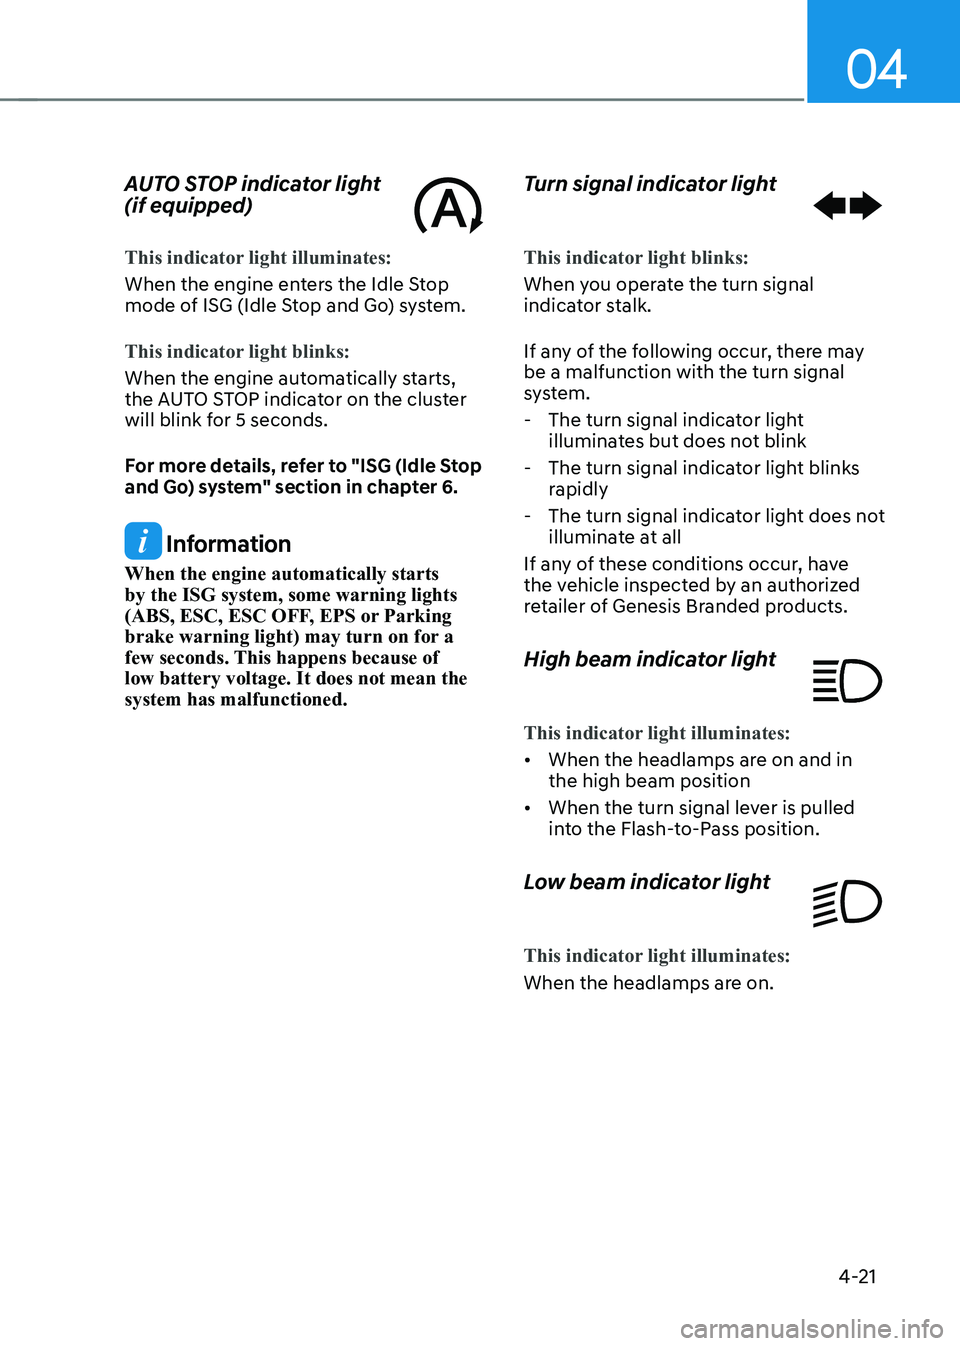
AUTO STOP indicator light
(if equipped)
This indicator light illuminates:
When the engine enters the Idle Stop
mode of ISG (Idle Stop and Go) system.
This indicator light blinks:
When the engine automatically starts,
the AUTO STOP indicator on the cluster
will blink for 5 seconds.
For more details, refer to "ISG (Idle Stop
and Go) system" section in chapter 6.
Information
When the engine automatically starts
by the ISG system, some warning lights
(ABS, ESC, ESC OFF, EPS or Parking
brake warning light) may turn on for a
few seconds. This happens because of
low battery voltage. It does not mean the
system has malfunctioned.
Turn signal indicator light
This indicator light blinks:
When you operate the turn signal
indicator stalk.
If any of the following occur, there may
be a malfunction with the turn signal
system.
-The turn signal indicator light
illuminates but does not blink
-The turn signal indicator light blinks
rapidly
-The turn signal indicator light does not
illuminate at all
If any of these conditions occur, have
the vehicle inspected by an authorized
retailer of Genesis Branded products.
High beam indicator light
This indicator light illuminates:
• When the headlamps are on and in
the high beam position
• When the turn signal lever is pulled
into the Flash-to-Pass position.
Low beam indicator light
This indicator light illuminates:
When the headlamps are on.
Page 188 of 632
Convenient Features
5-46
7. Return to the vehicle and firmly press,
hold for two seconds and release the
HomeLink button up to three times.
Do not press the HomeLink button
rapidly. At this point programming
is complete and your device should
operate when the HomeLink button is
pressed and released.
Information
• Some garage door openers require to
press the programmed button on the
mirror up to three times right after
the programming is just completed to
operate the garage door.
• The indicator (4) is turned ON in
Orange and flashes for about 60
seconds, during the programing mode
and if a programing is not succeeded
within the 60 seconds, the programing
mode will be abort.
HomeLink® should now activate your
rolling code equipped device. Gate operator & Canadian programming
During programming, your handheld
transmitter may automatically stop
transmitting. Continue to press the
Integrated HomeLink® Wireless Control
System button while you press and re-
press (“cycle”) your handheld transmitter
every two seconds until the frequency
signal has been learned. The indicator
light will flash slowly and then rapidly
after several seconds upon successful
training.
ORG3050209NORG3050209N
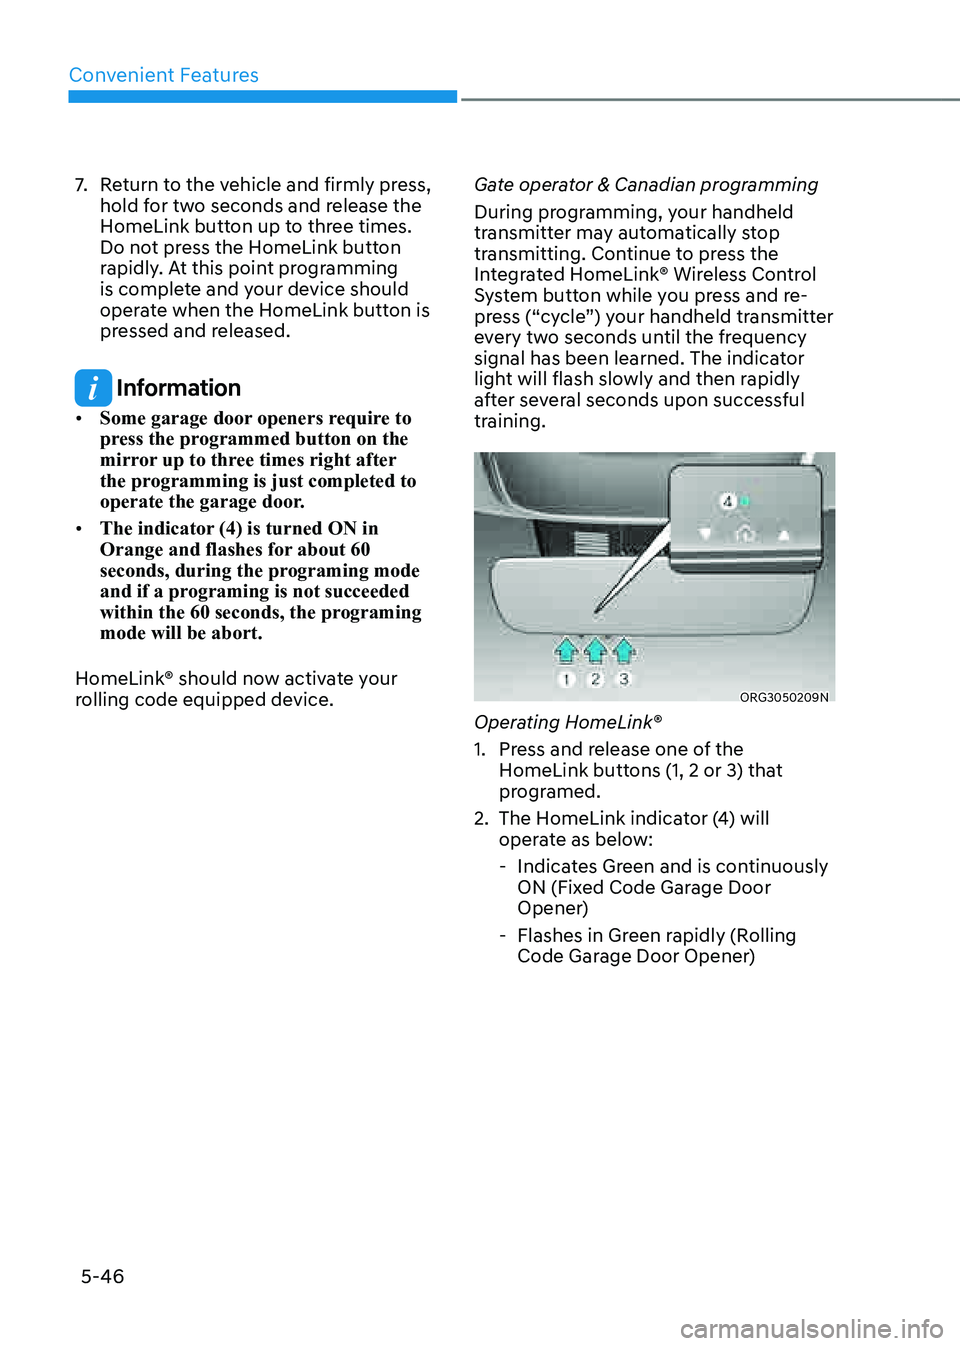
Operating HomeLink®
1. Press and release one of the
HomeLink buttons (1, 2 or 3) that
programed.
2. The HomeLink indicator (4) will
operate as below:
-
Indicates Green and is continuously
ON (Fixed Code Garage Door
Opener)
-Flashes in Green rapidly (Rolling
Code Garage Door Opener)
Page 220 of 632
Convenient Features
5-78
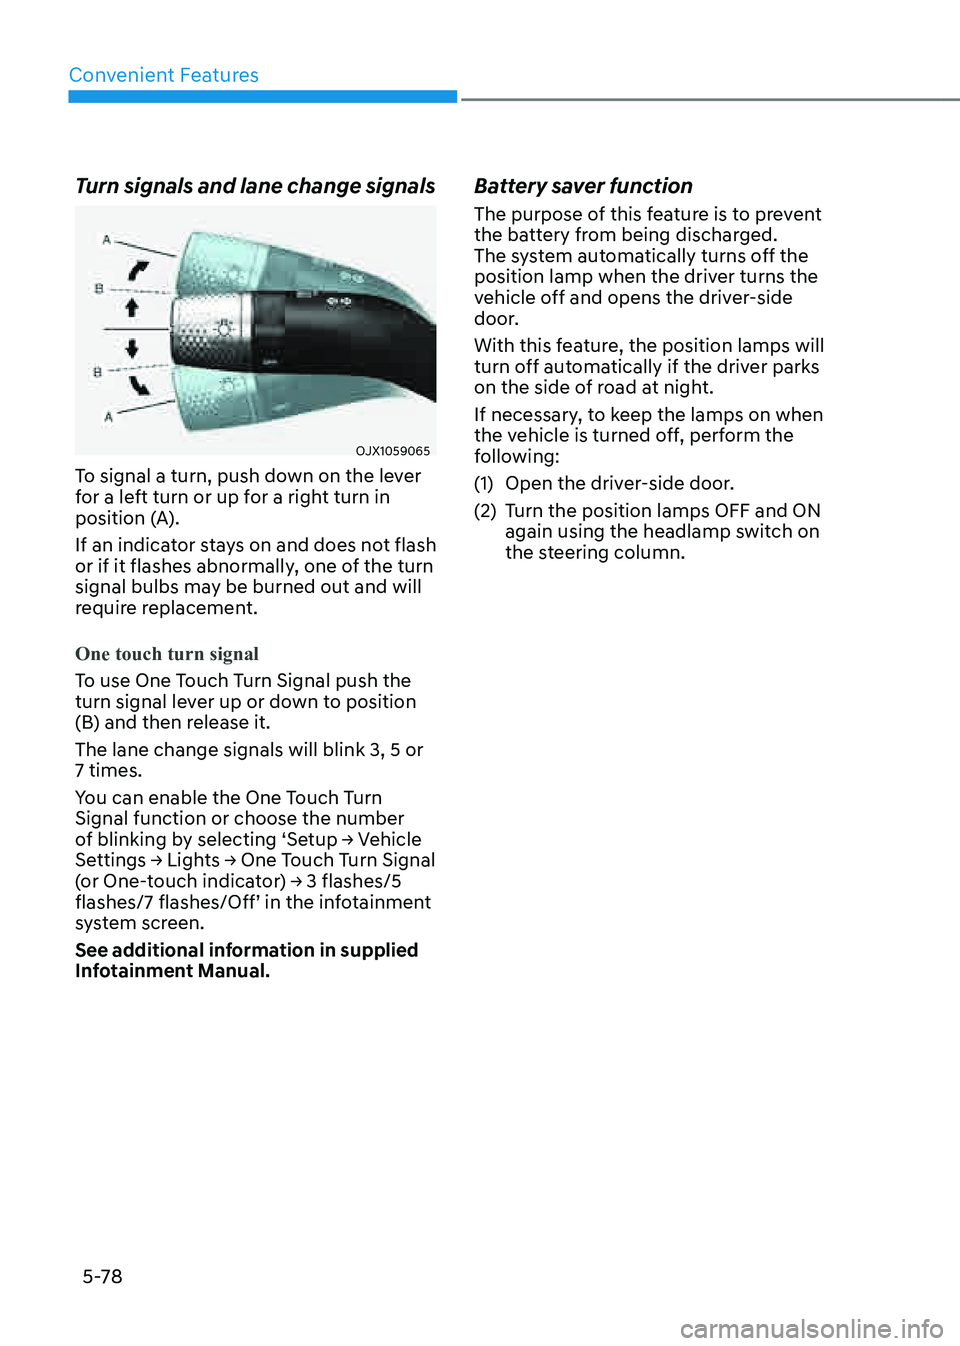
Turn signals and lane change signals
OJX1059065OJX1059065
To signal a turn, push down on the lever
for a left turn or up for a right turn in
position (A).
If an indicator stays on and does not flash
or if it flashes abnormally, one of the turn
signal bulbs may be burned out and will
require replacement.
One touch turn signal
To use One Touch Turn Signal push the
turn signal lever up or down to position
(B) and then release it.
The lane change signals will blink 3, 5 or
7 times.
You can enable the One Touch Turn
Signal function or choose the number
of blinking by selecting ‘Setup → Vehicle
Settings → Lights → One Touch Turn Signal
(or One-touch indicator) → 3 flashes/5
flashes/7 flashes/Off’ in the infotainment
system screen.
See additional information in supplied
Infotainment Manual.
Battery saver function
The purpose of this feature is to prevent
the battery from being discharged.
The system automatically turns off the
position lamp when the driver turns the
vehicle off and opens the driver-side
door.
With this feature, the position lamps will
turn off automatically if the driver parks
on the side of road at night.
If necessary, to keep the lamps on when
the vehicle is turned off, perform the
following:
(1) Open the driver-side door.
(2) Turn the position lamps OFF and ON
again using the headlamp switch on
the steering column.
Page 251 of 632
05
5-109
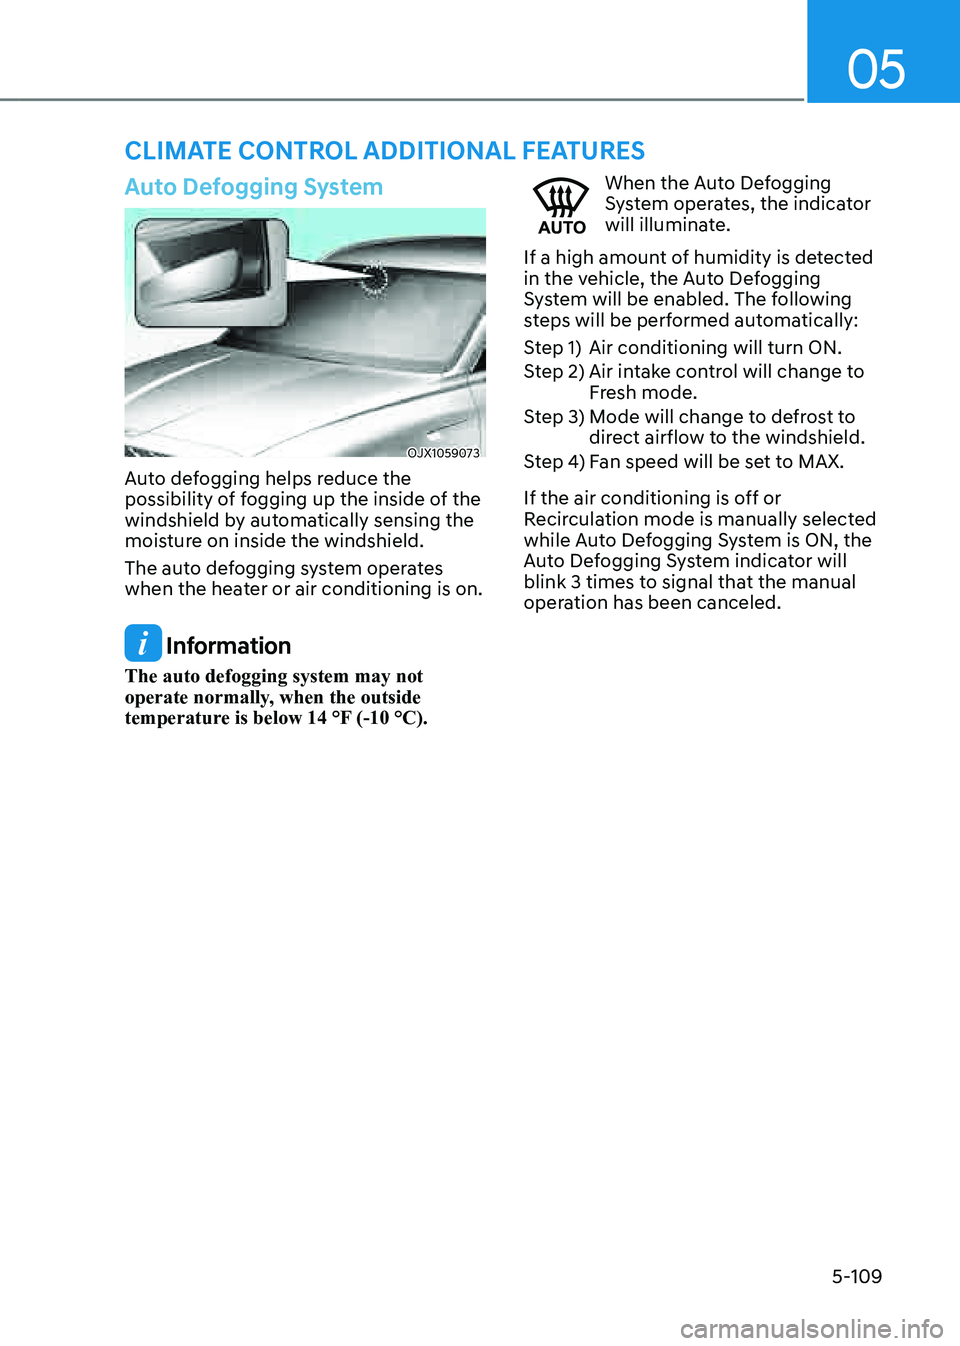
Auto Defogging System
OJX1059073OJX1059073
Auto defogging helps reduce the
possibility of fogging up the inside of the
windshield by automatically sensing the
moisture on inside the windshield.
The auto defogging system operates
when the heater or air conditioning is on.
Information
The auto defogging system may not
operate normally, when the outside
temperature is below 14 °F (-10 °C).
When the Auto Defogging System operates, the indicator
will illuminate.
If a high amount of humidity is detected
in the vehicle, the Auto Defogging
System will be enabled. The following
steps will be performed automatically:
Step 1) Air conditioning will turn ON.
Step 2) Air intake control will change to
Fresh mode.
Step 3) Mode will change to defrost to
direct airflow to the windshield.
Step 4) Fan speed will be set to MAX.
If the air conditioning is off or
Recirculation mode is manually selected
while Auto Defogging System is ON, the
Auto Defogging System indicator will
blink 3 times to signal that the manual
operation has been canceled.
CLIMATE CONTROL ADDITIONAL FEATURES
Page 252 of 632
Convenient Features
5-110
Turning the Auto Defogging System
ON or OFF
Climate control system
Press the front windshield defroster
button for 3 seconds when the Engine
Start/Stop button is in the ON position.
When the Auto Defogging System is
turned off, the ADS OFF symbol will blink
3 times and ADS OFF will be displayed on
the climate control information screen.
When the Auto Defogging System is
turned on, the ADS OFF symbol will blink
6 times without a signal.
Infotainment system
Auto Defogging System can be turned
on and off by selecting ‘Setup →
Vehicle Settings → Climate → Defog/
Defrost Options → Auto Defog’ from the
infotainment system screen.
See additional information in supplied
Infotainment Manual.
Information
• When the air conditioning is turned
on by Auto Defogging System, if you
try to turn off the air conditioning, the
indicator will blink 3 times and the air
conditioning will not be turned off.
• To maintain the effectiveness and
efficiency of the Auto Defogging
System, do not select Recirculation
mode while the system is operating.
• When Auto Defogging System is
operating, fan speed adjustment,
temperature adjustment, and air intake
control selection are all disabled.
NOTICE
Do not remove the sensor cover located
on the upper end of the windshield
glass.
Damage to system parts could occur
and may not be covered by your vehicle
warranty.
Auto Dehumidify (if equipped)
To increase cabin air quality and help
reduce windshield misting, Recirculation
mode switches off automatically after
about 5 to 30 minutes, depending on the
outside temperature, and the air intake
will change to Fresh mode.
Turning Auto Dehumidify ON or OFF
Climate control system
To turn the Auto Dehumidify feature
on or off, select Face level (
) mode
and press the air intake control ()
button at least five times within three
seconds. When Auto Dehumidify is
turned on, the air intake control button
indicator will blink 6 times. When turned
off, the indicator will blink 3 times.
Infotainment system
Auto Dehumidify can be turned on and
off by selecting ‘Setup → Vehicle Settings
→ Climate → Automatic Ventilation →
Auto Dehumidify’ from the infotainment
system screen.
See additional information in supplied
Infotainment Manual.
Page 325 of 632

06
6-53
Coasting Release Conditions
The Coasting function will be
automatically released when the
following conditions are met.
• Comfort or Sport is selected for
driving mode
• The driver uses the paddle shifter
• Smart Cruise Control is activated (Set
speed appears on the cluster)
• The vehicle’s speed exceeds 30~100 mph (50~160 km/h) range
• The road gradient is under -5% or over
+5%
• If the distance between the vehicle
ahead is too close or the relative
speed changes momentarily in Smart
mode
• If lane change is predicated in Smart
mode (e.g. the turn signal is turned
ON or a LKA warning appears due to
steering wheel control, etc.)
Information
It is recommended to turn off the
Coasting function if you are driving under
frequently stop-and-go condition. Change
the drive mode to Comfort or Sport or
deselect Coasting from the infotainment
system screen.
NOTICE
• If the accelerator pedal is pressed
quickly for accelerating with the
Coasting function in operation,
acceleration may occur after the
engagement of the clutch inside the
transmission. In turn, the driver may
continue to feel acceleration even
after the system is turned off.
• Driving with the Coasting function
off may be required in some cases
since the engine brake is not applied
while the Coasting function is
operating.
• Operating the infotainment system
screen to activate or deactivate
the Coasting function while driving
may be dangerous as the driver’s
attention is distracted.
Page 340 of 632
Driving Your Vehicle
6-68
Backing up
Hold the bottom of the steering wheel
with one hand. Then, to move the trailer
to the left, move your hand to the left. To
move the trailer to the right, move your
hand to the right. Always back up slowly
and, if possible, have someone guide
you.
Making turns
When you’re turning with a trailer, make
wider turns than normal. Do this so your
trailer won’t strike soft shoulders, curbs,
road signs, trees, or other objects. Avoid
jerky or sudden maneuvers. Signal well in
advance.
Turn signals
When you tow a trailer, your vehicle has
to have a different turn signal flasher and
extra wiring. The green arrows on your
instrument panel will flash whenever you
signal a turn or lane change. Properly
connected, the trailer lights will also flash
to alert other drivers you’re about to turn,
change lanes, or stop.
When towing a trailer, the green arrows
on your instrument panel will flash for
turns even if the bulbs on the trailer
are burned out. Thus, you may think
drivers behind you are seeing your
signals when, in fact, they are not. It’s
important to check frequently to be sure
the trailer bulbs are still working. You
must also check the lights every time
you disconnect and then reconnect the
wires.
WARNING
Do not connect a trailer lighting system
directly to your vehicle’s lighting
system. Use an approved trailer wiring
harness. Failure to do so could result in
damage to the vehicle electrical system
and/or personal injury. Consult an
authorized retailer of Genesis Branded
products for assistance.
Driving on hills
Reduce speed and shift to a lower gear
before you start down a long or steep
downgrade. If you don’t shift to a lower
gear, you may have to use your brakes
excessively and they would overheat and
may not operate efficiently.
On a long uphill grade, shift to a lower
gear and reduce your speed to around
45 mph (70 km/h) to reduce the possibility of engine and transmission
overheating.
If your trailer weighs more than the
maximum trailer weight without trailer
brakes and you have an automatic
transmission, you should drive in D
(Drive) when towing a trailer.
Operating your vehicle in D (Drive)
when towing a trailer will minimize heat
build-up and extend the life of your
transmission.
Page 374 of 632

Driver Assistance System
7-26
Lane Keeping Assist is designed to help
detect lane markings while driving
over a certain speed. The system will
warn the driver if the vehicle leaves
the lane without using the turn signal,
or will automatically assist the driver’s
steering to help prevent the vehicle from
departing the lane.
Detecting sensor
OJX1079178OJX1079178[1]: Front view camera
The front view camera is used as
a detecting sensor to detect lane
markings.
Refer to the picture above for the
detailed location of the detecting sensor.
CAUTION
For more details on the precautions
of the front view camera, refer to
“Forward Collision-Avoidance Assist
(FCA)” section in chapter 7.
System Settings
Setting functions for the system
OJX1070143NOJX1070143N
Lane Safety
With the Engine Start/Stop button in the
ON position, select or deselect ‘Driver
Assistance → Lane Safety’ from the
Settings menu to set whether or not to
use each function.
-If ‘Assist’ is selected, the system
will automatically assist the driver’s
steering when lane departure is
detected to help prevent the vehicle
from moving out of its lane. The
indicator light will turn on in the
cluster.
- If 'Warning Only' is selected, the
system will warn the driver with an
audible warning and steering wheel
vibration when lane departure is
detected. The driver must steer the
vehicle. The
indicator light will
turn on in the cluster.
- If ‘Off’ is selected, the system will turn
off. The indicator light will turn
off in the cluster.
WARNING
• If 'Warning Only' is selected, steering
is not assisted.
• Lane Keeping Assist does not control
the steering wheel when the vehicle
is driven in the middle of the lane.
• The driver should always be aware
of the surroundings and steer the
vehicle if ‘Off’ is selected.
LANE KEEPING ASSIST (LKA)
Page 453 of 632

07
7-105
Information
• While Lane Change Assist function
is turned on (indicator on), Lane
Following Assist will not cancel even
if the turn signal indicator or hazard
warning flasher is operating.
• Lane Change Assist function turns
off automatically when driven in the
following road conditions:
-One driving lane
-A road with a intersection or
crosswalk ahead
-A road with no structure, such as a
medium strip, guardrails, etc.
-There is a pedestrian or cyclist on the
road ahead
• When the function is in the ready state,
and vehicle speed is below 35 mph
(55 km/h), the function will change to
the standby state.
WARNING
When Highway Lane Change Assist
function turns off while operating,
steering assist will be temporarily
canceled. Always be cautious while
driving.
Function operating
�
Page 547 of 632
Maintenance
9-6
Owner Maintenance Schedule
When you stop for fuel:
• Check the engine oil level.
• Check the coolant level in the engine
coolant reservoir or the liquid-cooled
intercooler coolant reservoir.
• Check the windshield liquid fluid level.
• Check for low or under-inflated tires.
WARNING
Be careful when checking your coolant
level when the engine is hot. This may
result in coolant being blown out of the
opening and cause serious burns and
other injuries.
While operating your vehicle:
• Note any changes in the sound of the
exhaust or any smell of exhaust fumes
in the vehicle.
• Check for vibrations in the steering
wheel. Notice if there is any increased
steering effort or looseness in the
steering wheel, or change in its
straight-ahead position.
• Notice if your vehicle constantly turns
slightly or “pulls” to one side when
traveling on smooth, level road.
• When stopping, listen and check for
unusual sounds, pulling to one side,
increased brake pedal travel or “hard-
to-push” brake pedal.
• If any slipping or changes in the
operation of your transmission occurs,
check the transmission fluid level.
• Check the automatic transmission P
(Park) function.
• Check the parking brake.
• Check for fluid leaks under your
vehicle (water dripping from the air
conditioning system during or after
use is normal).
At least monthly:
• Check coolant level in the engine
coolant reservoir.
• Check the operation of all exterior
lights, including the stoplights, turn
signals and hazard warning flashers.
• Check the inflation pressures of all
tires including the spare for tires that
are worn, show uneven wear, or are
damaged.
• Check for loose wheel lug nuts.
At least twice a year: (i.e., every
Spring and Autumn)
• Check radiator, heater and air
conditioning hoses for leaks or
damage.
• Check windshield washer spray and
wiper operation. Clean wiper blades
with a clean cloth dampened with
washer fluid.
• Check headlamp alignment.
• Check muffler, exhaust pipes, shields
and clamps.
• Check the seat belts for wear and
function.
At least once a year:
• Clean body and door drain holes.
• Lubricate door hinges and hood
hinges.
• Lubricate door and hood locks and
latches.
• Lubricate door rubber weather strips.
• Check the air conditioning system.
• Inspect and lubricate automatic
transmission linkage and controls.
• Clean the battery and terminals.
• Check the brake fluid level.