Service GENESIS GV80 2021 Owner's Manual
[x] Cancel search | Manufacturer: GENESIS, Model Year: 2021, Model line: GV80, Model: GENESIS GV80 2021Pages: 632, PDF Size: 9.37 MB
Page 4 of 632
IntroductionF4
Your Genesis Branded Vehicle may be equipped with technologies and services
that use information collected, generated, recorded or stored by the vehicle.
Genesis Branded Vehicle has created a Vehicle Owner Privacy Policy to explain
how these technologies and services collect use and share this information.
You may read our Vehicle Owner Privacy Policy on the GenesisMotorsUSA.com
website at:
http://www.genesismotorsusa.com/privacy-policy.html
If you would like to receive a hard copy of our Vehicle Owner Privacy Policy,
please contact our Genesis Customer Care at:
Genesis Customer Care
PO BOX 20650
Fountain Valley, CA 92728
844-340-9741
Genesis Customer Care representatives are available Monday through Friday,
between the hours of 5:00 AM and 7:00 PM PST and Saturday and Sunday
between 6:30 AM and 3:00 PM PST (English).
For Genesis Customer Care assistance in Spanish or Korean, representatives are
available Monday through Friday between 6:30 AM and 3:00 PM PST.
GENESIS BRANDED VEHICLE OWNER PRIVACY POLICY
Page 6 of 632
Introduction
1-2
INTRODUCTION
Congratulations, and thank you for choosing this Genesis Branded Vehicle. We are
pleased to welcome you to the growing number of discerning people who drive the
Genesis Branded Vehicle. We are very proud of the advanced engineering and high-
quality construction of each Genesis Branded Vehicle we build.
Your Owner’s Manual will introduce you to the features and operation of your new
Genesis Branded Vehicle. To become familiar with your new Genesis Branded Vehicle,
so that you can fully enjoy it, read this Owner’s Manual carefully before driving your
new vehicle.
This manual contains important safety information and instructions intended to
familiarize you with your vehicle’s controls and safety features so you can safely
operate your vehicle.
This manual also contains information on maintenance designed to enhance safe
operation of the vehicle. It is recommended that all service and maintenance on your
car be performed by an authorized retailer of Genesis Branded products. Retailers of
Genesis Branded products are prepared to provide high-quality service, maintenance
and any other assistance that may be required.
This Owner’s Manual should be considered a permanent part of your vehicle, and
should be kept in the vehicle so you can refer to it at any time. The manual should stay
with the vehicle if you sell it to provide the next owner with important operating, safety
and maintenance information.
GENESIS CUSTOMER CARE
CAUTION
Severe engine and transmission damage may result from the use of poor quality
fuels and lubricants that do not meet Genesis Branded Vehicle specifications. You
must always use high quality fuels and lubricants that meet the specifications listed
on Page 2-14 in the Vehicle Specifications section of the Owner’s Manual.
Copyright 2020 Genesis Customer Care. All rights reserved. No part of this publication
may be reproduced, stored in any retrieval system or transmitted in any form or by any
means without the prior written permission of Genesis Customer Care.
Page 68 of 632
03
3-39
WARNING
Pre-tensioner Seat Belts that
malfunction may not protect you
properly during an accident. Take the
following precautions:
• Always wear your seat belt and sit
properly in your seat.
• Do not use the seat belt if it is loose
or twisted. A loose or twisted seat
belt will not protect you properly in
an accident.
• Do not place anything near the
buckle. This may adversely affect
the buckle and cause it to function
improperly.
• Always replace your pre-tensioners
after activation or an accident. A
pre-tensioner seat belt system is
designed to activate only once.
• NEVER inspect, service, repair or
replace the pre-tensioners yourself.
This must be done by an authorized
retailer of Genesis Branded products.
• Do not hit the seat belt assemblies.
WARNING
Do not touch the pre-tensioner seat
belt assemblies for several minutes
after they have been activated. When
the pre-tensioner seat belt mechanism
deploys during a collision, the pre-
tensioner can become hot and can burn
you.
CAUTION
Body work on the front area of the
vehicle may damage the pre-tensioner
seat belt system. Therefore, have the
system serviced by an authorized
retailer of Genesis Branded products.
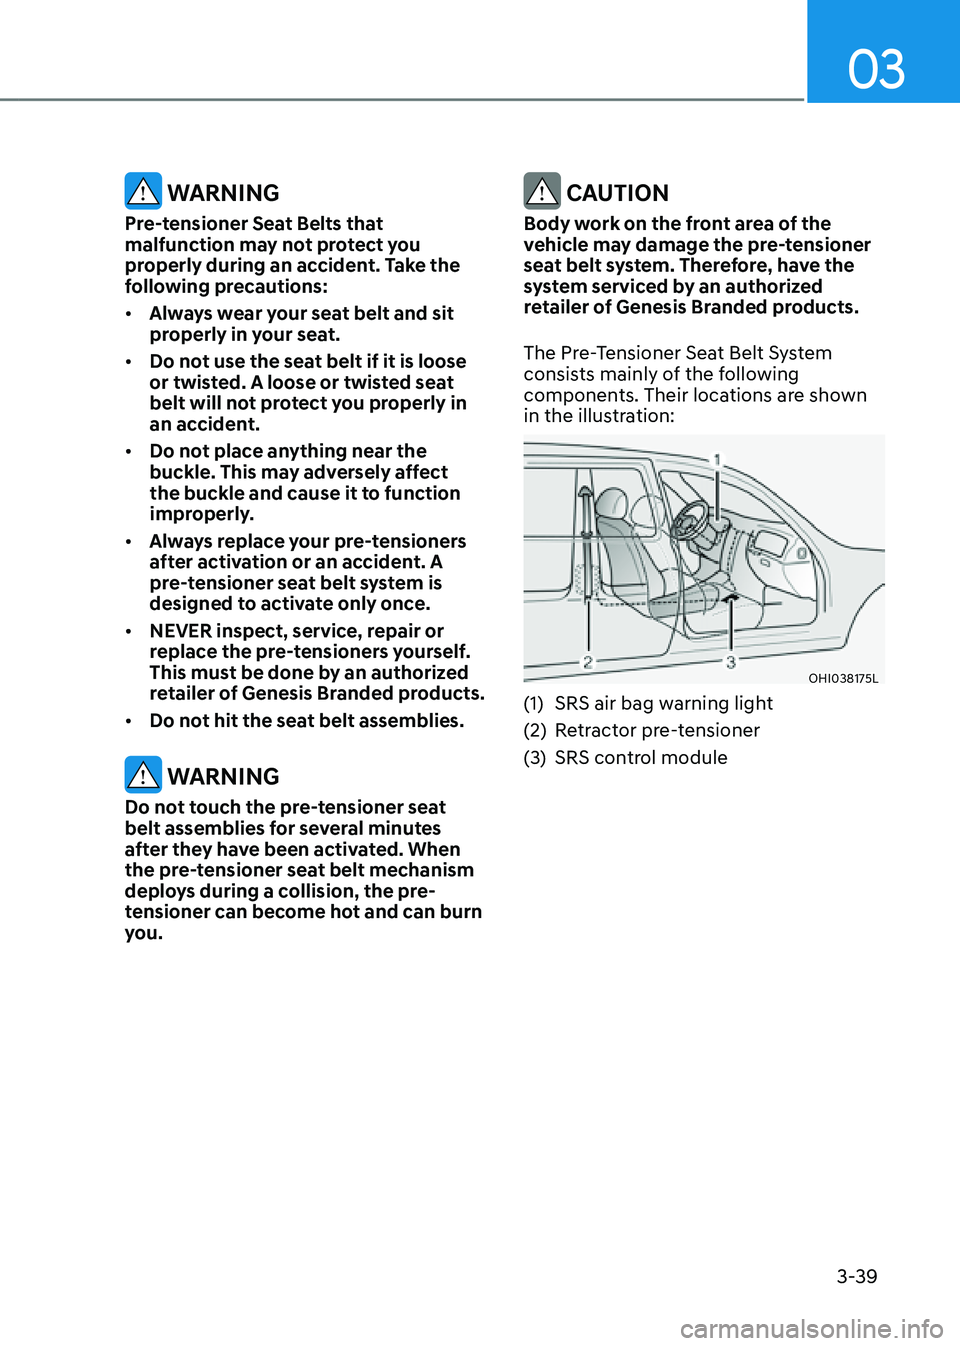
The Pre-Tensioner Seat Belt System
consists mainly of the following
components. Their locations are shown
in the illustration:
OHI038175LOHI038175L
(1) SRS air bag warning light
(2) Retractor pre-tensioner
(3) SRS control module
Page 87 of 632
Safety System
3-58
The side air bags and front center air bag
are designed to deploy during certain
side impact collisions, depending on the
crash severity.
The front center air bag, side and/or
curtain air bags and pre-tensioners on
both sides of the vehicle may deploy if a
rollover or possible rollover is detected.
The side air bags and front center air bag
are not designed to deploy in all side
impact or rollover situations.
WARNING
To reduce the risk of serious injury or
death from an inflating side air bag and
front center air bag, take the following
precautions:
• Seat belts must be worn at all times
to help keep occupants positioned
properly.
• Do not allow passengers to lean their
heads or bodies onto doors, put their
arms on the doors, stretch their arms
out of the window, or place objects
between the doors and seats.
• Hold the steering wheel at the 9
o’clock and 3 o’clock positions, to
minimize the risk of injuries to your
hands and arms.
• Do not use any accessory seat
covers. This could reduce or prevent
the effectiveness of the system.
• Do not hang other objects except
clothes. In an accident it may cause
vehicle damage or personal injury
especially when air bag is inflated.
• Do not place any objects over the
air bag or between the air bag and
yourself. Also, do not attach any
objects around the area the air bag
inflates such as the door, side door
glass, front and rear pillar.
• Do not place any objects between
the door and the seat. They may
become dangerous projectiles if the
side air bag inflates.
• Do not install any accessories on the
side or near the side air bags.
• Do not cause impact to the doors
when the Engine Start/Stop button
is in the ON or START position as this
may cause the side air bags to inflate.
• If the seat or seat cover is damaged,
have the system serviced by an
authorized retailer of Genesis
Branded products.
Page 104 of 632
03
3-75
SRS Care
The SRS is virtually maintenance-free
and there are no parts you can safely
service by yourself. If the SRS air bag
warning light does not illuminate when
the Engine Start/Stop button is in the
ON position, or continuously remains
on, we recommend that the system be
immediately inspected by an authorized
retailer of Genesis Branded products.
Any work on the SRS system, such as
removing, installing, repairing, or any
work on the steering wheel, the front
passenger’s panel, front seats and roof
rails be performed by an authorized
retailer of Genesis Branded products.
Improper handling of the SRS system
may result in serious personal injury. WARNING
To reduce the risk of serious injury or
death take the following precautions:
• Do not attempt to modify or
disconnect the SRS components or
wiring, including the addition of any
kind of badges to the pad covers or
modifications to the body structure.
• Do not place objects over or near
the air bag modules on the steering
wheel, instrument panel, and the
front passenger’s panel above the
glove box.
• Clean the air bag pad covers with
a soft cloth moistened with plain
water. Solvents or cleaners could
adversely affect the air bag covers
and proper deployment of the
system.
• Always have inflated air bags
replaced by an authorized retailer of
Genesis Branded products.
• If components of the air bag system
must be discarded, or if the vehicle
must be scrapped, certain safety
precautions must be observed.
Consult an authorized retailer of
Genesis Branded products for the
necessary information. Failure to
follow these precautions could
increase the risk of personal injury.
Page 108 of 632
4
4. Instrument Cluster
LCD Display ........................................................................\
..............................4-27LCD Display Control ........................................................................\
...........................4-27
View Modes ........................................................................\
........................................4-27
Driving Assist view ........................................................................\
...........................4-28
Turn By Turn (TBT) view ........................................................................\
...................4-28
Utility view ........................................................................\
........................................4-28
Additional information display ........................................................................\
........4-32
Option Menu ........................................................................\
.......................................4-32
Service messages ........................................................................\
............................4-33
3D cluster (for 12.3-inch 3D cluster) .......................................................................4-33
Head-up display ........................................................................\
...............................4-33
Driver Assistance settings ........................................................................\
...............4-33
Speed unit ........................................................................\
.......................................4-34
3D Instrument Cluster (for 12.3-Inch 3D Cluster) .....................................................4-34
3D cluster setting ........................................................................\
.............................4-34
Recommendations to optimize the 3D effect .......................................................4-34
Vehicle Settings (Infotainment System) ........................................................4-37Setting Your Vehicle ........................................................................\
..........................4-37
Page 137 of 632
Instrument Cluster
4-32
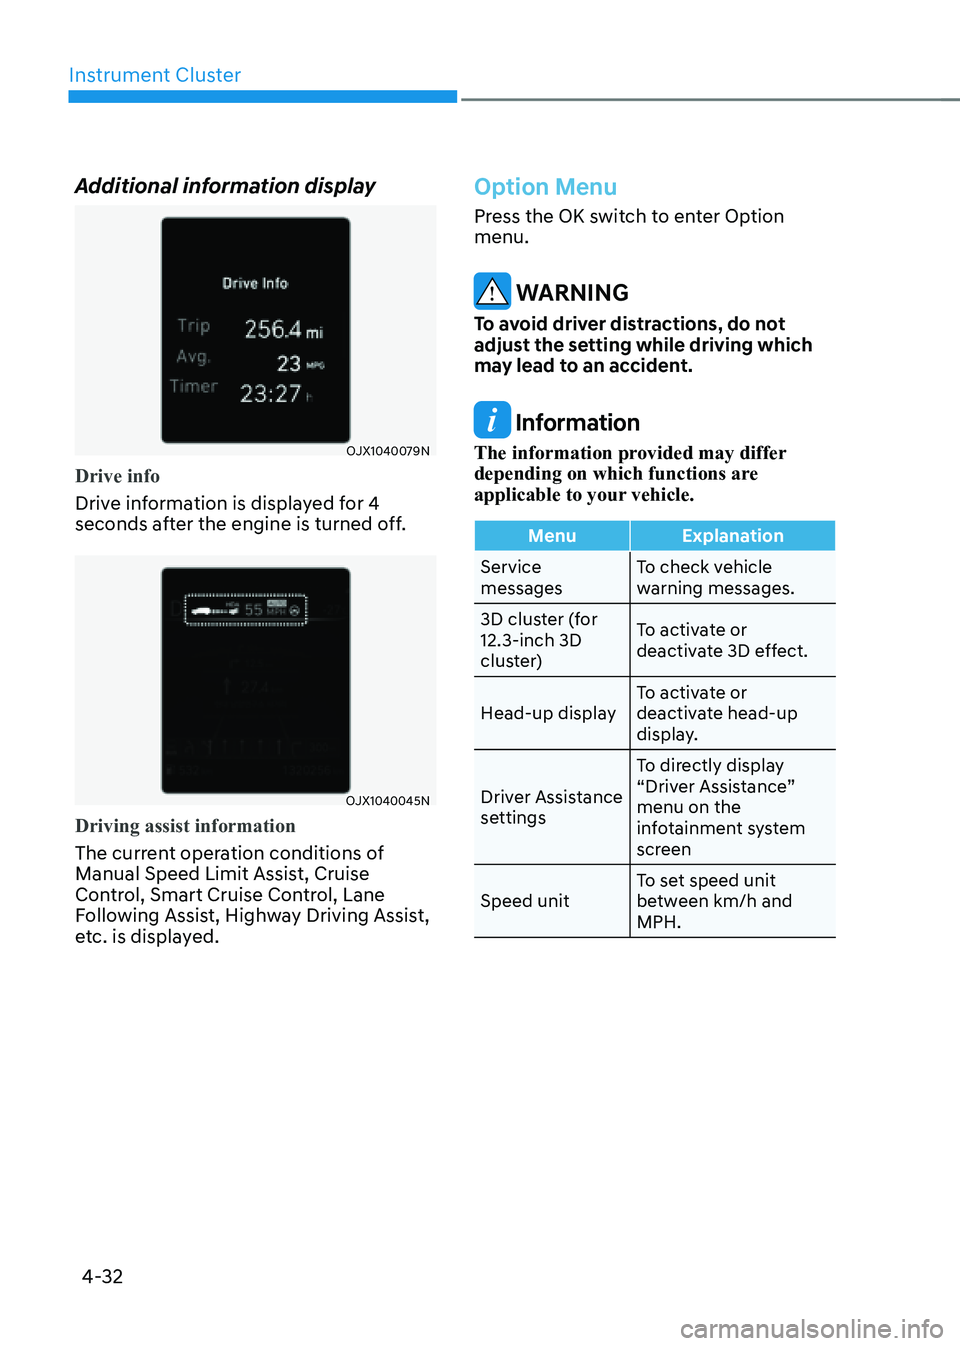
Additional information display
OJX1040079NOJX1040079N
Drive info
Drive information is displayed for 4
seconds after the engine is turned off.
OJX1040045NOJX1040045N
Driving assist information
The current operation conditions of
Manual Speed Limit Assist, Cruise
Control, Smart Cruise Control, Lane
Following Assist, Highway Driving Assist,
etc. is displayed.
Option Menu
Press the OK switch to enter Option
menu.
WARNING
To avoid driver distractions, do not
adjust the setting while driving which
may lead to an accident.
Information
The information provided may differ
depending on which functions are
applicable to your vehicle.
MenuExplanation
Service
messages To check vehicle
warning messages.
3D cluster (for
12.3-inch 3D
cluster) To activate or
deactivate 3D effect.
Head-up display To activate or
deactivate head-up
display.
Driver Assistance
settings To directly display
“Driver Assistance”
menu on the
infotainment system
screen
Speed unit To set speed unit
between km/h and
MPH.
Page 138 of 632
04
4-33
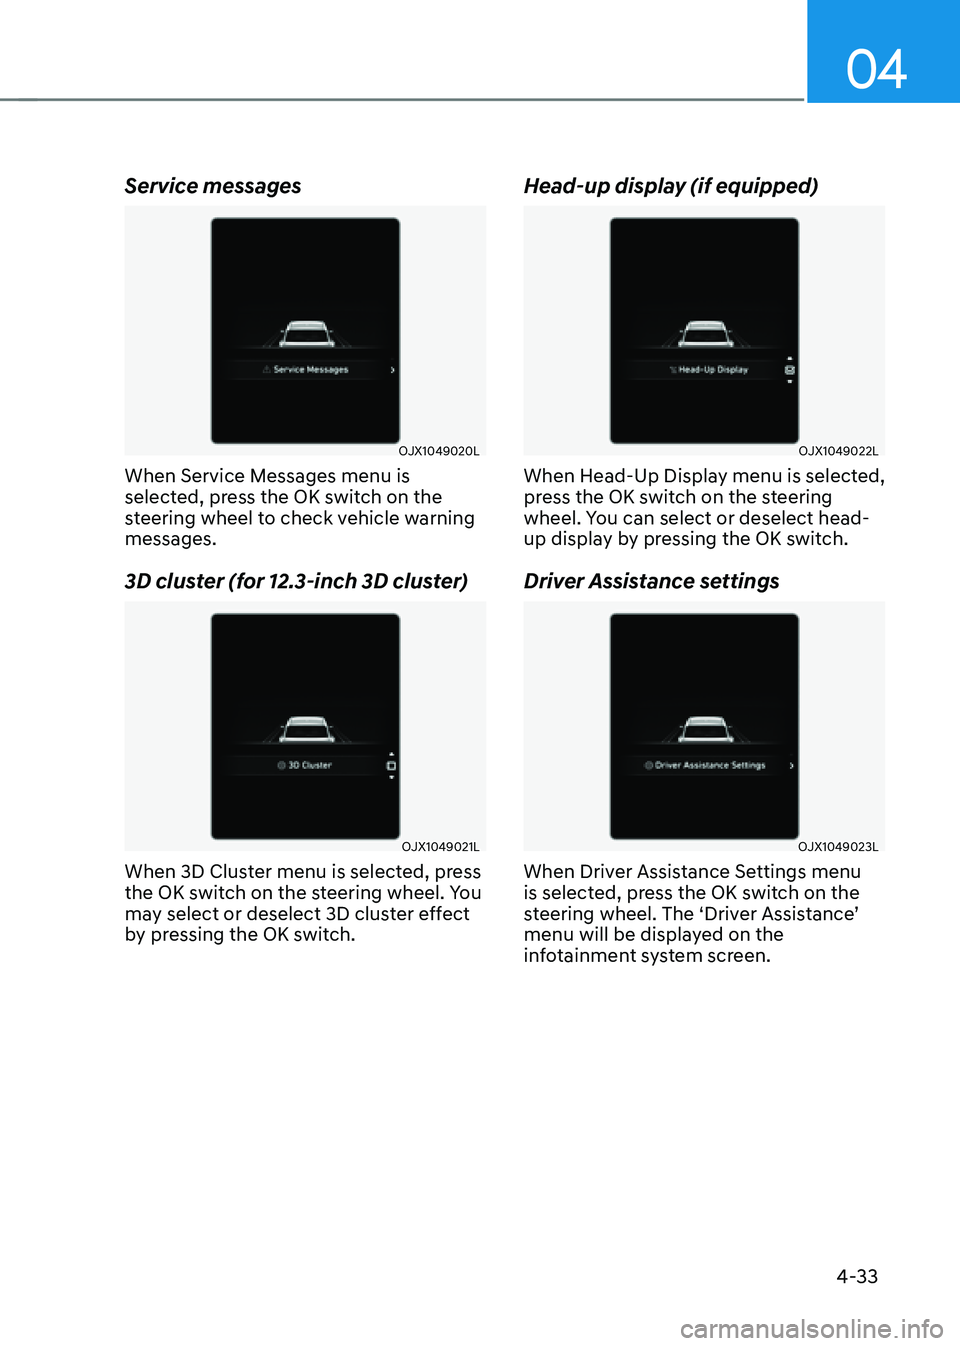
Service messages
OJX1049020LOJX1049020L
When Service Messages menu is
selected, press the OK switch on the
steering wheel to check vehicle warning
messages.
3D cluster (for 12.3-inch 3D cluster)
OJX1049021LOJX1049021L
When 3D Cluster menu is selected, press
the OK switch on the steering wheel. You
may select or deselect 3D cluster effect
by pressing the OK switch.
Head-up display (if equipped)
OJX1049022LOJX1049022L
When Head-Up Display menu is selected,
press the OK switch on the steering
wheel. You can select or deselect head-
up display by pressing the OK switch.
Driver Assistance settings
OJX1049023LOJX1049023L
When Driver Assistance Settings menu
is selected, press the OK switch on the
steering wheel. The ‘Driver Assistance’
menu will be displayed on the
infotainment system screen.
Page 153 of 632
05
5-11
Immobilizer System
The immobilizer system helps protect
your vehicle from theft. If an improperly
coded key (or other device) is used, the
engine’s fuel system is disabled.
When the Engine Start/Stop button
is pressed to the ON position, the
immobilizer system indicator should
come on briefly, then go off. If the
indicator starts to blink, the system does
not recognize the coding of the key.
Press the Engine Start/Stop button to
the OFF position, then press the Engine
Start/Stop button to the ON position
again.
In some circumstances, the vehicle may
not recognize your smart key if another
smart key device is nearby or a metal
object such as a key chain is causing
interference with the smart key.
If this occurs, your vehicle may not
start. Remove any metal objects or
additional keys near the smart key before
attempting to start the vehicle again.
If the system repeatedly does not
recognize the coding of the key, contact
an authorized retailer of Genesis Branded
products.
Do not attempt to alter this system
or add other devices to it. Electrical
problems could result that may make
your vehicle inoperable. WARNING
In order to prevent theft of your
vehicle, do not leave spare keys
anywhere in your vehicle. Your
immobilizer password is a customer
unique password and should be kept
confidential.
NOTICE
The transponder in your key is an
important part of the immobilizer
system. It is designed to give years
of trouble-free service, however you
should avoid exposure to moisture,
static electricity and rough handling.
Immobilizer system malfunction could
occur.
Information
This device complies with Part 15 of the
FCC rules. Operation is subject to the
following three conditions:
1. This device may not cause harmful
interference, and
2. This device must accept any
interference received, including
interference that may cause undesired
operation.
3. Changes or modifications not expressly
approved by the party responsible
for compliance could void the user’s
authority to operate the device.
Page 154 of 632
Convenient Features
5-12
Genesis digital key provides convenience
to the driver, which the driver can use to
lock or unlock the driver and passenger
doors or the liftgate and turn on the
engine.
Digital Key (Smart Phone)
How to register Digital Key (Smart
phone)
To use the smart phone as a digital key
follow the following procedure.
This service is only available for Android
smart phones that has passed the internal
usability test. The driver can confirm
supported/compatible devices on our
website (https://owners.genesis.com).
In case of iPhone, Apple does not assist
any of the NFC services. (Services are
expected to be provided according to
policy change.)
Genesis Digital Key App
1. Search ‘Genesis Digital Key’ from
the Google Play Store and download
the app. Please refer to the detailed
manual of the digital key app or
Genesis website. The option can be
found under the following app menu:
Menu → Application Info → Tutorial.
Please read the manual before using
the app.
2. After downloading the app, sign up for
a Genesis account and service.Smart phone set up
• The driver can use the Digital Key NFC
(Near Field Communication) feature
after enabling it on the smart phone’s
settings menu. To change the NFC
setting of the smart phone, please
refer to the smart phone manual or
contact the customer service center
of smart phone manufacturers.
• The driver should unlock and turn on
the smart phone screen. (Unlock the
screen lock such as password, pattern
or fingerprint, etc.)
Smart phone registration
1. Turn the vehicle on with the smart key
and make sure to keep the smart key
inside the vehicle during digital key
registration.
2. Open Genesis Digital Key App in the
vehicle owner’s smart phone and
activate the digital key registration
screen after selecting the vehicle to
register.
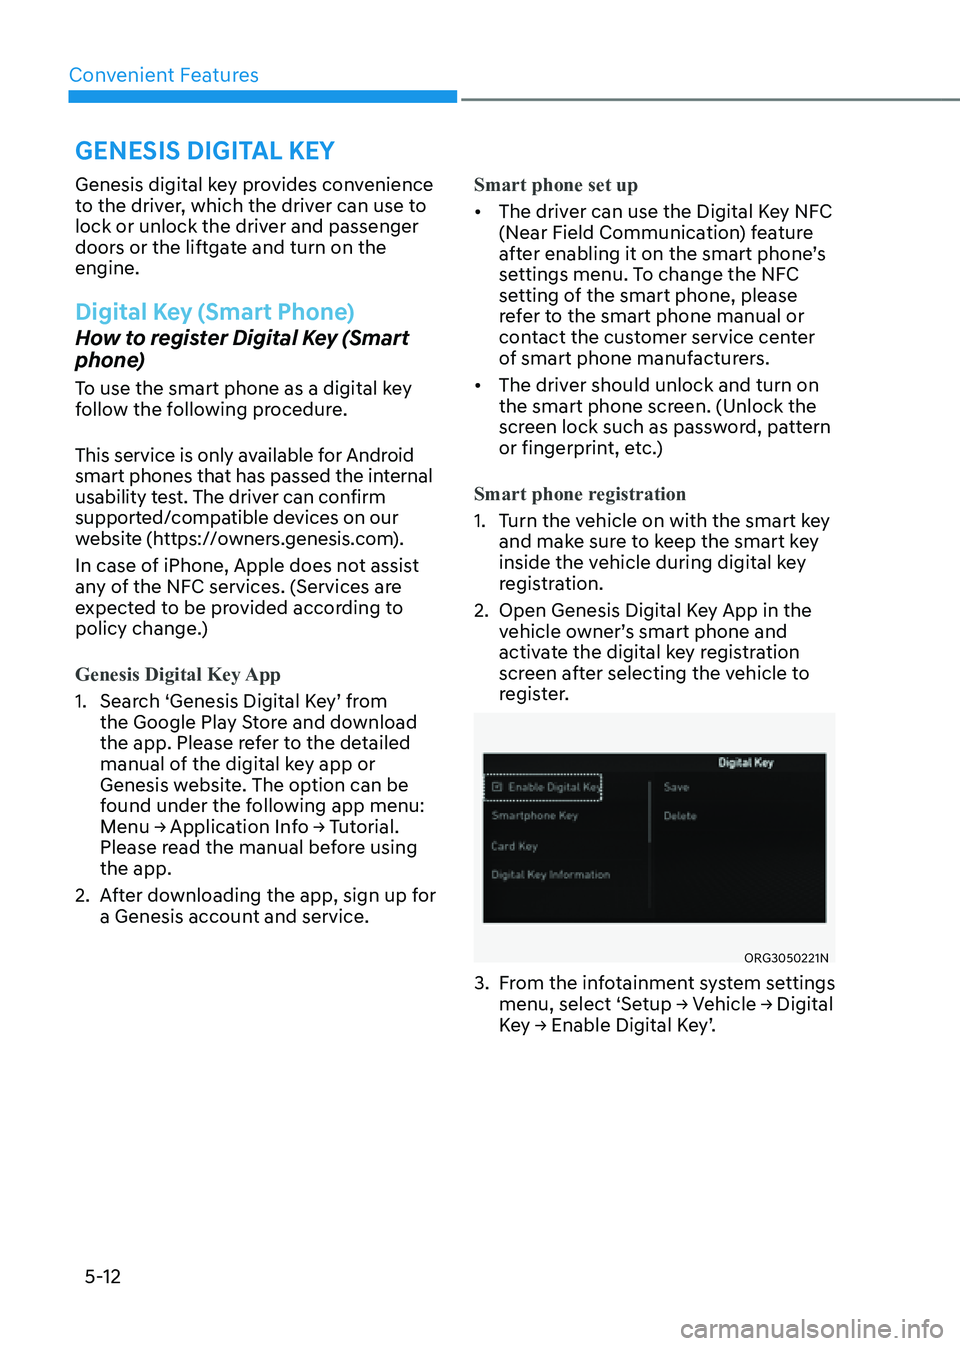
ORG3050221NORG3050221N
3. From the infotainment system settings
menu, select ‘Setup → Vehicle → Digital
Key → Enable Digital Key’.
GENESIS DIGITAL KEY