ignition GMC ACADIA 2008 Get To Know Guide
[x] Cancel search | Manufacturer: GMC, Model Year: 2008, Model line: ACADIA, Model: GMC ACADIA 2008Pages: 24, PDF Size: 1.48 MB
Page 5 of 24
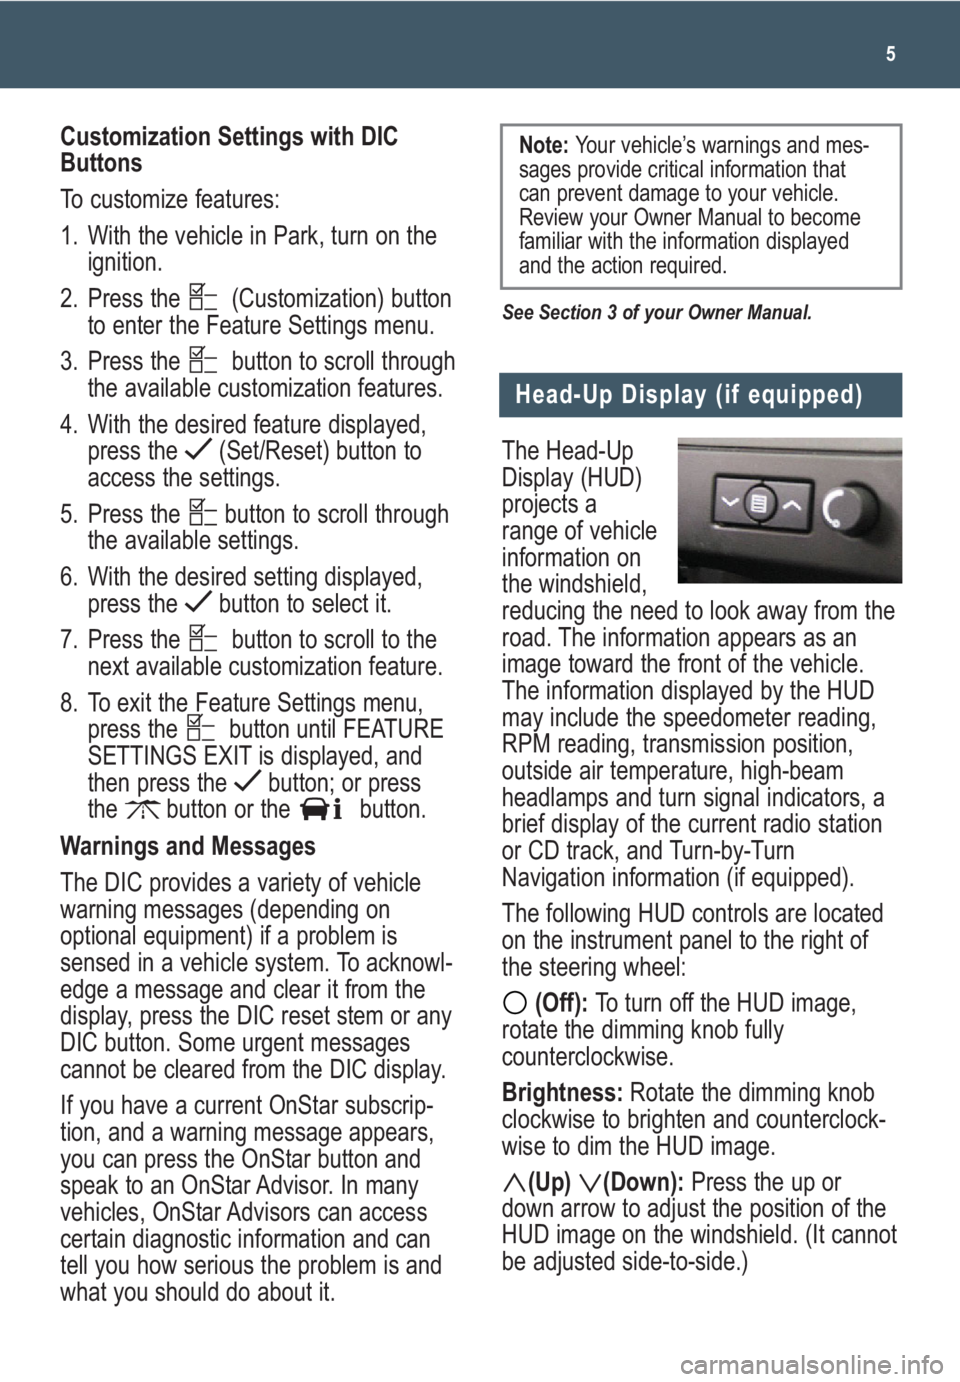
The Head-Up
Display (HUD)
projects a
range of vehicle
information on
the windshield,
reducing the need to look away from the
road. The information appears as an
image toward the front of the vehicle.
The information displayed by the HUD
may include the speedometer reading,
RPM reading, transmission position,
outside air temperature, high-beam
headlamps and turn signal indicators, a
brief display of the current radio station
or CD track, and Turn-by-Turn
Navigation information (if equipped).
The following HUD controls are located
on the instrument panel to the right of
the steering wheel:
(Off): To turn off the HUD image,
rotate the dimming knob fully
counterclockwise.
Brightness: Rotate the dimming knob
clockwise to brighten and counterclock-
wise to dim the HUD image.
(Up) (Down):Press the up or
down arrow to adjust the position of the
HUD image on the windshield. (It cannot
be adjusted side-to-side.)
5
Head-Up Display (if equipped)
Customization Settings with DIC
Buttons
To customize features:
1. With the vehicle in Park, turn on the
ignition.
2. Press the (Customization) button
to enter the Feature Settings menu.
3. Press the button to scroll through
the available customization features.
4. With the desired feature displayed,
press the (Set/Reset) button to
access the settings.
5. Press the button to scroll through
the available settings.
6. With the desired setting displayed,
press the button to select it.
7. Press the button to scroll to the
next available customization feature.
8. To exit the Feature Settings menu,
press the button until FEATURE
SETTINGS EXIT is displayed, and
then press the button; or press
the button or the button.
Warnings and Messages
The DIC provides a variety of vehicle
warning messages (depending on
optional equipment) if a problem is
sensed in a vehicle system. To acknowl-
edge a message and clear it from the
display, press the DIC reset stem or any
DIC button. Some urgent messages
cannot be cleared from the DIC display.
If you have a current OnStar subscrip-
tion, and a warning message appears,
you can press the OnStar button and
speak to an OnStar Advisor. In many
vehicles, OnStar Advisors can access
certain diagnostic information and can
tell you how serious the problem is and
what you should do about it.
See Section 3 of your Owner Manual.
Note: Your vehicle’s warnings and mes-
sages provide critical information that
can prevent damage to your vehicle.
Review your Owner Manual to become
familiar with the information displayed
and the action required.
Page 6 of 24
Getting to Know Your Acadia6
If you change your seat position, you
may have to readjust the HUD image for
proper viewing.
(Page):Press and hold this button to
change the display format. Release the
button when the desired display is
shown.
If the ignition is on and you cannot see
the HUD image, check to see whether:
• Something is covering the HUD lens
• The brightness is adjusted properly
• The HUD image is adjusted to the
proper height
• The windshield and HUD lens are
clean (do not spray glass cleaner
directly on the HUD lens)
• You are wearing polarized sunglass-
es, which could make the image
harder to see
• A fuse is blown (see your Owner
Manual)
See Section 3 of your Owner Manual.
and/or horn chirp) can be programmed
using the Driver Information Center (DIC).
(Unlock):Press this button to unlock
the driver’s door. Press it again within
five seconds to unlock all remaining
doors. RKE feedback (light flash) can be
programmed using the DIC.
(Power Liftgate)(if equipped):
Press and hold this button until the lift-
gate starts moving to open and close
the liftgate. The taillamps will flash and
a chime will sound when the liftgate is
moving.
(Vehicle Locator/Panic Alarm):
Press and release this button to locate
your vehicle. The turn signal lamps will
flash and the horn will sound three
times.
Press and hold the button to activate the
panic alarm. The turn signal lamps will
flash and the horn will sound for 30 sec-
onds. Press the button again or turn the
ignition to On to cancel the panic alarm.
See Section 2 of your Owner Manual.
Remote Keyless Entry
SAFETY & SECURITY
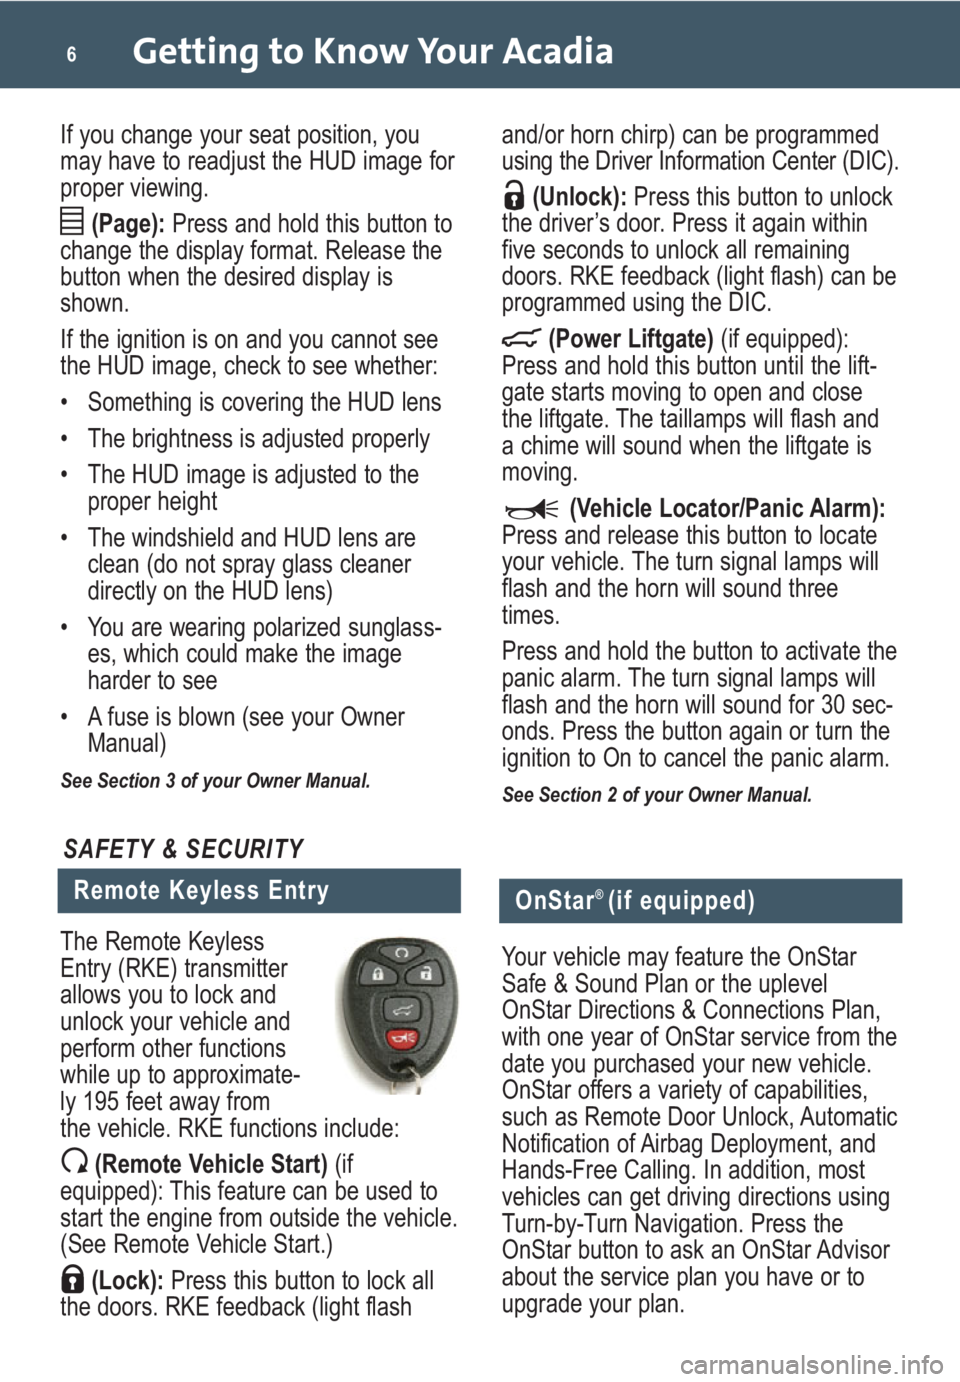
The Remote Keyless
Entry (RKE) transmitter
allows you to lock and
unlock your vehicle and
perform other functions
while up to approximate-
ly 195 feet away from
the vehicle. RKE functions include:
(Remote Vehicle Start)(if
equipped): This feature can be used to
start the engine from outside the vehicle.
(See Remote Vehicle Start.)
(Lock):Press this button to lock all
the doors. RKE feedback (light flash
OnStar® (if equipped)
Your vehicle may feature the OnStar
Safe & Sound Plan or the uplevel
OnStar Directions & Connections Plan,
with one year of OnStar service from the
date you purchased your new vehicle.
OnStar offers a variety of capabilities,
such as Remote Door Unlock, Automatic
Notification of Airbag Deployment, and
Hands-Free Calling. In addition, most
vehicles can get driving directions using
Turn-by-Turn Navigation. Press the
OnStar button to ask an OnStar Advisor
about the service plan you have or to
upgrade your plan.
Page 9 of 24
9
3rd-Row Seats
The 3rd-row 60/40 split bench seat
features folding seatbacks. Prior to fold-
ing a seatback, make sure all of the
safety belts are unbuckled, nothing is on
the 3rd-row seat, and the 2nd-row seat
is not reclined.
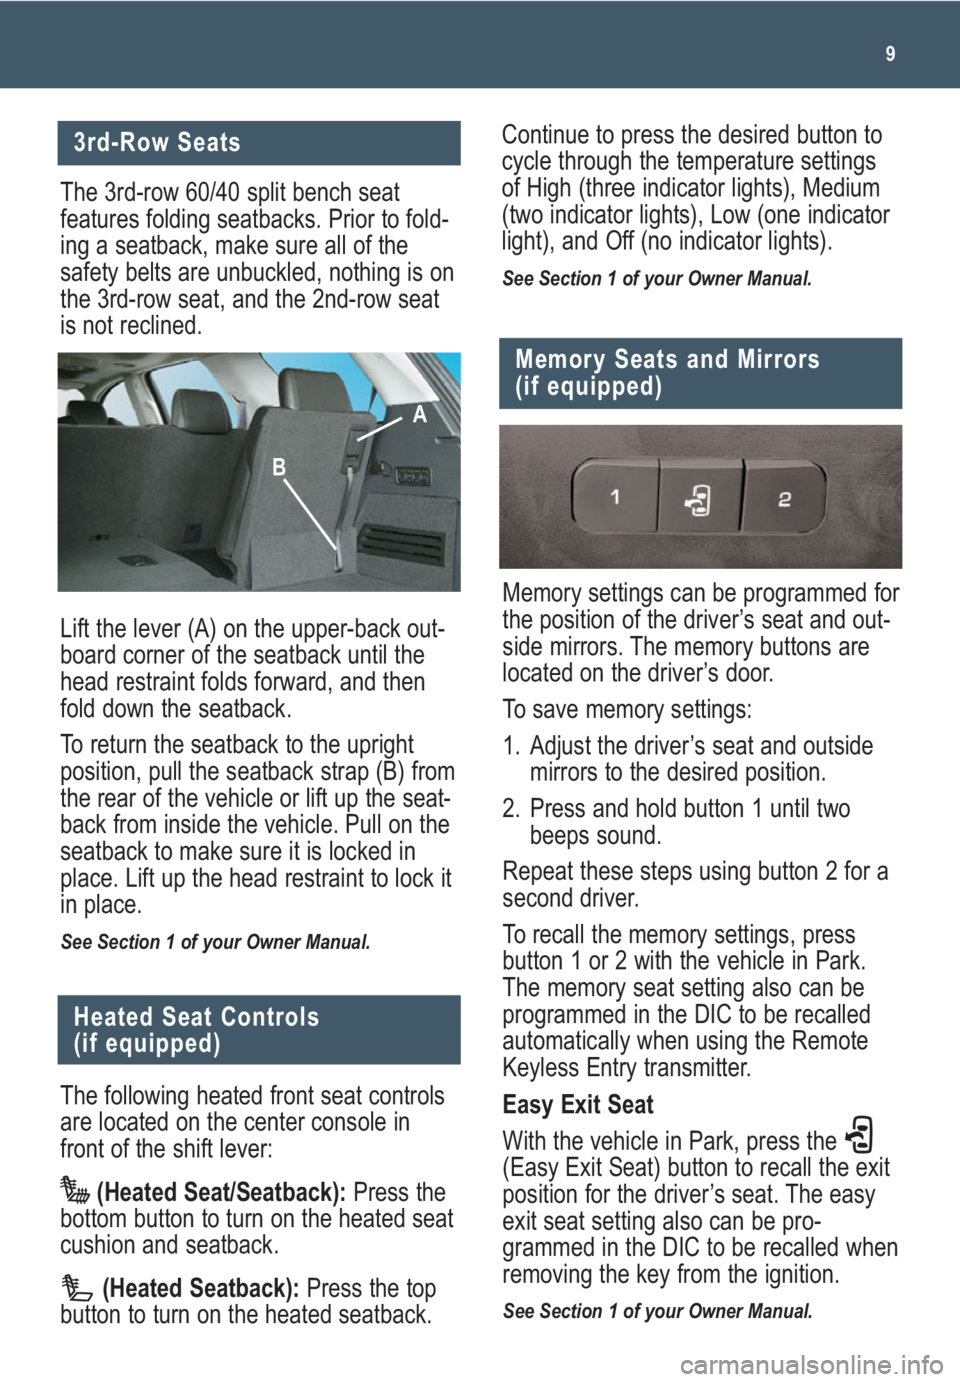
Lift the lever (A) on the upper-back out-
board corner of the seatback until the
head restraint folds forward, and then
fold down the seatback.
To return the seatback to the upright
position, pull the seatback strap (B) from
the rear of the vehicle or lift up the seat-
back from inside the vehicle. Pull on the
seatback to make sure it is locked in
place. Lift up the head restraint to lock it
in place.
See Section 1 of your Owner Manual.
The following heated front seat controls
are located on the center console in
front of the shift lever:
(Heated Seat/Seatback):Press the
bottom button to turn on the heated seat
cushion and seatback.
(Heated Seatback):Press the top
button to turn on the heated seatback.
Heated Seat Controls
(if equipped)
Memory settings can be programmed for
the position of the driver’s seat and out-
side mirrors. The memory buttons are
located on the driver’s door.
To save memory settings:
1. Adjust the driver’s seat and outside
mirrors to the desired position.
2. Press and hold button 1 until two
beeps sound.
Repeat these steps using button 2 for a
second driver.
To recall the memory settings, press
button 1 or 2 with the vehicle in Park.
The memory seat setting also can be
programmed in the DIC to be recalled
automatically when using the Remote
Keyless Entry transmitter.
Easy Exit Seat
With the vehicle in Park, press the
(Easy Exit Seat) button to recall the exit
position for the driver’s seat. The easy
exit seat setting also can be pro-
grammed in the DIC to be recalled when
removing the key from the ignition.
See Section 1 of your Owner Manual.
Memory Seats and Mirrors
(if equipped)
Continue to press the desired button to
cycle through the temperature settings
of High (three indicator lights), Medium
(two indicator lights), Low (one indicator
light), and Off (no indicator lights).
See Section 1 of your Owner Manual.
A
B
Page 15 of 24
15
Rear Seat Audio and DVD
Rear Seat Entertainment
Systems (if equipped)
Rear Seat Audio
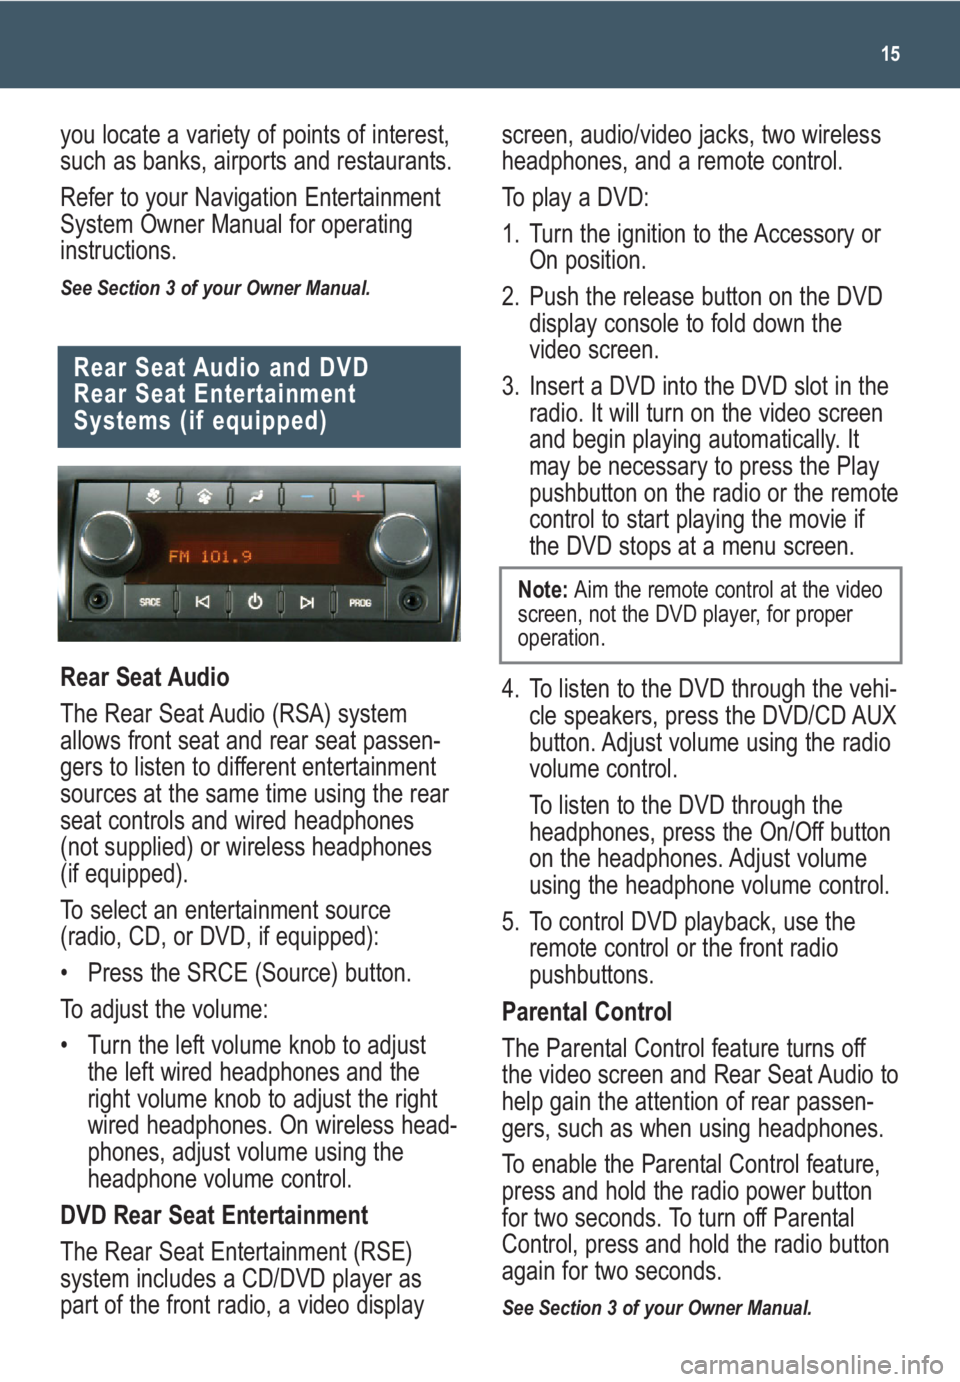
The Rear Seat Audio (RSA) system
allows front seat and rear seat passen-
gers to listen to different entertainment
sources at the same time using the rear
seat controls and wired headphones
(not supplied) or wireless headphones
(if equipped).
To select an entertainment source
(radio, CD, or DVD, if equipped):
• Press the SRCE (Source) button.
To adjust the volume:
• Turn the left volume knob to adjust
the left wired headphones and the
right volume knob to adjust the right
wired headphones. On wireless head-
phones, adjust volume using the
headphone volume control.
DVD Rear Seat Entertainment
The Rear Seat Entertainment (RSE)
system includes a CD/DVD player as
part of the front radio, a video display
you locate a variety of points of interest,
such as banks, airports and restaurants.
Refer to your Navigation Entertainment
System Owner Manual for operating
instructions.
See Section 3 of your Owner Manual.
screen, audio/video jacks, two wireless
headphones, and a remote control.
To play a DVD:
1. Turn the ignition to the Accessory or
On position.
2. Push the release button on the DVD
display console to fold down the
video screen.
3. Insert a DVD into the DVD slot in the
radio. It will turn on the video screen
and begin playing automatically. It
may be necessary to press the Play
pushbutton on the radio or the remote
control to start playing the movie if
the DVD stops at a menu screen.
4. To listen to the DVD through the vehi-
cle speakers, press the DVD/CD AUX
button. Adjust volume using the radio
volume control.
To listen to the DVD through the
headphones, press the On/Off button
on the headphones. Adjust volume
using the headphone volume control.
5. To control DVD playback, use the
remote control or the front radio
pushbuttons.
Parental Control
The Parental Control feature turns off
the video screen and Rear Seat Audio to
help gain the attention of rear passen-
gers, such as when using headphones.
To enable the Parental Control feature,
press and hold the radio power button
for two seconds. To turn off Parental
Control, press and hold the radio button
again for two seconds.
See Section 3 of your Owner Manual.
Note: Aim the remote control at the video
screen, not the DVD player, for proper
operation.
Page 21 of 24
21
There are several ways to open and
close the power liftgate:
• Press and hold the (Power
Liftgate) button on the Remote
Keyless Entry transmitter until the
liftgate starts moving. Press it again
to reverse operation.
• Press the (Power Liftgate) button
on the center console in front of the
shift lever. Press it again to reverse
operation.
• Press the touchpad on the liftgate
handle to open. Press it again to
reverse operation.
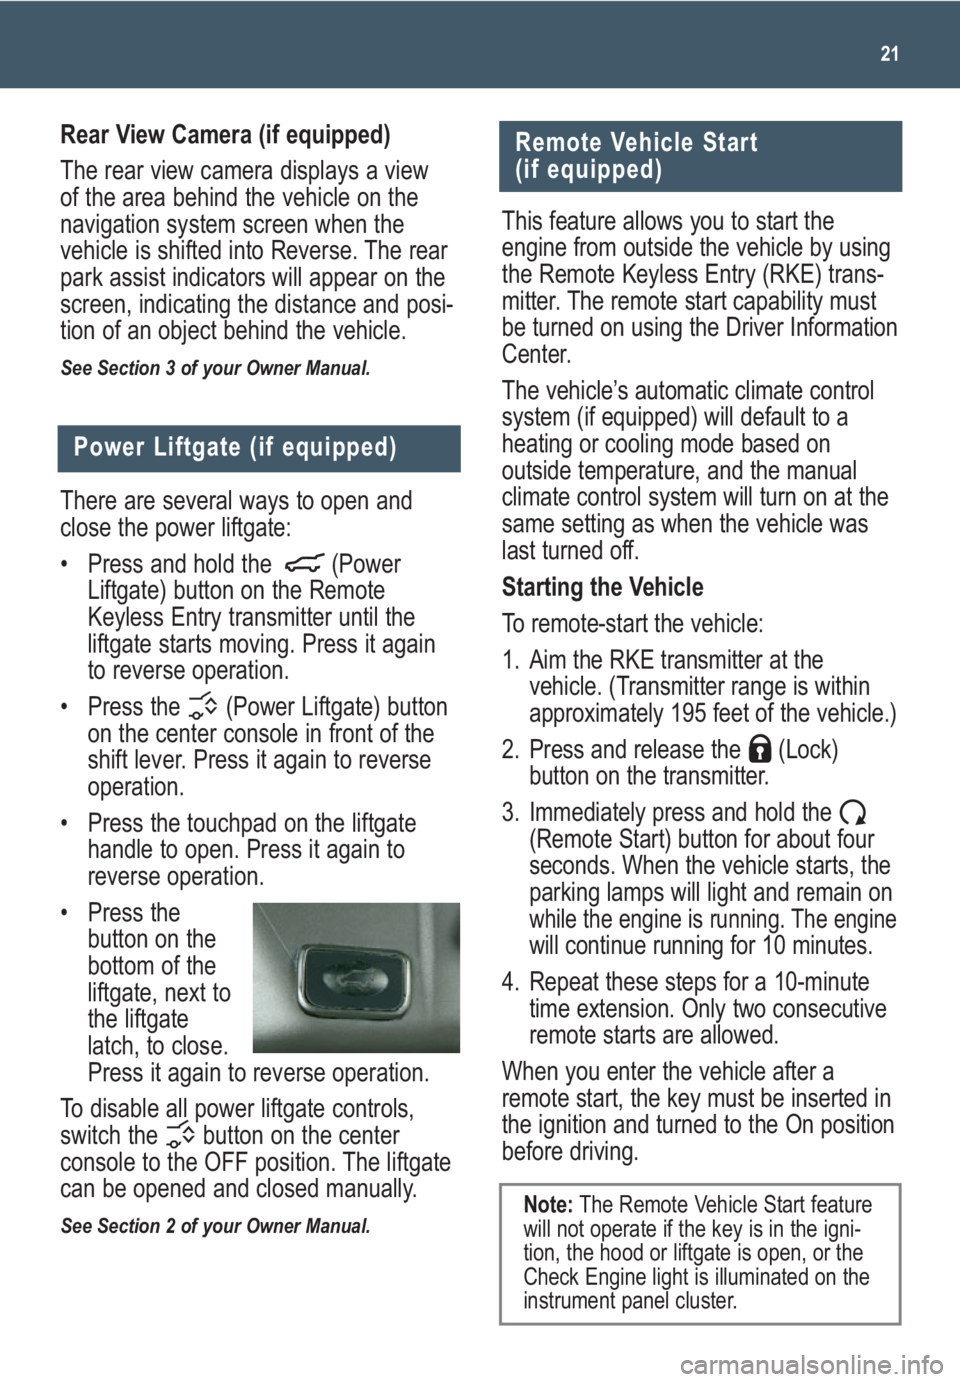
• Press the
button on the
bottom of the
liftgate, next to
the liftgate
latch, to close.
Press it again to reverse operation.
To disable all power liftgate controls,
switch the button on the center
console to the OFF position. The liftgate
can be opened and closed manually.
See Section 2 of your Owner Manual.
Power Liftgate (if equipped)
Remote Vehicle Start
(if equipped)
This feature allows you to start the
engine from outside the vehicle by using
the Remote Keyless Entry (RKE) trans-
mitter. The remote start capability must
be turned on using the Driver Information
Center.
The vehicle’s automatic climate control
system (if equipped) will default to a
heating or cooling mode based on
outside temperature, and the manual
climate control system will turn on at the
same setting as when the vehicle was
last turned off.
Starting the Vehicle
To remote-start the vehicle:
1. Aim the RKE transmitter at the
vehicle. (Transmitter range is within
approximately 195 feet of the vehicle.)
2. Press and release the (Lock)
button on the transmitter.
3. Immediately press and hold the
(Remote Start) button for about four
seconds. When the vehicle starts, the
parking lamps will light and remain on
while the engine is running. The enginewill continue running for 10 minutes.
4. Repeat these steps for a 10-minute
time extension. Only two consecutive
remote starts are allowed.
When you enter the vehicle after a
remote start, the key must be inserted in
the ignition and turned to the On position
before driving.
Note:The Remote Vehicle Start feature
will not operate if the key is in the igni-
tion, the hood or liftgate is open, or the
Check Engine light is illuminated on the
instrument panel cluster.
Rear View Camera (if equipped)
The rear view camera displays a view
of the area behind the vehicle on the
navigation system screen when the
vehicle is shifted into Reverse. The rear
park assist indicators will appear on the
screen, indicating the distance and posi-
tion of an object behind the vehicle.
See Section 3 of your Owner Manual.
Page 22 of 24
Getting to Know Your Acadia22
PERFORMANCE & MAINTENANCE
Refueling the Vehicle
To open the fuel door, press the center
of the rear edge of the door and it will
pop open slightly. Pull the door to open
it fully.
When closing the fuel door, press the
center of the rear edge of the door until
it is flush with the side of the vehicle.
See Section 5 of your Owner Manual.
Automatic Transmission
Operation
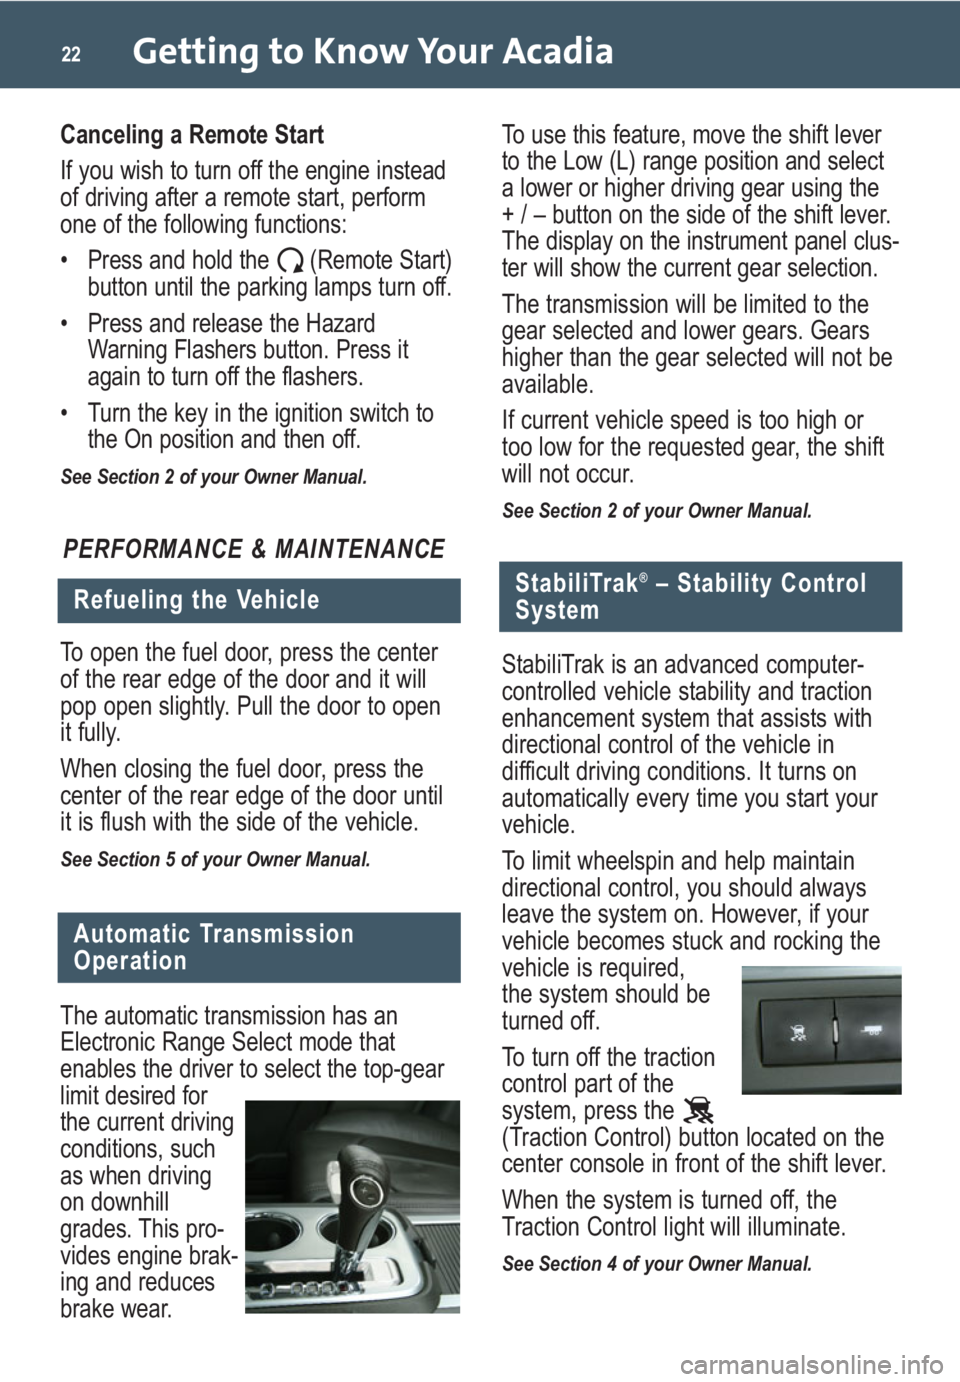
The automatic transmission has an
Electronic Range Select mode that
enables the driver to select the top-gear
limit desired for
the current driving
conditions, such
as when driving
on downhill
grades. This pro-
vides engine brak-
ing and reduces
brake wear.
StabiliTrak®– Stability Control
System
StabiliTrak is an advanced computer-
controlled vehicle stability and traction
enhancement system that assists with
directional control of the vehicle in
difficult driving conditions. It turns on
automatically every time you start your
vehicle.
To limit wheelspin and help maintain
directional control, you should always
leave the system on. However, if your
vehicle becomes stuck and rocking the
vehicle is required,
the system should be
turned off.
To turn off the traction
control part of the
system, press the
(Traction Control) button located on the
center console in front of the shift lever.
When the system is turned off, the
Traction Control light will illuminate.
See Section 4 of your Owner Manual.
To use this feature, move the shift lever
to the Low (L) range position and select
a lower or higher driving gear using the
+ / – button on the side of the shift lever.
The display on the instrument panel clus-
ter will show the current gear selection.
The transmission will be limited to the
gear selected and lower gears. Gears
higher than the gear selected will not be
available.
If current vehicle speed is too high or
too low for the requested gear, the shift
will not occur.
See Section 2 of your Owner Manual.
Canceling a Remote Start
If you wish to turn off the engine instead
of driving after a remote start, perform
one of the following functions:
• Press and hold the (Remote Start)
button until the parking lamps turn off.
• Press and release the Hazard
Warning Flashers button. Press it
again to turn off the flashers.
• Turn the key in the ignition switch to
the On position and then off.
See Section 2 of your Owner Manual.
Page 23 of 24
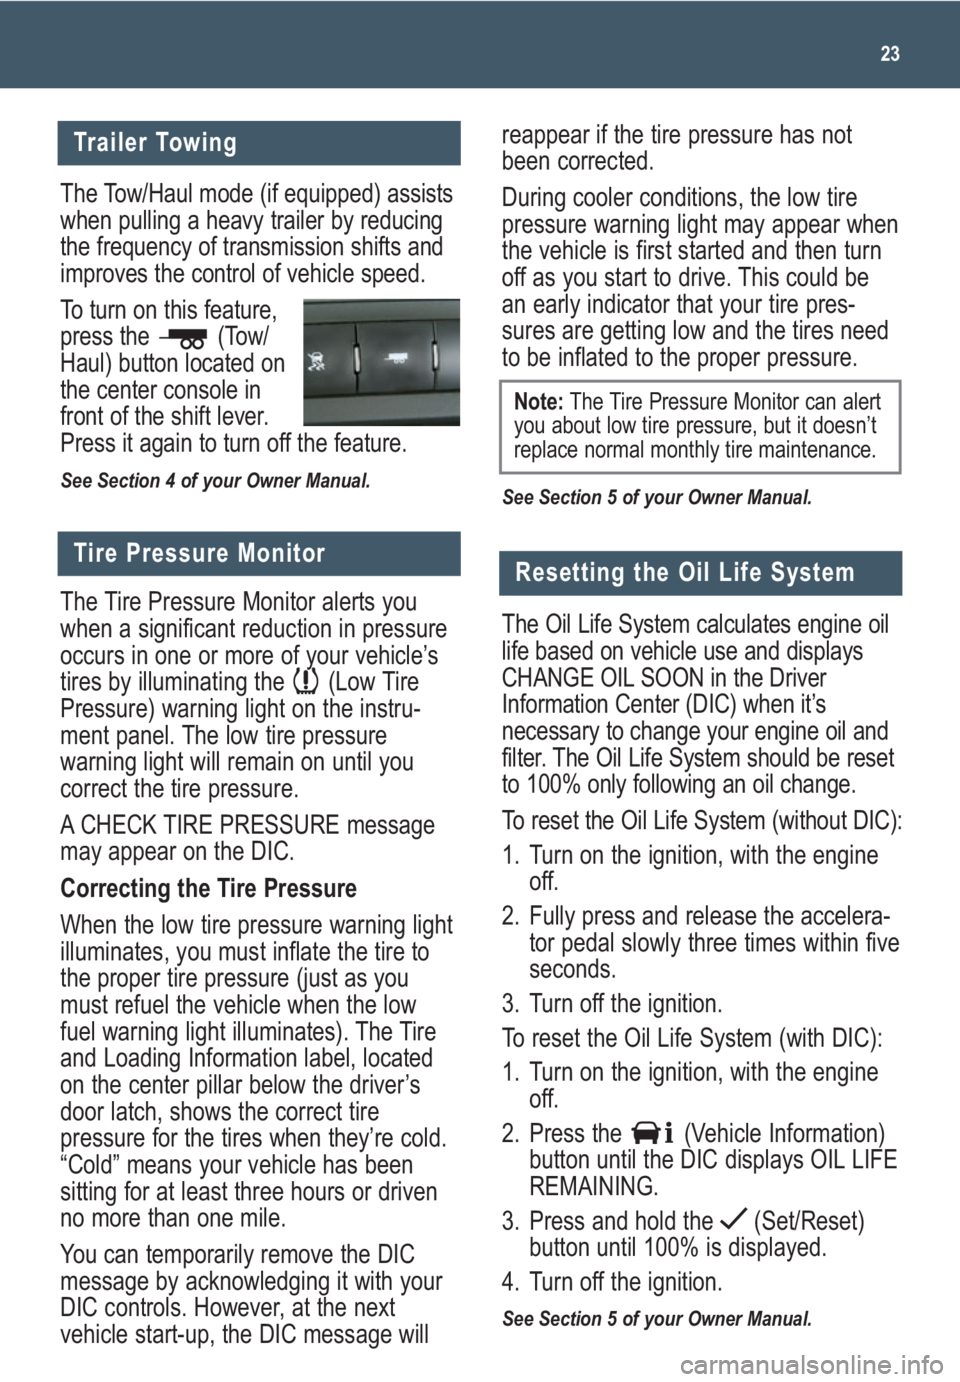
The Tow/Haul mode (if equipped) assists
when pulling a heavy trailer by reducing
the frequency of transmission shifts and
improves the control of vehicle speed.
To turn on this feature,
press the (Tow/
Haul) button located on
the center console in
front of the shift lever.
Press it again to turn off the feature.
See Section 4 of your Owner Manual.
reappear if the tire pressure has not
been corrected.
During cooler conditions, the low tire
pressure warning light may appear when
the vehicle is first started and then turn
off as you start to drive. This could be
an early indicator that your tire pres-
sures are getting low and the tires need
to be inflated to the proper pressure.
See Section 5 of your Owner Manual.
23
Trailer Towing
Tire Pressure Monitor
The Tire Pressure Monitor alerts you
when a significant reduction in pressure
occurs in one or more of your vehicle’s
tires by illuminating the (Low Tire
Pressure) warning light on the instru-
ment panel. The low tire pressure
warning light will remain on until you
correct the tire pressure.
A CHECK TIRE PRESSURE message
may appear on the DIC.
Correcting the Tire Pressure
When the low tire pressure warning light
illuminates, you must inflate the tire to
the proper tire pressure (just as you
must refuel the vehicle when the low
fuel warning light illuminates). The Tire
and Loading Information label, located
on the center pillar below the driver’s
door latch, shows the correct tire
pressure for the tires when they’re cold.
“Cold” means your vehicle has been
sitting for at least three hours or driven
no more than one mile.
You can temporarily remove the DIC
message by acknowledging it with your
DIC controls. However, at the next
vehicle start-up, the DIC message will
Note:The Tire Pressure Monitor can alert
you about low tire pressure, but it doesn’t
replace normal monthly tire maintenance.
Resetting the Oil Life System
The Oil Life System calculates engine oil
life based on vehicle use and displays
CHANGE OIL SOON in the Driver
Information Center (DIC) when it’s
necessary to change your engine oil and
filter. The Oil Life System should be reset
to 100% only following an oil change.
To reset the Oil Life System (without DIC):
1. Turn on the ignition, with the engine
off.
2. Fully press and release the accelera-
tor pedal slowly three times within five
seconds.
3. Turn off the ignition.
To reset the Oil Life System (with DIC):
1. Turn on the ignition, with the engine
off.
2. Press the (Vehicle Information)
button until the DIC displays OIL LIFE
REMAINING.
3. Press and hold the (Set/Reset)
button until 100% is displayed.
4. Turn off the ignition.
See Section 5 of your Owner Manual.