mirror controls GMC ACADIA 2009 Get To Know Guide
[x] Cancel search | Manufacturer: GMC, Model Year: 2009, Model line: ACADIA, Model: GMC ACADIA 2009Pages: 24, PDF Size: 1.48 MB
Page 1 of 24

Congratulations on your purchase of a GMC Acadia. Please read this information and your Owner Manual to
ensure an outstanding ownership experience. Note that your vehicle may not include all the features described in
this booklet. Keep this booklet with your Owner Manual for easy reference.
DRIVER INFORMATIONInstrument Panel . . . . . . . . . . . . .2
Instrument Panel Cluster . . . . . . .3
Driver Information Center . . . . . . .4
Head-Up Display . . . . . . . . . . . . . .5
SAFETY & SECURITYRemote Keyless Entry . . . . . . . . .6
OnStar® . . . . . . . . . . . . . . . . . . . . . .6
Child Restraints (LATCH) . . . . . . .7
COMFORT Seat Adjustments . . . . . . . . . . . . .7
2nd-Row Seats . . . . . . . . . . . . . . .8
3rd-Row Seats . . . . . . . . . . . . . . . .9
Heated Seat Controls . . . . . . . . . .9
Heated and Cooled Seat
Controls . . . . . . . . . . . . . . . . . . . . .9
Memory Seat and Mirrors . . . . . . .9
Steering Wheel Adjustment . . . .10
Dual Automatic Climate
Controls . . . . . . . . . . . . . . . . . . . .10Manual Climate Controls . . . . . .11
Rear Seat Climate Controls . . . .12
ENTERTAINMENT Audio System Features . . . . . . .12
XM®Radio . . . . . . . . . . . . . . . . . .14
Navigation Entertainment
System . . . . . . . . . . . . . . . . . . . . .14
Rear Seat Audio and DVD
Rear Seat Entertainment
Systems . . . . . . . . . . . . . . . . . . . .15
Audio Steering Wheel Controls .16
Bluetooth
®System . . . . . . . . . . .16
CONVENIENCE Automatic Headlamp System . . .16
Interior Lighting Features . . . . . .17
Outside Power Foldaway
Mirrors . . . . . . . . . . . . . . . . . . . . .17
Power Windows . . . . . . . . . . . . . .17
Sunroof . . . . . . . . . . . . . . . . . . . . .18
Windshield Wipers and Washer .18Heated Washer Fluid . . . . . . . . . .19
Cruise Control . . . . . . . . . . . . . . .19
115-Volt Outlet . . . . . . . . . . . . . . .19
Center Console Features . . . . . .20
2nd-Row Console Features . . . .20
Ultrasonic Rear Park Assist . . . .20
Power Liftgate . . . . . . . . . . . . . . .21
Remote Vehicle Start . . . . . . . . .21
PERFORMANCE & MAINTENANCE Refueling the Vehicle . . . . . . . . .22
Automatic Transmission
Operation . . . . . . . . . . . . . . . . . . .22
StabiliTrak
® – Stability Control
System . . . . . . . . . . . . . . . . . . . . .22
Trailer Towing . . . . . . . . . . . . . . .22
Tire Pressure Monitor . . . . . . . . .23
Resetting the Oil Life System . .23
OWNER INFORMATIONRoadside Assistance . . . . . . . . .24
My GMLink . . . . . . . . . . . . . . . . . .24
Page 9 of 24

9
3rd-Row Seats
The 3rd-row 60/40 split bench seat
features folding seatbacks. Prior to fold-
ing a seatback, make sure all of the
safety belts are unbuckled, nothing is on
the 3rd-row seat, and the 2nd-row seat
is not reclined.
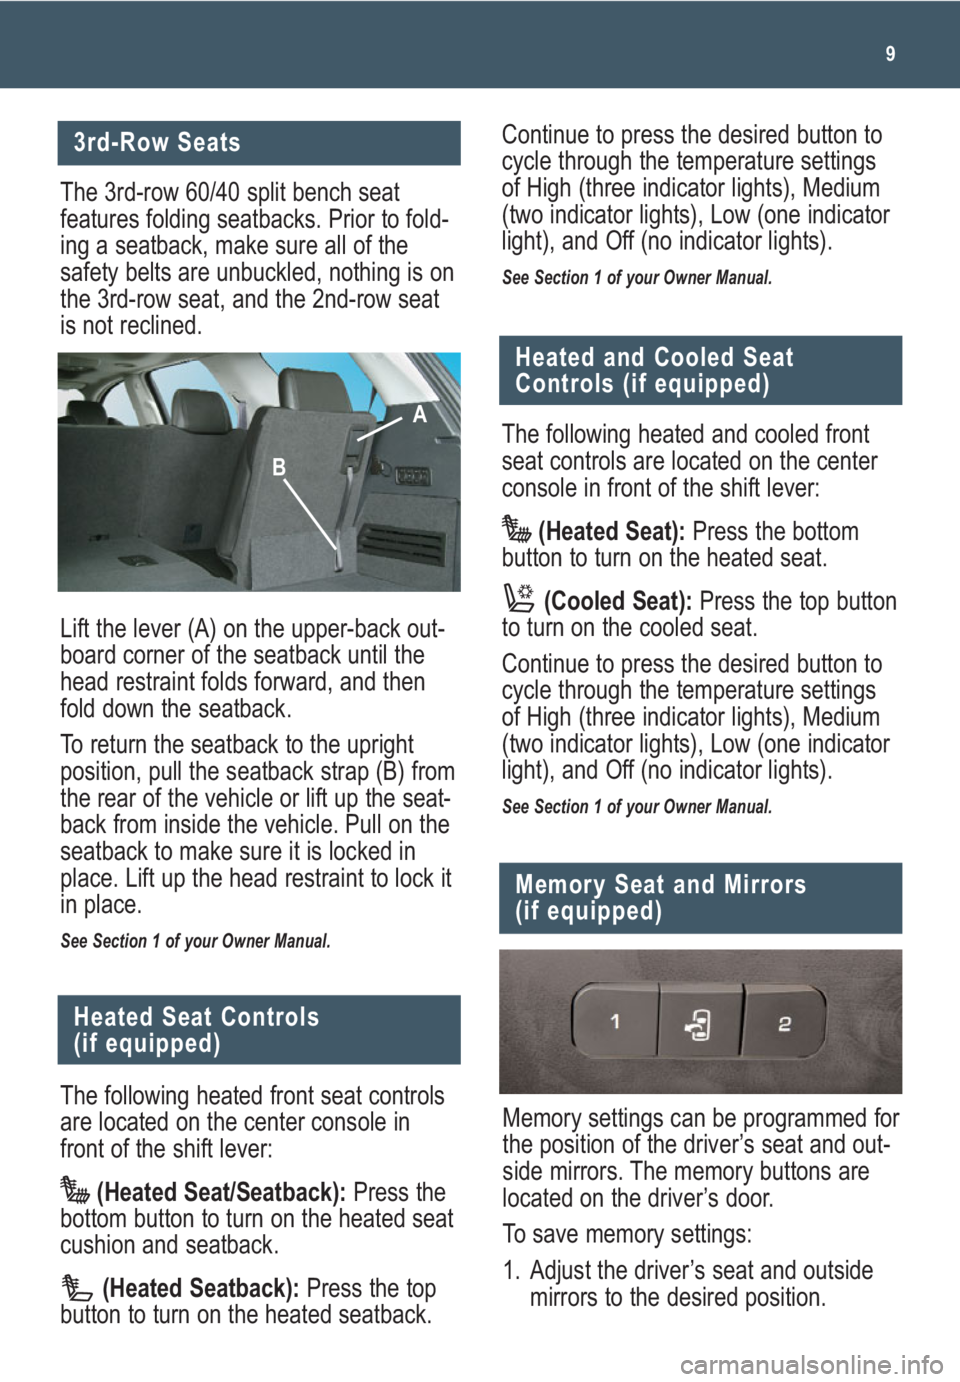
Lift the lever (A) on the upper-back out-
board corner of the seatback until the
head restraint folds forward, and then
fold down the seatback.
To return the seatback to the upright
position, pull the seatback strap (B) from
the rear of the vehicle or lift up the seat-
back from inside the vehicle. Pull on the
seatback to make sure it is locked in
place. Lift up the head restraint to lock it
in place.
See Section 1 of your Owner Manual.
The following heated front seat controls
are located on the center console in
front of the shift lever:
(Heated Seat/Seatback):Press the
bottom button to turn on the heated seat
cushion and seatback.
(Heated Seatback):Press the top
button to turn on the heated seatback.
Heated Seat Controls
(if equipped)
Memory settings can be programmed for
the position of the driver’s seat and out-
side mirrors. The memory buttons are
located on the driver’s door.
To save memory settings:
1. Adjust the driver’s seat and outside
mirrors to the desired position.
Memory Seat and Mirrors
(if equipped)
Continue to press the desired button to
cycle through the temperature settings
of High (three indicator lights), Medium
(two indicator lights), Low (one indicator
light), and Off (no indicator lights).
See Section 1 of your Owner Manual.
A
B
Heated and Cooled Seat
Controls (if equipped)
The following heated and cooled front
seat controls are located on the center
console in front of the shift lever:
(Heated Seat):Press the bottom
button to turn on the heated seat.
(Cooled Seat):Press the top button
to turn on the cooled seat.
Continue to press the desired button to
cycle through the temperature settings
of High (three indicator lights), Medium
(two indicator lights), Low (one indicator
light), and Off (no indicator lights).
See Section 1 of your Owner Manual.
Page 17 of 24

17
Interior Lighting Features
Instrument Panel Brightness
The (Instrument Panel Brightness)
control knob is located on the left side of
the instrument panel. To brighten or dim
the instrument panel lights, press the
knob; it will pop out. Turn the knob to
adjust the intensity of the lights.
Dome Lamps
The dome lamps will come on when a
door is open. The lamps also can be
turned on by fully rotating the instrument
panel brightness control knob clockwise.
To disable the dome lamps, press the
(Dome Lamp Override) button
located above the instrument panel
brightness control knob.
See Section 3 of your Owner Manual.
Outside Power Foldaway
Mirrors (if equipped)
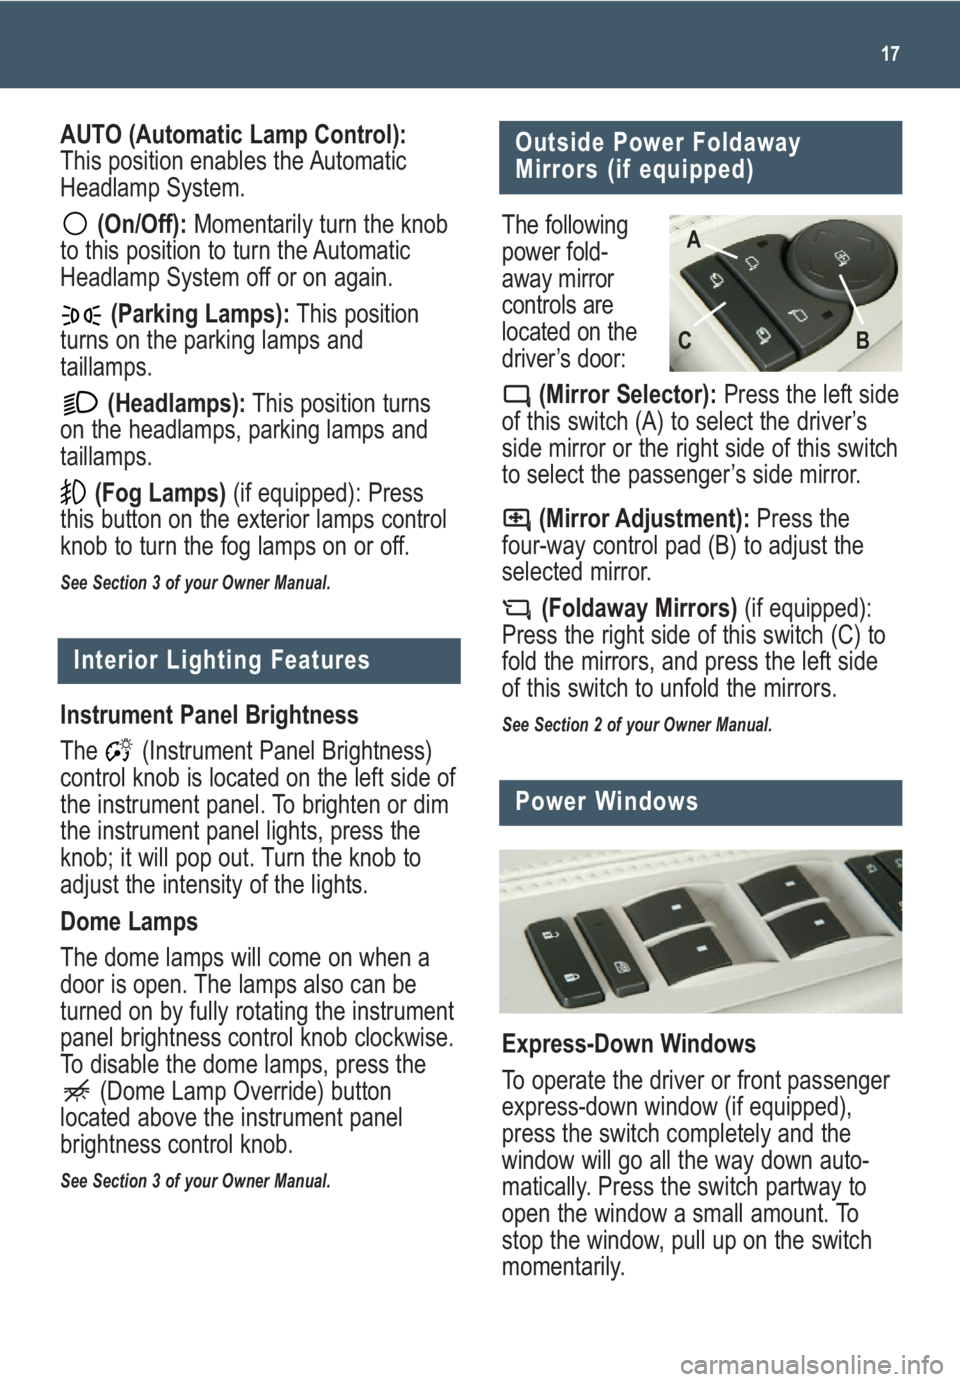
The following
power fold-
away mirror
controls are
located on the
driver’s door:
(Mirror Selector):Press the left side
of this switch (A) to select the driver’s
side mirror or the right side of this switch
to select the passenger’s side mirror.
(Mirror Adjustment):Press the
four-way control pad (B) to adjust the
selected mirror.
(Foldaway Mirrors)(if equipped):
Press the right side of this switch (C) to
fold the mirrors, and press the left side
of this switch to unfold the mirrors.
See Section 2 of your Owner Manual.
B AC
AUTO (Automatic Lamp Control):
This position enables the Automatic
Headlamp System.
(On/Off):Momentarily turn the knob
to this position to turn the Automatic
Headlamp System off or on again.
(Parking Lamps):This position
turns on the parking lamps and
taillamps.
(Headlamps):This position turns
on the headlamps, parking lamps and
taillamps.
(Fog Lamps)(if equipped): Press
this button on the exterior lamps control
knob to turn the fog lamps on or off.
See Section 3 of your Owner Manual.
Power Windows
Express-Down Windows
To operate the driver or front passenger
express-down window (if equipped),
press the switch completely and the
window will go all the way down auto-
matically. Press the switch partway to
open the window a small amount. To
stop the window, pull up on the switch
momentarily.
Page 18 of 24

Getting to Know Your Acadia18
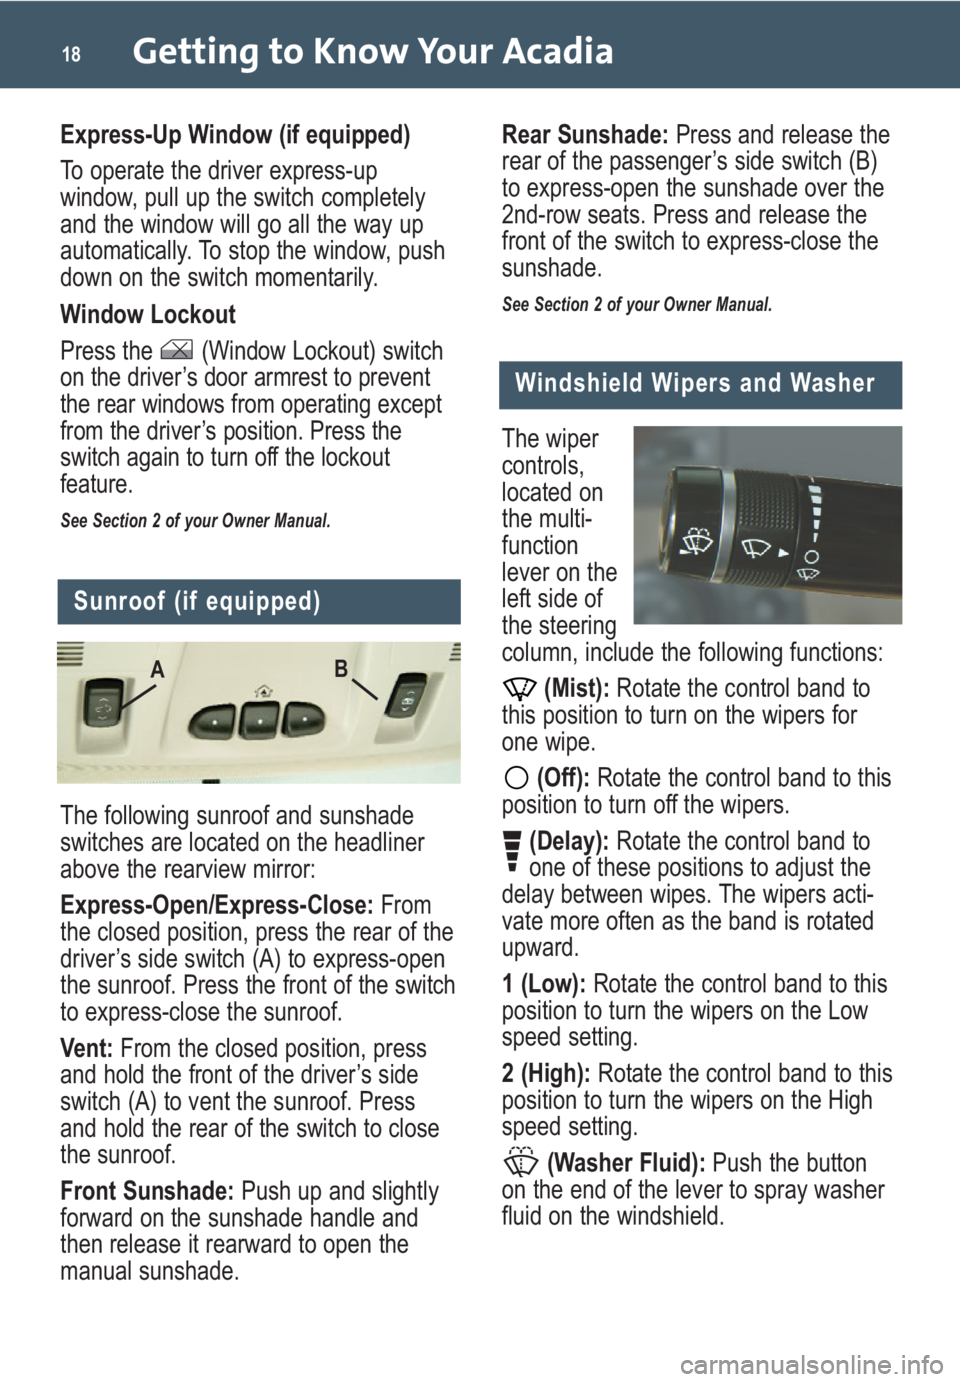
The following sunroof and sunshade
switches are located on the headliner
above the rearview mirror:
Express-Open/Express-Close:From
the closed position, press the rear of the
driver’s side switch (A) to express-open
the sunroof. Press the front of the switch
to express-close the sunroof.
Vent: From the closed position, press
and hold the front of the driver’s side
switch (A) to vent the sunroof. Press
and hold the rear of the switch to close
the sunroof.
Front Sunshade: Push up and slightly
forward on the sunshade handle and
then release it rearward to open the
manual sunshade.
Sunroof (if equipped)
AB
Windshield Wipers and Washer
The wiper
controls,
located on
the multi-
function
lever on the
left side of
the steering
column, include the following functions:
(Mist):Rotate the control band to
this position to turn on the wipers for
one wipe.
(Off):Rotate the control band to this
position to turn off the wipers.
(Delay):Rotate the control band to
one of these positions to adjust the
delay between wipes. The wipers acti-
vate more often as the band is rotated
upward.
1 (Low):Rotate the control band to this
position to turn the wipers on the Low
speed setting.
2 (High):Rotate the control band to this
position to turn the wipers on the High
speed setting.
(Washer Fluid): Push the button
on the end of the lever to spray washer
fluid on the windshield.
Express-Up Window (if equipped)
To operate the driver express-up
window, pull up the switch completely
and the window will go all the way up
automatically. To stop the window, push
down on the switch momentarily.
Window Lockout
Press the (Window Lockout) switch
on the driver’s door armrest to prevent
the rear windows from operating except
from the driver’s position. Press the
switch again to turn off the lockout
feature.
See Section 2 of your Owner Manual.
Rear Sunshade:Press and release the
rear of the passenger’s side switch (B)
to express-open the sunshade over the
2nd-row seats. Press and release the
front of the switch to express-close the
sunshade.
See Section 2 of your Owner Manual.