GMC ACADIA 2009 Owner's Manual
Manufacturer: GMC, Model Year: 2009, Model line: ACADIA, Model: GMC ACADIA 2009Pages: 420, PDF Size: 2.23 MB
Page 1 of 420
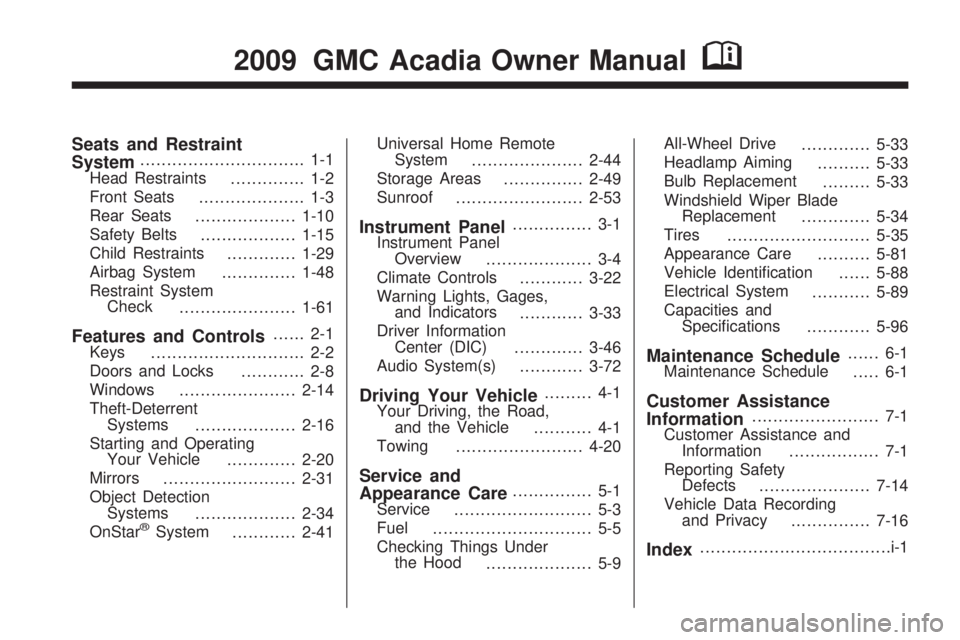
Seats and Restraint
System............................... 1-1
Head Restraints
.............. 1-2
Front Seats
.................... 1-3
Rear Seats
...................1-10
Safety Belts
..................1-15
Child Restraints
.............1-29
Airbag System
..............1-48
Restraint System
Check
......................1-61
Features and Controls...... 2-1
Keys
............................. 2-2
Doors and Locks
............ 2-8
Windows
......................2-14
Theft-Deterrent
Systems
...................2-16
Starting and Operating
Your Vehicle
.............2-20
Mirrors
.........................2-31
Object Detection
Systems
...................2-34
OnStar
®System
............2-41Universal Home Remote
System
.....................2-44
Storage Areas
...............2-49
Sunroof
........................2-53
Instrument Panel............... 3-1
Instrument Panel
Overview
.................... 3-4
Climate Controls
............3-22
Warning Lights, Gages,
and Indicators
............3-33
Driver Information
Center (DIC)
.............3-46
Audio System(s)
............3-72
Driving Your Vehicle......... 4-1
Your Driving, the Road,
and the Vehicle
........... 4-1
Towing
........................4-20
Service and
Appearance Care............... 5-1
Service
.......................... 5-3
Fuel
.............................. 5-5
Checking Things Under
the Hood
.................... 5-9All-Wheel Drive
.............5-33
Headlamp Aiming
..........5-33
Bulb Replacement
.........5-33
Windshield Wiper Blade
Replacement
.............5-34
Tires
...........................5-35
Appearance Care
..........5-81
Vehicle Identi�cation
......5-88
Electrical System
...........5-89
Capacities and
Speci�cations
............5-96
Maintenance Schedule...... 6-1
Maintenance Schedule
..... 6-1
Customer Assistance
Information........................ 7-1
Customer Assistance and
Information
................. 7-1
Reporting Safety
Defects
.....................7-14
Vehicle Data Recording
and Privacy
...............7-16
Index....................................i-1
2009 GMC Acadia Owner ManualM
Page 2 of 420
GENERAL MOTORS, GM, the GM
Emblem, GMC, the GMC Emblem,
and the name ACADIA, are
registered trademarks of General
Motors Corporation.
This manual includes the latest
information at the time it was
printed. GM reserves the right to
make changes after that time
without further notice. For vehicles
�rst sold in Canada, substitute
the name “General Motors of
Canada Limited” for GMC wherever
it appears in this manual.This manual describes features that
may or may not be on your
speci�c vehicle.
Read this manual from beginning to
end to learn about the vehicle’s
features and controls. Pictures,
symbols, and words work together
to explain vehicle operation.
Keep this manual in the vehicle for
quick reference.
Canadian Owners
A French language copy of this
manual can be obtained from your
dealer/retailer or from:
Helm, Incorporated
P.O. Box 07130
Detroit, MI 48207
1-800-551-4123
helminc.com
Propriétaires Canadiens
On peut obtenir un exemplaire de
ce guide en français auprès de
concessionnaire ou à l’adresse
suivante:
Helm Incorporated
P.O. Box 07130
Detroit, MI 48207
1-800-551-4123
helminc.com
ii Preface
Litho in U.S.A.
Part No. 15919282 A First Printing©2008 General Motors Corporation. All Rights Reserved.
Page 3 of 420

Index
To quickly locate information about
the vehicle use the Index in the back
of the manual. It is an alphabetical
list of what is in the manual and the
page number where it can be found.
Safety Warnings and
Symbols
A circle with a slash through it is a
safety symbol which means “Do Not,”
“Do not do this” or “Do not let this
happen.”A box with the word CAUTION is
used to tell about things that could
hurt you or others if you were to
ignore the warning.
{CAUTION
These mean there is something
that could hurt you or other
people.
Cautions tell what the hazard is and
what to do to avoid or reduce the
hazard. Read these cautions.
A notice tells about something that
can damage the vehicle.
Notice:These mean there is
something that could damage
your vehicle.
Many times, this damage would not
be covered by the vehicle’s warranty,
and it could be costly. The notice
tells what to do to help avoid the
damage.There are also warning labels on
the vehicle which use the same
words, CAUTION or Notice.
Vehicle Symbols
The vehicle has components and
labels that use symbols instead
of text. Symbols are shown along
with the text describing the operation
or information relating to a speci�c
component, control, message,
gage, or indicator.
M:This symbol is shown when
you need to see your owner manual
for additional instructions or
information.
*:This symbol is shown when
you need to see a service manual
for additional instructions or
information.
Preface iii
Page 4 of 420
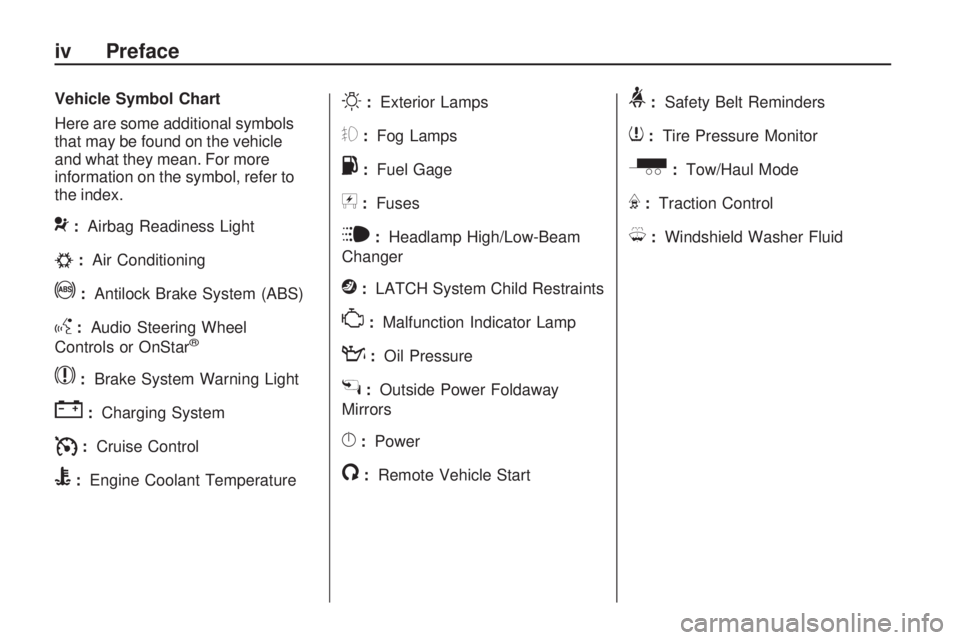
Vehicle Symbol Chart
Here are some additional symbols
that may be found on the vehicle
and what they mean. For more
information on the symbol, refer to
the index.
9:Airbag Readiness Light
#:Air Conditioning
!:Antilock Brake System (ABS)
g:Audio Steering Wheel
Controls or OnStar®
$:Brake System Warning Light
":Charging System
I:Cruise Control
B:Engine Coolant Temperature
O:Exterior Lamps
#:Fog Lamps
.:Fuel Gage
+:Fuses
i:Headlamp High/Low-Beam
Changer
j:LATCH System Child Restraints
*:Malfunction Indicator Lamp
::Oil Pressure
g:Outside Power Foldaway
Mirrors
}:Power
/:Remote Vehicle Start
>:Safety Belt Reminders
7:Tire Pressure Monitor
_:Tow/Haul Mode
F:Traction Control
M:Windshield Washer Fluid
iv Preface
Page 5 of 420
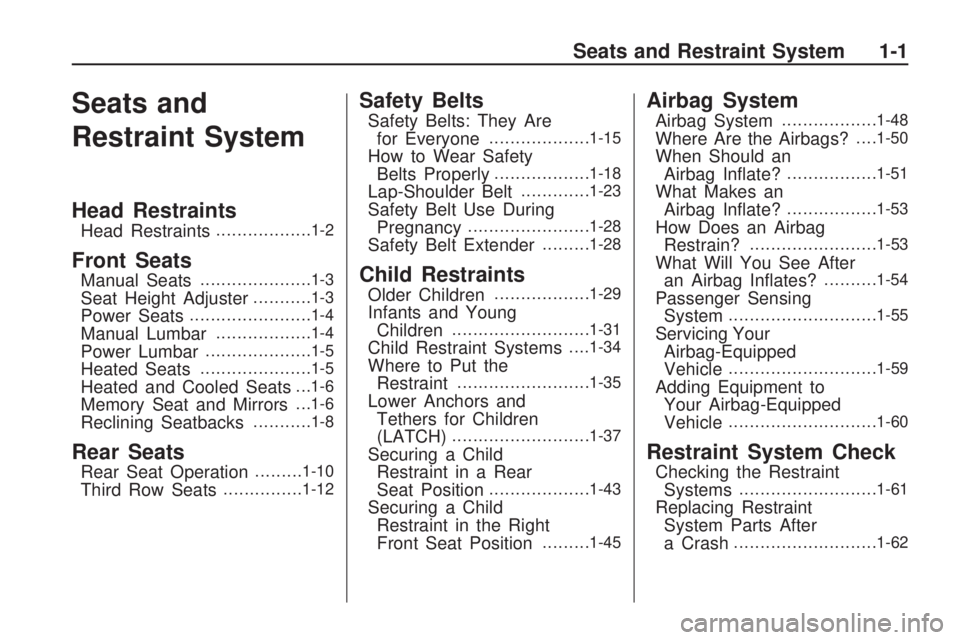
Seats and
Restraint System
Head Restraints
Head Restraints..................1-2
Front Seats
Manual Seats.....................1-3
Seat Height Adjuster...........1-3
Power Seats.......................1-4
Manual Lumbar..................1-4
Power Lumbar....................1-5
Heated Seats.....................1-5
Heated and Cooled Seats. . .1-6
Memory Seat and Mirrors. . .1-6
Reclining Seatbacks...........1-8
Rear Seats
Rear Seat Operation.........1-10
Third Row Seats...............1-12
Safety Belts
Safety Belts: They Are
for Everyone...................1-15
How to Wear Safety
Belts Properly..................1-18
Lap-Shoulder Belt.............1-23
Safety Belt Use During
Pregnancy.......................1-28
Safety Belt Extender.........1-28
Child Restraints
Older Children..................1-29
Infants and Young
Children..........................1-31
Child Restraint Systems. . . .1-34
Where to Put the
Restraint.........................1-35
Lower Anchors and
Tethers for Children
(LATCH)
..........................1-37
Securing a Child
Restraint in a Rear
Seat Position
...................1-43
Securing a Child
Restraint in the Right
Front Seat Position
.........1-45
Airbag System
Airbag System..................1-48
Where Are the Airbags?. . . .1-50
When Should an
Airbag In�ate?.................1-51
What Makes an
Airbag In�ate?.................1-53
How Does an Airbag
Restrain?........................1-53
What Will You See After
an Airbag In�ates?..........1-54
Passenger Sensing
System............................1-55
Servicing Your
Airbag-Equipped
Vehicle
............................1-59
Adding Equipment to
Your Airbag-Equipped
Vehicle
............................1-60
Restraint System Check
Checking the Restraint
Systems..........................1-61
Replacing Restraint
System Parts After
a Crash
...........................1-62
Seats and Restraint System 1-1
Page 6 of 420
Head Restraints
The vehicle’s front seats have
adjustable head restraints in all
outboard seating positions.
{CAUTION
With head restraints that are not
installed and adjusted properly,
there is a greater chance that
occupants will suffer a neck/spinal
injury in a crash. Do not drive until
the head restraints for all
occupants are installed and
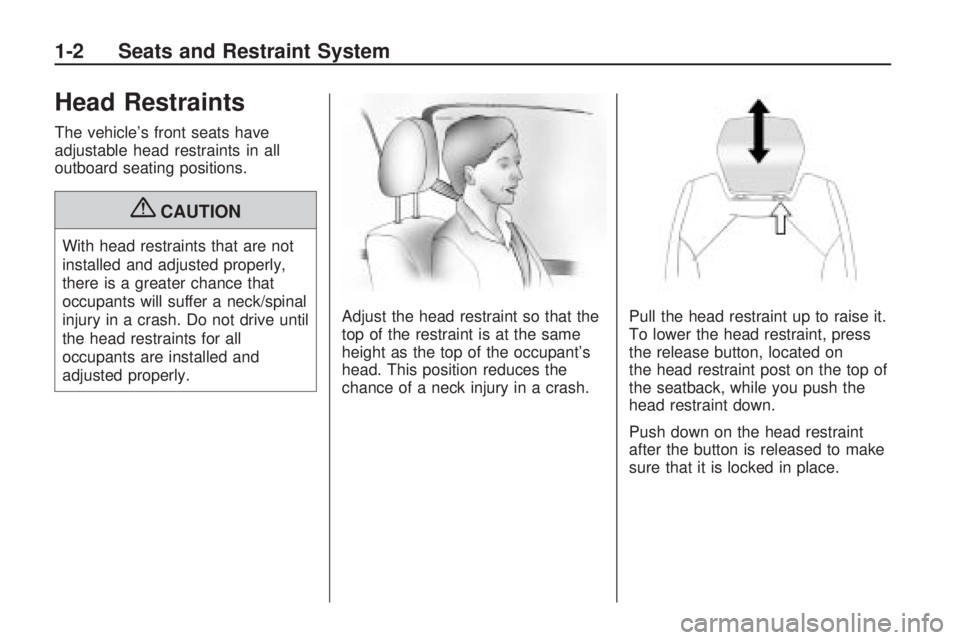
adjusted properly.Adjust the head restraint so that the
top of the restraint is at the same
height as the top of the occupant’s
head. This position reduces the
chance of a neck injury in a crash.Pull the head restraint up to raise it.
To lower the head restraint, press
the release button, located on
the head restraint post on the top of
the seatback, while you push the
head restraint down.
Push down on the head restraint
after the button is released to make
sure that it is locked in place.
1-2 Seats and Restraint System
Page 7 of 420
Front Seats
Manual Seats
{CAUTION
You can lose control of the
vehicle if you try to adjust a
manual driver’s seat while the
vehicle is moving. The sudden
movement could startle and
confuse you, or make you push a
pedal when you do not want to.
Adjust the driver’s seat only when
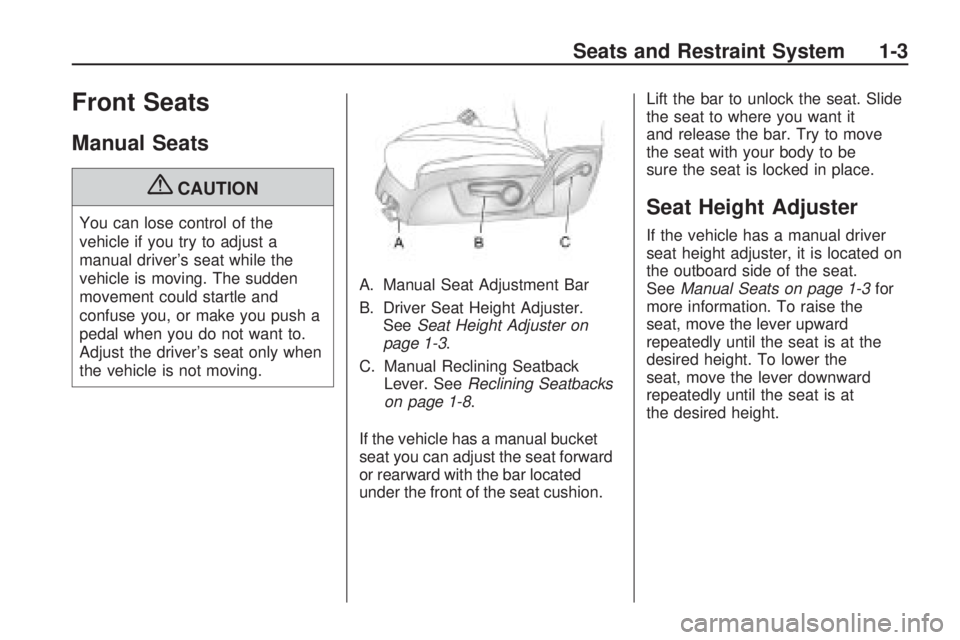
the vehicle is not moving.A. Manual Seat Adjustment Bar
B. Driver Seat Height Adjuster.
SeeSeat Height Adjuster on
page 1-3.
C. Manual Reclining Seatback
Lever. SeeReclining Seatbacks
on page 1-8.
If the vehicle has a manual bucket
seat you can adjust the seat forward
or rearward with the bar located
under the front of the seat cushion.Lift the bar to unlock the seat. Slide
the seat to where you want it
and release the bar. Try to move
the seat with your body to be
sure the seat is locked in place.Seat Height Adjuster
If the vehicle has a manual driver
seat height adjuster, it is located on
the outboard side of the seat.
SeeManual Seats on page 1-3for
more information. To raise the
seat, move the lever upward
repeatedly until the seat is at the
desired height. To lower the
seat, move the lever downward
repeatedly until the seat is at
the desired height.
Seats and Restraint System 1-3
Page 8 of 420
Power Seats
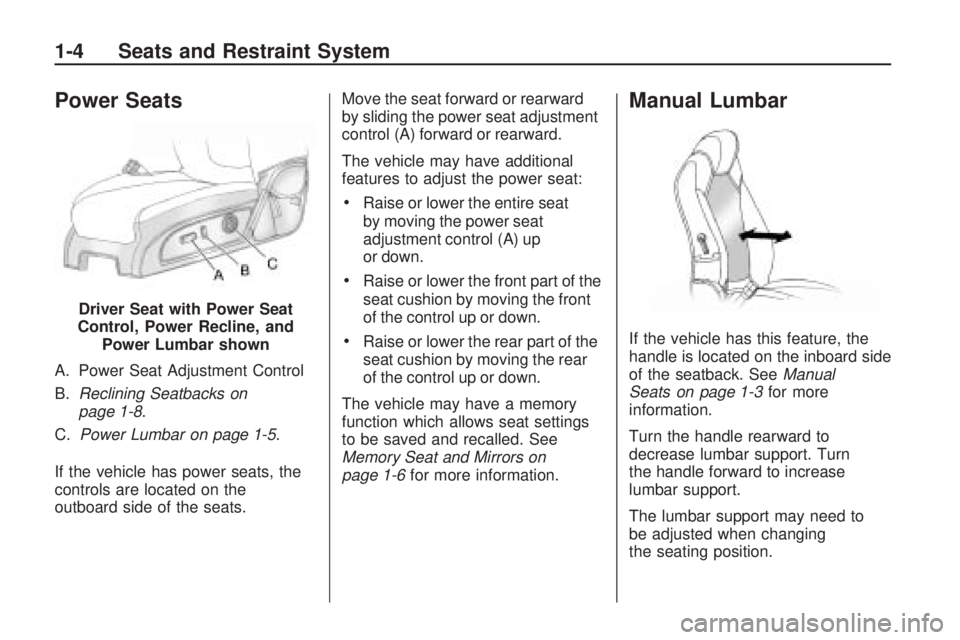
A. Power Seat Adjustment Control
B.Reclining Seatbacks on
page 1-8.
C.Power Lumbar on page 1-5.
If the vehicle has power seats, the
controls are located on the
outboard side of the seats.Move the seat forward or rearward
by sliding the power seat adjustment
control (A) forward or rearward.
The vehicle may have additional
features to adjust the power seat:
Raise or lower the entire seat
by moving the power seat
adjustment control (A) up
or down.
Raise or lower the front part of the
seat cushion by moving the front
of the control up or down.
Raise or lower the rear part of the
seat cushion by moving the rear
of the control up or down.
The vehicle may have a memory
function which allows seat settings
to be saved and recalled. See
Memory Seat and Mirrors on
page 1-6for more information.
Manual Lumbar
If the vehicle has this feature, the
handle is located on the inboard side
of the seatback. SeeManual
Seats on page 1-3for more
information.
Turn the handle rearward to
decrease lumbar support. Turn
the handle forward to increase
lumbar support.
The lumbar support may need to
be adjusted when changing
the seating position. Driver Seat with Power Seat
Control, Power Recline, and
Power Lumbar shown
1-4 Seats and Restraint System
Page 9 of 420
Power Lumbar
If the seats have power lumbar,
the controls used to operate
this feature are located on the
outboard side of the seats. See
“Power Lumbar” underPower Seats
on page 1-4for more information.
To increase or decrease lumbar
support, press and hold the front
or rear of the control (C).
Release the control when the
seatback reaches the desired
level of lumbar support.
The lumbar support may need
to be adjusted when changing
the seating position.
Heated Seats
On vehicles with heated front seats,
the controls are located on the center
console. To operate the heated seats
the engine must be running.
I(Heated Seatback):Press to
turn on the heated seatback.
J(Heated Seat and Seatback):
Press to turn on or off the heated
seat and seatback.
The light on the button will come
on to indicate that the feature is on.
Each time the button is pressed,
the temperature settings change
from high, to medium, to low, to
off. Indicator lights above the button
will show the level of heat selected:
three for high, two for medium,
and one for low.The passenger seat may take
longer to heat up.
If the vehicle has remote vehicle
start and is started using the remote
keyless entry transmitter, the front
heated seats will be turned on to the
high setting if it is cold outside.
See “Remote Vehicle Start” under
Remote Keyless Entry (RKE)
System Operation on page 2-3.
When the ignition is turned on, the
heated seat feature will turn off.
To turn the heated seat feature back
on, press the desired button.
Seats and Restraint System 1-5
Page 10 of 420
Heated and Cooled Seats
If the front seats have the heated
and cooled seat feature, the buttons
used to control this feature are
located on the front doors near the
door handle.
H(Cooled Seat):To cool the
entire seat, press the button with the
cooled seat symbol.
This symbol will appear on the
climate control display to indicate
that the feature is on. Press the
button to cycle through the
temperature settings of high,
medium, and low and to turn the
cooled seat off. Indicator bars next to
the symbol designate the level of
cooling selected: three for high,
two for medium, and one for low.
z(Heated Seat and Seatback):
To heat the entire seat, press
the button with the heated seat and
seatback symbol.
This symbol will appear on the
climate control display to indicate
that the feature is on. Press the
button to cycle through the
temperature settings of high,
medium, and low and to turn the
heated seat off. Indicator bars next to
the symbol designate the level of
heat selected: three for high, two for
medium, and one for low.
The heated and cooled seats will be
canceled after the ignition is
turned off. To use the heated and
cooled seat feature after the vehicle
is started, you will need to press
the appropriate seat button again.Memory Seat and Mirrors
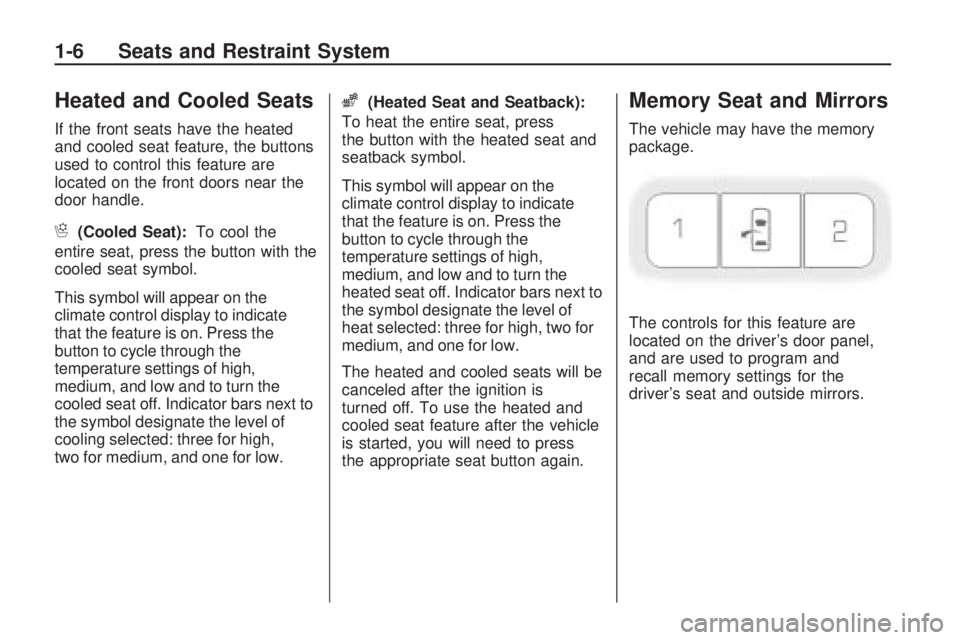
The vehicle may have the memory
package.
The controls for this feature are
located on the driver’s door panel,
and are used to program and
recall memory settings for the
driver’s seat and outside mirrors.
1-6 Seats and Restraint System