stop start GMC ACADIA 2009 Owner's Guide
[x] Cancel search | Manufacturer: GMC, Model Year: 2009, Model line: ACADIA, Model: GMC ACADIA 2009Pages: 420, PDF Size: 2.23 MB
Page 234 of 420
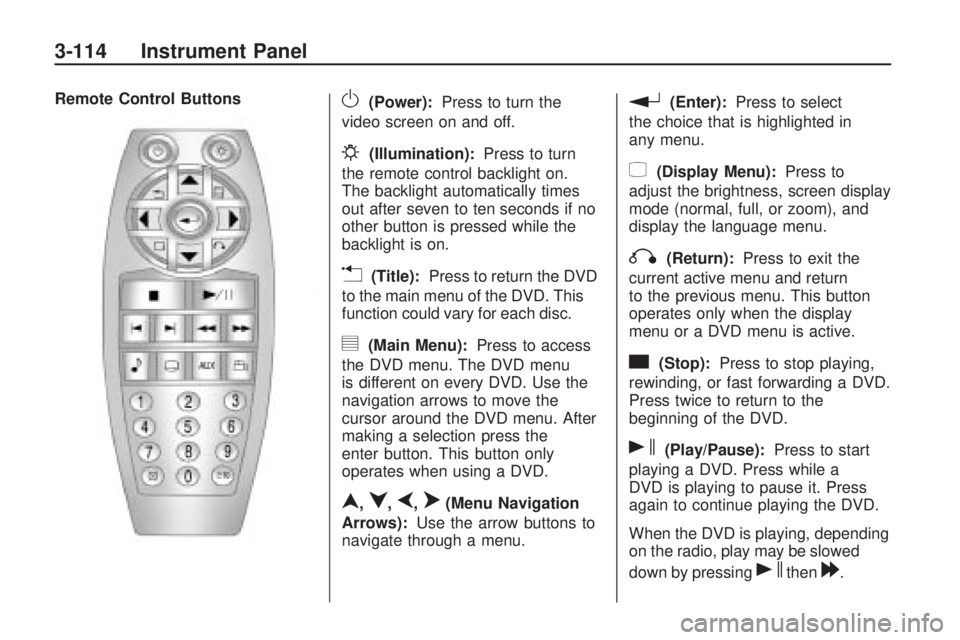
Remote Control ButtonsO(Power):Press to turn the
video screen on and off.
P(Illumination):Press to turn
the remote control backlight on.
The backlight automatically times
out after seven to ten seconds if no
other button is pressed while the
backlight is on.
v(Title):Press to return the DVD
to the main menu of the DVD. This
function could vary for each disc.
y(Main Menu):Press to access
the DVD menu. The DVD menu
is different on every DVD. Use the
navigation arrows to move the
cursor around the DVD menu. After
making a selection press the
enter button. This button only
operates when using a DVD.
n,q,p,o(Menu Navigation
Arrows):Use the arrow buttons to
navigate through a menu.
r(Enter):Press to select
the choice that is highlighted in
any menu.
z(Display Menu):Press to
adjust the brightness, screen display
mode (normal, full, or zoom), and
display the language menu.
q(Return):Press to exit the
current active menu and return
to the previous menu. This button
operates only when the display
menu or a DVD menu is active.
c(Stop):Press to stop playing,
rewinding, or fast forwarding a DVD.
Press twice to return to the
beginning of the DVD.
s(Play/Pause):Press to start
playing a DVD. Press while a
DVD is playing to pause it. Press
again to continue playing the DVD.
When the DVD is playing, depending
on the radio, play may be slowed
down by pressing
sthen[.
3-114 Instrument Panel
Page 235 of 420
The DVD continues playing in a slow
play mode. Depending on the radio,
perform reverse slow play by
pressing
sthenr. To cancel
slow play mode, press
sagain.
t(Previous Track/Chapter):
Press to return to the start of the
current track or chapter. Press again
to go to the previous track or chapter.
This button might not work when the
DVD is playing the copyright
information or the previews.
u(Next Track/Chapter):Press to
go to the beginning of the next
chapter or track. This button might
not work when the DVD is playing
the copyright information or the
previews.
r(Fast Reverse):Press to
quickly reverse the DVD or CD.
To stop fast reversing a DVD video,
press
s. To stop fast reversing
a DVD audio or CD, release
r.This button might not work when
the DVD is playing the copyright
information or the previews.
[(Fast Forward):Press to fast
forward the DVD or CD. To stop fast
forwarding a DVD video, press
s.
To stop fast forwarding a DVD audio
or CD, release
[. This button might
not work when the DVD is playing
the copyright information or the
previews.
e(Audio):Press to change audio
tracks on DVDs that have this
feature when the DVD is playing.
The format and content of this
function vary for each disc.
{(Subtitles):Press to turn
ON/OFF subtitles and to move
through subtitle options when a DVD
is playing. The format and content
of this function vary for each disc.
AUX (Auxiliary):Press to
switch the system between the DVD
player and an auxiliary source.
d(Camera):Press to change
camera angles on DVDs that have
this feature when a DVD is
playing. The format and content of
this function vary for each disc.
1 through 0 (Numeric Keypad):
The numeric keypad provides
the capability of direct chapter or
track number selection.
\(Clear):Press within
three seconds after entering a
numeric selection, to clear all
numerical inputs.
}10 (Double Digit Entries):Press
to select chapter or track numbers
greater than nine. Press this
button before entering the number.
If the remote control becomes
lost or damaged, a new universal
remote control can be purchased.
If this happens, make sure the
universal remote control uses a
Toshiba
®code set.
Instrument Panel 3-115
Page 236 of 420
Battery Replacement
To change the remote control
batteries:
1. Slide the rear cover back, on theremote control.
2. Replace the two batteries in the compartment. Make sure that
they are installed correctly, using
the diagram on the inside of
the battery compartment.
3. Replace the battery cover.
If the remote control is to be stored
for a long period of time, remove
the batteries and keep them in
a cool, dry place.Problem Recommended Action
No power. The ignition might not be turned
ON/RUN or in ACC/ACCESSORY.
The picture does not �ll the screen.
There are black borders on the top
and bottom or on both sides or it
looks stretched out. Check the display mode settings in
the setup menu by pressing the
display menu button on the remote
control.
In auxiliary mode, the picture moves
or scrolls. Check the auxiliary input
connections at both devices.
The remote control does not work. Check to make sure there is no obstruction between the remote
control and the transmitter window.
Check the batteries to make sure
they are not dead or installed
incorrectly.
After stopping the player, I push
Play but sometimes the DVD starts
where I left off and sometimes at
the beginning. If the stop button was pressed
one time, the DVD player resumes
playing where the DVD was
stopped. If the stop button was
pressed two times the DVD player
begins to play from the beginning of
the DVD.
The auxiliary source is running but
there is no picture or sound. Check that the RSE video screen is
in the auxiliary source mode.
Check the auxiliary input
connections at both devices.
3-116 Instrument Panel
Page 239 of 420
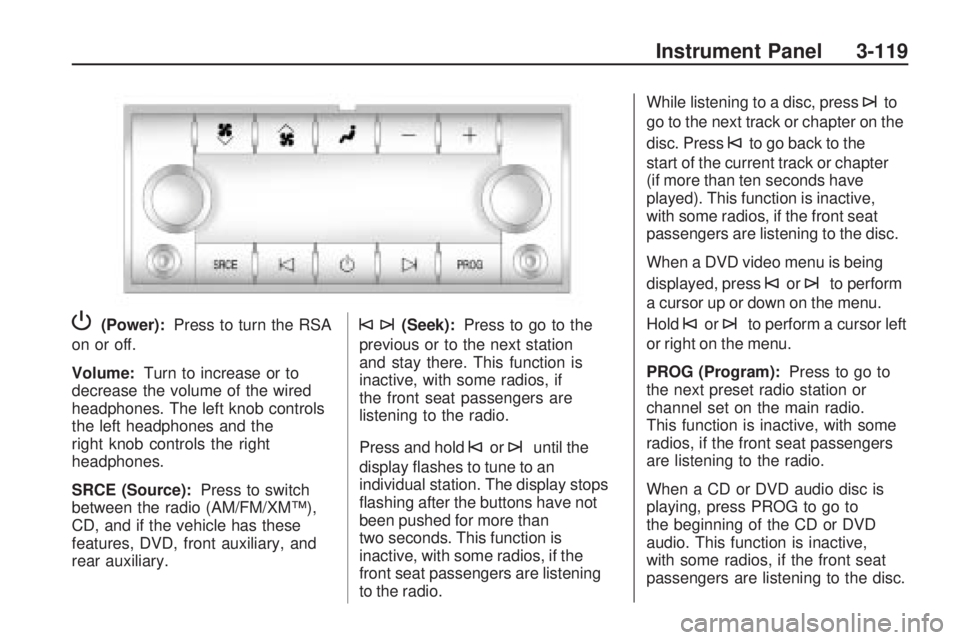
P(Power):Press to turn the RSA
on or off.
Volume: Turn to increase or to
decrease the volume of the wired
headphones. The left knob controls
the left headphones and the
right knob controls the right
headphones.
SRCE (Source): Press to switch
between the radio (AM/FM/XMâ¢),
CD, and if the vehicle has these
features, DVD, front auxiliary, and
rear auxiliary.©¨(Seek): Press to go to the
previous or to the next station
and stay there. This function is
inactive, with some radios, if
the front seat passengers are
listening to the radio.
Press and hold
©or¨until the
display �ashes to tune to an
individual station. The display stops
�ashing after the buttons have not
been pushed for more than
two seconds. This function is
inactive, with some radios, if the
front seat passengers are listening
to the radio. While listening to a disc, press
¨to
go to the next track or chapter on the
disc. Press
©to go back to the
start of the current track or chapter
(if more than ten seconds have
played). This function is inactive,
with some radios, if the front seat
passengers are listening to the disc.
When a DVD video menu is being
displayed, press
©or¨to perform
a cursor up or down on the menu.
Hold
©or¨to perform a cursor left
or right on the menu.
PROG (Program): Press to go to
the next preset radio station or
channel set on the main radio.
This function is inactive, with some
radios, if the front seat passengers
are listening to the radio.
When a CD or DVD audio disc is
playing, press PROG to go to
the beginning of the CD or DVD
audio. This function is inactive,
with some radios, if the front seat
passengers are listening to the disc.
Instrument Panel 3-119
Page 243 of 420
Driving Your
Vehicle
Your Driving, the Road,
and the Vehicle
Driving for Better Fuel
Economy...........................4-1
Defensive Driving................4-2
Drunk Driving.....................4-2
Control of a Vehicle............4-3
Braking...............................4-3
Antilock Brake
System (ABS)...................4-4
Braking in Emergencies......4-5
StabiliTrak®System............4-5
All-Wheel Drive (AWD)
System.............................4-7
Steering..............................4-8
Off-Road Recovery.............4-9
Passing..............................4-9
Loss of Control...................4-9
Driving at Night.................4-10
Driving in Rain and on
Wet Roads......................4-11
Before Leaving on a
Long Trip........................4-12
Highway Hypnosis.............4-12
Hill and Mountain Roads. . .4-12
Winter Driving...................4-13
If Your Vehicle is Stuck
in Sand, Mud, Ice,
or Snow
..........................4-15
Rocking Your Vehicle to
Get It Out.......................4-15
Loading the Vehicle..........4-16
Towing
Towing Your Vehicle.........4-20
Recreational Vehicle
Towing............................4-21
Towing a Trailer................4-24
Your Driving, the
Road, and the Vehicle
Driving for Better Fuel
Economy
Driving habits can affect fuel
mileage. Here are some driving
tips to get the best fuel economy
possible.
Avoid fast starts and accelerate
smoothly.
Brake gradually and avoid
abrupt stops.
Avoid idling the engine for long
periods of time.
When road and weather
conditions are appropriate, use
cruise control, if equipped.
Always follow posted speed limits
or drive more slowly when
conditions require.
Driving Your Vehicle 4-1
Page 246 of 420
And, of course, actual stopping
distances vary greatly with the
surface of the road, whether it is
pavement or gravel; the condition of
the road, whether it is wet, dry, or icy;
tire tread; the condition of the brakes;
the weight of the vehicle; and the
amount of brake force applied.
Avoid needless heavy braking. Some
people drive in spurts â heavy
acceleration followed by heavy
braking â rather than keeping pace
with traffic. This is a mistake. The
brakes might not have time to cool
between hard stops. The brakes will
wear out much faster with a lot of
heavy braking. Keeping pace with
the traffic and allowing realistic
following distances eliminates a lot of
unnecessary braking. That means
better braking and longer brake life.
If the engine ever stops while the
vehicle is being driven, brake
normally but do not pump the
brakes. If the brakes are pumped,
the pedal could get harder to
push down. If the engine stops,there will still be some power brake
assist but it will be used when
the brake is applied. Once the power
assist is used up, it can take
longer to stop and the brake pedal
will be harder to push.
Adding non-dealer/non-retailer
accessories can affect vehicle
performance. SeeAccessories and
Modiï¬cations on page 5-3.
Antilock Brake
System (ABS)
This vehicle has the Antilock Brake
System (ABS), an advanced
electronic braking system that will
help prevent a braking skid.
When the engine is started and the
vehicle begins to drive away,
ABS checks itself. A momentary
motor or clicking noise might
be heard while this test is going on,
and it might even be noticed that
the brake pedal moves a little. This
is normal.If there is a problem with ABS, this
warning light stays on. See
Antilock Brake System (ABS)
Warning Light on page 3-39.
Let us say the road is wet and you
are driving safely. Suddenly, an
animal jumps out in front of you.
You slam on the brakes and continue
braking. Here is what happens
with ABS:
A computer senses that the wheels
are slowing down. If one of the
wheels is about to stop rolling, the
computer will separately work
the brakes at each wheel.
ABS can change the brake pressure
to each wheel, as required, faster
than any driver could. This can help
the driver steer around the
obstacle while braking hard.
4-4 Driving Your Vehicle
Page 247 of 420
As the brakes are applied, the
computer keeps receiving updates
on wheel speed and controls braking
pressure accordingly.
Remember: ABS does not change
the time needed to get a foot
up to the brake pedal or always
decrease stopping distance. If you
get too close to the vehicle in
front of you, there will not be enough
time to apply the brakes if that
vehicle suddenly slows or stops.
Always leave enough room up
ahead to stop, even with ABS.
Using ABS
Do not pump the brakes. Just hold
the brake pedal down �rmly and
let antilock work. The antilock pump
or motor operating might be
heard and the brake pedal might be
felt to pulsate, but this is normal.
Braking in Emergencies
ABS allows the driver to steer and
brake at the same time. In many
emergencies, steering can help more
than even the very best braking.
Brake Assist
This vehicle has a Brake Assist
feature designed to assist the driver
in stopping or decreasing vehicle
speed in emergency driving
conditions. This feature uses the
stability system hydraulic brake
control module to supplement the
power brake system under
conditions where the driver has
quickly and forcefully applied the
brake pedal in an attempt to quickly
stop or slow down the vehicle. The
stability system hydraulic brake
control module increases brake
pressure at each corner of the
vehicle until the ABS activates.
Minor brake pedal pulsations or
pedal movement during this time is
normal and the driver should
continue to apply the brake pedal
as the driving situation dictates.The Brake Assist feature will
automatically disengage when the
brake pedal is released or brake
pedal pressure is quickly decreased.
StabiliTrak®System
The vehicle has the StabiliTrak
system which combines antilock
brake, traction and stability control
systems and helps the driver
maintain directional control of the
vehicle in most driving conditions.
When you �rst start the vehicle and
begin to drive away, the system
performs several diagnostic checks
to ensure there are no problems. The
system may be heard or felt while it
is working. This is normal and does
not mean there is a problem with the
vehicle. The system should initialize
before the vehicle reaches 20 mph
(32 km/h). In some cases, it may take
approximately two miles of driving
before the system initializes.
Driving Your Vehicle 4-5
Page 252 of 420
Skidding
In a skid, a driver can lose control
of the vehicle. Defensive drivers
avoid most skids by taking
reasonable care suited to existing
conditions, and by not overdriving
those conditions. But skids are
always possible.
The three types of skids correspond
to the vehicleâs three control
systems. In the braking skid, the
wheels are not rolling. In the steering
or cornering skid, too much speed
or steering in a curve causes tires
to slip and lose cornering force.
And in the acceleration skid, too
much throttle causes the driving
wheels to spin.
If the vehicle starts to slide, ease
your foot off the accelerator
pedal and quickly steer the way you
want the vehicle to go. If you
start steering quickly enough, the
vehicle may straighten out. Always
be ready for a second skid if it
occurs.Of course, traction is reduced when
water, snow, ice, gravel, or other
material is on the road. For safety,
slow down and adjust your
driving to these conditions. It is
important to slow down on slippery
surfaces because stopping
distance is longer and vehicle
control more limited.
While driving on a surface with
reduced traction, try your best to
avoid sudden steering, acceleration,
or braking, including reducing vehicle
speed by shifting to a lower gear.
Any sudden changes could cause
the tires to slide. You might not
realize the surface is slippery until
the vehicle is skidding. Learn to
recognize warning clues â such as
enough water, ice, or packed snow
on the road to make a mirrored
surface â and slow down when you
have any doubt.
Remember: Any Antilock Brake
System (ABS) helps avoid only the
braking skid.
Driving at Night
Night driving is more dangerous than
day driving because some drivers
are likely to be impaired â by alcohol
or drugs, with night vision problems,
or by fatigue.
Night driving tips include:
Drive defensively.
Do not drink and drive.
Reduce headlamp glare by
adjusting the inside rearview
mirror.
Slow down and keep more space
between you and other vehicles
because headlamps can only
light up so much road ahead.
Watch for animals.
When tired, pull off the road.
Do not wear sunglasses.
Avoid staring directly into
approaching headlamps.
4-10 Driving Your Vehicle
Page 257 of 420
To save fuel, run the engine for only
short periods as needed to warm the
vehicle and then shut the engine off
and close the window most of the
way to save heat. Repeat this until
help arrives but only when you feel
really uncomfortable from the cold.
Moving about to keep warm also
helps.
If it takes some time for help to
arrive, now and then when you run
the engine, push the accelerator
pedal slightly so the engine runs
faster than the idle speed. This
keeps the battery charged to restart
the vehicle and to signal for help with
the headlamps. Do this as little as
possible to save fuel.
If Your Vehicle is
Stuck in Sand, Mud, Ice,
or Snow
Slowly and cautiously spin the
wheels to free the vehicle when
stuck in sand, mud, ice, or snow.
SeeRocking Your Vehicle to Get It
Out on page 4-15.If the vehicle has a traction system,
it can often help to free a stuck
vehicle. Refer to the vehicleâs
traction system in the Index. If stuck
too severely for the traction
system to free the vehicle, turn the
traction system off and use the
rocking method.
{CAUTION
If you let your vehicleâs tires spin
at high speed, they can explode,
and you or others could be
injured. The vehicle can overheat,
causing an engine compartment
�re or other damage. Spin the
wheels as little as possible and
avoid going above 35 mph
(55 km/h) as shown on the
speedometer.
For information about using tire
chains on the vehicle, seeTire
Chains on page 5-54.
Rocking Your Vehicle to
Get It Out
Turn the steering wheel left and
right to clear the area around
the front wheels. Turn off any
traction or stability system. Shift
back and forth between R (Reverse)
and a forward gear, spinning the
wheels as little as possible. To
prevent transmission wear, wait until
the wheels stop spinning before
shifting gears. Release the
accelerator pedal while shifting, and
press lightly on the accelerator
pedal when the transmission is in
gear. Slowly spinning the wheels in
the forward and reverse directions
causes a rocking motion that
could free the vehicle. If that does
not get the vehicle out after a
few tries, it might need to be towed
out. If the vehicle does need to
be towed out, seeTowing Your
Vehicle on page 4-20.
Driving Your Vehicle 4-15
Page 263 of 420
Recreational Vehicle
Towing
Recreational vehicle towing means
towing the vehicle behind another
vehicle â such as behind a
motorhome. The two most common
types of recreational vehicle towing
are known as âdinghy towingâ (towing
the vehicle with all four wheels on the
ground) and âdolly towingâ (towing
the vehicle with two wheels on the
ground and two wheels up on a
device known as a âdollyâ).
Here are some important things to
consider before recreational
vehicle towing:
What is the towing capacity of the
towing vehicle? Be sure to read
the tow vehicle manufacturerâs
recommendations.
What is the distance that will be
travelled? Some vehicles have
restrictions on how far and how
long they can tow.
Is the proper towing equipment
going to be used? See your
dealer/retailer or trailering
professional for additional advice
and equipment recommendations.
Is the vehicle ready to be towed?
Just as preparing the vehicle for a
long trip, make sure the vehicle is
prepared to be towed. SeeBefore
Leaving on a Long Trip on
page 4-12.
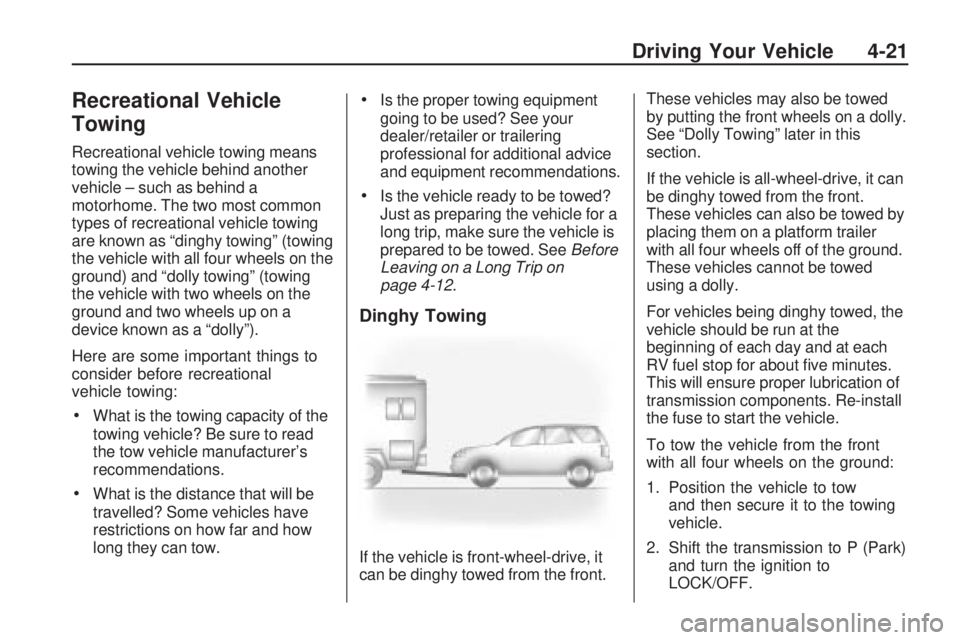
Dinghy Towing
If the vehicle is front-wheel-drive, it
can be dinghy towed from the front.These vehicles may also be towed
by putting the front wheels on a dolly.
See âDolly Towingâ later in this
section.
If the vehicle is all-wheel-drive, it can
be dinghy towed from the front.
These vehicles can also be towed by
placing them on a platform trailer
with all four wheels off of the ground.
These vehicles cannot be towed
using a dolly.
For vehicles being dinghy towed, the
vehicle should be run at the
beginning of each day and at each
RV fuel stop for about �ve minutes.
This will ensure proper lubrication of
transmission components. Re-install
the fuse to start the vehicle.
To tow the vehicle from the front
with all four wheels on the ground:
1. Position the vehicle to tow
and then secure it to the towing
vehicle.
2. Shift the transmission to P (Park)
and turn the ignition to
LOCK/OFF.
Driving Your Vehicle 4-21