seats GMC ACADIA 2010 Owner's Manual
[x] Cancel search | Manufacturer: GMC, Model Year: 2010, Model line: ACADIA, Model: GMC ACADIA 2010Pages: 444, PDF Size: 2.58 MB
Page 1 of 444
2010 GMC Acadia Owner ManualM
In Brief. . . . . . . . . . . . . . . . . . . . . . . . 1-1
Instrument Panel . . . . . . . . . . . . . . 1-2
Initial Drive Information . . . . . . . . 1-4
Vehicle Features . . . . . . . . . . . . . 1-14
Performance and Maintenance . . . . . . . . . . . . . . . . 1-18
Keys, Doors and Windows . . . 2-1
Keys and Locks . . . . . . . . . . . . . . . 2-2
Doors . . . . . . . . . . . . . . . . . . . . . . . . . . 2-9
Vehicle Security . . . . . . . . . . . . . . 2-13
Exterior Mirrors . . . . . . . . . . . . . . . 2-16
Interior Mirrors . . . . . . . . . . . . . . . . 2-18
Windows . . . . . . . . . . . . . . . . . . . . . 2-19
Roof . . . . . . . . . . . . . . . . . . . . . . . . . . 2-21
Seats and Restraints . . . . . . . . . 3-1
Head Restraints . . . . . . . . . . . . . . . 3-2
Front Seats . . . . . . . . . . . . . . . . . . . . 3-3
Rear Seats . . . . . . . . . . . . . . . . . . . . 3-9
Safety Belts . . . . . . . . . . . . . . . . . . 3-14
Airbag System . . . . . . . . . . . . . . . . 3-30
Child Restraints . . . . . . . . . . . . . . 3-45 Storage
. . . . . . . . . . . . . . . . . . . . . . . 4-1
Storage Compartments . . . . . . . . 4-1
Additional Storage Features . . . 4-3
Roof Rack System . . . . . . . . . . . . . 4-4
Instruments and Controls . . . . 5-1
Controls . . . . . . . . . . . . . . . . . . . . . . . 5-2
Warning Lights, Gages, and
Indicators . . . . . . . . . . . . . . . . . . . 5-10
Information Displays . . . . . . . . . . 5-23
Vehicle Messages . . . . . . . . . . . . 5-34
Vehicle Personalization . . . . . . . 5-44
Universal Remote System . . . . 5-51
Lighting . . . . . . . . . . . . . . . . . . . . . . . 6-1
Exterior Lighting . . . . . . . . . . . . . . . 6-1
Interior Lighting . . . . . . . . . . . . . . . . 6-5
Lighting Features . . . . . . . . . . . . . . 6-6
Infotainment System . . . . . . . . . 7-1
Introduction . . . . . . . . . . . . . . . . . . . . 7-1
Radio . . . . . . . . . . . . . . . . . . . . . . . . . . 7-6
Audio Players . . . . . . . . . . . . . . . . 7-12
Rear Seat Infotainment . . . . . . . 7-36
Phone . . . . . . . . . . . . . . . . . . . . . . . . 7-46 Climate Controls
. . . . . . . . . . . . . 8-1
Climate Control Systems . . . . . . 8-1
Air Vents . . . . . . . . . . . . . . . . . . . . . 8-11
Driving and Operating . . . . . . . . 9-1
Driving Information . . . . . . . . . . . . . 9-2
Starting and Operating . . . . . . . 9-15
Engine Exhaust . . . . . . . . . . . . . . 9-21
Automatic Transmission . . . . . . 9-22
Drive Systems . . . . . . . . . . . . . . . . 9-25
Brakes . . . . . . . . . . . . . . . . . . . . . . . 9-26
Ride Control Systems . . . . . . . . 9-28
Cruise Control . . . . . . . . . . . . . . . . 9-30
Object Detection Systems . . . . 9-32
Fuel . . . . . . . . . . . . . . . . . . . . . . . . . . 9-39
Towing . . . . . . . . . . . . . . . . . . . . . . . 9-44
Conversions and Add-Ons . . . 9-55
Vehicle Care . . . . . . . . . . . . . . . . . 10-1
General Information . . . . . . . . . . 10-3
Vehicle Checks . . . . . . . . . . . . . . . 10-4
Headlamp Aiming . . . . . . . . . . . 10-28
Bulb Replacement . . . . . . . . . . 10-29
Electrical System . . . . . . . . . . . . 10-30
Wheels and Tires . . . . . . . . . . . 10-37
Page 7 of 444
In Brief 1-1
In Brief
Instrument Panel
Instrument Panel . . . . . . . . . . . . . . 1-2
Initial Drive Information
Initial Drive Information . . . . . . . . 1-4
Remote Keyless Entry (RKE)System . . . . . . . . . . . . . . . . . . . . . . 1-4
Remote Vehicle Start . . . . . . . . . 1-4
Door Locks . . . . . . . . . . . . . . . . . . . 1-5
Liftgate . . . . . . . . . . . . . . . . . . . . . . . . 1-5
Windows . . . . . . . . . . . . . . . . . . . . . . 1-6
Seat Adjustment . . . . . . . . . . . . . . 1-6
Second Row Seats . . . . . . . . . . . 1-7
Third Row Seats . . . . . . . . . . . . . . 1-7
Heated Seats . . . . . . . . . . . . . . . . . 1-8
Heated and Ventilated Seats . . . . . . . . . . . . . . . . . . . . . . . . 1-8
Head Restraint Adjustment . . . . 1-8
Safety Belt . . . . . . . . . . . . . . . . . . . . 1-8
Sensing System for Passenger Airbag . . . . . . . . . . . . . . . . . . . . . . . 1-9
Mirror Adjustment . . . . . . . . . . . . . 1-9
Steering Wheel Adjustment . . . . . . . . . . . . . . . . . 1-10
Interior Lighting . . . . . . . . . . . . . . 1-10 Exterior Lighting . . . . . . . . . . . . . 1-11
Windshield Wiper/Washer . . . . 1-11
Climate Controls . . . . . . . . . . . . . 1-12
Vehicle Features
Radio(s) . . . . . . . . . . . . . . . . . . . . . 1-14
Satellite Radio . . . . . . . . . . . . . . . 1-15
Portable Audio Devices . . . . . . 1-15
Bluetooth
®. . . . . . . . . . . . . . . . . . . 1-15
Steering Wheel Controls . . . . . 1-16
Navigation System . . . . . . . . . . . 1-16
Cruise Control . . . . . . . . . . . . . . . 1-17
Storage Compartments . . . . . . 1-17
Power Outlets . . . . . . . . . . . . . . . 1-18
Sunroof . . . . . . . . . . . . . . . . . . . . . . 1-18
Performance and Maintenance
StabiliTrak®. . . . . . . . . . . . . . . . . . 1-18
Tire Pressure Monitor . . . . . . . . 1-19
Tire Sealant and Compressor Kit . . . . . . . . . . . . . 1-19
Engine Oil Life System . . . . . . 1-19
Driving for Better Fuel Economy . . . . . . . . . . . . . . . . . . . 1-20
Roadside Assistance Program . . . . . . . . . . . . . . . . . . . . 1-20
OnStar
®. . . . . . . . . . . . . . . . . . . . . 1-21
Page 9 of 444
In Brief 1-3
A.Air Vents on page 8‑11.
B. Windshield Wiper/Washer
on
page 5‑5.
C. Instrument Cluster
on
page 5‑11.
D. Head-Up Display (HUD)
on
page 5‑31(If Equipped).
E. Solar Sensor. See Dual
Automatic Climate Control
System on page 8‑4.
F. AM-FM Radio
on page 7‑6.
Navigation/Radio System (If
Equipped). See Navigation
System manual.
G. Exterior Lamp Controls
on
page 6‑1.
H. Hood Release. See Hood
on
page 10‑5. I.
Instrument Panel Illumination
Control
on page 6‑5.
J. Cruise Control on page 9‑30.
K. Steering Wheel Adjustment
on
page 5‑2.
L. Horn on page 5‑5.
M. Steering Wheel Controls
on
page 5‑3.
N. Driver Information Center (DIC) Buttons. See Driver Information
Center (DIC) (With DIC Buttons)
on page 5‑23or Driver
Information Center (DIC)
(Without DIC Buttons)
on
page 5‑28.
O. Dual Automatic Climate Control
System on page 8‑4. P. Center Console Shift Lever (If
Equipped). See “Console Shift
Lever” underShifting Into Park
on page 9‑19.
Q. Hazard Warning Flashers
on
page 6‑3.
R. Cupholders on page 4‑1.
S. Power Outlets on page 5‑8.
T. Rear Window Wiper/Washer
on
page 5‑6.
U. Heated Front Seats
on
page 3‑8(If Equipped).
V. Passenger Airbag Status
Indicator
on page 5‑15(If
Equipped) .
W. Glove Box on page 4‑1.
Page 12 of 444
1-6 In Brief
Power Liftgate
On vehicles with a power liftgate,
the vehicle must be in P (Park) to
operate it.
.Press and hold the liftgate
button
&on the Remote
Keyless Entry (RKE) transmitter.
.Press the liftgate button on the
center console.
.Press the touchpad switch on
the outside liftgate handle.
For more information see Liftgate
on page 2‑9.
Windows
On vehicles with power windows,
the switches are on the driver door
armrest. Each passenger door has
a switch that controls only that
window.
Press the switch to lower the
window. Pull the switch up to
raise it.
For more information, see Power
Windows on page 2‑20.
Seat Adjustment
Manual Seats
1. Pull the handle under the seat to unlock the seat.
2. Slide the seat to the desired position and release the handle.
Try to move the seat to be sure it is
locked in place.
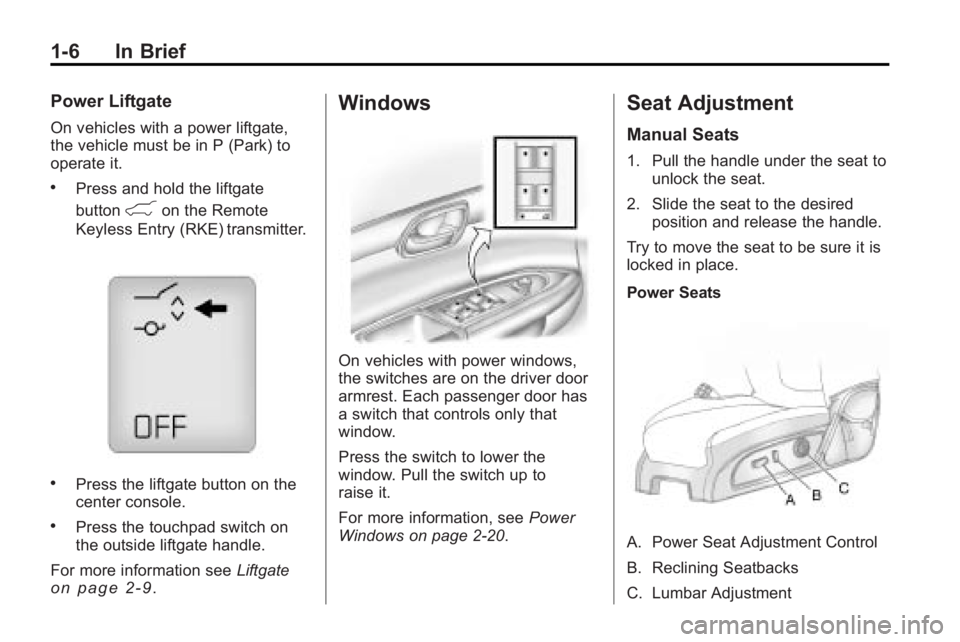
Power Seats
A. Power Seat Adjustment Control
B. Reclining Seatbacks
C. Lumbar Adjustment
Page 13 of 444
In Brief 1-7
Move the seat forward or rearward
by moving the control (A) forward or
rearward.
Raise or lower the entire seat by
moving the control (A) up or down.
SeePower Seat Adjustment
on
page 3‑3.
To raise or recline the seatback, tilt
the top of the control (B) forward or
rearward.
See Reclining Seatbacks
on
page 3‑6.
Press the front or rear of the
control (C) to increase or decrease
lumbar support.
See Lumbar Adjustment
on
page 3‑5.
Second Row Seats
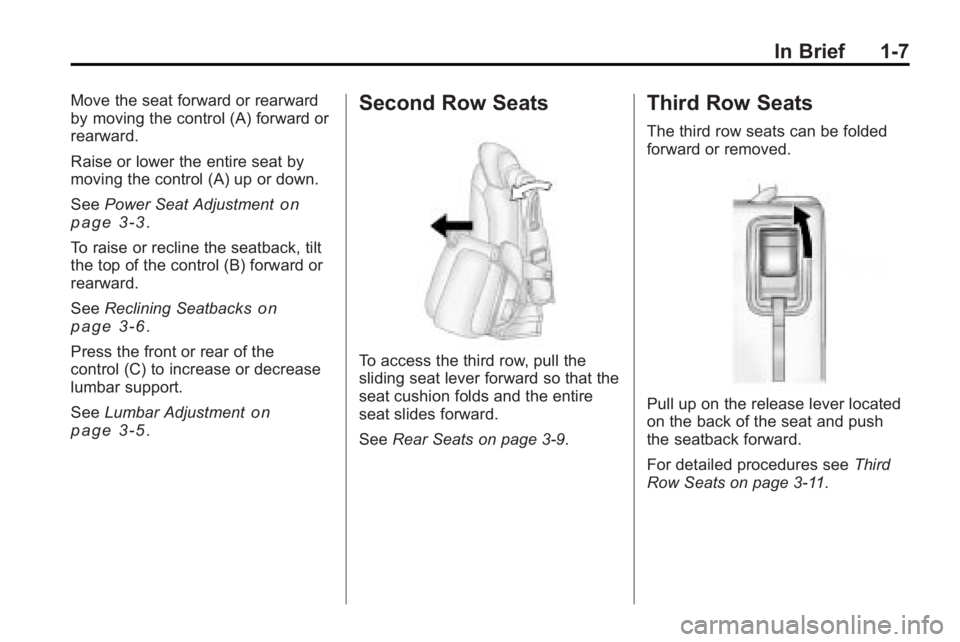
To access the third row, pull the
sliding seat lever forward so that the
seat cushion folds and the entire
seat slides forward.
See Rear Seats on page 3‑9.
Third Row Seats
The third row seats can be folded
forward or removed.
Pull up on the release lever located
on the back of the seat and push
the seatback forward.
For detailed procedures see Third
Row Seats on page 3‑11.
Page 14 of 444
1-8 In Brief
Heated Seats
Heated Front Seats
The heated seat controls are
located on the center console.
The engine must be running to
operate them.
I:Press to turn on the heated
seatback.
J: Press to turn on or off the
heated seat and seatback.
For more information see Heated
Front Seats on page 3‑8.
Heated and Ventilated
Seats
On vehicles with this feature, the
controls are on the front doors near
the handle.
H: Press to ventilate the seat.
z:Press to heat the seat.
For more information see Heated
and Ventilated Front Seats
on
page 3‑9.
Head Restraint
Adjustment
Do not drive until the head restraints
for all occupants are installed and
adjusted properly.
For more information see Head
Restraints on page 3‑2.
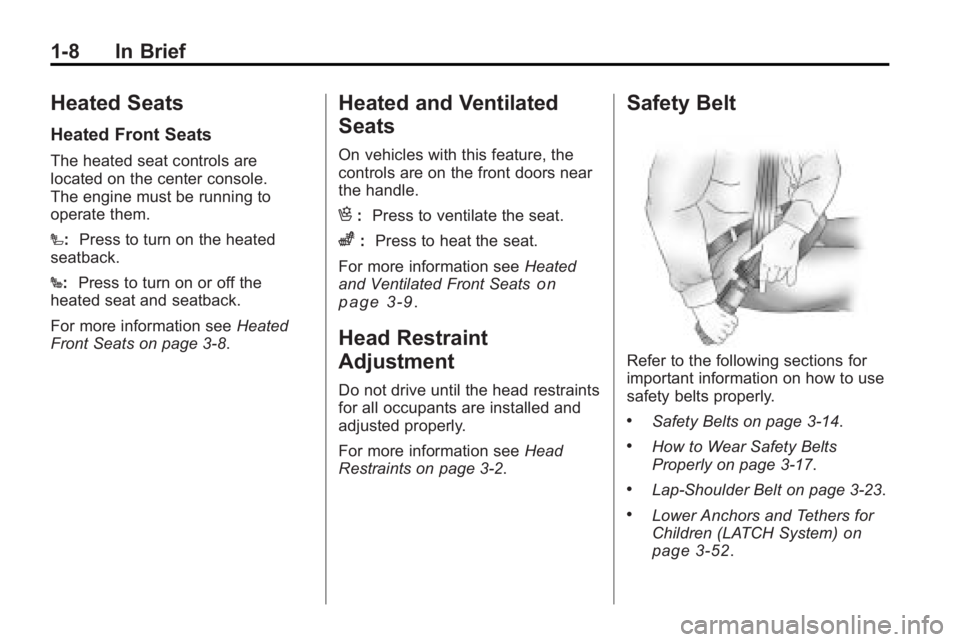
Safety Belt
Refer to the following sections for
important information on how to use
safety belts properly.
.Safety Belts on page 3‑14.
.How to Wear Safety Belts
Properly on page 3‑17.
.Lap-Shoulder Belt on page 3‑23.
.Lower Anchors and Tethers for
Children (LATCH System)on
page 3‑52.
Page 33 of 444
Keys, Doors and Windows 2-5
Remote Vehicle Start
This vehicle may have a remote
starting feature that starts the
engine from outside of the vehicle.
/(Remote Start): This button is
located on the RKE transmitter if the
vehicle has remote start.
Laws in some communities may
restrict the use of remote starters.
For example, some laws may
require a person using the remote
start to have the vehicle in view
when doing so. Check local
regulations for any requirements on
remote starting of vehicles.
Do not use the remote start feature
if the vehicle is low on fuel. The
vehicle could run out of fuel.
If the vehicle has the remote start
feature, the RKE transmitter
functions have an increased range
of operation. However, the range
may be less while the vehicle is
running. There are other conditions which
can affect the performance of the
transmitter, see
Remote Keyless
Entry (RKE) System
on page 2‑2for additional information.
Starting the Engine Using
Remote Start
To start the vehicle:
1. Aim the RKE transmitter at the vehicle.
2. Press
Qon the RKE transmitter.
3. Immediately after completing Step 2, press and hold
/until
the parking lamps flash. If the
vehicle's lights can not be seen,
press and hold
/for at least
four seconds.
When the vehicle starts the parking
lamps will turn on and remain on as
long as the engine is running. The
doors will be locked and the climate
control system will operate
automatically if the vehicle has the automatic system, or at the same
setting as when the vehicle was last
turned off.
If the vehicle has an automatic
climate control system and heated
seats, the heated seats turn on
during colder outside temperatures
and shut off when the key is turned
to ON/RUN. See
Heated Front
Seats
on page 3‑8or Heated and
Ventilated Front Seatson
page 3‑9for more information.
The rear window defogger and
heated mirrors, if the vehicle has
them, turn on during colder outside
temperatures and turn off when the
key is turned to ON/RUN.
After entering the vehicle during a
remote start, insert and turn the key
to the ON/RUN position to drive the
vehicle.
If the vehicle is left running it
automatically shuts off after
10 minutes unless a time extension
has been done.
Page 49 of 444
Keys, Doors and Windows 2-21
2. Press and continue to hold thewindow switch until the window
is fully open.
3. Pull up and hold the window switch to close the window.
Continue to hold it briefly after
the window is fully closed.
4. Repeat for each window that has the express-up feature.
Anti-Pinch Feature
The anti-pinch feature is on
windows with the express-up
feature. If an object is in the way of
the window as it is express-closing,
or in certain weather conditions like
severe icing, the window will stop
and open to a factory preset
position. The window functions
normally once the obstruction is
removed.
Window Lockout
o(Window Lockout): The window
lockout switch is located with the
power window switches on the
driver door armrest. This feature
prevents the rear windows from being operated, except from the
driver position. Press the switch to
turn the lockout feature on or off. An
indicator light will come on to show
the lockout feature is on.
Sun Visors
Pull the sun visor down to block
glare. Detach the sun visor from the
center mount and slide it along the
rod from side-to-side to cover the
driver or passenger side of the front
window. Swing the sun visor to the
side to cover the side window. It can
be moved along the rod from
side-to-side in this position also.
Lighted Visor Vanity Mirror
The vehicle has lighted visor vanity
mirrors on both the driver and
passenger sun visors. Pull the sun
visor down and lift the mirror cover
to turn the lamps on.
Roof
Sunroof
The ignition must be in ON/RUN or
ACC/ACCESSORY to operate the
sunroof and power sunshade. See
Retained Accessory Power (RAP)
on page 9‑17
The vehicle may have a sunroof
over the front seats and a rear
sunroof over the second row seats.
The rear sunroof does not open.
The switch to operate the front
sunroof is on the headliner above
the rearview mirror.
Do not keep the sunroof open for
long periods of time while the
vehicle is not in use. Debris can
collect in the tracks, damage the
sunroof operation and plug the
water draining system.
Page 50 of 444
2-22 Keys, Doors and Windows
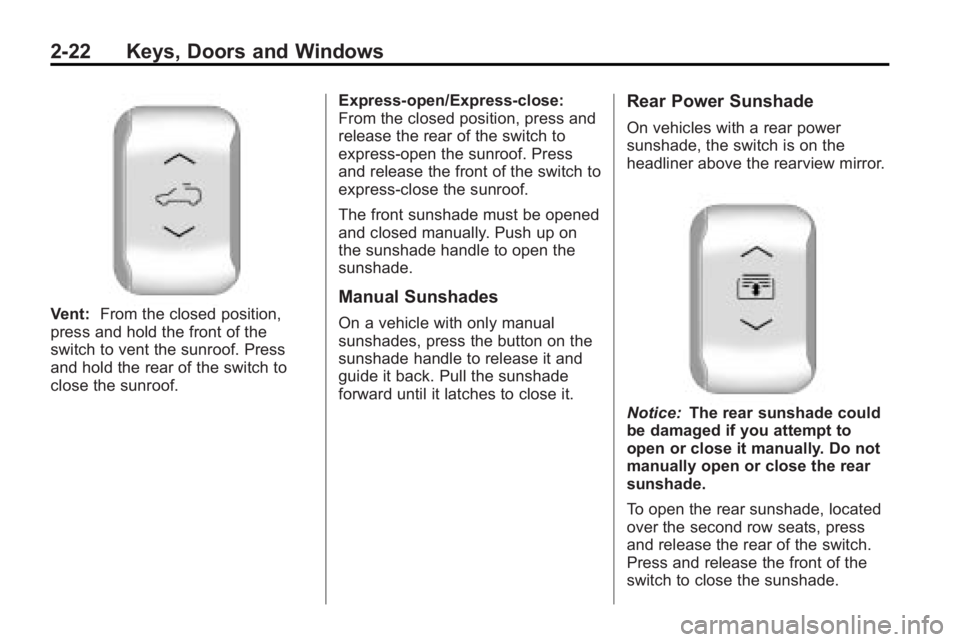
Vent:From the closed position,
press and hold the front of the
switch to vent the sunroof. Press
and hold the rear of the switch to
close the sunroof. Express-open/Express-close:
From the closed position, press and
release the rear of the switch to
express-open the sunroof. Press
and release the front of the switch to
express-close the sunroof.
The front sunshade must be opened
and closed manually. Push up on
the sunshade handle to open the
sunshade.Manual Sunshades
On a vehicle with only manual
sunshades, press the button on the
sunshade handle to release it and
guide it back. Pull the sunshade
forward until it latches to close it.
Rear Power Sunshade
On vehicles with a rear power
sunshade, the switch is on the
headliner above the rearview mirror.
Notice:
The rear sunshade could
be damaged if you attempt to
open or close it manually. Do not
manually open or close the rear
sunshade.
To open the rear sunshade, located
over the second row seats, press
and release the rear of the switch.
Press and release the front of the
switch to close the sunshade.
Page 51 of 444
Seats and Restraints 3-1
Seats and
Restraints
Head Restraints
Head Restraints . . . . . . . . . . . . . . . 3-2
Front Seats
Seat Adjustment . . . . . . . . . . . . . . 3-3
Power Seat Adjustment . . . . . . . 3-3
Lumbar Adjustment . . . . . . . . . . . 3-5
Reclining Seatbacks . . . . . . . . . . 3-6
Heated Front Seats . . . . . . . . . . . 3-8
Heated and Ventilated FrontSeats . . . . . . . . . . . . . . . . . . . . . . . . 3-9
Rear Seats
Rear Seats . . . . . . . . . . . . . . . . . . . . 3-9
Third Row Seats . . . . . . . . . . . . . 3-11
Safety Belts
Safety Belts . . . . . . . . . . . . . . . . . . 3-14
How to Wear Safety BeltsProperly . . . . . . . . . . . . . . . . . . . . 3-17
Lap-Shoulder Belt . . . . . . . . . . . 3-23
Safety Belt Use During Pregnancy . . . . . . . . . . . . . . . . . . 3-28
Safety Belt Extender . . . . . . . . . 3-28 Safety System Check . . . . . . . . 3-28
Safety Belt Care . . . . . . . . . . . . . 3-29
Replacing Safety Belt System
Parts After a Crash . . . . . . . . . 3-29
Airbag System
Airbag System . . . . . . . . . . . . . . . 3-30
Where Are the Airbags? . . . . . 3-32
When Should an AirbagInflate? . . . . . . . . . . . . . . . . . . . . . 3-33
What Makes an Airbag Inflate? . . . . . . . . . . . . . . . . . . . . . 3-35
How Does an Airbag Restrain? . . . . . . . . . . . . . . . . . . . 3-35
What Will You See After an Airbag Inflates? . . . . . . . . . . . . 3-36
Passenger Sensing
System . . . . . . . . . . . . . . . . . . . . . 3-38
Servicing the Airbag-Equipped Vehicle . . . . . . . . . . . . . . . . . . . . . 3-42
Adding Equipment to the Airbag-Equipped Vehicle . . . 3-43
Airbag System Check . . . . . . . . 3-44
Replacing Airbag System Parts After a Crash . . . . . . . . . 3-44
Child Restraints
Older Children . . . . . . . . . . . . . . . 3-45
Infants and YoungChildren . . . . . . . . . . . . . . . . . . . . 3-47
Child Restraint Systems . . . . . 3-49
Where to Put the Restraint . . . 3-51
Lower Anchors and Tethers for Children (LATCH
System) . . . . . . . . . . . . . . . . . . . . 3-52
Replacing LATCH System Parts After a Crash . . . . . . . . . 3-59
Securing Child Restraints (Rear Seat ) . . . . . . . . . . . . . . . . 3-59
Securing Child Restraints (Right Front
Passenger Seat) . . . . . . . . . . . 3-61