wheel size GMC ACADIA 2010 Owner's Manual
[x] Cancel search | Manufacturer: GMC, Model Year: 2010, Model line: ACADIA, Model: GMC ACADIA 2010Pages: 444, PDF Size: 2.58 MB
Page 93 of 444
Seats and Restraints 3-43
Adding Equipment to the
Airbag-Equipped Vehicle
Q: Is there anything I might addto or change about the vehicle
that could keep the airbags
from working properly?
A: Yes. If you add things that
change the vehicle's frame,
bumper system, height, front end
or side sheet metal, they may
keep the airbag system from
working properly. Changing or
moving any parts of the front
seats, safety belts, the airbag
sensing and diagnostic module,
steering wheel, instrument
panel, roof-rail airbag modules,
ceiling headliner or pillar garnish
trim, overhead console, front
sensors, side impact sensors,
rollover sensor module, or airbag
wiring can affect the operation of
the airbag system.
In addition, the vehicle has a
passenger sensing system for
the right front passenger
position, which includes sensors that are part of the passenger
seat. The passenger sensing
system may not operate properly
if the original seat trim is
replaced with non-GM covers,
upholstery or trim, or with GM
covers, upholstery or trim
designed for a different vehicle.
Any object, such as an
aftermarket seat heater or a
comfort enhancing pad or
device, installed under or on top
of the seat fabric, could also
interfere with the operation of
the passenger sensing system.
This could either prevent proper
deployment of the passenger
airbag(s) or prevent the
passenger sensing system from
properly turning off the
passenger airbag(s). See
Passenger Sensing System
on
page 3‑38.
If you have questions, call
Customer Assistance. The
phone numbers and addresses
for Customer Assistance are in Step Two of the Customer
Satisfaction Procedure in this
manual.
If the vehicle has rollover
roof-rail airbags, see
Different
Size Tires and Wheels
on
page 10‑53for additional
important information.
Q: Because I have a disability, I have to get my vehicle
modified. How can I find out
whether this will affect my
airbag system?
A: If you have questions, call
Customer Assistance. The
phone numbers and addresses
for Customer Assistance are in
Step Two of the Customer
Satisfaction Procedure in this
manual.
In addition, your dealer/retailer and
the service manual have information
about the location of the airbag
sensors, sensing and diagnostic
module and airbag wiring.
Page 150 of 444
5-32 Instruments and Controls
The following indicator lights come
on the instrument panel when
activated and also appear on
the HUD:
.Turn Signal Indicators
.High-Beam Indicator Symbol
The HUD temporarily displays
CHECK GAGES and ICE
POSSIBLE when these messages
are on the DIC trip computer.
The HUD also displays the following
messages on vehicles with these
systems, when they are active:
.TRACTION CONTROL ACTIVE
.STABILITRAK ACTIVE
Notice: If you try to use the HUD
image as a parking aid, you may
misjudge the distance and
damage your vehicle. Do not use
the HUD image as a parking aid.
When the HUD is on, the
speedometer reading is continually
displayed. The current radio station
or CD track number will display for a
short period of time after the radio or CD track status changes. This
happens whenever radio information
is changed. The speedometer size
is reduced when radio, CD
information, warnings,
or turn-by-turn navigation
information are displayed on
the HUD.
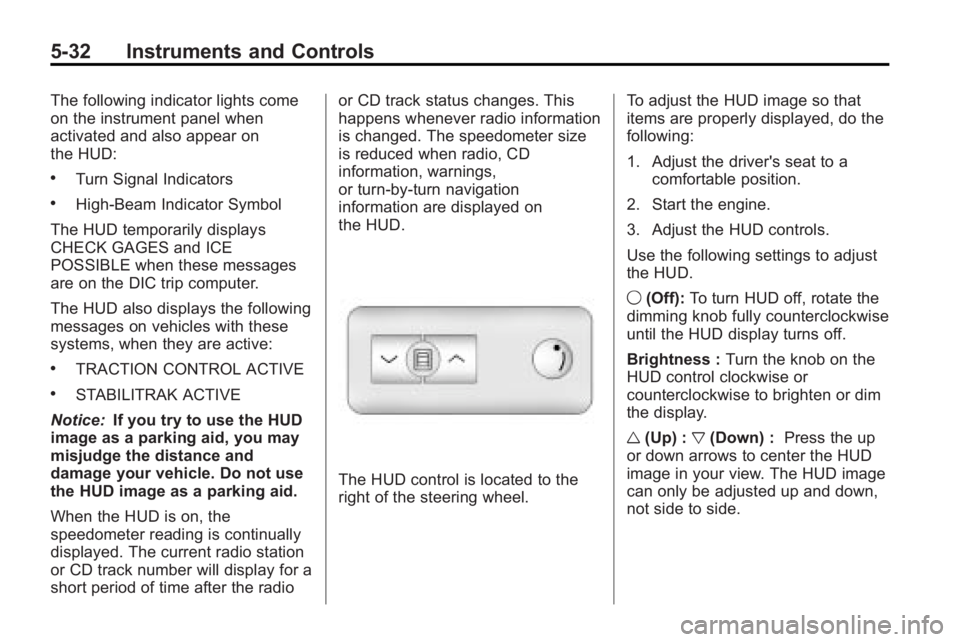
The HUD control is located to the
right of the steering wheel.
To adjust the HUD image so that
items are properly displayed, do the
following:
1. Adjust the driver's seat to a
comfortable position.
2. Start the engine.
3. Adjust the HUD controls.
Use the following settings to adjust
the HUD.
9 (Off): To turn HUD off, rotate the
dimming knob fully counterclockwise
until the HUD display turns off.
Brightness : Turn the knob on the
HUD control clockwise or
counterclockwise to brighten or dim
the display.
w (Up) : x(Down) : Press the up
or down arrows to center the HUD
image in your view. The HUD image
can only be adjusted up and down,
not side to side.
Page 160 of 444
5-42 Instruments and Controls
Driver Information Center (DIC)
(Without DIC Buttons)on
page 5‑28.
SERVICE TIRE MONITOR
SYSTEM
On vehicles with the Tire Pressure
Monitor System (TPMS), this
message displays if a part on the
TPMS is not working properly. The
tire pressure light also flashes and
then remains on during the same
ignition cycle. See Tire Pressure
Light
on page 5‑21. Several
conditions may cause this message
to appear. See Tire Pressure
Monitor Operation
on page 10‑45for
more information. If the warning
comes on and stays on, there may
be a problem with the TPMS. See
your dealer/retailer.
TIRE LEARNING ACTIVE
This message displays when the
Tire Pressure Monitor System
(TPMS) is re-learning the tire
positions on your vehicle. The tire positions must be re-learned after
rotating the tires or after replacing a
tire or sensor. See
Tire Rotation
on
page 10‑49, Tire Pressure Monitor
Systemon page 10‑44, and Tire
Pressureon page 10‑43for more
information.
Transmission Messages
ALL WHEEL DRIVE OFF
If your vehicle has the All-Wheel
Drive (AWD) system, this message
displays when there is a compact
spare tire on the vehicle, when the
Antilock Brake System (ABS)
warning light comes on, or when the
rear differential fluid is overheating.
This message turns off when the
differential fluid cools.
The AWD system is disabled until
the compact spare tire is replaced
by a full-size tire. If the warning
message is still on after putting on
the full-size tire, you need to reset
the warning message. To reset the warning message, turn the ignition
off and then back on again after
30 seconds. If the message stays
on, see your dealer/retailer right
away. See
All-Wheel Drive
on
page 9‑25for more information.
SERVICE ALL WHEEL DRIVE
If your vehicle has the All-Wheel
Drive (AWD) system, this message
displays if there is a problem with
this system. If this message
appears, stop as soon as possible
and turn off the vehicle. Restart the
vehicle after 30 seconds and check
for the message on the DIC display.
If the message is still displayed or
appears again when you begin
driving, the AWD system needs
service. See your dealer/retailer.
SERVICE TRANSMISSION
This message displays when there
is a problem with the transmission.
See your dealer/retailer for service.
Page 275 of 444
Driving and Operating 9-25
Automatic Engine Grade braking is
not available when the ERS is
active. It is available in D (Drive) for
both normal and Tow/Haul mode.
While using the ERS, cruise control
and the tow/haul mode can be used.
See Tow/Haul Mode following.
Tow/Haul Mode
_
(Tow/Haul):The vehicle may
have a Tow/Haul mode.
The button is located on the
instrument panel under the climate
controls.
Push the button to activate the
system. Push it again to deactivate
the system. You can use this feature
to assist when towing or hauling a
heavy load.
When Tow/Haul is activated the
Tow/Haul symbol will come on the
instrument panel cluster. See “Tow/
Haul Mode” underDriving
Characteristics and Towing Tips
on
page 9‑44for more information.
Automatic Engine Grade
Braking
Automatic Engine Grade Braking
assists when driving on a downhill
grade. It maintains vehicle speed by
automatically implementing a shift
schedule that uses the engine and
the transmission to slow the vehicle.
The system will automatically
command downshifts to reduce
vehicle speed, until the brake pedal
is no longer being pressed.
While in the Electronic Range
Select (ERS) mode, grade braking
is deactivated, allowing the driver to
select a range and limiting the
highest gear available. Grade
braking is available for normal
driving and in Tow/Haul mode.
See Automatic Transmission
on
page 9‑22.
Drive Systems
All-Wheel Drive
With this feature, engine power is
always sent to all four wheels. It is
fully automatic, and adjusts itself as
needed for road conditions.
When using a compact spare tire on
an AWD vehicle, the system
automatically detects the compact
spare and disables AWD. To restore
AWD operation and prevent
excessive wear on system, replace
the compact spare with a full-size
tire as soon as possible. See
Compact Spare Tire
on page 10‑77for more information.
Page 308 of 444
10-2 Vehicle Care
Fuses and CircuitBreakers . . . . . . . . . . . . . . . . . . 10-31
Engine Compartment Fuse Block . . . . . . . . . . . . . . . . . . . . . 10-31
Instrument Panel Fuse
Block . . . . . . . . . . . . . . . . . . . . . 10-34
Wheels and Tires
Tires . . . . . . . . . . . . . . . . . . . . . . . . 10-37
Tire Sidewall Labeling . . . . . . 10-37
Tire Designations . . . . . . . . . . . 10-39
Tire Terminology andDefinitions . . . . . . . . . . . . . . . . 10-40
Tire Pressure . . . . . . . . . . . . . . . 10-43
Tire Pressure Monitor System . . . . . . . . . . . . . . . . . . . 10-44
Tire Pressure Monitor
Operation . . . . . . . . . . . . . . . . . 10-45 Tire Inspection . . . . . . . . . . . . . . 10-49
Tire Rotation . . . . . . . . . . . . . . . 10-49
When It Is Time for New
Tires . . . . . . . . . . . . . . . . . . . . . . 10-50
Buying New Tires . . . . . . . . . . . 10-51
Different Size Tires and
Wheels . . . . . . . . . . . . . . . . . . . 10-53
Uniform Tire Quality Grading . . . . . . . . . . . . . . . . . . . 10-53
Wheel Alignment and Tire Balance . . . . . . . . . . . . . . . . . . . 10-55
Wheel Replacement . . . . . . . . 10-55
Tire Chains . . . . . . . . . . . . . . . . . 10-56
If a Tire Goes Flat . . . . . . . . . . 10-56
Tire Sealant and Compressor Kit . . . . . . . . . . . 10-58
Storing the Tire Sealant and Compressor Kit . . . . . . . . . . . 10-65 Tire Changing . . . . . . . . . . . . . . 10-66
Secondary Latch System . . . 10-74
Compact Spare Tire . . . . . . . . 10-77
Jump Starting
Jump Starting . . . . . . . . . . . . . . 10-78
Towing
Towing the Vehicle . . . . . . . . . 10-82
Recreational Vehicle
Towing . . . . . . . . . . . . . . . . . . . . 10-82
Appearance Care
Exterior Care . . . . . . . . . . . . . . . 10-85
Interior Care . . . . . . . . . . . . . . . . 10-88
Floor Mats . . . . . . . . . . . . . . . . . . 10-91
Page 343 of 444
Vehicle Care 10-37
Wheels and Tires
Tires
Your new vehicle comes with
high-quality tires made by a
leading tire manufacturer. If you
ever have questions about your
tire warranty and where to
obtain service, see your vehicle
Warranty booklet for details. For
additional information refer to
the tire manufacturer.
{WARNING
Poorly maintained and improperly
used tires are dangerous.
.Overloading your tires can
cause overheating as a result
of too much flexing. You
could have an air-out and a
serious accident. SeeVehicle
Load Limits on page 9‑10.
(Continued)
WARNING (Continued)
.Underinflated tires pose the
same danger as overloaded
tires. The resulting accident
could cause serious injury.
Check all tires frequently to
maintain the recommended
pressure. Tire pressure
should be checked when your
tires are cold. See Tire
Pressure on page 10‑43.
.Overinflated tires are more
likely to be cut, punctured or
broken by a sudden
impact —such as when you
hit a pothole. Keep tires at
the recommended pressure.
.Worn, old tires can cause
accidents. If your tread is
badly worn, or if your tires
have been damaged,
replace them.
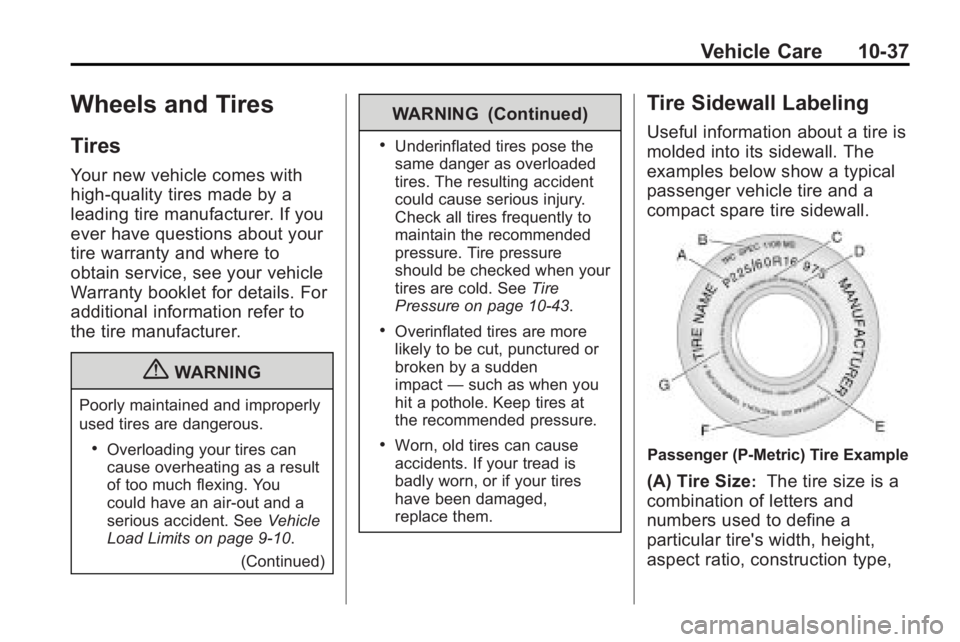
Tire Sidewall Labeling
Useful information about a tire is
molded into its sidewall. The
examples below show a typical
passenger vehicle tire and a
compact spare tire sidewall.
Passenger (P-Metric) Tire Example
(A) Tire Size:The tire size is a
combination of letters and
numbers used to define a
particular tire's width, height,
aspect ratio, construction type,
Page 346 of 444
10-40 Vehicle Care
(C) Aspect Ratio:A two-digit
number that indicates the tire
height-to-width measurements.
For example, if the tire size
aspect ratio is 60, as shown in
item C of the illustration, it would
mean that the tire's sidewall is
60 percent as high as it is wide.
(D) Construction Code
:A
letter code is used to indicate
the type of ply construction in
the tire. The letter R means
radial ply construction; the
letter D means diagonal or bias
ply construction; and the letter B
means belted-bias ply
construction.
(E) Rim Diameter
:Diameter of
the wheel in inches.
(F) Service Description
:These
characters represent the load
index and speed rating of the
tire. The load index represents
the load carry capacity a tire is certified to carry. The speed
rating is the maximum speed a
tire is certified to carry a load.
Tire Terminology and
Definitions
Air Pressure:The amount of
air inside the tire pressing
outward on each square inch of
the tire. Air pressure is
expressed in psi (pounds per
square inch) or kPa (kilopascal).
Accessory Weight
:This
means the combined weight of
optional accessories. Some
examples of optional
accessories are, automatic
transmission, power steering,
power brakes, power windows,
power seats, and air
conditioning.
Aspect Ratio
:The relationship
of a tire's height to its width. Belt
:A rubber coated layer of
cords that is located between
the plies and the tread. Cords
may be made from steel or other
reinforcing materials.
Bead
:The tire bead contains
steel wires wrapped by steel
cords that hold the tire onto
the rim.
Bias Ply Tire
:A pneumatic tire
in which the plies are laid at
alternate angles less than
90 degrees to the centerline of
the tread.
Cold Tire Pressure
:The
amount of air pressure in a tire,
measured in psi (pounds per
square inch) or kPa (kilopascal)
before a tire has built up heat
from driving. See Tire Pressure
on page 10‑43.
Page 352 of 444
10-46 Vehicle Care
and wheel assembly, if the vehicle
has one. The TPMS sensors
monitor the air pressure in the
vehicle's tires and transmits the tire
pressure readings to a receiver
located in the vehicle.
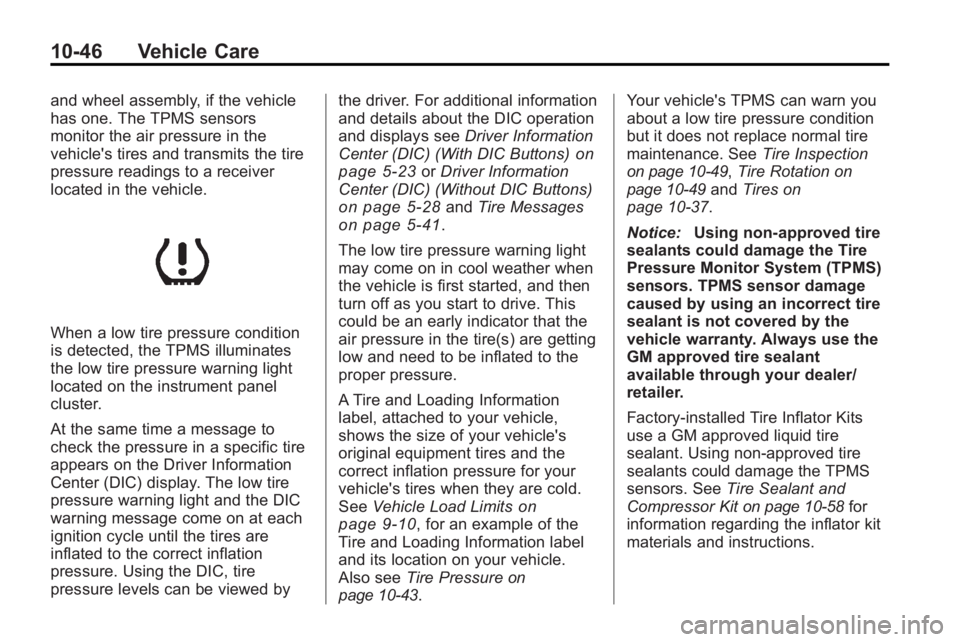
When a low tire pressure condition
is detected, the TPMS illuminates
the low tire pressure warning light
located on the instrument panel
cluster.
At the same time a message to
check the pressure in a specific tire
appears on the Driver Information
Center (DIC) display. The low tire
pressure warning light and the DIC
warning message come on at each
ignition cycle until the tires are
inflated to the correct inflation
pressure. Using the DIC, tire
pressure levels can be viewed bythe driver. For additional information
and details about the DIC operation
and displays see
Driver Information
Center (DIC) (With DIC Buttons)
on
page 5‑23or Driver Information
Center (DIC) (Without DIC Buttons)
on page 5‑28and Tire Messageson page 5‑41.
The low tire pressure warning light
may come on in cool weather when
the vehicle is first started, and then
turn off as you start to drive. This
could be an early indicator that the
air pressure in the tire(s) are getting
low and need to be inflated to the
proper pressure.
A Tire and Loading Information
label, attached to your vehicle,
shows the size of your vehicle's
original equipment tires and the
correct inflation pressure for your
vehicle's tires when they are cold.
See Vehicle Load Limits
on
page 9‑10, for an example of the
Tire and Loading Information label
and its location on your vehicle.
Also see Tire Pressure
on
page 10‑43. Your vehicle's TPMS can warn you
about a low tire pressure condition
but it does not replace normal tire
maintenance. See
Tire Inspection
on page 10‑49,Tire Rotationon
page 10‑49and Tires on
page 10‑37.
Notice: Using non-approved tire
sealants could damage the Tire
Pressure Monitor System (TPMS)
sensors. TPMS sensor damage
caused by using an incorrect tire
sealant is not covered by the
vehicle warranty. Always use the
GM approved tire sealant
available through your dealer/
retailer.
Factory-installed Tire Inflator Kits
use a GM approved liquid tire
sealant. Using non-approved tire
sealants could damage the TPMS
sensors. See Tire Sealant and
Compressor Kit
on page 10‑58for
information regarding the inflator kit
materials and instructions.
Page 356 of 444
10-50 Vehicle Care
Make certain that all wheel nuts
are properly tightened. See
“Wheel Nut Torque”under
Capacities and Specifications
on
page 12‑2
.
{WARNING
Rust or dirt on a wheel, or on the
parts to which it is fastened, can
make wheel nuts become loose
after time. The wheel could come
off and cause an accident. When
changing a wheel, remove any
rust or dirt from places where the
wheel attaches to the vehicle. In
an emergency, use a cloth or a
paper towel to do this; but be sure
to use a scraper or wire brush
later, if needed, to get all the rust
or dirt off. See If a Tire Goes Flat
on page 10‑56.
Make sure the spare tire, if the
vehicle has one, is stored
securely. Push, pull, and then try to rotate or turn the tire. If it
moves, tighten the cable. See
Tire Changing
on page 10‑66.
When It Is Time for New
Tires
Various factors, such as
maintenance, temperatures, driving
speeds, vehicle loading, and road
conditions influence when you need
new tires.
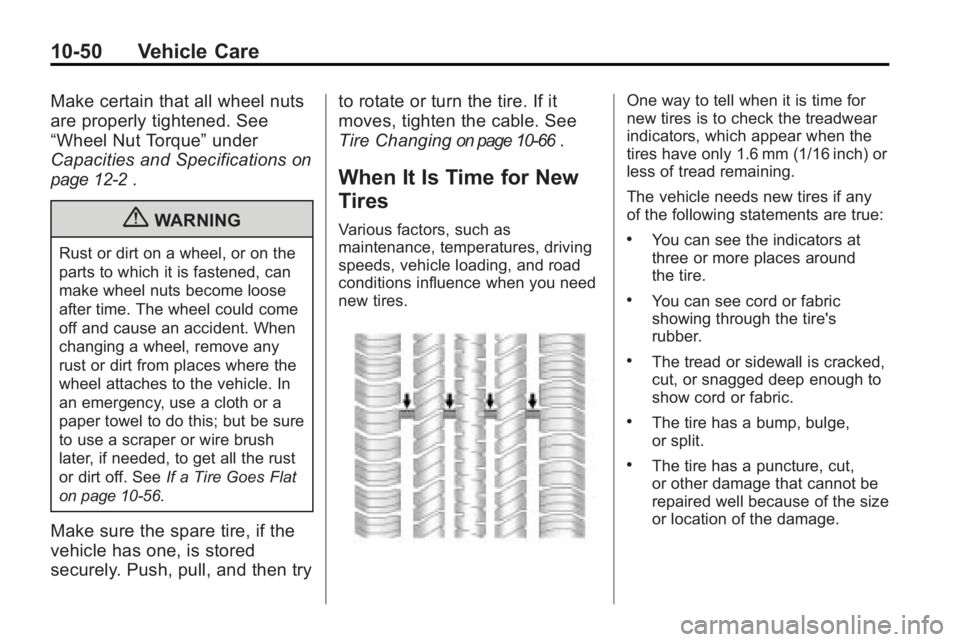
One way to tell when it is time for
new tires is to check the treadwear
indicators, which appear when the
tires have only 1.6 mm (1/16 inch) or
less of tread remaining.
The vehicle needs new tires if any
of the following statements are true:
.You can see the indicators at
three or more places around
the tire.
.You can see cord or fabric
showing through the tire's
rubber.
.The tread or sidewall is cracked,
cut, or snagged deep enough to
show cord or fabric.
.The tire has a bump, bulge,
or split.
.The tire has a puncture, cut,
or other damage that cannot be
repaired well because of the size
or location of the damage.
Page 358 of 444
10-52 Vehicle Care
GM recommends replacing tires
in sets of four. This is because
uniform tread depth on all tires
will help keep your vehicle
performing most like it did when
the tires were new. Replacing
less than a full set of tires can
affect the braking and handling
performance of your vehicle.
SeeTire Inspection
on page 10‑49
andTire Rotationon page 10‑49
for information on proper tire
rotation.
{WARNING
Mixing tires could cause you
to lose control while driving.
If you mix tires of different
sizes, brands, or types (radial
and bias-belted tires), the
vehicle may not handle
properly, and you could have
a crash. Using tires of different
sizes, brands, or types may
(Continued)
WARNING (Continued)
also cause damage to your
vehicle. Be sure to use the
correct size, brand, and type
of tires on all wheels. It is all
right to drive with your
compact spare temporarily, as
it was developed for use on
your vehicle. See Compact
Spare Tire
on page 10‑77.
{WARNING
If you use bias-ply tires on the
vehicle, the wheel rim flanges
could develop cracks after
many miles of driving. A tire
and/or wheel could fail
suddenly, causing a crash.
Use only radial-ply tires with
the wheels on the vehicle. If you must replace your
vehicle's tires with those that do
not have a TPC Spec number,
make sure they are the same
size, load range, speed rating,
and construction type (radial and
bias-belted tires) as your
vehicle's original tires.
Vehicles that have a tire
pressure monitoring system
could give an inaccurate
low-pressure warning if non-TPC
Spec rated tires are installed on
your vehicle. Non-TPC Spec
rated tires may give a
low-pressure warning that is
higher or lower than the proper
warning level you would get with
TPC Spec rated tires. See
Tire
Pressure Monitor System
on
page 10‑44
.
Your vehicle's original
equipment tires are listed on the
Tire and Loading Information
Label. See Vehicle Load Limits