display GMC ACADIA 2012 Manual Online
[x] Cancel search | Manufacturer: GMC, Model Year: 2012, Model line: ACADIA, Model: GMC ACADIA 2012Pages: 468, PDF Size: 5.57 MB
Page 224 of 468
Black plate (38,1)GMC Acadia/Acadia Denali Owner Manual - 2012
7-38 Infotainment System
Rear Seat
Infotainment
Rear Seat Entertainment
(RSE) System
The vehicle may have a DVD Rear
Seat Entertainment (RSE) system.
The RSE system works with the
vehicle's audio system. The DVD
player is part of the front radio.
The RSE system includes a radio
with a DVD player, a video display
screen, audio/video jacks, two
wireless headphones, and a remote
control. SeeOperation on page 7‑2
for more information on the vehicle's
infotainment system.
Before Driving
The RSE is designed for rear seat
passengers only. The driver cannot
safely view the video screen while
driving and should not try to do so. In severe or extreme weather
conditions, the RSE system might or
might not work until the temperature
is within the operating range.
The operating range for the RSE
system is above
−20°C (−4°F)
or below 60°C (140°F). If the
temperature of the vehicle is outside
of this range, heat or cool the
vehicle until the temperature is
within the operating range of the
RSE system.
Parental Control
The RSE system may have a
Parental Control feature, depending
on the radio. To enable Parental
Control, press and hold the radio
power button for more than
two seconds to stop all system
features such as: radio, video
screen, RSA, DVD and/or CD.
While Parental Control is on,
Qdisplays.
When the radio is turned back on,
Parental Control is unlocked.
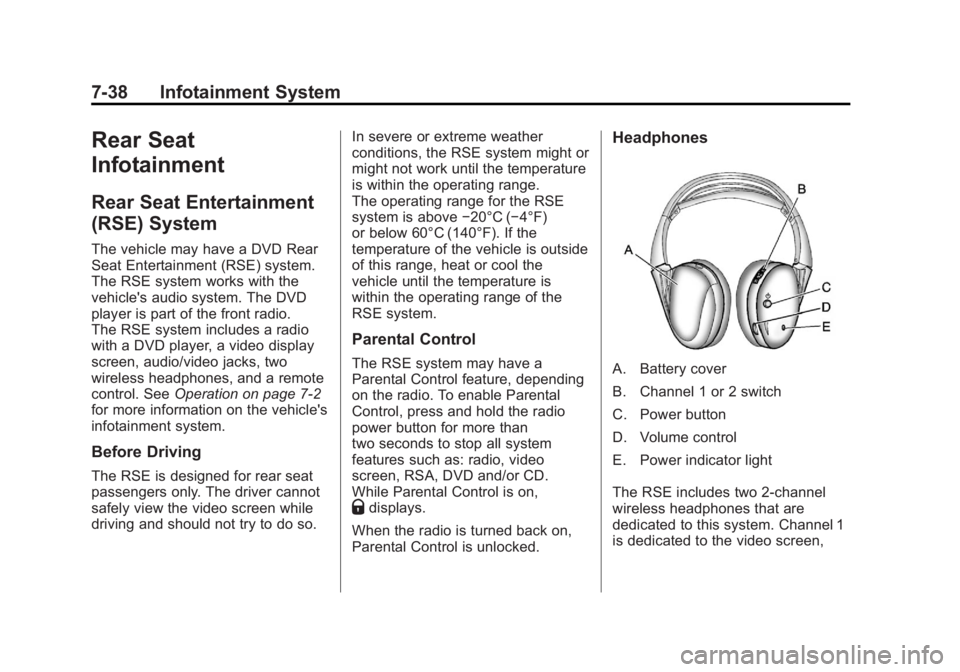
Headphones
A. Battery cover
B. Channel 1 or 2 switch
C. Power button
D. Volume control
E. Power indicator light
The RSE includes two 2-channel
wireless headphones that are
dedicated to this system. Channel 1
is dedicated to the video screen,
Page 227 of 468
Black plate (41,1)GMC Acadia/Acadia Denali Owner Manual - 2012
Infotainment System 7-41
How to Change the RSE Video
Screen Settings
The screen display mode (normal,
full, and zoom), screen brightness,
and setup menu language can be
changed from the on screen setup
menu by using the remote control.
To change a setting:
1. Press
z.
2. Use
n,q,p,oandrto
navigate and use the
setup menu.
3. Press
zagain to remove the
setup menu from the screen.
Audio Output
Audio from the DVD player or
auxiliary inputs can be heard
through the following sources:
.Wireless headphones
.Vehicle speakers
.Vehicle‐wired headphone jacks
on the RSA system, if the
vehicle has this feature. The RSE system always transmits
the audio signal to the wireless
headphones, if there is audio
available. See
“Headphones” earlier
in this section for more information.
The DVD player is capable of
outputting audio to the wired
headphone jacks on the RSA
system, if the vehicle has this
feature. The DVD player can be
selected as an audio source on the
RSA system. See Rear Seat Audio
(RSA) System on page 7‑47 for
more information.
When a device is connected to the
A/V jacks, or the radio's auxiliary
input jack, if the vehicle has this
feature, the rear seat passengers
are able to hear audio from the
auxiliary device through the wireless
or wired headphones. The front seat
passengers are able to listen to
playback from this device through
the vehicle speakers by selecting
AUX as the source on the radio.
Video Screen
The video screen is located in the
overhead console. When the video
screen is not in use, push it up into
its locked position.
To use the video screen:
1. Push the release button located on the overhead console.
2. Move the screen to the desired position.
If a DVD is playing and the screen
is raised to its locked position, the
screen remains on; this is normal,
and the DVD continues to play
through the previous audio source.
Press
Pon the remote control or
eject the disc to turn off the screen.
The infrared receivers for the
wireless headphones and the
remote control are located at the
rear of the overhead console.
Notice: Avoid directly touching
the video screen, as damage may
occur. See “Cleaning the Video
Screens” later in this section for
more information.
Page 228 of 468
Black plate (42,1)GMC Acadia/Acadia Denali Owner Manual - 2012
7-42 Infotainment System
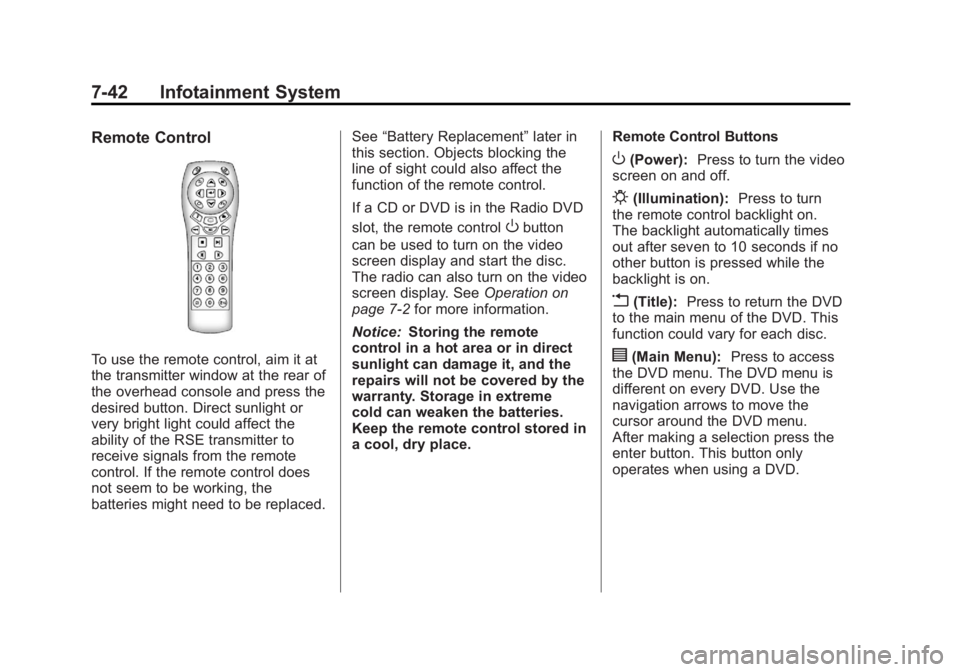
Remote Control
To use the remote control, aim it at
the transmitter window at the rear of
the overhead console and press the
desired button. Direct sunlight or
very bright light could affect the
ability of the RSE transmitter to
receive signals from the remote
control. If the remote control does
not seem to be working, the
batteries might need to be replaced.See
“Battery Replacement” later in
this section. Objects blocking the
line of sight could also affect the
function of the remote control.
If a CD or DVD is in the Radio DVD
slot, the remote control
Obutton
can be used to turn on the video
screen display and start the disc.
The radio can also turn on the video
screen display. See Operation on
page 7‑2 for more information.
Notice: Storing the remote
control in a hot area or in direct
sunlight can damage it, and the
repairs will not be covered by the
warranty. Storage in extreme
cold can weaken the batteries.
Keep the remote control stored in
a cool, dry place. Remote Control Buttons
O(Power):
Press to turn the video
screen on and off.
P(Illumination): Press to turn
the remote control backlight on.
The backlight automatically times
out after seven to 10 seconds if no
other button is pressed while the
backlight is on.
v(Title): Press to return the DVD
to the main menu of the DVD. This
function could vary for each disc.
y(Main Menu): Press to access
the DVD menu. The DVD menu is
different on every DVD. Use the
navigation arrows to move the
cursor around the DVD menu.
After making a selection press the
enter button. This button only
operates when using a DVD.
Page 229 of 468
Black plate (43,1)GMC Acadia/Acadia Denali Owner Manual - 2012
Infotainment System 7-43
n,q,p,o(Menu Navigation
Arrows): Use the arrow buttons to
navigate through a menu.
r(Enter): Press to select the
choice that is highlighted in
any menu.
z(Display Menu): Press to adjust
the brightness, screen display mode
(normal, full, or zoom), and display
the language menu.
q(Return): Press to exit the
current active menu and return to
the previous menu. This button
operates only when the display
menu or a DVD menu is active.
c(Stop): Press to stop playing,
rewinding, or fast forwarding a DVD.
Press twice to return to the
beginning of the DVD.
s(Play/Pause): Press to start
playing a DVD. Press while a DVD
is playing to pause it. Press again to
continue playing the DVD.
When the DVD is playing,
depending on the radio, play may
be slowed down by pressing
s
then[. The DVD continues playing
in a slow play mode. Depending on
the radio, perform reverse slow play
by pressing
sthenr. To cancel
slow play mode, press
sagain.
t(Previous Track/Chapter):
Press to return to the start of the
current track or chapter. Press again
to go to the previous track or
chapter. This button might not work
when the DVD is playing the
copyright information or the
previews.
u(Next Track/Chapter): Press to
go to the beginning of the next
chapter or track. This button might
not work when the DVD is playing
the copyright information or the
previews.
r(Fast Reverse): Press to
quickly reverse the DVD or CD.
To stop fast reversing a DVD video,
press
s. To stop fast reversing a
DVD audio or CD, release
r.
This button might not work when
the DVD is playing the copyright
information or the previews.
[(Fast Forward): Press to fast
forward the DVD or CD. To stop fast
forwarding a DVD video, press
s.
To stop fast forwarding a DVD audio
or CD, release
[. This button might
not work when the DVD is playing
the copyright information or the
previews.
Page 231 of 468
Black plate (45,1)GMC Acadia/Acadia Denali Owner Manual - 2012
Infotainment System 7-45
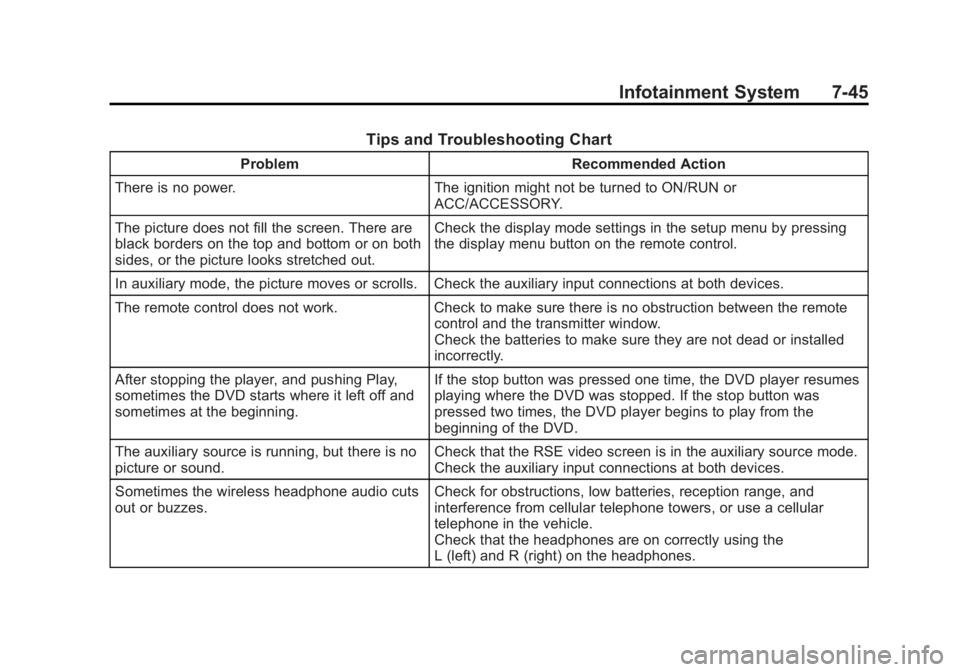
Tips and Troubleshooting Chart
ProblemRecommended Action
There is no power. The ignition might not be turned to ON/RUN or
ACC/ACCESSORY.
The picture does not fill the screen. There are
black borders on the top and bottom or on both
sides, or the picture looks stretched out. Check the display mode settings in the setup menu by pressing
the display menu button on the remote control.
In auxiliary mode, the picture moves or scrolls. Check the auxiliary input connections at both devices.
The remote control does not work. Check to make sure there is no obstruction between the remote
control and the transmitter window.
Check the batteries to make sure they are not dead or installed
incorrectly.
After stopping the player, and pushing Play,
sometimes the DVD starts where it left off and
sometimes at the beginning. If the stop button was pressed one time, the DVD player resumes
playing where the DVD was stopped. If the stop button was
pressed two times, the DVD player begins to play from the
beginning of the DVD.
The auxiliary source is running, but there is no
picture or sound. Check that the RSE video screen is in the auxiliary source mode.
Check the auxiliary input connections at both devices.
Sometimes the wireless headphone audio cuts
out or buzzes. Check for obstructions, low batteries, reception range, and
interference from cellular telephone towers, or use a cellular
telephone in the vehicle.
Check that the headphones are on correctly using the
L (left) and R (right) on the headphones.
Page 232 of 468
Black plate (46,1)GMC Acadia/Acadia Denali Owner Manual - 2012
7-46 Infotainment System
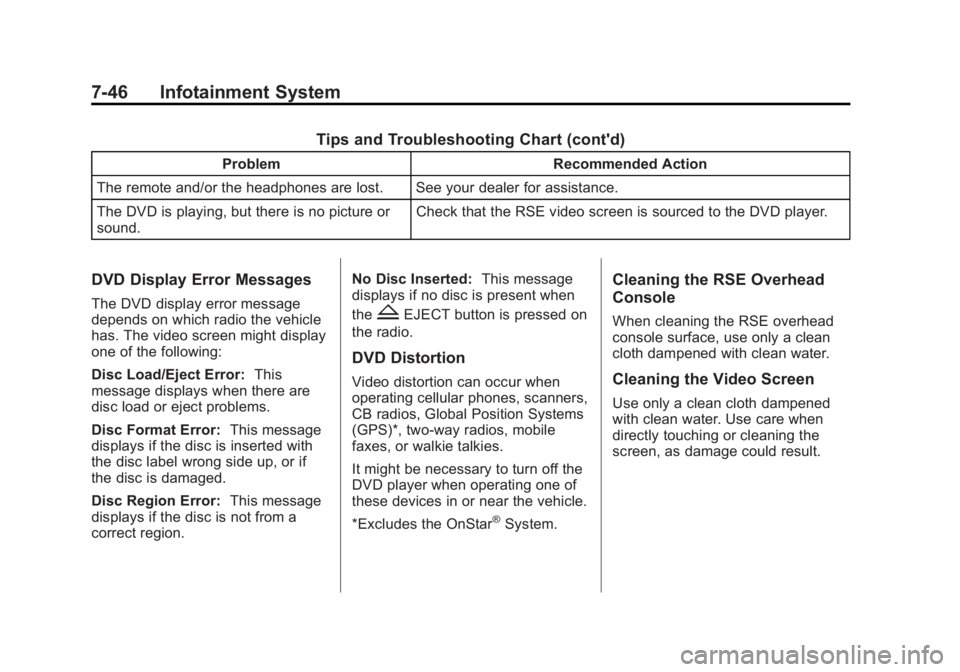
Tips and Troubleshooting Chart (cont'd)
ProblemRecommended Action
The remote and/or the headphones are lost. See your dealer for assistance.
The DVD is playing, but there is no picture or
sound. Check that the RSE video screen is sourced to the DVD player.
DVD Display Error Messages
The DVD display error message
depends on which radio the vehicle
has. The video screen might display
one of the following:
Disc Load/Eject Error:
This
message displays when there are
disc load or eject problems.
Disc Format Error: This message
displays if the disc is inserted with
the disc label wrong side up, or if
the disc is damaged.
Disc Region Error: This message
displays if the disc is not from a
correct region. No Disc Inserted:
This message
displays if no disc is present when
theZEJECT button is pressed on
the radio.
DVD Distortion
Video distortion can occur when
operating cellular phones, scanners,
CB radios, Global Position Systems
(GPS)*, two-way radios, mobile
faxes, or walkie talkies.
It might be necessary to turn off the
DVD player when operating one of
these devices in or near the vehicle.
*Excludes the OnStar
®System.
Cleaning the RSE Overhead
Console
When cleaning the RSE overhead
console surface, use only a clean
cloth dampened with clean water.
Cleaning the Video Screen
Use only a clean cloth dampened
with clean water. Use care when
directly touching or cleaning the
screen, as damage could result.
Page 233 of 468
Black plate (47,1)GMC Acadia/Acadia Denali Owner Manual - 2012
Infotainment System 7-47
Rear Seat Audio (RSA)
System
For vehicles with Rear Seat Audio
(RSA), rear seat passengers can
listen to and control any of the
music sources: radio, CDs, DVDs,
or other auxiliary sources. The rear
seat passengers can only control
the music sources the front seat
passengers are not listening to
(except on some radios where dual
control is allowed). For example,
rear seat passengers can control a
CD and listen to it through the
headphones, while the driver listens
to the radio through the front
speakers. The rear seat passengers
have control of the volume for each
set of headphones.The RSA functions operate even
when the main radio is off. The front
audio system displaysXwhen the
RSA is on, and disappears from the
display when it is off.
Audio can be heard through wired
headphones (not included) plugged
into the jacks on the RSA. If the
vehicle has this feature, audio can
also be heard on Channel 2 of the
wireless headphones.
The audio system mutes the rear
speakers when the RSA audio is
active through the headphones.
To listen to an iPod or portable
audio device through the RSA,
attach the iPod or portable audio
device to the front auxiliary input
(if available), located on the front
audio system. Turn the iPod on,
then choose the front auxiliary input
with the RSA SRCE button.
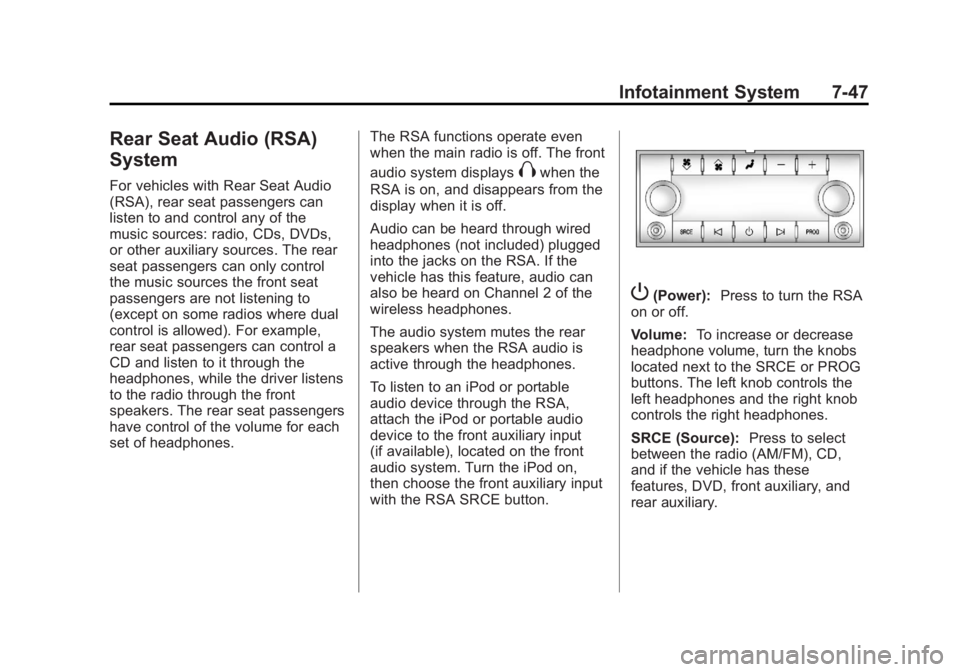
P(Power): Press to turn the RSA
on or off.
Volume: To increase or decrease
headphone volume, turn the knobs
located next to the SRCE or PROG
buttons. The left knob controls the
left headphones and the right knob
controls the right headphones.
SRCE (Source): Press to select
between the radio (AM/FM), CD,
and if the vehicle has these
features, DVD, front auxiliary, and
rear auxiliary.
Page 234 of 468
Black plate (48,1)GMC Acadia/Acadia Denali Owner Manual - 2012
7-48 Infotainment System
© ¨(Seek):Press to go to the
previous or next station and stay
there. This function is inactive,
with some radios, if the front seat
passengers are listening to the
radio.
Press and hold
©or¨until the
display flashes to tune to an
individual station. The display
stops flashing after the buttons
have not been pushed for more
than two seconds. This function is
inactive, with some radios, if the
front seat passengers are listening
to the radio.
While listening to a disc, press
¨to
go to the next track or chapter on
the disc. Press
©to go back to the
start of the current track or chapter
(if more than 10 seconds have
played). This function is inactive,
with some radios, if the front seat
passengers are listening to the disc. When a DVD video menu is being
displayed, press
©or¨to perform a
cursor up or down on the menu.
Hold
©or¨to perform a cursor left
or right on the menu.
PROG (Program): Press to go to
the next preset radio station or
channel set on the main radio.
This function is inactive, with some
radios, if the front seat passengers
are listening to the radio.
When a CD or DVD audio disc is
playing, press PROG to go to the
beginning of the CD or DVD audio.
This function is inactive, with some
radios, if the front seat passengers
are listening to the disc.
When a disc is playing in the CD or
DVD changer, press PROG to
select the next disc, if multiple discs
are loaded. This function is inactive,
with some radios, if the front seat
passengers are listening to the disc.
When a DVD video menu is being
displayed, press PROG to perform
the ENTER menu function.
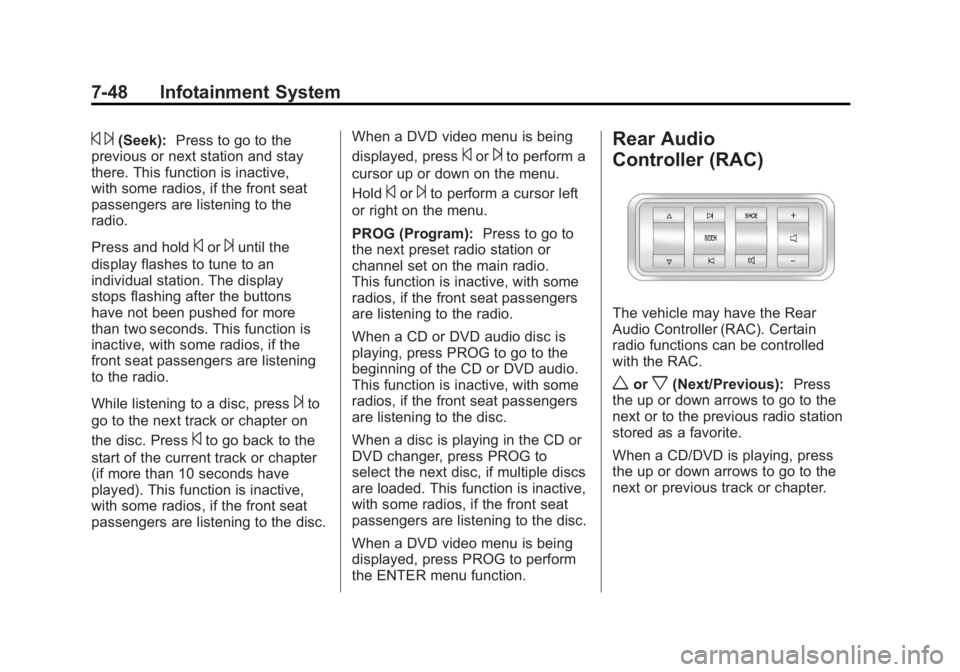
Rear Audio
Controller (RAC)
The vehicle may have the Rear
Audio Controller (RAC). Certain
radio functions can be controlled
with the RAC.
worx(Next/Previous): Press
the up or down arrows to go to the
next or to the previous radio station
stored as a favorite.
When a CD/DVD is playing, press
the up or down arrows to go to the
next or previous track or chapter.
Page 248 of 468
Black plate (4,1)GMC Acadia/Acadia Denali Owner Manual - 2012
8-4 Climate Controls
Do not drive the vehicle until all
windows are clear.
For vehicles with heated outside
rearview mirrors, fog or frost is
cleared from the surface of the
mirror when
1is pressed.
Notice: Do not use anything
sharp on the inside of the rear
window. If you do, you could cut
or damage the warming grid, and
the repairs would not be covered
by the vehicle warranty. Do not
attach a temporary vehicle
license, tape, a decal, or anything
similar to the defogger grid.
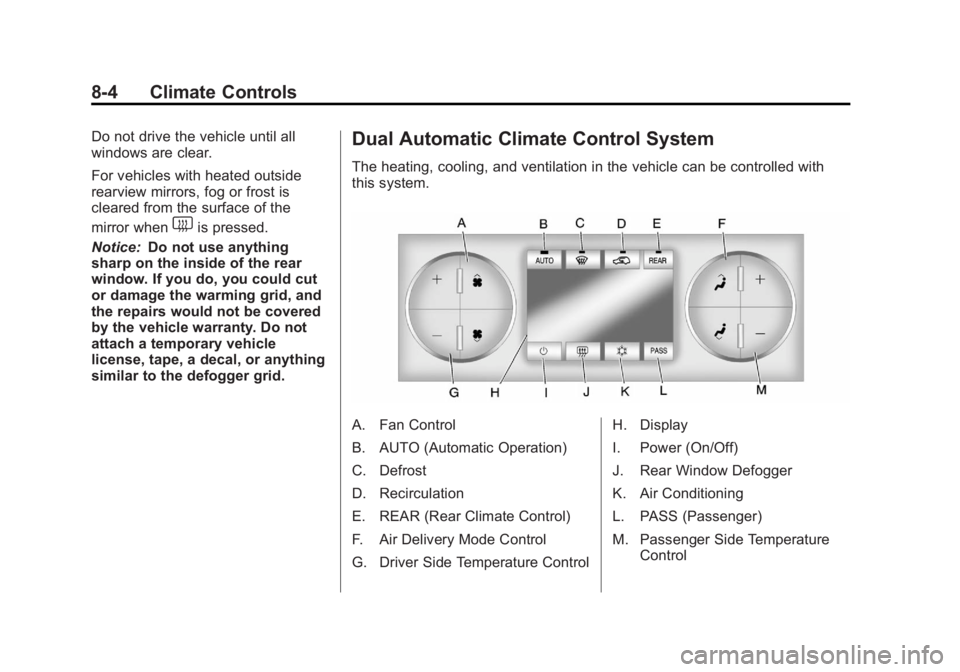
Dual Automatic Climate Control System
The heating, cooling, and ventilation in the vehicle can be controlled with
this system.
A. Fan Control
B. AUTO (Automatic Operation)
C. Defrost
D. Recirculation
E. REAR (Rear Climate Control)
F. Air Delivery Mode Control
G. Driver Side Temperature Control H. Display
I. Power (On/Off)
J. Rear Window Defogger
K. Air Conditioning
L. PASS (Passenger)
M. Passenger Side Temperature
Control
Page 249 of 468
Black plate (5,1)GMC Acadia/Acadia Denali Owner Manual - 2012
Climate Controls 8-5
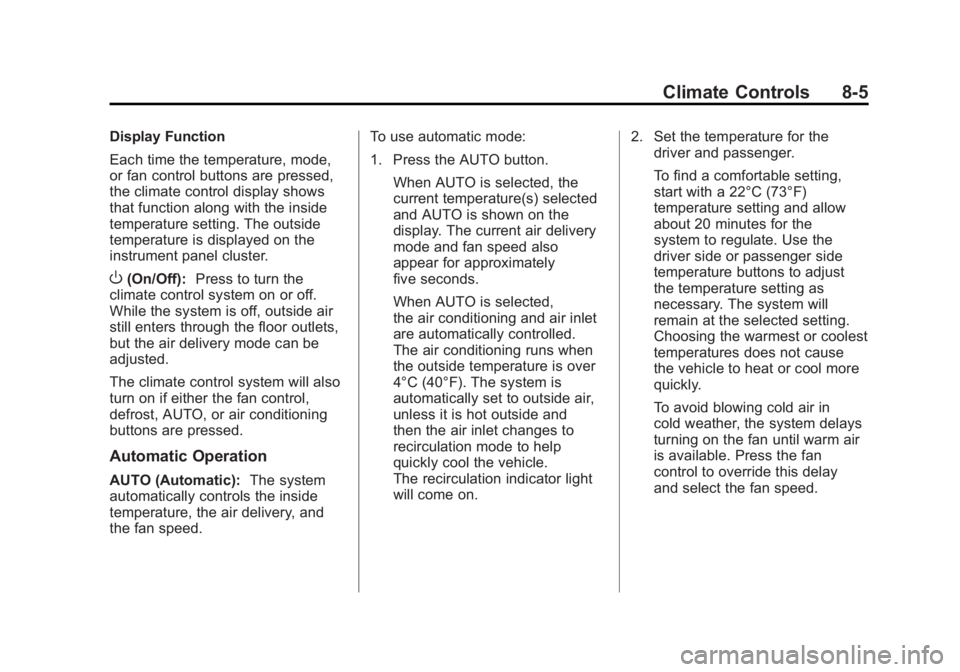
Display Function
Each time the temperature, mode,
or fan control buttons are pressed,
the climate control display shows
that function along with the inside
temperature setting. The outside
temperature is displayed on the
instrument panel cluster.
O(On/Off):Press to turn the
climate control system on or off.
While the system is off, outside air
still enters through the floor outlets,
but the air delivery mode can be
adjusted.
The climate control system will also
turn on if either the fan control,
defrost, AUTO, or air conditioning
buttons are pressed.
Automatic Operation
AUTO (Automatic): The system
automatically controls the inside
temperature, the air delivery, and
the fan speed. To use automatic mode:
1. Press the AUTO button.
When AUTO is selected, the
current temperature(s) selected
and AUTO is shown on the
display. The current air delivery
mode and fan speed also
appear for approximately
five seconds.
When AUTO is selected,
the air conditioning and air inlet
are automatically controlled.
The air conditioning runs when
the outside temperature is over
4°C (40°F). The system is
automatically set to outside air,
unless it is hot outside and
then the air inlet changes to
recirculation mode to help
quickly cool the vehicle.
The recirculation indicator light
will come on. 2. Set the temperature for the
driver and passenger.
To find a comfortable setting,
start with a 22°C (73°F)
temperature setting and allow
about 20 minutes for the
system to regulate. Use the
driver side or passenger side
temperature buttons to adjust
the temperature setting as
necessary. The system will
remain at the selected setting.
Choosing the warmest or coolest
temperatures does not cause
the vehicle to heat or cool more
quickly.
To avoid blowing cold air in
cold weather, the system delays
turning on the fan until warm air
is available. Press the fan
control to override this delay
and select the fan speed.