display GMC ACADIA 2012 Owner's Manual
[x] Cancel search | Manufacturer: GMC, Model Year: 2012, Model line: ACADIA, Model: GMC ACADIA 2012Pages: 468, PDF Size: 5.57 MB
Page 332 of 468
Black plate (20,1)GMC Acadia/Acadia Denali Owner Manual - 2012
10-20 Vehicle Care
If the overheat warning is displayed
with no sign of steam:
1. Turn the air conditioning off.
2. Turn the heater on to the highesttemperature and to the highest
fan speed. Open the windows as
necessary.
3. If in a traffic jam, shift to N (Neutral); otherwise,
shift to the highest gear while
driving —D (Drive) or L (Low).
If the temperature overheat gauge
is no longer in the overheat zone or
an overheat warning no longer
displays, the vehicle can be driven.
Continue to drive the vehicle slow
for about 10 minutes. Keep a safe
vehicle distance from the car in front
of you. If the warning does not come
back on, continue to drive normally.
If the warning continues, pull over,
stop, and park the vehicle
right away. If there is no sign of steam, idle the
engine for three minutes while
parked. If the warning is still
displayed, turn off the engine until it
cools down. Also, see
“Overheated
Engine Protection Operating Mode”
next in this section.
Overheated Engine
Protection
Operating Mode
This emergency operating mode lets
the vehicle be driven to a safe place
in an emergency situation. If an
overheated engine condition exists,
an overheat protection mode which
alternates firing groups of cylinders
helps prevent engine damage. In this mode, there is a significant
loss in power and engine
performance. The temperature
gauge indicates an overheat
condition exists. Driving extended
distances and/or towing a trailer in
the overheat protection mode
should be avoided.
Notice:
After driving in the
overheated engine protection
operating mode, to avoid engine
damage, allow the engine to cool
before attempting any repair.
The engine oil will be severely
degraded. Repair the cause of
coolant loss, change the oil
and reset the oil life system.
See Engine Oil on page 10‑8.
Page 334 of 468
Black plate (22,1)GMC Acadia/Acadia Denali Owner Manual - 2012
10-22 Vehicle Care
Washer Fluid
What to Use
When adding windshield
washer fluid, be sure to read the
manufacturer's instructions before
use. If the vehicle will be operating
in an area where the temperature
may fall below freezing, use a fluid
that has sufficient protection against
freezing.
Adding Washer Fluid
When the windshield washer fluid
reservoir is low, a WASHER FLUID
LOW ADD FLUID message will be
displayed on the Driver Information
Center (DIC). SeeWasher Fluid
Messages on page 5‑45 for more
information.
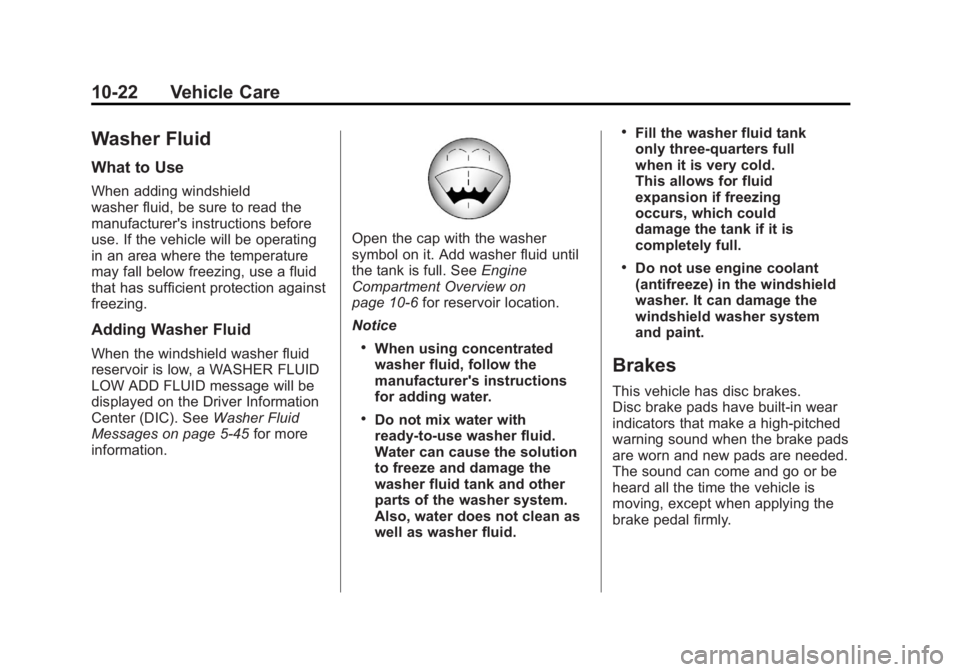
Open the cap with the washer
symbol on it. Add washer fluid until
the tank is full. See Engine
Compartment Overview on
page 10‑6 for reservoir location.
Notice
.When using concentrated
washer fluid, follow the
manufacturer's instructions
for adding water.
.Do not mix water with
ready-to-use washer fluid.
Water can cause the solution
to freeze and damage the
washer fluid tank and other
parts of the washer system.
Also, water does not clean as
well as washer fluid.
.Fill the washer fluid tank
only three-quarters full
when it is very cold.
This allows for fluid
expansion if freezing
occurs, which could
damage the tank if it is
completely full.
.Do not use engine coolant
(antifreeze) in the windshield
washer. It can damage the
windshield washer system
and paint.
Brakes
This vehicle has disc brakes.
Disc brake pads have built-in wear
indicators that make a high-pitched
warning sound when the brake pads
are worn and new pads are needed.
The sound can come and go or be
heard all the time the vehicle is
moving, except when applying the
brake pedal firmly.
Page 340 of 468
Black plate (28,1)GMC Acadia/Acadia Denali Owner Manual - 2012
10-28 Vehicle Care
Wiper Blade Replacement
Windshield wiper blades should be
inspected for wear or cracking.
SeeMaintenance Schedule on
page 11‑3 for more information.
Replacement blades come in
different types and are removed in
different ways. To replace the wiper
blade assembly:
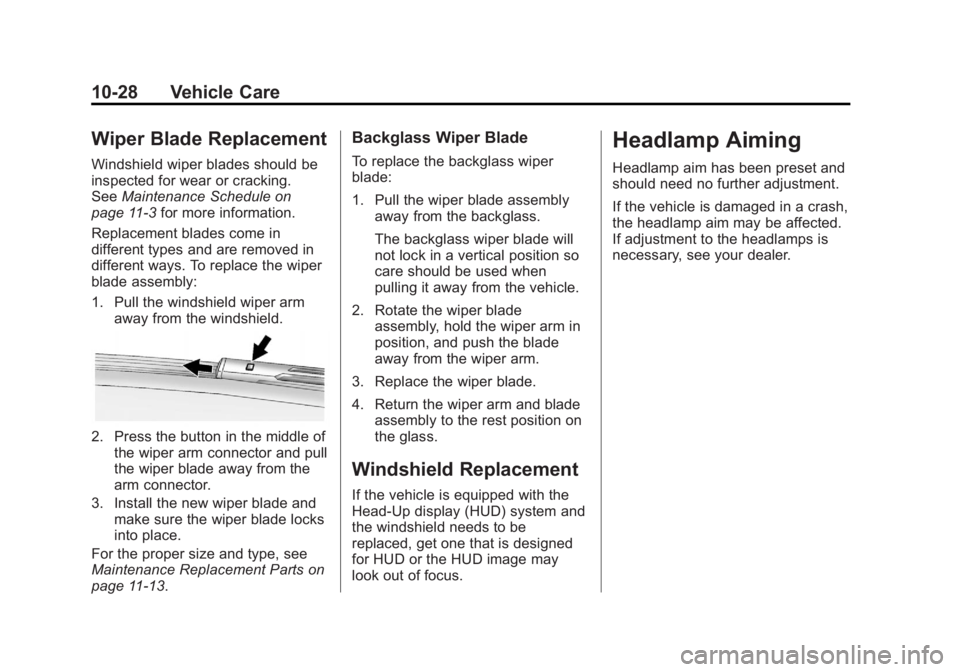
1. Pull the windshield wiper arm away from the windshield.
2. Press the button in the middle ofthe wiper arm connector and pull
the wiper blade away from the
arm connector.
3. Install the new wiper blade and make sure the wiper blade locks
into place.
For the proper size and type, see
Maintenance Replacement Parts on
page 11‑13.
Backglass Wiper Blade
To replace the backglass wiper
blade:
1. Pull the wiper blade assembly away from the backglass.
The backglass wiper blade will
not lock in a vertical position so
care should be used when
pulling it away from the vehicle.
2. Rotate the wiper blade assembly, hold the wiper arm in
position, and push the blade
away from the wiper arm.
3. Replace the wiper blade.
4. Return the wiper arm and blade assembly to the rest position on
the glass.
Windshield Replacement
If the vehicle is equipped with the
Head‐Up display (HUD) system and
the windshield needs to be
replaced, get one that is designed
for HUD or the HUD image may
look out of focus.
Headlamp Aiming
Headlamp aim has been preset and
should need no further adjustment.
If the vehicle is damaged in a crash,
the headlamp aim may be affected.
If adjustment to the headlamps is
necessary, see your dealer.
Page 347 of 468

Black plate (35,1)GMC Acadia/Acadia Denali Owner Manual - 2012
Vehicle Care 10-35
Fuse Side
The vehicle may not be equipped
with all of the fuses, relays, and
features shown. Fuses Usage
AIRBAG Airbag AMP Amplifier
BCK/UP/ STOP Back‐up Lamp/
Stoplamp
BCM Body Control
Module
CNSTR/ VENT Canister Vent
CTSY Courtesy Lamps
DR/LCK Door Locks
DRL Daytime Running
Lamps
DRL 2/
RR Fog GMC HID Only
(If Equipped)/
Rear Fog Lamps
(China Only)
DSPLY Display
FRT/WSW Front Windshield
Washer
HTD/COOL SEAT Heated/Cooling
Seats Fuses Usage
HVAC Heating,
Ventilation, and
Air Conditioning
INADV/
PWR/LED Inadvertent
Power LED
INFOTMNT Infotainment
LT/TRN/SIG Driver Side Turn
Signal
MSM Memory Seat
Module
PDM Power Mirrors,
Liftgate Release
PWR MODE Power Mode
PWR/MIR Power Mirrors RDO Radio
REAR WPR Rear Wiper
RT/TRN/SIG Passenger Side
Turn Signal
SPARE Spare
STR/WHL/ ILLUM Steering Wheel
Illumination
Page 359 of 468
Black plate (47,1)GMC Acadia/Acadia Denali Owner Manual - 2012
Vehicle Care 10-47
If the warning light comes on, stop
as soon as possible and inflate
the tires to the recommended
pressure shown on the tire loading
information label. SeeVehicle Load
Limits on page 9‑10.
A message to check the pressure in
a specific tire displays in the Driver
Information Center (DIC). The low
tire pressure warning light and the
DIC warning message come on at
each ignition cycle until the tires
are inflated to the correct inflation
pressure. Using the DIC, tire
pressure levels can be viewed.
For additional information and
details about the DIC operation and
displays see Driver Information
Center (DIC) (Without DIC Buttons)
on page 5‑30 orDriver Information
Center (DIC) (With DIC Buttons) on
page 5‑25 andTire Messages on
page 5‑43. The low tire pressure warning light
may come on in cool weather when
the vehicle is first started, and then
turn off as the vehicle is driven.
This could be an early indicator that
the air pressure is getting low and
needs to be inflated to the proper
pressure.
A Tire and Loading Information
label shows the size of the original
equipment tires and the correct
inflation pressure for the tires when
they are cold. See
Vehicle Load
Limits on page 9‑10, for an example
of the Tire and Loading Information
label and its location. Also see Tire
Pressure on page 10‑44.
The TPMS can warn about a
low tire pressure condition but it
does not replace normal tire
maintenance. See Tire Inspection
on page 10‑50, Tire Rotation on
page 10‑50 andTires on
page 10‑37. Notice:
Tire sealant materials are
not all the same. A non-approved
tire sealant could damage the
TPMS sensors. TPMS sensor
damage caused by using an
incorrect tire sealant is not
covered by the vehicle
warranty. Always use only the
GM-approved tire sealant
available through your dealer or
included in the vehicle.
Factory-installed Tire Inflator Kits
use a GM approved liquid tire
sealant. Using non-approved tire
sealants could damage the TPMS
sensors. See Tire Sealant and
Compressor Kit on page 10‑60 for
information regarding the inflator kit
materials and instructions.
Page 360 of 468
Black plate (48,1)GMC Acadia/Acadia Denali Owner Manual - 2012
10-48 Vehicle Care
TPMS Malfunction Light and
Message
The TPMS will not function properly
if one or more of the TPMS sensors
are missing or inoperable. When the
system detects a malfunction, the
low tire warning light flashes for
about one minute and then stays on
for the remainder of the ignition
cycle. A DIC warning message also
displays. The malfunction light and
DIC warning message come on at
each ignition cycle until the problem
is corrected. Some of the conditions
that can cause these to come
on are:
.One of the road tires has been
replaced with the spare tire.
The spare tire does not have a
TPMS sensor. The malfunction
light and DIC message should
go off after the road tire is
replaced and the sensor
matching process is performed
successfully. See "TPMS Sensor
Matching Process" later in this
section.
.The TPMS sensor matching
process was not done or not
completed successfully
after rotating the tires. The
malfunction light and the DIC
message should go off after
successfully completing the
sensor matching process.
See "TPMS Sensor Matching
Process" later in this section
.One or more TPMS sensors
are missing or damaged.
The malfunction light and the
DIC message should go off
when the TPMS sensors are
installed and the sensor
matching process is performed
successfully. See your dealer
for service.
.Replacement tires or wheels do
not match the original equipment
tires or wheels. Tires and wheels
other than those recommended
could prevent the TPMS from
functioning properly. SeeBuying
New Tires on page 10‑52.
.Operating electronic devices or
being near facilities using radio
wave frequencies similar to the
TPMS could cause the TPMS
sensors to malfunction.
If the TPMS is not functioning
properly, it cannot detect or signal a
low tire condition. See your dealer
for service if the TPMS malfunction
light and DIC message comes on
and stays on.
TPMS Sensor Matching
Process
Each TPMS sensor has a unique
identification code. The identification
code needs to be matched to a new
tire/wheel position after rotating the
tires or replacing one or more of the
TPMS sensors. The TPMS sensor
matching process should also be
performed after replacing a spare
tire with a road tire containing the
Page 361 of 468
Black plate (49,1)GMC Acadia/Acadia Denali Owner Manual - 2012
Vehicle Care 10-49
TPMS sensor. The malfunction
light and the DIC message should
go off at the next ignition cycle.
The sensors are matched to the
tire/wheel positions, using a TPMS
relearn tool, in the following order:
driver side front tire, passenger side
front tire, passenger side rear tire,
and driver side rear. See your
dealer for service or to purchase a
relearn tool.
There are two minutes to match
the first tire/wheel position, and
five minutes overall to match all
four tire/wheel positions. If it takes
longer, the matching process stops
and must be restarted.
The TPMS sensor matching
process is:
1. Set the parking brake.
2. Turn the ignition to ON/RUNwith the engine off. 3. Press the Remote Keyless Entry
(RKE) transmitter's LOCK and
UNLOCK buttons at the same
time for approximately
five seconds. The horn sounds
twice to signal the receiver is in
relearn mode and TIRE
LEARNING ACTIVE message
displays on the DIC screen.
4. Start with the driver side front tire.
5. Place the relearn tool against the tire sidewall, near the valve
stem. Then press the button to
activate the TPMS sensor.
A horn chirp confirms that the
sensor identification code has
been matched to this tire and
wheel position.
6. Proceed to the passenger side front tire, and repeat the
procedure in Step 5. 7. Proceed to the passenger side
rear tire, and repeat the
procedure in Step 5.
8. Proceed to the driver side rear tire, and repeat the procedure in
Step 5. The horn sounds two
times to indicate the sensor
identification code has been
matched to the driver side rear
tire, and the TPMS sensor
matching process is no longer
active. The TIRE LEARNING
ACTIVE message on the DIC
display screen goes off.
9. Turn the ignition to LOCK/OFF.
10. Set all four tires to the recommended air pressure
level as indicated on the Tire
and Loading Information label.
Page 409 of 468
Black plate (3,1)GMC Acadia/Acadia Denali Owner Manual - 2012
Service and Maintenance 11-3
Maintenance
Schedule
Owner Checks and Services
At Each Fuel Stop
.Check the engine oil level.
SeeEngine Oil on page 10‑8.
Once a Month
.Check the tire inflation
pressures. See Tire Pressure on
page 10‑44.
.Inspect the tires for wear.
See Tire Inspection on
page 10‑50.
.Check the windshield washer
fluid level. See Washer Fluid on
page 10‑22.
Engine Oil Change
When the CHANGE ENGINE OIL
SOON message displays, have the
engine oil and filter changed within
the next 1 000 km/600 mi. If driven
under the best conditions, the
engine oil life system might not
indicate the need for vehicle service
for more than a year. The engine oil
and filter must be changed at least
once a year and the oil life system
must be reset. Your trained dealer
technician can perform this work.
If the engine oil life system is reset
accidentally, service the vehicle
within 5 000 km/3,000 mi since the
last service. Reset the oil life
system when the oil is changed.
See Engine Oil Life System on
page 10‑10.
Tire Rotation and
Required Services Every
12 000 km/7,500 mi
Rotate the tires, if recommended
for the vehicle, and perform the
following services. See Tire
Rotation on page 10‑50.
.Check engine oil level and oil
life percentage. If needed,
change engine oil and filter, and
reset oil life system. See Engine
Oil on page 10‑8 andEngine Oil
Life System on page 10‑10.
.Check engine coolant level.
See Engine Coolant on
page 10‑14.
.Check windshield washer fluid
level. See Washer Fluid on
page 10‑22.
Page 461 of 468
Black plate (5,1)GMC Acadia/Acadia Denali Owner Manual - 2012
INDEX i-5
Flat Tire . . . . . . . . . . . . . . . . . . . . . . 10-58Changing . . . . . . . . . . . . . . . . . . . 10-68
Floor Console Storage . . . . . . . . . . 4-3
Floor Mats . . . . . . . . . . . . . . . . . . . . 10-92
Fluid Automatic Transmission . . . . 10-12
Brakes . . . . . . . . . . . . . . . . . . . . . . 10-24
Power Steering . . . . . . . . . . . . . 10-21
Washer . . . . . . . . . . . . . . . . . . . . . 10-22
Fog Lamps Bulb Replacement . . . . . . . . . . . . . 6-5
Folding Mirrors . . . . . . . . . . . . . . . . 2-17
Front Fog Lamp Light . . . . . . . . . . . . . . . . . . . . . . . . . . 5-25
Front Seats Adjustment . . . . . . . . . . . . . . . . . . . . 3-3
Heated and Ventilated . . . . . . . . . 3-9
Fuel . . . . . . . . . . . . . . . . . . . . . . . . . . . 9-40 Additives . . . . . . . . . . . . . . . . . . . . . 9-41
Economy Driving . . . . . . . . . . . . . 1-24
Filling a Portable FuelContainer . . . . . . . . . . . . . . . . . . . 9-44
Filling the Tank . . . . . . . . . . . . . . . 9-42
Foreign Countries . . . . . . . . . . . . 9-41 Fuel (cont'd)
Gasoline Specifications . . . . . . . 9-40
Gauge . . . . . . . . . . . . . . . . . . . . . . . . 5-13
Recommended . . . . . . . . . . . . . . . 9-40
Requirements, California . . . . . 9-40
System Messages . . . . . . . . . . . . 5-40
Fuses Engine CompartmentFuse Block . . . . . . . . . . . . . . . . 10-31
Fuses and Circuit Breakers . . . . . . . . . . . . . . . . . . 10-31
Instrument Panel Fuse Block . . . . . . . . . . . . . . . . . . . . . . 10-34
G
Garage Door Opener . . . . . . . . . . 5-54Programming . . . . . . . . . . . . . . . . . 5-54
Gasoline Specifications . . . . . . . . . . . . . . . . . 9-40
Gauges
Engine CoolantTemperature . . . . . . . . . . . . . . . . 5-14
Fuel . . . . . . . . . . . . . . . . . . . . . . . . . . 5-13
Odometer . . . . . . . . . . . . . . . . . . . . . 5-13
Speedometer . . . . . . . . . . . . . . . . . 5-13 Gauges (cont'd)
Tachometer . . . . . . . . . . . . . . . . . . . 5-13
Voltmeter . . . . . . . . . . . . . . . . . . . . . 5-15
Warning Lights and
Indicators . . . . . . . . . . . . . . . . . . . 5-11
General Information Service and Maintenance . . . . . 11-1
Towing . . . . . . . . . . . . . . . . . . . . . . . . 9-44
Vehicle Care . . . . . . . . . . . . . . . . . . 10-2
Glove Box . . . . . . . . . . . . . . . . . . . . . . 4-1
GM Mobility Reimbursement Program . . . . . . . . . . . . . . . . . . . . . . 13-8
H
Hazard Warning Flashers . . . . . . . 6-4
Head Restraints . . . . . . . . . . . . . . . . 3-2
Head-up Display . . . . . . . . . . . . . . . 5-33
HeadlampsAiming . . . . . . . . . . . . . . . . . . . . . . 10-28
Bulb Replacement . . . . . . . . . . 10-29
Daytime RunningLamps/Automatic
Headlamp System . . . . . . . . . . . 6-3
Delayed . . . . . . . . . . . . . . . . . . . . . . . 6-3