change wheel GMC ACADIA 2012 Owner's Manual
[x] Cancel search | Manufacturer: GMC, Model Year: 2012, Model line: ACADIA, Model: GMC ACADIA 2012Pages: 468, PDF Size: 5.57 MB
Page 5 of 468
Black plate (5,1)GMC Acadia/Acadia Denali Owner Manual - 2012
Introduction v
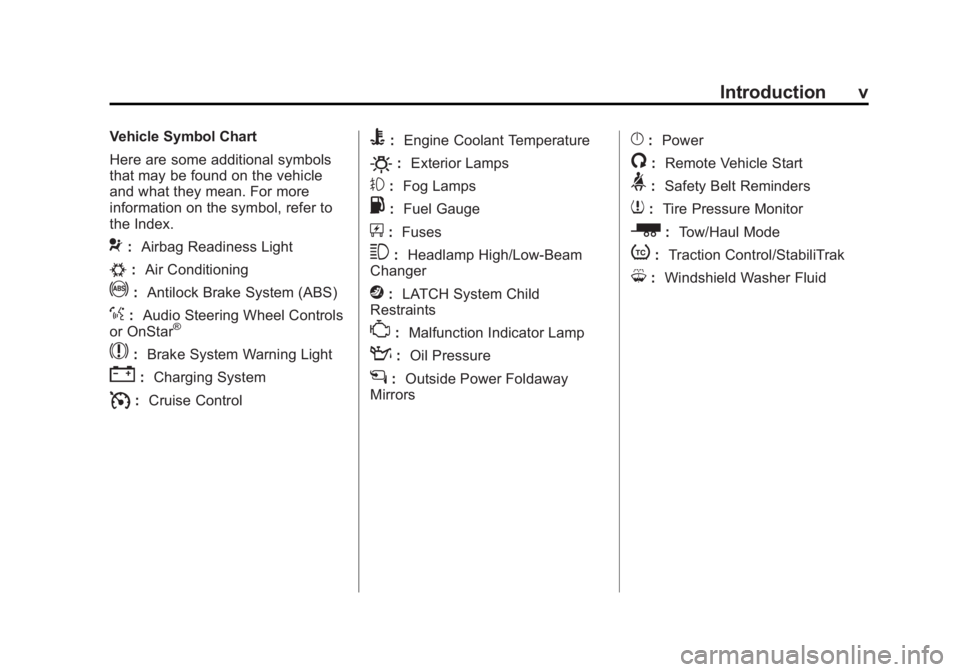
Vehicle Symbol Chart
Here are some additional symbols
that may be found on the vehicle
and what they mean. For more
information on the symbol, refer to
the Index.
9:Airbag Readiness Light
#:Air Conditioning
!:Antilock Brake System (ABS)
%:Audio Steering Wheel Controls
or OnStar®
$: Brake System Warning Light
":Charging System
I:Cruise Control
B: Engine Coolant Temperature
O:Exterior Lamps
#:Fog Lamps
.: Fuel Gauge
+:Fuses
3: Headlamp High/Low-Beam
Changer
j: LATCH System Child
Restraints
*: Malfunction Indicator Lamp
::Oil Pressure
g:Outside Power Foldaway
Mirrors
}: Power
/:Remote Vehicle Start
>:Safety Belt Reminders
7:Tire Pressure Monitor
_: Tow/Haul Mode
t:Traction Control/StabiliTrak
M:Windshield Washer Fluid
Page 25 of 468
Black plate (19,1)GMC Acadia/Acadia Denali Owner Manual - 2012
In Brief 1-19
Bluetooth®
The Bluetooth system allows users
with a Bluetooth-enabled cell phone
to make and receive hands-free
calls using the vehicle audio system
and controls.
The Bluetooth-enabled cell phone
must be paired with the in-vehicle
Bluetooth system before it can be
used in the vehicle. Not all phones
will support all functions.
SeeBluetooth on page 7‑49.
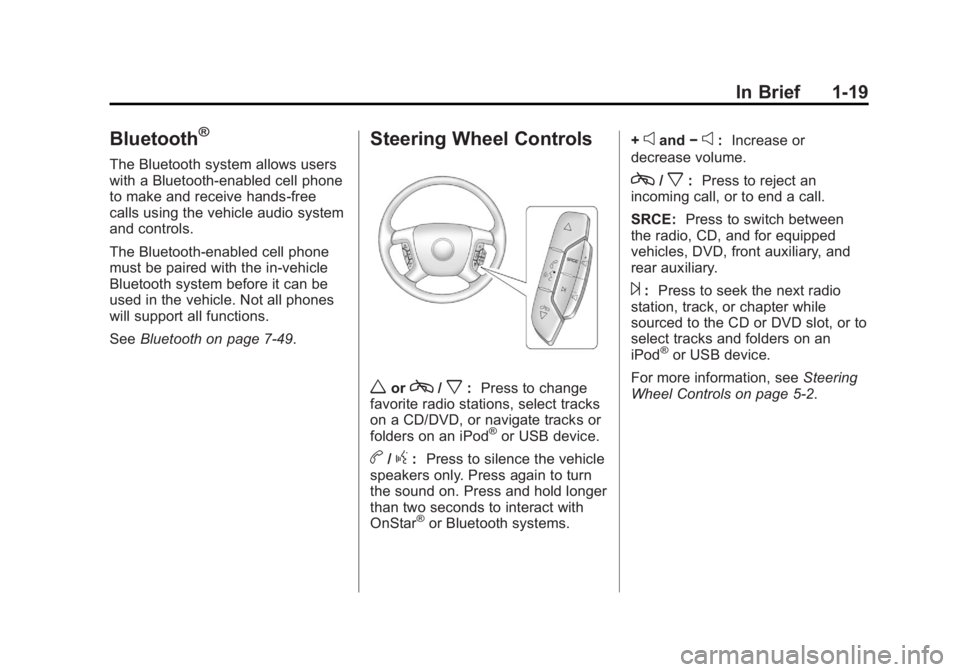
Steering Wheel Controls
worc/x:Press to change
favorite radio stations, select tracks
on a CD/DVD, or navigate tracks or
folders on an iPod
®or USB device.
b/g: Press to silence the vehicle
speakers only. Press again to turn
the sound on. Press and hold longer
than two seconds to interact with
OnStar
®or Bluetooth systems. +
eand
−e:Increase or
decrease volume.
c/x: Press to reject an
incoming call, or to end a call.
SRCE: Press to switch between
the radio, CD, and for equipped
vehicles, DVD, front auxiliary, and
rear auxiliary.
¨: Press to seek the next radio
station, track, or chapter while
sourced to the CD or DVD slot, or to
select tracks and folders on an
iPod
®or USB device.
For more information, see Steering
Wheel Controls on page 5‑2.
Page 92 of 468
Black plate (36,1)GMC Acadia/Acadia Denali Owner Manual - 2012
3-36 Seats and Restraints
Adding Equipment to the
Airbag-Equipped Vehicle
Adding accessories that change the
vehicle's frame, bumper system,
height, front end, or side sheet
metal may keep the airbag system
from working properly.
The operation of the airbag system
can also be affected by changing or
moving any parts of the front seats,
safety belts, airbag sensing and
diagnostic module, steering wheel,
instrument panel, roof-rail airbag
modules, ceiling or pillar garnish
trim, overhead console, front
sensors, side impact sensors,
or airbag wiring.
Your dealer and the service manual
have information about the location
of the airbag sensors, sensing and
diagnostic module, and airbag
wiring.In addition, the vehicle has a
passenger sensing system that
includes sensors as part of the
front outboard passenger seat.
The passenger sensing system may
not operate properly if the original
seat trim is replaced with non-GM
covers, upholstery or trim, or with
GM covers, upholstery or trim
designed for a different vehicle.
Any object, such as an aftermarket
seat heater or a comfort enhancing
pad or device, installed under or
on top of the seat fabric, could also
interfere with the operation of
the passenger sensing system.
This could either prevent proper
deployment of the passenger
airbag(s) or prevent the passenger
sensing system from properly
turning off the passenger airbag(s).
See
Passenger Sensing System on
page 3‑31. If the vehicle has roof‐rail airbags,
see
Different Size Tires and Wheels
on page 10‑54 for additional
information.
If your vehicle needs to be modified
because you have a disability and
you have questions about whether
the modifications will affect the
vehicle's airbag system, or if you
have questions about whether the
airbag system will be affected if the
vehicle is modified for any other
reason, call Customer Assistance.
See Customer Assistance Offices
(U.S. and Canada) on page 13‑5
or Customer Assistance Offices
(Mexico) on page 13‑6.
Page 125 of 468
Black plate (5,1)GMC Acadia/Acadia Denali Owner Manual - 2012
Instruments and Controls 5-5
Horn
Pressaon the steering wheel pad
to sound the horn.
Windshield Wiper/Washer
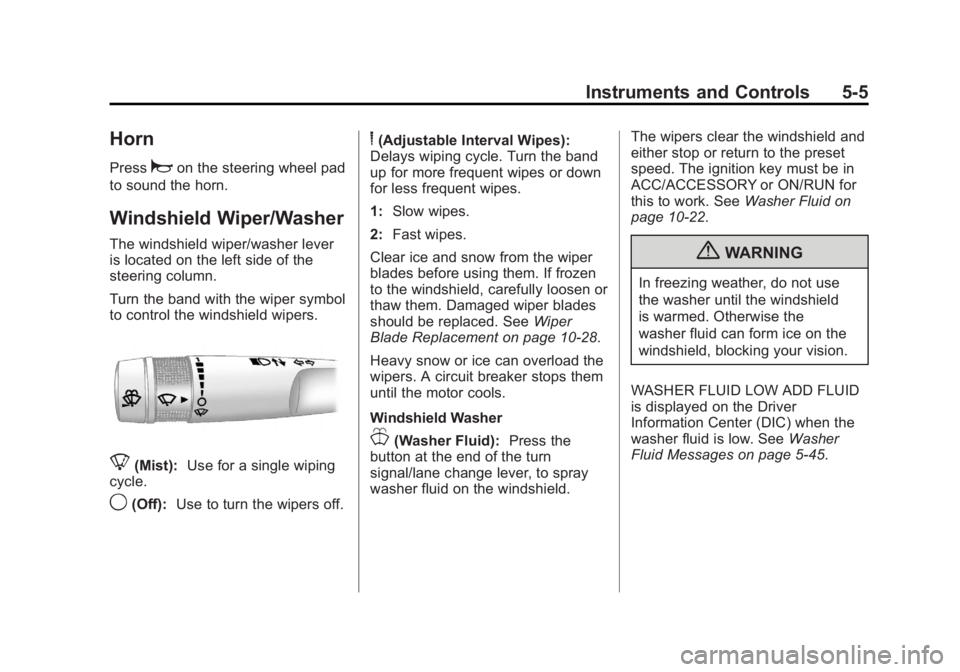
The windshield wiper/washer lever
is located on the left side of the
steering column.
Turn the band with the wiper symbol
to control the windshield wipers.
8(Mist): Use for a single wiping
cycle.
9(Off): Use to turn the wipers off.
6(Adjustable Interval Wipes):
Delays wiping cycle. Turn the band
up for more frequent wipes or down
for less frequent wipes.
1: Slow wipes.
2: Fast wipes.
Clear ice and snow from the wiper
blades before using them. If frozen
to the windshield, carefully loosen or
thaw them. Damaged wiper blades
should be replaced. See Wiper
Blade Replacement on page 10‑28.
Heavy snow or ice can overload the
wipers. A circuit breaker stops them
until the motor cools.
Windshield Washer
J(Washer Fluid): Press the
button at the end of the turn
signal/lane change lever, to spray
washer fluid on the windshield. The wipers clear the windshield and
either stop or return to the preset
speed. The ignition key must be in
ACC/ACCESSORY or ON/RUN for
this to work. See
Washer Fluid on
page 10‑22.
{WARNING
In freezing weather, do not use
the washer until the windshield
is warmed. Otherwise the
washer fluid can form ice on the
windshield, blocking your vision.
WASHER FLUID LOW ADD FLUID
is displayed on the Driver
Information Center (DIC) when the
washer fluid is low. See Washer
Fluid Messages on page 5‑45.
Page 140 of 468
Black plate (20,1)GMC Acadia/Acadia Denali Owner Manual - 2012
5-20 Instruments and Controls
If one or more of these conditions
occurs, change the fuel brand used.
It will require at least one full tank of
the proper fuel to turn the light off.
SeeRecommended Fuel on
page 9‑40.
If none of the above have made the
light turn off, your dealer can check
the vehicle. The dealer has the
proper test equipment and
diagnostic tools to fix any
mechanical or electrical problems
that might have developed.
Emissions Inspection and
Maintenance Programs
Some local governments may have
programs to inspect the on-vehicle
emission control equipment.
For the inspection, the emission
system test equipment is
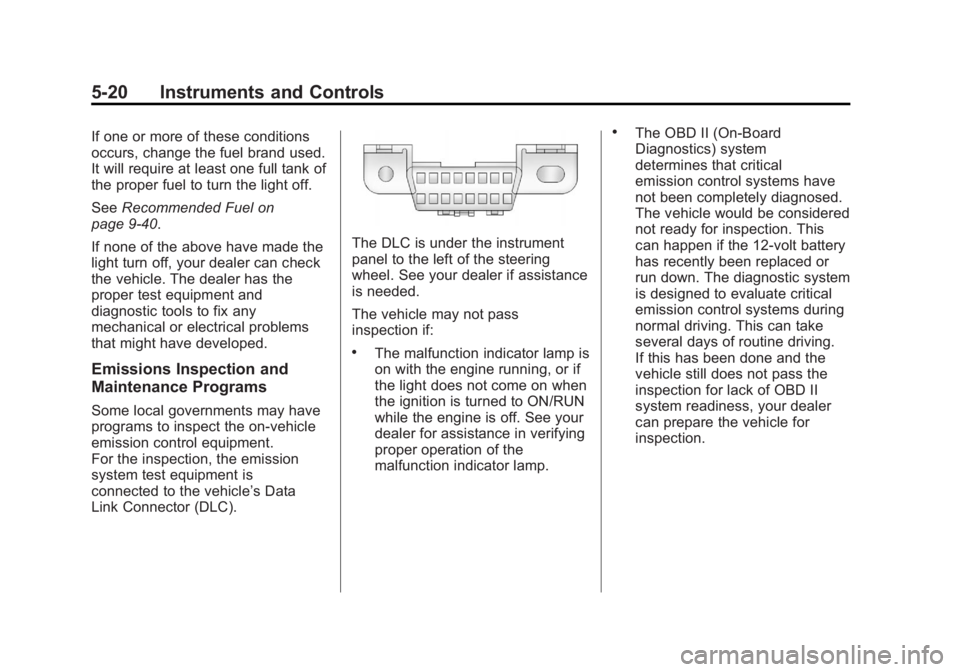
connected to the vehicle’s Data
Link Connector (DLC).
The DLC is under the instrument
panel to the left of the steering
wheel. See your dealer if assistance
is needed.
The vehicle may not pass
inspection if:
.The malfunction indicator lamp is
on with the engine running, or if
the light does not come on when
the ignition is turned to ON/RUN
while the engine is off. See your
dealer for assistance in verifying
proper operation of the
malfunction indicator lamp.
.The OBD II (On-Board
Diagnostics) system
determines that critical
emission control systems have
not been completely diagnosed.
The vehicle would be considered
not ready for inspection. This
can happen if the 12-volt battery
has recently been replaced or
run down. The diagnostic system
is designed to evaluate critical
emission control systems during
normal driving. This can take
several days of routine driving.
If this has been done and the
vehicle still does not pass the
inspection for lack of OBD II
system readiness, your dealer
can prepare the vehicle for
inspection.
Page 154 of 468
Black plate (34,1)GMC Acadia/Acadia Denali Owner Manual - 2012
5-34 Instruments and Controls
The following indicator lights come
on the instrument panel when
activated and also appear on
the HUD:
.Turn Signal Indicators
.High-Beam Indicator Symbol
The HUD temporarily displays
CHECK GAGES and ICE
POSSIBLE when these messages
are on the DIC trip computer.
The HUD also displays the following
messages on vehicles with these
systems, when they are active:
.TRACTION CONTROL ACTIVE
.STABILITRAK ACTIVE
Notice: If you try to use the HUD
image as a parking aid, you may
misjudge the distance and
damage your vehicle. Do not use
the HUD image as a parking aid. When the HUD is on, the
speedometer reading is continually
displayed. The current radio station
or CD track number will display
for a short period of time after the
radio or CD track status changes.
This happens whenever radio
information is changed. The
speedometer size is reduced when
radio, CD information, warnings,
or turn-by-turn navigation
information are displayed on
the HUD.
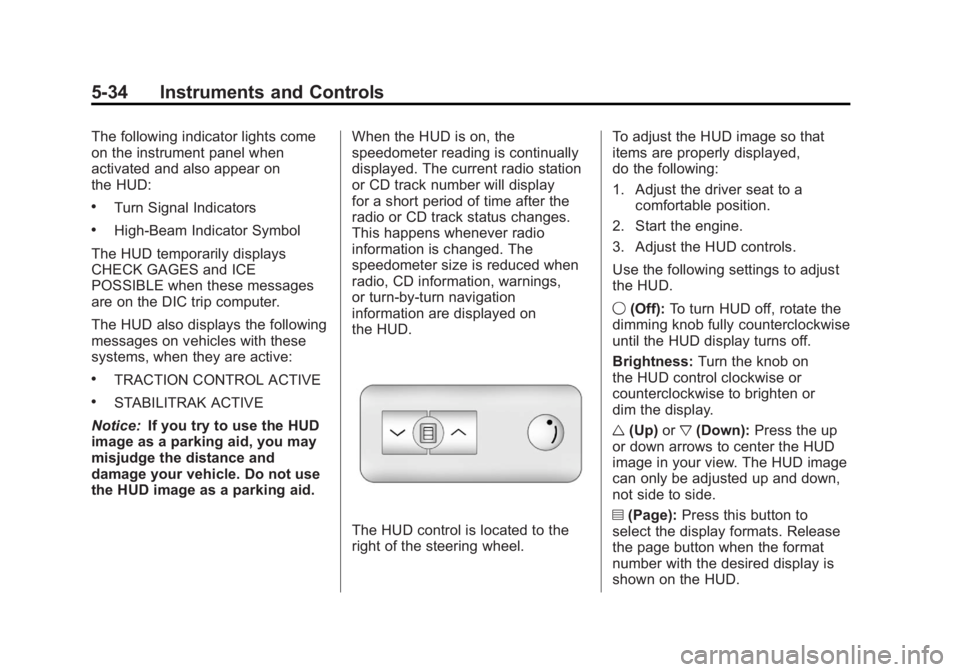
The HUD control is located to the
right of the steering wheel.To adjust the HUD image so that
items are properly displayed,
do the following:
1. Adjust the driver seat to a
comfortable position.
2. Start the engine.
3. Adjust the HUD controls.
Use the following settings to adjust
the HUD.
9 (Off): To turn HUD off, rotate the
dimming knob fully counterclockwise
until the HUD display turns off.
Brightness: Turn the knob on
the HUD control clockwise or
counterclockwise to brighten or
dim the display.
w (Up) orx(Down): Press the up
or down arrows to center the HUD
image in your view. The HUD image
can only be adjusted up and down,
not side to side.
? (Page): Press this button to
select the display formats. Release
the page button when the format
number with the desired display is
shown on the HUD.
Page 179 of 468
Black plate (1,1)GMC Acadia/Acadia Denali Owner Manual - 2012
Lighting 6-1
Lighting
Exterior Lighting
Exterior Lamp Controls . . . . . . . . 6-1
Headlamp High/Low-BeamChanger . . . . . . . . . . . . . . . . . . . . . 6-2
Flash-to-Pass . . . . . . . . . . . . . . . . . 6-2
Daytime Running Lamps (DRL)/Automatic Headlamp
System . . . . . . . . . . . . . . . . . . . . . . 6-3
Delayed Headlamps . . . . . . . . . . 6-3
Hazard Warning Flashers . . . . . 6-4
Turn and Lane-Change Signals . . . . . . . . . . . . . . . . . . . . . . 6-4
Fog Lamps . . . . . . . . . . . . . . . . . . . . 6-5
Interior Lighting
Instrument Panel Illumination Control . . . . . . . . . . . . . . . . . . . . . . 6-5
Courtesy Lamps . . . . . . . . . . . . . . 6-5
Dome Lamps . . . . . . . . . . . . . . . . . 6-5
Reading Lamps . . . . . . . . . . . . . . . 6-6
Lighting Features
Entry Lighting . . . . . . . . . . . . . . . . . 6-6
Delayed Entry Lighting . . . . . . . . 6-6
Delayed Exit Lighting . . . . . . . . . 6-7
Parade Dimming . . . . . . . . . . . . . . 6-7
Battery Load Management . . . . 6-7
Battery Power Protection . . . . . . 6-8
Exterior Lighting
Exterior Lamp Controls
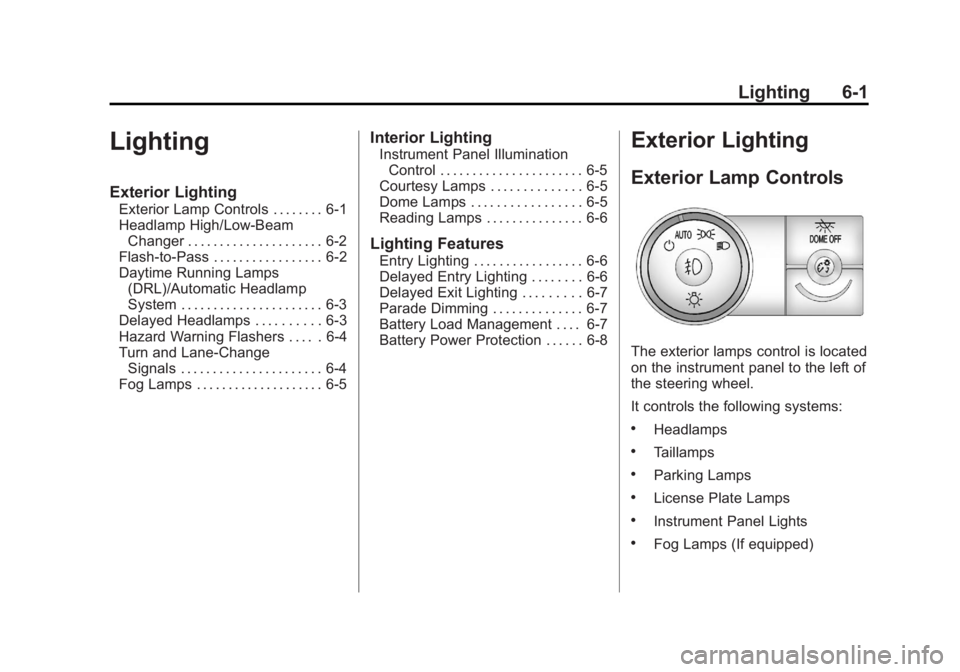
The exterior lamps control is located
on the instrument panel to the left of
the steering wheel.
It controls the following systems:
.Headlamps
.Taillamps
.Parking Lamps
.License Plate Lamps
.Instrument Panel Lights
.Fog Lamps (If equipped)
Page 236 of 468
Black plate (50,1)GMC Acadia/Acadia Denali Owner Manual - 2012
7-50 Infotainment System
{WARNING
When using a cell phone, it can
be distracting to look too long or
too often at the screen of the
phone or the infotainment
(navigation) system. Taking your
eyes off the road too long or
too often could cause a crash
resulting in injury or death.
Focus your attention on driving.
A Bluetooth system can use a
Bluetooth‐capable cell phone with a
Hands‐Free Profile to make and
receive phone calls. The system
can be used while the key is in the
ON/RUN or ACC/ACCESSORY
position. The range of the Bluetooth
system can be up to 9.1 m (30 ft).
Not all phones support all functions,
and not all phones work with the
in-vehicle Bluetooth system.
See www.gm.com/bluetooth for
more information on compatible
phones.
Voice Recognition
The Bluetooth system uses voice
recognition to interpret voice
commands to dial phone numbers
and name tags.
For additional information, say
“Help” while you are in a voice
recognition menu.
Noise: Keep interior noise levels to
a minimum. The system may not
recognize voice commands if there
is too much background noise.
When to Speak: A short tone
sounds after the system responds
indicating when it is waiting for a
voice command. Wait until the tone
and then speak.
How to Speak: Speak clearly in a
calm and natural voice.
Audio System
When using the in‐vehicle Bluetooth
system, sound comes through the
vehicle's front audio system
speakers and overrides the audio
system. Use the audio system
volume knob, during a call, to
change the volume level. The
adjusted volume level remains in
memory for later calls. To prevent
missed calls, a minimum volume
level is used if the volume is turned
down too low.
Bluetooth Controls
Use the buttons located on the
steering wheel to operate the
in‐vehicle Bluetooth system.
See Steering Wheel Controls on
page 5‑2 for more information.
b/g(Push To Talk): Press to
answer incoming calls, confirm
system information, and start
speech recognition.
c/x(End): Press to end a call,
reject a call, or cancel an operation.
Page 256 of 468
Black plate (12,1)GMC Acadia/Acadia Denali Owner Manual - 2012
8-12 Climate Controls
N(Air Delivery Mode Control):
Press to manually change the
direction of the airflow. Repeatedly
press the button until the desired
mode appears on the display.
H(Vent): Air is directed through
the overhead outlets.
)(Bi-Level): Air is directed
through the rear floor outlets, as
well as the overhead outlets.
6(Floor): Air is directed through
the floor outlets. The rear system
floor outlets are located under the
third row seats.
Air Vents
Use the slider switch in the center of
the outlet, to change the direction of
the airflow. Use the thumbwheel
near the outlet to control the amount
of airflow or to shut off the airflow.
Keep all outlets open whenever
possible for best system
performance.
Operation Tips
.Clear away any ice, snow,
or leaves from the air inlets at
the base of the windshield that
can block the flow of air into the
vehicle.
.Use of non-GM approved hood
deflectors can adversely affect
the performance of the system.
.Keep the path under all seats
clear of objects to help circulate
the air inside the vehicle more
effectively.
.If fogging reoccurs while in
vent or bi-level modes with
mild temperature throughout
the vehicle, turn on the air
conditioner to reduce windshield
fogging.
Page 286 of 468
Black plate (28,1)GMC Acadia/Acadia Denali Owner Manual - 2012
9-28 Driving and Operating
If driving safely on a wet road and it
becomes necessary to slam on the
brakes and continue braking to
avoid a sudden obstacle, a
computer senses that the wheels
are slowing down. If one of the
wheels is about to stop rolling, the
computer will separately work the
brakes at each wheel.
ABS can change the brake pressure
to each wheel, as required, faster
than any driver could. This can help
the driver steer around the obstacle
while braking hard.
As the brakes are applied, the
computer keeps receiving updates
on wheel speed and controls
braking pressure accordingly.
Remember: ABS does not change
the time needed to get a foot up to
the brake pedal or always decrease
stopping distance. If you get too
close to the vehicle in front of you,there will not be enough time to
apply the brakes if that vehicle
suddenly slows or stops. Always
leave enough room up ahead to
stop, even with ABS.
Using ABS
Do not pump the brakes. Just hold
the brake pedal down firmly and let
ABS work. You might hear the ABS
pump or motor operating and feel
the brake pedal pulsate, but this is
normal.
Braking in Emergencies
ABS allows the driver to steer and
brake at the same time. In many
emergencies, steering can help
more than even the very best
braking.
Parking Brake
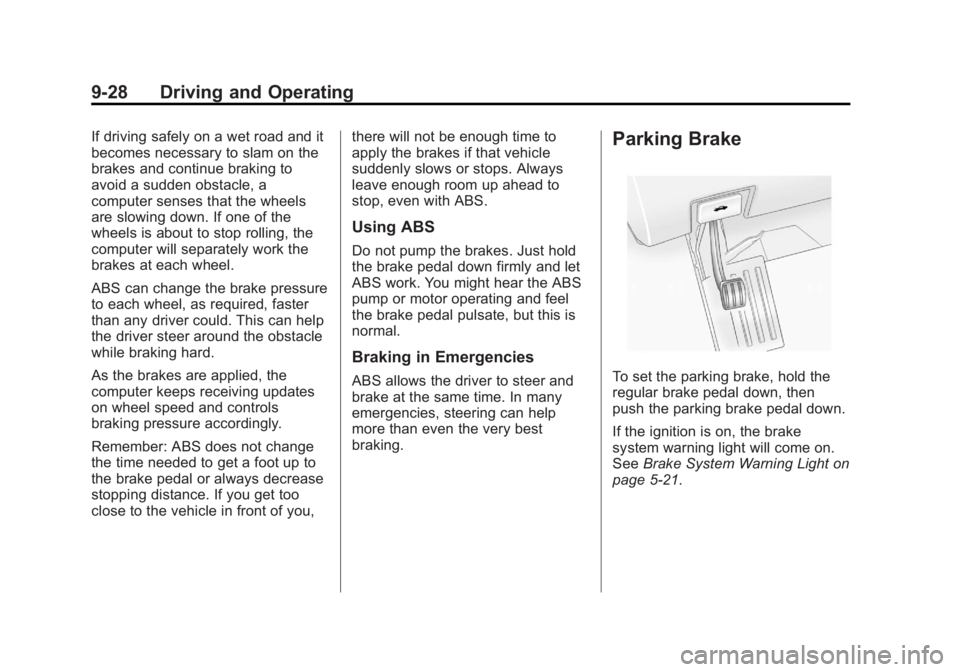
To set the parking brake, hold the
regular brake pedal down, then
push the parking brake pedal down.
If the ignition is on, the brake
system warning light will come on.
See
Brake System Warning Light on
page 5‑21.