manual radio set GMC ACADIA 2014 User Guide
[x] Cancel search | Manufacturer: GMC, Model Year: 2014, Model line: ACADIA, Model: GMC ACADIA 2014Pages: 414, PDF Size: 4.21 MB
Page 183 of 414
Black plate (9,1)GMC Acadia/Acadia Denali Owner Manual (GMNA-Localizing-U.S./Canada/
Mexico-6014315) - 2014 - crc - 8/15/13
Infotainment System 7-9
.Audible Alert: This feature will
give an audio alert when certain
artists or songs are available on
a specific station. Press to turn
on or off.
Storing Radio Station Presets
Up to 30 preset stations can be
stored. AM, FM, and SiriusXM (if
equipped) can be mixed.
1. From the AM, FM, or SiriusXMmain page, press and hold any 1
−5 buttons or one of the preset
screen buttons at the bottom of
the screen. After a few seconds,
a beep is heard and the new
preset information displays on
that screen button.
2. Repeat for each preset.
Mixed-Band Presets
Each favorite page can store
five preset stations. The presets
within a page can be from different
radio bands. To scroll through the pages, press
FAV or the FAV screen button on the
top bar. The current page number
displays above the preset buttons.
The stored stations for each favorite
page display on the preset buttons.
To change the number of favorite
pages displayed:
1. Press Settings on the
Home Page.
2. Press Favorite Pages.
3. Select the number of pages to display.
Recalling a Preset Station
To recall a preset station from a
favorites page, do one the following:
.Press the FAV screen button at
the top bar to display the preset
pop-up. Press one of the preset
screen buttons to go to the
selected preset station.
.In the AM, FM, or SiriusXM (if
equipped) main page, press one
of the preset screen buttons to
go to the selected preset station.
Satellite Radio
Vehicles with a valid SiriusXM®
satellite radio subscription can
receive SiriusXM programming.
SiriusXM satellite radio has a wide
variety of programming and
commercial-free music, coast to
coast, and in digital-quality sound.
For more information, see
www.siriusxm.com or call
1-866-635-2349 (U.S.) and
www.xmradio.ca or call
1-877-209-0079 (Canada).
When SiriusXM is active, the station
name, number, category name,
song title, and artist display on the
screen. SiriusXM may update the
background picture at any time.
SiriusXM Categories
SiriusXM stations are organized in
categories.
Page 184 of 414
Black plate (10,1)GMC Acadia/Acadia Denali Owner Manual (GMNA-Localizing-U.S./Canada/
Mexico-6014315) - 2014 - crc - 8/15/13
7-10 Infotainment System
Adding or Removing SiriusXM
Categories
Using the home page:
1. Press the Settings screen buttonon the Home Page.
2. Select XM Categories.
3. Select or deselect a category. A checkmark will indicate that
the category is selected.
Press “Show All XM Categories” to
restore all SiriusXM categories.
Using the XM playing screen:
1. Press the Menu screen button.
2. Select XM Categories.
3. Select or deselect a category. A checkmark will indicate that
the category is selected.
SiriusXM Messages
XL (Explicit Language
Channels): These stations, or any
others, can be blocked by request,
by calling 1-866-635-2349 (U.S.),
and 1-877-209-0079 (Canada). XM Updating:
The encryption code
in the receiver is being updated. No
action is required.
Loading XM: The audio system is
acquiring and processing audio and
text data. No action is needed.
Channel Off Air: This station is not
currently in service.
Channel Unauth: This station is
blocked or cannot be received.
Channel Unavailable: This
previously assigned station is no
longer assigned.
No Artist Info: No artist
information is available at this time
on this station.
No Title Info: No song title
information is available at this time
on this station.
No CAT Info: No category
information is available at this time
on this station.
No Information: No text or
informational messages are
available at this time on this station. No XM Signal:
The vehicle may be
in a location where the SiriusXM
signal is being blocked. When the
vehicle is moved into an open area,
the signal should return.
CAT Not Found: There are no
stations available for the selected
category.
XM Radio ID: If tuned to station 0,
this message alternates with the
SiriusXM radio eight-digit radio ID
label. This label is needed to
activate the service.
Unknown: If this message is
received when tuned to station 0,
there could be a receiver fault.
Consult with your dealer.
XM Not Available: If this message
does not clear within a short period
of time, the receiver could have a
fault. Consult with your dealer.
Page 191 of 414
Black plate (17,1)GMC Acadia/Acadia Denali Owner Manual (GMNA-Localizing-U.S./Canada/
Mexico-6014315) - 2014 - crc - 8/15/13
Infotainment System 7-17
Composers
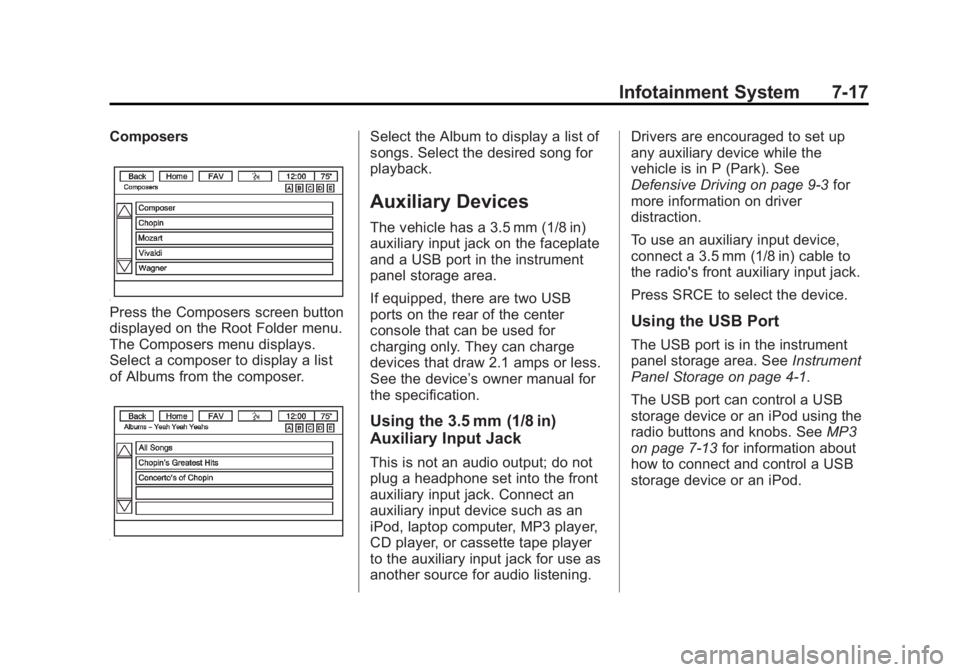
Press the Composers screen button
displayed on the Root Folder menu.
The Composers menu displays.
Select a composer to display a list
of Albums from the composer.
Select the Album to display a list of
songs. Select the desired song for
playback.
Auxiliary Devices
The vehicle has a 3.5 mm (1/8 in)
auxiliary input jack on the faceplate
and a USB port in the instrument
panel storage area.
If equipped, there are two USB
ports on the rear of the center
console that can be used for
charging only. They can charge
devices that draw 2.1 amps or less.
See the device’s owner manual for
the specification.
Using the 3.5 mm (1/8 in)
Auxiliary Input Jack
This is not an audio output; do not
plug a headphone set into the front
auxiliary input jack. Connect an
auxiliary input device such as an
iPod, laptop computer, MP3 player,
CD player, or cassette tape player
to the auxiliary input jack for use as
another source for audio listening. Drivers are encouraged to set up
any auxiliary device while the
vehicle is in P (Park). See
Defensive Driving on page 9-3
for
more information on driver
distraction.
To use an auxiliary input device,
connect a 3.5 mm (1/8 in) cable to
the radio's front auxiliary input jack.
Press SRCE to select the device.
Using the USB Port
The USB port is in the instrument
panel storage area. See Instrument
Panel Storage on page 4-1.
The USB port can control a USB
storage device or an iPod using the
radio buttons and knobs. See MP3
on page 7-13 for information about
how to connect and control a USB
storage device or an iPod.
Page 192 of 414
Black plate (18,1)GMC Acadia/Acadia Denali Owner Manual (GMNA-Localizing-U.S./Canada/
Mexico-6014315) - 2014 - crc - 8/15/13
7-18 Infotainment System
USB Supported Devices
.USB Flash Drives
.Portable USB Hard Drives
.Fifth generation or later iPod
.iPod classic®(6th generation)
.iPod nano®(3G, 4G, 5G,
and 6G)
.iPod touch®(1G, 2G, 3G,
and 4G)
.iPhone®(2G, 3G, 3GS, 4, and 5)
.iPad®(1G, 2G)
Not all iPods and USB drives are
compatible with the USB port.
Make sure the iPod has the latest
firmware from Apple
®for proper
operation. iPod firmware can be
updated using the latest iTunes
®
application. See www.apple.com/
itunes.
For help identifying your iPod, go to
www.apple.com/support.
Rear Seat
Infotainment
Rear Seat Audio (RSA)
System
If equipped with RSA, rear seat
passengers can listen to and control
any of the music sources: radio,
CDs, DVDs, or other auxiliary
sources. The rear seat passengers
can only control the music sources
the front seat passengers are not
listening to (except on some radios
where dual control is allowed). For
example, rear seat passengers can
control a CD and listen to it through
the headphones, while the driver
listens to the radio through the front
speakers. The rear seat passengers
have control of the volume for each
set of headphones.
The RSA functions operate even
when the main radio is off. The front
audio system displays
Xwhen the
RSA is on, and disappears from the
display when it is off. Audio can be heard through wired
headphones (not included) plugged
into the jacks on the RSA. If the
vehicle has this feature, audio can
also be heard on Channel 2 of the
wireless headphones.
The audio system mutes the rear
speakers when the RSA audio is
active through the headphones.
To listen to an iPod or portable
audio device through the RSA,
attach the iPod or portable audio
device to the front auxiliary input (if
available), located on the front audio
system. Turn the iPod on, then
choose the front auxiliary input with
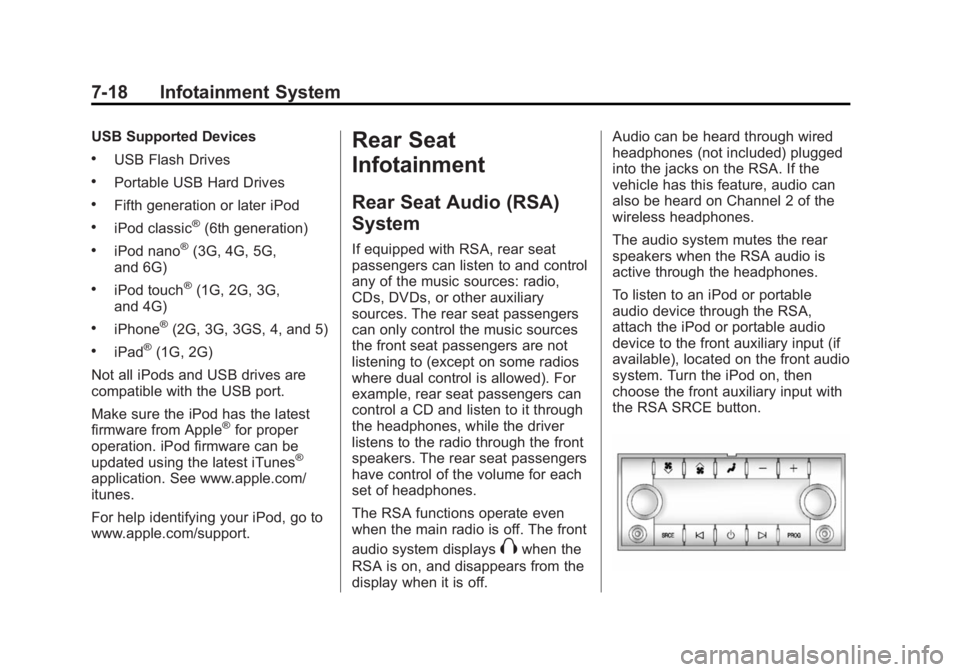
the RSA SRCE button.
Page 193 of 414
Black plate (19,1)GMC Acadia/Acadia Denali Owner Manual (GMNA-Localizing-U.S./Canada/
Mexico-6014315) - 2014 - crc - 8/15/13
Infotainment System 7-19
P(Power):Press to turn the RSA
on or off.
Volume: Turn to increase or to
decrease the volume of the wired
headphones. The left knob controls
the left headphones and the right
knob controls the right headphones.
SRCE (Source): Press to select
between the radio, CD, and if the
vehicle has these features, DVD,
front auxiliary, and rear auxiliary.
© ¨(Seek): Press to go to the
previous or to the next station and
stay there. This function is inactive,
with some radios, if the front seat
passengers are listening to the
radio.
Press and hold
©or¨until the
display flashes to tune to an
individual station. The display stops
flashing after the buttons have not
been pushed for more than
two seconds. This function is
inactive, with some radios, if the
front seat passengers are listening
to the radio. While listening to a disc, press
¨to
go to the next track or chapter on
the disc. Press
©to go back to the
start of the current track or chapter
(if more than 10 seconds have
played). This function is inactive,
with some radios, if the front seat
passengers are listening to the disc.
When a DVD video menu is being
displayed, press
©or¨to perform a
cursor up or down on the menu.
Hold
©or¨to perform a cursor left
or right on the menu.
PROG (Program): Press to go to
the next preset radio station or
channel set on the main radio. This
function is inactive, with some
radios, if the front seat passengers
are listening to the radio.
When a CD or DVD audio disc is
playing, press PROG to go to the
beginning of the CD or DVD audio.
This function is inactive, with some
radios, if the front seat passengers
are listening to the disc. When a disc is playing in the CD or
DVD changer, press PROG to
select the next disc, if multiple discs
are loaded. This function is inactive,
with some radios, if the front seat
passengers are listening to the disc.
When a DVD video menu is being
displayed, press PROG to perform
the ENTER menu function.
Rear Audio
Controller (RAC)
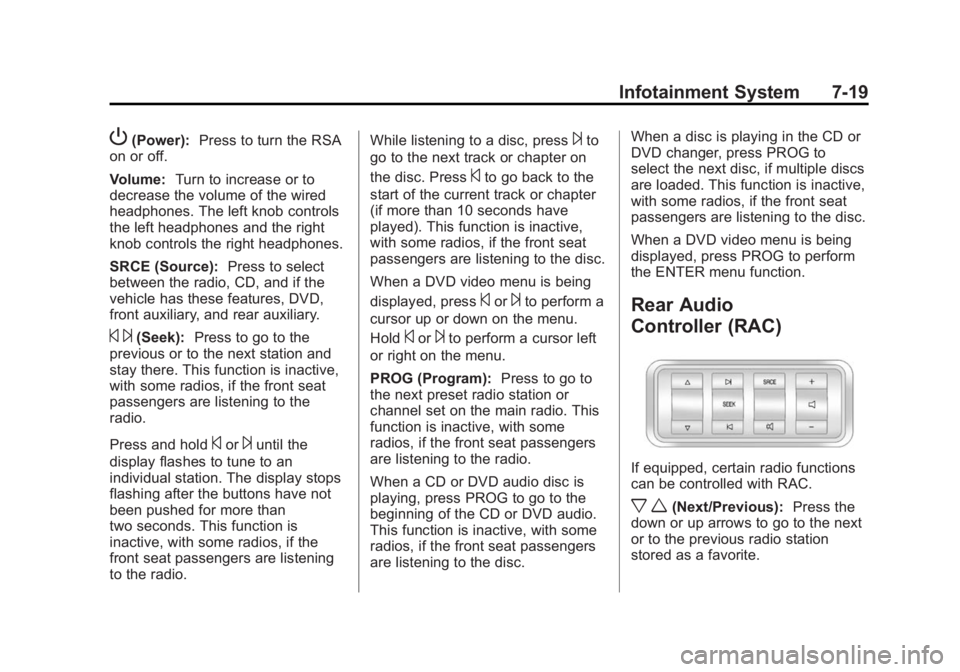
If equipped, certain radio functions
can be controlled with RAC.
x w(Next/Previous):
Press the
down or up arrows to go to the next
or to the previous radio station
stored as a favorite.
Page 201 of 414
Black plate (27,1)GMC Acadia/Acadia Denali Owner Manual (GMNA-Localizing-U.S./Canada/
Mexico-6014315) - 2014 - crc - 8/15/13
Infotainment System 7-27
Other Information
The Bluetooth®word mark and
logos are owned by the Bluetooth®
SIG, Inc. and any use of such marks
by General Motors is under license.
Other trademarks and trade names
are those of their respective owners.
See Radio Frequency Statement on
page 13-15.
Settings
Press Settings on the Home Page
to adjust features and preferences,
such as Time, Date, Bluetooth
Device List, Voice Recognition,
Favorite Pages, Display Settings,
Navigation Settings, etc.
1. Press the Settings screen button on the Home Page.
2. Touch-tap the scroll bar until the desired option displays. Select
the desired settings to change.
A few of the setting options change
the way the navigation system
displays or reacts while in use.
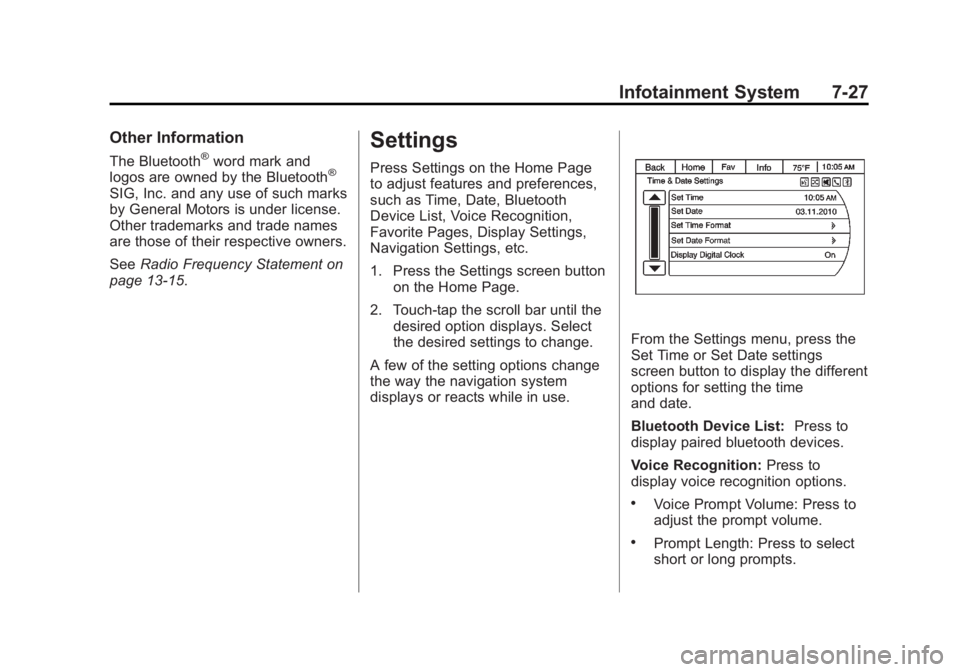
From the Settings menu, press the
Set Time or Set Date settings
screen button to display the different
options for setting the time
and date.
Bluetooth Device List: Press to
display paired bluetooth devices.
Voice Recognition: Press to
display voice recognition options.
.Voice Prompt Volume: Press to
adjust the prompt volume.
.Prompt Length: Press to select
short or long prompts.
Page 202 of 414
Black plate (28,1)GMC Acadia/Acadia Denali Owner Manual (GMNA-Localizing-U.S./Canada/
Mexico-6014315) - 2014 - crc - 8/15/13
7-28 Infotainment System
Favorite Pages :Press to select
the number of favorite pages
displayed on the screen. The choice
is 1–6 pages.
Display Settings : Press to adjust
the screen settings.
.The Auto setting adjusts the
screen background automatically
depending on the exterior
lighting conditions.
.The Day setting brightens the
map background.
.The Night setting darkens the
map background.
Speed Dependent Volume :
Select OFF, Low, Medium, or High
sensitivity to automatically adjust
the volume to minimize the effects
of unwanted background noise that
can result from changing road
surfaces, driving speeds, or open
windows. This feature works best at
lower volume settings where
background noise is typically louder
than the sound system volume. Startup Volume :
Press to set the
maximum volume level for startup
that will be used even if a higher
volume had been set when the radio
was turned off.
Radio Favorites : Press to select
the number of FAV pages to be
used in the system.
Add/Remove XM Categories :
Press to customize which available
XM Categories are displayed and
used in the system.
RDS Settings : Press to customize
station name and radio text display
options.
Set Time:
.Press the up or down arrows to
increase or decrease the Hours,
Minutes, AM, PM, or 24 hr on
the clock.
.Press and hold to quickly
increase or decrease the time
settings.
.Press OK or the Back screen
button to save the adjustments. Set Date:
.Press the up or down arrows to
increase or decrease the Month,
Day, and Year settings.
.Press and hold to quickly
increase or decrease the date
settings.
.Press OK or the Back screen
button to save the adjustments.
Radio Settings
Press the Config button on the
Home Page or the CONFIG button
on the faceplate to enter the menu
options. Turn the PUSH/SEL knob
or touch-tap the scroll bar to scroll
through the available options. Press
the PUSH/SEL knob or press Radio
Settings to display the radio settings
menu. Press this feature to make
changes for radio information
displayed, preset pages, Auto
Volume Control, and XM Categories
Restore. See
Satellite Radio on
page 7-9 (if equipped), for more
information about XM Categories.
Page 203 of 414
Black plate (29,1)GMC Acadia/Acadia Denali Owner Manual (GMNA-Localizing-U.S./Canada/
Mexico-6014315) - 2014 - crc - 8/15/13
Infotainment System 7-29
The Radio Settings are:
Phone Settings
SeeBluetooth on page 7-20 in the
“Phone” section for more
information on phone settings.
Vehicle Settings
See Vehicle Personalization on
page 5-42.
Display
Mode : Press Mode to change the
screen background. This setting
controls map colors.
Calibrate Touchscreen : Press to
display the Touchscreen Calibration
Screen.
Turn Display Off : Press to turn
the Display option off.
Rear Vision Camera (If
Equipped)
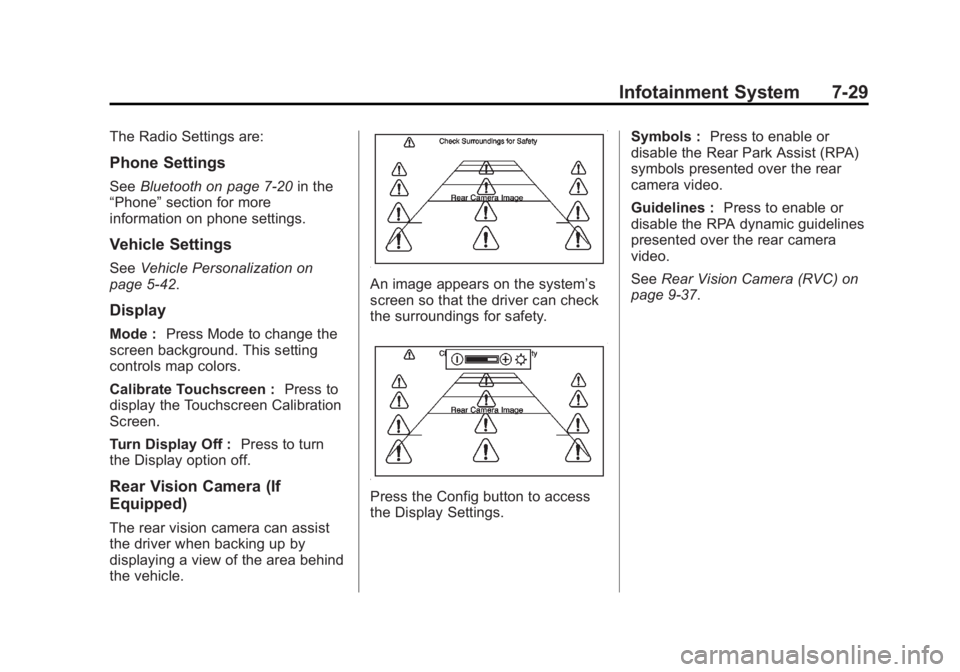
The rear vision camera can assist
the driver when backing up by
displaying a view of the area behind
the vehicle.
An image appears on the system’s
screen so that the driver can check
the surroundings for safety.
Press the Config button to access
the Display Settings. Symbols :
Press to enable or
disable the Rear Park Assist (RPA)
symbols presented over the rear
camera video.
Guidelines : Press to enable or
disable the RPA dynamic guidelines
presented over the rear camera
video.
See Rear Vision Camera (RVC) on
page 9-37.
Page 218 of 414
Black plate (2,1)GMC Acadia/Acadia Denali Owner Manual (GMNA-Localizing-U.S./Canada/
Mexico-6014315) - 2014 - crc - 8/15/13
9-2 Driving and Operating
Trailer Towing
General TowingInformation . . . . . . . . . . . . . . . . . 9-46
Driving Characteristics and Towing Tips . . . . . . . . . . . . . . . . 9-46
Trailer Towing . . . . . . . . . . . . . . . . 9-49
Towing Equipment . . . . . . . . . . . 9-51
Conversions and Add-Ons
Add-On Electrical
Equipment . . . . . . . . . . . . . . . . . 9-53
Driving Information
Distracted Driving
Distraction comes in many forms
and can take your focus from the
task of driving. Exercise good
judgment and do not let other
activities divert your attention away
from the road. Many local
governments have enacted laws
regarding driver distraction. Become
familiar with the local laws in
your area.
To avoid distracted driving, always
keep your eyes on the road, hands
on the wheel, and mind on the drive.
.Do not use a phone in
demanding driving situations.
Use a hands-free method to
place or receive necessary
phone calls.
.Watch the road. Do not read,
take notes, or look up
information on phones or other
electronic devices.
.Designate a front seat
passenger to handle potential
distractions.
.Become familiar with vehicle
features before driving, such as
programming favorite radio
stations and adjusting climate
control and seat settings.
Program all trip information into
any navigation device prior to
driving.
.Wait until the vehicle is parked
to retrieve items that have fallen
to the floor.
.Stop or park the vehicle to tend
to children.
.Keep pets in an appropriate
carrier or restraint.
.Avoid stressful conversations
while driving, whether with a
passenger or on a cell phone.
Page 339 of 414
Black plate (69,1)GMC Acadia/Acadia Denali Owner Manual (GMNA-Localizing-U.S./Canada/
Mexico-6014315) - 2014 - crc - 8/15/13
Vehicle Care 10-69
2. Get the vehicles close enoughso the jumper cables can reach,
but be sure the vehicles are not
touching each other. If they are,
it could cause a ground
connection you do not want. You
would not be able to start your
vehicle, and the bad grounding
could damage the electrical
systems.
To avoid the possibility of the
vehicles rolling, set the parking
brake firmly on both vehicles
involved in the jump start
procedure. Put an automatic
transmission in P (Park) or a
manual transmission in Neutral
before setting the parking brake.
If one of the vehicles is a
four-wheel-drive vehicle, be sure
the transfer case is not in
Neutral.{Caution
If any accessories are left on or
plugged in during the jump
starting procedure, they could be
damaged. The repairs would not
be covered by the vehicle
warranty. Whenever possible, turn
off or unplug all accessories on
either vehicle when jump starting.
3. Turn off the ignition on both vehicles. Unplug unnecessary
accessories plugged into the
cigarette lighter or the accessory
power outlets. Turn off the radio
and all lamps that are not
needed. This will avoid sparks
and help save both batteries.
And it could save the radio!
4. Open the hoods and locate the positive (+) and negative (−)
terminal locations on the other
vehicle. Your vehicle has a remote positive (+) and a remote
negative (−) jump starting
terminal. See
Engine
Compartment Overview on
page 10-5 for the terminal
locations.
{Warning
Using a match near a battery can
cause battery gas to explode.
People have been hurt doing this,
and some have been blinded.
Use a flashlight if you need more
light.
Be sure the batteries have
enough water. You do not need to
add water to the ACDelco
®
battery (or batteries) installed in
your new vehicle. But if a battery
has filler caps, be sure the right
amount of fluid is there. If it is low,
add water to take care of that
first. If you do not, explosive gas
could be present.
(Continued)