light GMC ACADIA 2020 Get To Know Guide
[x] Cancel search | Manufacturer: GMC, Model Year: 2020, Model line: ACADIA, Model: GMC ACADIA 2020Pages: 20, PDF Size: 8.68 MB
Page 3 of 20
3
Refer to your Owner’s Manual to learn about the information being relayed by the lights, gauges and indicators on the instrument cluster.
See Introduction in your Owner’s Manual.
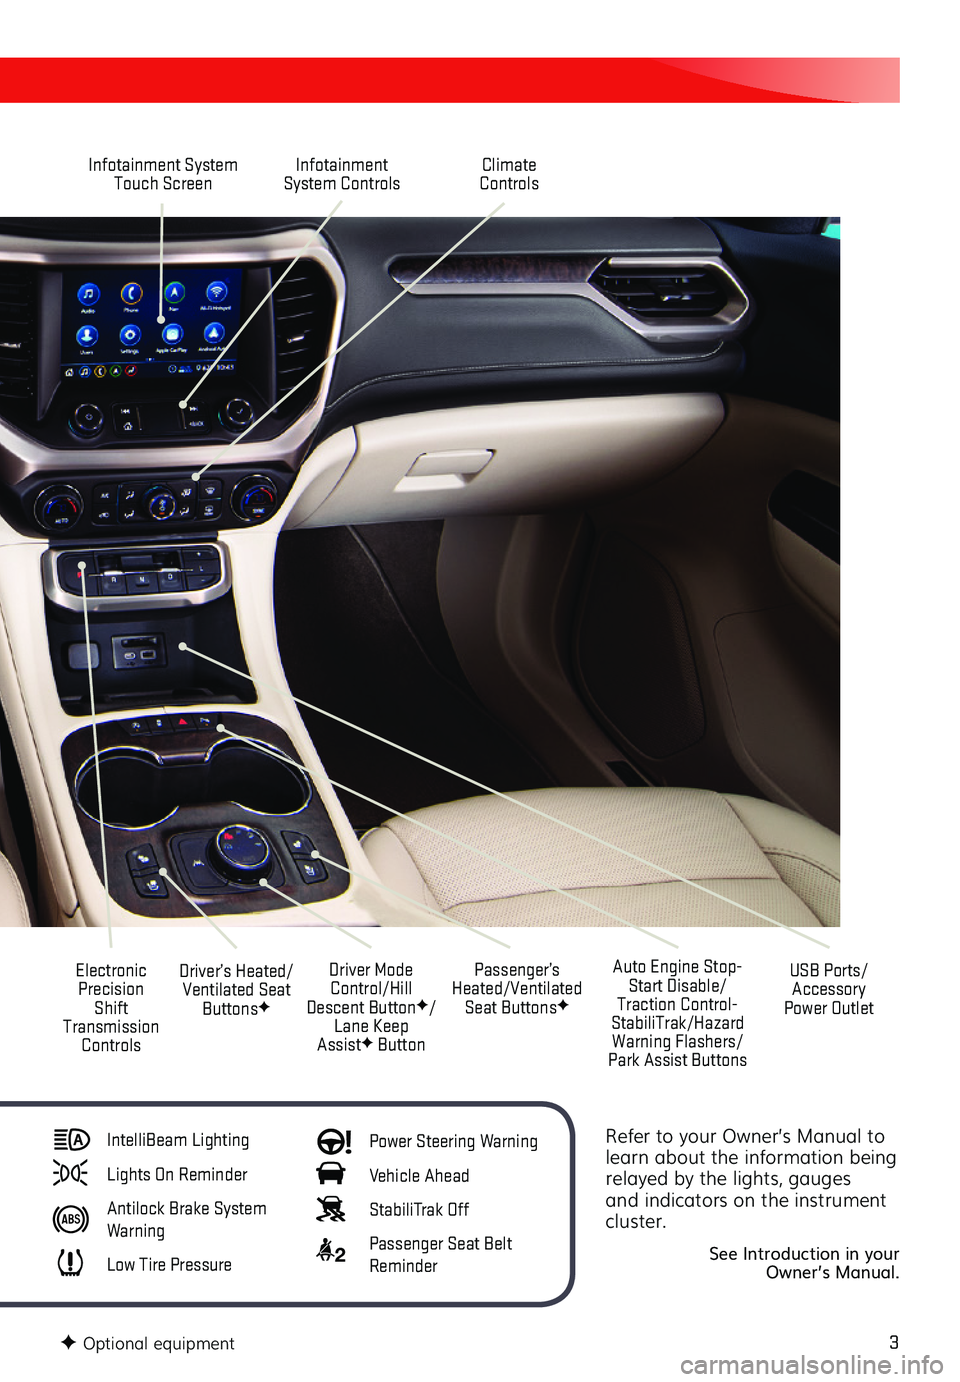
Infotainment System Touch ScreenInfotainment System Controls
Electronic Precision Shift Transmission Controls
Driver Mode Control/Hill Descent ButtonF/Lane Keep AssistF Button
Driver’s Heated/Ventilated Seat ButtonsF
Auto Engine Stop-Start Disable/Traction Control-StabiliTrak/Hazard Warning Flashers/Park Assist Buttons
USB Ports/Accessory Power Outlet
Climate Controls
Passenger’s Heated/Ventilated Seat ButtonsF
IntelliBeam Lighting
Lights On Reminder
Antilock Brake System Warning
Low Tire Pressure
Power Steering Warning
Vehicle Ahead
StabiliTrak Off
2 Passenger Seat Belt Reminder
F Optional equipment
Page 10 of 20
10F Optional equipment
AUDIO STEERING WHEEL CONTROLS
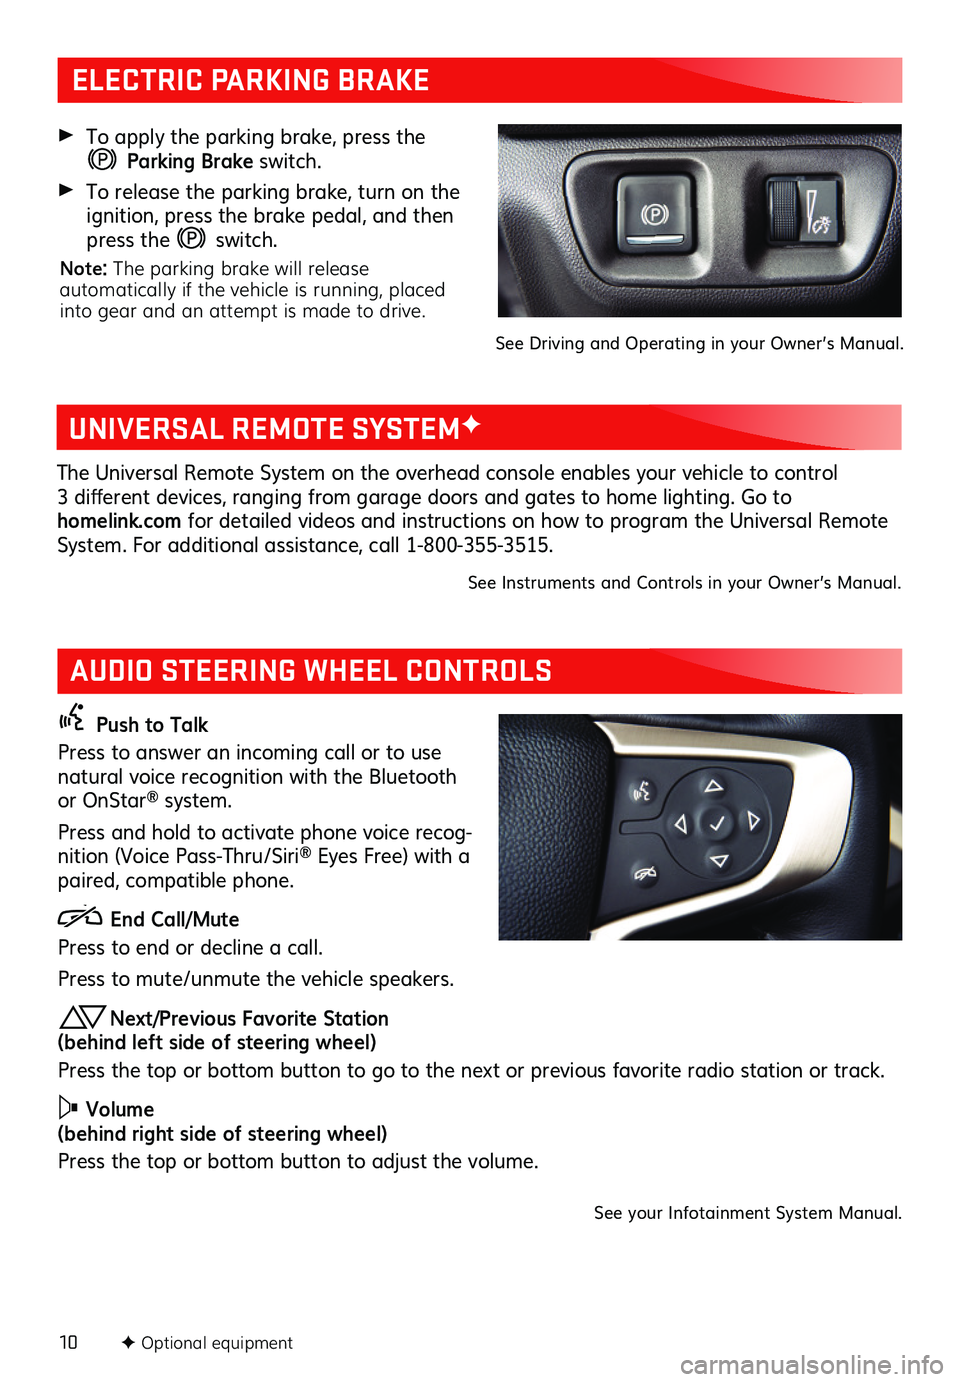
Push to Talk
Press to answer an incoming call or to use natural voice recognition with the Bluetooth or OnStar® system.
Press and hold to activate phone voice recog-nition (Voice Pass-Thru/Siri® Eyes Free) with a paired, compatible phone.
End Call/Mute
Press to end or decline a call.
Press to mute/unmute the vehicle speakers.
Next/Previous Favorite Station (behind left side of steering wheel)
Press the top or bottom button to go to the next or previous favorite radio station or track.
Volume (behind right side of steering wheel)
Press the top or bottom button to adjust the volume.
See your Infotainment System Manual.
ELECTRIC PARKING BRAKE
To apply the parking brake, press the
Parking Brake switch.
To release the parking brake, turn on the ignition, press the brake pedal, and then press the switch.
Note: The parking brake will release automatically if the vehicle is running, placed into gear and an attempt is made to drive.
See Driving and Operating in your Owner’s Manual.
UNIVERSAL REMOTE SYSTEMF
The Universal Remote System on the overhead console enables your vehicle to control 3 different devices, ranging from garage doors and gates to home lighting. Go to homelink.com for detailed videos and instructions on how to program the Universal Remote System. For additional assistance, call 1-800-355-3515.
See Instruments and Controls in your Owner’s Manual.
Page 11 of 20
11
INFOTAINMENT SYSTEM
F Optional equipment
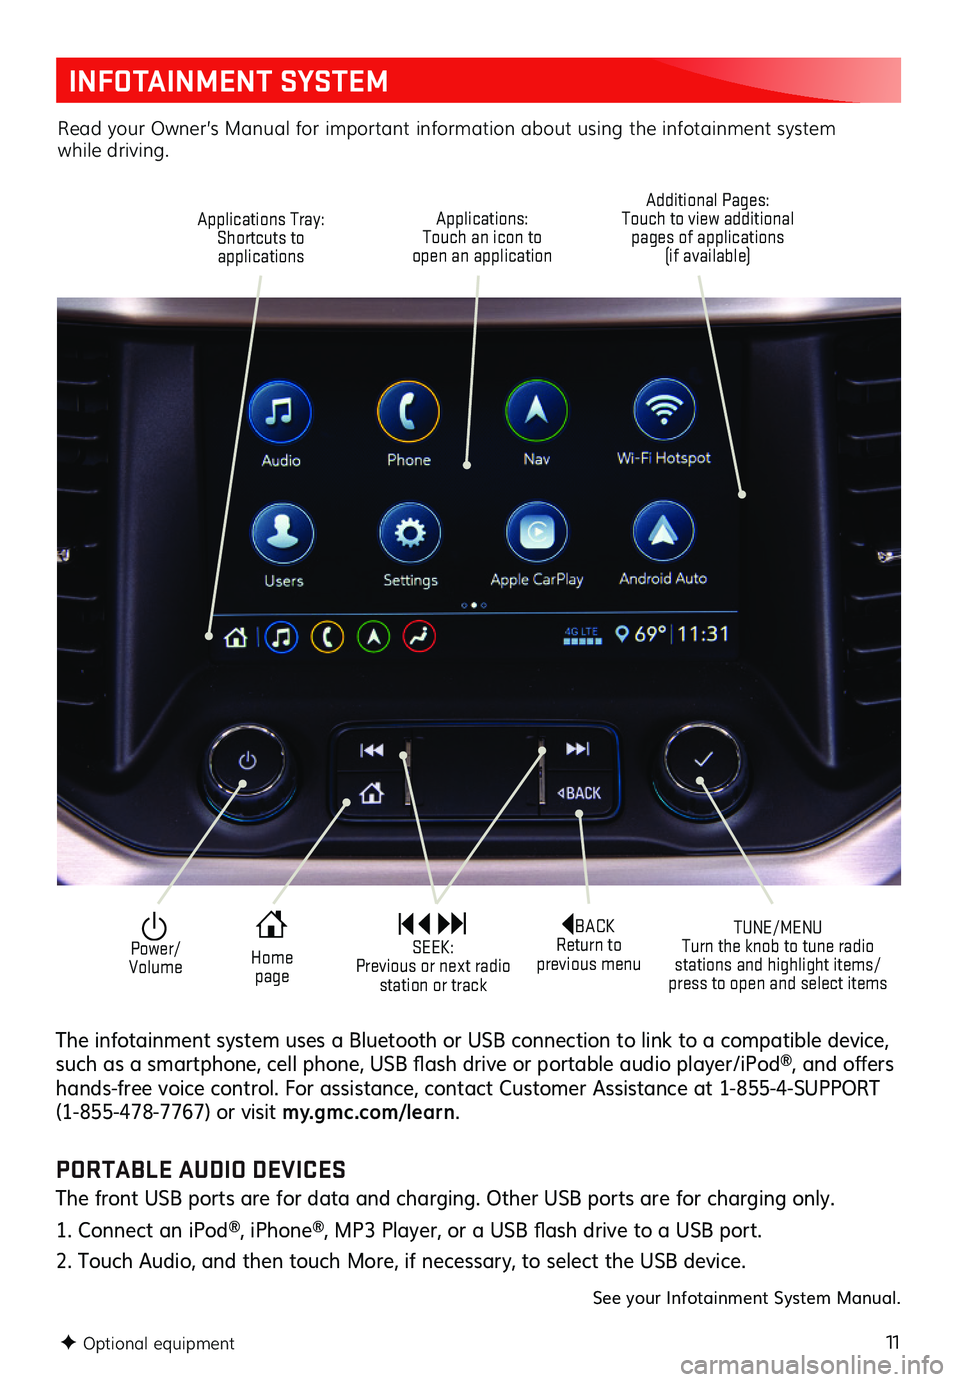
Applications Tray: Shortcuts to applications
TUNE/MENU Turn the knob to tune radio stations and highlight items/press to open and select items
Applications: Touch an icon to open an application
Additional Pages: Touch to view additional pages of applications (if available)
Power/ Volume
BACK Return to previous menu Home page
SEEK: Previous or next radio station or track
The infotainment system uses a Bluetooth or USB connection to link to a compatible device, such as a smartphone, cell phone, USB flash drive or portable audio player/iPod®, and offers hands-free voice control. For assistance, contact Customer Assistance at 1-855-4-SUPPORT (1-855-478-7767) or visit my.gmc.com/ learn.
Read your Owner’s Manual for important information about using the infotainment system while driving.
PORTABLE AUDIO DEVICES
The front USB ports are for data and charging. Other USB ports are for charging only.
1. Connect an iPod®, iPhone®, MP3 Player, or a USB flash drive to a USB port.
2. Touch Audio, and then touch More, if necessary, to select the USB device.
See your Infotainment System Manual.
Page 12 of 20
12
INFOTAINMENT SYSTEM
STORING FAVORITES
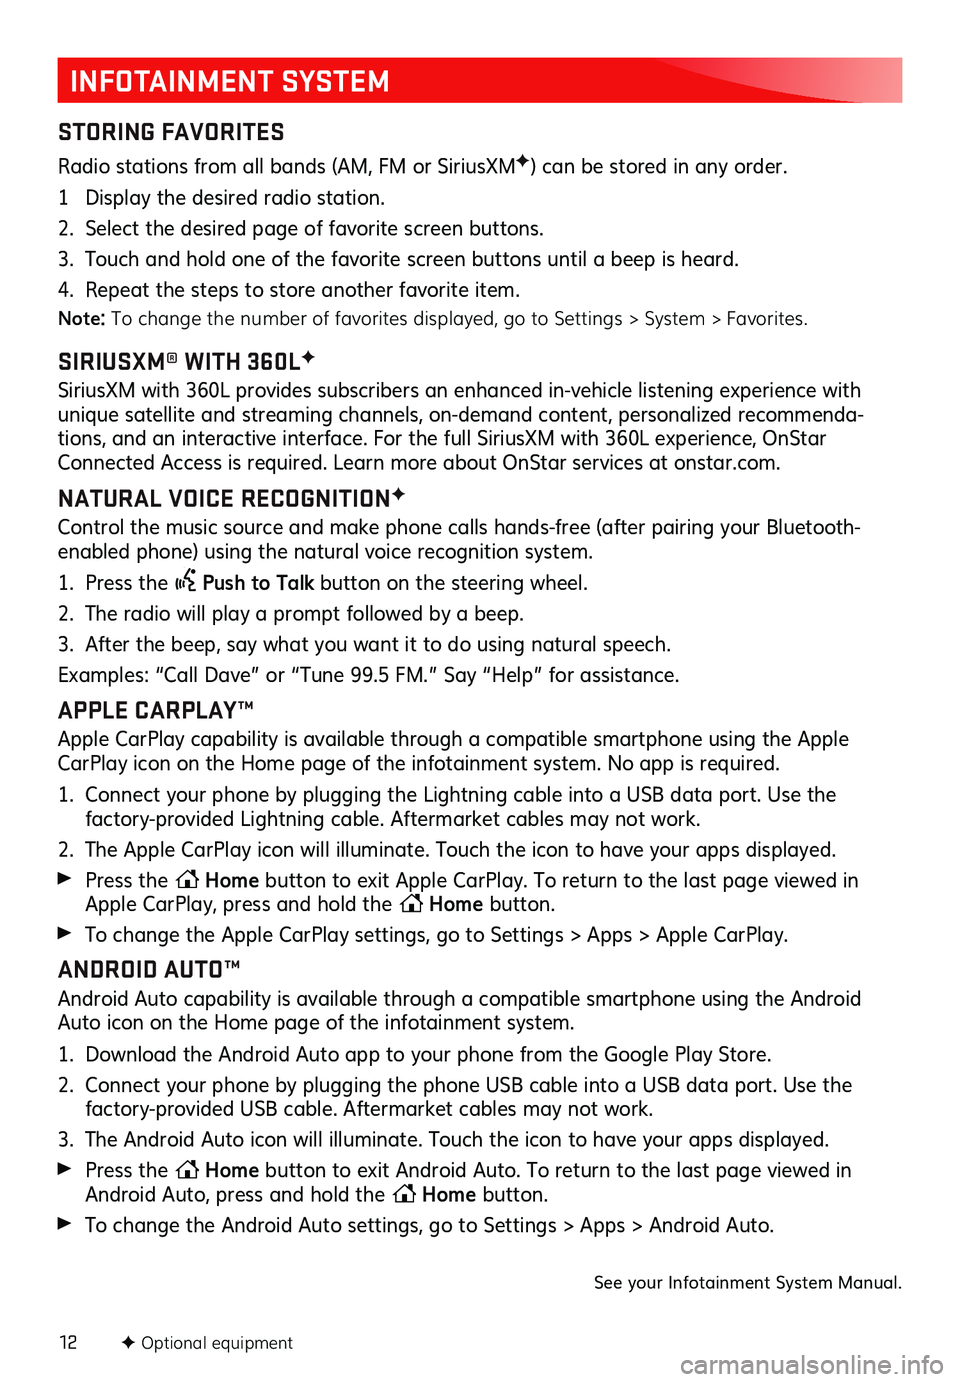
Radio stations from all bands (AM, FM or SiriusXMF) can be stored in any order.
1 Display the desired radio station.
2. Select the desired page of favorite screen buttons.
3. Touch and hold one of the favorite screen buttons until a beep is heard.
4. Repeat the steps to store another favorite item.
Note: To change the number of favorites displayed, go to Settings > System > Favorites.
SIRIUSXM® WITH 360LF
SiriusXM with 360L provides subscribers an enhanced in-vehicle listening experience with unique satellite and streaming channels, on-demand content, personalized recommenda-tions, and an interactive interface. For the full SiriusXM with 360L experience, OnStar Connected Access is required. Learn more about OnStar services at onstar.com.
NATURAL VOICE RECOGNITIONF
Control the music source and make phone calls hands-free (after pairing your Bluetooth-enabled phone) using the natural voice recognition system.
1. Press the Push to Talk button on the steering wheel.
2. The radio will play a prompt followed by a beep.
3. After the beep, say what you want it to do using natural speech.
Examples: “Call Dave” or “Tune 99.5 FM.” Say “Help” for assistance.
APPLE CARPLAY™
Apple CarPlay capability is available through a compatible smartphone using the Apple CarPlay icon on the Home page of the infotainment system. No app is required.
1. Connect your phone by plugging the Lightning cable into a USB data port. Use the
factory-provided Lightning cable. Aftermarket cables may not work.
2. The Apple CarPlay icon will illuminate. Touch the icon to have your apps displayed.
Press the Home button to exit Apple CarPlay. To return to the last page viewed in Apple CarPlay, press and hold the Home button.
To change the Apple CarPlay settings, go to Settings > Apps > Apple CarPlay.
ANDROID AUTO™
Android Auto capability is available through a compatible smartphone using the Android Auto icon on the Home page of the infotainment system.
1. Download the Android Auto app to your phone from the Google Play Store.
2. Connect your phone by plugging the phone USB cable into a USB data port. Use the factory-provided USB cable. Aftermarket cables may not work.
3. The Android Auto icon will illuminate. Touch the icon to have your apps displayed.
Press the Home button to exit Android Auto. To return to the last page viewed in Android Auto, press and hold the Home button.
To change the Android Auto settings, go to Settings > Apps > Android Auto.
See your Infotainment System Manual.
F Optional equipment
Page 15 of 20
15
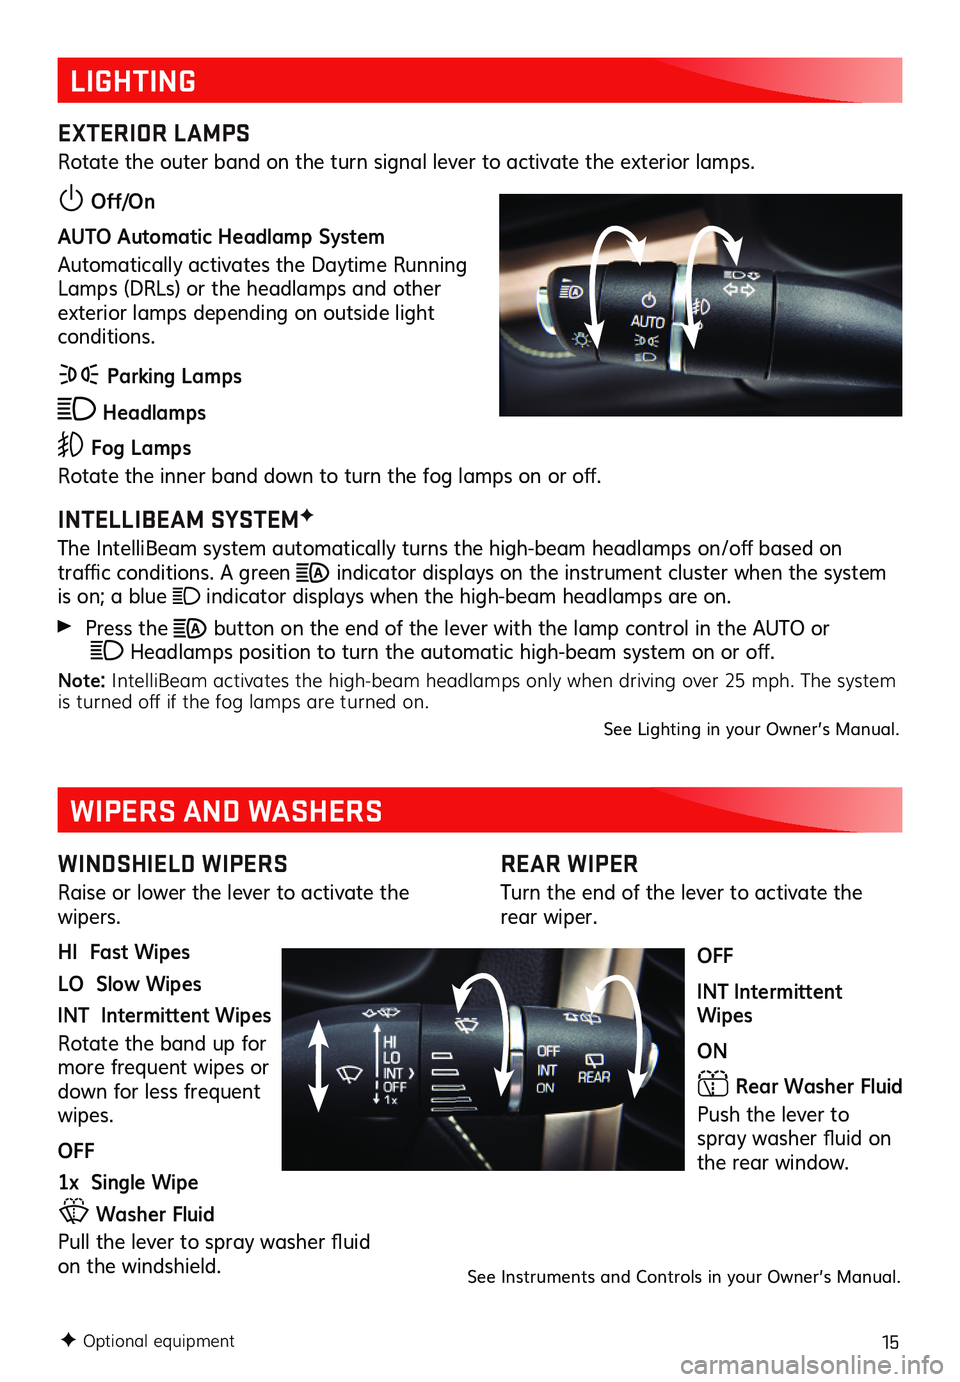
REAR WIPER
Turn the end of the lever to activate the rear wiper.
OFF
INT Intermittent Wipes
ON
Rear Washer Fluid
Push the lever to spray washer fluid on the rear window.
LIGHTING
EXTERIOR LAMPS
Rotate the outer band on the turn signal lever to activate the exterior lamps.
Off/On
AUTO Automatic Headlamp System
Automatically activates the Daytime Running Lamps (DRLs) or the headlamps and other exterior lamps depending on outside light conditions.
Parking Lamps
Headlamps
Fog Lamps
Rotate the inner band down to turn the fog lamps on or off.
INTELLIBEAM SYSTEMF
The IntelliBeam system automatically turns the high-beam headlamps on/off based on
traffic conditions. A green indicator displays on the instrument cluster when the system is on; a blue indicator displays when the high-beam headlamps are on.
Press the button on the end of the lever with the lamp control in the AUTO or Headlamps position to turn the automatic high-beam system on or off.
Note: IntelliBeam activates the high-beam headlamps only when driving over 25 mph. The system is turned off if the fog lamps are turned on.See Lighting in your Owner’s Manual.
WINDSHIELD WIPERS
Raise or lower the lever to activate the wipers.
HI Fast Wipes
LO Slow Wipes
INT Intermittent Wipes
Rotate the band up for more frequent wipes or down for less frequent wipes.
OFF
1x Single Wipe
Washer Fluid
Pull the lever to spray washer fluid on the windshield.
WIPERS AND WASHERS
See Instruments and Controls in your Owner’s Manual.
F Optional equipment
Page 19 of 20
19
TRACTION SELECT
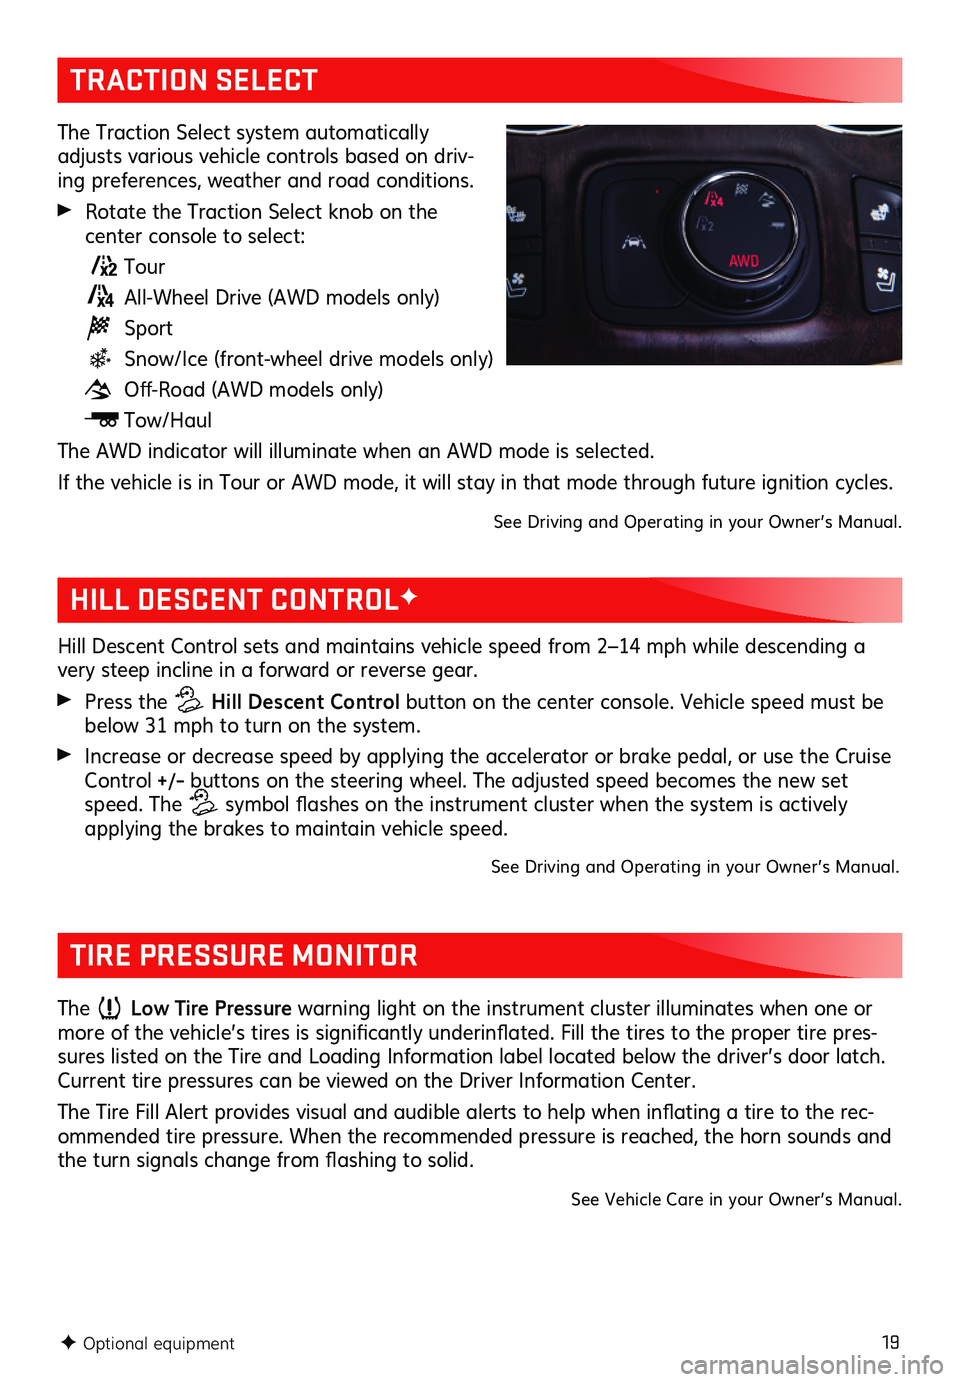
The Traction Select system automatically adjusts various vehicle controls based on driv-ing preferences, weather and road conditions.
Rotate the Traction Select knob on the
center console to select:
Tour
All-Wheel Drive (AWD models only)
Sport
Snow/Ice (front-wheel drive models only)
Off-Road (AWD models only)
Tow/Haul
The AWD indicator will illuminate when an AWD mode is selected.
If the vehicle is in Tour or AWD mode, it will stay in that mode through future ignition cycles.
See Driving and Operating in your Owner’s Manual.
F Optional equipment
HILL DESCENT CONTROLF
Hill Descent Control sets and maintains vehicle speed from 2–14 mph while descending a very steep incline in a forward or reverse gear.
Press the Hill Descent Control button on the center console. Vehicle speed must be below 31 mph to turn on the system.
Increase or decrease speed by applying the accelerator or brake pedal, or use the Cruise Control +/– buttons on the steering wheel. The adjusted speed becomes the new set speed. The symbol flashes on the instrument cluster when the system is actively applying the brakes to maintain vehicle speed.
See Driving and Operating in your Owner’s Manual.
TIRE PRESSURE MONITOR
The Low Tire Pressure warning light on the instrument cluster illuminates when one or more of the vehicle’s tires is significantly underinflated. Fill the tires to the proper tire pres-sures listed on the Tire and Loading Information label located below the driver’s door latch. Current tire pressures can be viewed on the Driver Information Center.
The Tire Fill Alert provides visual and audible alerts to help when inflating a tire to the rec-ommended tire pressure. When the recommended pressure is reached, the horn sounds and the turn signals change from flashing to solid.
See Vehicle Care in your Owner’s Manual.
Page 20 of 20
20
ROADSIDE ASSISTANCE
1-888-881-3302 TTY Users: 1-888-889-2438
As the owner of a new GMC, you are automatically enrolled in the GMC Roadside Assistance program for up to 5 years/60,000 miles, whichever occurs first, at no expense to you. GMC’s Roadside Assistance toll-free number is staffed by a team of trained advisors who are
available 24 hours a day, 365 days a year, to contact a service provider for light services (fuel delivery, jump-starts, flat tire and lock-outs) or make arrangements to tow your vehicle to the nearest GMC dealer for any repairs.
Roadside Assistance and OnStar®
If you have a current OnStar Safety & Security plan, push the blue OnStar button or red Emergency button to get the help you need. An OnStar advisor will use GPS technology to pinpoint your vehicle location and contact the nearest service provider.
To learn more about OnStar services, press the blue OnStar button, visit ons tar.com, call 1-888-4-ONSTAR (1-888-466-7827), or refer to your Owner’s Manual.
Get to know your vehicle inside and out with the GMC Owner Center. Check out personal-ized information, including an online Owner’s Manual and helpful how-to videos, track your service history and warranty status, manage your OnStar and Connected Services vehicle plans, review your current Vehicle Diagnostics report (active service required) and more. Create an account today at my.gmc.com.
!84289159=A!
Download the myGMC app to your compatible smartphone (or device) and, if your vehicle is properly equipped, you can start or turn off your engine, lock or unlock your doors, view key diagnostic information, set parking information and more.
The app is available on select Apple and Android devices. Service availability, features and functionality vary by vehicle, device and data plan. Device data connection required. Visit onstar.com for more details. Download the mobile app from your compatible mobile device’s app store.
MYGMC MOBILE APP
GMC OWNER CENTER
84289159 A
Certain restrictions, precautions and safety procedures apply to your vehicle. Please read your Owner’s Manual for complete instructions. All information contained in this guide is based on the latest information available at the time of printing and is subject to change without notice. Copyright 2019 General Motors. All rights reserved.
We recommend always using ACDelco or genuine GM service parts.