four wheel drive GMC ACADIA 2020 Owner's Manual
[x] Cancel search | Manufacturer: GMC, Model Year: 2020, Model line: ACADIA, Model: GMC ACADIA 2020Pages: 406, PDF Size: 6.78 MB
Page 143 of 406

GMC Acadia/Acadia Denali Owner Manual (GMNA-Localizing-U.S./Canada/
Mexico-13687875) - 2020 - CRC - 10/28/19
142 Instruments and Controls
Press and holdVto clear the graph
or press
pto reset through
the menu.
ECO Index : Provides feedback on
the efficiency of current driving
behavior. The bar graph shows a
value that is based on current fuel
consumption compared to what is
expected from the vehicle with good
and bad driving habits.
Speed Signs : Shows sign
information, which comes from a
roadway database in the onboard
navigation.
Off Road : Displays vehicle pitch
and roll information, road wheel
angle, and four-wheel drive (4WD)
status.
Following Distance : The following
distance to a moving vehicle ahead
in your path is indicated in following
time in seconds. See Forward
Collision Alert (FCA) System 0231.
Blank Page : Shows no
information. Transmission Fluid Temperature
Gauge :
Shows the temperature of
the automatic transmission fluid in
either degrees Celsius (°C) or
degrees Fahrenheit (°F).
Head-Up Display (HUD)
{Warning
If the HUD image is too bright or
too high in your field of view, it
may take you more time to see
things you need to see when it is
dark outside. Be sure to keep the
HUD image dim and placed low in
your field of view.
If equipped with HUD, some
information concerning the
operation of the vehicle is projected
onto the windshield. The information
is projected through the HUD lens
on the driver side of the instrument
panel and focused out toward the
front of the vehicle.
Caution
If you try to use the HUD image
as a parking aid, you may
misjudge the distance and
damage your vehicle. Do not use
the HUD image as a parking aid.
The HUD information can be
displayed in various languages. The
speedometer reading and other
numerical values can be displayed
in either English or metric units.
The language selection is changed
through the radio and the units of
measurement is changed through
the instrument cluster. See Vehicle
Personalization 0146 and "Options"
under Instrument Cluster (Base and
Midlevel) 0115 or
Instrument Cluster (Uplevel) 0119.
Page 144 of 406
GMC Acadia/Acadia Denali Owner Manual (GMNA-Localizing-U.S./Canada/
Mexico-13687875) - 2020 - CRC - 10/28/19
Instruments and Controls 143
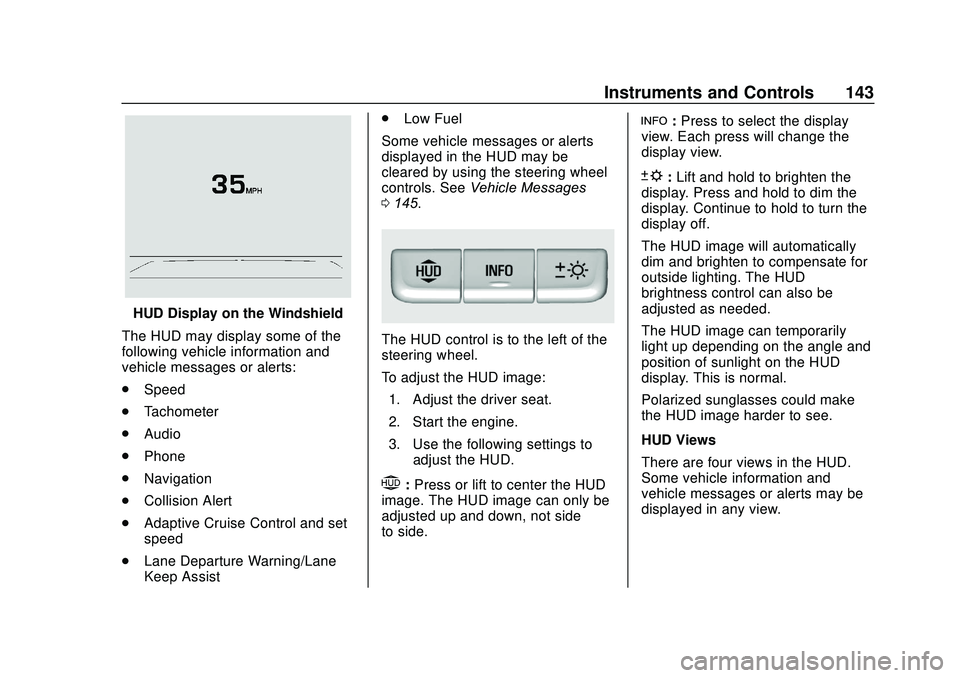
HUD Display on the Windshield
The HUD may display some of the
following vehicle information and
vehicle messages or alerts:
. Speed
. Tachometer
. Audio
. Phone
. Navigation
. Collision Alert
. Adaptive Cruise Control and set
speed
. Lane Departure Warning/Lane
Keep Assist .
Low Fuel
Some vehicle messages or alerts
displayed in the HUD may be
cleared by using the steering wheel
controls. See Vehicle Messages
0 145.
The HUD control is to the left of the
steering wheel.
To adjust the HUD image:
1. Adjust the driver seat.
2. Start the engine.
3. Use the following settings to adjust the HUD.
$:Press or lift to center the HUD
image. The HUD image can only be
adjusted up and down, not side
to side.
!: Press to select the display
view. Each press will change the
display view.
D: Lift and hold to brighten the
display. Press and hold to dim the
display. Continue to hold to turn the
display off.
The HUD image will automatically
dim and brighten to compensate for
outside lighting. The HUD
brightness control can also be
adjusted as needed.
The HUD image can temporarily
light up depending on the angle and
position of sunlight on the HUD
display. This is normal.
Polarized sunglasses could make
the HUD image harder to see.
HUD Views
There are four views in the HUD.
Some vehicle information and
vehicle messages or alerts may be
displayed in any view.
Page 152 of 406
GMC Acadia/Acadia Denali Owner Manual (GMNA-Localizing-U.S./Canada/
Mexico-13687875) - 2020 - CRC - 10/28/19
Instruments and Controls 151
Seating Position
Touch and the following may
display:
.Seat Entry Memory
. Seat Exit Memory
Seat Entry Memory
This feature automatically recalls
the previously stored 1 or 2 button
positions when the ignition is
changed from off to on or ACC/
ACCESSORY. See Memory Seats
0 46.
Touch Off or On.
Seat Exit Memory
This feature automatically recalls
the previously stored exit button
positions when the ignition is
changed from on or ACC/
ACCESSORY to off if the driver
door is open or opened. See
Memory Seats 046.
Touch Off or On.
Teen Driver
See “Teen Driver” under“Settings”
in the infotainment manual.
Valet Mode
This will lock the infotainment
system and steering wheel controls.
It may also limit access to vehicle
storage locations, if equipped.
To enable valet mode:
1. Enter a four-digit code on the keypad.
2. Touch Enter to go to the confirmation screen.
3. Re-enter the four-digit code.
Touch Lock or Unlock to lock or
unlock the system. Touch Back to
go back to the previous menu.
Universal Remote
System
See Radio Frequency Statement
0 380.
Universal Remote System
Programming
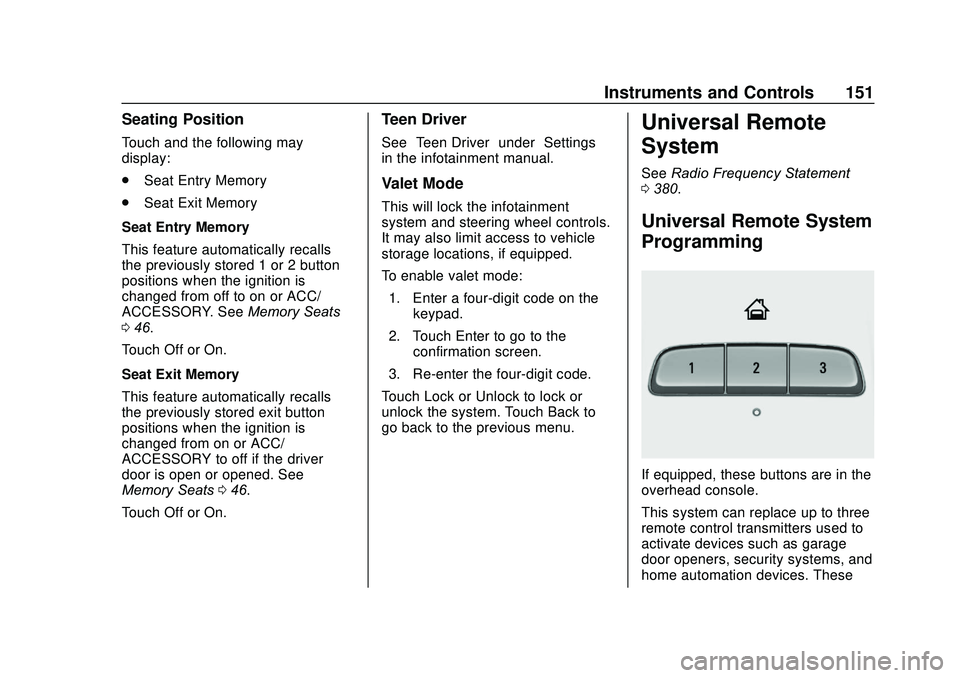
If equipped, these buttons are in the
overhead console.
This system can replace up to three
remote control transmitters used to
activate devices such as garage
door openers, security systems, and
home automation devices. These
Page 207 of 406
GMC Acadia/Acadia Denali Owner Manual (GMNA-Localizing-U.S./Canada/
Mexico-13687875) - 2020 - CRC - 10/28/19
206 Driving and Operating
available to use. For example, when
4 (Fourth) is shown next to the L,
1 (First) through 4 (Fourth) gears are
shifted automatically. To shift to
5 (Fifth) gear, press the + (Plus)
button or shift into D (Drive).
L (Low) will prevent shifting to a
lower gear range if the engine
speed is too high. If vehicle speed is
not reduced within the time allowed,
the lower gear range shift will not be
completed. Slow the vehicle, then
press the−(Minus) button to the
desired lower gear range.
While using ERS, cruise control can
be used.
Tow/Haul Mode
See Driver Mode Control 0212.
Drive Systems
All-Wheel Drive
Vehicles with this feature can
operate in AWD Mode. See Driver
Mode Control 0212.
Brakes
Electric Brake Boost
Vehicles equipped with electric
brake boost have hydraulic brake
circuits that are electronically
controlled when the brake pedal is
applied during normal operation.
The system performs routine tests
and turns off within a few minutes
after the vehicle is shutdown. Noise
may be heard during this time. If the
brake pedal is pressed during the
tests or when the electric brake
boost system is off, a noticeable
change in pedal force and travel
may be felt. This is normal.
Antilock Brake
System (ABS)
The Antilock Brake System (ABS)
helps prevent a braking skid and
maintain steering while
braking hard.
ABS performs a system check when
the vehicle is first driven.
A momentary motor or clicking noise
Page 214 of 406
GMC Acadia/Acadia Denali Owner Manual (GMNA-Localizing-U.S./Canada/
Mexico-13687875) - 2020 - CRC - 10/28/19
Driving and Operating 213
4AWD (AWD Only) :AWD Mode
provides drive torque to all four
wheels. Select AWD to improve
traction and control on slippery road
surfaces, such as gravel, sand, wet
pavement, snow, and ice. When in
AWD Mode, the AWD Mode
indicator will be on. The AWD Mode
will stay selected until the mode is
changed.
AWD is active in AWD, Sport, Tow/
Haul, and Off-Road Modes.
Sport, Tow/Haul, and Off-Road
Modes are cancelled with each
ignition cycle and will return to Tour
(FWD) Mode.
When using a compact spare tire on
an AWD vehicle, the system
automatically detects the compact
spare and reduces AWD
performance to protect the system.
To restore full AWD operation and
prevent excessive wear on the
system, replace the compact spare
with a full-size tire as soon as
possible. See Compact Spare Tire
0 334.6Snow/Ice (FWD Only) : Snow/
Ice Mode improves vehicle
acceleration on snow and ice
covered roads.
_Tow/Haul : This feature can
assist when towing or hauling a
heavy load. Use this mode to assist
in maintaining desired vehicle
speeds when driving on downhill
grades by using the engine and
transmission. For AWD vehicles,
choosing Tow/Haul Mode also
engages AWD mode. See Driving
Characteristics and Towing Tips
0 246.
Automatic Engine Grade Braking
Automatic Engine Grade Braking
assists when driving downhill.
It maintains vehicle speed by
automatically implementing a shift
pattern that uses the engine and the
transmission to slow the vehicle.
The system will automatically
command downshifts to reduce
vehicle speed. The normal shift
pattern will return once the vehicle
is on a low grade or when the
accelerator pedal is pressed. While in the Electronic Range
Select (ERS) mode, grade braking
is deactivated, allowing the driver to
select a range and limiting the
highest gear available. Grade
braking is available for normal
driving and in Tow/Haul Mode.
See
Automatic Transmission 0201.
7Off-Road (AWD Only) : Use this
mode for off-road recreational
driving. Choosing Off-Road Mode
also engages AWD Mode. For more
information on Off-Road Mode, see
Off-Road Driving 0178.
Page 312 of 406
GMC Acadia/Acadia Denali Owner Manual (GMNA-Localizing-U.S./Canada/
Mexico-13687875) - 2020 - CRC - 10/28/19
Vehicle Care 311
.The battery of the TPMS sensor
is low.
If the tire fill alert does not operate
due to TPMS interference, move the
vehicle about 1 m (3 ft) back or
forward and try again. If the tire fill
alert feature is not working, use a
tire pressure gauge.
TPMS Sensor Matching
Process
Each TPMS sensor has a unique
identification code. The identification
code needs to be matched to a new
tire/wheel position after rotating the
vehicle’s tires or replacing one or
more of the TPMS sensors. The
TPMS sensor matching process
should also be performed after
replacing a spare tire with a road
tire containing the TPMS sensor.
The malfunction light and the DIC
message should go off at the next
ignition cycle. The sensors are
matched to the tire/wheel positions,
using a TPMS relearn tool, in the
following order: driver side front tire,
passenger side front tire, passenger
side rear tire, and driver side rear
tire. See your dealer for service or to purchase a relearn tool. A TPMS
relearn tool can also be purchased.
See Tire Pressure Monitor Sensor
Activation Tool at
www.gmtoolsandequipment.com or
call 1-800-GM TOOLS
(1-800-468-6657).
There are two minutes to match the
first tire/wheel position, and
five minutes overall to match all four
tire/wheel positions. If it takes
longer, the matching process stops
and must be restarted.
The TPMS sensor matching
process is:
1. Set the parking brake.
2. Place the vehicle in Service Mode. See Ignition Positions
0 190.
3. Make sure the Tire Pressure info page option is turned on.
The info pages on the DIC can
be turned on and off through
the Options menu. See Driver
Information Center (DIC)
(Base) 0137 or
Driver Information Center (DIC)
(Midlevel and Uplevel) 0139. 4. Use the DIC controls on the
right side of the steering wheel
to scroll to the Tire Pressure
screen under the DIC
info page.
5. Press and hold
Vin the center
of the DIC controls.
The horn sounds twice to
signal the receiver is in relearn
mode and the TIRE
LEARNING ACTIVE message
displays on the DIC display.
6. Start with the driver side front tire.
7. Place the relearn tool against the tire sidewall, near the valve
stem. Then press the button to
activate the TPMS sensor.
A horn chirp confirms that the
sensor identification code has
been matched to this tire and
wheel position.
8. Proceed to the passenger side front tire, and repeat the
procedure in Step 7.
Page 313 of 406
GMC Acadia/Acadia Denali Owner Manual (GMNA-Localizing-U.S./Canada/
Mexico-13687875) - 2020 - CRC - 10/28/19
312 Vehicle Care
9. Proceed to the passenger siderear tire, and repeat the
procedure in Step 7.
10. Proceed to the driver side rear tire, and repeat the procedure
in Step 7. The horn sounds two
times to indicate the sensor
identification code has been
matched to the driver side rear
tire, and the TPMS sensor
matching process is no longer
active. The TIRE LEARNING
ACTIVE message on the DIC
display goes off.
11. Turn the vehicle off.
12. Set all four tires to the recommended air pressure
level as indicated on the Tire
and Loading Information label.
Tire Inspection
We recommend that the tires,
including the spare tire, if the
vehicle has one, be inspected
for signs of wear or damage at
least once a month. Replace the tire if:
.The indicators at three or
more places around the tire
can be seen.
.There is cord or fabric
showing through the tire's
rubber.
.The tread or sidewall is
cracked, cut, or snagged
deep enough to show cord or
fabric.
.The tire has a bump, bulge,
or split.
.The tire has a puncture, cut,
or other damage that cannot
be repaired well because of
the size or location of the
damage.
Tire Rotation
Tires should be rotated every
12 000 km (7,500 mi). See
Maintenance Schedule
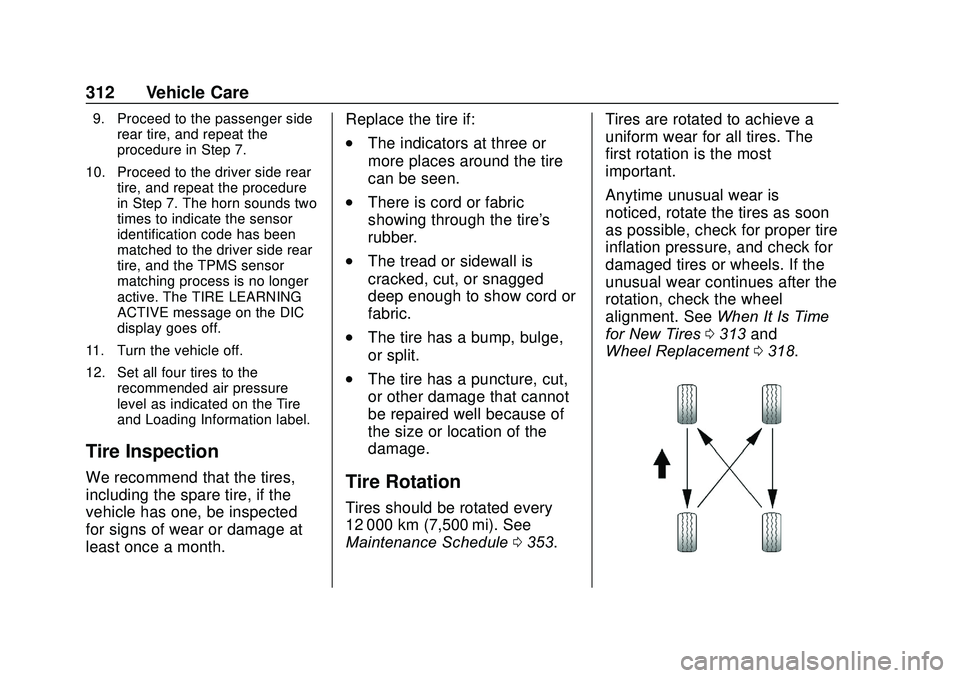
0353. Tires are rotated to achieve a
uniform wear for all tires. The
first rotation is the most
important.
Anytime unusual wear is
noticed, rotate the tires as soon
as possible, check for proper tire
inflation pressure, and check for
damaged tires or wheels. If the
unusual wear continues after the
rotation, check the wheel
alignment. See
When It Is Time
for New Tires 0313 and
Wheel Replacement 0318.
Page 341 of 406
GMC Acadia/Acadia Denali Owner Manual (GMNA-Localizing-U.S./Canada/
Mexico-13687875) - 2020 - CRC - 10/28/19
340 Vehicle Care
Dinghy Towing
Caution
If the vehicle is towed with all four
wheels on the ground, the
drivetrain components could be
damaged. The repairs would not
be covered by the vehicle
warranty. Do not tow the vehicle
with all four wheels on the
ground.
The vehicle is neither designed nor
intended to be towed with all four
wheels on the ground. If the vehicle must be towed, a dolly should be
used. See the following information
on dolly towing.
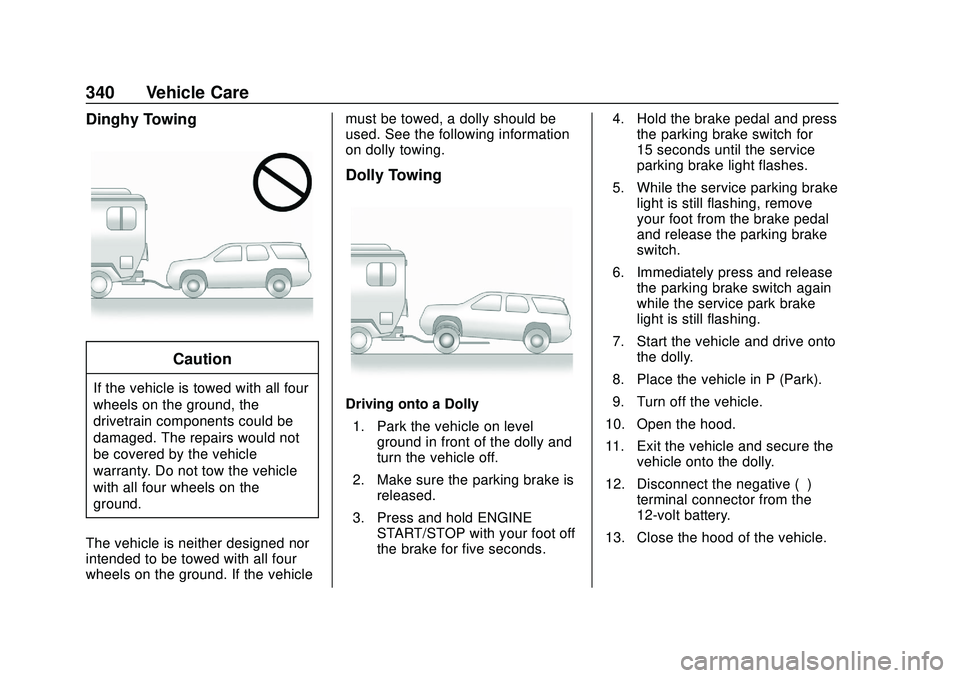
Dolly Towing
Driving onto a Dolly
1. Park the vehicle on level ground in front of the dolly and
turn the vehicle off.
2. Make sure the parking brake is released.
3. Press and hold ENGINE START/STOP with your foot off
the brake for five seconds. 4. Hold the brake pedal and press
the parking brake switch for
15 seconds until the service
parking brake light flashes.
5. While the service parking brake light is still flashing, remove
your foot from the brake pedal
and release the parking brake
switch.
6. Immediately press and release the parking brake switch again
while the service park brake
light is still flashing.
7. Start the vehicle and drive onto the dolly.
8. Place the vehicle in P (Park).
9. Turn off the vehicle.
10. Open the hood.
11. Exit the vehicle and secure the vehicle onto the dolly.
12. Disconnect the negative (–) terminal connector from the
12-volt battery.
13. Close the hood of the vehicle.