brake light GMC ACADIA 2021 Get To Know Guide
[x] Cancel search | Manufacturer: GMC, Model Year: 2021, Model line: ACADIA, Model: GMC ACADIA 2021Pages: 20, PDF Size: 1.78 MB
Page 3 of 20

3
Read your Owner’s Manual to
learn about the information being
relayed by the lights, gauges
and indicators on the instrument
cluster.
See Introduction in your
Owner’s Manual.
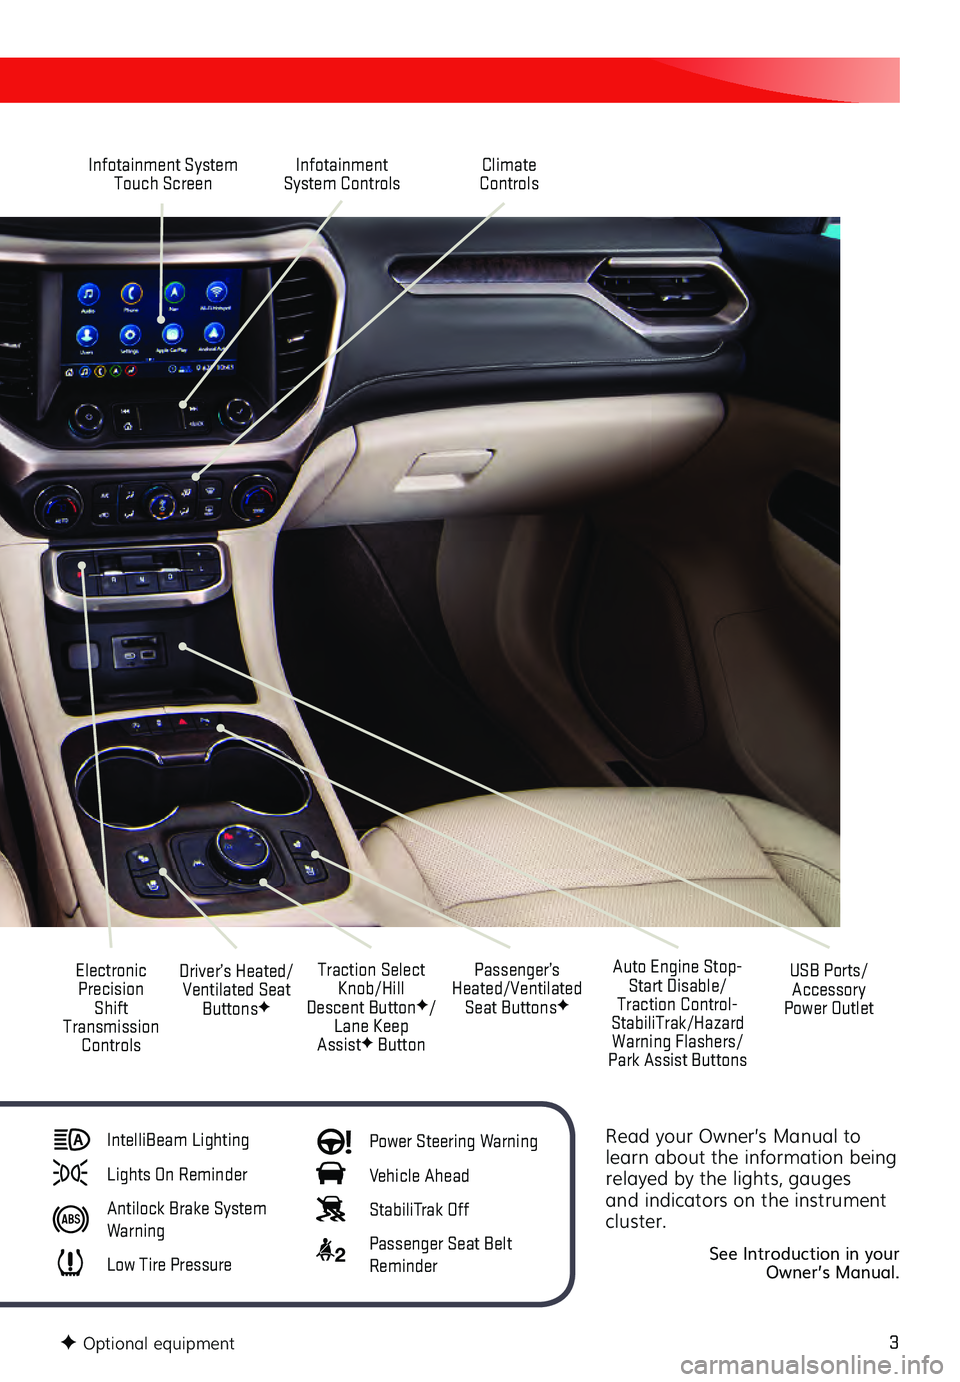
Infotainment System Touch Screen Infotainment
System Controls
Electronic Precision Shift
Transmission Controls Traction Select
Knob/Hill
Descent Button
F/
Lane Keep
Assist
F Button
Driver’s Heated/
Ventilated Seat Buttons
F
Auto Engine Stop-Start Disable/
Traction Control-
StabiliTrak/Hazard Warning Flashers/
Park Assist Buttons USB Ports/
Accessory
Power Outlet
Climate
Controls
Passenger’s
Heated/Ventilated Seat Buttons
F
IntelliBeam Lighting
Lights On Reminder
Antilock Brake System
Warning
Low Tire Pressure
Power Steering Warning
Vehicle Ahead
StabiliTrak Off
2 Passenger Seat Belt
Reminder
F Optional equipment
Page 10 of 20

10F Optional equipment
AUDIO STEERING WHEEL CONTROLS
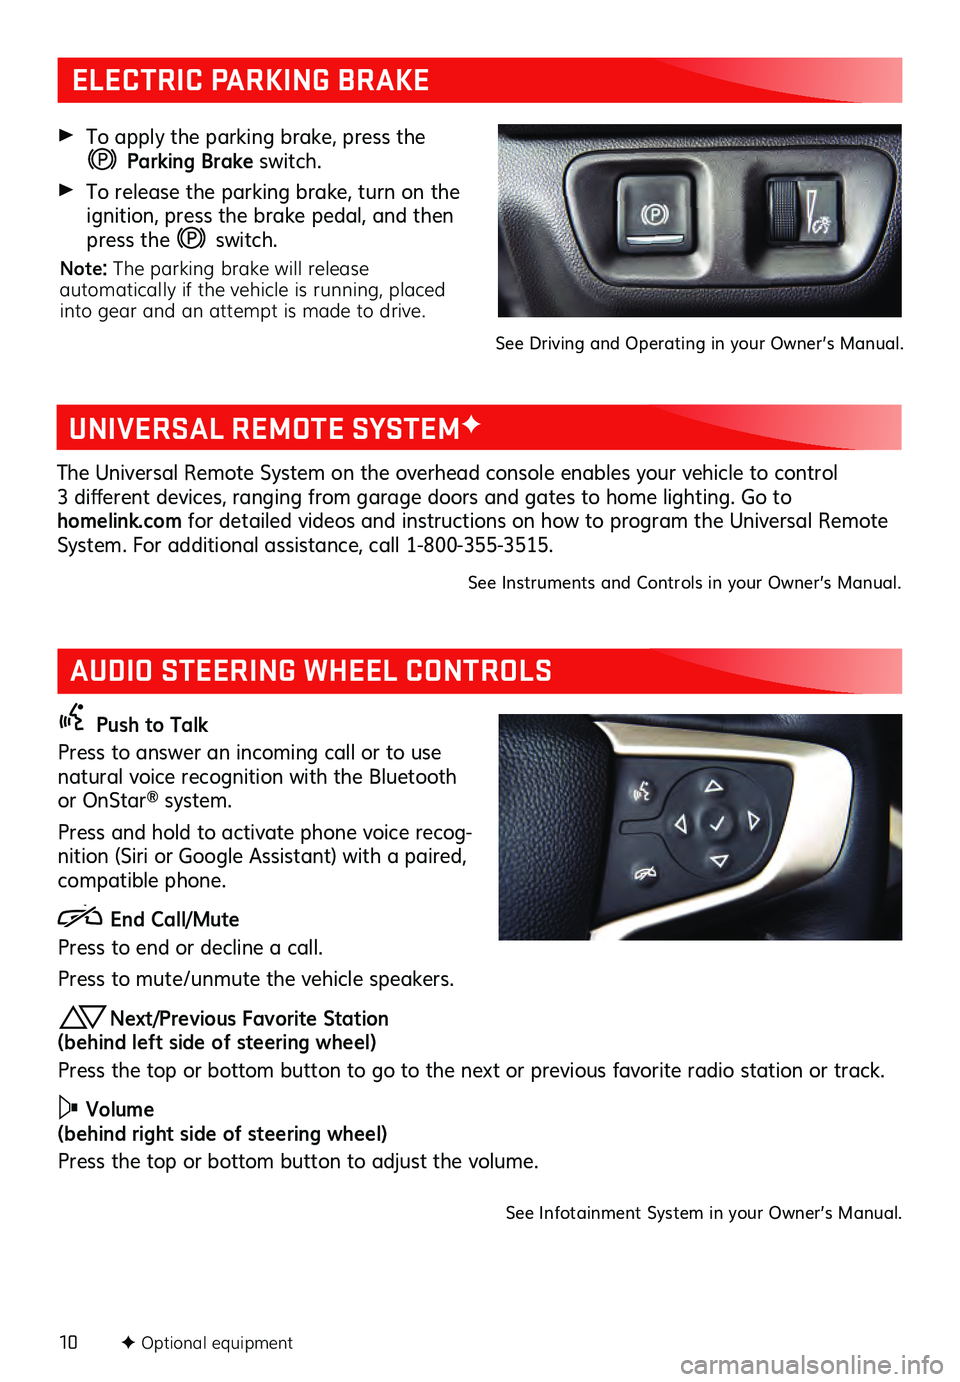
Push to Talk
Press to answer an incoming call or to use
natural voice recognition with the Bluetooth
or OnStar
® system.
Press and hold to activate phone voice recog -
nition (Siri or Google Assistant) with a paired,
compatible phone.
End Call/Mute
Press to end or decline a call.
Press to mute/unmute the vehicle s peakers.
Next/Previous Favorite Station
(behind left side of steering wheel)
Press the top or bottom button to go to the next or previous favorite radio station or track.
Volume
(behind right side of steering wheel)
Press the top or bottom button to adjust the volume.
See Infotainment System in your Owner’s Manual.
ELECTRIC PARKING BRAKE
To apply the parking brake, pres s the
Parking Brake switch.
To release the parking brake, turn on the ignition, press the brake pedal, and then
press the
switch.
Note: The parking brake will release
automatically if the vehicle is running, placed
into gear and an attempt is made to drive.
See Driving and Operating in your Owner’s Manual.
UNIVERSAL REMOTE SYSTEMF
The Universal Remote System on the overhead console enables your vehicle to control 3 different devic es, ranging from garage doors and gates to home lighting. Go to
homelink.com for detailed videos and instructions on how to program the Universal Remote
System. For additional as sistance, c all 1- 800-355-3515.
See Instruments and Controls in your Owner’s Manual.
Page 19 of 20

19
TRACTION SELECT
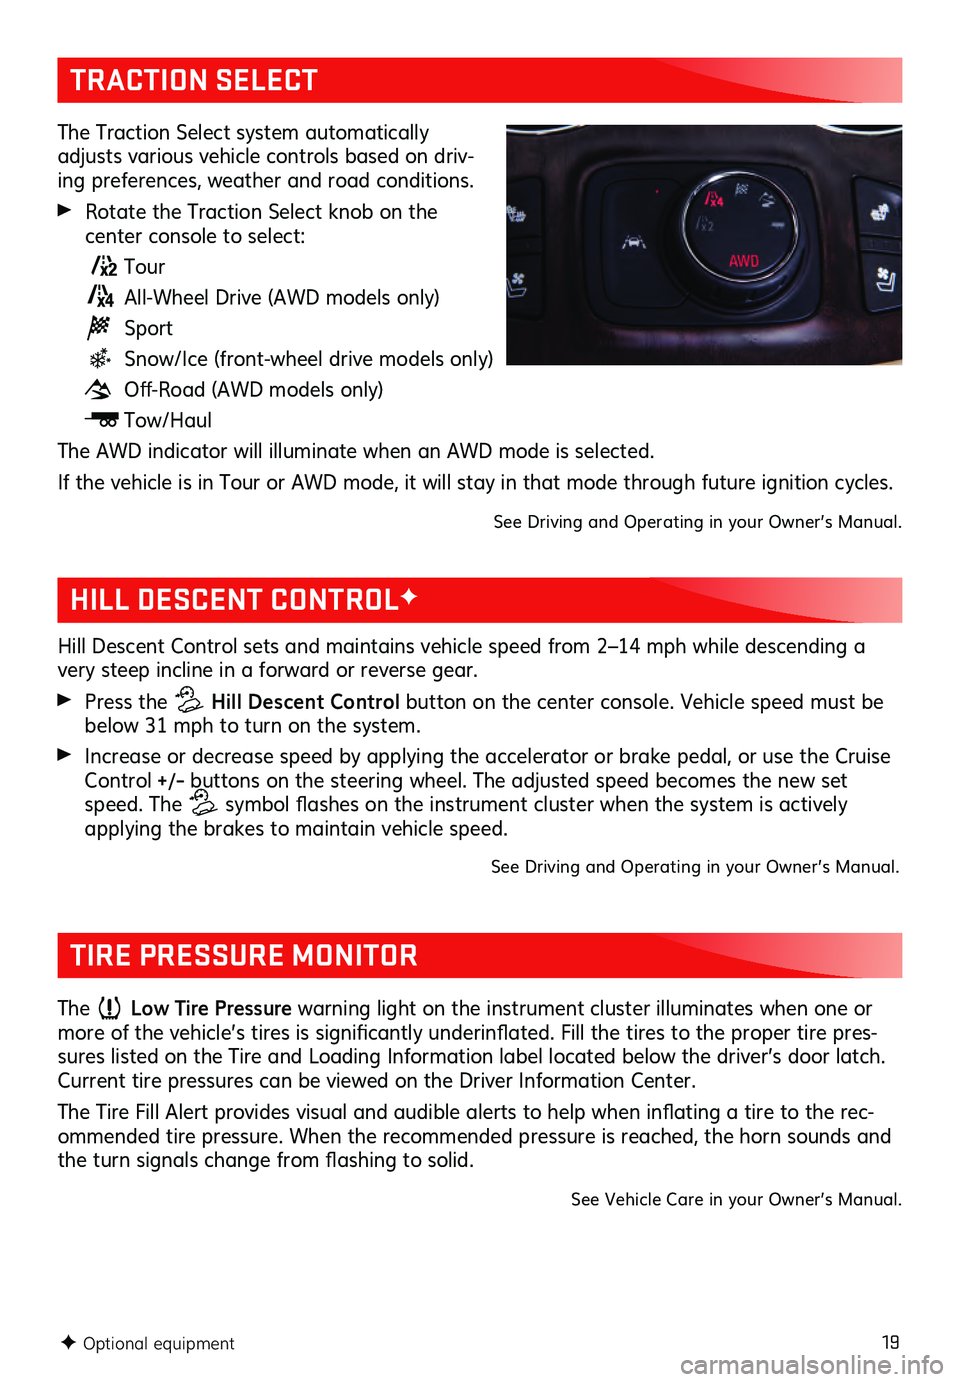
The Traction Select system automatically
adjusts various vehicle controls based on driv-
ing preferences, weather and road conditions.
Rotate the Traction Select knob on the center console to select:
Tour
All-Wheel Drive (AWD models only)
Sport
Snow/Ice (front-wheel drive models only)
Off-Road (AWD models only)
Tow/Haul
The AWD indicator will illuminate when an AWD mode is selected.
If the vehicle is in Tour or AWD mode, it will stay in that mode through future ignition cycles.
See Driving and Operating in your Owner’s Manual.
F Optional equipment
HILL DESCENT CONTROLF
Hill Descent Control sets and maintains vehicle speed from 2–14 mph while descending a
very steep incline in a forward or reverse gear.
Press the Hill Descent Control button on the center console. Vehicle speed must be
below 31 mph to turn on the system.
Increase or decrease speed by applying the accelerator or brake pedal, or use the Cruise Control +/– buttons on the steering wheel. The adjusted speed becomes the new set
speed. The
symbol flashes on the ins trument c luster when the s ystem is ac tively applying the brakes to maintain vehicle speed.
See Driving and Operating in your Owner’s Manual.
TIRE PRESSURE MONITOR
The Low Tire Pressure warning light on the instrument cluster illuminates when one or more of the vehicle’s tires is s ignificantly u nderinflated. Fill the tires to the proper tire pres-
sures listed on the Tire and Loading Information label located below the driver’s door latch.
Current tire pres sures can be viewed on the Driver Information Center.
The Tire Fill Alert provides vis ual and au dible alerts to help when infla ting a tire to the rec-
ommended tire pressure. When the recommended pressure is reached, the horn sounds and
the turn signals c hange from fla shing to s olid.
See Vehicle Care in your Owner’s Manual.