lights GMC CANYON 2021 User Guide
[x] Cancel search | Manufacturer: GMC, Model Year: 2021, Model line: CANYON, Model: GMC CANYON 2021Pages: 359, PDF Size: 7.37 MB
Page 107 of 359
GMC Canyon/Canyon Denali Owner Manual (GMNA-Localizing-U.S./Canada-
14430430) - 2021 - CRC - 9/9/20
106 Lighting
Press the switch down to turn the cargo
lamp on or off. The shift lever must be in
P (Park), R (Reverse), or N (Neutral) to
operate the cargo lamp.
Become familiar with and follow all state
and local laws that apply to cargo lamp
operation.
Interior Lighting
Instrument Panel Illumination
Control
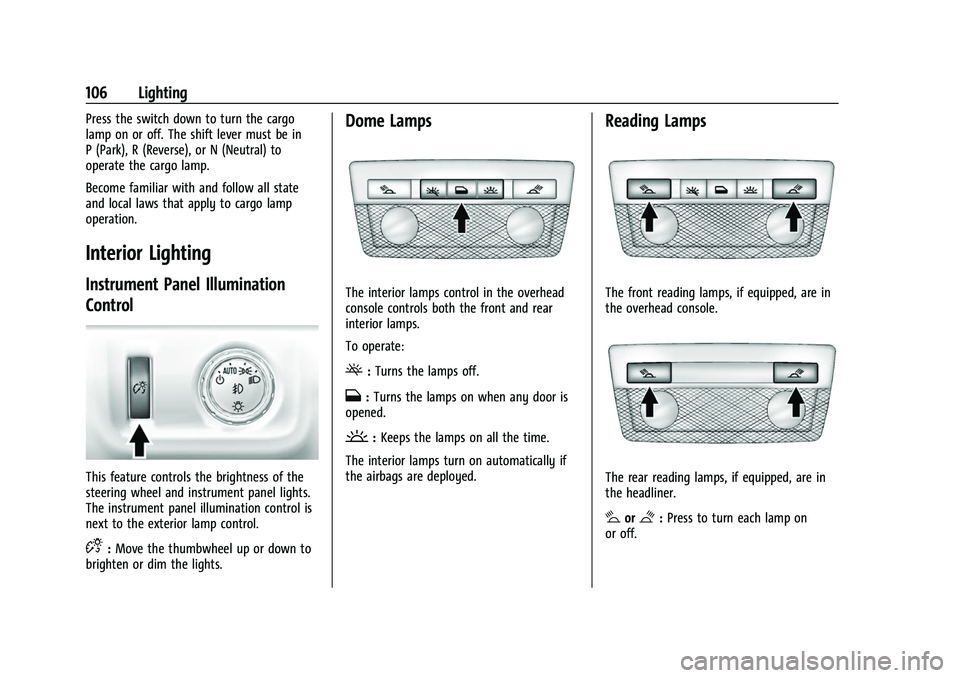
This feature controls the brightness of the
steering wheel and instrument panel lights.
The instrument panel illumination control is
next to the exterior lamp control.
D:Move the thumbwheel up or down to
brighten or dim the lights.
Dome Lamps
The interior lamps control in the overhead
console controls both the front and rear
interior lamps.
To operate:
(: Turns the lamps off.
H:Turns the lamps on when any door is
opened.
': Keeps the lamps on all the time.
The interior lamps turn on automatically if
the airbags are deployed.
Reading Lamps
The front reading lamps, if equipped, are in
the overhead console.
The rear reading lamps, if equipped, are in
the headliner.
#or$: Press to turn each lamp on
or off.
Page 108 of 359
GMC Canyon/Canyon Denali Owner Manual (GMNA-Localizing-U.S./Canada-
14430430) - 2021 - CRC - 9/9/20
Lighting 107
Lighting Features
Entry Lighting
Some exterior lamps and the interior lamps
turn on briefly at night, or in areas with
limited lighting, when
Kis pressed on the
Remote Keyless Entry (RKE) transmitter.
When a door is opened, the interior lamps
come on if the dome lamp control is in the
Hposition. After about 30 seconds the
exterior lamps turn off. Entry lighting can be
disabled manually by changing the ignition
out of the OFF position, or by pressing
Q
on the RKE transmitter.
This feature can be changed. See “Vehicle
Locator Lights” underVehicle Personalization
0 99.
Exit Lighting
Some exterior lamps and the interior lamps
come on at night, or in areas with limited
lighting when the key is removed from the
ignition. The exterior and interior lamps
remain on for a set amount of time and
then automatically turn off. The interior
lamps do not come on if the dome lamp
control is in the Off position. The exterior lamps turn off immediately by
turning the exterior lamps control off.
This feature can be changed. See
Vehicle
Personalization 099.
Battery Load Management
The vehicle has Electric Power Management
(EPM), which estimates the battery's
temperature and state of charge. It then
adjusts the voltage for best performance
and extended life of the battery.
When the battery's state of charge is low,
the voltage is raised slightly to quickly bring
the charge back up. When the state of
charge is high, the voltage is lowered
slightly to prevent overcharging. The
voltmeter gauge or the voltage display on
the Driver Information Center (DIC),
if equipped, may show the voltage moving
up or down. This is normal. If there is a
problem, an alert will be displayed.
The battery can be discharged at idle if the
electrical loads are very high. This is true for
all vehicles. This is because the generator
(alternator) may not be spinning fast
enough at idle to produce all the power that
is needed for very high electrical loads. A high electrical load occurs when several of
the following are on, such as: headlamps,
high beams, fog lamps, rear window
defogger, climate control fan at high speed,
heated seats, engine cooling fans, trailer
loads, and loads plugged into accessory
power outlets.
EPM works to prevent excessive discharge of
the battery. It does this by balancing the
generator's output and the vehicle's
electrical needs. It can increase engine idle
speed to generate more power, whenever
needed. It can temporarily reduce the power
demands of some accessories.
Normally, these actions occur in steps or
levels, without being noticeable. In rare
cases at the highest levels of corrective
action, this action may be noticeable to the
driver. If so, a DIC message might be
displayed and it is recommended that the
driver reduce the electrical loads as much as
possible.
Battery Power Protection
This feature shuts off the dome and reading
lamps, if they are left on for more than
10 minutes after the ignition is turned off.
Page 188 of 359
GMC Canyon/Canyon Denali Owner Manual (GMNA-Localizing-U.S./Canada-
14430430) - 2021 - CRC - 9/9/20
Driving and Operating 187
1. Push the key all the way in toward thesteering column, then turn the key to
ACC/ACCESSORY.
2. Brake using firm and steady pressure. Do not pump the brakes repeatedly. This
may deplete power assist, requiring
increased brake pedal force.
3. Shift the vehicle to N (Neutral). This can be done while the vehicle is moving.
Continue braking and steer the vehicle to
a safe location.
4. Come to a complete stop.
5. Shift to P (Park).
6. Push the key all the way in toward the steering column (1), then turn the
ignition to LOCK/OFF (2).
7. Set the parking brake. See Parking Brake
0 203.
8. Remove the key.
9. Release the brake pedal.
Caution
Use the correct key, make sure it is all
the way in —or pushed all the way in
toward the steering column when turning
off the vehicle —and turn it only with
your hand. 1 (ACC/ACCESSORY) :
This position allows
features such as the infotainment system to
operate while the vehicle is off. It also
unlocks the steering column, if equipped
with a locking steering column. Use this
position if the vehicle must be pushed or
towed. See Retained Accessory Power (RAP)
0 190.
From ON/RUN, push the key all the way in
toward the steering column, then turn the
key to ACC/ACCESSORY.
If the key is left in ACC/ACCESSORY with the
engine off, the battery could drain and the
vehicle may not start.
A warning chime will sound when the driver
door is opened and the key is in the
ignition.
2 (ON/RUN) : This position can be used to
operate the electrical accessories and to
display some instrument cluster warning
and indicator lights. This position can also
be used for service and diagnostics, and to
verify the proper operation of the
malfunction indicator lamp as may be
required for emission inspection purposes.
The switch stays in this position when the
engine is running. The transmission is also
unlocked in this position. If the key is left in ON/RUN with the engine
off, the battery could drain and the vehicle
may not start.
3 (START) :
This is the position that starts
the engine. When the engine starts, release
the key. The ignition returns to ON/RUN for
driving.
Starting the Engine
If the vehicle has a diesel engine, see the
Duramax diesel supplement.
Caution
If you add electrical parts or accessories,
you could change the way the engine
operates. Any resulting damage would
not be covered by the vehicle warranty.
See Add-On Electrical Equipment 0232.
Place the transmission in the proper gear.
Move the shift lever to P (Park) or
N (Neutral). The engine will not start in any
other position. To restart the engine when
the vehicle is already moving, use
N (Neutral) only.
Page 199 of 359
GMC Canyon/Canyon Denali Owner Manual (GMNA-Localizing-U.S./Canada-
14430430) - 2021 - CRC - 9/9/20
198 Driving and Operating
Electronic Transfer Case
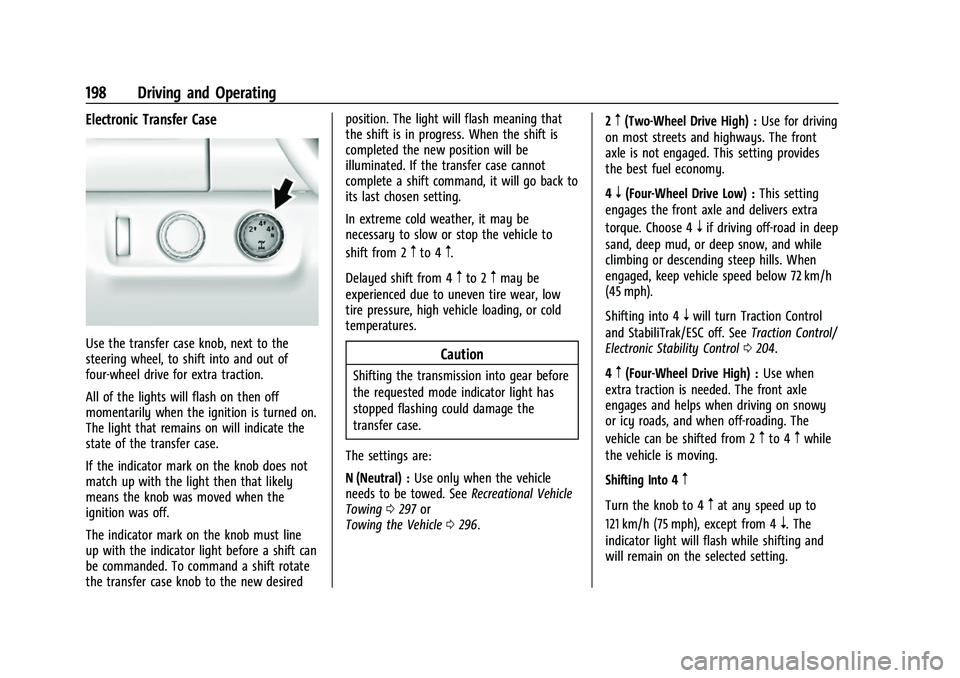
Use the transfer case knob, next to the
steering wheel, to shift into and out of
four-wheel drive for extra traction.
All of the lights will flash on then off
momentarily when the ignition is turned on.
The light that remains on will indicate the
state of the transfer case.
If the indicator mark on the knob does not
match up with the light then that likely
means the knob was moved when the
ignition was off.
The indicator mark on the knob must line
up with the indicator light before a shift can
be commanded. To command a shift rotate
the transfer case knob to the new desiredposition. The light will flash meaning that
the shift is in progress. When the shift is
completed the new position will be
illuminated. If the transfer case cannot
complete a shift command, it will go back to
its last chosen setting.
In extreme cold weather, it may be
necessary to slow or stop the vehicle to
shift from 2
mto 4m.
Delayed shift from 4
mto 2mmay be
experienced due to uneven tire wear, low
tire pressure, high vehicle loading, or cold
temperatures.
Caution
Shifting the transmission into gear before
the requested mode indicator light has
stopped flashing could damage the
transfer case.
The settings are:
N (Neutral) : Use only when the vehicle
needs to be towed. See Recreational Vehicle
Towing 0297 or
Towing the Vehicle 0296. 2
m(Two-Wheel Drive High) :
Use for driving
on most streets and highways. The front
axle is not engaged. This setting provides
the best fuel economy.
4
n(Four-Wheel Drive Low) : This setting
engages the front axle and delivers extra
torque. Choose 4
nif driving off-road in deep
sand, deep mud, or deep snow, and while
climbing or descending steep hills. When
engaged, keep vehicle speed below 72 km/h
(45 mph).
Shifting into 4
nwill turn Traction Control
and StabiliTrak/ESC off. See Traction Control/
Electronic Stability Control 0204.
4
m(Four-Wheel Drive High) : Use when
extra traction is needed. The front axle
engages and helps when driving on snowy
or icy roads, and when off-roading. The
vehicle can be shifted from 2
mto 4mwhile
the vehicle is moving.
Shifting Into 4
m
Turn the knob to 4mat any speed up to
121 km/h (75 mph), except from 4
n. The
indicator light will flash while shifting and
will remain on the selected setting.
Page 201 of 359
GMC Canyon/Canyon Denali Owner Manual (GMNA-Localizing-U.S./Canada-
14430430) - 2021 - CRC - 9/9/20
200 Driving and Operating
4. Turn the transfer case knob to 2m.
After the transfer case has shifted out of
N (Neutral), the N (Neutral) light will
go out.
5. Release the parking brake.
Caution
Shifting the transmission into gear before
the requested mode indicator light has
stopped flashing could damage the
transfer case.
6. Start the engine and shift the transmission to the desired gear.
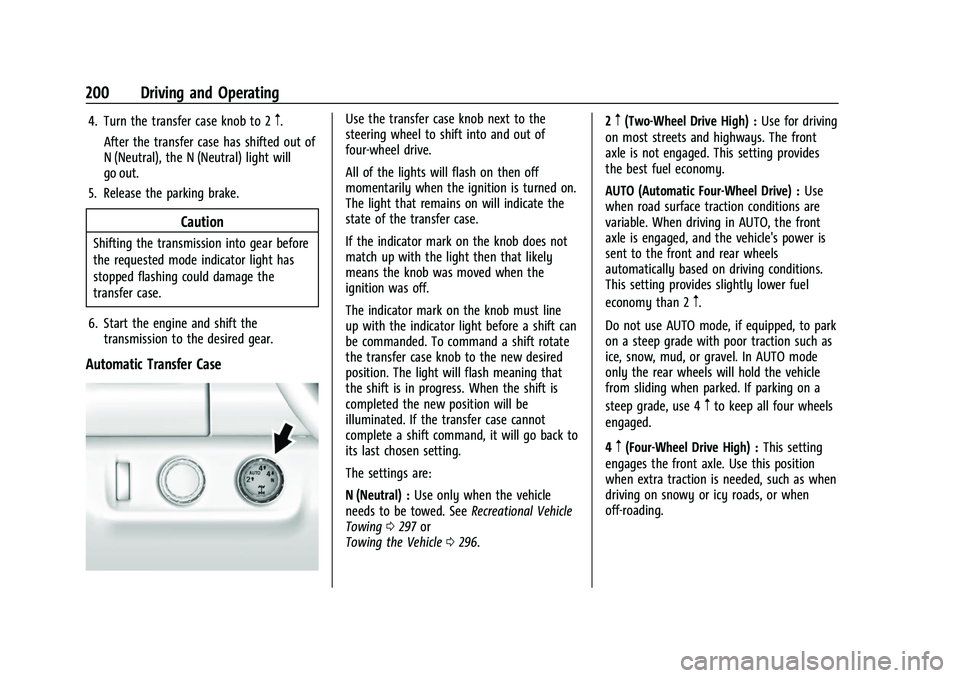
Automatic Transfer Case
Use the transfer case knob next to the
steering wheel to shift into and out of
four-wheel drive.
All of the lights will flash on then off
momentarily when the ignition is turned on.
The light that remains on will indicate the
state of the transfer case.
If the indicator mark on the knob does not
match up with the light then that likely
means the knob was moved when the
ignition was off.
The indicator mark on the knob must line
up with the indicator light before a shift can
be commanded. To command a shift rotate
the transfer case knob to the new desired
position. The light will flash meaning that
the shift is in progress. When the shift is
completed the new position will be
illuminated. If the transfer case cannot
complete a shift command, it will go back to
its last chosen setting.
The settings are:
N (Neutral) : Use only when the vehicle
needs to be towed. See Recreational Vehicle
Towing 0297 or
Towing the Vehicle 0296. 2m(Two-Wheel Drive High) :
Use for driving
on most streets and highways. The front
axle is not engaged. This setting provides
the best fuel economy.
AUTO (Automatic Four-Wheel Drive) : Use
when road surface traction conditions are
variable. When driving in AUTO, the front
axle is engaged, and the vehicle's power is
sent to the front and rear wheels
automatically based on driving conditions.
This setting provides slightly lower fuel
economy than 2
m.
Do not use AUTO mode, if equipped, to park
on a steep grade with poor traction such as
ice, snow, mud, or gravel. In AUTO mode
only the rear wheels will hold the vehicle
from sliding when parked. If parking on a
steep grade, use 4
mto keep all four wheels
engaged.
4
m(Four-Wheel Drive High) : This setting
engages the front axle. Use this position
when extra traction is needed, such as when
driving on snowy or icy roads, or when
off-roading.
Page 212 of 359
GMC Canyon/Canyon Denali Owner Manual (GMNA-Localizing-U.S./Canada-
14430430) - 2021 - CRC - 9/9/20
Driving and Operating 211
Blocked sensors will not detect objects and
can also cause false detections. Keep the
sensors clean of mud, dirt, snow, ice, and
slush; and clean sensors after a car wash in
freezing temperatures.
{Warning
The Park Assist system does not detect
children, pedestrians, bicyclists, animals,
or objects below the bumper or that are
too close or too far from the vehicle. It is
not available at speeds greater than
8 km/h (5 mph). To prevent injury, death,
or vehicle damage, even with Park Assist,
always check the area around the vehicle
and check all mirrors before backing.
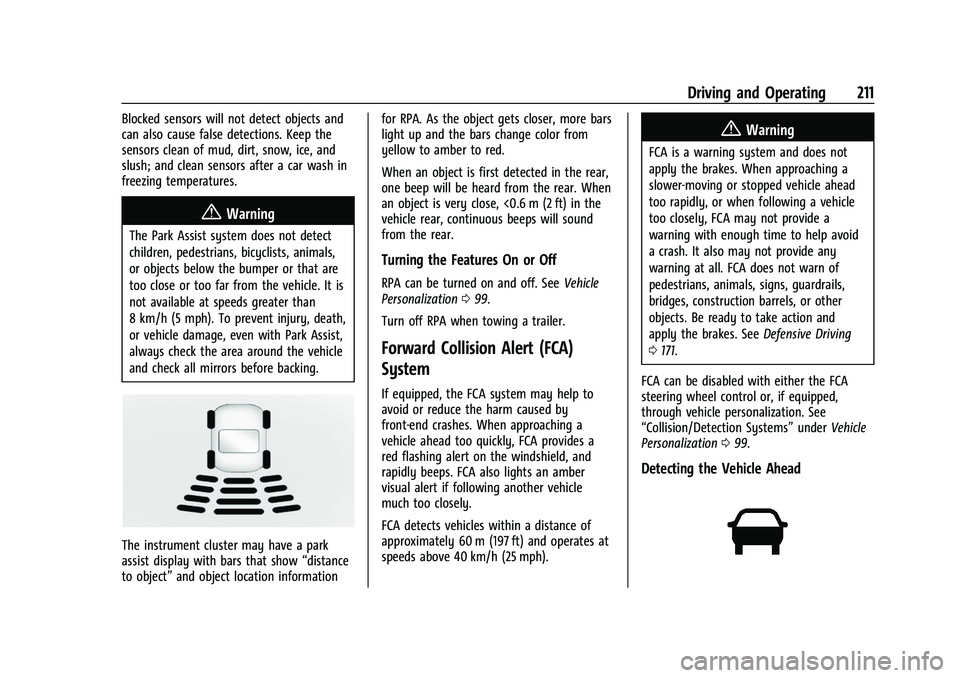
The instrument cluster may have a park
assist display with bars that show“distance
to object” and object location information for RPA. As the object gets closer, more bars
light up and the bars change color from
yellow to amber to red.
When an object is first detected in the rear,
one beep will be heard from the rear. When
an object is very close, <0.6 m (2 ft) in the
vehicle rear, continuous beeps will sound
from the rear.
Turning the Features On or Off
RPA can be turned on and off. See
Vehicle
Personalization 099.
Turn off RPA when towing a trailer.
Forward Collision Alert (FCA)
System
If equipped, the FCA system may help to
avoid or reduce the harm caused by
front-end crashes. When approaching a
vehicle ahead too quickly, FCA provides a
red flashing alert on the windshield, and
rapidly beeps. FCA also lights an amber
visual alert if following another vehicle
much too closely.
FCA detects vehicles within a distance of
approximately 60 m (197 ft) and operates at
speeds above 40 km/h (25 mph).
{Warning
FCA is a warning system and does not
apply the brakes. When approaching a
slower-moving or stopped vehicle ahead
too rapidly, or when following a vehicle
too closely, FCA may not provide a
warning with enough time to help avoid
a crash. It also may not provide any
warning at all. FCA does not warn of
pedestrians, animals, signs, guardrails,
bridges, construction barrels, or other
objects. Be ready to take action and
apply the brakes. See Defensive Driving
0 171.
FCA can be disabled with either the FCA
steering wheel control or, if equipped,
through vehicle personalization. See
“Collision/Detection Systems” underVehicle
Personalization 099.
Detecting the Vehicle Ahead
Page 213 of 359
GMC Canyon/Canyon Denali Owner Manual (GMNA-Localizing-U.S./Canada-
14430430) - 2021 - CRC - 9/9/20
212 Driving and Operating
FCA warnings will not occur unless the FCA
system detects a vehicle ahead. When a
vehicle is detected, the vehicle ahead
indicator will display green. Vehicles may
not be detected on curves, highway exit
ramps, or hills, due to poor visibility; or if a
vehicle ahead is partially blocked by
pedestrians or other objects. FCA will not
detect another vehicle ahead until it is
completely in the driving lane.
{Warning
FCA does not provide a warning to help
avoid a crash, unless it detects a vehicle.
FCA may not detect a vehicle ahead if
the FCA sensor is blocked by dirt, snow,
or ice, or if the windshield is damaged.
It may also not detect a vehicle on
winding or hilly roads, or in conditions
that can limit visibility such as fog, rain,
or snow, or if the headlamps or
windshield are not cleaned or in proper
condition. Keep the windshield,
headlamps, and FCA sensors clean and in
good repair.Collision Alert
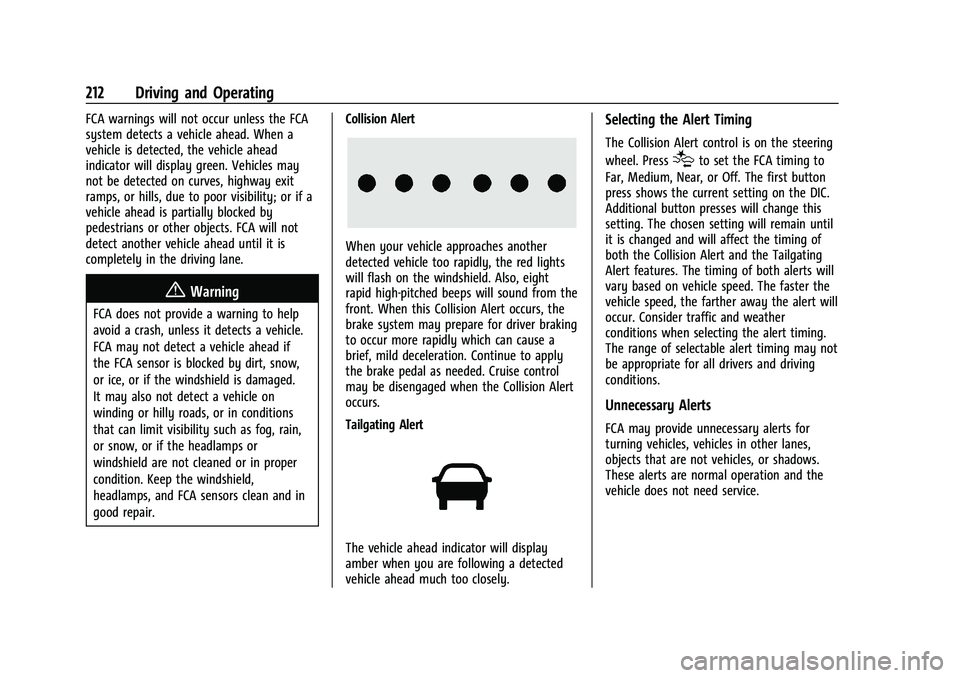
When your vehicle approaches another
detected vehicle too rapidly, the red lights
will flash on the windshield. Also, eight
rapid high-pitched beeps will sound from the
front. When this Collision Alert occurs, the
brake system may prepare for driver braking
to occur more rapidly which can cause a
brief, mild deceleration. Continue to apply
the brake pedal as needed. Cruise control
may be disengaged when the Collision Alert
occurs.
Tailgating Alert
The vehicle ahead indicator will display
amber when you are following a detected
vehicle ahead much too closely.
Selecting the Alert Timing
The Collision Alert control is on the steering
wheel. Press
[to set the FCA timing to
Far, Medium, Near, or Off. The first button
press shows the current setting on the DIC.
Additional button presses will change this
setting. The chosen setting will remain until
it is changed and will affect the timing of
both the Collision Alert and the Tailgating
Alert features. The timing of both alerts will
vary based on vehicle speed. The faster the
vehicle speed, the farther away the alert will
occur. Consider traffic and weather
conditions when selecting the alert timing.
The range of selectable alert timing may not
be appropriate for all drivers and driving
conditions.
Unnecessary Alerts
FCA may provide unnecessary alerts for
turning vehicles, vehicles in other lanes,
objects that are not vehicles, or shadows.
These alerts are normal operation and the
vehicle does not need service.
Page 296 of 359
GMC Canyon/Canyon Denali Owner Manual (GMNA-Localizing-U.S./Canada-
14430430) - 2021 - CRC - 9/9/20
Vehicle Care 295
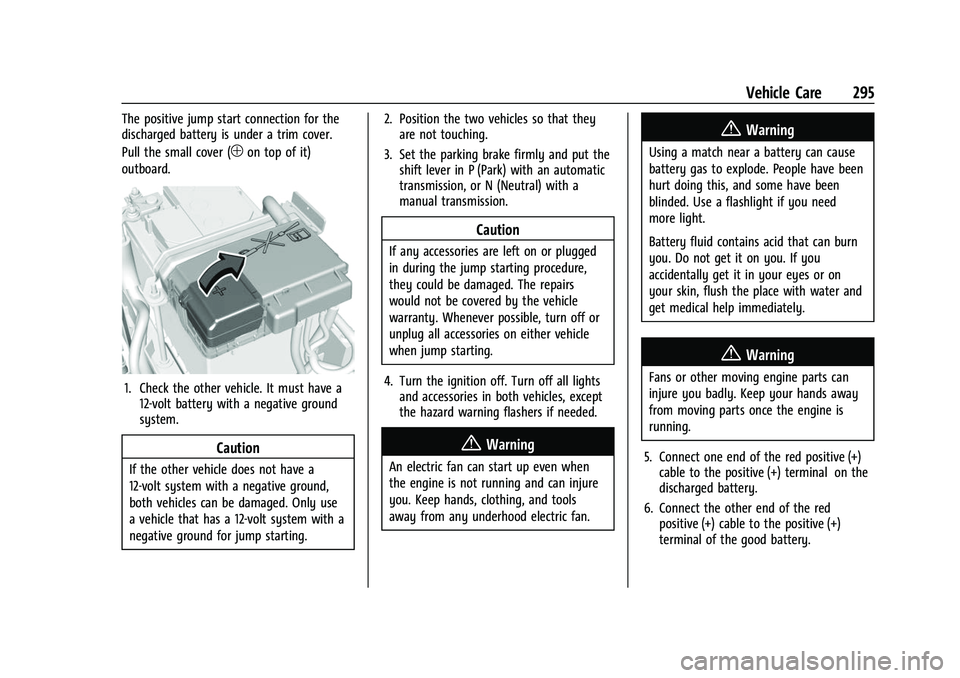
The positive jump start connection for the
discharged battery is under a trim cover.
Pull the small cover (
1on top of it)
outboard.
1. Check the other vehicle. It must have a 12-volt battery with a negative ground
system.
Caution
If the other vehicle does not have a
12-volt system with a negative ground,
both vehicles can be damaged. Only use
a vehicle that has a 12-volt system with a
negative ground for jump starting. 2. Position the two vehicles so that they
are not touching.
3. Set the parking brake firmly and put the shift lever in P (Park) with an automatic
transmission, or N (Neutral) with a
manual transmission.
Caution
If any accessories are left on or plugged
in during the jump starting procedure,
they could be damaged. The repairs
would not be covered by the vehicle
warranty. Whenever possible, turn off or
unplug all accessories on either vehicle
when jump starting.
4. Turn the ignition off. Turn off all lights and accessories in both vehicles, except
the hazard warning flashers if needed.
{Warning
An electric fan can start up even when
the engine is not running and can injure
you. Keep hands, clothing, and tools
away from any underhood electric fan.
{Warning
Using a match near a battery can cause
battery gas to explode. People have been
hurt doing this, and some have been
blinded. Use a flashlight if you need
more light.
Battery fluid contains acid that can burn
you. Do not get it on you. If you
accidentally get it in your eyes or on
your skin, flush the place with water and
get medical help immediately.
{Warning
Fans or other moving engine parts can
injure you badly. Keep your hands away
from moving parts once the engine is
running.
5. Connect one end of the red positive (+) cable to the positive (+) terminal on the
discharged battery.
6. Connect the other end of the red positive (+) cable to the positive (+)
terminal of the good battery.
Page 318 of 359
GMC Canyon/Canyon Denali Owner Manual (GMNA-Localizing-U.S./Canada-
14430430) - 2021 - CRC - 9/9/20
Service and Maintenance 317
Battery
The 12-volt battery supplies power to start
the engine and operate any additional
electrical accessories.
.To avoid break-down or failure to start
the vehicle, maintain a battery with full
cranking power.
.Trained dealer technicians have the
diagnostic equipment to test the battery
and ensure that the connections and
cables are corrosion-free.
Belts
.Belts may need replacing if they squeak
or show signs of cracking or splitting.
.Trained dealer technicians have access to
tools and equipment to inspect the belts
and recommend adjustment or
replacement when necessary.
Brakes
Brakes stop the vehicle and are crucial to
safe driving.
.Signs of brake wear may include chirping,
grinding, or squealing noises, or difficulty
stopping.
.Trained dealer technicians have access to
tools and equipment to inspect the brakes
and recommend quality parts engineered
for the vehicle.
Fluids
Proper fluid levels and approved fluids
protect the vehicle’s systems and
components. See Recommended Fluids and
Lubricants 0319 for GM approved fluids.
.Engine oil and windshield washer fluid
levels should be checked at every fuel fill.
.Instrument cluster lights may come on to
indicate that fluids may be low and need
to be filled.
Hoses
Hoses transport fluids and should be
regularly inspected to ensure that there are
no cracks or leaks. With a multi-point
inspection, your dealer can inspect the hoses
and advise if replacement is needed.
Lamps
Properly working headlamps, taillamps, and
brake lamps are important to see and be
seen on the road.
.Signs that the headlamps need attention
include dimming, failure to light, cracking,
or damage. The brake lamps need to be
checked periodically to ensure that they
light when braking.
.With a multi-point inspection, your dealer
can check the lamps and note any
concerns.
Shocks and Struts
Shocks and struts help aid in control for a
smoother ride.
.Signs of wear may include steering wheel
vibration, bounce/sway while braking,
longer stopping distance, or uneven
tire wear.
.As part of the multi-point inspection,
trained dealer technicians can visually
inspect the shocks and struts for signs of
leaking, blown seals, or damage, and can
advise when service is needed.
Tires
Tires need to be properly inflated, rotated,
and balanced. Maintaining the tires can save
money and fuel, and can reduce the risk of
tire failure.
Page 352 of 359
GMC Canyon/Canyon Denali Owner Manual (GMNA-Localizing-U.S./Canada-
14430430) - 2021 - CRC - 9/9/20
Index 351
Gauges (cont'd)Tachometer . . . . . . . . . . . . . . . . . . . . . . . . . . . . . 84
Trip Odometer . . . . . . . . . . . . . . . . . . . . . . . . . . 84
Warning Lights and Indicators . . . . . . . . . . 80
General Information Service and Maintenance . . . . . . . . . . . . . . 309
Towing . . . . . . . . . . . . . . . . . . . . . . . . . . . . . . . . 216
Vehicle Care . . . . . . . . . . . . . . . . . . . . . . . . . . . 234
Global Positioning System (GPS) . . . . . . . . . .134
Glove Box . . . . . . . . . . . . . . . . . . . . . . . . . . . . . . . . .73
GM Mobility Reimbursement Program . . . . . . . . . . . . . . . . . . . . . . . . . . . . . . . 330
Guidance Problems with the Route . . . . . . . . . . . . . . 135
H
Halogen Bulbs . . . . . . . . . . . . . . . . . . . . . . . . . . . 256
Hazard Warning Flashers . . . . . . . . . . . . . . . . 104
HD Radio Technology . . . . . . . . . . . . . . . . . . . . . 117
Head Restraints . . . . . . . . . . . . . . . . . . . . . . . . . . . . 21
HeadlampsAiming . . . . . . . . . . . . . . . . . . . . . . . . . . . . . . . . 255
Automatic . . . . . . . . . . . . . . . . . . . . . . . . . . . . . 103
Bulb Replacement . . . . . . . . . . . . . . . . . . . . . . 256
Daytime Running Lamps (DRL) . . . . . . . . . 103
Flash-to-Pass . . . . . . . . . . . . . . . . . . . . . . . . . . . 103
Headlamps, Front Turn Signal,
Sidemarker, and Parking Lamps . . . . . . 256 Headlamps (cont'd)
High-Beam On Light . . . . . . . . . . . . . . . . . . . . 93
High/Low Beam Changer . . . . . . . . . . . . . . 103
Lamps On Reminder . . . . . . . . . . . . . . . . . . . . 93
Heated Steering Wheel . . . . . . . . . . . . . . . . . . . . . . . . . 76
Heated and Ventilated Front Seats . . . . . . . .25
Heated Mirrors . . . . . . . . . . . . . . . . . . . . . . . . . . . .16
Heater
Engine . . . . . . . . . . . . . . . . . . . . . . . . . . . . . . . . . 188
Heating . . . . . . . . . . . . . . . . . . . . . . . . . . . . . 164, 166
High-Beam On Light . . . . . . . . . . . . . . . . . . . . . . 93
Hill and Mountain Roads . . . . . . . . . . . . . . . . .178
Hill Descent Control (HDC) . . . . . . . . . . . . . . . 205
Hill Descent Control Light . . . . . . . . . . . . . . . . . 90
Hill Start Assist (HSA) . . . . . . . . . . . . . . . . . . . . 203
Hood . . . . . . . . . . . . . . . . . . . . . . . . . . . . . . . . . . . . 236
Horn . . . . . . . . . . . . . . . . . . . . . . . . . . . . . . . . . . . . . . .77
How to Wear Seat Belts Properly . . . . . . . . . 28
HVAC . . . . . . . . . . . . . . . . . . . . . . . . . . . . . . . 164, 166
I
If the System Needs Service . . . . . . . . . . . . . . 135
Ignition Positions . . . . . . . . . . . . . . . . . . . . . . . . 186
Ignition Transmission Lock Check . . . . . . . . 253
Immobilizer . . . . . . . . . . . . . . . . . . . . . . . . . . . . . . . . 15
Indicator Vehicle Ahead . . . . . . . . . . . . . . . . . . . . . . . . . . 90 Infants and Young Children, Restraints . . . . 45
Information
Publication Ordering . . . . . . . . . . . . . . . . . . . 334
Infotainment System . . . . . . . . . . . . . . . . . . . . 338
Instrument Cluster . . . . . . . . . . . . . . . . . . . . . . . . .81
Instrument Panel Overview . . . . . . . . . . . . . . . . 4
Interior Rearview Mirrors . . . . . . . . . . . . . . . . . . 17
Introduction . . . . . . . . . . . . . . . . . . . . . . . . . . . 1, 109
J
Jack Auxiliary . . . . . . . . . . . . . . . . . . . . . . . . . . . . . . . 122
Jump Starting - North America . . . . . . . . . . . 294
K
Keyless Entry Remote (RKE) System . . . . . . . . . . . . . . . . . . . . 9
Keys . . . . . . . . . . . . . . . . . . . . . . . . . . . . . . . . . . . . . . . 6
L
Labeling, Tire Sidewall . . . . . . . . . . . . . . . . . . . 267
Lamps Daytime Running (DRL) . . . . . . . . . . . . . . . . 103
Dome . . . . . . . . . . . . . . . . . . . . . . . . . . . . . . . . . . 106
Exterior Cargo . . . . . . . . . . . . . . . . . . . . . . . . . 105
Exterior Controls . . . . . . . . . . . . . . . . . . . . . . . 102
Exterior Lamps Off Reminder . . . . . . . . . . 103
Exterior Lighting Battery Saver . . . . . . . . 108