light GMC CANYON 2021 Workshop Manual
[x] Cancel search | Manufacturer: GMC, Model Year: 2021, Model line: CANYON, Model: GMC CANYON 2021Pages: 359, PDF Size: 7.37 MB
Page 118 of 359
GMC Canyon/Canyon Denali Owner Manual (GMNA-Localizing-U.S./Canada-
14430430) - 2021 - CRC - 9/9/20
Infotainment System 117
A valid AM or FM station will automatically
tune to the new frequency but not close the
Direct Tune display. When listening to SXM
(if equipped), touch Go after entering the
channel. Touch the Back icon on the
infotainment display or touch
zto exit out
of Direct Tune.
The tune arrows on the right side of the
Direct Tune display will tune through the
complete station or channel list one station
step at a time per touch. A touch and hold
advances through stations or channels
quickly.
If equipped, HD Radio multicast stations
cannot be tuned directly through the Direct
Tune feature. Only the analog or
HD1 station can use that feature. Use the
display arrows to adjust to the multicast
stations.
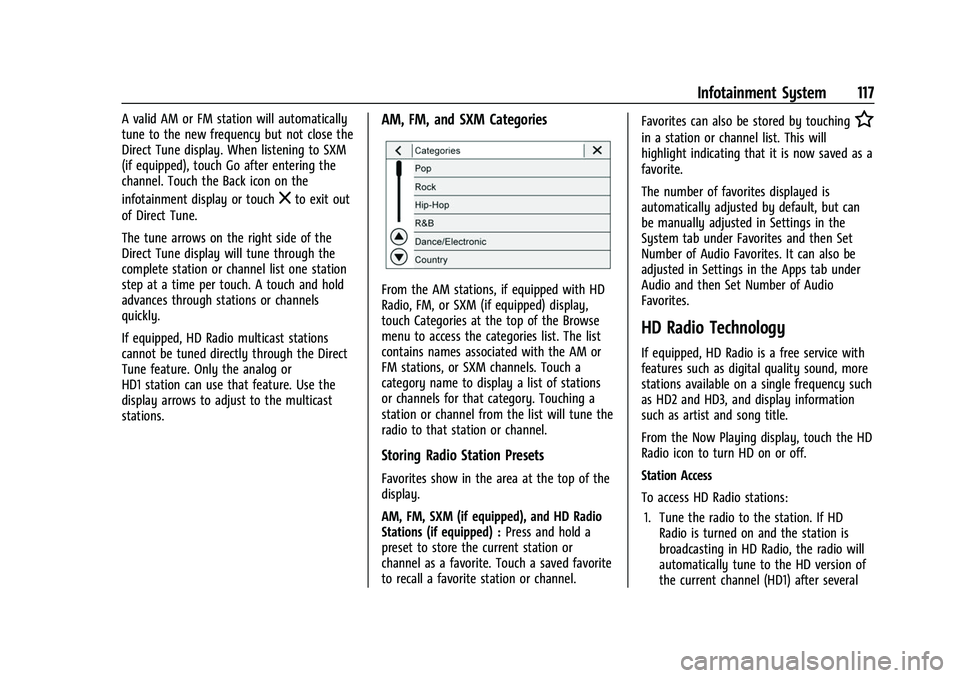
AM, FM, and SXM Categories
From the AM stations, if equipped with HD
Radio, FM, or SXM (if equipped) display,
touch Categories at the top of the Browse
menu to access the categories list. The list
contains names associated with the AM or
FM stations, or SXM channels. Touch a
category name to display a list of stations
or channels for that category. Touching a
station or channel from the list will tune the
radio to that station or channel.
Storing Radio Station Presets
Favorites show in the area at the top of the
display.
AM, FM, SXM (if equipped), and HD Radio
Stations (if equipped) : Press and hold a
preset to store the current station or
channel as a favorite. Touch a saved favorite
to recall a favorite station or channel. Favorites can also be stored by touching
H
in a station or channel list. This will
highlight indicating that it is now saved as a
favorite.
The number of favorites displayed is
automatically adjusted by default, but can
be manually adjusted in Settings in the
System tab under Favorites and then Set
Number of Audio Favorites. It can also be
adjusted in Settings in the Apps tab under
Audio and then Set Number of Audio
Favorites.
HD Radio Technology
If equipped, HD Radio is a free service with
features such as digital quality sound, more
stations available on a single frequency such
as HD2 and HD3, and display information
such as artist and song title.
From the Now Playing display, touch the HD
Radio icon to turn HD on or off.
Station Access
To access HD Radio stations:
1. Tune the radio to the station. If HD Radio is turned on and the station is
broadcasting in HD Radio, the radio will
automatically tune to the HD version of
the current channel (HD1) after several
Page 126 of 359
GMC Canyon/Canyon Denali Owner Manual (GMNA-Localizing-U.S./Canada-
14430430) - 2021 - CRC - 9/9/20
Infotainment System 125
the top of the navigation map view.
Manually close the search bar by touching
z. When the vehicle is moving, the}(Search) icon will replace the search bar to
maximize the full map view.
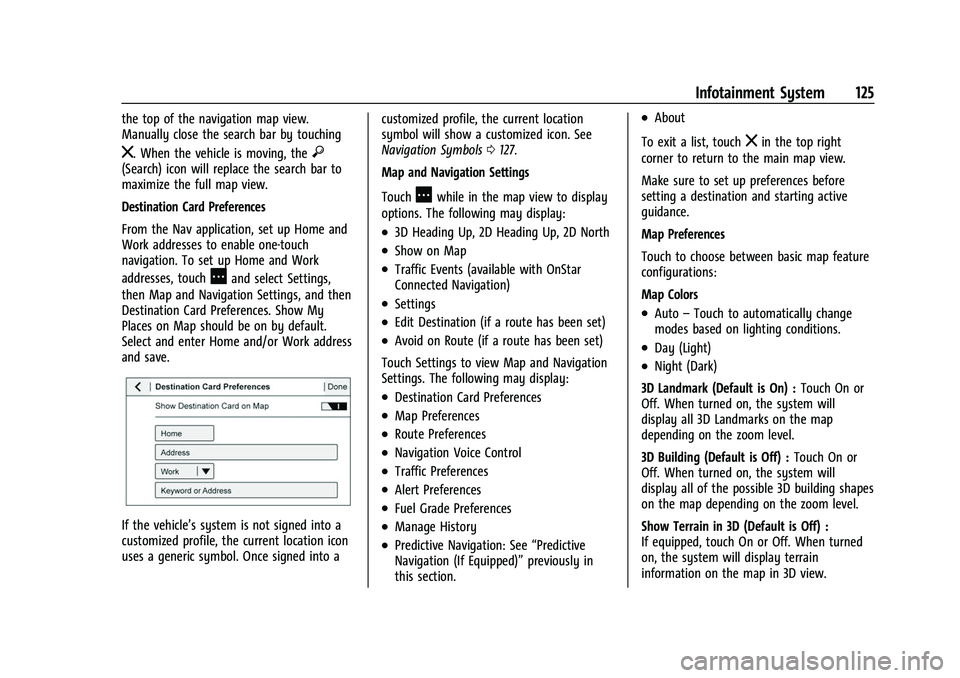
Destination Card Preferences
From the Nav application, set up Home and
Work addresses to enable one-touch
navigation. To set up Home and Work
addresses, touch
Aand select Settings,
then Map and Navigation Settings, and then
Destination Card Preferences. Show My
Places on Map should be on by default.
Select and enter Home and/or Work address
and save.
If the vehicle’s system is not signed into a
customized profile, the current location icon
uses a generic symbol. Once signed into a customized profile, the current location
symbol will show a customized icon. See
Navigation Symbols
0127.
Map and Navigation Settings
Touch
Awhile in the map view to display
options. The following may display:
.3D Heading Up, 2D Heading Up, 2D North
.Show on Map
.Traffic Events (available with OnStar
Connected Navigation)
.Settings
.Edit Destination (if a route has been set)
.Avoid on Route (if a route has been set)
Touch Settings to view Map and Navigation
Settings. The following may display:
.Destination Card Preferences
.Map Preferences
.Route Preferences
.Navigation Voice Control
.Traffic Preferences
.Alert Preferences
.Fuel Grade Preferences
.Manage History
.Predictive Navigation: See “Predictive
Navigation (If Equipped)” previously in
this section.
.About
To exit a list, touch
zin the top right
corner to return to the main map view.
Make sure to set up preferences before
setting a destination and starting active
guidance.
Map Preferences
Touch to choose between basic map feature
configurations:
Map Colors
.Auto –Touch to automatically change
modes based on lighting conditions.
.Day (Light)
.Night (Dark)
3D Landmark (Default is On) : Touch On or
Off. When turned on, the system will
display all 3D Landmarks on the map
depending on the zoom level.
3D Building (Default is Off) : Touch On or
Off. When turned on, the system will
display all of the possible 3D building shapes
on the map depending on the zoom level.
Show Terrain in 3D (Default is Off) :
If equipped, touch On or Off. When turned
on, the system will display terrain
information on the map in 3D view.
Page 129 of 359
GMC Canyon/Canyon Denali Owner Manual (GMNA-Localizing-U.S./Canada-
14430430) - 2021 - CRC - 9/9/20
128 Infotainment System
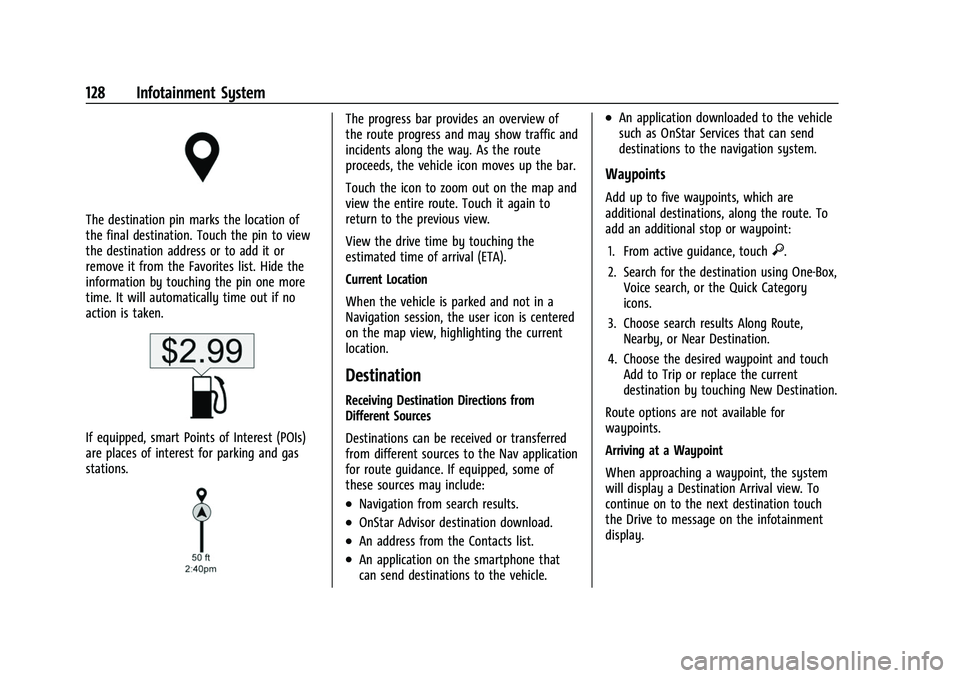
The destination pin marks the location of
the final destination. Touch the pin to view
the destination address or to add it or
remove it from the Favorites list. Hide the
information by touching the pin one more
time. It will automatically time out if no
action is taken.
If equipped, smart Points of Interest (POIs)
are places of interest for parking and gas
stations.
The progress bar provides an overview of
the route progress and may show traffic and
incidents along the way. As the route
proceeds, the vehicle icon moves up the bar.
Touch the icon to zoom out on the map and
view the entire route. Touch it again to
return to the previous view.
View the drive time by touching the
estimated time of arrival (ETA).
Current Location
When the vehicle is parked and not in a
Navigation session, the user icon is centered
on the map view, highlighting the current
location.
Destination
Receiving Destination Directions from
Different Sources
Destinations can be received or transferred
from different sources to the Nav application
for route guidance. If equipped, some of
these sources may include:
.Navigation from search results.
.OnStar Advisor destination download.
.An address from the Contacts list.
.An application on the smartphone that
can send destinations to the vehicle.
.An application downloaded to the vehicle
such as OnStar Services that can send
destinations to the navigation system.
Waypoints
Add up to five waypoints, which are
additional destinations, along the route. To
add an additional stop or waypoint:1. From active guidance, touch
}.
2. Search for the destination using One-Box, Voice search, or the Quick Category
icons.
3. Choose search results Along Route, Nearby, or Near Destination.
4. Choose the desired waypoint and touch Add to Trip or replace the current
destination by touching New Destination.
Route options are not available for
waypoints.
Arriving at a Waypoint
When approaching a waypoint, the system
will display a Destination Arrival view. To
continue on to the next destination touch
the Drive to message on the infotainment
display.
Page 130 of 359
GMC Canyon/Canyon Denali Owner Manual (GMNA-Localizing-U.S./Canada-
14430430) - 2021 - CRC - 9/9/20
Infotainment System 129
If the vehicle passes the waypoint or gets
out of the current route, the system will
automatically reroute back to this waypoint.
At the same time, it will show a Drive to
icon along with the next waypoint address
so the current waypoint can be skipped and
guidance can resume to the next waypoint
or destination.
Editing a Waypoint
When waypoints are added during active
guidance, the system allows a stop to be
deleted or the order to be changed. To edit
a waypoint:1. Touch
A.
2. Touch Edit Destinations.
.Modify destination order by touching
and holding the arrow until it is
highlighted. Drag to move the
waypoint up or down the list.
.Delete a waypoint by touchingY.
A pop-up will appear to confirm
waypoint removal. Once the request
is confirmed, the system will remove
the address from the destinations list.
Touch
zon the top right corner so
the system can recalculate the route. If there is only one address in the
destinations list, the system will
disable the move and delete
functions. The system will not allow
the final destination to be deleted.
Map Information
Road network attributes are contained in the
map database for map information.
Attributes include information such as street
names, street addresses, and turn
restrictions. A detailed area includes all
major highways, service roads, and
residential roads. The detailed areas include
Places of Interest (POIs) such as restaurants,
airports, banks, hospitals, police stations, gas
stations, tourist attractions, and historical
monuments.
If the vehicle does not have an applicable
service plan, the map database may not
include data for newly constructed areas or
map database corrections that are
completed after production. The navigation
system provides full route guidance in the
detailed map areas.
Zoom Control
The zoom control display is shown on the
map view. A few ways to zoom in or
out are:
.Touch + or
–to zoom in or out on
the map.
.Double tap with one finger to zoom in or
single tap with two fingers to zoom out
on the map.
.Use the index finger and thumb to zoom
out by pinching and then zoom in by
spreading those two fingers on the map.
Map Gestures and Map Scale
Use the following gestures on the
infotainment display to adjust the map scale
and display options.
.Pinch to zoom in or out.
.Pan the map.
.Use two fingers to tilt down and change
from 2D to 3D. Tilt up to change back
to 2D.
.Rotate the map.
See Using the System 0113.
Page 156 of 359
GMC Canyon/Canyon Denali Owner Manual (GMNA-Localizing-U.S./Canada-
14430430) - 2021 - CRC - 9/9/20
Infotainment System 155
.When trying to change a safety feature
that is not configurable in Teen Driver,
the DIC displays a message indicating
that Teen Driver is active and the action
is not available.
.Super Cruise, if equipped, is not available.
.Enhanced Low Fuel Warning (if equipped)
–When the vehicle is low on fuel, the
low fuel light on the instrument cluster
flashes and the DIC low fuel warning
cannot be dismissed.
.Do not tow a trailer.
Report Card
The vehicle owner must secure the driver’s
consent to record certain vehicle data when
the vehicle is driven with a registered Teen
Driver key. There is one Report Card per
vehicle. Data is only recorded when a
registered Teen Driver key is used to
operate the vehicle.
The Report Card data is collected from the
time Teen Driver is activated or the last
time the Report Card was reset. The
following items may be recorded:
.Distance Driven –the total distance
driven.
.Maximum Speed –the maximum vehicle
speed detected.
.Overspeed Warnings –the number of
times the speed warning setting was
exceeded.
.Wide Open Throttle –the number of
times the accelerator pedal was pressed
nearly all the way down.
.Forward Collision Alerts –the number of
times the driver was notified when
approaching a vehicle ahead too quickly
and at potential risk for a crash.
.Forward Automatic Braking, also called
Automatic Emergency Braking (if
equipped) –the number of times the
vehicle detected that a forward collision
was imminent and applied the brakes.
.Reverse Automatic Braking (if equipped) –
the number of times the vehicle detected
that a rearward collision was imminent
and applied the brakes.
.Traction Control –the number of times
the Traction Control System activated to
reduce wheel spin or loss of traction.
.Stability Control –the number of events
which required the use of electronic
stability control.
.Antilock Braking System Active –The
number of Antilock Brake System
activations.
.Tailgating Alerts –the number of times
the driver was alerted for following a
vehicle ahead too closely.
Report Card Data
Cumulative Data is saved for all trips until
the Report Card is reset or until the
maximum count is exceeded. If the
maximum count is exceeded for a Report
Card line item, that item will no longer be
updated in the Report Card until it is reset.
Each item will report a maximum of
1,000 counts. The distance driven will report
a maximum of 64 374 km (40,000 mi).
To delete Report Card data, do one of the
following:
.From the Report Card display, touch
Reset.
.Touch Clear All Teen Keys and PIN from
the Teen Driver menu. This will also
unregister any Teen Driver keys and
delete the PIN.
Forgotten PIN
See your dealer to reset the PIN.
Page 166 of 359
GMC Canyon/Canyon Denali Owner Manual (GMNA-Localizing-U.S./Canada-
14430430) - 2021 - CRC - 9/9/20
Climate Controls 165
TEMP :Turn clockwise or counterclockwise
to increase or decrease the temperature
inside the vehicle.
9: Turn clockwise or counterclockwise to
increase or decrease the fan speed. There is
about a five second delay when the fan is
turned on. Turn the knob all the way
counterclockwise to turn the fan off.
Air Delivery Mode Control : Press
Y,\,
[, or-to change the direction of the
airflow. An indicator light comes on in the
selected mode button.
Y: Air is directed to the instrument panel
outlets.
\: Air is divided between the instrument
panel and floor outlets.
[: Air is directed to the floor outlets,
with some air directed to the windshield,
outboard instrument panel, and side window
outlets.
-: This mode clears the windows of fog or
moisture. Air is directed to the windshield,
with some air directed to the floor, outboard
instrument panel outlets, and side window
outlets.
0: Press to clear the windshield of fog or
frost more quickly. Air is directed to the
windshield and side window vents, with
some air directed to the outboard
instrument panel. The system automatically
forces outside air into the vehicle and the
air conditioning compressor will run, unless
the outside temperature is close to freezing.
Do not drive the vehicle until all the
windows are clear.
See Air Vents 0169.
@:Press to turn on recirculation. An
indicator light comes on. Air is recirculated
to quickly cool the inside of the vehicle.
It can also be used to help reduce outside
air and odors that enter the vehicle.
8: If equipped, press to turn on outside
air. An indicator light comes on. Outside air
is circulated throughout the vehicle.
A/C : Press to turn the air conditioning
system on or off. An indicator light comes
on to show that the air conditioning is
enabled. If the fan is turned off, the air
conditioner will not run. The A/C light will
stay on even if the outside temperatures are
below freezing.
Rear Window Defogger
K: If equipped, press to turn the rear
window defogger on or off. An indicator
light on the button comes on to show that
the rear window defogger is on.
The rear window defogger only works when
the ignition is on. The defogger also turns
off if the ignition is turned to off or ACC/
ACCESSORY.
Caution
Using a razor blade or sharp object to
clear the inside rear window can damage
the rear window defogger. Repairs would
not be covered by the vehicle warranty.
Do not clear the inside rear window with
sharp objects.
Heated Mirrors : If equipped with heated
outside mirrors, the mirrors heat to help
clear fog or frost from the surface of the
mirror when the rear window defog button
is pressed. See Heated Mirrors 016.
Page 168 of 359
GMC Canyon/Canyon Denali Owner Manual (GMNA-Localizing-U.S./Canada-
14430430) - 2021 - CRC - 9/9/20
Climate Controls 167
Climate Control Status Display
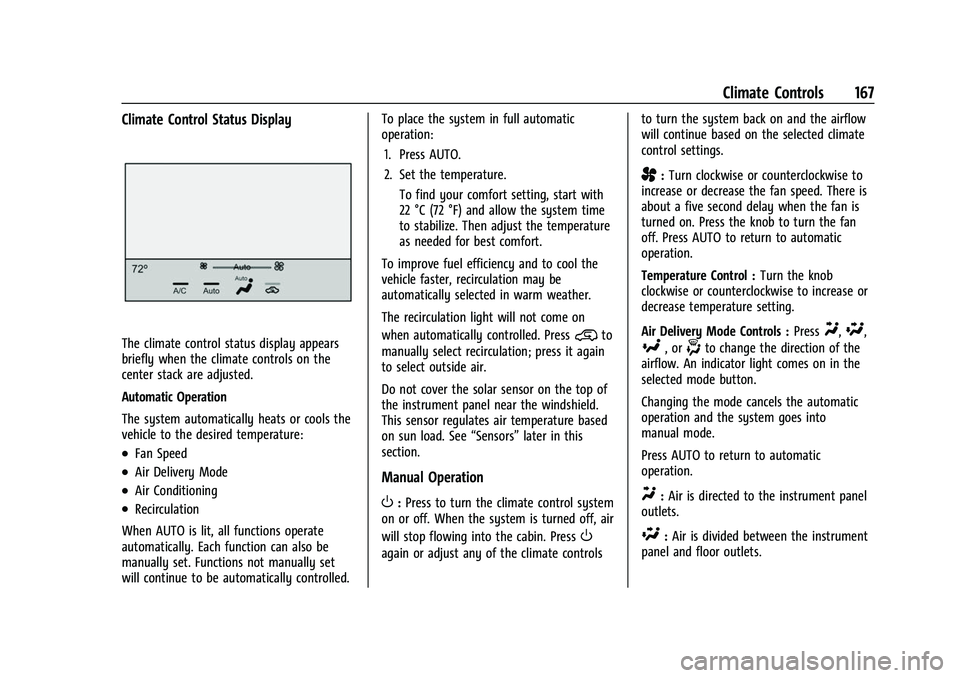
The climate control status display appears
briefly when the climate controls on the
center stack are adjusted.
Automatic Operation
The system automatically heats or cools the
vehicle to the desired temperature:
.Fan Speed
.Air Delivery Mode
.Air Conditioning
.Recirculation
When AUTO is lit, all functions operate
automatically. Each function can also be
manually set. Functions not manually set
will continue to be automatically controlled. To place the system in full automatic
operation:
1. Press AUTO.
2. Set the temperature. To find your comfort setting, start with
22 °C (72 °F) and allow the system time
to stabilize. Then adjust the temperature
as needed for best comfort.
To improve fuel efficiency and to cool the
vehicle faster, recirculation may be
automatically selected in warm weather.
The recirculation light will not come on
when automatically controlled. Press
@to
manually select recirculation; press it again
to select outside air.
Do not cover the solar sensor on the top of
the instrument panel near the windshield.
This sensor regulates air temperature based
on sun load. See “Sensors”later in this
section.
Manual Operation
O: Press to turn the climate control system
on or off. When the system is turned off, air
will stop flowing into the cabin. Press
O
again or adjust any of the climate controls to turn the system back on and the airflow
will continue based on the selected climate
control settings.
A:
Turn clockwise or counterclockwise to
increase or decrease the fan speed. There is
about a five second delay when the fan is
turned on. Press the knob to turn the fan
off. Press AUTO to return to automatic
operation.
Temperature Control : Turn the knob
clockwise or counterclockwise to increase or
decrease temperature setting.
Air Delivery Mode Controls : Press
Y,\,
[, or-to change the direction of the
airflow. An indicator light comes on in the
selected mode button.
Changing the mode cancels the automatic
operation and the system goes into
manual mode.
Press AUTO to return to automatic
operation.
Y: Air is directed to the instrument panel
outlets.
\: Air is divided between the instrument
panel and floor outlets.
Page 169 of 359
GMC Canyon/Canyon Denali Owner Manual (GMNA-Localizing-U.S./Canada-
14430430) - 2021 - CRC - 9/9/20
168 Climate Controls
[:Air is directed to the floor outlets,
with some to the windshield, outboard
instrument panel outlets, side window
outlets, and second row floor outlets.
-: This mode clears the windows of fog or
moisture. Air is directed to the windshield,
floor outlets, outboard instrument panel
outlets, and side window outlets. The
system automatically forces outside air into
the vehicle and the air conditioning
compressor will run, unless the outside
temperature is close to or below freezing.
0: Press to clear the windshield of fog or
frost more quickly. Air is directed to the
windshield and the side window vents, with
some air directed to the outboard
instrument panel outlets. The system
automatically forces outside air into the
vehicle and the air conditioning compressor
will run, unless the outside temperature is
close to or below freezing.
Do not drive the vehicle until all windows
are clear.
See Air Vents 0169.
A/C : Press to turn the air conditioning
system on or off. An indicator light comes
on to show that the air conditioning is
enabled. The A/C light will stay on even if the outside temperatures are below freezing.
If the fan is turned off, the air conditioner
will not run. Press AUTO to return to
automatic operation.
@:
Press to turn on recirculation. An
indicator light comes on. Air is recirculated
to quickly cool the inside of the vehicle.
It can also be used to help reduce outside
air and odors that enter the vehicle. The air
conditioning compressor also comes on
when this mode is activated. Press AUTO to
return to automatic operation.
Auto Defog : The climate control system
may have a sensor to automatically detect
high humidity inside the vehicle. When high
humidity is detected, the climate control
system may adjust air delivery modes,
outside air supply, and turn on the air
conditioner. If the climate control system
does not detect possible window fogging, it
returns to normal operation. To turn Auto
Defog off or on, see “Climate and Air
Quality” underVehicle Personalization 099.
Rear Window Defogger
The rear window defogger uses a warming
grid to remove fog from the rear window.
K:Press to turn the rear window defogger
on or off. An indicator light on the button
comes on to show that the rear window
defogger is on.
The rear window defogger only works when
the ignition is on. The defogger also turns
off if the ignition is turned to off or ACC/
ACCESSORY.
Caution
Using a razor blade or sharp object to
clear the inside rear window can damage
the rear window defogger. Repairs would
not be covered by the vehicle warranty.
Do not clear the inside rear window with
sharp objects.
Heated Mirrors : If equipped with heated
outside mirrors, the mirrors heat to help
clear fog or frost from the surface of the
mirror when the rear window defog button
is pressed. See Heated Mirrors 016.
Page 177 of 359
GMC Canyon/Canyon Denali Owner Manual (GMNA-Localizing-U.S./Canada-
14430430) - 2021 - CRC - 9/9/20
176 Driving and Operating
.When driving down a hill, keep the
vehicle headed straight down. Use a low
gear because the engine will work with
the brakes to slow the vehicle and help
keep the vehicle under control.
{Warning
Heavy braking when going down a hill
can cause your brakes to overheat and
fade. This could cause loss of control and
you or others could be injured or killed.
Apply the brakes lightly when descending
a hill and use a low gear to keep vehicle
speed under control.
If the vehicle stalls on a hill: 1. Apply the brakes to stop the vehicle, and then apply the parking brake.
2. Shift into P (Park) and then restart the engine.
.If driving uphill when the vehicle
stalls, shift to R (Reverse), release the
parking brake, and back
straight down.
.Never try to turn the vehicle around.
If the hill is steep enough to stall the
vehicle, it is steep enough to cause it
to roll over.
.If you cannot make it up the hill,
back straight down the hill.
.Never back down a hill in N (Neutral)
using only the brake. The vehicle can
roll backward quickly and you could
lose control.
.If driving downhill when the vehicle
stalls, shift to a lower gear, release
the parking brake, and drive straight
down the hill.
3. If the vehicle cannot be restarted after stalling, set the parking brake, shift into
P (Park), and turn the vehicle off.
3.1. Leave the vehicle and seek help.
3.2. Stay clear of the path the vehicle would take if it rolled downhill.
.Avoid turns that take the vehicle across
the incline of the hill. A hill that can be
driven straight up or down might be too
steep to drive across. Driving across an
incline puts more weight on the downhill
wheels, which could cause a downhill
slide or a rollover.
.Surface conditions can be a problem.
Loose gravel, muddy spots, or even wet
grass can cause the tires to slip sideways,
downhill. If the vehicle slips sideways, it
can hit something that will trip it —a
rock, a rut, etc. —and roll over.
.Hidden obstacles can make the steepness
of the incline more severe. If a rock is
driven across with the uphill wheels, or if
the downhill wheels drop into a rut or
depression, the vehicle can tilt even more.
.If an incline must be driven across, and
the vehicle starts to slide, turn downhill.
This should help straighten out the
vehicle and prevent the side slipping.
{Warning
Getting out of the vehicle on the
downhill side when stopped across an
incline is dangerous. If the vehicle rolls
over, you could be crushed or killed.
Always get out on the uphill side of the
vehicle and stay well clear of the
rollover path.
Driving in Mud, Sand, Snow, or Ice
Use a low gear when driving in mud —the
deeper the mud, the lower the gear. Keep
the vehicle moving to avoid getting stuck.
Traction changes when driving on sand. On
loose sand, such as on beaches or sand
dunes, the tires tend to sink into the sand.
Page 178 of 359
GMC Canyon/Canyon Denali Owner Manual (GMNA-Localizing-U.S./Canada-
14430430) - 2021 - CRC - 9/9/20
Driving and Operating 177
This affects steering, accelerating, and
braking. Drive at a reduced speed and avoid
sharp turns or abrupt maneuvers.
Traction is reduced on hard packed snow
and ice and it is easy to lose control. Reduce
vehicle speed when driving on hard packed
snow and ice.
{Warning
Driving on frozen lakes, ponds, or rivers
can be dangerous. Ice conditions vary
greatly and the vehicle could fall through
the ice; you and your passengers could
drown. Drive your vehicle on safe
surfaces only.
Driving in Water
{Warning
Driving through rushing water can be
dangerous. Deep water can sweep your
vehicle downstream and you and your
passengers could drown. If it is only
shallow water, it can still wash away the
ground from under your tires. Traction
could be lost, and the vehicle could roll
over. Do not drive through rushing water.
Caution
Do not drive through standing water if it
is deep enough to cover the wheel hubs,
axles, or exhaust pipe. Deep water can
damage the axle and other vehicle parts.
If the standing water is not too deep, drive
through it slowly. At faster speeds, water
can get into the engine and cause it to stall.
Stalling can occur if the exhaust pipe is
under water. Do not turn off the ignition
when driving through water. If the exhaust
pipe is under water, the engine will not
start. When going through water, the brakes
get wet and it may take longer to stop. See
“Driving on Wet Roads” later in this section.
After Off-Road Driving
Remove any brush or debris that has
collected on the underbody or chassis,
or under the hood. These accumulations can
be a fire hazard.
After operation in mud or sand, have the
brake linings cleaned and checked. These
substances can cause glazing and uneven
braking. Check the body structure, driveline,
steering, suspension, wheels, tires, and exhaust system for damage and check the
fuel lines and cooling system for any
leakage.
More frequent maintenance service is
required. See the
Maintenance Schedule
0 310.
Driving on Wet Roads
Rain and wet roads can reduce vehicle
traction and affect your ability to stop and
accelerate. Always drive slower in these
types of driving conditions and avoid driving
through large puddles and deep-standing or
flowing water.
{Warning
Wet brakes can cause crashes. They
might not work as well in a quick stop
and could cause pulling to one side. You
could lose control of the vehicle.
After driving through a large puddle of
water or a car/vehicle wash, lightly apply
the brake pedal until the brakes work
normally.
(Continued)