bumper rear GMC CANYON 2021 Owner's Manual
[x] Cancel search | Manufacturer: GMC, Model Year: 2021, Model line: CANYON, Model: GMC CANYON 2021Pages: 359, PDF Size: 7.37 MB
Page 210 of 359
GMC Canyon/Canyon Denali Owner Manual (GMNA-Localizing-U.S./Canada-
14430430) - 2021 - CRC - 9/9/20
Driving and Operating 209
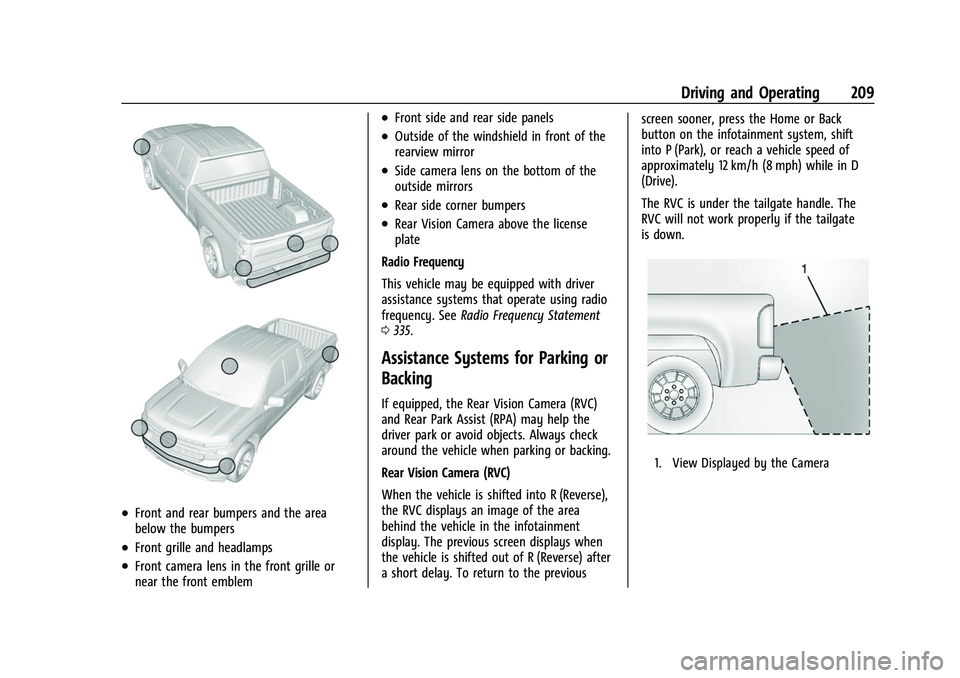
.Front and rear bumpers and the area
below the bumpers
.Front grille and headlamps
.Front camera lens in the front grille or
near the front emblem
.Front side and rear side panels
.Outside of the windshield in front of the
rearview mirror
.Side camera lens on the bottom of the
outside mirrors
.Rear side corner bumpers
.Rear Vision Camera above the license
plate
Radio Frequency
This vehicle may be equipped with driver
assistance systems that operate using radio
frequency. See Radio Frequency Statement
0 335.
Assistance Systems for Parking or
Backing
If equipped, the Rear Vision Camera (RVC)
and Rear Park Assist (RPA) may help the
driver park or avoid objects. Always check
around the vehicle when parking or backing.
Rear Vision Camera (RVC)
When the vehicle is shifted into R (Reverse),
the RVC displays an image of the area
behind the vehicle in the infotainment
display. The previous screen displays when
the vehicle is shifted out of R (Reverse) after
a short delay. To return to the previous screen sooner, press the Home or Back
button on the infotainment system, shift
into P (Park), or reach a vehicle speed of
approximately 12 km/h (8 mph) while in D
(Drive).
The RVC is under the tailgate handle. The
RVC will not work properly if the tailgate
is down.
1. View Displayed by the Camera
Page 211 of 359
GMC Canyon/Canyon Denali Owner Manual (GMNA-Localizing-U.S./Canada-
14430430) - 2021 - CRC - 9/9/20
210 Driving and Operating
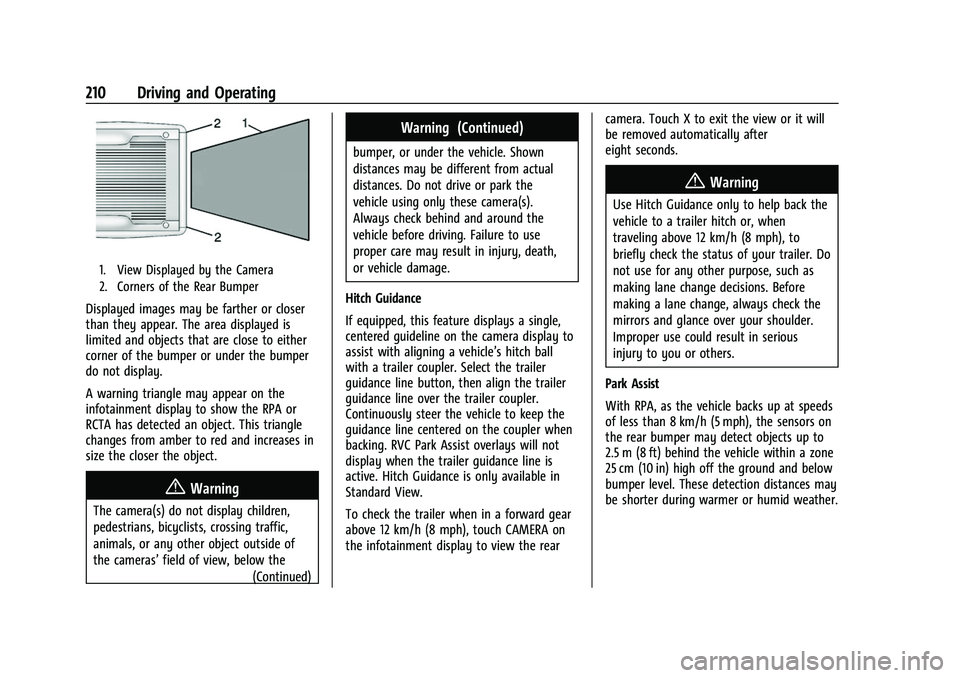
1. View Displayed by the Camera
2. Corners of the Rear Bumper
Displayed images may be farther or closer
than they appear. The area displayed is
limited and objects that are close to either
corner of the bumper or under the bumper
do not display.
A warning triangle may appear on the
infotainment display to show the RPA or
RCTA has detected an object. This triangle
changes from amber to red and increases in
size the closer the object.
{Warning
The camera(s) do not display children,
pedestrians, bicyclists, crossing traffic,
animals, or any other object outside of
the cameras’field of view, below the
(Continued)
Warning (Continued)
bumper, or under the vehicle. Shown
distances may be different from actual
distances. Do not drive or park the
vehicle using only these camera(s).
Always check behind and around the
vehicle before driving. Failure to use
proper care may result in injury, death,
or vehicle damage.
Hitch Guidance
If equipped, this feature displays a single,
centered guideline on the camera display to
assist with aligning a vehicle’s hitch ball
with a trailer coupler. Select the trailer
guidance line button, then align the trailer
guidance line over the trailer coupler.
Continuously steer the vehicle to keep the
guidance line centered on the coupler when
backing. RVC Park Assist overlays will not
display when the trailer guidance line is
active. Hitch Guidance is only available in
Standard View.
To check the trailer when in a forward gear
above 12 km/h (8 mph), touch CAMERA on
the infotainment display to view the rear camera. Touch X to exit the view or it will
be removed automatically after
eight seconds.
{Warning
Use Hitch Guidance only to help back the
vehicle to a trailer hitch or, when
traveling above 12 km/h (8 mph), to
briefly check the status of your trailer. Do
not use for any other purpose, such as
making lane change decisions. Before
making a lane change, always check the
mirrors and glance over your shoulder.
Improper use could result in serious
injury to you or others.
Park Assist
With RPA, as the vehicle backs up at speeds
of less than 8 km/h (5 mph), the sensors on
the rear bumper may detect objects up to
2.5 m (8 ft) behind the vehicle within a zone
25 cm (10 in) high off the ground and below
bumper level. These detection distances may
be shorter during warmer or humid weather.
Page 212 of 359
GMC Canyon/Canyon Denali Owner Manual (GMNA-Localizing-U.S./Canada-
14430430) - 2021 - CRC - 9/9/20
Driving and Operating 211
Blocked sensors will not detect objects and
can also cause false detections. Keep the
sensors clean of mud, dirt, snow, ice, and
slush; and clean sensors after a car wash in
freezing temperatures.
{Warning
The Park Assist system does not detect
children, pedestrians, bicyclists, animals,
or objects below the bumper or that are
too close or too far from the vehicle. It is
not available at speeds greater than
8 km/h (5 mph). To prevent injury, death,
or vehicle damage, even with Park Assist,
always check the area around the vehicle
and check all mirrors before backing.
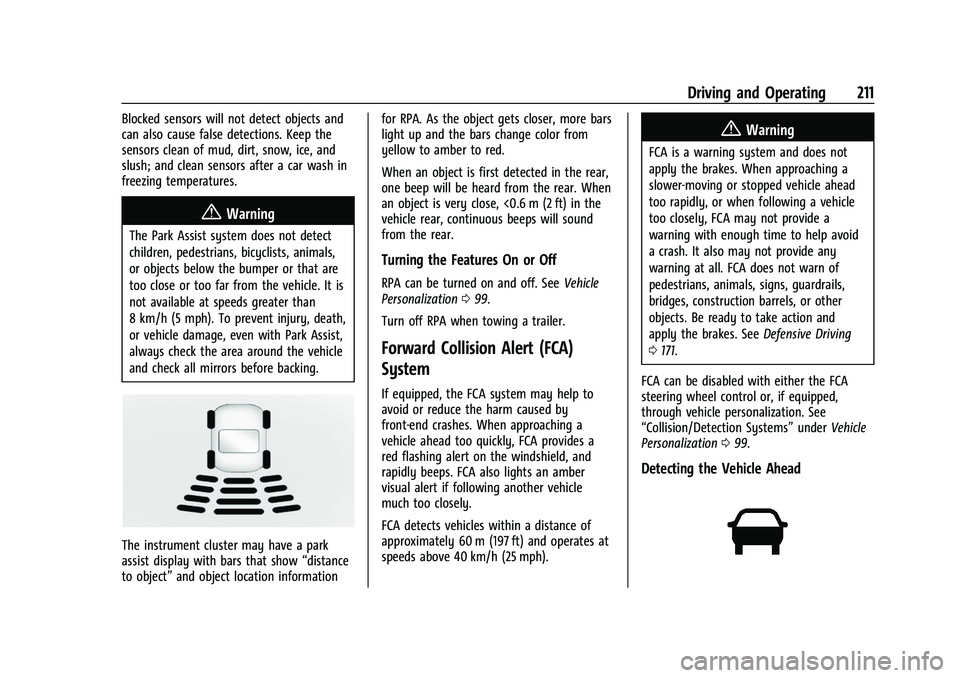
The instrument cluster may have a park
assist display with bars that show“distance
to object” and object location information for RPA. As the object gets closer, more bars
light up and the bars change color from
yellow to amber to red.
When an object is first detected in the rear,
one beep will be heard from the rear. When
an object is very close, <0.6 m (2 ft) in the
vehicle rear, continuous beeps will sound
from the rear.
Turning the Features On or Off
RPA can be turned on and off. See
Vehicle
Personalization 099.
Turn off RPA when towing a trailer.
Forward Collision Alert (FCA)
System
If equipped, the FCA system may help to
avoid or reduce the harm caused by
front-end crashes. When approaching a
vehicle ahead too quickly, FCA provides a
red flashing alert on the windshield, and
rapidly beeps. FCA also lights an amber
visual alert if following another vehicle
much too closely.
FCA detects vehicles within a distance of
approximately 60 m (197 ft) and operates at
speeds above 40 km/h (25 mph).
{Warning
FCA is a warning system and does not
apply the brakes. When approaching a
slower-moving or stopped vehicle ahead
too rapidly, or when following a vehicle
too closely, FCA may not provide a
warning with enough time to help avoid
a crash. It also may not provide any
warning at all. FCA does not warn of
pedestrians, animals, signs, guardrails,
bridges, construction barrels, or other
objects. Be ready to take action and
apply the brakes. See Defensive Driving
0 171.
FCA can be disabled with either the FCA
steering wheel control or, if equipped,
through vehicle personalization. See
“Collision/Detection Systems” underVehicle
Personalization 099.
Detecting the Vehicle Ahead
Page 286 of 359
GMC Canyon/Canyon Denali Owner Manual (GMNA-Localizing-U.S./Canada-
14430430) - 2021 - CRC - 9/9/20
Vehicle Care 285
3. Turn the knob on the jack (1)counterclockwise to lower the jack head
to release the jack from its holder.
4. Turn the wing nut (2) counterclockwise to remove the jack and wheel blocks.
5. Turn the wing nut (3) counterclockwise to remove the tool bag.
Use the jack handle extensions and the
wheel wrench to remove the
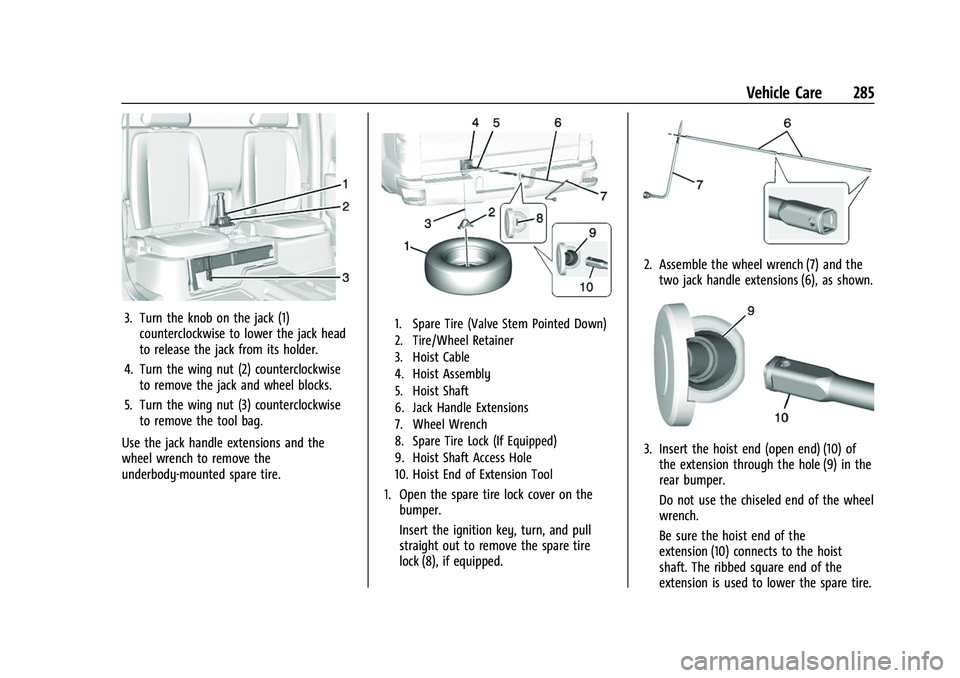
underbody-mounted spare tire.1. Spare Tire (Valve Stem Pointed Down)
2. Tire/Wheel Retainer
3. Hoist Cable
4. Hoist Assembly
5. Hoist Shaft
6. Jack Handle Extensions
7. Wheel Wrench
8. Spare Tire Lock (If Equipped)
9. Hoist Shaft Access Hole
10. Hoist End of Extension Tool
1. Open the spare tire lock cover on the bumper.
Insert the ignition key, turn, and pull
straight out to remove the spare tire
lock (8), if equipped.
2. Assemble the wheel wrench (7) and thetwo jack handle extensions (6), as shown.
3. Insert the hoist end (open end) (10) ofthe extension through the hole (9) in the
rear bumper.
Do not use the chiseled end of the wheel
wrench.
Be sure the hoist end of the
extension (10) connects to the hoist
shaft. The ribbed square end of the
extension is used to lower the spare tire.
Page 292 of 359
GMC Canyon/Canyon Denali Owner Manual (GMNA-Localizing-U.S./Canada-
14430430) - 2021 - CRC - 9/9/20
Vehicle Care 291
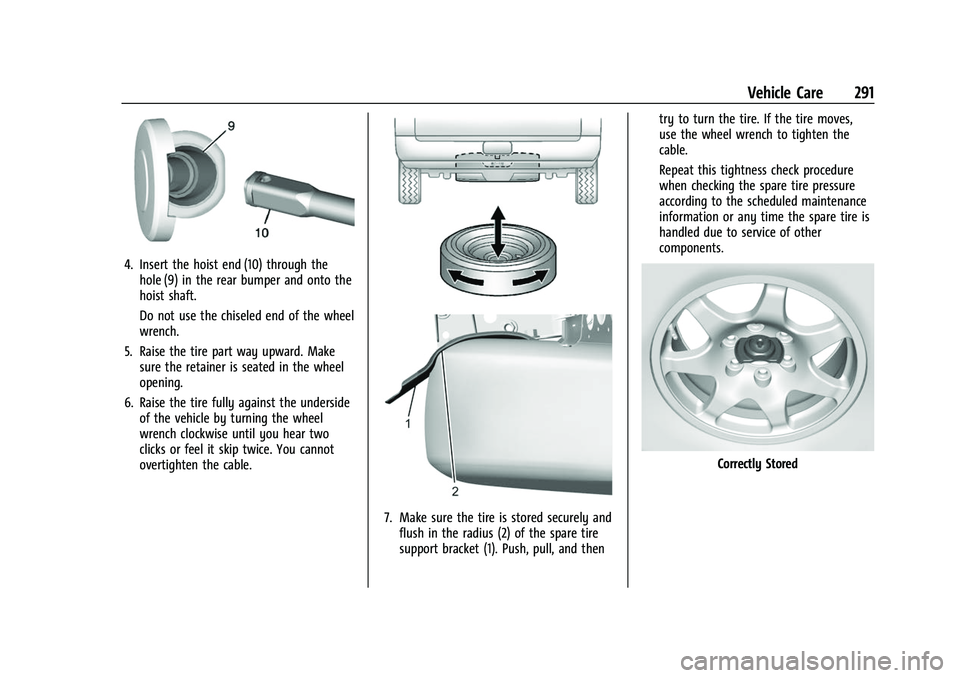
4. Insert the hoist end (10) through thehole (9) in the rear bumper and onto the
hoist shaft.
Do not use the chiseled end of the wheel
wrench.
5. Raise the tire part way upward. Make sure the retainer is seated in the wheel
opening.
6. Raise the tire fully against the underside of the vehicle by turning the wheel
wrench clockwise until you hear two
clicks or feel it skip twice. You cannot
overtighten the cable.
7. Make sure the tire is stored securely andflush in the radius (2) of the spare tire
support bracket (1). Push, pull, and then try to turn the tire. If the tire moves,
use the wheel wrench to tighten the
cable.
Repeat this tightness check procedure
when checking the spare tire pressure
according to the scheduled maintenance
information or any time the spare tire is
handled due to service of other
components.
Correctly Stored