ECU GMC ENVOY 1998 Owner's Guide
[x] Cancel search | Manufacturer: GMC, Model Year: 1998, Model line: ENVOY, Model: GMC ENVOY 1998Pages: 386, PDF Size: 20.33 MB
Page 195 of 386
You may see highway signs on mountains that warn
of special problems. Examples are long grades,
passing or no-passing zones,
a falling rocks area
or winding roads. Be alert
to these and take
appropriate action.
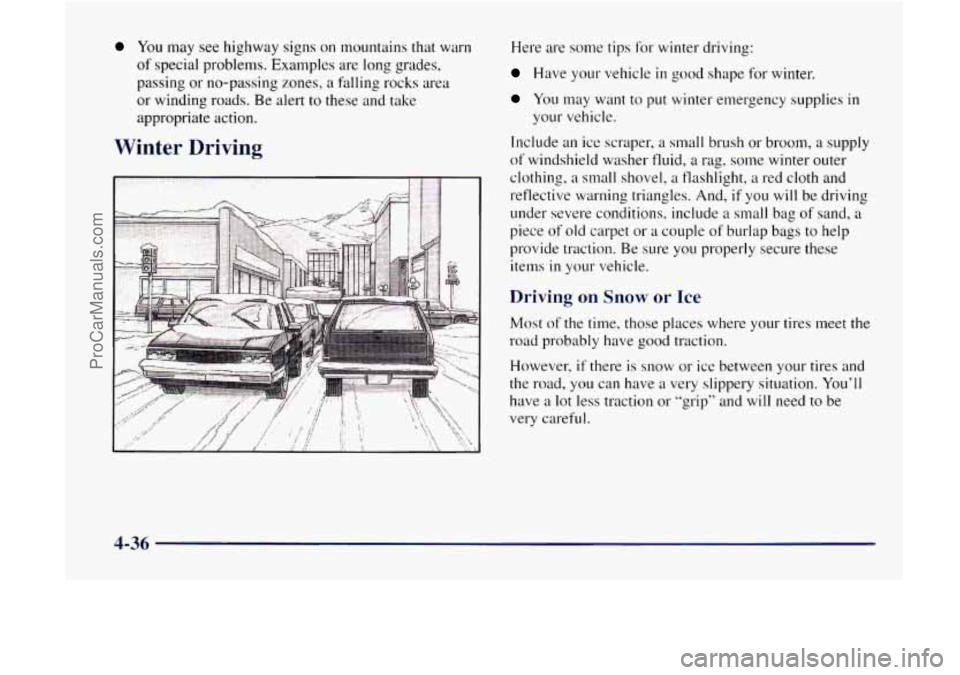
Winter Driving
Here are solne tips for winter driving:
Have your vehicle in good shape for winter.
You may want to put winter emergency supplies in
Tnclude an ice scraper, a small brush or broom, a supply
of windshield washer fluid, a rag, some winter outer
clothing,
a small shovel, a flashlight, a red cloth and
reflective warning triangles.
And, if you will be driving
under severe conditions, include a small bag
of sand, a
piece of old carpet or a couple of burlap bags to help
provide traction. Be sure
you properly secure these
your vehicle.
items
in your vehicle.
Driving on Snow or Ice
Most of the time, those places where your tires
road probably have
good traction.
However,
if there is snow or ice between your t
the road, you can have a very slippery situation meet the
ires and . You’ll
have a lot less traction or “,I-ip” and will need to be
very careful. -- -
4-36
ProCarManuals.com
Page 200 of 386
Using heavier suspension components to get added
durability might not change your weight ratings. Ask
your dealer to help you load your vehicle the right way.
-
NOTICE:
Your warranty does not cover parts or
components that fail because of overloading.
If you put things inside your vehicle -- like suitcases,
tools, packages, or anything else
-- they will go as fast
as the vehicle goes. If you have to stop or turn quickly,
or if there is a crash, they’ll keep going.
A CAUmmdN:
Things you put inside your vehicle can strike and
injure people in a sudden stop or turn, or in
a crash.
0 Put things in the cargo area of your vehicle.
0 Never stack heavier things, like suitcases,
Try to spread the weight evenly.
inside the vehicle
so that some of them are
above the tops of the seats.
0 Don’t leave an unsecured child restraint in
your vehicle.
0 When you carry something inside the
vehicle, secure
it whenever you can.
0 Don’t leave a seat folded down unless you
need to.
There’s also important loading information for off-road
driving in this manual. See “Loading Your Vehicle for
Off-Road Driving” in the Index.
4-41
ProCarManuals.com
Page 207 of 386

Driving with a Trailer
A CAUTION: I
0
0
0
If you have a rear-most window open and you
pull a trailer with your vehicle, carbon monoxide
(CO) could come into your vehicle. You can’t see
or smell
CO. It can cause unconsciousness or
death. (See ‘(Engine Exhaust” in the Index.) To
maximize your safety when towing a trailer:
Have your exhaust system inspected for
leaks, and make necessary repairs before
starting on your trip.
Keep the rear-most windows closed.
If exhaust does come into your vehicle
through a window in the rear or another
opening, drive with your front, main
heating or cooling system on and with the
fan on any speed. This will bring fresh,
outside air into your vehicle.
Do not use
RECIRCULATION because it only
recirculates the air inside your vehicle. (See
“Comfort Controls” in the Index.)
Towing a trailer requires a certain amount of experience, ~
Before setting out for the open road, you’ll want to get
to know your rig. Acquaint yourself with the feel of
handling and braking with the added weight of the
trailer. And always keep in mind that the vehicle you
arc
driving is now a good deal longer and not nearly as
responsive as your vehicle is by itself.
Before you
start, check the trailer hitch and platform
(and attachments), safety chains, electrical connector,
lamps, tires and mirror adjustment. If the trailer has
electric brakes, start your vehicle and trailer moving and
then apply the trailer brake controller by hand to be sure
the brakes are working. This lets you check your
electrical connection at the same time.
During your trip, check occasionally to
be sure that the
load is secure, and that the lamps and any trailer brakes
are still working.
Following Distance
Stay at least twice as far behind the vehicle ahead as you 1
would when driving your vehicle without a trailer. This
can help you avoid situations that require heavy braking
and sudden turns.
4-48
ProCarManuals.com
Page 211 of 386

Trailer Wiring Harness
The heavy-duty trailer wiring is an eight-wire harness
assembly. The harness is stored under the vehicle, on the
driver’s side corner frame rear crossmember. The
heavy-duty trailer wiring has a 30-amp feed wire
with
an in-line fuse located by the junct.ion block. See “Fuses
and Circuit Breakers”
in the Index. The harness does not
have a cannector and should be wired by
a qualified
electrical technician. The technician can use the
following color code chart when connecting the wiring
harness
to your trailer.
0
0
0
0
0
0
0
0
Dark Blue: Use for electric trailer brakes or
auxiliary wiring.
Red: Use for battery charging;
it connects to the
starter solenoid.
Light Green: Back-up lamps.
Brown: Taillamps and parking lamps.
Yellow: Left stoplamp and turn signal.
Dark Green: Right stoplamp
and turn signal.
White (Heavy Gage): Ground wire.
White (Light Gage): Auxiliary stoplamp.
Securely attach the harness to the trailer, then tape or
strap
it to your vehicle’s frame rail. Be sure you leave it
loose enough so the wiring doesn’t bend or break, but
not
so loose that it drags on the ground. Store the
harness
in its original place. Wrap the harness together
and tie
it neatly so it won’t be damaged.
4-52
ProCarManuals.com
Page 218 of 386
Towing Your Vehicle
Try to have a GM dealer or a proressional towing
service tow your vehicle. See "Roadside Assistance"
in
the Index.
If your vehicle has been changed since it was
factory-new by adding things like fog lamps, aero
skirting, or special tires and wheels, these instructions
may not be correct.
Before you do anything, turn
on the hazard
warning flashers.
When you call,
tell the towing service:
0 That your vehicle has four-wheel drive.
0 The make, model and year of your vehicle.
0 Whether you can rnolle the shift lever for the
transmission and shift the transfer case.
0 If there was an accident, what was damaged.
When the towing service arrives,
let the tow operator
know that this manual contains these towing
instructions. The operator may want to see them.
To help avoid injury to you or others:
0 Never let passengers ride in a vehicle that is
Never tow faster than safe or posted speeds.
Never tow with damaged parts not
Never get under your vehicle after it has
Always use separate safety chains on each
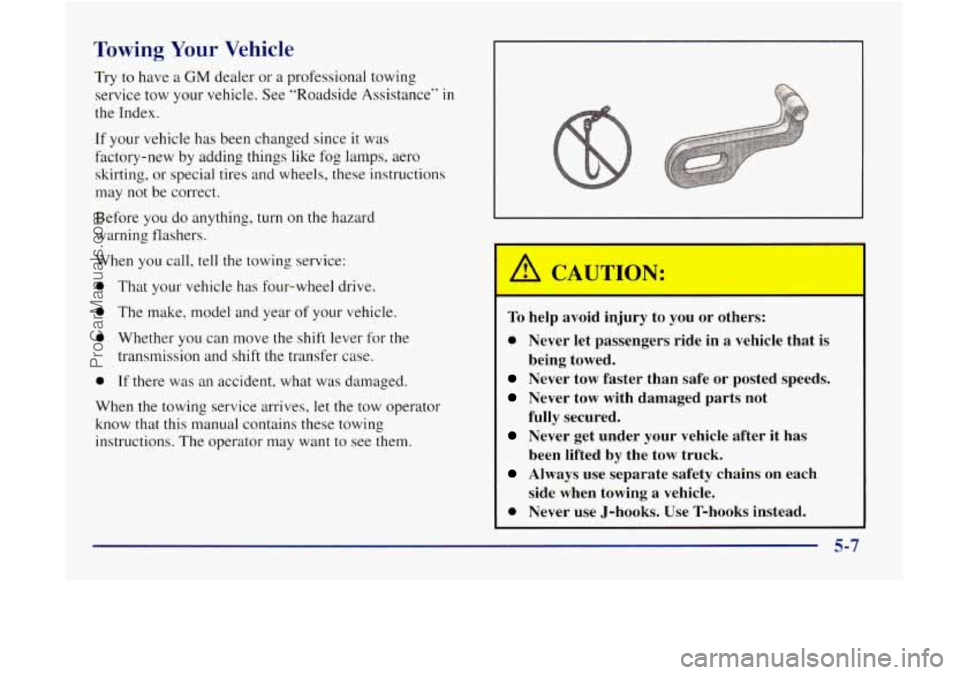
0 Never use J-hooks. Use T-hooks instead.
being
towed.
fully secured.
been lifted by the tow truck.
side when towing
a vehicle.
5-7
ProCarManuals.com
Page 219 of 386
JTION:
A vehicle can fall from a car carrier if it isn’t
adequately secured. This can cause
a collision,
serious personal injury and vehicle damage. The
vehicle should be tightly secured with chains or
steel cables before it is transported.
Don’t use substitutes (ropes, leather straps,
canvas webbing, etc.) that can be cut by sharp
edges underneath the towed vehicle. Always use
T-hooks inserted in the T-hook slots. Never use
J-hooks. They will damage drivetrain and
suspension components.
When your vehicle is being towed, have the ignition key
turned
to the OFF position. The steering wheel should
be clamped
in a straight-ahead position with a clamping
device designed for towing service.
Do not use the
vehicle’s steering column lock for this. The transmission
should be in NEUTRAL
(N) and the transfer case
should be
in 2HI. The parking brake should be released.
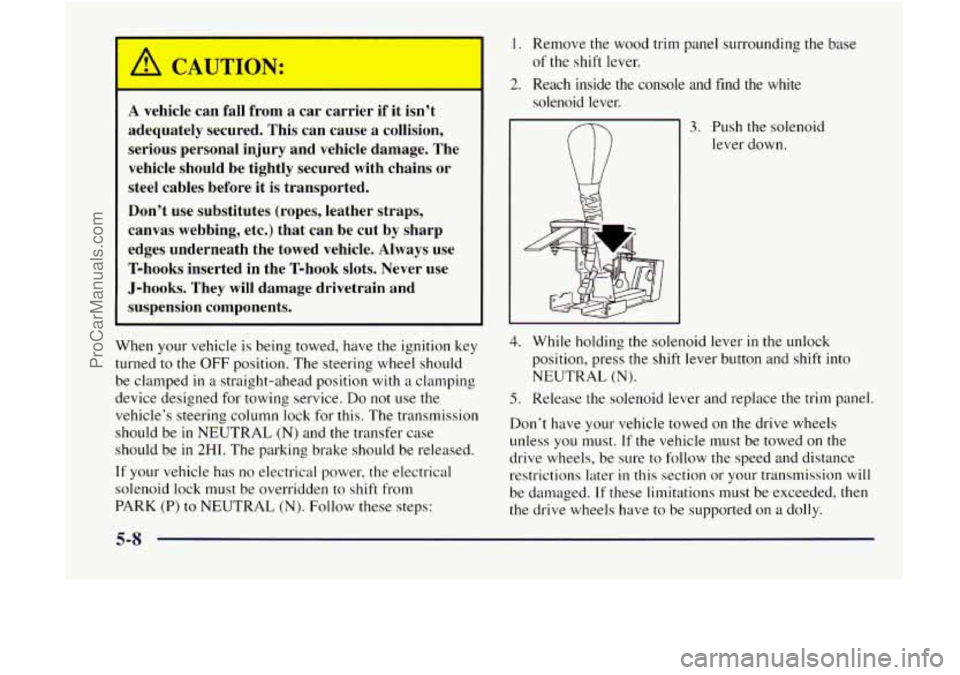
If your vehicle has no electrical power, the electrical
solenoid lock
must be overridden to shift from
PARK (P) to NEUTRAL (N). Follow these steps:
1 I Remove the wood trim panel surrounding the base
2. Reach inside the console and find the white of the shift lever.
solenoid lever.
(ii
3. Push the solenoid
lever down.
4. While holding the solenoid lever in the unlock
position, press the shift lever button and shift into
NEUTRAL
(N).
5. Release the solenoid lever and replace the trim panel.
Don’t have your vehicle towed on the drive wheels
unless
you must. If the vehicle must be towed on the
drive wheels, be sure to follow the speed and distance
restrictions later
in this section or your transmission will
be damaged. If these limitations must be exceeded, then
the drive wheels have to be supported
on a dolly.
5-8
ProCarManuals.com
Page 241 of 386
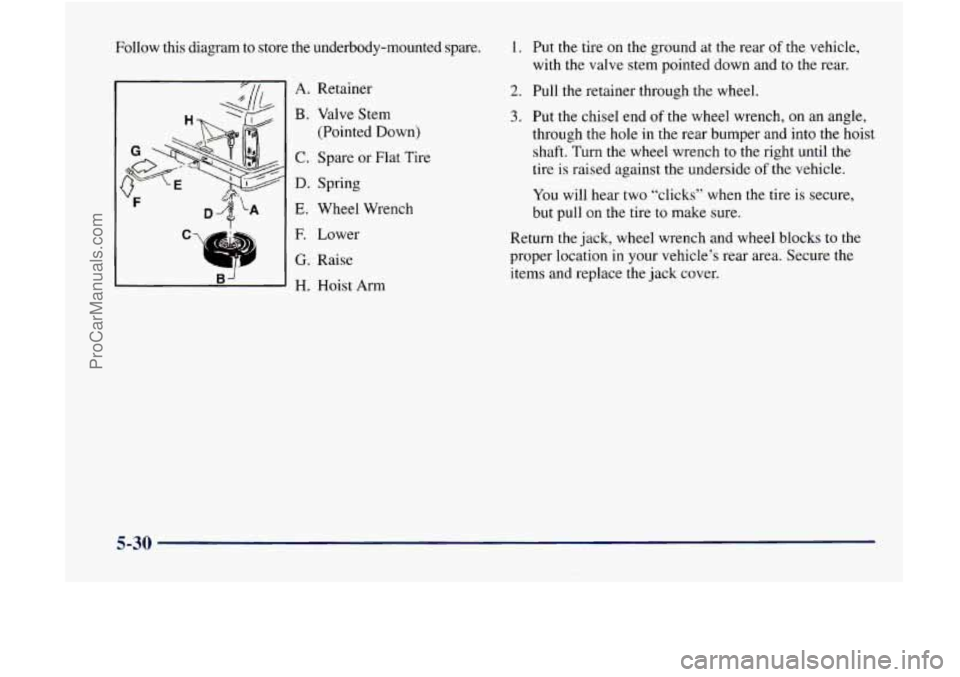
Follow this diagram to store the underbody-mounted spare.
Retainer Valve Stem
(Pointed Down)
Spare or Flat Tire
Spring
Wheel Wrench
“3 -1- b
E Lower
G. Raise
I BJ I H. Hoist Arm
1. Put the tire on the ground at the rear of the vehicle,
with the valve stem pointed down and to the rear.
2. Pull the retainer through the wheel.
3. Put the chisel end of the wheel wrench, on an angle,
through
the hole in the rear bumper and into the hoist
shaft. Turn the wheel wrench to the right until the
tire is raised against the underside
of the vehicle.
You will hear two “clicks” when the tire is secure,
but pull on
the tire to make sure.
Return the jack, wheel wrench and wheel blocks
to the
proper location
in your vehicle’s rear area. Secure the
items and replace the jack cover.
5-30
ProCarManuals.com
Page 242 of 386

L
A. Retainer
B. Rubber Band (Some Models)
C. Work Gloves
D. Ground Mat
E. Jack Storage Cover
E Wheel Blocks
G. Wheel Wrench
H. Jack
1. Jacking Instructions
-
/I CAUTION:
Make sure the tire and carrier are secure.
Driving with the tire or carrier unlatched could
injure pedestrians
or damage the vehicle.
5-31
ProCarManuals.com
Page 261 of 386

Remote Oil Filter
The access door for the remote oil filter is in the steering
linkage shield assembly located under the radiator
support. Twist the screw to unlock or lock the door.
If
you open the door, make sure it is securely closed when
you are finished.
What to Do with Used Oil
Did you know that used engine oil contains certain
elements
that may be unhealthy for your skin and could
even cause cancer? Don’t let used oil stay on your skin
for very long. Clean your skin and nails with soap and
water, or
a good hand cleaner. Wash or properly throw
away clothing or rags containing used engine oil. (See
the manufacturer’s warnings about the use and disposal
of oil products.)
Used oil can be a real threat to the environment. If you
change your own oil, be sure to drain all free-flowing oil
from the filter before disposal. Don’t ever dispose of oil
by putting
it in the trash, pouring it on the ground, into
sewers, or into streams or bodies
of water. Instead,
recycle it by taking it to
a place that collects used oil. If
you have a problem properly disposing of your used oil,
ask your dealer, a service station or a local recycling
center for help.
To remove the air cleaner, remove the wing nuts that
hold the cover on. Remove the cover and lift
out the
air filter.
Insert
a new air filter, then replace the air cleaner cover.
Tighten the wing nuts
to hold the cover in place.
6-14
ProCarManuals.com
Page 375 of 386
Brake. -Parking ................................. 2-20
Brake System Warning Light
...................... 2-65
Brakes Adjustment
.................................. 6-30
Anti-Lock
................................... 4-7
PedalTravel
................................. 6-30
Master
Cylinder
.............................. 6-27
Replacing System
Parts ........................ 6-30
Trailer
...................................... 4-47
Brake-Transmission Shift Interlock Check
........... 7-41
Braking
........................................ 4-6
Braking in Emergencies
........................... 4-9
Break-In, New Vehicle
.......................... 2- 13
Brightness Control
.............................. 2-39
Bulb Replacement ......................... 6-3 1, 6-60
Wear
....................................... 6-29
BTSICheck
................................... 7-41
Canadian Roadside Assistance
.................... 8-7
Capacities and Specifications
................. 6.60. 6.61
Carbon Monoxide
................ 2.9.2.24.4.39. 4.48
Cargo Tie Downs
............................... 2-47
Cellular Telephone
.............................. 2-57
Center Rear Passenger Position
.................... 1-34
Certificationnire Label
.......................... 4-40
Cargo
Security Shade
............................ 2-47
Chains Safety
...................................... 4-47
Tire
........................................ 6-44
Changing a Flat Tire
............................. 5-21
Charging System Light .......................... 2-63
Check Gages Light
.............................. 2-71
Checking Your Restraint Systems
.................. 1-52
Chemical Paint Spotting .......................... 6-52
Child Restraints
................................ 1-38
Center Seat Position
........................... 1-46
Different Types
............................... 1-38
Securing in a Rear Outside Seat Position ........... 1-44
Securing in the Right Front Seat Position
.......... 1-46
Where Not to
Put ............................. 1-46
Cigarette Lighter
............................... 2-49
Circuit Breakers and Fuses
....................... 6-55
Aluminum Wheels
............................ 6-51
Exterior Lamps and Lenses
..................... 6-50
Glass
....................................... 6-49
Inside
of Your Vehicle ......................... 6-46
Instrument Panel
............................. 6-48
Interior Plastic Components
..................... 6-48
Outside of Your Vehicle
........................ 6-51
Vinyl
....................................... 6-47
Weatherstrips
................................ 6-49
Windshield. Backglass and Wiper Blades
.......... 6-49
WoodPanels
................................. 6-48
TopStrap
................................... 1-43
WheretoPut
.......................,........ l-42
................................... Cleaner, Air 6-14
Cleaning
Fabric
...................................... 6-46
Leather
..................................... 6-48
Stains
...................................... 6-47
Tires
....................................... 6-51
Wheels
..................................... 6-51
9-2
.. ~ , ... . ~ .. . -.A-LL---.~~ -. ... ..,.. .... ..... -. ...... -- .
ProCarManuals.com