clock GMC ENVOY 1998 Owners Manual
[x] Cancel search | Manufacturer: GMC, Model Year: 1998, Model line: ENVOY, Model: GMC ENVOY 1998Pages: 386, PDF Size: 20.33 MB
Page 134 of 386
Section 3 Comfort Controls and Audio Systems
In this section, you’ll find out how to operate the comfort control and audio systems offered with your vehicle. Be
sure to read about the particular systems supplied with your vehicle.
3-2
3-2
3
-5
3-5
3-5
3-6
3-7
3-8
3-8
3-8
Comfort Controls Electronic Climate Control System
Air Conditioning
Heating
Ventilation System
Defogging and Defrosting
Rear Window Defogger
Audio Systems Setting the Clock
AM-FM Stereo with Cassette
Tape Player 3- 12
3- 16
3-18
3-2 1
3-23
3-23
3-24
3-26
3-26
3-26
AM-FM Stereo with Compact Disc Player
(If Equipped)
Rear Seat Audio (RSA)
Console-Mounted CD Changer
Theft-Deterrent Feature
Understanding Radio Reception
Tips About Your Audio System
Care of Your Cassette Tape Player
Care
of Your Compact Discs
Care of Your Compact Disc Player
Fixed Mast Antenna
3-1
ProCarManuals.com
Page 141 of 386

Audio Systems
Your Delco Electronics audio system has been designed
to operate easily and give years
of listening pleasure.
You will get the most enjoyment out of it if you acquaint
yourself with
it first. Find out what your Delco
Electronics system can do and how to operate all its
controls, to be sure you’re getting the most
out of the
advanced engineering that went into it.
Setting the Clock
Press and hold HR until the correct hour appears on the
display. Press and hold
MN until the correct minute
appears
on the display. To display the clock with the
ignition
off, press RECALL or HR/MN and the time
will be displayed for
a few seconds. There is an initial
two-second delay before the clock goes into the
time-set mode.
AM-FM Stereo with Cassette Tape Player
Included with the AM-FM Stereo with Cassette Tape
Player are six
Base@ high performance speakers and a six
channel Bose amplifier. Please see your dealer for details.
Playing the Radio
PWR-VOL: Press this knob to turn the system on and
off.
To increase volume, turn the knob to the right. Turn
it to the left to decrease volume. The knob is capable of
being rotated continuously.
REAR DSPL: When the primary radio is turned on,
press
this button to turn the rear seat audio display on.
Press
it again to turn the rear seat audio display off.
3-8
ProCarManuals.com
Page 170 of 386
Load Recovery
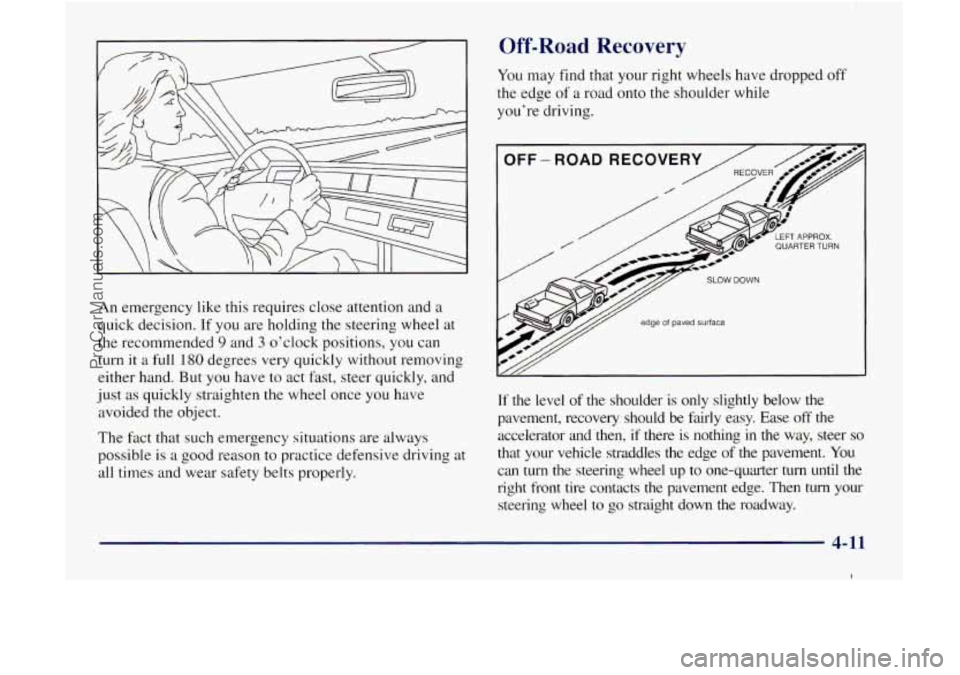
You may find that your right wheels have dropped off
the edge of a road onto the shoulder while
you're driving.
An emergency like this requires close attention and a
quick decision. If you are holding the steering wheel at
the recommended
9 and 3 o'clock positions, you can
turn it a
full 180 degrees very quickly without removing
either hand.
But you have to act fast, steer quickly, and
just as quickly straighten the wheel once you have
avoided the object.
The fac.t that such emergency situations are always
possible is
a good reason to practice defensive driving at
all times
and wear safety belts properly.
OFF - ROAD RECOVE
edge of paved surface
If the level of the shoulder is only slightly below the
pavement, recovery should be fairly easy. Ease
off the
accelerator and then, if there is nothing in the way, steer so
that your vehicle straddles the edge of the pavement. You
can turn the steering wheel up to one-quarter turn until the right front tire contacts the pavement edge. Then turn your
steering wheel to go straight down the roadway.
ProCarManuals.com
Page 180 of 386

What should I do if my vehicle stalls, or is about
to stall, and
I can’t make it up the hill?
A: If this happens, there are some things you should
0
0
0
0
do, and there are some things you must not do.
First, here’s what you
should do:
Push the brake pedal to stop the vehicle and keep
it
from rolling backwards. Also, apply the
parking brake.
If your engine is still running, shift the transmission
to REVERSE
(R), release the parking brake, and
slowly back down the
hill in REVERSE (R).
If your engine has stopped running, you’ll need to restart
it. With the brake pedal depressed and the parking brake
still applied, shift the transmission
to PARK (P) and
restart the engine. Then, shift to REVERSE
(R), release
the parking brake, and slowly back down the
hill as
straight as possible
in REVERSE (R).
As you are backing down the hill, put your left hand
on the steering wheel at
the 12 o’clock position. This
way. you’ll be able to tell
if your wheels are straight
and maneuver
as you back down. It’s best that you
back down the
hill with your wheels straight rather
than
in the left or right direction. Turning the wheel
too far to the left or right will increase the possibility
of
a rollover. Here
are some things you
must r7ot do if you stall, or are
about to stall, when going up
a hill.
0 Never attempt to prevent a stall by shifting into
NEUTRAL
(N) to “rev-up” the engine and regain
forward momentum. This won’t work. Your vehicle
will roll backwards very quickly and you could go
out of control.
Instead, apply the regular brake to stop
the vehicle.
Then apply the parking brake. Shift to REVERSE
(R), release the parking brake, and slowly back
straight down.
0 Never attempt to turn around if you are about to stall
when going up
a hill. If the hill is steep enough to
stall your vehicle, it’s steep enough to cause you to
roll over if you turn around. If you can’t make it up
the
hill, you must back straight down the hill.
Q: Suppose, after stalling, I try to back down the
hill and decide
I just can’t do it. What should
I do?
A: Set the parking brake, put your transmission in
PARK (P) and turn off the engine. Leave the
vehicle and go get some help. Exit on the uphill
side and stay clear of the path the vehicle would
take
if it rolled downhill.
4-21
I
ProCarManuals.com
Page 228 of 386
How to Add Coolant to the Radiator
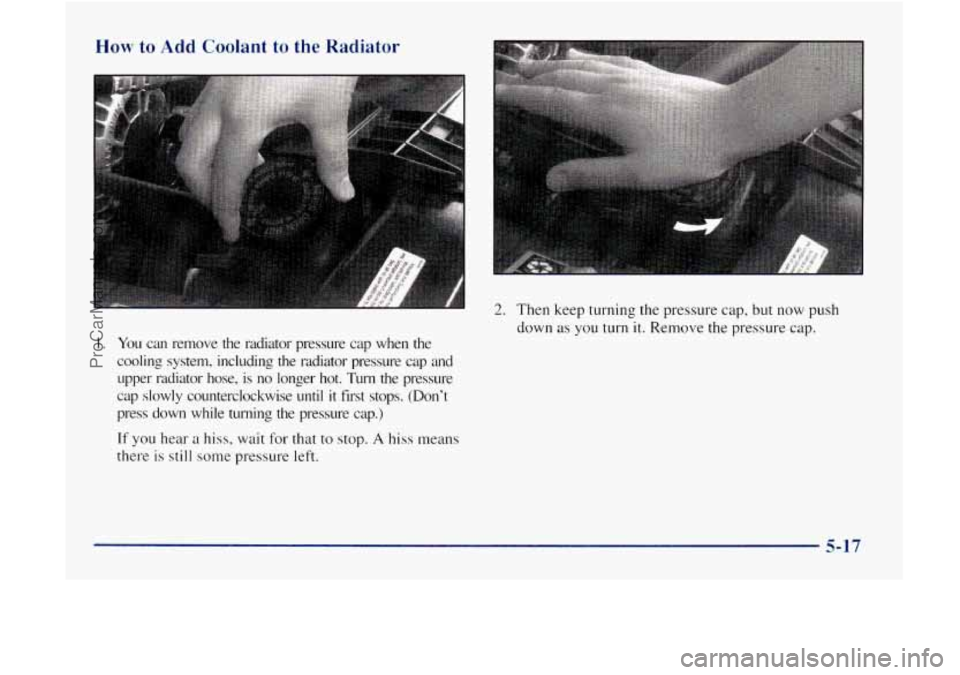
2. Then keep turning the pressure cap, but now push
down as you
turn it. Remove the pressure cap.
I. You can remove the radiator pressure cap when the
cooling
system. including the radiator pressure cap and
upper radiator hose, is no longer hot. Turn the pressure
cap slowly counterclockwise
until it first stops. (Don’t
press down while turning the pressure cap.)
If you hear a hiss, wait for that to stop. A hiss means
there is still some pressure left.
5-17
ProCarManuals.com
Page 253 of 386
- , . . .. . , .. , . . . . . . . .
Gasoline vapor is highly flammable. It burns
violently, and that can cause very bad injuries.
Don’t smoke if you’re near gasoline or refueling
your vehicle. Keep sparks, flames and smoking
materials away from gasoline.
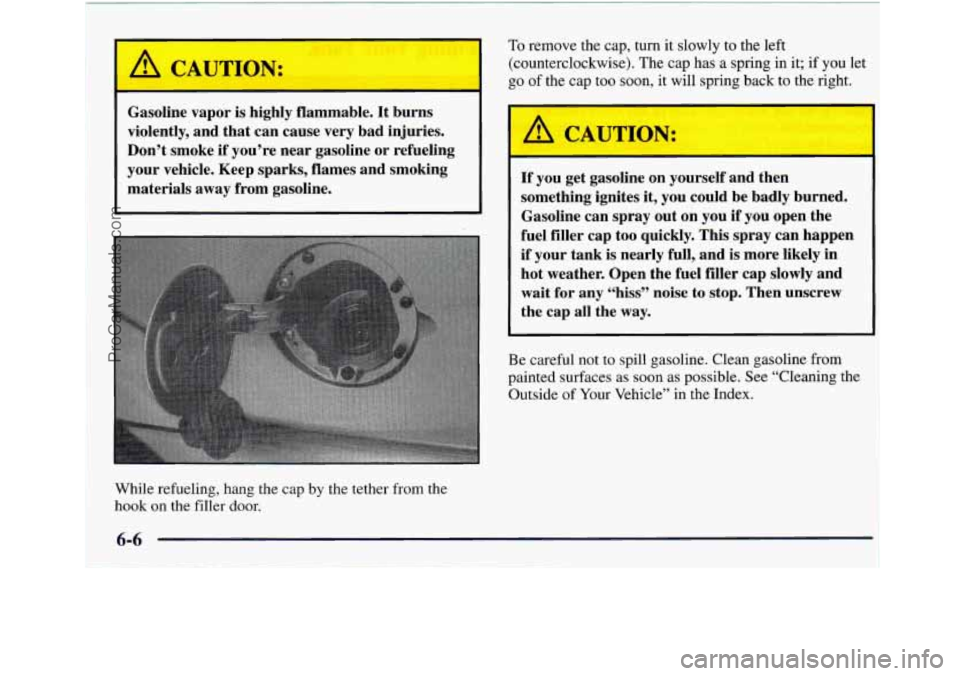
While refueling, hang the cap by the tether from the
hook on the filler door.
To remove the cap, turn it slowly to the left
(counterclockwise). The cap has a
spring in it; if you let
go of the cap too
soon, it will spring back to the right.
A CAUTION:
I
If you get gasoline on yourself and then
something ignites it, you could be badly burned.
Gasoline can spray out on you
if you open the
fuel filler cap too quickly. This spray can happen
if your tank
is nearly full, and is more likely in
hot weather. Open the fuel filler cap slowly and
wait for any “hiss” noise
to stop. Then unscrew
the cap all the way.
Be careful not to spill gasoline. Clean gasoline from
painted surfaces as soon as possible. See “Cleaning the
Outside
of Your Vehicle” in the Index.
6-6
ProCarManuals.com
Page 254 of 386
When you put the cap back on, turn it to the right
(clockwise) until you hear a clicking sound. Make
sure you fully install the cap. The diagnostic system
can determine if the fuel cap has been left off or
improperly installed. This would allow fuel to
evaporate into the atmosphere. See “Malfunction Indicator Lamp” in the Index.
NOTICE:
If you need a new cap, be sure to get the right
type. Your dealer can get one for you.
If you get
the wrong type, it may not fit properly. This may
cause your malfunction indicator lamp to light
and your fuel tank and emissions system may be
damaged. See “Malfunction Indicator Lamp” in
the Index.
Filling a Portable Fuel Container
Never fill a portable fuel container while it is in
your vehicle. Static electricity discharge from the
container can ignite the gasoline vapor. You can
be badly burned and your vehicle damaged if this
occurs.
To help avoid injury to you and others:
Dispense gasoline only into
approved containers.
Do not fill a container while it is inside a
vehicle, in a vehicle’s trunk, pickup bed or
on any surface other than the ground.
inside of the
fill opening before operating
the nozzle. Contact should be maintained
until the filling
is complete.
Bring the fill nozzle in contact with the
Don’t smoke while pumping gasoline.
6-7
ProCarManuals.com
Page 376 of 386

Climate Control System ........................... 3-2
Clock. Setting
................................... 3-8
Comfort Controls
................................ 3-2
Console Mounted CD Changer
.................... 3- 18
Content Theft-Deterrent
......................... 2- I 1
Control of a Vehicle .............................. 4-6
ConvenienceNet
............................... 2-46
Convex Outside Mirror
.......................... 2-42
Coolant
.................................. 5-14. 6.21
Coolant Heater. Engine .......................... 2- 16
Courtesy Transportation ........................... 8-8
Cruise Control
................................. 2-33
Customer Assistance Information
................... 8- 1
Customer Satisfaction Procedure .................... 8-2
Compact Disc Care
............................. 3-26
Dama. ue. Finish
............................... 6-52
Damage. Sheet Metal ............................ 6-5 1
Daytime Running Lamps ......................... 2-37
Dead Battery
................................... 5-3
Defects. Reporting Safety
........................ 8- IO
Defensive Driving ............................... 4-2
Defrosting
..................................... 3-6
Dimensions. Vehicle
............................ 6-62
Dome Lamps
.................................. 2-39
DoorLocks
..................................... 2-4
Drive
........................................ 2-19
Drive Axle Service
.............................. 7-44
Defogging
..................................... 3-6 Driver Information System
....................... 2-43
Driver Position
................................. i . 12
Driving
City
........................................ 4-31
Defensive
.................................... 4-2
Drunken ..................................... 4-3
Foreign Countries
.............................. 6-5
Freeway
.................................... 4-32
Guidelines
.................................. 4-14
Hill and Mountain Roads ....................... 4-34
In a Blizzard ................................. 4-38
Night
...................................... 4-27
Off-Road
................................... 4-15
OnCurves ...................................
4-9
Rainy Conditions ............................. 4-28
Snowy and Icy Conditions
...................... 4-36
Through Deep Standing Water
................... 4-30
WetRoads
.................................. 4-28
Winter
...................................... 4-36
With
a Trailer ................................ 4-48
Driving On Grades While Towing
a Trailer ........... 4-50
Drunken Driving
................................ 4-3
Electrical Equipment. Adding
............... 3.24. 6.54
Electrical System
............................... 6-54
Electrochomic Inside Day/Night Rearview Mirror
..... 2-40
Electronic Level Control
......................... 4-42
Engine
........................................ 6-9
Coolant Heater
............................... 2-16
Coolant Level Check
.......................... 7-39
Coolant Temperature Gage ..................... 2-66
9-3
ProCarManuals.com
Page 380 of 386

Net. Convenience .............................. 2-46 Over Things That Burn ........................ 2-24
Neutral
....................................... 2-19 Passing ..................................... 4-12
New Vehicle “Break-In”
......................... 2- 13 Passlock’ ..................................... 2-12
Nightvision
................................... 4-27 Payload ....................................... 4-42
Normal Maintenance Replacement Parts
............. 6-6 1 Periodic Maintenance Inspections .................. 7-43
Power
Odometer
.................................... 2-6 1
Off-Road Driving .............................. 4- 15
Off-Road Recovery
............................. 4- I 1
OnStar System ................................ 2-57
Ordering Owner and Service Publications
....... 8- I 1, 8- 12
Outside Mirror
Power Remote Control
......................... 2-41
Convex ..................................... 2-42
Overhead Console
.............................. 2-42
Oil. Engine
.................................... 6-10
Accessory Outlets ............................ 2-52
DoorLocks
................................... 2-5
Remote Control Mirror
........................ 2-41
Seat
......................................... 1-2
Steering
..................................... 4-9
Steering Fluid
................................ 6-25
Windows
................................... 2-28
Pregnancy. Use of Safety Belts
.................... 1 . 19
Problems on the Road
............................ 5-1
Publications. Service and Owner .............. 8- 1 1. 8. 12
Overheating Engine
............................. 5- 1 1
Owner Checks and Services ....................... 7-39 Radiator. Adding Coolant ....................... 5-17
Owner Publications
........................ 8- I 1. 8- 12 Radiator Pressure Cap ........................... 6-24
Radio Reception
................................ 3-23
Paint Spotting. Chemical 6-52
Park
......................................... 2-18
Shifting Into 2-21
Shifting Out
of 2-23
AtNight
2-11
Brake ...................................... 2-20
Brake Mechanism Check 7-42
Lots ....................................... 2-11
On Hills with a Trailer 4-50
Radios ........................ Cassette Tape Player ........................... 3-8
Cassette Tape Player Care 3.24. 7.39
CDChanger 3-18
Compact Disc Player 3-12
Compact Disc Player Care 3-26
Rear Seat Audio
.............................. 3-16
Setting the Clock 3-8
Theft-Deterrent Feature
........................ 3-21
Rain. Driving 4-28
................. ................................. ................................. ............................... .......................... Parking ...................... ....................................
.............................. .......................
.................................. ......................... RAP ......................................... 2-15
9-7
ProCarManuals.com