Driver side GMC ENVOY 2003 Owner's Guide
[x] Cancel search | Manufacturer: GMC, Model Year: 2003, Model line: ENVOY, Model: GMC ENVOY 2003Pages: 442, PDF Size: 3.1 MB
Page 106 of 442
Outside Convex Mirror
A convex mirror's surface is curved so you can see
more from the driver's seat.
{CAUTION:
A convex mirror can make things (like other
vehicles) look farther away than they really are.
If you cut too sharply into the right or left lane,
you could hit a vehicle. Check your inside
mirror or glance over your shoulder before
changing lanes.
Outside Heated Mirrors
Your vehicle may have this feature.
When you operate the rear window defogger, a defogger
also warms the heated driver's and passenger's
outside rearview mirrors to help clear them of ice, snow
and condensation.
Outside Automatic Dimming Mirror
with Curb View Assist
If your vehicle has this feature, the driver's and/or
passenger's outside mirror will adjust to a preset tilt
position while the vehicle is in REVERSE (R) gear. Curb
view assist may be useful when you are parallel
parking. The mirror(s) will return to normal position
when the vehicle is shifted out of REVERSE (R) gear.
Automatic mirror movement in either direction will follow
a short delay.
To change the tilt position, adjust the mirror while the
vehicle is in REVERSE (R) gear with the engine running,
the parking brake engaged and the brake pedal
pressed. The new position will be saved into memory
once the vehicle is shifted out of REVERSE (R).
You may be able to enable/disable this feature through
the Driver Information Center (DIC). See Mirror Curb
View Assist under
DIC Operation and Displays on
page 3-51.
2-38
Page 112 of 442

Resetting Defaults
To reset HomeLinkžto default settings do the following:
1. Hold down the two outside buttons for about
20 seconds until the indicator light begins to ¯ash.
2. Continue to hold both buttons until the HomeLink
ž
indicator light turns off.
3. Release both buttons.
For questions or comments, contact HomeLink
žat
1-800-355-3515, or on the internet at
www.homelink.com.
Storage Areas
Glove Box
To open your glove box, pull the handle on the front of
the glove box and lower the door.
Overhead Console
Your vehicle may have this
feature. The overhead
console includes
sunglasses storage, a
HomeLink
žtransmitter and
a travel note recorder (if
equipped).
If your vehicle has a third row seat, the rear quarter
glass switches are also located in the overhead console.
These switches allow the driver to open and close
each third row seat window separately.
Sunglasses Storage Compartment
To open the sunglasses storage compartment in the
overhead console, press the release button. Then pull
the compartment down.
2-44
Page 116 of 442
Luggage Carrier
{CAUTION:
If you try to carry something on top of your
vehicle that is longer or wider than the luggage
carrier Ð like paneling, plywood, a mattress
and so forth Ð the wind can catch it as you
drive along. This can cause you to lose
control. What you are carrying could be
violently torn off, and this could cause you or
other drivers to have a collision, and of course
damage your vehicle. You may be able to carry
something like this inside. But, never carry
something longer or wider than the luggage
carrier on top of your vehicle.
A luggage carrier allows you to load things on top of
your vehicle. The luggage carrier has side rails attached
to the roof, sliding crossrails (if equipped) and places
to use for tying things down. These let you load
some other things on top of your vehicle, as long as
they are not wider or longer than the luggage carrier.To slide the crossrails to where you want them, pull up
on the lever on each side of the crossrail. This will
release the crossrail and allow you to slide it. When the
crossrail is where you want it, press down on the
levers to lock it into place.Notice:Loading cargo that weighs more than
220 lbs. (100 kg) on the luggage carrier may damage
your vehicle.
Don't exceed the maximum vehicle capacity when
loading your vehicle. For more information on vehicle
capacity and loading, see
Loading Your Vehicle on
page 4-47.
To prevent damage or loss of cargo as you're driving,
check now and then to make sure the luggage carrier is
locked and cargo is still securely fastened.
When the luggage carrier is not in use, place the
crossrails at the following positions for wind noise
reduction. Place one crossrail at the rear most point of
the vehicle and the other crossrail above the opening
of the rear door.
2-48
Page 119 of 442
Sunroof
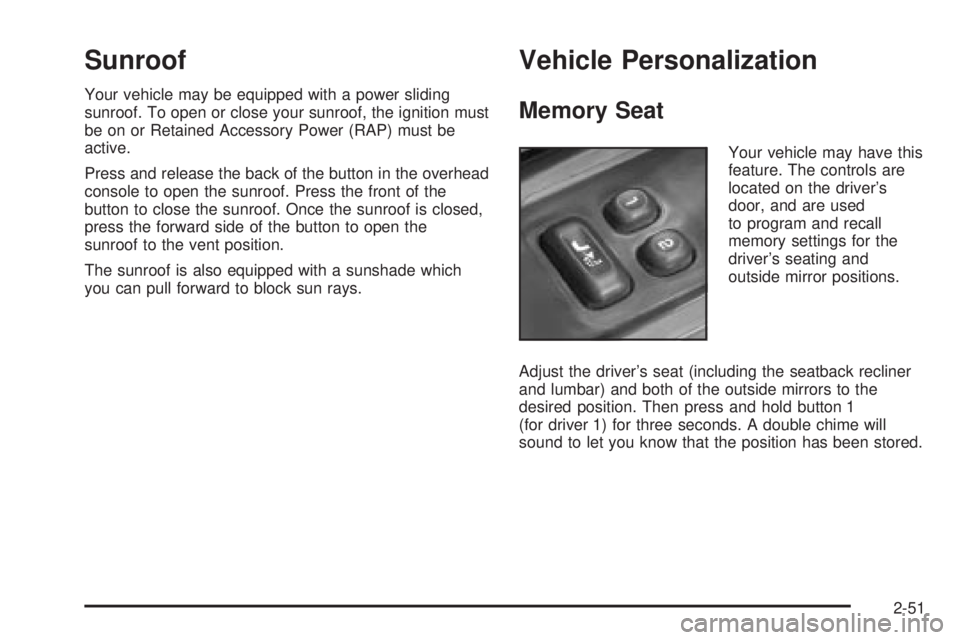
Your vehicle may be equipped with a power sliding
sunroof. To open or close your sunroof, the ignition must
be on or Retained Accessory Power (RAP) must be
active.
Press and release the back of the button in the overhead
console to open the sunroof. Press the front of the
button to close the sunroof. Once the sunroof is closed,
press the forward side of the button to open the
sunroof to the vent position.
The sunroof is also equipped with a sunshade which
you can pull forward to block sun rays.
Vehicle Personalization
Memory Seat
Your vehicle may have this
feature. The controls are
located on the driver's
door, and are used
to program and recall
memory settings for the
driver's seating and
outside mirror positions.
Adjust the driver's seat (including the seatback recliner
and lumbar) and both of the outside mirrors to the
desired position. Then press and hold button 1
(for driver 1) for three seconds. A double chime will
sound to let you know that the position has been stored.
2-51
Page 128 of 442
Turn and Lane Change Signals
The turn signal has two upward (for right) and two
downward (for left) positions. These positions allow you
to signal a turn or a lane change.
To signal a turn, move the lever all the way up or down.
When the turn is ®nished, the lever will return
automatically.
An arrow on the instrument
panel cluster will ¯ash in
the direction of the
turn or lane change.
To signal a lane change, just raise or lower the lever
until the arrow starts to ¯ash. Hold it there until you
complete your lane change. The lever will return by itself
when you release it. The bottom of the outside
rearview mirrors may also be equipped with lane change
indicators.
As you signal a turn or a lane change, if the arrows
¯ash more quickly than normal, a signal bulb may
be burned out and other drivers won't see your turn
signal.If a bulb is burned out, replace it to help avoid an
accident. If the arrows don't go on at all when you signal
a turn, check the fuse. SeeFuses and Circuit Breakers
on page 5-90and check for burned-out bulbs.
If you have a trailer towing option with added wiring for
the trailer lamps, a different turn signal ¯asher is
used. With this ¯asher installed, the signal indicator will
¯ash even if a turn signal bulb is burned out. Check
the front and rear turn signal lamps regularly to make
sure they are working.
Turn Signal On Chime
If your turn signal is left on for more than 3/4 of a mile
(1.2 km), a chime will sound at each ¯ash of the
turn signal. To turn off the chime, move the turn signal
lever to the off position.
Headlamp High/Low-Beam Changer
To change the headlamps from low to high beam, push
the lever toward the instrument panel. To return to
low-beam headlamps, pull the multifunction lever toward
you. Then release it.
3-8
Page 136 of 442
There is a delay in the transition between the daytime
and nighttime operation of the Daytime Running
Lamps (DRL) and the automatic headlamp systems, so
that driving under bridges or bright overhead street
lights does not affect the system. The DRL and
automatic headlamp system will only be affected when
the light sensor sees a change in lighting lasting
longer than the delay.
If you start your vehicle in a dark garage, the automatic
headlamp system will come on immediately. Once
you leave the garage, it will take about one minute for
the automatic headlamp system to change to DRL if it is
light outside. During that delay, your instrument panel
cluster may not be as bright as usual. Make sure
your instrument panel brightness control is in the full
bright position.
To idle your vehicle with the automatic headlamp
system off, set the parking brake while the ignition is off.
Then start your vehicle. The automatic headlamp
system will stay off until you release the parking brake,
shift out of park or turn the exterior lamp control to
the off position as described in ªExterior Lampsº listed
previously.
Lamps On Reminder
A reminder tone will sound when your headlamps or
parking lamps are manually turned on, the driver's door
is open and your ignition is in LOCK or ACCESSORY.To turn the tone off, turn the knob all the way
counterclockwise. In the automatic mode, the headlamps
turn off once the ignition key is in LOCK.
Daytime Running Lamps (DRL)
Daytime Running Lamps (DRL) can make it easier for
others to see the front of your vehicle during the
day. DRL can be helpful in many different driving
conditions, but they can be especially helpful in the short
periods after dawn and before sunset. Fully functional
daytime running lamps are required on all vehicles
®rst sold in Canada.
The DRL system will make your headlamps come on
at reduced brightness when the following conditions
are met:
·The ignition is on,
·the exterior lamps knob is in automatic headlamp
mode,
·the light sensor detects daytime light, and
·the transmission is not in PARK (P).
When the DRL are on, only your headlamps will be on.
The taillamps, sidemarker and other lamps won't be
on. The instrument panel won't be lit up either.
When it begins to get dark, the headlamps will
automatically switch from DRL to the regular headlamps.
3-16
Page 142 of 442

Temperature Control
Driver's Side:The lever on the left side of the climate
control panel is used to raise or lower the temperature
on the driver's side of the vehicle. Slide the lever
up or down to adjust the temperature.
Passenger's Side:The lever on the right side of the
climate control panel is used to raise or lower the
temperature on the passenger's side of the vehicle.
Slide the lever up or down to adjust the temperature.
This lever also adjusts the temperature to the rear seat
outlets.
When the temperature outside is 0ÉF (-18ÉC) or lower,
use the engine coolant heater, if equipped, to provide
warmer air, faster to your vehicle.
#(Air Conditioning):Press this button to turn the
air-conditioning system on or off. When the button
is pressed, an indicator light will come on and the
system will begin to cool and dehumidify the air inside
of your vehicle. You may notice a slight change in
engine performance when the air conditioning
compressor shuts off and turns on again. This is
normal.
Defogging and Defrosting
Fog on the inside of windows is a result of high humidity
(moisture) condensing on the cool window glass. This
can be minimized if the climate control system is
used properly. There are two modes to choose from to
clear fog or frost from your windshield. Use the
defog mode to clear the windows of fog or moisture and
warm the passengers. Use the defrost mode to
remove fog or frost from the windshield more quickly.
Turn the right knob clockwise or counterclockwise
to select one of the following modes:
-(Defog):This mode directs the air to the ¯oor
outlets, windshield and side window outlets. The
recirculation button cannot be selected while in defog
mode.
1(Defrost):This mode directs most of the air to the
windshield and the side window outlets, with only a
little air directed to the ¯oor outlets. The air conditioning
compressor may run to dehumidify the air to prevent
window fogging. The recirculation button cannot
be selected while in defrost mode. Do not drive the
vehicle until all the windows are clear.
3-22
Page 144 of 442

Operation Tips
·
Keep the hood and front air inlets free of ice, snow,
or any other obstruction (such as leaves). The
heater and defroster will work far better, reducing
the chance of fogging the inside of your windows.
·When you enter a vehicle in cold weather, turn the
fan knob all the way to the right for a few moments
before driving. This helps clear the intake ducts
of snow and moisture, and reduces the chance of
fogging the inside of your window.
·Keep the air path under the front seats clear of
objects. This helps air to circulate throughout
your vehicle.
·Adding outside equipment to the front of your
vehicle, such as hood-air de¯ectors, may affect the
performance of the heating and air conditioning
system. Check with your dealer before adding
equipment to the outside of your vehicle.
Dual Automatic Climate Control
System
Your vehicle may have the optional dual automatic
climate control system. With this system you can control
the heating, cooling and ventilation for your vehicle.
When your vehicle is ®rst started and the climate control
system is on, or if the climate control system has
been turned on, the display will show the driver's
temperature setting for ®ve seconds. Then it will show
the outside temperature.
9(Off):Press this button to turn off the entire climate
control system. Outside air will still enter the vehicle,
and will be directed to the ¯oor. Press the AUTO button,
the mode button, the fan arrows, or either temperature
knob to turn the system on.
3-24
Page 145 of 442
C(Mode):Press this button to manually select the air
delivery mode to the ¯oor, instrument panel, or
windshield outlets. The system will stay in the selected
mode until the mode button is pressed again or the
AUTO button is pressed.
Driver's Side Temperature Knob:Turn this knob
clockwise or counterclockwise to manually raise or lower
the temperature on the driver's side of the vehicle.
The display will show the temperature setting decreasing
or increasing and the word DRIVER will appear on
the display. This knob can also adjust the passenger's
side temperature setting simultaneously if the two
zones are linked. The words DRIVER and PASS will
then appear on the display.
Passenger's Side Temperature Knob:Turn this knob
clockwise or counterclockwise to manually raise or
lower the temperature on the passenger's side of the
vehicle. The display will show the temperature
setting decreasing or increasing and the word PASS will
appear on the display. The passenger's temperature
setting can be set to match and link to the driver's
temperature setting by pressing and holding the AUTO
button for three seconds. Now, by adjusting the
driver's side temperature setting, the passenger's side
temperature setting will follow and both DRIVER
and PASS will appear on the display. The passenger's
side temperature setting also resets and relinks to
the driver's side temperature setting if the vehicle has
been off for more than two hours.Automatic Operation
AUTO (Automatic):When automatic operation is
active, the system will control the inside temperature,
the air delivery mode, and the fan speed.
Use the steps below to place the entire system in
automatic mode:
1. Press the AUTO button.
When AUTO is selected, the air conditioning
operation and air inlet mode will be automatically
controlled. The air conditioning compressor will run
when the outside temperature is over approximately
40ÉF (4ÉC). The air inlet will normally be set to
outside air. If it's hot outside, the air inlet will
automatically switch to recirculate inside air to help
quickly cool down your vehicle.
2. Set the driver's and passenger's temperature.
To ®nd your comfort setting, start with a 72ÉF (22ÉC)
temperature setting and allow about 20 minutes
for the system to regulate. Turn the driver's or
passenger's side temperature knob to adjust the
temperature setting as necessary. If you choose the
temperature setting of 60ÉF (15ÉC), the system
will remain at the maximum cooling setting. If you
choose the temperature setting of 90ÉF (32ÉC),
the system will remain at the maximum heat setting.
Choosing either maximum setting may not cause
the vehicle to heat or cool any faster.
3-25
Page 146 of 442

Manual Operation
To change the current setting, select one of the
following:
w9x(Fan):This button allows you to manually
adjust the fan speed. Press the up arrow to increase fan
speed and the down arrow to decrease fan speed.
The display will change to show you the selected fan
speed and the driver's side temperature setting for
®ve seconds.
C(Mode):Press this button to manually change the
direction of the air¯ow in your vehicle. Keep pressing the
button until the desired mode appears on the display.
The display will change to show you the selected
air delivery mode and the driver's temperature setting
for ®ve seconds.
H(Vent):This mode directs air to the instrument
panel outlets.
)(Bi-Level):This mode directs approximately half of
the air to the instrument panel outlets, then directs
the remaining air to the ¯oor outlets. A little air is
directed toward the windshield and the side window
outlets. Cooler air is directed to the upper outlets and
warmer air to the ¯oor outlets.
6(Floor):This mode directs most of the air to the
¯oor outlets. Some air also comes out of the defroster
and side window outlets. The recirculation button cannot
be selected in ¯oor mode.
h(Recirculation):Press this button to turn
recirculation mode on or off. When this button is
pressed, an indicator light in the button will also come
on to let you know that it is activated. Recirculation
mode is used to recirculate the air inside of your vehicle.
Use this mode to help prevent outside odors and/or
dust from entering your vehicle or to help cool the air
inside of your vehicle more quickly. Recirculation
mode can be used with vent and bi-level modes, but it
cannot be used with ¯oor, defog or defrost modes.
If the weather is cold and damp, the system may cause
the windows to fog while using recirculation mode. If the
windows do start to fog, select defog or defrost mode.
#A/C (Air Conditioning):Press this button to
manually turn the air conditioning system on or off.
When the system is on, the system will automatically
begin to cool and dehumidify the air inside of your
vehicle.
If you select air conditioning off while in front defrost or
defog mode, the air conditioning off symbol will ¯ash
to let you know this option is not allowed.
3-26