headlamp GMC ENVOY 2006 User Guide
[x] Cancel search | Manufacturer: GMC, Model Year: 2006, Model line: ENVOY, Model: GMC ENVOY 2006Pages: 524, PDF Size: 3.36 MB
Page 152 of 524
If a bulb is burned out, replace it to help avoid an
accident. If the arrows don’t go on at all when you signal
a turn, check the fuse. SeeFuses and Circuit Breakers
on page 5-103and check for burned-out bulbs.
If you have a trailer towing option with added wiring for
the trailer lamps, a turn signal �asher is used. With
this �asher installed, the signal indicator will �ash even
if a turn signal bulb is burned out. Check the front
and rear turn signal lamps regularly to make sure they
are working.
Turn Signal On Chime
If your turn signal is left on for more than 3/4 of a mile
(1.2 km), a chime will sound at each �ash of the
turn signal. To turn off the chime, move the turn signal
lever to the off position.
Headlamp High/Low-Beam Changer
To change the headlamps from low to high beam,
push the lever toward the instrument panel. To return to
low-beam headlamps, pull the multifunction lever
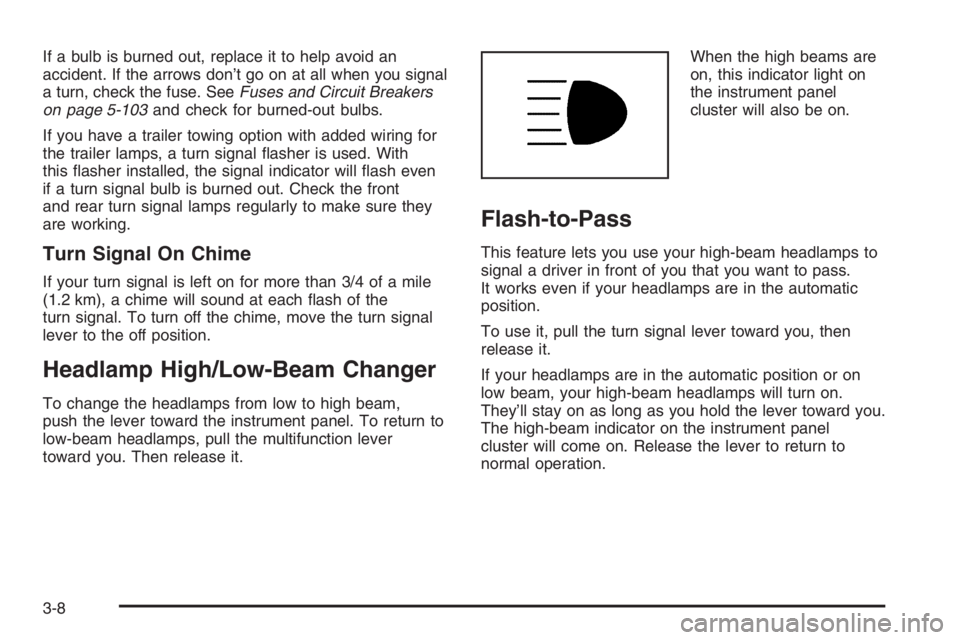
toward you. Then release it.When the high beams are
on, this indicator light on
the instrument panel
cluster will also be on.
Flash-to-Pass
This feature lets you use your high-beam headlamps to
signal a driver in front of you that you want to pass.
It works even if your headlamps are in the automatic
position.
To use it, pull the turn signal lever toward you, then
release it.
If your headlamps are in the automatic position or on
low beam, your high-beam headlamps will turn on.
They’ll stay on as long as you hold the lever toward you.
The high-beam indicator on the instrument panel
cluster will come on. Release the lever to return to
normal operation.
3-8
Page 155 of 524

Headlamp Washer
Your vehicle may be
equipped with a headlamp
washer system. The
button to operate this
feature is located on the
instrument panel and
functions separately from
your other washer
systems.
To wash your headlamps, press the headlamp washer
button brie�y and release to activate the system.
Cruise Control
Your vehicle has
cruise control. The
controls are located
on the end of the turn
signal/multifunction lever.
R(On):Move the switch to this position to turn the
cruise control system on.
S(Resume/Accelerate):Move the switch to this
position to resume a set speed or to accelerate.
T(Set):Press this button, located at the end of the
lever, to set a speed.
9(Off):This position turns the cruise control system
off and cancels memory of a set speed.
3-11
Page 158 of 524

Using Cruise Control on Hills
How well your cruise control will work on hills depends
upon your speed, load and the steepness of the
hills. When going up steep hills, you may want to step
on the accelerator pedal to maintain your speed.
When going downhill, you may have to brake or shift to
a lower gear to keep your speed down. Of course,
applying the brake takes you out of cruise control. Many
drivers �nd this to be too much trouble and don’t use
cruise control on steep hills.
Ending Cruise Control
There are three ways to turn off the cruise control:
Step lightly on the brake pedal.
Move the cruise switch to off, or
Shift the transmission to NEUTRAL (N).
Erasing Speed Memory
When you turn off the cruise control or the ignition, your
cruise control set speed memory is erased.
Headlamps
Your exterior lamps knob
is located on your
instrument panel to the left
of the steering wheel.
c(Off):Turn the knob to this symbol and release it to
turn off the Daytime Running Lamps (DRL) and the
Automatic Headlamps (AHS). An indicator will illuminate
when the position is selected. This position is not
available for vehicles �rst sold in Canada.
i(Automatic DRL/AHS):Turning the knob to this
symbol puts the system into automatic headlamp mode.
An indicator will illuminate when the position is
selected.
3-14
Page 159 of 524
;(Parking Lamps):Turn the knob to this symbol to
manually turn on the following:
Parking Lamps
Sidemarker Lamps
Taillamps
License Plate Lamps
Instrument Panel Lights
2(Headlamps):Turn the knob to this symbol to turn
on all the lamps listed as well as the headlamps.
Headlamps on Reminder
A reminder tone will sound when your headlamps or
parking lamps are manually turned on, the driver’s door
is open and your ignition is in LOCK or ACCESSORY.
To turn the tone off, turn the knob all the way
counterclockwise. In the automatic mode, the headlamps
turn off once the ignition key is in LOCK.
Daytime Running Lamps (DRL)
Daytime Running Lamps (DRL) can make it easier for
others to see the front of your vehicle during the
day. DRL can be helpful in many different driving
conditions, but they can be especially helpful in the short
periods after dawn and before sunset. Fully functional
daytime running lamps are required on all vehicles
�rst sold in Canada.
The DRL system will make your headlamps come on
at reduced brightness when the following conditions
are met:
The ignition is on.
The exterior lamps knob is in automatic headlamp
mode.
The light sensor detects daytime light.
The transmission is not in PARK (P).
When the DRL are on, only your headlamps will be on.
The taillamps, sidemarker and other lamps won’t be
on. The instrument panel won’t be lit up either.
When it begins to get dark, the headlamps will
automatically switch from DRL to the regular headlamps.
3-15
Page 160 of 524

Automatic Headlamp System
When it is dark enough outside, your Automatic
Headlamp System will turn on your headlamps at the
normal brightness along with other lamps such as
the taillamps, sidemarker, parking lamps and the
instrument panel lights. The radio lights will also be on.
Your vehicle is equipped with a light sensor on the
top of the instrument panel. Be sure it is not covered or
the system will be on whenever the ignition is on.
The system may also turn on your lights when driving
through a parking garage, heavy overcast weather
or a tunnel. This is normal.
There is a delay in the transition between the daytime
and nighttime operation of the Daytime Running
Lamps (DRL) and the automatic headlamp systems, so
that driving under bridges or bright overhead street
lights does not affect the system. The DRL and
automatic headlamp system will only be affected when
the light sensor sees a change in lighting lasting
longer than the delay.If you start your vehicle in a dark garage, the automatic
headlamp system will come on immediately. Once
you leave the garage, it will take about one minute for
the automatic headlamp system to change to DRL if it is
light outside. During that delay, your instrument panel
cluster may not be as bright as usual. Make sure
your instrument panel brightness control is in the full
bright position.
Only vehicles �rst sold in the United States can idle with
the automatic headlamp system off. To idle with the
automatic headlamp system off, set the parking brake
while the ignition is off. Then start your vehicle. The
automatic headlamp system will stay off until you release
the parking brake, shift out of park or turn the exterior
lamp control to the off position (US vehicles only)
as described previously.
3-16
Page 161 of 524

Fog Lamps
Your vehicle may have this feature. Use your fog lamps
for better vision in foggy or misty conditions. Your
ignition must be in RUN for your fog lamps to work.
The fog lamp button is
located on the instrument
panel to the right of
the exterior lamps knob.
Press the button to turn the fog lamps on. Press the
button again to turn them off. A light will glow near the
button while the fog lamps are on. Fog lamps will
turn off whenever your high-beam headlamps are on.
Some localities have laws that require the headlamps to
be on along with the fog lamps.
Instrument Panel Brightness
Press the knob located
next to the exterior lamps
knob to extend it.
Turn the knob to adjust the instrument panel lights. Turn
the knob all the way up to turn on the interior lamps.
Press the knob back into its stored position when you’re
not using it.
Dome Lamps
The dome lamps will come on when you open a door
unless the dome lamp override is pressed in.
3-17
Page 163 of 524
Battery Run-Down Protection
This feature shuts off the dome, courtesy and vanity if
they are left on for more than 20 minutes when the
ignition is off. This will keep your battery from
running down.
If the battery run-down protection shuts off the interior
lamps, it may be necessary to do one of the following to
return to normal operation:
Shut off all lamps and close all doors.
Turn the ignition key to RUN.
This feature will also turn off the parking lamps and
headlamps under most circumstances, if they are left on.
If you would like to turn them back on, turn the exterior
lamps knob.
Accessory Power Outlet(s)
Your vehicle may have accessory power outlets.
With the accessory power outlets, you can plug in
auxiliary electrical equipment such as a cellular
telephone or CB radio.
An outlet is located below the cigarette lighter and the
rear wiper switch on the instrument panel. Another outlet
is located on the rear of the center console.Remove the cover from the outlet to use the outlet. Be
sure to put the cover back on when not using the
accessory power outlet.
Certain electrical accessories may not be compatible
with the accessory power outlet and could result
in blown vehicle or adaptor fuses. If you experience a
problem, see your dealer for additional information
on the accessory power outlets.
Notice:Adding any electrical equipment to your
vehicle may damage it or keep other components
from working as they should. The repairs would not
be covered by your warranty. Do not use equipment
exceeding maximum amperage rating. Check
with your dealer before adding electrical equipment.
When adding electrical equipment, be sure to follow
the proper installation instructions included with
the equipment.
Notice:Improper use of the power outlet can cause
damage not covered by your warranty. Do not
hang any type of accessory or accessory bracket
from the plug because the power outlets are
designed for accessory power plugs only.
3-19
Page 191 of 524

Cruise Control Light
If equipped, the cruise
control light appears
whenever you set your
cruise control.
SeeCruise Control on page 3-11for more information.
Reduced Engine Power Light
This light is displayed
when a noticeable
reduction in the vehicle’s
performance may occur.
The vehicle may be driven at a reduced speed when
the reduced engine power light is on but acceleration
and speed may be reduced. The performance may
be reduced until the next time you drive your vehicle.If this light stays on, see your dealer as soon as
possible for diagnosis and repair.
This light may also come on if there is a problem with
the Electronic Throttle Control (ETC) system. If this
happens, take the vehicle in for service as soon
as possible.
Highbeam On Light
This light will come on
when the high-beam
headlamps are in use.
SeeHeadlamp High/Low-Beam Changer on page 3-8.
3-47
Page 206 of 524
Unlock Feedback
Press the customization button until UNLOCK
FEEDBACK: LAMPS appears in the display. To select
your preference for the feedback you will receive
when unlocking the vehicle with the remote keyless
entry transmitter, press the select button while UNLOCK
FEEDBACK: LAMPS is displayed on the DIC. Pressing
the select button will scroll through the following
choices:
UNLOCK FEEDBACK: LAMPS (default):The parking
lamps will �ash each time you press the button with the
unlock symbol on the remote keyless entry transmitter.
UNLOCK FEEDBACK: HORN:The horn will chirp the
second time you press the button with the unlock
symbol on the remote keyless entry transmitter.
UNLOCK FEEDBACK: BOTH:The parking lamps will
�ash each time you press the button with the unlock
symbol on the remote keyless entry transmitter and the
horn will chirp the second time you press the unlock
button.
UNLOCK FEEDBACK: OFF:There will be no feedback
when unlocking the vehicle.
Choose one of the available options and press the
customization button while it is displayed on the DIC to
select it and move on to the next feature.
Headlamp Delay
Press the customization button until HEADLAMP
DELAY: 10 SEC appears in the display. To select your
preference for how long the headlamps will stay on
when you turn off the vehicle, press the select button
while HEADLAMP DELAY: 10 SEC is displayed on
the DIC. Pressing the select button will scroll through
the following choices:
HEADLAMP DELAY: 10 SEC (default)
HEADLAMP DELAY: 20 SEC
HEADLAMP DELAY: 40 SEC
HEADLAMP DELAY: 1 MIN
HEADLAMP DELAY: 2 MIN
HEADLAMP DELAY: 3 MIN
HEADLAMP DELAY: OFF
The amount of time you choose will be the amount of
time that the headlamps stay on after you turn off
the vehicle. If you choose OFF, the headlamps will turn
off as soon as you turn off the vehicle.
Choose one of the available options and press the
customization button while it is displayed on the DIC to
select it and move on to the next feature.
3-62
Page 207 of 524
Perimeter Lights
Press the customization button until PERIMETER
LIGHTS: ON appears in the display. To select your
preference for perimeter lighting, press the select button
while PERIMETER LIGHTS: ON is displayed on the
DIC. Pressing the select button will scroll through
the following choices:
PERIMETER LIGHTS: ON (default):The headlamps
and back-up lamps will come on for 40 seconds, if
it is dark enough outside, when you unlock the vehicle
with the remote keyless entry transmitter.
PERIMETER LIGHTS: OFF:The perimeter lights will
not come on when you unlock the vehicle with the
remote keyless entry transmitter.
Choose one of the available options and press the
customization button while it is displayed on the DIC to
select it and move on to the next feature.
Easy Exit Seat
Press the customization button until EASY EXIT SEAT:
OFF appears in the display. To select your preference
for seat position exit, press the select button while EASY
EXIT SEAT: OFF is displayed on the DIC. Pressing
the select button will scroll through the following choices:
EASY EXIT SEAT: OFF (default):No seat exit recall
will occur.
EASY EXIT SEAT: ON:The driver’s seat will move to
the exit position when the key is removed from the
ignition.
Choose one of the available options and press the
customization button while it is displayed on the DIC to
select it and move on to the next feature. For more
information on seat position exit, see “Easy Exit Seat”
underMemory Seat on page 2-62.
3-63