GMC ENVOY 2006 Get To Know Guide
Manufacturer: GMC, Model Year: 2006, Model line: ENVOY, Model: GMC ENVOY 2006Pages: 20, PDF Size: 0.47 MB
Page 1 of 20
Instrument Panel . . . . . . . . . . . . . . . . . . . . . . . . . .2
Instrument Panel Cluster . . . . . . . . . . . . . . . . . . .3
Malfunction Indicator Lamp . . . . . . . . . . . . . . . . .4
Heated Front Seats . . . . . . . . . . . . . . . . . . . . . . . .4
Interior Lamps . . . . . . . . . . . . . . . . . . . . . . . . . . . .4
Manual Dual�Zone Climate Control . . . . . . . . . . .5
Automatic Dual�Zone Climate Control . . . . . . . .6
Rear Seat Climate Controls . . . . . . . . . . . . . . . . .7
Content Theft�Deterrent System . . . . . . . . . . . . .8
Lockout Protection . . . . . . . . . . . . . . . . . . . . . . . .8
Headlamp Controls . . . . . . . . . . . . . . . . . . . . . . . .8
Heated, Power Outside Mirrors . . . . . . . . . . . . . .9
Outside Mirror with Curb View Assist . . . . . . . . .9
Memory Seats . . . . . . . . . . . . . . . . . . . . . . . . . . .10
Electric Adjustable Pedals . . . . . . . . . . . . . . . . .10Entertainment Systems . . . . . . . . . . . . . . . . . . .10
Rainsense Wipers . . . . . . . . . . . . . . . . . . . . . . . .12
Headlamp Washers . . . . . . . . . . . . . . . . . . . . . . .12
Universal Home Remote . . . . . . . . . . . . . . . . . . .13
OnStar
®...... .... .... .... ..... .... .... ..14
Driver Information Center (DIC) . . . . . . . . . . . . .14
Sun Visors . . . . . . . . . . . . . . . . . . . . . . . . . . . . . .16
Electronically Controlled Air Suspension . . . . .16
Air Inflator System . . . . . . . . . . . . . . . . . . . . . . .16
Four�Wheel Drive . . . . . . . . . . . . . . . . . . . . . . . . .17
StabiliTrak
®– Stability Control System . . . . . . .17
Luggage Carrier . . . . . . . . . . . . . . . . . . . . . . . . . .18
Roadside Assistance . . . . . . . . . . . . . . . . . . . . .20
My GMLink . . . . . . . . . . . . . . . . . . . . . . . . . . . . . .20
Congratulations on your purchase of a GMC Envoy. Please read this information and your Owner Manual to
ensure an outstanding ownership experience. Note that your vehicle may not include all the features
described in this booklet. Keep this booklet with your Owner Manual for easy reference.
Page 2 of 20
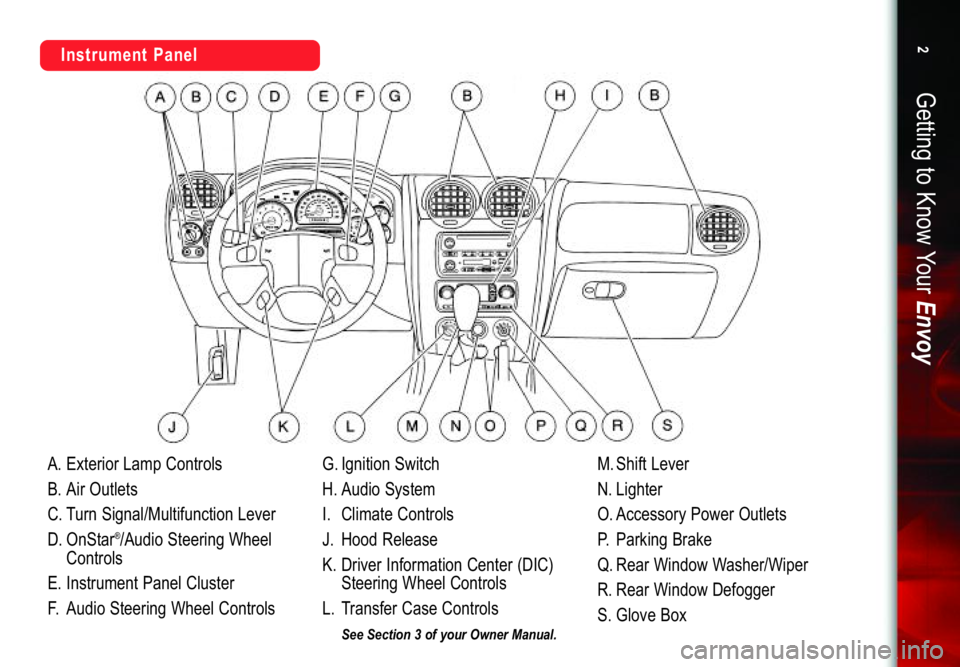
A.ExteriorLampControls
B.AirOutlets
C.TurnSignal/MultifunctionLever
D.OnStar
®/AudioSteeringWheel
Controls
E.InstrumentPanelCluster
F.AudioSteeringWheelControlsG.IgnitionSwitch
H.AudioSystem
I.ClimateControls
J.HoodRelease
K.DriverInformationCenter(DIC)
SteeringWheelControls
L.TransferCaseControlsM.ShiftLever
N.Lighter
O.AccessoryPowerOutlets
P.ParkingBrake
Q.RearWindowWasher/Wiper
R.RearWindowDefogger
S.GloveBox
Getting to Know YourEnvoy2
InstrumentPanel
SeeSection3ofyourOwnerManual.
Page 3 of 20
3
SeeSection3ofyourOwnerManual.
A
B
C
D
E
F
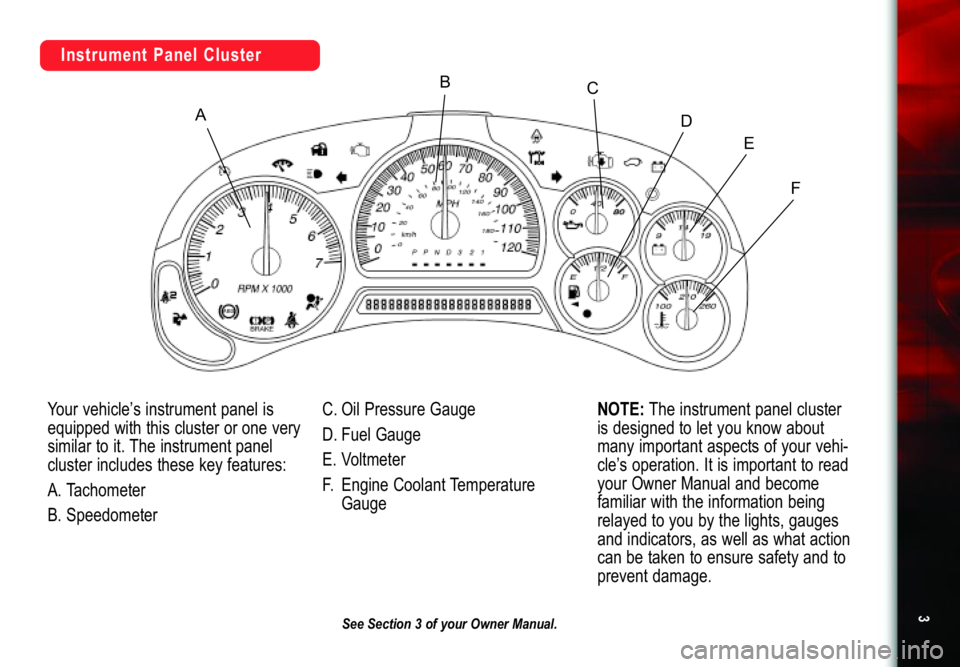
InstrumentPanelClusterYourvehicle’sinstrumentpanelis
equippedwiththisclusteroronevery
similartoit.Theinstrumentpanel
clusterincludesthesekeyfeatures:
A.Tachometer
B.SpeedometerC.OilPressureGauge
D.FuelGauge
E.Voltmeter
F.EngineCoolantTemperature
Gauge
NOTE:
Theinstrumentpanelcluster
isdesignedtoletyouknowabout
manyimportantaspectsofyourvehi�
cle’soperation.Itisimportanttoread
yourOwnerManualandbecome
familiarwiththeinformationbeing
relayedtoyoubythelights,gauges
andindicators,aswellaswhataction
canbetakentoensuresafetyandto
preventdamage.
Page 4 of 20
Getting to Know YourEnvoy4
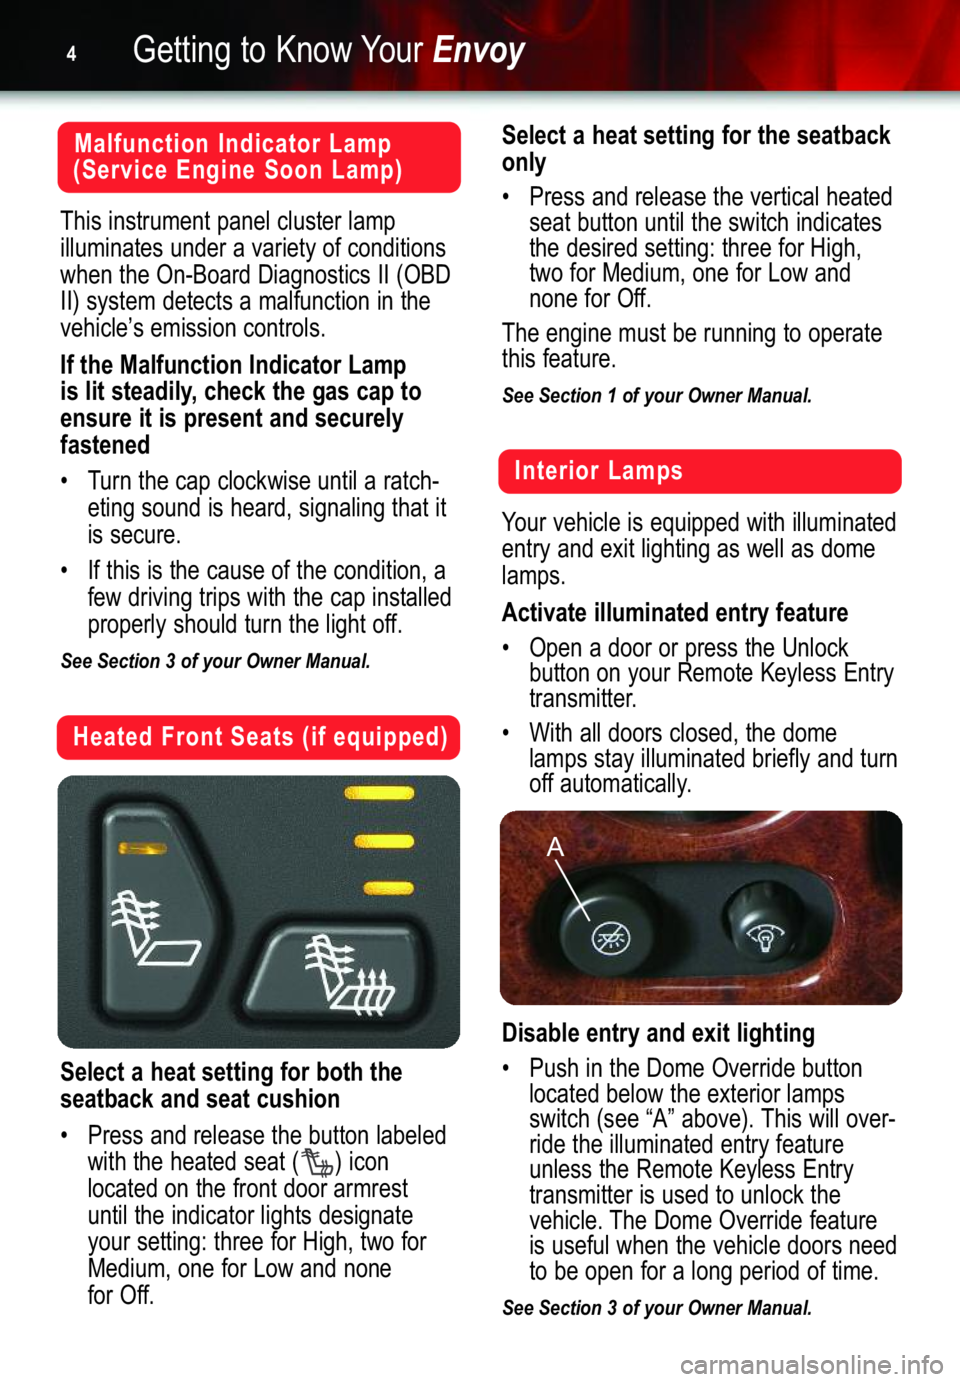
Heated Front Seats (if equipped)
Select a heat setting for both the
seatback and seat cushion
• Press and release the button labeled
with the heated seat ( ) icon
located on the front door armrest
until the indicator lights designate
your setting: three for High, two for
Medium, one for Low and none
for Off.
Select a heat setting for the seatback
only
• Press and release the vertical heated
seat button until the switch indicates
the desired setting: three for High,
two for Medium, one for Low and
none for Off.
The engine must be running to operate
this feature.
See Section 1 of your Owner Manual.
Malfunction Indicator Lamp
(Service Engine Soon Lamp)
This instrument panel cluster lamp
illuminates under a variety of conditions
when the On�Board Diagnostics II (OBD
II) system detects a malfunction in the
vehicle’s emission controls.
If the Malfunction Indicator Lamp
is lit steadily, check the gas cap to
ensure it is present and securely
fastened
• Turn the cap clockwise until a ratch�
eting sound is heard, signaling that it
is secure.
• If this is the cause of the condition, a
few driving trips with the cap installed
properly should turn the light off.
See Section 3 of your Owner Manual.
Interior Lamps
Your vehicle is equipped with illuminated
entry and exit lighting as well as dome
lamps.
Activate illuminated entry feature
• Open a door or press the Unlock
button on your Remote Keyless Entry
transmitter.
• With all doors closed, the dome
lamps stay illuminated briefly and turn
off automatically.
Disable entry and exit lighting
• Push in the Dome Override button
located below the exterior lamps
switch (see “A” above). This will over�
ride the illuminated entry feature
unless the Remote Keyless Entry
transmitter is used to unlock the
vehicle. The Dome Override feature
is useful when the vehicle doors need
to be open for a long period of time.
See Section 3 of your Owner Manual.
A
Page 5 of 20
5
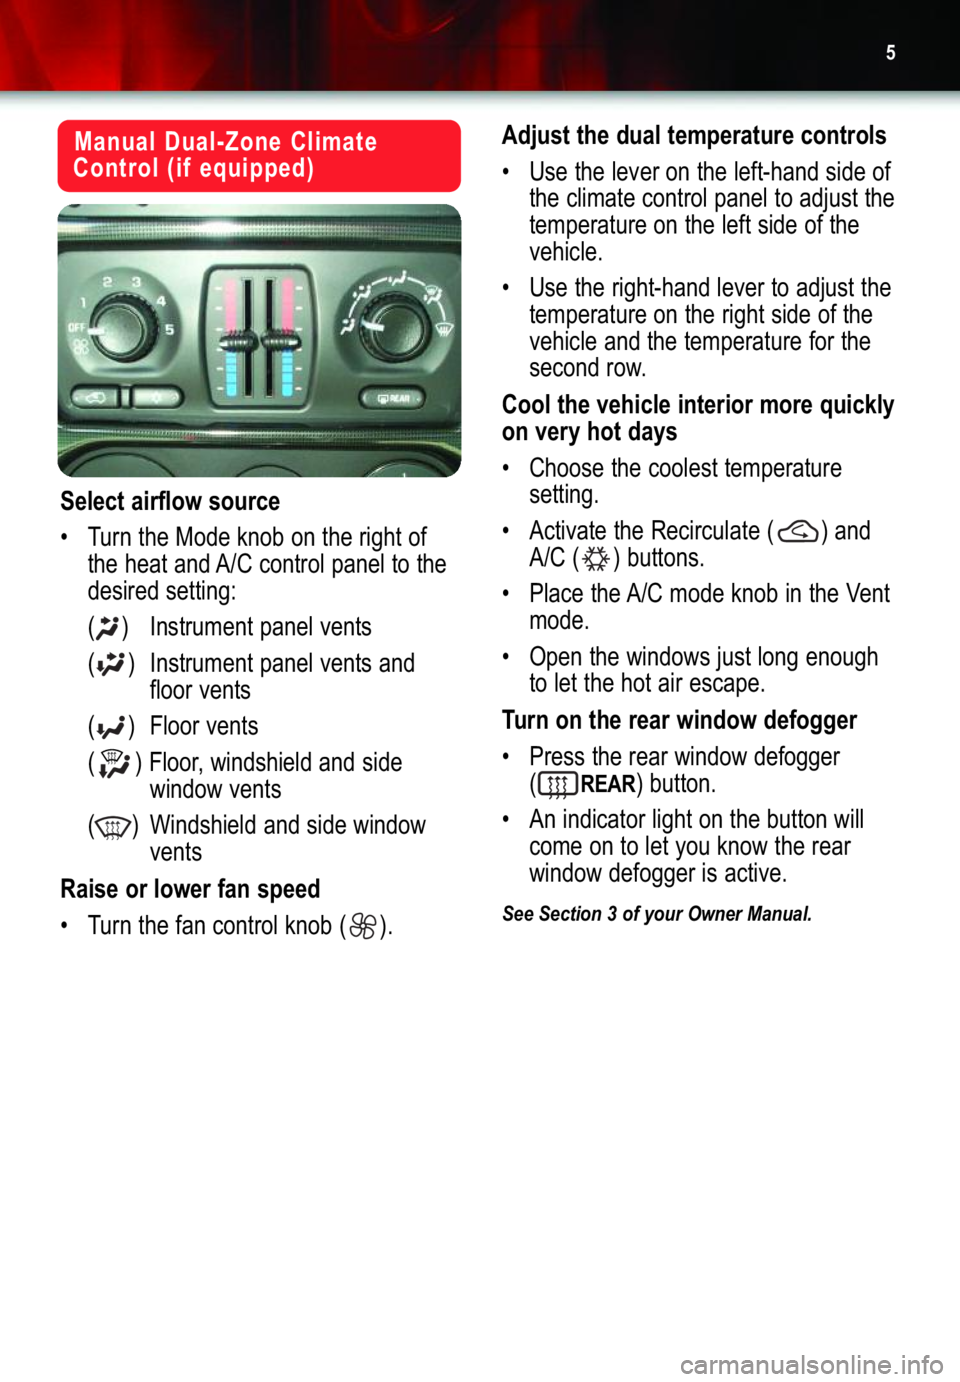
Manual Dual�Zone Climate
Control (if equipped)
Select airflow source
• Turn the Mode knob on the right of
the heat and A/C control panel to the
desired setting:
( ) Instrument panel vents()Instrument panel vents and
floor vents
() Floor vents
()Floor, windshield and side
window vents
( ) Windshield and side window
vents
Raise or lower fan speed
• Turn the fan control knob ( ).
Adjust the dual temperature controls
• Use the lever on the left�hand side of
the climate control panel to adjust the
temperature on the left side of the
vehicle.
• Use the right�hand lever to adjust the
temperature on the right side of the
vehicle and the temperature for the
second row.
Cool the vehicle interior more quickly
on very hot days
• Choose the coolest temperature
setting.
• Activate the Recirculate ( ) and
A/C ( ) buttons.
• Place the A/C mode knob in the Vent
mode.
•Open the windows just long enough
to let the hot air escape.
Turn on the rear window defogger
• Press the rear window defogger
(REAR)button.
•An indicator light on the button will
come on to let you know the rear
window defogger is active.
See Section 3 of your Owner Manual.
Page 6 of 20
Getting to Know YourEnvoy6
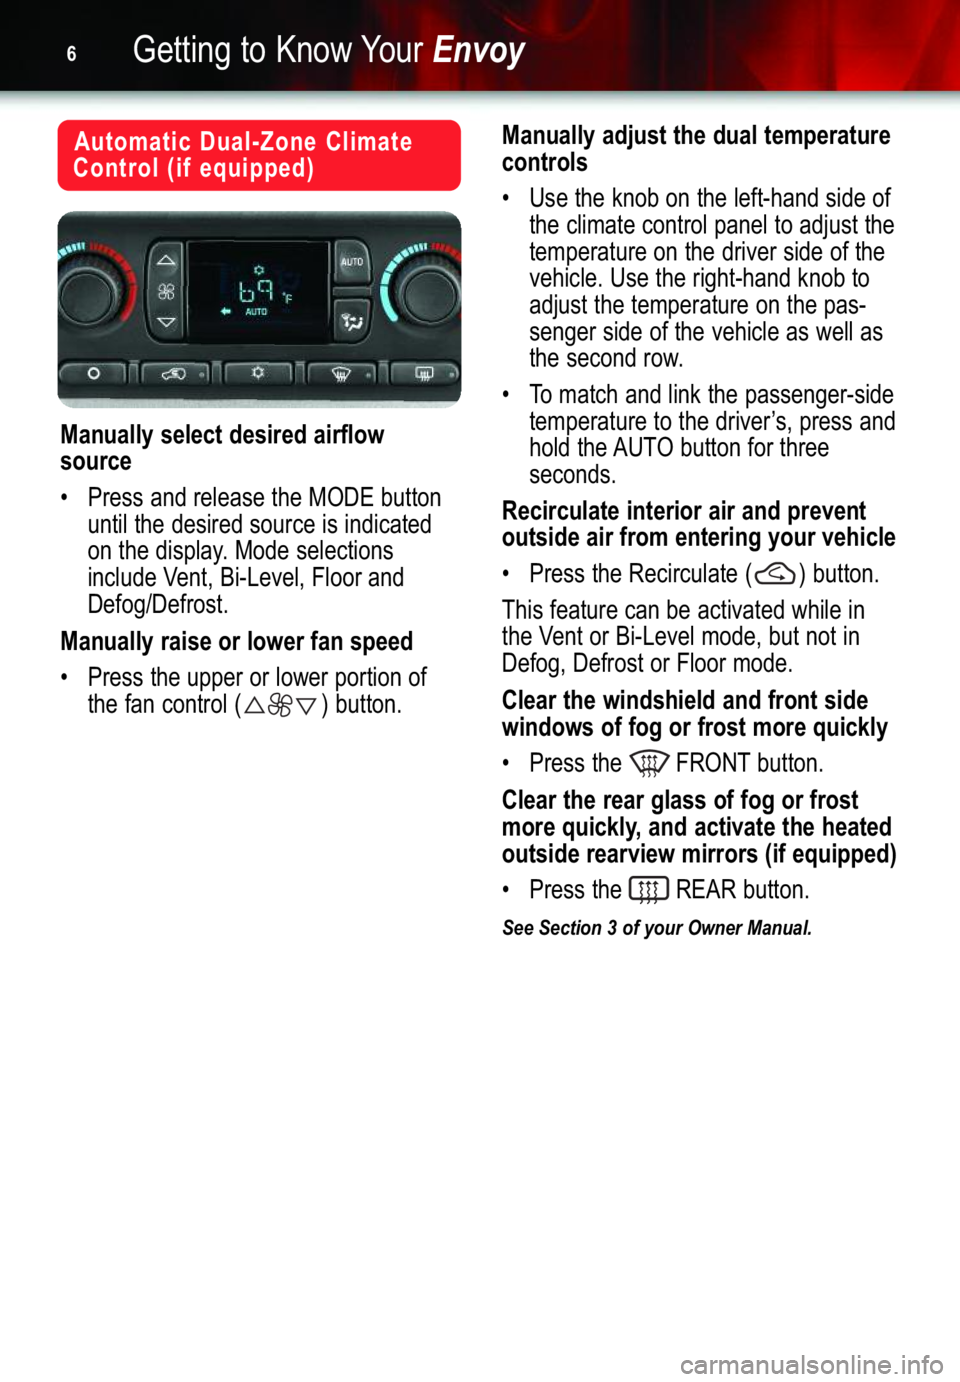
Automatic Dual�Zone Climate
Control (if equipped)
Manually select desired airflow
source
• Press and release the MODE button
until the desired source is indicated
on the display. Mode selections
include Vent, Bi�Level, Floor and
Defog/Defrost.
Manually raise or lower fan speed
• Press the upper or lower portion of
the fan control ( ) button.
Manually adjust the dual temperature
controls
• Use the knob on the left�hand side of
the climate control panel to adjust the
temperature on the driver side of the
vehicle. Use the right�hand knob to
adjust the temperature on the pas�
senger side of the vehicle as well as
the second row.
• To match and link the passenger�side
temperature to the driver’s, press and
hold the AUTO button for three
seconds.
Recirculate interior air and prevent
outside air from entering your vehicle
•Press the Recirculate ( ) button.
This feature can be activated while in
the Vent or Bi�Level mode, but not in
Defog, Defrost or Floor mode.
Clear the windshield and front side
windows of fog or frost more quickly
• Press the FRONT button.
Clear the rear glass of fog or frost
more quickly, and activate the heated
outside rearview mirrors (if equipped)
• Press the REAR button.
See Section 3 of your Owner Manual.
Page 7 of 20
7
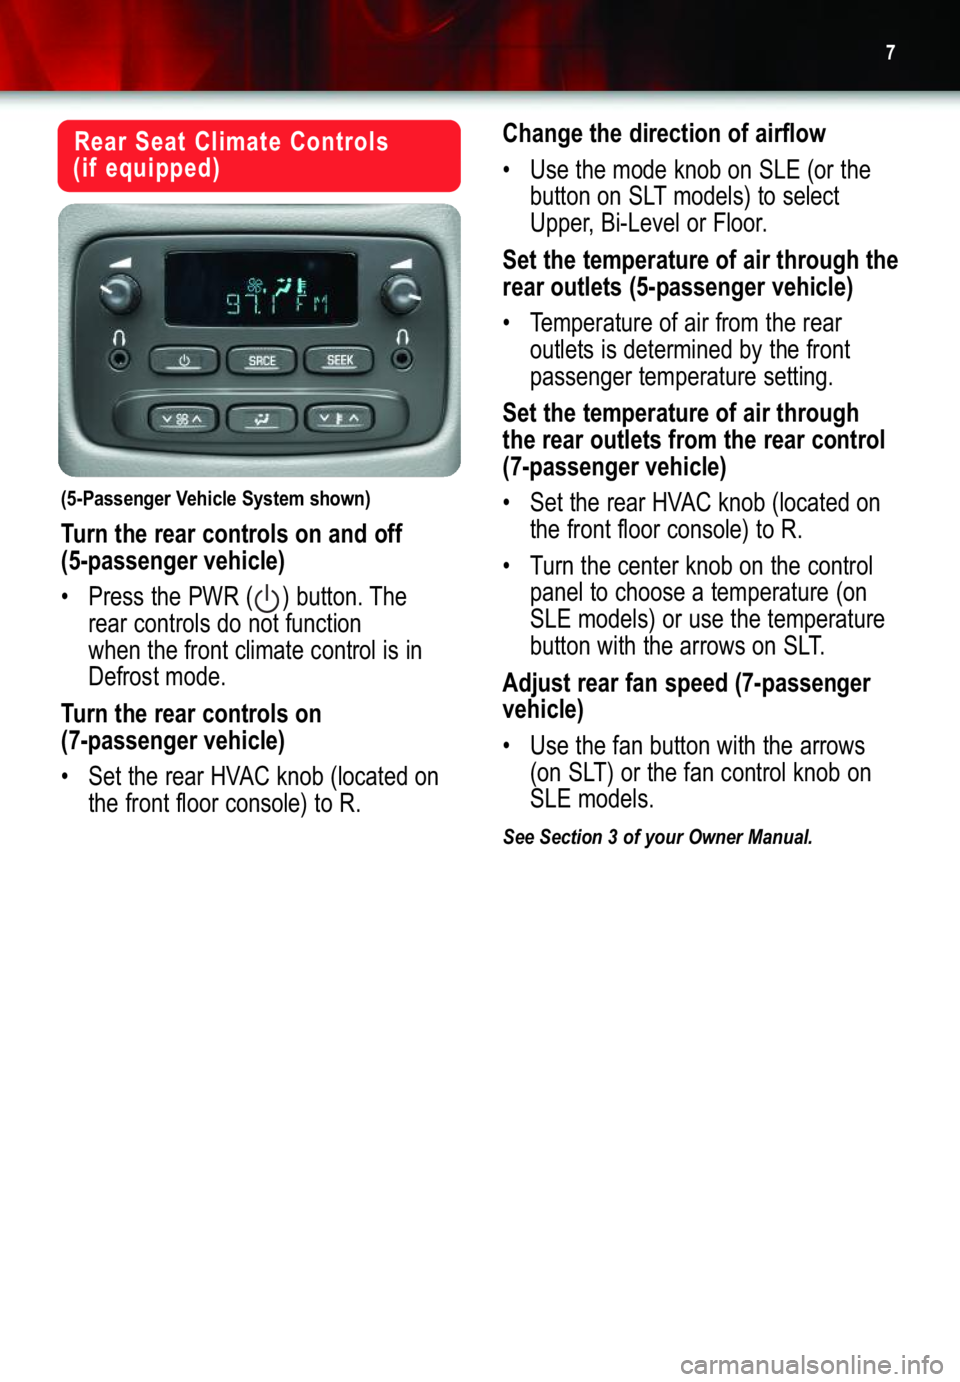
Rear Seat Climate Controls
(if equipped)
(5�Passenger Vehicle System shown)
Turn the rear controls on and off
(5�passenger vehicle)
•Press the PWR ( ) button. The
rear controls do not function
when the front climate control is in
Defrost mode.
Turn the rear controls on
(7�passenger vehicle)
•Set the rear HVAC knob (located on
the front floor console) to R.
Change the direction of airflow
• Use the mode knob on SLE (or the
button on SLT models) to select
Upper, Bi�Level or Floor.
Set the temperature of air through the
rear outlets (5�passenger vehicle)
• Temperature of air from the rear
outlets is determined by the front
passenger temperature setting.
Set the temperature of air through
the rear outlets from the rear control
(7�passenger vehicle)
• Set the rear HVAC knob (located on
the front floor console) to R.
•Turn the center knob on the control
panel to choose a temperature (on
SLE models) or use the temperature
button with the arrows on SLT.
Adjust rear fan speed (7�passenger
vehicle)
• Use the fan button with the arrows
(on SLT) or the fan control knob on
SLE models.
See Section 3 of your Owner Manual.
Page 8 of 20
Getting to Know YourEnvoy8
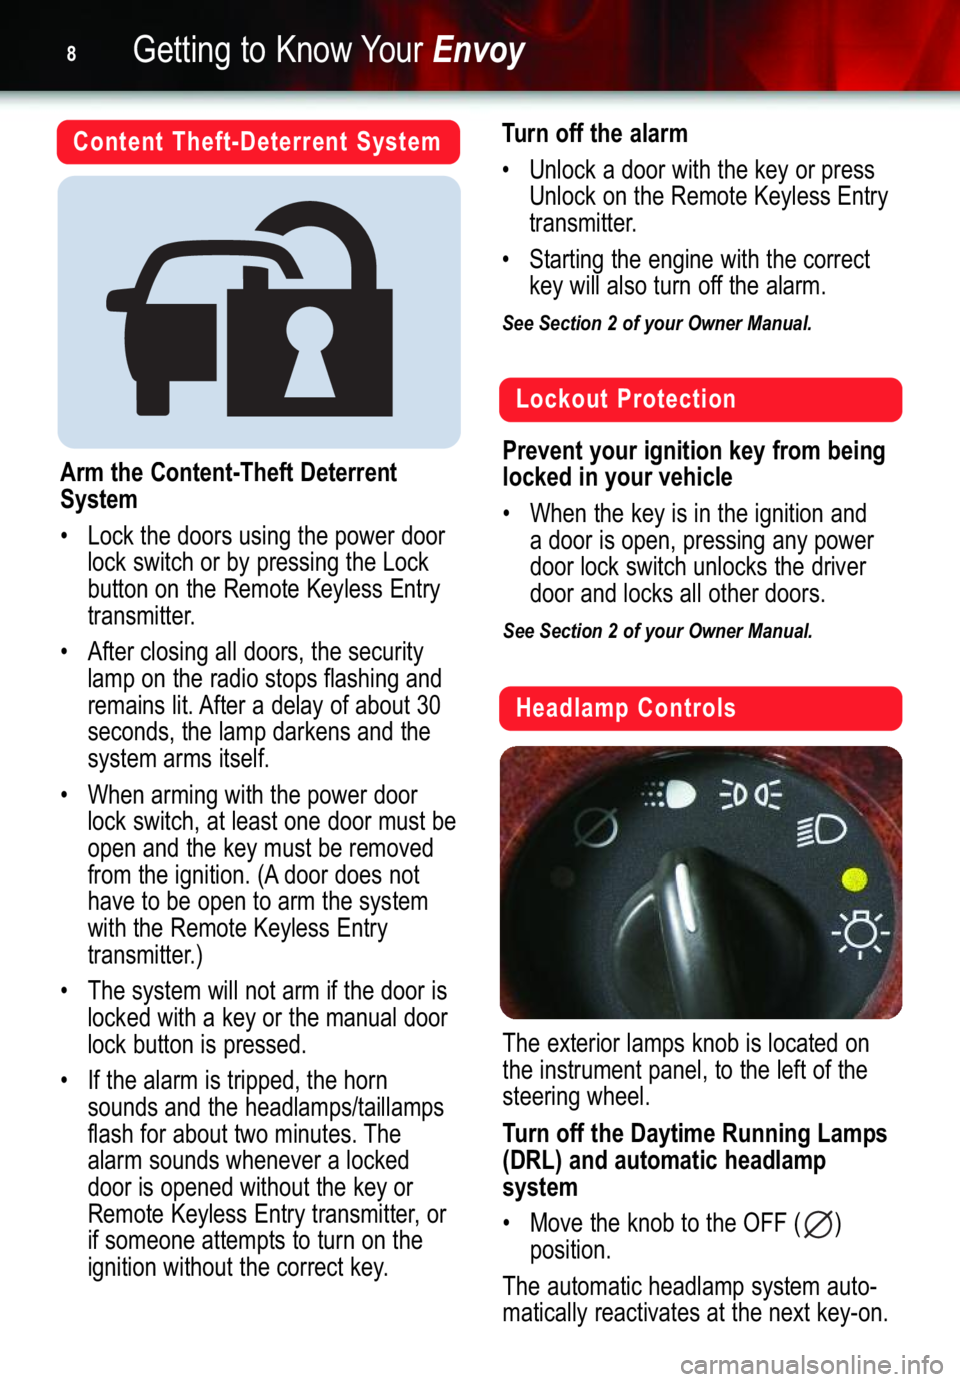
Content Theft�Deterrent System
Arm the Content�Theft Deterrent
System
• Lock the doors using the power door
lock switch or by pressing the Lock
button on the Remote Keyless Entry
transmitter.
• After closing all doors, the security
lamp on the radio stops flashing and
remains lit. After a delay of about 30
seconds, the lamp darkens and the
system arms itself.
• When arming with the power door
lock switch, at least one door must be
open and the key must be removed
from the ignition. (A door does not
have to be open to arm the system
with the Remote Keyless Entry
transmitter.)
•The system will not arm if the door is
locked with a key or the manual door
lock button is pressed.
• If the alarm is tripped, the horn
sounds and the headlamps/taillamps
flash for about two minutes. The
alarm sounds whenever a locked
door is opened without the key or
Remote Keyless Entry transmitter,or
if someone attempts to turn on the
ignition without the correct key.
Turn off the alarm
• Unlock a door with the key or press
Unlock on the Remote Keyless Entry
transmitter.
• Starting the engine with the correct
key will also turn off the alarm.
See Section 2 of your Owner Manual.
Lockout Protection
Prevent your ignition key from being
locked in your vehicle
• When the key is in the ignition and
a door is open, pressing any power
door lock switch unlocks the driver
door and locks all other doors.
See Section 2 of your Owner Manual.
Headlamp Controls
The exterior lamps knob is located on
the instrument panel, to the left of the
steering wheel.
Turn off the Daytime Running Lamps
(DRL) and automatic headlamp
system
• Move the knob to the OFF ( )
position.
The automatic headlamp system auto�
matically reactivates at the next key�on.
Page 9 of 20
9
Activate the Daytime Running Lamps
(DRL) and automatic headlamp system
• Move the knob to the AUTO ( )
position.
• All exterior lamps and the instrument
panel/radio lights will illuminate when
they are needed.
Manually activate the parking lamps,
side�marker lamps, taillamps, instru�
ment panel/radio lights and license
plate lamps
• Move the knob to the parking lamp
()position.
Manually activate the headlamps, all
exterior tail/marker lamps and the
instrument panel/radio lights
• Move the knob to the ON ( )
position.
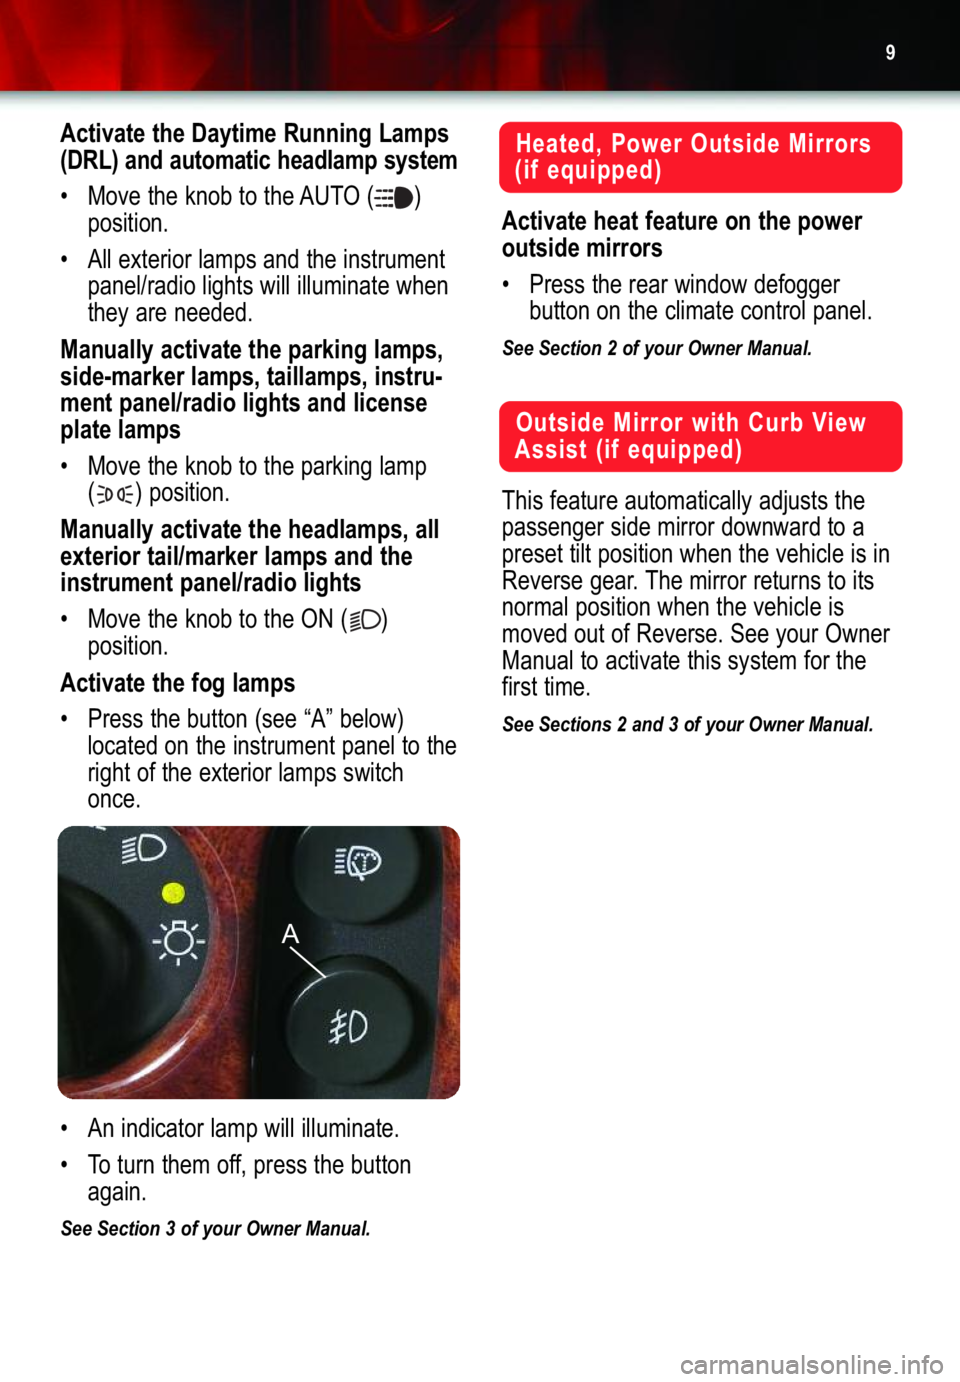
Activate the fog lamps
• Press the button (see “A” below)
located on the instrument panel to the
right of the exterior lamps switch
once.
• An indicator lamp will illuminate.
• To turn them off, press the button
again.
See Section 3 of your Owner Manual.
Heated, Power Outside Mirrors
(if equipped)
Activate heat feature on the power
outside mirrors
• Press the rear window defogger
button on the climate control panel.
See Section 2 of your Owner Manual.
Outside Mirror with Curb View
Assist (if equipped)
This feature automatically adjusts the
passenger side mirror downward to a
preset tilt position when the vehicle is in
Reverse gear. The mirror returns to its
normal position when the vehicle is
moved out of Reverse. See your Owner
Manual to activate this system for the
first time.
See Sections 2 and 3 of your Owner Manual.
A
Page 10 of 20
Getting to Know YourEnvoy10
Memory Seats (if equipped)
Save driver seat preference memory
setting
• Adjust the driver seat (including seat�
back recliner and lumbar) to a com�
fortable position.
•Press and hold either the driver 1 or
driver 2 memory button located on
the driver’sdoor. A double chime will
sound to confirm your settings.
To program settings for a second driver,
repeat the same procedure using the
other numbered memory button.
See Section 2 of your Owner Manual.
Electric Adjustable Pedals
Adjust the brake and accelerator
pedals to comfortable positions
• Press the switch located on the steer�
ing column toward you to move the
pedals closer to you.
• Press the switch away from you to
move the pedals away from you.
See Section 2 of your Owner Manual.
Entertainment Systems
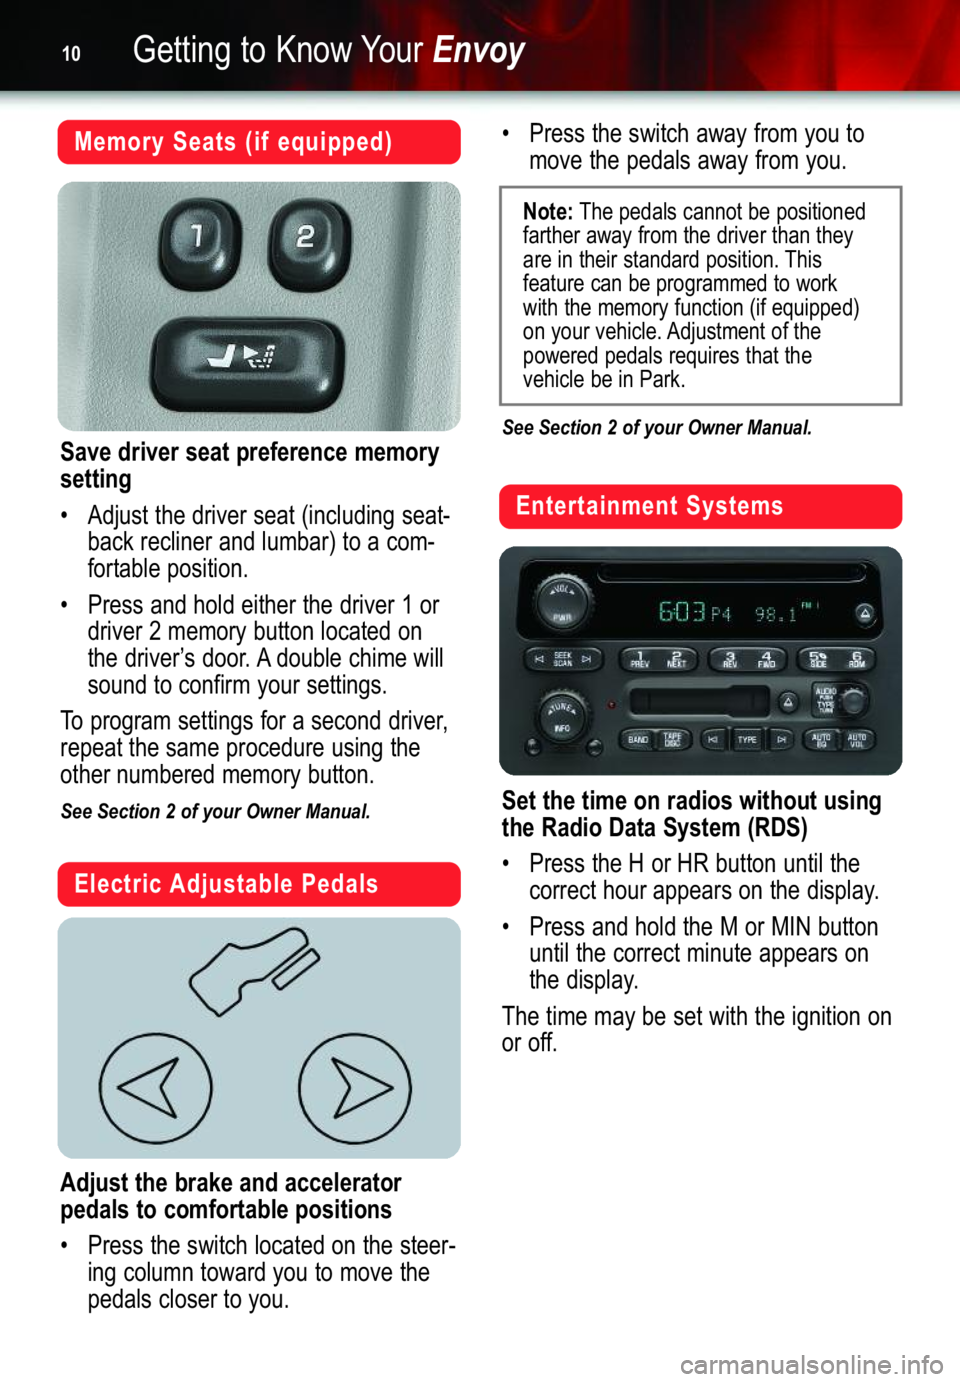
Set the time on radios without using
the Radio Data System (RDS)
• Press the H or HR button until the
correct hour appears on the display.
• Press and hold the M or MIN button
until the correct minute appears on
the display.
The time may be set with the ignition on
or off.
Note:The pedals cannot be positioned
farther away from the driver than they
are in their standard position. This
feature can be programmed to work
with the memory function (if equipped)
on your vehicle. Adjustment of the
powered pedals requires that the
vehicle be in Park.