four GMC ENVOY DENALI 2005 Workshop Manual
[x] Cancel search | Manufacturer: GMC, Model Year: 2005, Model line: ENVOY DENALI, Model: GMC ENVOY DENALI 2005Pages: 502, PDF Size: 2.66 MB
Page 328 of 502
Dolly Towing
Front Towing (Front Wheels Off
the Ground)
Two-Wheel-Drive Vehicles
Notice:If you tow a two-wheel-drive vehicle with
the rear wheels on the ground, the transmission
could be damaged. The repairs would not be
covered by your warranty. Never tow your vehicle
with the rear wheels on the ground.
Four-Wheel-Drive Vehicles
Four-wheel-drive vehicles can be dolly towed with the
rear wheels on the ground.
Use the following procedure to tow your vehicle:
1. Drive the vehicle onto the tow dolly.
2. Shift the automatic transmission to PARK (P).
3. Turn the engine off, but leave the ignition on.
4. Firmly set the parking brake.
5. Securely attach the vehicle being towed to the dolly.
{CAUTION:
Shifting a four-wheel-drive vehicle’s transfer
case into NEUTRAL can cause your vehicle to
roll even if the transmission is in PARK (P).
You or others could be injured. Make sure the
parking brake is rmly set before you shift the
transfer case to NEUTRAL.
6. Shift the transfer case to NEUTRAL (N). See
Four-Wheel Drive on page 2-26for the proper
procedure to select the NEUTRAL (N) position for
your vehicle.
7. Release the parking brake only after the vehicle
being towed is rmly attached to the towing vehicle.
8. Turn the ignition off.
After towing, see “Shifting Out of Neutral” under
Four-Wheel Drive on page 2-26.
4-54
Page 329 of 502
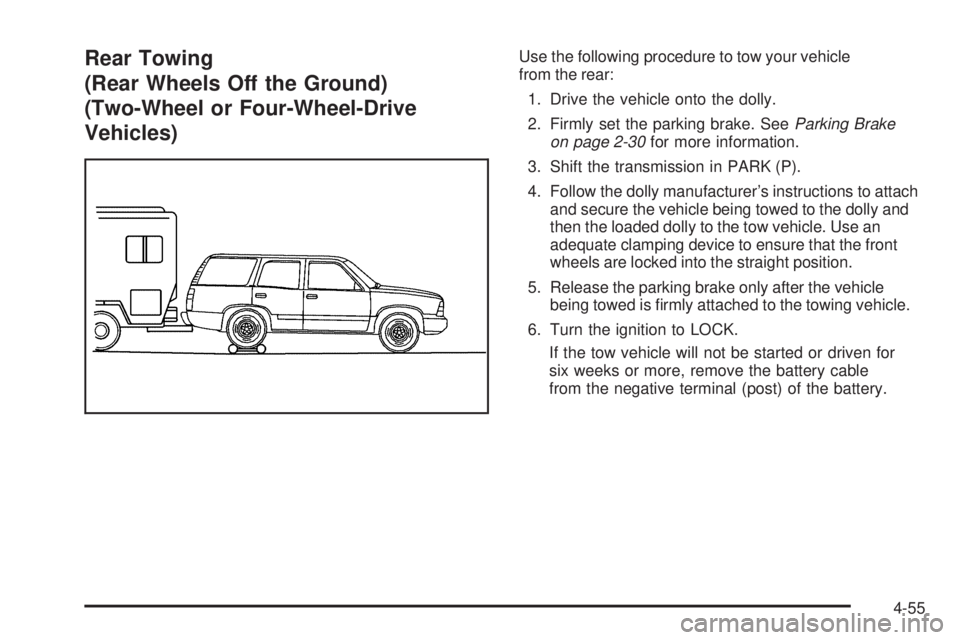
Rear Towing
(Rear Wheels Off the Ground)
(Two-Wheel or Four-Wheel-Drive
Vehicles)Use the following procedure to tow your vehicle
from the rear:
1. Drive the vehicle onto the dolly.
2. Firmly set the parking brake. SeeParking Brake
on page 2-30for more information.
3. Shift the transmission in PARK (P).
4. Follow the dolly manufacturer’s instructions to attach
and secure the vehicle being towed to the dolly and
then the loaded dolly to the tow vehicle. Use an
adequate clamping device to ensure that the front
wheels are locked into the straight position.
5. Release the parking brake only after the vehicle
being towed is rmly attached to the towing vehicle.
6. Turn the ignition to LOCK.
If the tow vehicle will not be started or driven for
six weeks or more, remove the battery cable
from the negative terminal (post) of the battery.
4-55
Page 340 of 502
Parking on Hills
{CAUTION:
You really should not park your vehicle, with a
trailer attached, on a hill. If something goes
wrong, your rig could start to move. People
can be injured, and both your vehicle and the
trailer can be damaged.
But if you ever have to park your rig on a hill, here’s
how to do it:
1. Apply your regular brakes, but don’t shift into
PARK (P) yet. When parking uphill, turn your wheels
away from the curb. When parking downhill, turn
your wheels into the curb.
2. Have someone place chocks under
the trailer wheels.
3. When the wheel chocks are in place, release the
regular brakes until the chocks absorb the load.
4. Reapply the regular brakes. Then apply your
parking brake, and then shift into PARK (P).
5. Release the regular brakes.
{CAUTION:
It can be dangerous to get out of your vehicle if
the shift lever is not fully in PARK (P) with the
parking brake rmly set. Your vehicle can roll.
If you have left the engine running, the vehicle
can move suddenly. You or others could be
injured. To be sure your vehicle will not move,
even when you are on fairly level ground, use
the steps that follow.
Always put the shift lever fully in PARK (P) with
the parking brake rmly set.
If the transfer case on four-wheel drive vehicles
is in NEUTRAL, your vehicle will be free to roll,
even if your shift lever is in PARK (P). So, be
sure the transfer case is in a drive gear — not in
NEUTRAL.
SeeFour-Wheel Drive on page 2-26.
4-66
Page 342 of 502
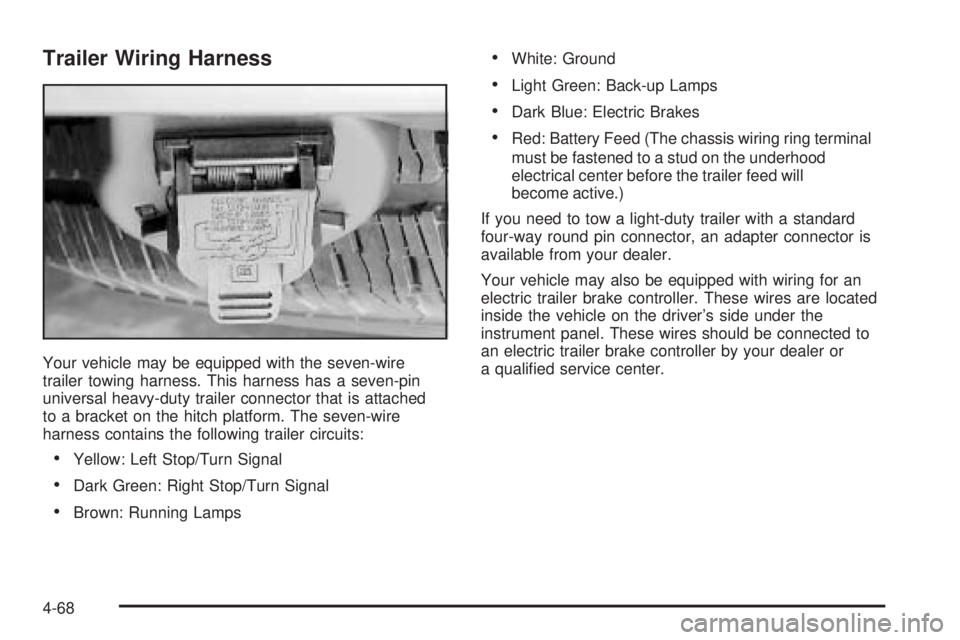
Trailer Wiring Harness
Your vehicle may be equipped with the seven-wire
trailer towing harness. This harness has a seven-pin
universal heavy-duty trailer connector that is attached
to a bracket on the hitch platform. The seven-wire
harness contains the following trailer circuits:
Yellow: Left Stop/Turn Signal
Dark Green: Right Stop/Turn Signal
Brown: Running Lamps
White: Ground
Light Green: Back-up Lamps
Dark Blue: Electric Brakes
Red: Battery Feed (The chassis wiring ring terminal
must be fastened to a stud on the underhood
electrical center before the trailer feed will
become active.)
If you need to tow a light-duty trailer with a standard
four-way round pin connector, an adapter connector is
available from your dealer.
Your vehicle may also be equipped with wiring for an
electric trailer brake controller. These wires are located
inside the vehicle on the driver’s side under the
instrument panel. These wires should be connected to
an electric trailer brake controller by your dealer or
a qualied service center.
4-68
Page 343 of 502
Service............................................................5-3
Doing Your Own Service Work.........................5-4
Adding Equipment to the Outside
of Your Vehicle...........................................5-5
Fuel................................................................5-5
Gasoline Octane............................................5-5
Gasoline Specications....................................5-5
California Fuel...............................................5-5
Additives.......................................................5-6
Fuels in Foreign Countries...............................5-6
Filling Your Tank............................................5-7
Filling a Portable Fuel Container.......................5-9
Checking Things Under the Hood....................5-10
Hood Release..............................................5-10
Engine Compartment Overview.......................5-12
Engine Oil...................................................5-16
Engine Oil Life System..................................5-19
Engine Air Cleaner/Filter................................5-20
Automatic Transmission Fluid.........................5-22
Engine Coolant.............................................5-25
Radiator Pressure Cap..................................5-28
Engine Overheating.......................................5-28
Cooling System............................................5-30Engine Fan Noise.........................................5-35
Power Steering Fluid.....................................5-36
Windshield Washer Fluid................................5-36
Brakes........................................................5-37
Battery........................................................5-41
Jump Starting...............................................5-42
Rear Axle.......................................................5-47
Four-Wheel Drive............................................5-48
Front Axle......................................................5-48
Bulb Replacement..........................................5-49
Halogen Bulbs..............................................5-49
Headlamps, Front Turn Signal, Sidemarker,
and Parking Lamps....................................5-50
Taillamps, Turn Signal, and Stoplamps............5-50
Back-Up Lamps............................................5-51
Replacement Bulbs.......................................5-51
Windshield Wiper Blade Replacement..............5-52
Tires..............................................................5-54
Tire Sidewall Labelling...................................5-55
Tire Terminology and Denitions.....................5-58
Ination - Tire Pressure.................................5-61
Tire Inspection and Rotation...........................5-62
When It Is Time for New Tires.......................5-64
Section 5 Service and Appearance Care
5-1
Page 368 of 502
What to Use
Use a mixture of one-halfclean, drinkable waterand
one-half DEX-COOL®coolant. If you use this coolant
mixture, you don’t need to add anything else.
{CAUTION:
Adding only plain water to your cooling
system can be dangerous. Plain water, or
some other liquid such as alcohol, can boil
before the proper coolant mixture will. Your
vehicle’s coolant warning system is set for the
proper coolant mixture. With plain water or the
wrong mixture, your engine could get too hot
but you would not get the overheat warning.
Your engine could catch re and you or others
could be burned. Use a 50/50 mixture of clean,
drinkable water and DEX-COOL
®coolant.
Notice:If you use an improper coolant mixture,
your engine could overheat and be badly damaged.
The repair cost would not be covered by your
warranty. Too much water in the mixture can freeze
and crack the engine, radiator, heater core and
other parts.If you have to add coolant more than four times a year,
have your dealer check your cooling system.
Notice:If you use the proper coolant, you do not
have to add extra inhibitors or additives which claim
to improve the system. These can be harmful.
Checking Coolant
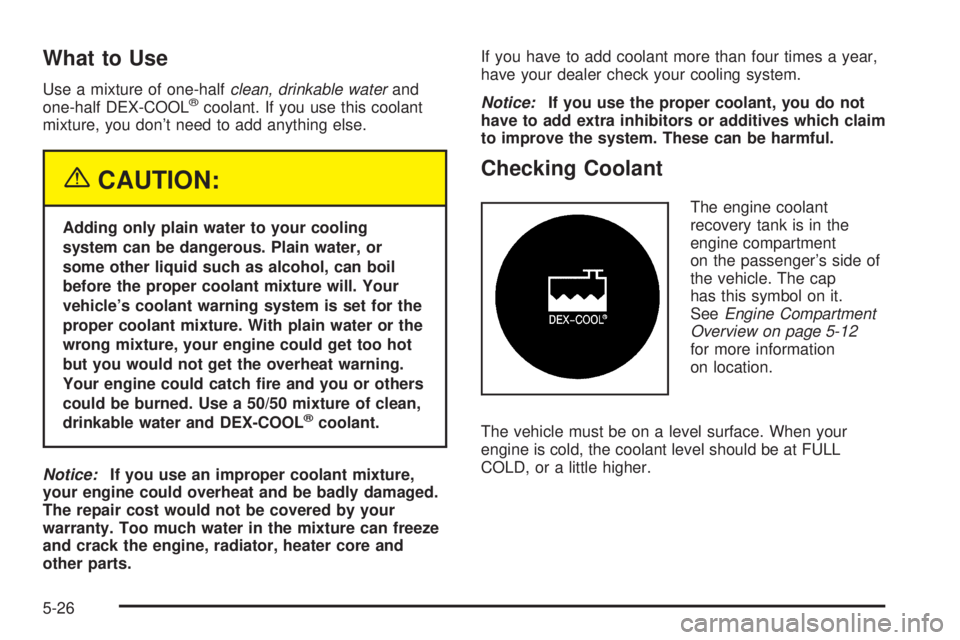
The engine coolant
recovery tank is in the
engine compartment
on the passenger’s side of
the vehicle. The cap
has this symbol on it.
SeeEngine Compartment
Overview on page 5-12
for more information
on location.
The vehicle must be on a level surface. When your
engine is cold, the coolant level should be at FULL
COLD, or a little higher.
5-26
Page 382 of 502
Brake Wear
Your vehicle has four-wheel disc brakes.
Disc brake pads have built-in wear indicators that make
a high-pitched warning sound when the brake pads
are worn and new pads are needed. The sound
may come and go or be heard all the time your vehicle
is moving, except when you are pushing on the
brake pedal rmly.
{CAUTION:
The brake wear warning sound means that
soon your brakes will not work well. That
could lead to an accident. When you hear the
brake wear warning sound, have your vehicle
serviced.
Notice:Continuing to drive with worn-out brake
pads could result in costly brake repair.
Some driving conditions or climates may cause a brake
squeal when the brakes are rst applied or lightly
applied. This does not mean something is wrong with
your brakes.Properly torqued wheel nuts are necessary to help
prevent brake pulsation. When tires are rotated, inspect
brake pads for wear and evenly tighten wheel nuts in
the proper sequence to GM torque specications.
Brake linings should always be replaced as complete
axle sets.
Brake Pedal Travel
See your dealer if the brake pedal does not return to
normal height, or if there is a rapid increase in
pedal travel. This could be a sign of brake trouble.
Brake Adjustment
Every time you make a brake stop, your disc brakes
adjust for wear.
5-40
Page 384 of 502
Jump Starting
If your battery has run down, you may want to use
another vehicle and some jumper cables to start your
vehicle. Be sure to use the following steps to do it safely.
{CAUTION:
Batteries can hurt you. They can be dangerous
because:
They contain acid that can burn you.
They contain gas that can explode
or ignite.
They contain enough electricity
to burn you.
If you do not follow these steps exactly, some
or all of these things can hurt you.Notice:Ignoring these steps could result in costly
damage to your vehicle that would not be covered
by your warranty.
Trying to start your vehicle by pushing or pulling it
will not work, and it could damage your vehicle.
1. Check the other vehicle. It must have a 12-volt
battery with a negative ground system.
Notice:If the other vehicle’s system is not a 12-volt
system with a negative ground, both vehicles can
be damaged. Only use vehicles with 12-volt systems
with negative grounds to jump start your vehicle.
2. Get the vehicles close enough so the jumper cables
can reach, but be sure the vehicles are not touching
each other. If they are, it could cause a ground
connection you do not want. You would not be able
to start your vehicle, and the bad grounding
could damage the electrical systems.
To avoid the possibility of the vehicles rolling, set the
parking brake rmly on both vehicles involved in the
jump start procedure. Put an automatic transmission
in PARK (P) or a manual transmission in NEUTRAL
before setting the parking brake. If you have a
four-wheel-drive vehicle, be sure the transfer case is
not in NEUTRAL.
5-42
Page 390 of 502
Four-Wheel Drive
Transfer Case
When to Check Lubricant
It is not necessary to regularly check uid unless you
suspect there is a leak or you hear an unusual noise.
A uid loss could indicate a problem. Have it inspected
and repaired.
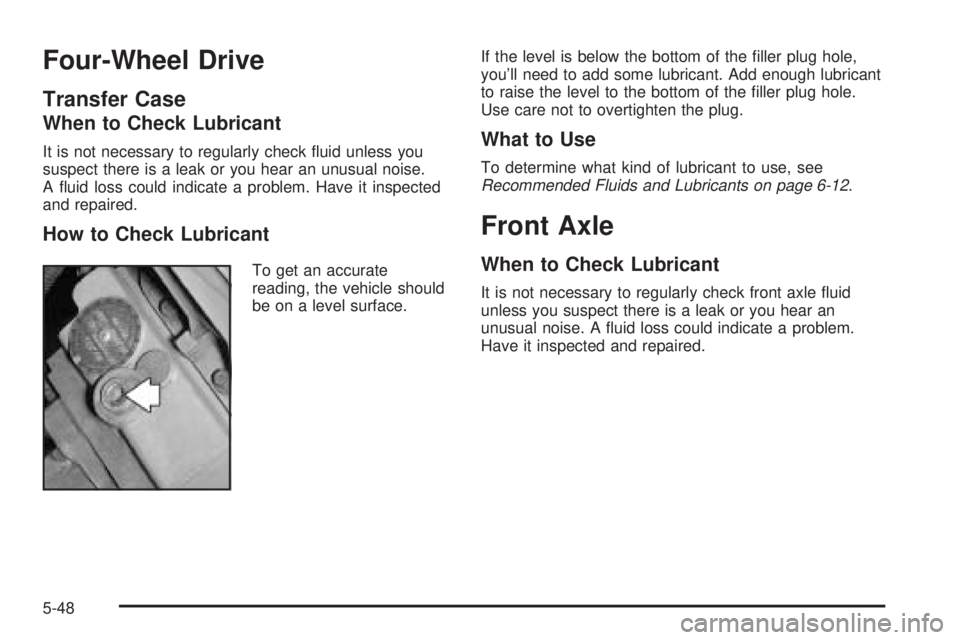
How to Check Lubricant
To get an accurate
reading, the vehicle should
be on a level surface.If the level is below the bottom of the ller plug hole,
you’ll need to add some lubricant. Add enough lubricant
to raise the level to the bottom of the ller plug hole.
Use care not to overtighten the plug.
What to Use
To determine what kind of lubricant to use, see
Recommended Fluids and Lubricants on page 6-12.
Front Axle
When to Check Lubricant
It is not necessary to regularly check front axle uid
unless you suspect there is a leak or you hear an
unusual noise. A uid loss could indicate a problem.
Have it inspected and repaired.
5-48
Page 413 of 502
{CAUTION:
Lifting a vehicle and getting under it to do
maintenance or repairs is dangerous without
the appropriate safety equipment and training.
The jack provided with your vehicle is
designed only for changing a at tire. If it is
used for anything else, you or others could be
badly injured or killed if the vehicle slips off
the jack. Use the jack provided with your
vehicle only for changing a at tire.
If a tire goes at, the next part shows how to use your
jacking equipment to change a at tire safely.
Changing a Flat Tire
If a tire goes at, avoid further tire and wheel damage
by driving slowly to a level place. Turn on your
hazard warning ashers.
{CAUTION:
Changing a tire can be dangerous. The vehicle
can slip off the jack and roll over or fall on you
or other people. You and they could be badly
injured or even killed. Find a level place to
change your tire. To help prevent the vehicle
from moving:
1. Set the parking brake rmly.
2. Put the shift lever in PARK (P).
3. If you have a four-wheel-drive vehicle, be
sure the transfer case is in a drive
gear — not in NEUTRAL.
4. Turn off the engine and do not restart
while the vehicle is raised.
5. Do not allow passengers to remain
in the vehicle.
6. Put the wheel blocks at the front and rear
of the tire farthest away from the one
being changed. That would be the tire on
the other side, at the opposite end
of the vehicle.
5-71