tow GMC ENVOY XUV 2004 Workshop Manual
[x] Cancel search | Manufacturer: GMC, Model Year: 2004, Model line: ENVOY XUV, Model: GMC ENVOY XUV 2004Pages: 460, PDF Size: 2.99 MB
Page 339 of 460

CAUTION: (Continued)
down. Wait until there is no sign of steam or
coolant before you open the hood.
If you keep driving when your engine is
overheated, the liquids in it can catch ®re. You
or others could be badly burned. Stop your
engine if it overheats, and get out of the
vehicle until the engine is cool.
Notice:If your engine catches ®re because you
keep driving with no coolant, your vehicle can
be badly damaged. The costly repairs would not be
covered by your warranty.
If No Steam Is Coming From Your
Engine
If you get an engine overheat warning but see or hear
no steam, the problem may not be too serious.
Sometimes the engine can get a little too hot when you:
·Climb a long hill on a hot day.
·Stop after high-speed driving.
·Idle for long periods in traffic.
·Tow a trailer.If you get the overheat warning with no sign of steam,
try this for a minute or so:
1. In heavy traffic, let the engine idle in neutral while
stopped. If it is safe to do so, pull off the road, shift to
PARK (P) or NEUTRAL (N) and let the engine idle.
2. Turn on your heater to full hot at the highest fan
speed and open the window as necessary.
If you no longer have the overheat warning, you can
drive. Just to be safe, drive slower for about 10 minutes.
If the warning doesn't come back on, you can drive
normally.
If the warning continues and you have not stopped, pull
over, stop, and park your vehicle right away.
If there's still no sign of steam, you can push down the
accelerator until the engine speed is about twice as
fast as normal idle speed for at least three minutes while
you're parked. If you still have the warning,
turn off
the engine and get everyone out of the vehicleuntil it
cools down.
You may decide not to lift the hood but to get service
help right away.
5-27
Page 346 of 460
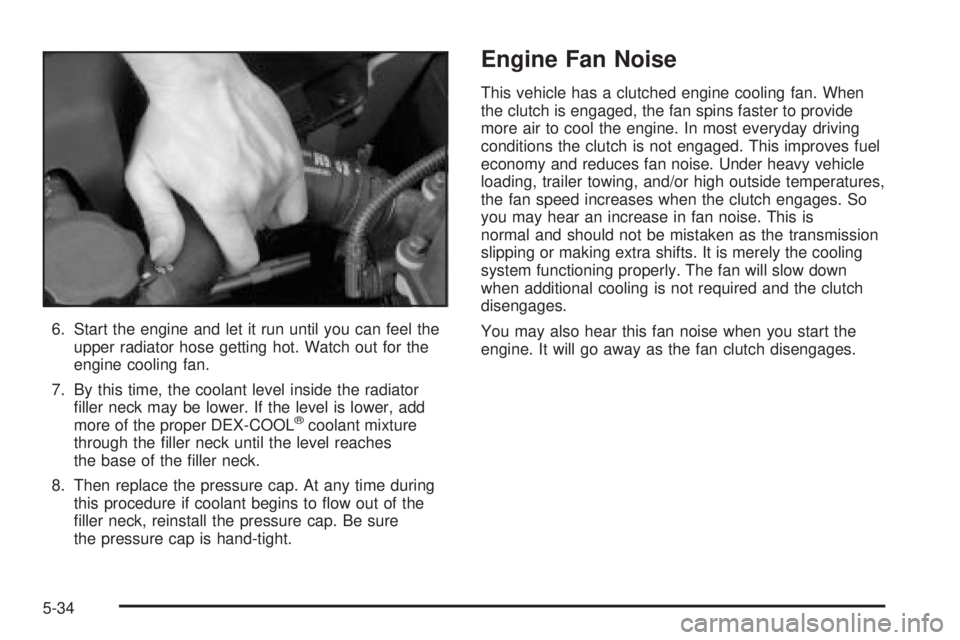
6. Start the engine and let it run until you can feel the
upper radiator hose getting hot. Watch out for the
engine cooling fan.
7. By this time, the coolant level inside the radiator
®ller neck may be lower. If the level is lower, add
more of the proper DEX-COOL
žcoolant mixture
through the ®ller neck until the level reaches
the base of the ®ller neck.
8. Then replace the pressure cap. At any time during
this procedure if coolant begins to ¯ow out of the
®ller neck, reinstall the pressure cap. Be sure
the pressure cap is hand-tight.
Engine Fan Noise
This vehicle has a clutched engine cooling fan. When
the clutch is engaged, the fan spins faster to provide
more air to cool the engine. In most everyday driving
conditions the clutch is not engaged. This improves fuel
economy and reduces fan noise. Under heavy vehicle
loading, trailer towing, and/or high outside temperatures,
the fan speed increases when the clutch engages. So
you may hear an increase in fan noise. This is
normal and should not be mistaken as the transmission
slipping or making extra shifts. It is merely the cooling
system functioning properly. The fan will slow down
when additional cooling is not required and the clutch
disengages.
You may also hear this fan noise when you start the
engine. It will go away as the fan clutch disengages.
5-34
Page 374 of 460
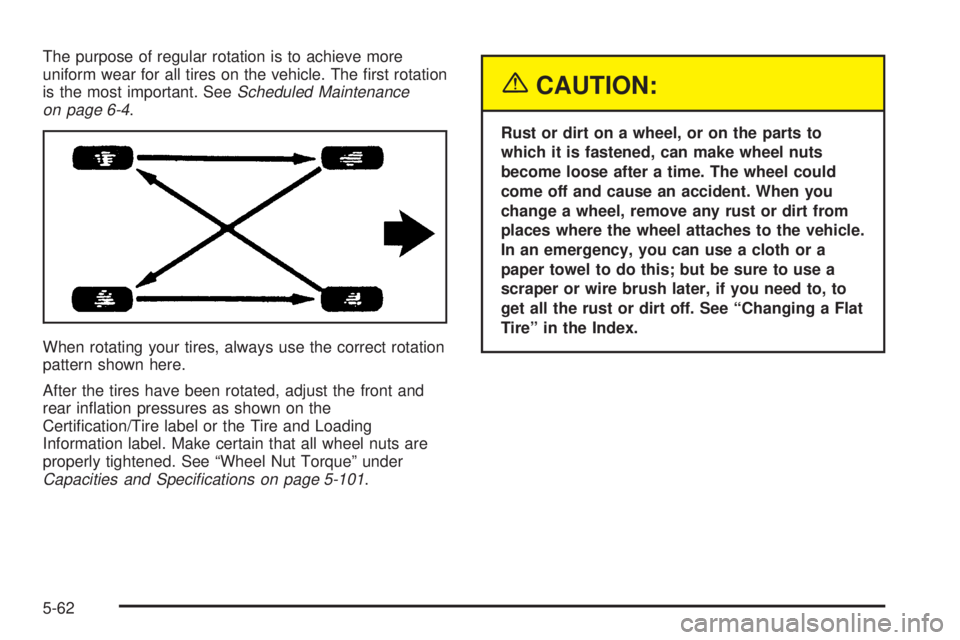
The purpose of regular rotation is to achieve more
uniform wear for all tires on the vehicle. The ®rst rotation
is the most important. See
Scheduled Maintenance
on page 6-4.
When rotating your tires, always use the correct rotation
pattern shown here.
After the tires have been rotated, adjust the front and
rear in¯ation pressures as shown on the
Certi®cation/Tire label or the Tire and Loading
Information label. Make certain that all wheel nuts are
properly tightened. See ªWheel Nut Torqueº under
Capacities and Speci®cations on page 5-101.
{CAUTION:
Rust or dirt on a wheel, or on the parts to
which it is fastened, can make wheel nuts
become loose after a time. The wheel could
come off and cause an accident. When you
change a wheel, remove any rust or dirt from
places where the wheel attaches to the vehicle.
In an emergency, you can use a cloth or a
paper towel to do this; but be sure to use a
scraper or wire brush later, if you need to, to
get all the rust or dirt off. See ªChanging a Flat
Tireº in the Index.
5-62
Page 382 of 460

If a Tire Goes Flat
It's unusual for a tire to ªblowoutº while you're driving,
especially if you maintain your tires properly. If air goes
out of a tire, it's much more likely to leak out slowly.
But if you should ever have a ªblowout,º here are a few
tips about what to expect and what to do:
If a front tire fails, the ¯at tire will create a drag that
pulls the vehicle toward that side. Take your foot off the
accelerator pedal and grip the steering wheel ®rmly.
Steer to maintain lane position, and then gently brake to
a stop well out of the traffic lane.
A rear blowout, particularly on a curve, acts much like a
skid and may require the same correction you'd use
in a skid. In any rear blowout, remove your foot from the
accelerator pedal. Get the vehicle under control by
steering the way you want the vehicle to go. It may be
very bumpy and noisy, but you can still steer. Gently
brake to a stop, well off the road if possible.{CAUTION:
Lifting a vehicle and getting under it to do
maintenance or repairs is dangerous without
the appropriate safety equipment and training.
The jack provided with your vehicle is
designed only for changing a ¯at tire. If it is
used for anything else, you or others could be
badly injured or killed if the vehicle slips off
the jack. Use the jack provided with your
vehicle only for changing a ¯at tire.
If a tire goes ¯at, the next part shows how to use your
jacking equipment to change a ¯at tire safely.
5-70
Page 384 of 460

Removing the Spare Tire and Tools
A. Wing Nut
B. Jack Bracket
C. Jack and Wheel
BlocksD. Retainer
E. Thumbwheel
F. Tool Kit Wing Nut
G. Tool Kit
The jacking equipment you will need is stored under the
rear seat on the passenger's side of the vehicle. See
Rear Seat Operation on page 1-7for more information
on accessing the jacking equipment. To remove the
tool kit, turn the tool kit wing nut (F) counterclockwise
and remove the jack bracket. To release the jackfrom the bracket, remove wing nut (A). Turn the
thumbwheel counterclockwise to lower the jack head.
Remove the retainer and wheel blocks.
The tools you'll be using include the wheel wrench (A),
wheel blocks (B), extensions (socket end) (C), handle
(jack end) (D), and jack (E).
The following instructions explain how to remove the
spare tire mounted underneath your vehicle.
Notice:If you remove or restow a tire from/to the
storage position under the vehicle when it is
supported by a jack, you could damage the tire
and/or your vehicle. Always remove or restow a tire
when the vehicle is on the ground.
5-72
Page 387 of 460

2. If it is not visible, proceed to Step 6.
If visible, ®rst try to tighten the cable by turning the
wheel wrench clockwise until you hear two clicks
or feel it skip twice. You cannot overtighten
the cable.
3. Loosen the cable by turning the wheel wrench
counterclockwise three or four turns.
4. Repeat this procedure at least two times.
If the spare tire lowers to the ground, continue with
Step 2 of ªRemoving the Spare Tire and Toolsº
earlier in this section.
5. Turn the wrench counterclockwise until about
6 inches (15 cm) of cable is exposed.
6. Attach the jack handle, extensions and the wheel
wrench to the jack and place it under the vehicle
towards the front of the rear bumper. Position
the center lift point of the jack under the center of
the spare tire.
7. Turn the wrench clockwise to raise the jack until it
lifts the end ®tting.
8. Continue raising the jack until the spare tire stops
moving upward and is held ®rmly in place. The
secondary latch has released and the spare tire is
balancing on the jack.
5-75
Page 391 of 460
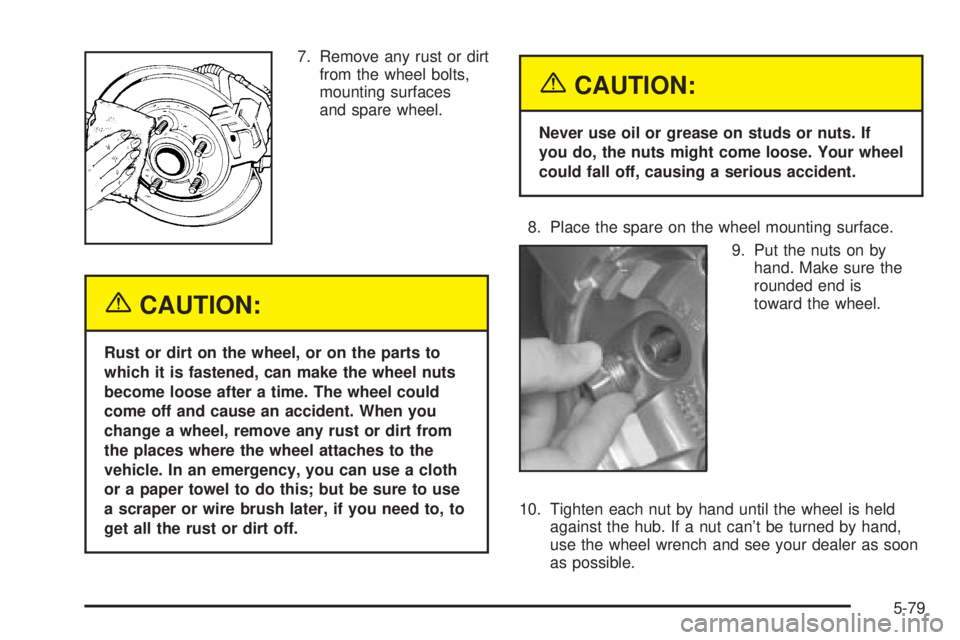
7. Remove any rust or dirt
from the wheel bolts,
mounting surfaces
and spare wheel.
{CAUTION:
Rust or dirt on the wheel, or on the parts to
which it is fastened, can make the wheel nuts
become loose after a time. The wheel could
come off and cause an accident. When you
change a wheel, remove any rust or dirt from
the places where the wheel attaches to the
vehicle. In an emergency, you can use a cloth
or a paper towel to do this; but be sure to use
a scraper or wire brush later, if you need to, to
get all the rust or dirt off.
{CAUTION:
Never use oil or grease on studs or nuts. If
you do, the nuts might come loose. Your wheel
could fall off, causing a serious accident.
8. Place the spare on the wheel mounting surface.
9. Put the nuts on by
hand. Make sure the
rounded end is
toward the wheel.
10. Tighten each nut by hand until the wheel is held
against the hub. If a nut can't be turned by hand,
use the wheel wrench and see your dealer as soon
as possible.
5-79
Page 393 of 460
Storing a Flat or Spare Tire and Tools
{CAUTION:
Storing a jack, a tire, or other equipment in the
passenger compartment of the vehicle could
cause injury. In a sudden stop or collision,
loose equipment could strike someone. Store
all these in the proper place.
{CAUTION:
The underbody-mounted spare tire needs to be
stored with the valve stem pointing up. If the
spare tire is stored with the valve stem
pointing downward, its secondary latch won't
work properly and the spare tire could loosen
and suddenly fall from your vehicle. If this
happened when your vehicle was being driven,
the tire might contact a person or another
vehicle, causing injury and, of course, damage
to itself as well. Be sure the
underbody-mounted spare tire is stored with
its valve stem pointing up.
Notice:An aluminum wheel with a ¯at tire should
always be stored under the vehicle with the
hoist. However, storing it that way for an extended
period could damage the wheel. To avoid this,
always stow the wheel properly with the valve stem
pointing up and have the wheel repaired as soon
as possible.
5-81
Page 397 of 460
Using Cleaner on Fabric
1. Vacuum and brush the area to remove any
loose dirt.
2. Always clean a whole trim panel or section. Mask
surrounding trim along stitch or welt lines.
3. Follow the directions on the container label.
4. Apply cleaner with a clean sponge. Do not saturate
the material and do not rub it roughly.
5. As soon as you have cleaned the section, use a
sponge to remove any excess cleaner.
6. Wipe cleaned area with a clean, water-dampened
towel or cloth.
7. Wipe with a clean cloth and let dry.
Special Fabric Cleaning Problems
Stains caused by such things as catsup, coffee (black),
egg, fruit, fruit juice, milk, soft drinks, vomit, urine
and blood can be removed as follows:
1. Carefully scrape off excess stain, then sponge the
soiled area with cool water.
2. If a stain remains, follow the cleaning instructions
described earlier.3. If an odor lingers after cleaning vomit or urine, treat
the area with a water and baking soda solution:
1 teaspoon (5 ml) of baking soda to 1 cup (250 ml)
of lukewarm water.
4. Let dry.
Stains caused by candy, ice cream, mayonnaise, chili
sauce and unknown stains can be removed as follows:
1. Carefully scrape off excess stain.
2. Clean with cool water and allow to dry completely.
3. If a stain remains, follow the cleaner instructions
described earlier.
Cleaning Vinyl
Use warm water and a clean cloth.
·Rub with a clean, damp cloth to remove dirt. You
may have to do this more than once.
·Things like tar, asphalt and shoe polish will stain if
you do not get them off quickly. Use a clean cloth
and vinyl cleaner. See your dealer for this product.
5-85
Page 399 of 460
Care of Safety Belts
Keep belts clean and dry.
{CAUTION:
Do not bleach or dye safety belts. If you do, it
may severely weaken them. In a crash, they
might not be able to provide adequate
protection. Clean safety belts only with mild
soap and lukewarm water.
Weatherstrips
Silicone grease on weatherstrips will make them last
longer, seal better, and not stick or squeak. Apply
silicone grease with a clean cloth at least every
six months. During very cold, damp weather more
frequent application may be required. See
Recommended Fluids and Lubricants on page 6-13.
Cleaning the Outside of Your
Vehicle
The paint ®nish on your vehicle provides beauty, depth
of color, gloss retention and durability.
Washing Your Vehicle
The best way to preserve your vehicle's ®nish is to
keep it clean by washing it often with lukewarm or
cold water.
Don't wash your vehicle in the direct rays of the sun.
Use a car washing soap. Don't use strong soaps
or chemical detergents. Be sure to rinse the vehicle
well, removing all soap residue completely. You can get
GM-approved cleaning products from your dealer.
See
Vehicle Care/Appearance Materials on page 5-90.
Don't use cleaning agents that are petroleum based,
or that contain acid or abrasives. All cleaning agents
should be ¯ushed promptly and not allowed to dry on the
surface, or they could stain. Dry the ®nish with a soft,
clean chamois or an all-cotton towel to avoid surface
scratches and water spotting.
High pressure car washes may cause water to enter
your vehicle.
5-87