ABS GMC ENVOY XUV 2004 Owner's Manual
[x] Cancel search | Manufacturer: GMC, Model Year: 2004, Model line: ENVOY XUV, Model: GMC ENVOY XUV 2004Pages: 460, PDF Size: 2.99 MB
Page 252 of 460

Avoid needless heavy braking. Some people drive in
spurts Ð heavy acceleration followed by heavy
braking Ð rather than keeping pace with traffic. This is
a mistake. Your brakes may not have time to cool
between hard stops. Your brakes will wear out much
faster if you do a lot of heavy braking. If you keep pace
with the traffic and allow realistic following distances,
you will eliminate a lot of unnecessary braking.
That means better braking and longer brake life.
If your engine ever stops while you are driving, brake
normally but do not pump your brakes. If you do,
the pedal may get harder to push down. If your engine
stops, you will still have some power brake assist.
But you will use it when you brake. Once the power
assist is used up, it may take longer to stop and
the brake pedal will be harder to push.Anti-lock Brake System
Your vehicle has anti-lock brakes. ABS is an advanced
electronic braking system that will help prevent a
braking skid.
When you start your engine and begin to drive away,
your anti-lock brake system will check itself. You
may hear a momentary motor or clicking noise while
this test is going on. This is normal.
If there is a problem with
the anti-lock brake system,
this warning light will
stay on. See
Anti-Lock
Brake System Warning
Light on page 3-37
.
Along with ABS, your vehicle has a Dynamic Rear
Proportioning (DRP) system. If there is a DRP problem,
both the brake and ABS warning lights will come on
accompanied by a 10-second chime. The lights
and chime will come on each time the ignition is turned
on until the problem is repaired. See your dealer for
service.
4-6
Page 253 of 460

Let us say the road is wet and you are driving safely.
Suddenly, an animal jumps out in front of you. You slam
on the brakes and continue braking. Here is what
happens with ABS:
A computer senses that wheels are slowing down.
If one of the wheels is about to stop rolling, the computer
will separately work the brakes at each front wheel
and at both rear wheels.The anti-lock system can change the brake pressure
faster than any driver could. The computer is
programmed to make the most of available tire and road
conditions. This can help you steer around the obstacle
while braking hard.
As you brake, your computer keeps receiving updates
on wheel speed and controls braking pressure
accordingly.
4-7
Page 260 of 460

Loss of Control
Let us review what driving experts say about what
happens when the three control systems (brakes,
steering and acceleration) do not have enough friction
where the tires meet the road to do what the driver
has asked.
In any emergency, do not give up. Keep trying to steer
and constantly seek an escape route or area of less
danger.
Skidding
In a skid, a driver can lose control of the vehicle.
Defensive drivers avoid most skids by taking reasonable
care suited to existing conditions, and by not
ªoverdrivingº those conditions. But skids are always
possible.
The three types of skids correspond to your vehicle's
three control systems. In the braking skid, your wheels
are not rolling. In the steering or cornering skid, too much
speed or steering in a curve causes tires to slip and lose
cornering force. And in the acceleration skid, too much
throttle causes the driving wheels to spin.
A cornering skid is best handled by easing your foot off
the accelerator pedal.If you have the Traction Assist System, remember: It
helps avoid only the acceleration skid. If you do not have
this system, or if the system is off, then an acceleration
skid is also best handled by easing your foot off the
accelerator pedal.
If your vehicle starts to slide, ease your foot off the
accelerator pedal and quickly steer the way you want
the vehicle to go. If you start steering quickly enough,
your vehicle may straighten out. Always be ready
for a second skid if it occurs.
Of course, traction is reduced when water, snow, ice,
gravel or other material is on the road. For safety,
you will want to slow down and adjust your driving to
these conditions. It is important to slow down on slippery
surfaces because stopping distance will be longer and
vehicle control more limited.
While driving on a surface with reduced traction, try
your best to avoid sudden steering, acceleration
or braking (including engine braking by shifting to a
lower gear). Any sudden changes could cause the tires
to slide. You may not realize the surface is slippery
until your vehicle is skidding. Learn to recognize warning
clues Ð such as enough water, ice or packed snow
on the road to make a ªmirrored surfaceº Ð and slow
down when you have any doubt.
Remember: Any anti-lock brake system (ABS) helps
avoid only the braking skid.
4-14
Page 310 of 460

Driving On Grades
Reduce speed and shift to a lower gearbeforeyou start
down a long or steep downgrade. If you don't shift
down, you might have to use your brakes so much that
they would get hot and no longer work well.
You can tow in DRIVE (D). You may want to shift the
transmission to THIRD (3) or a lower gear, under heavy
loads or hilly conditions.
When towing at high altitude on steep uphill grades,
consider the following: Engine coolant will boil at a lower
temperature than at normal altitudes. If you turn your
engine off immediately after towing at high altitude
on steep uphill grades, your vehicle may show signs
similar to engine overheating. To avoid this, let the
engine run while parked (preferably on level ground)
with the automatic transmission in PARK (P) for a
few minutes before turning the engine off. If you do get
the overheat warning, see
Engine Overheating on
page 5-26.
Parking on Hills
{CAUTION:
You really should not park your vehicle, with a
trailer attached, on a hill. If something goes
wrong, your rig could start to move. People
can be injured, and both your vehicle and the
trailer can be damaged.
But if you ever have to park your rig on a hill, here's
how to do it:
1. Apply your regular brakes, but don't shift into
PARK (P) yet. When parking uphill, turn your wheels
away from the curb. When parking downhill, turn
your wheels into the curb.
2. Have someone place chocks under the trailer
wheels.
3. When the wheel chocks are in place, release the
regular brakes until the chocks absorb the load.
4. Reapply the regular brakes. Then apply your
parking brake, and then shift into PARK (P).
5. Release the regular brakes.
4-64
Page 381 of 460

To use the air in¯ator, attach the appropriate nozzle
adapter to the end of the hose if required. Then attach
that end of the hose to the object you wish to in¯ate.
Attach the other end of the hose to the outlet.
Press and release the switch to turn the air in¯ator on.
The indicator light will remain on when the in¯ator is
running.
The system has an internal clock to prevent overheating.
The system will allow about ®ve minutes of running
time, then the compressor will stop. The indicator light
will then begin to ¯ash. When the indicator is off,
the in¯ator can be started again by pressing the switch.
If the compressor is still hot, it may only run for a
short time before shutting off again.
Press and release the switch to turn the in¯ator off.
Place the in¯ator kit tools in the pouch and store
it properly. Remove the in¯ator hose from the outlet
during loading and unloading. Load leveling will
not function with the in¯ator hose attached to the
in¯ator outlet.To reinstall the cover, line up the tabs at the back of the
cover, put it in place and latch the tabs.
A continuous ¯ashing indicator light may also indicate a
malfunction in the air suspension system.
{CAUTION:
In¯ating something too much can make it
explode, and you or others could be injured.
Be sure to read the in¯ator instructions, and
in¯ate any object only to its recommended
pressure.
5-69
Page 405 of 460

Fuses and Circuit Breakers
The wiring circuits in your vehicle are protected from
short circuits by a combination of fuses and circuit
breakers. This greatly reduces the chance of ®res
caused by electrical problems.
Look at the silver-colored band inside the fuse. If the
band is broken or melted, replace the fuse. Be sure you
replace a bad fuse with a new one of the identical
size and rating.
If you ever have a problem on the road and don't have
a spare fuse, you can borrow one that has the same
amperage. Just pick some feature of your vehicle
that you can get along without Ð like the radio or
cigarette lighterÐ and use its fuse, if it is the correct
amperage. Replace it as soon as you can.
Engine Compartment Fuse Block
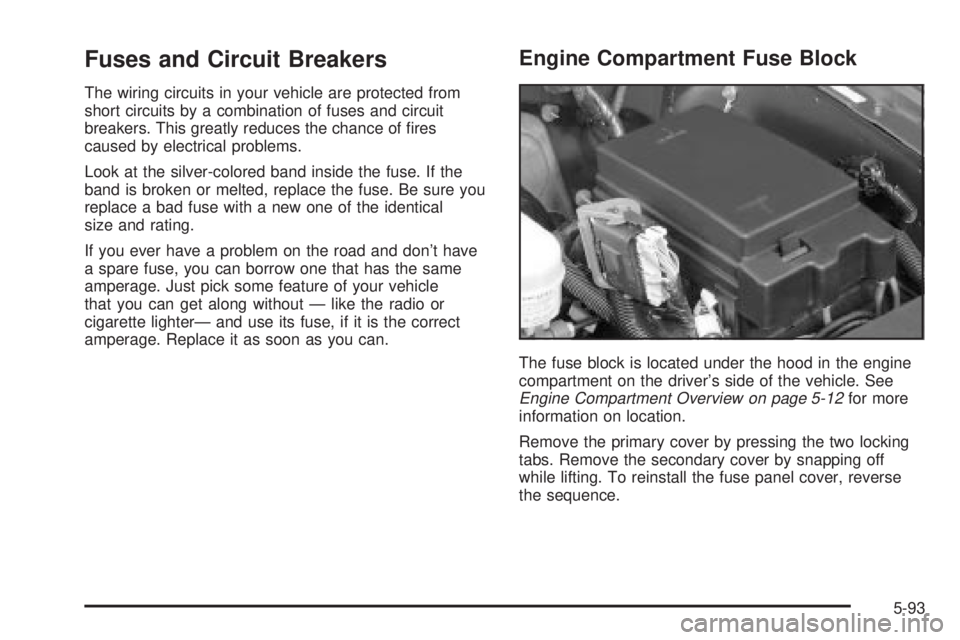
The fuse block is located under the hood in the engine
compartment on the driver's side of the vehicle. See
Engine Compartment Overview on page 5-12for more
information on location.
Remove the primary cover by pressing the two locking
tabs. Remove the secondary cover by snapping off
while lifting. To reinstall the fuse panel cover, reverse
the sequence.
5-93
Page 407 of 460

Fuses Usage
8 Automatic Transfer Case
9 Windshield Wipers
10 Powertrain Control Module B
11 Fog Lamps
12 Stop Lamp
13 Cigarette Lighter
14 Ignition Coils
15 Blank
16 TBD-Ignition 1
17 Crank
18 Air Bag
19 Electric Brake
20 Cooling Fan
21 Horn
22 Ignition E
23 Electronic Throttle Control
24Instrument Panel Cluster, Driver
Information Center
25 Automatic Shift Lock Control System
26 Engine 1
27 Back-Up
28 Powertrain Control Module 1
29 Oxygen Sensor
30 Air Conditioning
31 Truck Body Controller
32 Trailer
33 Anti-Lock Brakes (ABS)Fuses Usage
34 Ignition A
35 Blower Motor
36 Ignition B
50 Passenger's Side Trailer Turn
51 Driver's Side Trailer Turn
52 Hazard Flashers
53 Electric Adjustable Pedal
54 A.I.R. Solenoid
56 A.I.R. Pump
Relays Usage
37 Blank
38 Rear Window Washer
39 Fog Lamps
40 Horn
41 Fuel Pump
42 Windshield Wipers/Washer
43 High-Beam Headlamp
44 Air Conditioning
45 Cooling Fan
46 Headlamp Driver Module
47 Starter
49 Electric Adjustable Pedal
55 A.I.R. Solenoid
Miscellaneous Usage
48 Instrument Panel Battery
49 Blank
5-95
Page 409 of 460

Fuses Usage
1Electrically-Controlled Air
Suspension
2Passenger's Side High-Beam
Headlamp
3Passenger's Side Low-Beam
Headlamp
4 Back-Up-Trailer Lamps
5Driver's Side High-Beam
Headlamp
6Driver's Side Low-Beam
Headlamp
7 Wash
8 Automatic Transfer Case
9 Windshield Wipers
10 Powertrain Control Module B
11 Fog Lamps
12 Stop Lamp
13 Cigarette Lighter
14 Ignition Coils
15 Canister Vent
16 TBD-Ignition 1
17 Crank
18 Air Bag
19 Electric Brake
20 Cooling FanFuses Usage
21 Horn
22 Ignition E
23 Electronic Throttle Control
24Instrument Panel Cluster, Driver
Information Center
25Automatic Shift Lock Control
System
26 Engine 1
27 Back-Up
28 Powertrain Control Module 1
30 Air Conditioning
31 Truck Body Controller
32 Trailer
33 Anti-Lock Brakes (ABS)
34 Ignition A
35 Blower Motor
36 Ignition B
50 Passenger's Side Trailer Turn
51 Driver's Side Trailer Turn
52 Hazard Flashers
53 Oxygen Sensor Bank A
54 Oxygen Sensor Bank B
55 Injector Bank A
56 Injector Bank B
5-97