hood open GMC ENVOY XUV 2004 Owner's Manual
[x] Cancel search | Manufacturer: GMC, Model Year: 2004, Model line: ENVOY XUV, Model: GMC ENVOY XUV 2004Pages: 460, PDF Size: 2.99 MB
Page 96 of 460
Engine Coolant Heater
Your vehicle may have this feature. In very cold
weather, 0ÉF (-18ÉC) or colder, the engine coolant
heater can help. You'll get easier starting and better fuel
economy during engine warm-up. Usually, the coolant
heater should be plugged in a minimum of four
hours prior to starting your vehicle. At temperatures
above 32ÉF (0ÉC), use of the coolant heater is not
required.
To Use the Engine Coolant Heater
1. Turn off the engine.
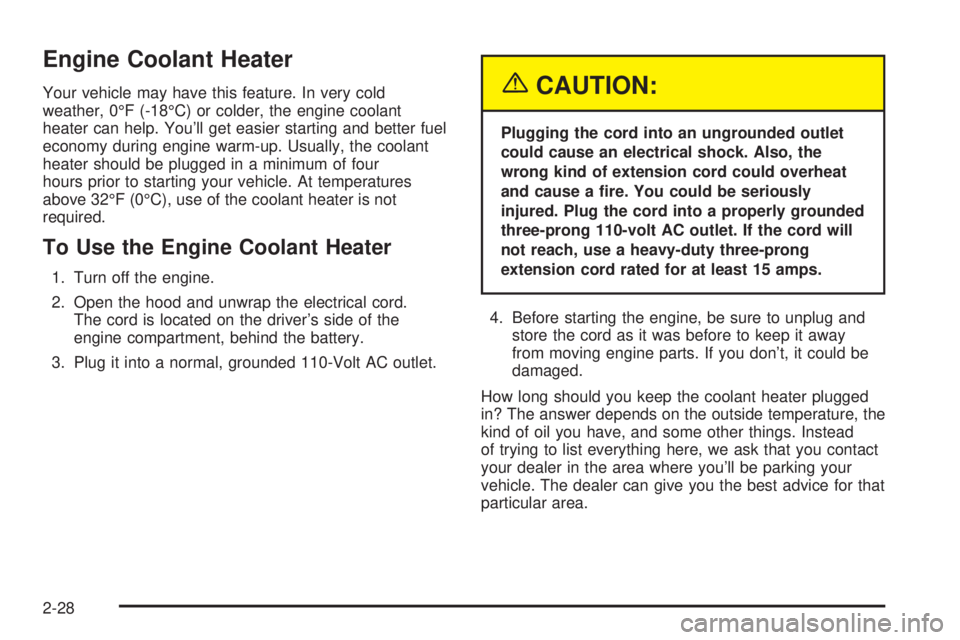
2. Open the hood and unwrap the electrical cord.
The cord is located on the driver's side of the
engine compartment, behind the battery.
3. Plug it into a normal, grounded 110-Volt AC outlet.
{CAUTION:
Plugging the cord into an ungrounded outlet
could cause an electrical shock. Also, the
wrong kind of extension cord could overheat
and cause a ®re. You could be seriously
injured. Plug the cord into a properly grounded
three-prong 110-volt AC outlet. If the cord will
not reach, use a heavy-duty three-prong
extension cord rated for at least 15 amps.
4. Before starting the engine, be sure to unplug and
store the cord as it was before to keep it away
from moving engine parts. If you don't, it could be
damaged.
How long should you keep the coolant heater plugged
in? The answer depends on the outside temperature, the
kind of oil you have, and some other things. Instead
of trying to list everything here, we ask that you contact
your dealer in the area where you'll be parking your
vehicle. The dealer can give you the best advice for that
particular area.
2-28
Page 322 of 460
Filling a Portable Fuel Container
{CAUTION:
Never ®ll a portable fuel container while it is in
your vehicle. Static electricity discharge from
the container can ignite the gasoline vapor.
You can be badly burned and your vehicle
damaged if this occurs. To help avoid injury to
you and others:
·Dispense gasoline only into approved
containers.
·Do not ®ll a container while it is inside a
vehicle, in a vehicle's trunk, pickup bed or
on any surface other than the ground.
·Bring the ®ll nozzle in contact with the
inside of the ®ll opening before operating
the nozzle. Contact should be maintained
until the ®lling is complete.
·Do not smoke while pumping gasoline.
Checking Things Under
the Hood
{CAUTION:
Things that burn can get on hot engine parts
and start a ®re. These include liquids like fuel,
oil, coolant, brake ¯uid, windshield washer and
other ¯uids, and plastic or rubber. You or
others could be burned. Be careful not to drop
or spill things that will burn onto a hot engine.
5-10
Page 323 of 460
Hood Release
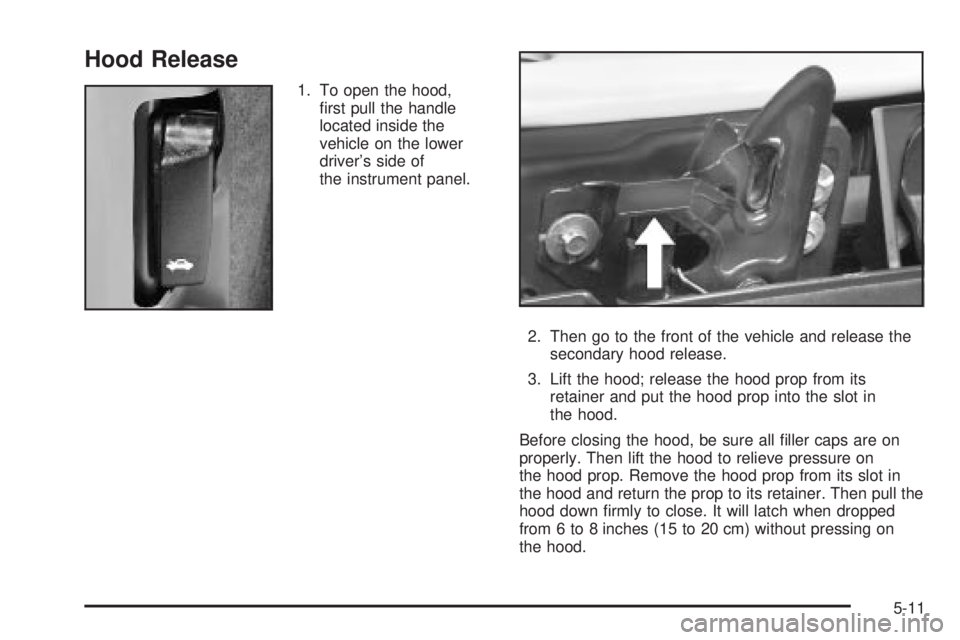
1. To open the hood,
®rst pull the handle
located inside the
vehicle on the lower
driver's side of
the instrument panel.
2. Then go to the front of the vehicle and release the
secondary hood release.
3. Lift the hood; release the hood prop from its
retainer and put the hood prop into the slot in
the hood.
Before closing the hood, be sure all ®ller caps are on
properly. Then lift the hood to relieve pressure on
the hood prop. Remove the hood prop from its slot in
the hood and return the prop to its retainer. Then pull the
hood down ®rmly to close. It will latch when dropped
from 6 to 8 inches (15 to 20 cm) without pressing on
the hood.
5-11
Page 324 of 460
Engine Compartment Overview
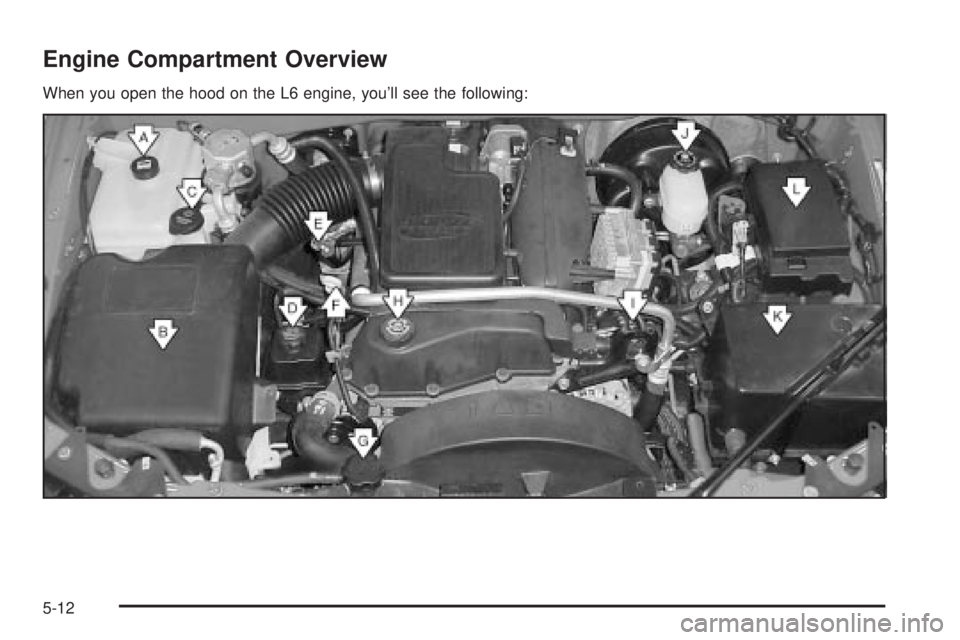
When you open the hood on the L6 engine, you'll see the following:
5-12
Page 326 of 460
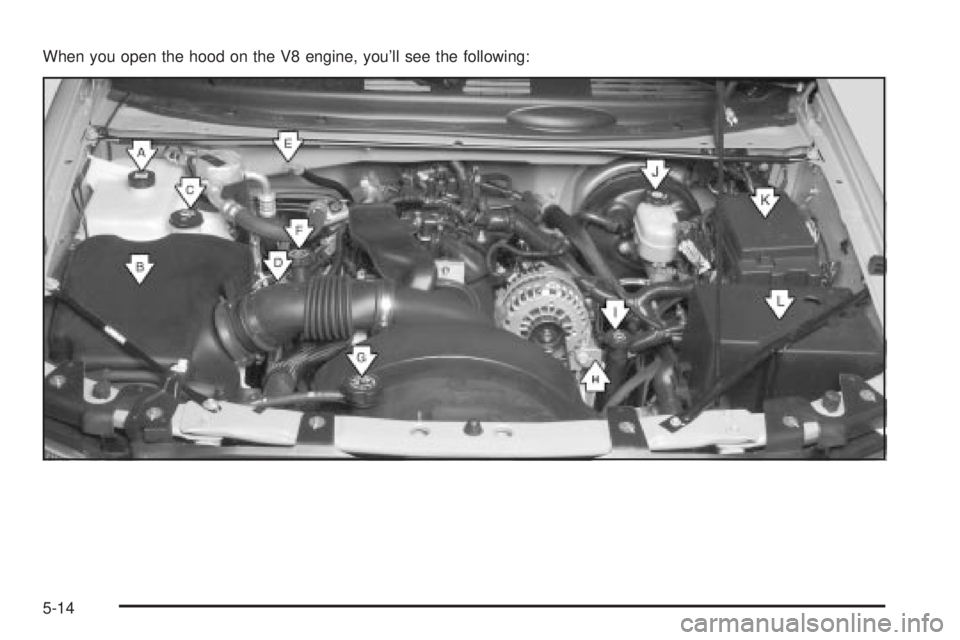
When you open the hood on the V8 engine, you'll see the following:
5-14
Page 338 of 460
Radiator Pressure Cap
Notice:If the pressure cap is not tightly installed,
coolant loss and possible engine damage may
occur. Be sure the cap is properly and tightly
secured.
See
Engine Compartment Overview on page 5-12for
information on location.
Engine Overheating
You will ®nd a coolant temperature gage on your
vehicle's instrument panel. If your vehicle has a DIC,
the display will show an Engine Coolant Hot or Engine
Overheated message.
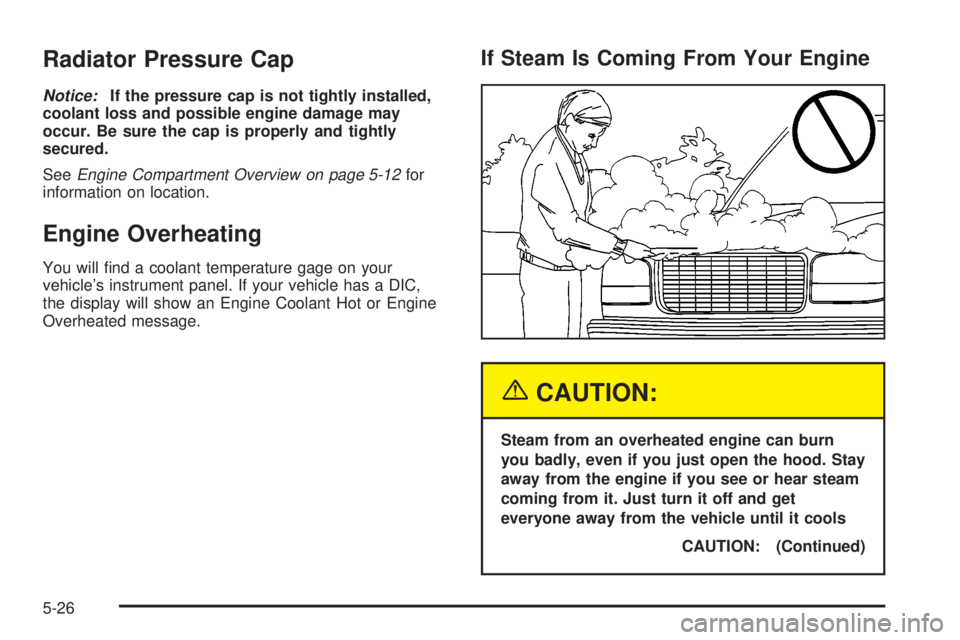
If Steam Is Coming From Your Engine
{CAUTION:
Steam from an overheated engine can burn
you badly, even if you just open the hood. Stay
away from the engine if you see or hear steam
coming from it. Just turn it off and get
everyone away from the vehicle until it cools
CAUTION: (Continued)
5-26
Page 339 of 460

CAUTION: (Continued)
down. Wait until there is no sign of steam or
coolant before you open the hood.
If you keep driving when your engine is
overheated, the liquids in it can catch ®re. You
or others could be badly burned. Stop your
engine if it overheats, and get out of the
vehicle until the engine is cool.
Notice:If your engine catches ®re because you
keep driving with no coolant, your vehicle can
be badly damaged. The costly repairs would not be
covered by your warranty.
If No Steam Is Coming From Your
Engine
If you get an engine overheat warning but see or hear
no steam, the problem may not be too serious.
Sometimes the engine can get a little too hot when you:
·Climb a long hill on a hot day.
·Stop after high-speed driving.
·Idle for long periods in traffic.
·Tow a trailer.If you get the overheat warning with no sign of steam,
try this for a minute or so:
1. In heavy traffic, let the engine idle in neutral while
stopped. If it is safe to do so, pull off the road, shift to
PARK (P) or NEUTRAL (N) and let the engine idle.
2. Turn on your heater to full hot at the highest fan
speed and open the window as necessary.
If you no longer have the overheat warning, you can
drive. Just to be safe, drive slower for about 10 minutes.
If the warning doesn't come back on, you can drive
normally.
If the warning continues and you have not stopped, pull
over, stop, and park your vehicle right away.
If there's still no sign of steam, you can push down the
accelerator until the engine speed is about twice as
fast as normal idle speed for at least three minutes while
you're parked. If you still have the warning,
turn off
the engine and get everyone out of the vehicleuntil it
cools down.
You may decide not to lift the hood but to get service
help right away.
5-27
Page 354 of 460
4. Open both hoods and locate the batteries. Find the
positive (+) and negative (-) terminals on each
battery. Your vehicle has a remote negative (-) jump
starting terminal. You should always use this
remote terminal instead of the terminal on the
battery. The remote negative (-) terminal is located
on the front engine lift bracket on vehicles with
the L6 engine or the engine accessory drive bracket
for vehicles with the V8 engine, and is marked
GND. See
Engine Compartment Overview on
page 5-12for more information on location.
{CAUTION:
Using a match near a battery can cause battery
gas to explode. People have been hurt doing
this, and some have been blinded. Use a
¯ashlight if you need more light.
Be sure the battery has enough water. You do
not need to add water to the ACDelco
žbattery
installed in your new vehicle. But if a battery
has ®ller caps, be sure the right amount of
¯uid is there. If it is low, add water to take care
of that ®rst. If you do not, explosive gas could
be present.
Battery ¯uid contains acid that can burn you.
Do not get it on you. If you accidentally get it
in your eyes or on your skin, ¯ush the place
with water and get medical help immediately.
5-42
Page 360 of 460
When the differential is cold, add enough lubricant to
raise the level to 1/2 inch (12 mm) below the ®ller
plug hole.
When the differential is at operating temperature
(warm), add enough lubricant to raise the level to the
bottom of the ®ller plug hole.
What to Use
To determine what kind of lubricant to use, seeRecommended Fluids and Lubricants on page 6-13.
Bulb Replacement
For the type of bulbs, seeReplacement Bulbs on
page 5-50.
For any bulb changing procedure not listed in this
section, contact your dealer.
Headlamps
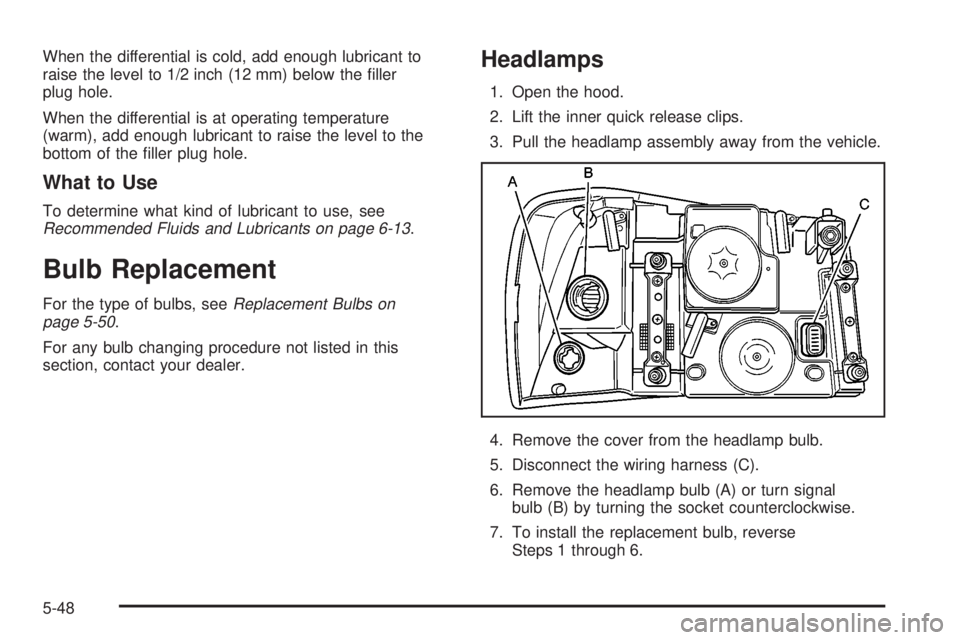
1. Open the hood.
2. Lift the inner quick release clips.
3. Pull the headlamp assembly away from the vehicle.
4. Remove the cover from the headlamp bulb.
5. Disconnect the wiring harness (C).
6. Remove the headlamp bulb (A) or turn signal
bulb (B) by turning the socket counterclockwise.
7. To install the replacement bulb, reverse
Steps 1 through 6.
5-48
Page 422 of 460
Maintenance Footnotes
²The U.S. Environmental Protection Agency or the
California Air Resources Board has determined that the
failure to perform this maintenance item will not nullify
the emission warranty or limit recall liability prior to
the completion of the vehicle's useful life. We, however,
urge that all recommended maintenance services be
performed at the indicated intervals and the
maintenance be recorded.
(a)Visually inspect brake lines and hoses for proper
hook-up, binding, leaks, cracks, cha®ng, etc. Inspect
disc brake pads for wear and rotors for surface
condition. Inspect other brake parts, including calipers,
parking brake, etc.
(b)Visually inspect front and rear suspension and
steering system for damaged, loose or missing parts or
signs of wear. Inspect power steering lines and
hoses for proper hook-up, binding, leaks, cracks,
cha®ng, etc.
(c)Visually inspect hoses and have them replaced if
they are cracked, swollen or deteriorated. Inspect
all pipes, ®ttings and clamps; replace with genuine GM
parts as needed. To help ensure proper operation, a
pressure test of the cooling system and pressure
cap and cleaning the outside of the radiator and air
conditioning condenser is recommended at least once
a year.
(d)Visually inspect wiper blades for wear or cracking.
Replace blade inserts that appear worn or damaged
or that streak or miss areas of the windshield.
(e)Make sure the safety belt reminder light and all your
belts, buckles, latch plates, retractors and anchorages
are working properly. Look for any other loose or
damaged safety belt system parts. If you see anything
that might keep a safety belt system from doing its
job, have it repaired. Have any torn or frayed safety belts
replaced. Also look for any opened or broken air bag
coverings, and have them repaired or replaced. (The air
bag system does not need regular maintenance.)
(f)Lubricate all key lock cylinders, hood latch assembly,
secondary latch, pivots, spring anchor, release pawl,
rear compartment hinges, outer liftgate handle pivot
points, rear door detent link, roller mechanism, liftgate
handle pivot points, latch bolt, fuel door hinge, cargo
door hinge, locks and folding seat hardware. More
frequent lubrication may be required when exposed to a
corrosive environment. Applying silicone grease on
weatherstrips with a clean cloth will make them
last longer, seal better and not stick or squeak.
(g)Add ¯uid as needed. A ¯uid loss could indicate a
problem; repair as needed. Check vent hose at transfer
case for kinks and proper installation.
6-8