start stop button GMC ENVOY XUV 2004 Owner's Manual
[x] Cancel search | Manufacturer: GMC, Model Year: 2004, Model line: ENVOY XUV, Model: GMC ENVOY XUV 2004Pages: 460, PDF Size: 2.99 MB
Page 171 of 460
Trip Information
Use the trip information button to scroll through the
odometer, TRIP A, TRIP B and TIMER.
Odometer
The trip odometer can tell you how far your vehicle has
been driven since you last set the trip odometer to
zero. Press and release the trip stem located on the
instrument panel cluster to display the trip odometer.
Press and hold the trip stem to reset the trip odometer
once it is displayed. Press and hold the trip stem for
a few seconds to reset the trip odometer to the mileage
since the vehicle was last started.
Trip A and Trip B
Press the trip information button until TRIP A or TRIP B
is displayed. This shows the current distance traveled
since the last reset for each trip odometer in either miles
or kilometers. Both odometers can be used at the
same time.
Each trip odometer can be reset to zero separately by
pressing select while the desired trip odometer is
displayed. You can also reset the trip odometers with
the reset stem on the cluster. If you press and hold the
reset stem for four seconds, the display will show the
distance traveled since the last ignition cycle.
Timer
The DIC can be used as a stopwatch. Press the select
button while TIMER is displayed to start the timer.
The display will show the amount of time that has
passed since the timer was last reset (not including time
the ignition is off). Time will continue to be counted as
long as the ignition is on, even if another display is being
shown on the DIC. The timer will record up to 99 hours,
59 minutes and 59 seconds (99:59:59) after which
the display will roll back to zero.
To stop the counting of time, press the select button
brie¯y while TIMER is displayed.
To reset the timer to zero, press and hold the select
button while TIMER is displayed.
3-47
Page 181 of 460

SERVICE BRAKE SYSTEM
If a problem occurs with the brake system this message
will appear on the DIC. If this message appears, stop
as soon as possible and turn off the vehicle. Restart the
vehicle and check for the message on the DIC display.
If the message is still displayed, or appears again when
you begin driving, the brake system needs service.
TURN SIGNAL ON
If a turn signal is left on for 3/4 of a mile (1.2 km), this
message will appear on the display and you will
hear a chime. Move the turn signal/multifunction lever to
the off position. Pressing the select button will
acknowledge this message and clear it from the DIC
display.
FUEL LEVEL LOW
If the fuel level is low in the vehicle's gas tank this
message will appear on the DIC and you will hear a
chime. Refuel as soon as possible. Pressing the select
button will acknowledge this message and clear it
from the DIC display.
CHECK WASHER FLUID
If the washer ¯uid level is low, this message will appear
on the DIC. Adding washer ¯uid will clear the message.
Pressing the select button will acknowledge this
message and clear it from the DIC display.
ICE POSSIBLE
If the outside temperature reaches a level where ice
could form on the roadway, this message may appear
on the DIC. If the temperature rises to a safe level,
the message will clear. Pressing the select button will
acknowledge this message and clear it from the
DIC display.
DRIVER DOOR AJAR
If the driver's door is not fully closed, this message will
appear on the display and you will hear a chime.
Stop and turn off the vehicle, check the door for
obstacles, and close the door again. Check to see if the
message still appears on the DIC. Pressing the select
button will acknowledge this message and clear it
from the DIC display.
3-57
Page 195 of 460
Playing a CD
Insert a CD partway into the slot, label side up. The
player will pull it in and the CD should begin playing.
The CD symbol will appear on the display. If you want to
insert a CD with the ignition off, ®rst press the eject
button or the DISPL knob.
If you turn off the ignition or radio with the CD in the
player, it will stay in the player. When you turn on
the ignition or the radio, the CD will start playing, where
it stopped, if it was the last selected audio source.
As each new track starts to play, the track number will
appear on the display.
The CD player can play the smaller 8 cm single CDs
with an adapter ring. Full-size CDs and the smaller CDs
are loaded in the same manner.
If playing a CD-R the sound quality may be reduced
due to CD-R quality, the method of recording, the quality
of the music that has been recorded, and the way the
CD-R has been handled. You may experience an
increase in skipping, difficulty in ®nding tracks, and/or
difficulty in loading and ejecting. If these problems occur
try a known good CD.Do not add paper labels to CDs, they could get caught
in the CD player.
Do not play 3 inch CDs without a standard adapter CD.
If an error appears on the display, see ªCD Messagesº
later in this section.
1 PREV (Previous):Press this pushbutton to go to the
current track if it has been playing for more than
eight seconds. TRACK and the track number will appear
on the display. If you hold this pushbutton or press it
more than once, the player will continue moving
backward through the CD.
2 NEXT:Press this pushbutton to go to the next track.
TRACK and the track number will appear on the
display. If you hold this pushbutton or press it more than
once, the player will continue moving forward through
the CD.
3 REV (Reverse):Press and hold this pushbutton to
reverse quickly within a track. Press and hold this
pushbutton for less than two seconds to reverse at six
times the normal playing speed. Press and hold it
for more than two seconds to reverse at 17 times the
normal playing speed. Release it to play the passage.
ET and the elapsed time of the track will appear on
the display.
3-71
Page 196 of 460

4 FWD (Forward):Press and hold this pushbutton to
advance quickly within a track. Press and hold this
pushbutton for less than two seconds to advance at six
times the normal playing speed. Press and hold it for
more than two seconds to advance at 17 times the
normal playing speed. Release it to play the passage.
ET and the elapsed time of the track will appear on
the display.
6 RDM (Random):Press this pushbutton to hear the
tracks in random, rather than sequential, order. RDM ON
will appear on the display. RDM T and the track
number will appear on the display when each track
starts to play. Press this pushbutton again to turn
off random play. RDM OFF will appear on the display.
qSEEKr:Press the left arrow to go to the start
of the current or to the previous track. Press the
right arrow to go to the start of the next track. If you
hold either arrow or press it more than once, the player
will continue moving backward or forward through
the CD.
qSCANr:To scan the CD, press and hold either
SCAN arrow for more than two seconds until SCAN
appears on the display and you hear a beep. Use this
feature to listen to 10 seconds of each track of the
CD. Press either SCAN arrow again, to stop scanning.
DISPL (Display):Press this knob to see how long
the current track has been playing. ET and the elapsed
time of the track will appear on the display. To
change the default on the display (track or elapsed
time), press this knob until you see the display you want,
then hold the knob for two seconds. The radio will
produce one beep and the selected display will now be
the default.
BAND:Press this button to listen to the radio when a
CD is playing. The inactive CD will remain safely
inside the radio for future listening
CD AUX (Auxiliary):Press this button to play a CD
when listening to the radio.
3-72
Page 210 of 460

Playing a CD
Insert a CD partway into the slot, label side up. The
player will pull it in and the CD should begin playing. The
CD symbol will appear on the display. If you want to
insert a CD with the ignition off, ®rst press the eject
button or the DISPL knob.
If you turn off the ignition or radio with the CD in the
player, it will stay in the player. When you turn on
the ignition or the radio, the CD will start playing, where
it stopped, if it was the last selected audio source.
As each new track starts to play, the track number will
appear on the display.
The CD player can play the smaller 8 cm single CDs
with an adapter ring. Full-size CDs and the smaller CDs
are loaded in the same manner.
If playing a CD-R the sound quality may be reduced
due to CD-R quality, the method of recording, the quality
of the music that has been recorded, and the way the
CD-R has been handled. You may experience an
increase in skipping, difficulty in ®nding tracks, and/or
difficulty in loading and ejecting. If these problems occur
try a known good CD.Do not add paper labels to CDs, they could get caught
in the CD player.
Do not play 3 inch CDs without a standard adapter CD.
If an error appears on the display, see ªCD Messagesº
later in this section.
1 PREV (Previous):Press this pushbutton to go to the
current track if it has been playing for more than
eight seconds. TRACK and the track number will appear
on the display. If you hold this pushbutton or press it
more than once, the player will continue moving
backward through the CD.
2 NEXT:Press this pushbutton to go to the next track.
TRACK and the track number will appear on the
display. If you hold this pushbutton or press it more than
once, the player will continue moving forward through
the CD.
3 REV (Reverse):Press and hold this pushbutton to
reverse quickly within a track. Press and hold this
pushbutton for less than two seconds to reverse at six
times the normal playing speed. Press and hold it
for more than two seconds to reverse at 17 times the
normal playing speed. Release it to play the passage.
ET and the elapsed time of the track will appear on
the display.
3-86
Page 211 of 460
4 FWD (Forward):Press and hold this pushbutton to
advance quickly within a track. Press and hold this
pushbutton for less than two seconds to advance at six
times the normal playing speed. Press and hold it for
more than two seconds to advance at 17 times the
normal playing speed. Release it to play the passage.
ET and the elapsed time of the track will appear on
the display.
6 RDM (Random):Press this pushbutton to hear the
tracks in random, rather than sequential, order. RDM ON
will appear on the display. RDM T and the track
number will appear on the display when each track
starts to play. Press this pushbutton again to turn
off random play. RDM OFF will appear on the display.
qSEEKr:Press the left arrow to go to the start
of the current or to the previous track. Press the
right arrow to go to the start of the next track. If you
hold either arrow or press it more than once, the player
will continue moving backward or forward through
the CD.
qSCANr:To scan the CD, press and hold either
SCAN arrow for more than two seconds until SCAN
appears on the display and you hear a beep. Use this
feature to listen to 10 seconds of each track of the
CD. Press either SCAN arrow again, to stop scanning.DISPL (Display):Press this knob to see how long the
current track has been playing. ET and the elapsed
time of the track will appear on the display. To change
the default on the display (track or elapsed time),
press this knob until you see the display you want, then
hold the knob for two seconds. The radio will produce
one beep and the selected display will now be the
default.
BAND:Press this button to listen to the radio when a
cassette tape or CD is playing. The inactive tape or CD
will remain safely inside the radio for future listening
TAPE DISC:Press this button to play a cassette tape
or CD when listening to the radio. The inactive tape
or CD will remain safely inside the radio for future
listening.
Z(Eject):Press this button to stop a CD when it is
playing or to eject a CD when it is not playing. Eject
may be activated with either the ignition or radio off. CDs
may be loaded with the radio and ignition off if this
button is pressed ®rst.
3-87
Page 222 of 460
Playing a CD
If you turn off the ignition or radio with the CD in the
player, it will stay in the player. When you turn on
the ignition or the radio, the CD will start playing, where
it stopped, if it was the last selected audio source.
The CD player can play the smaller 8 cm single CDs
with an adapter ring. Full-size CDs and the smaller CDs
are loaded in the same manner.
If playing a CD-R the sound quality may be reduced
due to CD-R quality, the method of recording, the quality
of the music that has been recorded, and the way the
CD-R has been handled. You may experience an
increase in skipping, difficulty in ®nding tracks, and/or
difficulty in loading and ejecting. If these problems occur
try a known good CD.
Do not add paper labels to CDs, they could get caught
in the CD player.
Do not play 3 inch CDs without a standard adapter CD.
If an error appears on the display, see ªCD Messagesº
later in this section.LOAD CD
Z:Press the LOAD side of this button to
load CDs into the CD player. This CD player will
hold up to six CDs.
To insert one CD, do the following:
1. Turn the ignition on.
2. Press and release the LOAD side of the LOAD CD
button.
3. Wait for the light, located to the right of the slot, to
turn green.
4. Load a CD. Insert the CD partway into the slot,
label side up. The player will pull the CD in.
When a CD is inserted, the CD symbol will appear on
the display. If you select an equalization setting for your
CD, it will be activated each time you play a CD.
The CD will begin to play automatically.
As each new track starts to play, the track number will
appear on the display.
3-98
Page 223 of 460
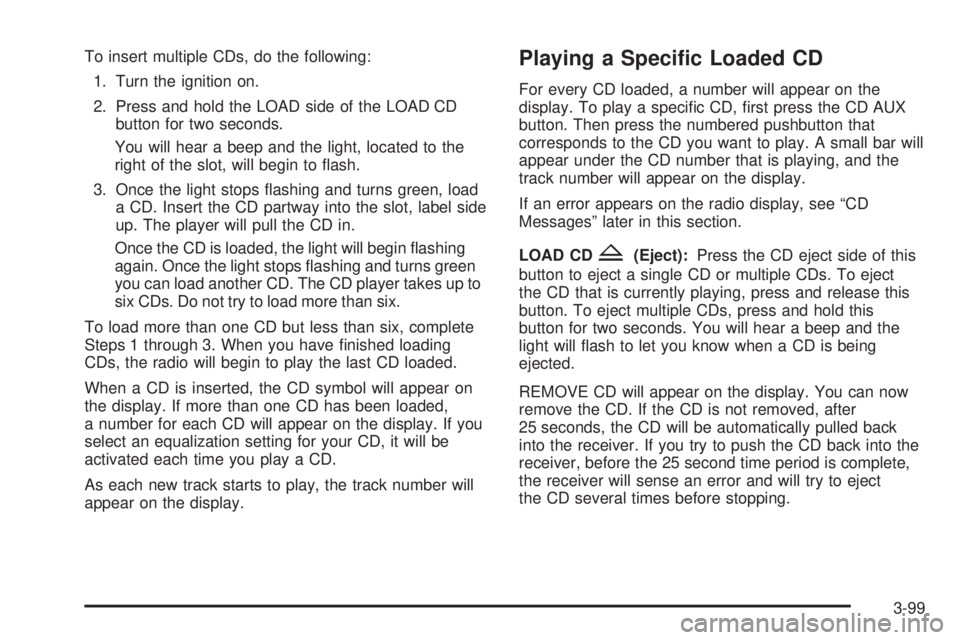
To insert multiple CDs, do the following:
1. Turn the ignition on.
2. Press and hold the LOAD side of the LOAD CD
button for two seconds.
You will hear a beep and the light, located to the
right of the slot, will begin to ¯ash.
3. Once the light stops ¯ashing and turns green, load
a CD. Insert the CD partway into the slot, label side
up. The player will pull the CD in.
Once the CD is loaded, the light will begin ¯ashing
again. Once the light stops ¯ashing and turns green
you can load another CD. The CD player takes up to
six CDs. Do not try to load more than six.
To load more than one CD but less than six, complete
Steps 1 through 3. When you have ®nished loading
CDs, the radio will begin to play the last CD loaded.
When a CD is inserted, the CD symbol will appear on
the display. If more than one CD has been loaded,
a number for each CD will appear on the display. If you
select an equalization setting for your CD, it will be
activated each time you play a CD.
As each new track starts to play, the track number will
appear on the display.Playing a Speci®c Loaded CD
For every CD loaded, a number will appear on the
display. To play a speci®c CD, ®rst press the CD AUX
button. Then press the numbered pushbutton that
corresponds to the CD you want to play. A small bar will
appear under the CD number that is playing, and the
track number will appear on the display.
If an error appears on the radio display, see ªCD
Messagesº later in this section.
LOAD CD
Z(Eject):Press the CD eject side of this
button to eject a single CD or multiple CDs. To eject
the CD that is currently playing, press and release this
button. To eject multiple CDs, press and hold this
button for two seconds. You will hear a beep and the
light will ¯ash to let you know when a CD is being
ejected.
REMOVE CD will appear on the display. You can now
remove the CD. If the CD is not removed, after
25 seconds, the CD will be automatically pulled back
into the receiver. If you try to push the CD back into the
receiver, before the 25 second time period is complete,
the receiver will sense an error and will try to eject
the CD several times before stopping.
3-99
Page 225 of 460
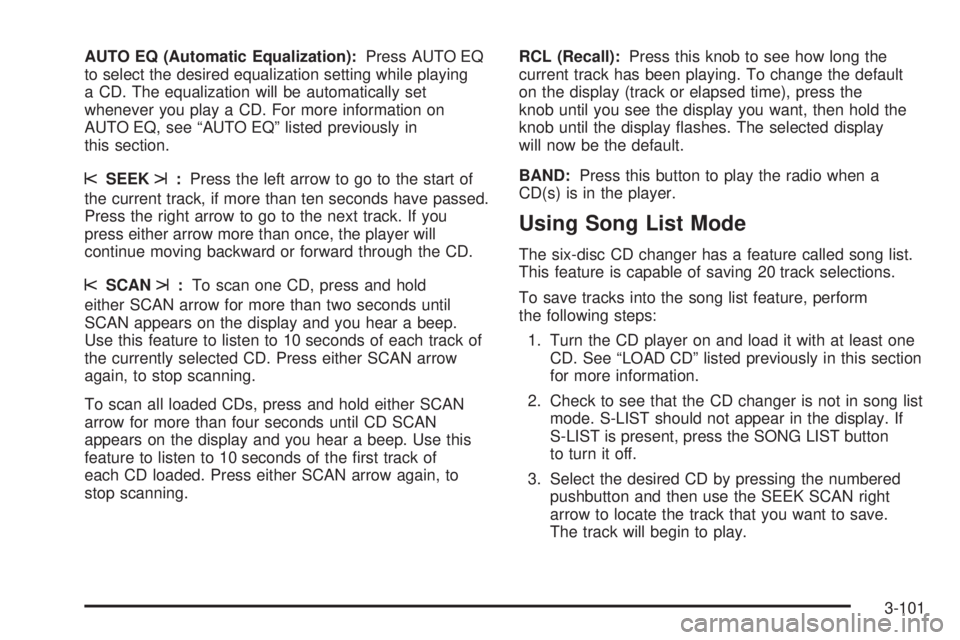
AUTO EQ (Automatic Equalization):Press AUTO EQ
to select the desired equalization setting while playing
a CD. The equalization will be automatically set
whenever you play a CD. For more information on
AUTO EQ, see ªAUTO EQº listed previously in
this section.
sSEEKt:Press the left arrow to go to the start of
the current track, if more than ten seconds have passed.
Press the right arrow to go to the next track. If you
press either arrow more than once, the player will
continue moving backward or forward through the CD.
sSCANt:To scan one CD, press and hold
either SCAN arrow for more than two seconds until
SCAN appears on the display and you hear a beep.
Use this feature to listen to 10 seconds of each track of
the currently selected CD. Press either SCAN arrow
again, to stop scanning.
To scan all loaded CDs, press and hold either SCAN
arrow for more than four seconds until CD SCAN
appears on the display and you hear a beep. Use this
feature to listen to 10 seconds of the ®rst track of
each CD loaded. Press either SCAN arrow again, to
stop scanning.RCL (Recall):Press this knob to see how long the
current track has been playing. To change the default
on the display (track or elapsed time), press the
knob until you see the display you want, then hold the
knob until the display ¯ashes. The selected display
will now be the default.
BAND:Press this button to play the radio when a
CD(s) is in the player.
Using Song List Mode
The six-disc CD changer has a feature called song list.
This feature is capable of saving 20 track selections.
To save tracks into the song list feature, perform
the following steps:
1. Turn the CD player on and load it with at least one
CD. See ªLOAD CDº listed previously in this section
for more information.
2. Check to see that the CD changer is not in song list
mode. S-LIST should not appear in the display. If
S-LIST is present, press the SONG LIST button
to turn it off.
3. Select the desired CD by pressing the numbered
pushbutton and then use the SEEK SCAN right
arrow to locate the track that you want to save.
The track will begin to play.
3-101
Page 229 of 460
When using the wired headphones, if the front seat
passengers play a CD in the Radio with Six-Disc CD
(if equipped) or use XMŸ Satellite Radio Service
(48 contiguous US states, if equipped), you will hear the
audio for these sources, instead of the DVD or CD
that is currently playing through the RSE.
If an error message appears on the video screen, see
ªDVD Messagesº later in this section.
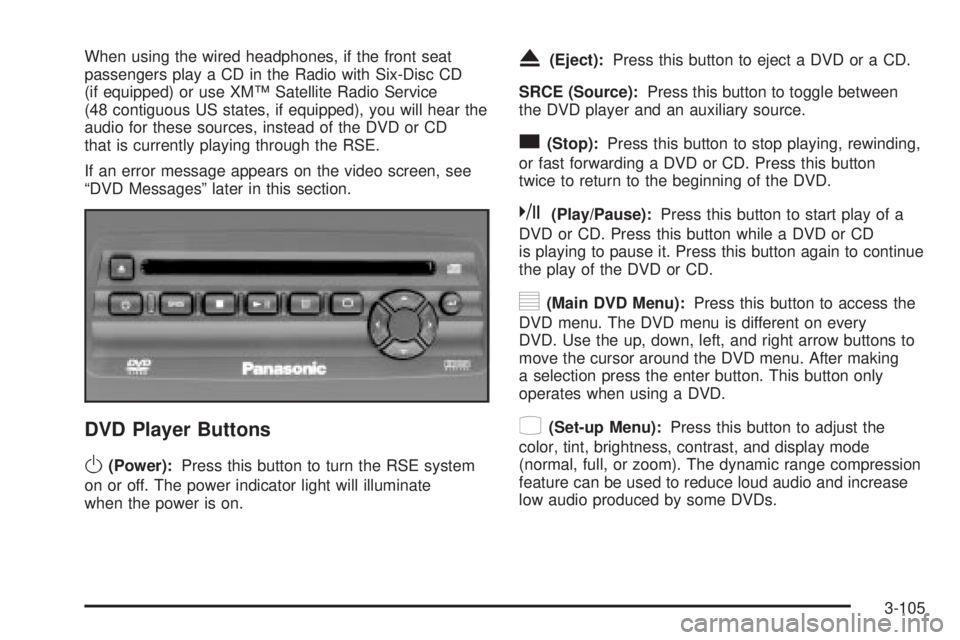
DVD Player Buttons
O(Power):Press this button to turn the RSE system
on or off. The power indicator light will illuminate
when the power is on.
X(Eject):Press this button to eject a DVD or a CD.
SRCE (Source):Press this button to toggle between
the DVD player and an auxiliary source.
c(Stop):Press this button to stop playing, rewinding,
or fast forwarding a DVD or CD. Press this button
twice to return to the beginning of the DVD.
k(Play/Pause):Press this button to start play of a
DVD or CD. Press this button while a DVD or CD
is playing to pause it. Press this button again to continue
the play of the DVD or CD.
y(Main DVD Menu):Press this button to access the
DVD menu. The DVD menu is different on every
DVD. Use the up, down, left, and right arrow buttons to
move the cursor around the DVD menu. After making
a selection press the enter button. This button only
operates when using a DVD.
z(Set-up Menu):Press this button to adjust the
color, tint, brightness, contrast, and display mode
(normal, full, or zoom). The dynamic range compression
feature can be used to reduce loud audio and increase
low audio produced by some DVDs.
3-105